Grow Your Business with Tree Journey

Our TradeWorks Revenue System™ builds a detailed advertising funnel that attracts, nurtures, and converts the right clients – so you can finally stop chasing leads and start scaling your business.

Ash trees are not as common as they once were, and peeling bark could be a sign of the culprit. Unforutantely, ash trees are susceptible to a variety of pests and fungus that can cause the bark to peel.

One of the biggest reasons you’ll find your ash tree is shedding bark is because it has emerald ash borers. This is an invasive pest that greatly decreases the life of ash trees and is quite problematic. We just took down 10+ ash trees on our family property that were infested with them!

But, they’re only one of the reasons bark falls off of ashes. Keep reading to find out what the causes of shedding bark are on your ash tree and if and how you can fix it!

If you want to learn more about shedding bark on your other yard trees, check out our article: 4 Reasons Bark Is Falling Off Your Oak Tree: Cause & Solution!

If My Ash Tree Is Shedding Bark, Is It Dying?

Like we mentioned above, trees shedding bark is part of their normal process, especially if it looks healthy overall. If you notice bare wood underneath the shedding bark, that’s not a great sign and usually a sign of distress and damage.

Extreme weather, like extreme heat and frost, can also cause shedding bark on your ash tree, indicating a sign of stress.

Additionally, if your tree is shedding bark and suffering, you will probably notice other signs of stress including dead branches, dead leaves, cankers, fungus, and oozing of sap. This could be a sign of fungus or pests.

By just examining the shedding bark of your ash tree, it’s hard to say if your tree is dying. We recommend calling in arborists (aka tree professionals) to check out your tree!

Is My Ash Tree Suffering From Ash Dieback?

The short answer, yes, ash dieback will cause your ash tree to shed bark. 

Ash dieback is a phenomenon that affects young shoots of trees and spreads to larger branches. It kills the young shoots first and causes injury to the roots

Ash dieback causes dark patches on leaves causing them to wilt and turn a black color. It also creates diamond-shaped lesions on the trunk where branches join to it.

Lesions become sunken, black, and turn into dead bark, causing the bark to shed from the tree. A typical sign of ash dieback is new growth under the dead branch, stem, or bark on the trunk of the tree. 

Unfortunately, ash dieback causes branches and stems to die resulting in deadwood, and stress in your tree. Similar to the emerald ash borer, ash dieback is a fungus that affects the vascular tissue, stopping water and nutrients from the rest of the tree. 

Healthier trees may or may not come back from ash dieback, however, although it’s still unknown how these trees will do long term. But, it is unlikely that they will recover if more than 50% of the tree’s canopy is affected. 

Let’s dive deeper into seven reasons why your ash tree is shedding bark and just how you can save it!

So, Why Exactly Is My Ash Tree Shedding Its Bark?

It’s normal for trees to lose bark, but just like most things in life, the key is in moderation! Additionally, there will be other key indicators to look for to see if your ash tree shedding bark is normal or not. 

Bark acts as the tough outer layer of skin on trees, so you can imagine it can be an issue if your tree loses its ‘skin’! If you see new-looking bark underneath the bark that’s peeling, then it is probably going through its normal bark shedding. Yes, trees do that!

On the other hand, if you notice that there is bare wood underneath the peeling bark, then there is a good chance your tree is most likely suffering from pests or fungus, especially when accompanied by other symptoms that we’ll touch on later in this article.

Interested in learning more about ash trees? We have an entire article dedicated to the full timeline of an ash tree!

1. It Could Be Normal For Your Ash Tree To Shed Bark

Did you know the shedding bark on trees can be normal? That’s the good news! Your ash tree shedding bark could be part of its normal process. 

Shedding bark could be your tree’s way of making way for the new bark that’s coming in underneath the old, shedding bark. 

So, if you don’t notice any other symptoms or telltale signs of issues on your tree, there’s a good chance that your ash tree is going through its normal bark shedding, where it’s preparing for new bark.

2. Extreme Heat Could Cause Your Ash Tree To Shed Bark

A lot of plants struggle, especially when in extreme heat. Bark shedding could be a result of extreme heat. The heat will cause the tree to shed and the bark will crack due to stress.

If you think of areas that don’t usually have Florida weather and then all of a sudden it feels like Florida in New York for extended periods, not only does the heat and humidity affect us, it affects the trees, plants, and animals the same.

Water can help with extreme heat. For some ash tree tips, look to our article on how much water your ash tree actually needs.

3. Extreme Cold Could Cause Your Ash Tree To Shed Bark

Like extreme heat, a lot of plants struggle in extreme cold, especially if they are already under any stress. Extreme cold or frosts can also cause the bark to shed, crack, and fall off of your tree. 

If your tree has previous damage, frost can cause the damaged area to crack, which generally happens when temperatures go from freezing to above freezing rapidly. 

4. Emerald Ash Borer Could Cause Your Ash Tree To Shed Bark

You may notice what is called blonding on your ash tree, this happens when the bark peels off the tree and leaves the inner bark exposed.

Here’s the inside of one of the ash trees we took down. You’ll notice how absolutely devestated the inside of this tree was.

Emerald Ash Borer Damage On Ash Tree
Emerald Ash Borer damage on the inside of an ash tree.

Basically, the tree begins to look patchy with spots of dark brown from the regular bark and the yellow or blonde color of the inner bark, which is where it gets the name ‘blonding’.

Bark shedding off of ash tree as a result of emerald ash borers.

Unfortunately, this is a direct result and indication that your tree is heavily infested with the emerald ash borer, and that your tree could be almost on its way out.

A great way to tell if a tree has emerald ash borer is to simply rip off a bit of the bark that’s falling. You’ll notice an almost worm like pattern on the inside of the bark. This is where the ash borers burrow, between the bark and the actual wood of the tree. Unfortunately, I didn’t have the foresight to take a picture of this when we took the trees down, but I’ll make sure to update it next time I’m near the wood!

Unfortuantely if you have emerald ash borers, you’ll probably need to cut down your ash tree, which you can read more about in our guide.

5. Woodpeckers Could Be The Culprit Of Your Ash Tree Shedding Bark

Woodpeckers, as we know, peck for insects in the trees’ bark. 

As infestations of emerald ash borers increase, woodpeckers will intensively peck into the bark searching for borers.
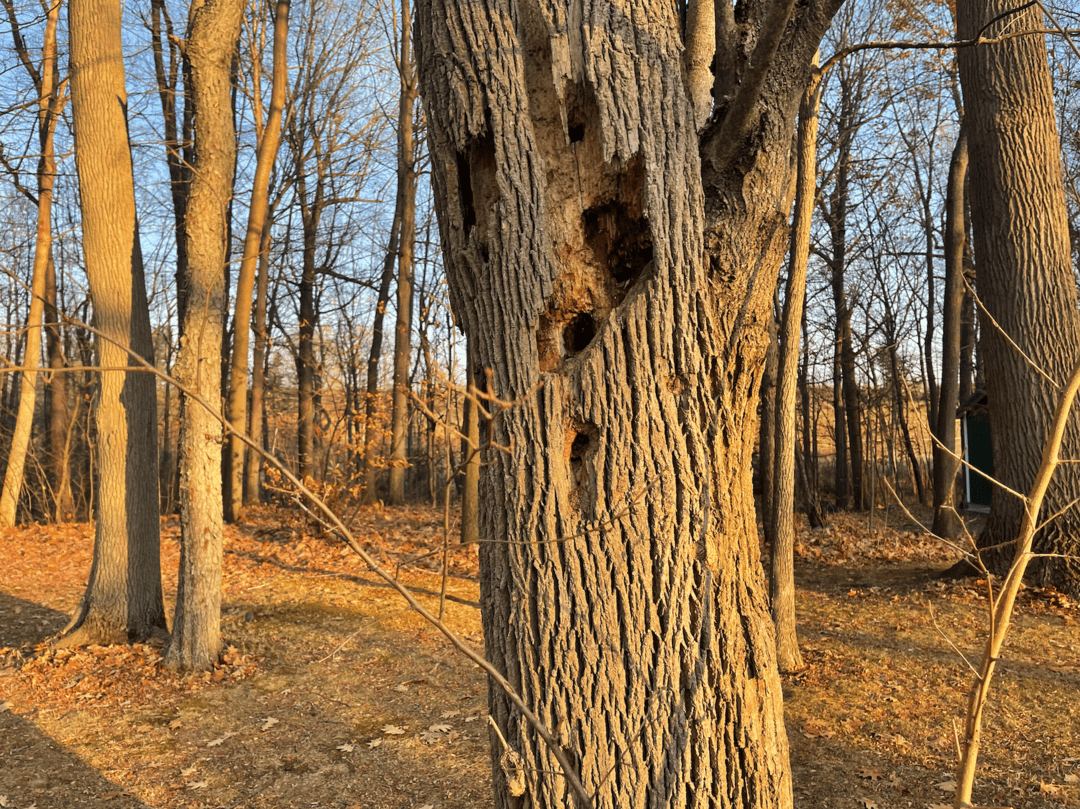
Woodpeckers trying to eat emerald ash borers from ash tree
Woodpeckers trying to eat emerald ash borers from ash tree.

Bark will then begin shedding or falling off. Although this is the result of pecking, it is mainly the result of the emerald ash borers. Basically this happens, woodpeckers and emerald ash borers are throwing a 1+2 combo punch to your ash tree, and there isn’t much you can do.

6. Fungus Could Cause Your Ash Tree To Shed Bark

Additionally, fungus can cause shedding bark on your ash tree. Hypoxylon canker is a fungus that causes shedding bark in hardwood trees. This is also known as canker and is characteristic by its round, large, protrusions from the trunk or branches of trees.

When fungus develops underneath the wood, it spreads throughout the tree, causing peeling and shedding bark. 

Unfortunately, the only way to deal with this fungus is to cut the tree down to prevent it from spreading. 

7. Sunscald Could Cause Your Ash Tree To Shed Bark

Sunscald could be another reason your ash tree is shedding bark. This occurs as a direct result of temperature. During the day, and during warmer temperatures, the vascular cells in the tree begin to reactivate. The vascular cells are part of the vascular system of the tree, which is responsible for transporting water and nutrients.

After the sun goes down and temperatures go below freezing, vascular cells have already lost some of their cold hardiness from the warm sun and warm temperatures, resulting in injury and cracking, peeling, or shedding bark. 

Should I Cut Down My Ash Tree If It’s Peeling Bark?

We understand it’s alarming if you see your ash tree peeling bark, especially when you know it’s not supposed to, after all, it’s not a birch tree. 

Additionally, we know it’s difficult to make the call whether to cut down your beloved ash tree, for either aesthetics or cost. It’s even a harder choice to make especially if it’s shedding bark and you aren’t sure exactly what’s wrong with it. 

If you notice fungus, oozing, cankers, dead or dying leaves and branches, and peeling bark, that’s generally not a good sign, so cutting down your tree might be in your best interest, especially to prevent the spread of fungus to your other trees.

For a deeper dive into this topic, read our article that we mentioned earlier on the 5 reasons you should cut down your ash tree.

However, we’d still recommend contacting arborist professionals to determine what’s going on with your tree and if you should cut it down!

What Is The Emerald Ash Borer And Will My Ash Tree Shed Bark From It?

Will your tree shed bark as a result of the emerald ash borer? Yes, that’s the short answer, but let’s talk about why that happens and give you a bit more detail than what we discussed earlier.

The emerald ash borer is a small emerald green insect that attacks ash trees by feeding on the tree transport vessels and stopping the tree from receiving nutrients. 

The transport vessels are called the vascular system of the tree, which is responsible for transporting water and nutrients throughout the tree. So, you can see why this would be an issue.

Emerald ash borer infestations are significantly impacting the ash tree population, decreasing it at alarmingly fast rates.

You can look for typical signs of these pests if you suspect your ash tree has an emerald ash borer infestation. Infestation signs include large dead areas of your tree’s canopy or very few leaves, tunnels underneath the bark, and D-shaped holes in the bark. 

The most tell-tale sign of an emerald ash borer infestation, though, is the peeling and shedding bark. Eventually, as bark sheds off the tree as a result of the emerald ash borer damage, the tree will become a blonde color. The blonde color you see is referred to as blonding, which is referring to the color of the inner bark being revealed as a result of shedding the normal dark brown outer bark that protects the tree.

If you suspect this is what’s going on with your tree, call a licensed tree professional to figure out the next steps to take with your tree!

How Can I Save My Ash Tree From Shedding Its Bark?

There are a few ways to save your tree if it’s shedding bark due to pests and fungus.

But like we mentioned, if your tree is shedding its bark as part of its normal process, then you don’t have to do anything! Although, if you notice yellowing leaves, dying or dead branches, or any signs that your tree just doesn’t look quite right, you might be able to save your ash tree from shedding its bark with the help of insecticide treatments or tree professionals.

If you want to add a new ash tree to your yard, check out our planting guide on the best time to plant ash trees.

Treat Infestations By Using Injection Insecticide Treatments Or Systemic Treatments

If you suspect your ash tree is shedding its bark due to an emerald ash borer infestation then you can use insecticides such as imidacloprid to treat the infestation. 

Unfortunately, most of the insecticides and pesticides contain neonicotinoids, which are neuro-active insecticides that are lethal to honey bees.

Trunk injections are an effective way of distributing pesticides throughout the plant quickly and efficiently. This method is exactly what it sounds like. Pesticides are injected directly into the tree’s trunk and are then distributed quickly throughout the trunk’s water and nutrient pathways called the vascular system.

Systemic insecticide treatments are readily uptaken by the roots of the plants and move easily throughout the stem, trunk, branches, leaves, and even flowers. Systemic insecticides are mainly used for maintaining long-term, and residual activity.

Imidacloprid contains emamectin benzoate, which is an insecticide used in the prevention of emerald ash borers. Imidacloprid is also an insecticide created to mimic nicotine, called a neonicotinoid, which is toxic to insects, and lethal to pollinators.

One potential product to use is the Bonide Insect Control Systemic Granules, which is great for getting rid of insect pests inside and outside. It comes in granule form, which makes it easy since there is no spraying! 

An injection of imidacloprid insecticide is a method that is an effective application of this pesticide. But it can also be used as a concentrate, drench, and granules. 

Because imidacloprid is a neonicotinoid and is extremely toxic to bees and other pollinators, make sure to use the insecticide in the late evening after pollinators are not active. 

If your infestation is past the point of no return, or almost there, the trunk injection method may be the best bet for you. Injection methods of insecticides and pesticides should only be done by licensed professionals.

If you have an emerald ash borer infestation, it is recommended not to take the infestation into your own hands, and to hire certified arborists or tree professionals. They will be able to tell you the recommended treatments for your tree, including if it needs to be cut down.

Prevent Further Spread By Cutting Down Your Tree

Cut down ash tree as a result of emerald ash borers.

Unfortunately, sometimes cutting down your tree is the best option. To prevent the further spread of infestation and fungus to other trees and plants in your yard, the only option might be to cut down your tree. 

If you want to maintain your tree, and prevent the spread of pests and fungus you can prune your tree yourself. We recommend the Fiskars Chain Drive Extendable Tree Pruner & Pole Saw! This does wonders when maintaining the health of your tree, and it extends to 16 feet!

Need help? We have a complete guide to pruning large trees, just for you!

However, as we mentioned above, contacting tree professionals will be the safest bet if you suspect your tree has damage or some other affliction. They will be able to tell you the best route to take, whether that be to treat your tree or to cut it down altogether.

If you do end up cutting down your ash tree, you can always consider growing a new one as they make wonderful shade trees!

That’s A Wrap!

That’s all we’ve got for our tree journey today! We hope you learned some interesting reasons why your ash tree is shedding bark. In case you forgot, let’s recap what we went over!

Peeling bark on an ash tree can be a sign of a dead or dying tree. This could be a response due to stress, pests, damage, or disease. However, it can also be a normal response, especially if it’s not accompanied by dead branches, oozing from anywhere, or dead leaves.

The main reasons why your ash tree is shedding bark could be a normal process, as a response to extreme weather like extreme heat or cold, emerald ash borers, woodpeckers, fungal disease, and even sunscald. But all in all, the emerald ash borer seems to be the main culprit in why your ash tree is shedding its bark.

If it’s not normal shedding of bark there are insecticide and fungicide treatments to attack whatever it is that’s causing your tree to shed bark. However, sometimes the best method is to cut your ash tree down altogether. 

But the best method to take, in this case, is to contact tree professionals in your area to help make the call!

Thanks for sticking around and learning about why your ash tree is shedding bark, and just how to save it!

You can learn more about trees shedding their bark in our article: 4 Reasons Bark Is Falling Off Your Oak Tree: Cause & Solution!

References

Arbab, N., Grabosky, J., & Leopold, R. (2022). Economic Assessment of Urban Ash Tree Management Options in New Jersey. Sustainability, 14(4), 2172.

Flower, Charles E., Kathleen S. Knight, and Miquel A. Gonzalez-Meler. “Impacts of the emerald ash borer (Agrilus planipennis Fairmaire) induced ash (Fraxinus spp.) mortality on forest carbon cycling and successional dynamics in the eastern United States.” Biological Invasions 15, no. 4 (2013): 931-944.

Kovacs, Kent F., Robert G. Haight, Deborah G. McCullough, Rodrigo J. Mercader, Nathan W. Siegert, and Andrew M. Liebhold. “Cost of potential emerald ash borer damage in US communities, 2009–2019.” Ecological Economics 69, no. 3 (2010): 569-578.

MacFarlane, D. W., & Meyer, S. P. (2005). Characteristics and distribution of potential ash tree hosts for emerald ash borer. Forest Ecology and Management, 213(1-3), 15-24.

Pugh, Scott A., Andrew M. Liebhold, and Randall S. Morin. “Changes in ash tree demography associated with emerald ash borer invasion, indicated by regional forest inventory data from the Great Lakes States.” Canadian journal of forest research 41, no. 11 (2011): 2165-2175.

Have you seen trees that offer 2 or 3 different types of apples? Or maybe a peach and plum tree at your garden store and wondered just how they do that?

It’s all done by grafting branches onto an existing rootstock, and it’s something that you can do at home. Today we will go over different varieties of fruit trees that can be grafted together, and how to do it. 

Generally speaking, there are lots of different fruit trees you can graft together, like stone fruits such as peaches, plums, and nectarines.

You can also graft various citrus fruits on one tree such as oranges, lemons, and limes. The trick to grafting is to use trees that are similar to one another! It can get pretty wild.

My family once had a citrus tree that carried 5 different citrus plants on one tree. Limes, lemons, oranges, tangerines, and Meyer lemons, but it was a very expensive tree. You too can graft such a tree yourself all while saving valuable yard space and money. Keep reading to learn how you can do it!

What Even Is Tree Grafting, Anyway?

A close up of an apple tree full of apples in an orchard with the sun shining through from behind.

Grafting is the process of taking a branch or a few branches and attaching them to a different tree to get either different colors of flowers—think roses—or different kinds of fruits on the same tree. 

The process takes small branches, also known as scions, and inserts them into either the trunk or other branches of an existing tree, known as the rootstock. When successful, the new branch is grafted onto a tree and from there it gains nutrients and water from the tree and will eventually produce fruit or flowers, becoming part of the tree!

Sometimes grafting is used to keep a certain type of tree alive, or to keep a tree producing the same quality fruits. If you plant seeds from a tree, you never know if they will grow into mature plants, or if they will produce the same quality fruits. 

With grafting, you can take the high-quality fruit tree, graft a branch and grow it into an exact copy of the parent plant that still produces the same great fruit. It helps to take away the guesswork and saves time compared to growing trees from seed. 

Why Should You Graft Different Trees?

A close up of a yellow plum tree with a branch full of ripe plum fruits against a blue sky.

There are several reasons why grafting trees might make sense. Grafting will save space in your garden and offer variety. Maybe you have a few fruit trees, but one is doing really well in producing plenty of fruit, while a few more just never seem to produce much.

If you have a lot of trees and want to keep them growing, grafting can be a way to keep the same tree growing indefinitely. Grafting can also save time compared to growing fruit trees from seeds and waiting for them to be mature enough to start producing fruits. 

Some plants, especially fruit trees cannot be economically reproduced by seed. This is because hybrid fruit seeds will grow back into their ancestral trees. 

Meaning the lush, fleshy, full apples you get from the market, will most likely grow into hard, small, and nearly inedible fruits if you plant them straight from the seed. In this way, grafting is essential to keep growing the same high-quality fruits we are accustomed to. 

Graft To Save Space In Your Garden

Say you have a granny smith apple tree in your yard that makes some great apple pie or cobblers, but they are a bit too tart to eat straight off of the tree. Instead of buying a honey crisp tree, a golden delicious tree, or other varieties and taking up your entire yard with different apple trees, you could graft a few branches to your granny smith tree and still have different varieties of apples from the same tree. 

It also makes sense to graft your own trees rather than buying pre-grafted trees from your garden center. You get to choose what varieties of fruits you are looking for and what you will be more likely to consume. 

Don’t have a garden? Never fear, just bring your tree indoors! Check out our article on the 7 easiest fruit trees to grow indoors.

Keep Your Tree Growing, Even After Its Prime

Trees don’t live forever. They can live for hundreds of years, but most fruit trees only produce fruit for 10 to 20 years. If you remember that apple tree in your grandmother’s yard, it may not be producing good fruit any longer. 

If it was grafted, however, it could continue to produce fruit and live on as a new tree producing the same fruit you remembered as a child.

You can do the same to your own fruit trees. If they look like they’re about to reach the end of their fruiting careers, take a cutting from that tree and graft into a newer rootstock and you basically have a new clone of your old, fading tree. 

Grafting Saves Time

Compared to growing fruit trees from seeds, grafting can save years of time. When planting trees from seed, you could possibly be waiting 10 to 20 years for that tree to start producing fruit, and even then, the fruit it produces might not be very good.

When you graft branches from a mature tree, you know what the fruit will be like, and it only takes about 2 to 3 years before it starts producing fruit. 

I know, you’re still looking at a handful of years and a lot can happen in that time, but compared to waiting decades, I can wait a few years for homegrown fruits in my own backyard.    

Grafting Offers Variety

Although we already touched on this, it bears repeating. Also, you don’t only have to stick to apple trees to have different varieties. You can even graft some varieties of pears to your apple trees. 

Do you have a peach or plum tree? Why not have both? If you have a stone fruit tree you can potentially graft any other stone fruit to that tree such as apricots, nectarines, white peaches, or other kinds. 

What Fruit Trees Can I Graft Together?

A close up of a peach tree branch with young, pink peach fruits.

Don’t get too carried away here and think you could have a ready-made fruit salad tree! You won’t be able to graft citrus, apples, plums, cherries, and mangoes together. The trees do have to be in the same family and have similar cell structures or they won’t take. 

Most woody plants (trees and shrubs) will take to being grafted, but it can be difficult without the proper amount of skill and education.  

Graft Citrus Together

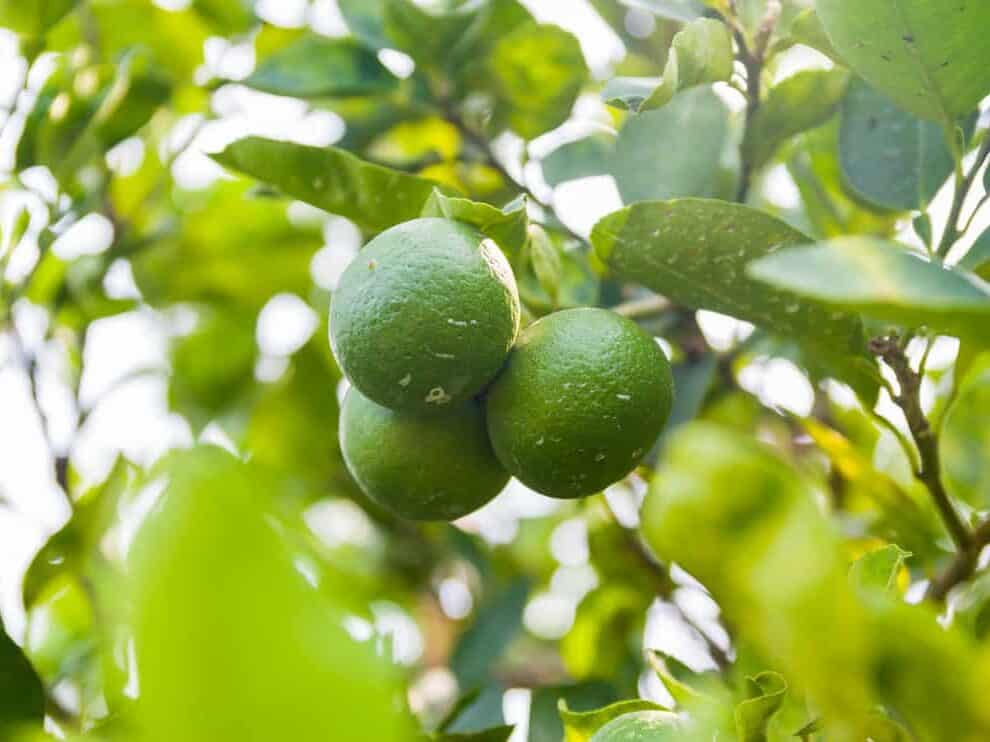
A close up of three limes hanging from a branch surrounded by leaves.

Remember the citrus tree with five different fruits on it? They were all citrus trees, that’s why they worked so well. There are a lot of varieties here, you could have grapefruit, pummelos, kumquats, or tangerines, mandarins, and navel oranges. Whatever you could think of, as long as they are still citrus trees. 

Learn more about citrus tree care by taking a look at our article all about pruning your orange tree and other care tips.

Apple Trees Varieties Are A Match

The branch of an apple tree frames a blurred sky with red apples clustered between green leaves.

You go to the local farmer’s market or grocery store and notice an ever-increasing lineup of apple varieties, well, these can all be grafted together too. You’ll know if a graft takes because after a few weeks, either it will take and start growing, or the scion will die off. 

Stone Fruit Trees Get Along Well

A close up of yellow and pink peaches between the leaves of peach tree.

These trees include soft, fleshy fruits that contain hard, stone-like pits in the middle, encasing a seed. Peaches, nectarines, plums, apricots, and cherries, are all considered stone fruits, and they can be grafted interchangeably. 

Graft Multiple Types Of Pear Trees

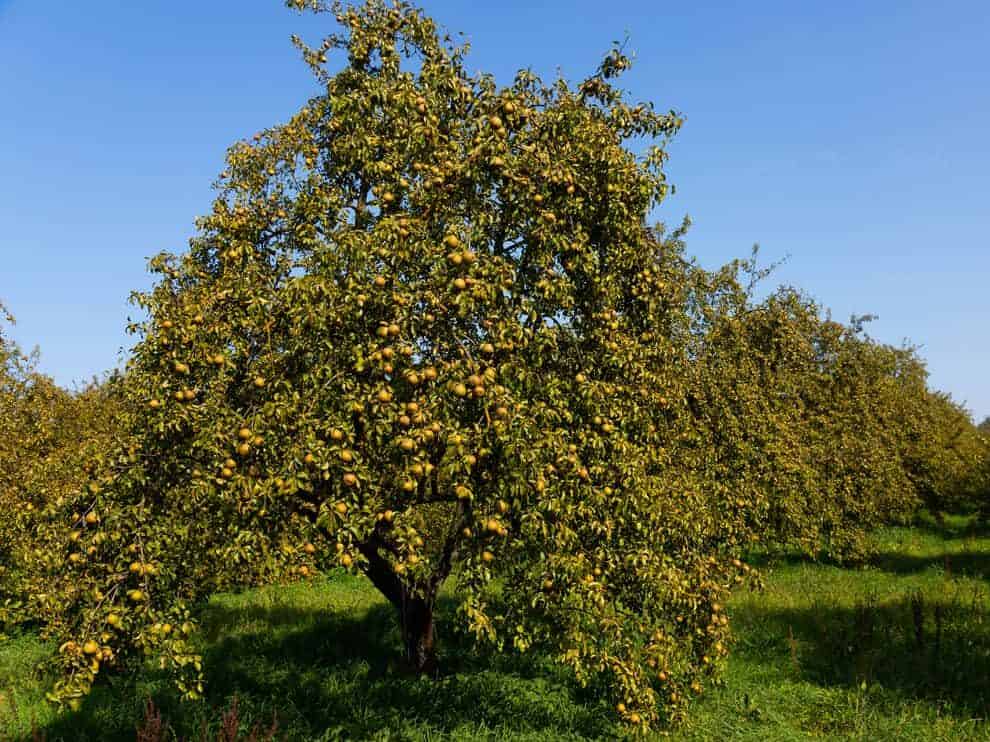
A pear tree loaded with fruit and leaves stands in a grassy field surrounded by other trees and a blue sky.

You can graft all kinds of different pears to each other including Asian pears, and quince. You might be able to graft apple and pear trees together as well but that requires some experimentation. 

You Can Even Graft Persimmons

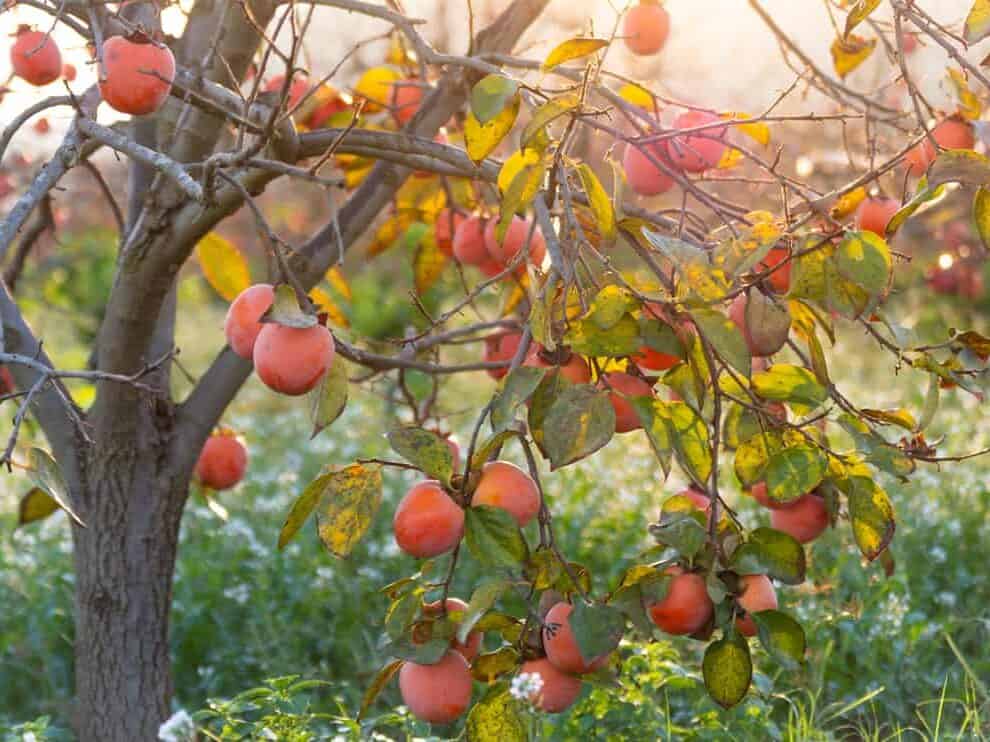
The lower trunk and branches of a persimmon tree are loaded with pinkish orange persimmon fruits in a grass field.

Persimmon trees can produce a lot of fruit, but unfortunately, they can only be grafted inside the family of other persimmons. You do still have variety here as you can graft American persimmon, Oriental persimmon, and the date-plum together.  

Can I Just Graft Any Old Trees Together?

A close up of pear fruits on a branch full of leaves.

This answer is both yes and no. Whereas you can graft nearly any of the same two trees together, you won’t be able to graft say a pine tree with a fig tree.

You can graft apples to apples, oranges to oranges, and figs to figs, but don’t get excited thinking you’ll be able to create a mashup of an avocado and a mango tree I’d affectionately call an “avocango” tree!

If you’re grafting at home, keep your experiments to trees of similar types to prevent a lot of disappointments. 

Another thing to take into consideration when you decide to start grafting is your hardiness zone. You’ll still need to stick to trees that grow well in your zone. For example, if you live in the south where the summers can be quite hot and humid, your cold-loving plants most likely won’t survive the harsh heat and vice versa. 

How To Graft Your Trees The Right Way

A cluster of several oranges hang from the branch of a tree with a blurred background.

There are several different ways to graft your trees, but we will keep it limited to three of the most popular and easier ways.

Grafting overall isn’t particularly easy, but once you get the hang of it, the biggest obstacle will be seeing if the pieces accept each other. There may be many things that keep your graft from growing properly and we will go over some of these possibilities.

The Right Time To Start Your Graft

You want to start grafting in the early spring after frost is no longer a threat, right about when your rootstock is starting to sprout new leaves. This gives the tree time to heal before summer sets in and all growing slow down. The spring is when trees do most of their growing and a great time for them to heal. 

Pick Your Tree To Graft

You want to start with a rootstock that isn’t too young or too old, but this also depends on how you are going to graft your tree.

This is assuming you have a tree that is established, is at least 5 to 10 years old, and possibly bearing fruit already. 

You can graft an entire, sapling, or tree to a root ball, but that’s a bit advanced and has a higher chance of failure, so in the interest of keeping things simple we won’t go into that in this article. 

When choosing your tree, you don’t want to start grafting the fruit tree you just purchased from your local garden center. You should have a tree that is established for a year or two.

When you plant a new tree, it really needs time to settle in, get its roots into the ground and be a well-established tree before you start cutting wounds into it. 

Pick Your Scions

The lower trunk and branches of a pear tree weighed down by yellow pears and green leaves surrounded by grass.

When picking the scions (branches) you will be using for grafting, you should do this before the tree comes out of dormancy. This is usually done before you start grafting, and you will need to store them properly for a few weeks.

Look for straight branches that do not have any other branches going perpendicular. They need to be about pencil thick in diameter, and about 12” to 18” long. Water sprouts work great for scions, and since they normally get cut off during trimming, why not place them where they will be useful?

Since it’s probably too soon to graft them into place, you’ll need to store your scions. Use food-grade storage bags to store them and add a damp paper towel or damp sphagnum moss in the bag with the scions, and place them in the refrigerator; the crisper drawer works great here. 

You’ll have to store these until your rootstock begins to open up and fluff out their new leaves. Depending on where you live this could be as early as March or into late April. Just make sure your scions are not too wet or get dried out. 

Materials Needed For Grafting

When you begin grafting you’ll need a few tools to get started.

You’ll need things such as:

  • Sharp pruning shears
  • Loppers or fine-toothed saw
  • Razor knife
  • Gloves
  • Grafting tape or electrical tape
  • Wax tree sealant (optional depending on what kind of grafting you are doing)

You can use the MESTUDIO Grafting Tool Set, it has literally everything you need to start grafting on your own, including professional grafting pruners and grafting tape! For your sealant wax, we recommend using Walter E. Clark Trowbridge’s Grafting Wax, which has great reviews and will be perfect for your grafting projects.

A quick note here about taping your graft. Grafting tape works the best here because you won’t have to go back and cut it loose. It is made to hold long enough for the graft to fuse together, then it begins to deteriorate and fall off.

If you use something like electrical tape, you will have to remember to cut it loose so that it doesn’t act like a tourniquet and strangle your new graft. 

We’ve got even more for you to learn along your tree journey! Check out our article: Full Mango Tree Lifespan (And How To Grow Them)!

Cleft Grafting

A tangerine tree with vivid green leaves and clusters of small orange tangerines.

Before cutting into your trees or removing scions, we want to make sure all of your cutting tools are clean, rust-free, and have been disinfected, this will ensure a clean and healthy cut.

A cleft graft is probably the easiest grafting technique to do. In a nutshell, you cut your rootstock branch straight and flat, cut a cleft into it, whittle down your scion, and shove it into the cleft, then seal everything up. 

With a cleft graft, you could potentially graft a few different branches into the same rootstock, if your rootstock is much bigger than your scions but we will stick with one right now. Once you have the hang of it and become a seasoned professional, you can attempt the multi-cleft graft. 

First off, find a branch about an inch thick on your rootstock where you will add your graft. Using sharp loppers or a fine-toothed saw, cut the branch off as clean and straight as you can.

Next, using your razor knife, carefully cut a straight cleft into the rootstock about an inch and a half deep. Take care here not to cut yourself or slice a large chunk off of the tree. If you rock your blade back and forth, you will have more control in your cleft cut.

Now you’ll take your scion, using your sharp knife, cut the end of your scion into a flat wedge. Cut on one side, then the other side evenly to make a flat wedge shape. This end you will insert into the cleft you made into your rootstock. You have now grafted your tree, but you’re not done yet. 

Use your sealing wax to seal the wound, then wrap it well with your grafting tape.

Now you can stand back and admire your handy work. 

Depending on the size of the tree, if you’re willing to keep going you could graft another place or two onto the same tree.

Be sure not to do more than 3 or 4, just to keep from opening up too many wounds on your tree, especially if it’s a younger specimen. 

Whip Grafting

A close up of small oranges hanging from the branch of a tree with a blurred background.

Whip grafting is done at the same time in the growing season as cleft grafting is done, but this works with branches that are about the same size in diameter. Whip grafting typically does less damage to the tree than cleft grafting. 

Start off by finding a branch on your rootstock that’s the same diameter as your scion, then you have a couple of options here. You can cut it straight off with a single slice, or you can cut a v-shape into it, but your scion has to be cut to fit into the v-shape.

Either way, once you have your rootstock and scion cut and the pieces meet up together well, wrap them together with your tape nice and tight so that the scion doesn’t bend, or fall off. The better they connect, and stay connected, the better they will mend. 

There is no need for sealant wax here, as the tape wraps everything tight and keeps the area free from the elements.  

Bud Grafting

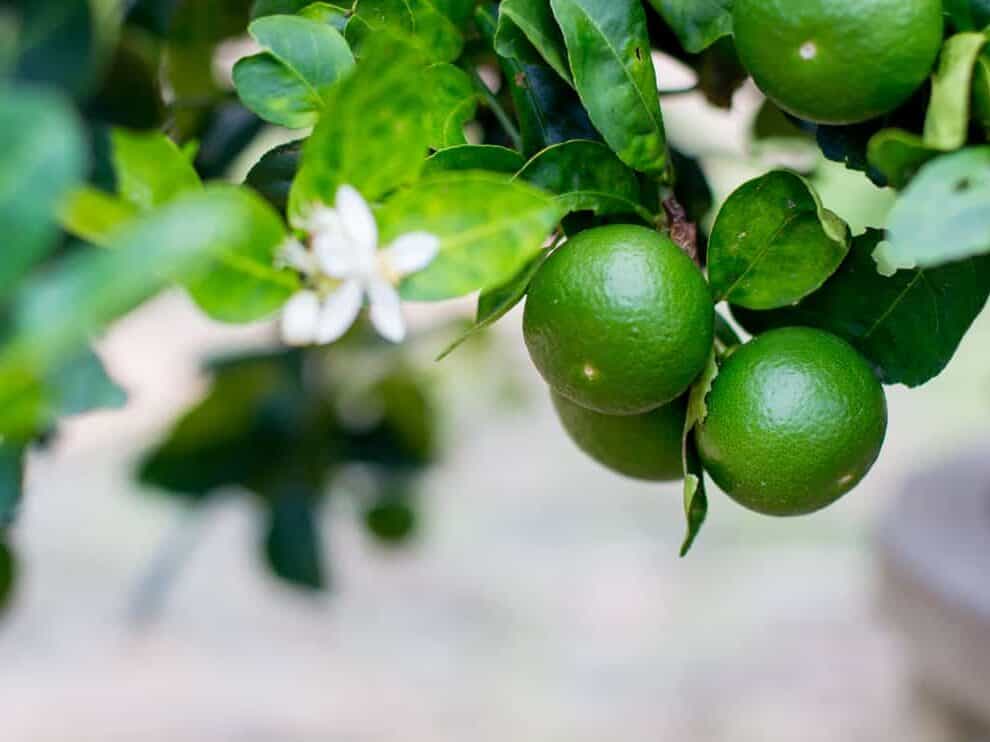
A close up of a cluster of limes and a small white flower on a tree with a blurred white background.

You’ll need a steady hand and a sharp knife for bud grafting. Here you will be cutting out a small section instead of cutting out an entire branch, then replacing that section with a bud from your donor tree.

This method works well with citrus plants.

On your rootstock, you’ll cut a shallow slice where you want the graft to go. You’re cutting just below the bark area in a shape as close as possible to your bud piece and vice versa. Also, leave a small flap of loose bark that the bud will be tucked into. 

From your scion or donor tree, find a section that has a bud starting off but not opened up yet. Patience and precision are key, as you want to slice a small piece of the tree, including the bud off of the donor.

Start above the bud, slice down past the bud, but not all the way through. Next at the bottom where you stopped cutting cut the bud free leaving a little wedge at the bottom of the bud piece. 

The bottom should be able to rest inside the loose flap of bark on your rootstock. This helps to hold the bud graft in place. 

Be careful not to touch the open, cut areas of the bud graft. Also, you don’t want to break off the tender bud, because it won’t grow back.

We know you got this though! You want to make sure your pieces line up as close as possible. Trim them if needed. Once they fit well, wrap it with your grafting tape. 

Wrap the entire piece up with several layers of tape. Keep the wrapping snug but not terribly tight, you don’t want to damage the bud. Keep this area and the tender bud in the shade for a few weeks if at all possible as this keeps the sun from drying out the graft. 

Then after three or four weeks, remove the tape and check your progress. The tree should have swollen up and incorporated the bud into the branch. 

Where Can You Get Grafting Scions?

If you don’t have a wide array of fruit trees to experiment with, it might be hard to start grafting your trees, so where can you go to find viable scions? Your local garden superstore might not appreciate you “trimming” their fruit trees and buying several trees just to get some foot-long scions could get expensive. 

Seek out friends and family if they have fruit trees they’d be willing to share with you. Maybe you could trade scions, then you’d both have some hybrid fruiting trees. You might be able to find some viable options in the wild, but I wouldn’t hold my breath looking for fruit trees in the wild. 

Did you know you can find viable scions and even rootstock online? Do a quick online search if you have no other options, or check with your local nursery. They might even be willing to sell you a few if they have them in stock. 

Just be mindful of what kind you purchase, and make sure your scions are either native to your area or are hardy in your growing zone. 

How Long Does It Take The Tree To Heal?

An orchard with rows of orange trees full of fruit with grass paths between rows of trees.

It may take anywhere from 4 to 6 weeks for your graft to heal, and most of the growing season for it to truly strengthen. During that time, it’s best not to trim your tree. Let it grow on its own, and you can always trim it next year if it needs it. 

During this time, the tree could certainly benefit from a dose of fertilizer to help stimulate more growth. Look for organic fertilizer that is safe for fruits and vegetables, since you will be eating the fruits once they are ripe and ready. 

Another consideration to think about, when grafting, you might want to tag your branches so you know what fruit will be coming from those branches, and just in case you forget and trim the grafted branch too much. We don’t want all your hard work gone in one accidental snip!

Read all about the full timeline of growing a lemon tree in our article to get better sense of how long you’ll have to wait to enjoy the fruits of your labor!

There You Have It!

A close up of a cluster of lemons hang from a branch with the sun shining through the leaves of the tree.

You want to keep the varieties of trees you graft together as close to the same family as possible, also while keeping the rootstock and scions to your hardiness zone. It may take a few tries to get the technique down, but with practice comes perfection. 

Now you know all about grafting; why it’s done, the practical uses, which fruit trees you can graft, and even how to graft fruit trees yourself. Go out there and start experimenting; make your own Franken trees with different fruits and have fun!

Want to learn more about trees along your tree journey? Check out our article 7 Best Fruit Trees for Rocky Soil (And How to Plant Them)!

References

Goldschmidt EE. Plant grafting: new mechanisms, evolutionary implications. Front Plant Sci. 2014;5:727. Published 2014 Dec 17. doi:10.3389/fpls.2014.00727

Habibi F, Liu T, Folta K, Sarkhosh A. Physiological, biochemical, and molecular aspects of grafting in fruit trees. Hortic Res. 2022 Feb 19:uhac032. doi: 10.1093/hr/uhac032. Epub ahead of print. PMID: 35184166.

Melnyk CW. Plant grafting: insights into tissue regeneration. Regeneration (Oxf). 2016;4(1):3-14. Published 2016 Dec 21. doi:10.1002/reg2.71

Mahama, A. Assibi; Sparks, Brian; Zalesny, Ronald S., Jr.; Hall, Richard B. 2006. Successful grafting in poplar species (Populus spp.) breeding. In: In: Seventh biennial conference of the short rotation woody crops operations working group: short rotation woody crop production systems for wood products, bioenergy and environmental services; 2006 September 25-28; Pasco, WA.

Pecans are a popular nut, found in everything from pies to salads, as well as other desserts, and even in addition to many savory dishes. So, in eating pecans, did you ever wonder how they actually grow? Maybe you’ve seen them on a tree recently, and want to know where all pecans can grow. 

Pecans start to grow on pecan trees that are between the ages of 4 and 12 years old. Pecan trees can grow across the world, from the United States to Argentina, South Africa to Mexico, and China to Peru. 

Stick with me here to learn about all of the different regions of the world, and more specifically the United States, where pecan trees can grow. And before you know it, maybe you’ll be growing your own pecan tree!

Where Are Pecan Trees Originally From?

According to the University of Kentucky’s Center for Crop Diversification, the pecan tree itself is native to North America, including the United States and Mexico.

Pecan trees were harvested for food, and for centuries pecans were a part of the transatlantic trade routes.

Eventually, European explorers ventured over and began to harvest pecans for both food and pecan lumber, which furniture makers held in high regard. By the 20th century, the pecan industry was booming. Thus, the reason for the shift in pecan trees being traded and transported around the world. 

Key Pecan Tree Characteristics

Ripe pecan nuts (Carya illinoinensis) on the tree, with husks open, ready for harvest. Pecans are drupes.

Pecan trees are a big deal throughout history, and today still a hot commodity! When thinking about pecan trees, there are a few main characteristics that make them so special – and things you may want to consider before planting!

  • Pecan trees are large deciduous trees, meaning that they lose their leaves as they go into their dormant state during the colder months of the year. , 
  • A pecan tree’s leaves alternate in pattern to create a unique look. 
  • They can mature to anywhere between 20-40 meters in height
  • Pecans aren’t actually nuts – they’re drupes! Let’s talk about this for a second. 

Pecans Aren’t Actually Nuts!

These trees are members of the hickory genus, which means that technically pecans are not a nut. Wait…what?

Pecans are technically classified as a drupe, in the same way, that peaches, coconuts, and dates are!

According to the National Phenology Network, a drupe is a one-seeded fruit that is either fleshy or pulpy. It is a ‘fruit’ that has developed from one flower having a single ovary, and the seed has a hard or stony endocarp (AKA: the pit.)

Now that you know a little background on pecan trees – let’s get into it – where do pecan trees commonly grow?

Pecan Tree Growing Zones

These trees grow in areas that are generally warmer, but pecan trees can also be cold-hardy. In the United States, you’ll find them located in USDA Hardiness Zones 5-9. 

While pecan trees can be found in countries all around the world that have similar environments, we’ll use the USDA’s growing zone map to discuss hardiness zones and what those look like.

It is a very digestible way to understand how the cold hardiness of trees can relate to the different zones of the country. We’ll talk more about the importance of hardiness zones later!

Without further ado – let’s get to it! Here are the common places where pecan trees grow!

7 Common Places That Pecan Trees Grow

Rows of pecan trees and green grass in the south during the Fall clear blue sky.

According to New Mexico State University’s Pecan Toolbox, major areas of production are spread across the United States, Mexico, and South Africa. 

Pecan growth started naturally in regions that were more humid and subtropical. Now, many of the regions that we talk about below will fall into the category of humid (best for growth), semi-arid, or arid (worst for growth.) 

We’ll dive into these areas below!

North America- Southeast United States

Pecans are a major product that comes out of the southeast region of the country, Georgia, New Mexico, Arizona, Texas, and Oklahoma are all major areas of pecan production within the states. 

It should be noted that the southern parts of the state that are west of central Texas, such as New Mexico and Arizona, are entirely dependent on irrigation systems to ensure that pecans grow well. Trees are more susceptible to disease in these regions, as their growing conditions are not quite as ideal.

For this reason, the American south and southeast are the best areas to grow pecans thanks to their long, hot, and unquestionably humid summers.

Pecan pie, pecan cookies, and pecans in a salad (sweet and savory) are just a few examples of the regional dishes you’ll find that use pecans heavily here.

North America – Mexico

Let’s not forget that Mexico was another one of the earliest places where pecans were recorded growing. In fact, today, Mexico produces nearly half of all the world’s pecans!

The states of Chihuahua, Coahuila, and Sonora are where you will find the most pecans being produced. 

Dishes like an Oaxacan bowl topped with pecans, pecan cookies, and even cream of pecan soup, are all typical dishes that can be found and enjoyed throughout these parts of Mexico.

Mexico produces 80,000 tons of pecans per year, which are sent around the world for people to buy and enjoy.

Africa – South Africa

Another country that is one of the main producers of pecans, South Africa, might be a bit more surprising.

This country is in a great spot in the world to have prime conditions for growing pecans. With a climate that borders subtropical and tropical, a sufficient amount of rainfall, and fertile, well-drained soil, pecan trees can thrive in South Africa.  

According to the South African Government, the Vaalharts and lower Orange river regions of the Northern Cape province are now home to major production of pecan nuts. However, pecan trees can be found growing in all provinces of the country.

Here, you’ll see pecan pie, cape brandy tart with pecans, and other delicious dishes that feature pecans.

While South Africa is the biggest pecan producer on the continent, other countries like Zimbabwe also produce this drupe.

Asia – China

The continent of Asia also has a stake in the world of pecans, and China is the main producer in this part of the world.

Since about 2017, China has been amping up its pecan production, as the health benefits of this nut are becoming more apparent and increasing its value.

Chinese five-spice candied pecans have become popular, as have Chinese fried pecans. These pecans are also often seen as an addition to Chinese dishes like chicken, carrot salads, and more. 

Australia

Does this one seem far out? After all, Australia is far from the Americas and Africa, and even China seems like a world away. Welcome to the globalized world, my friends. Australia is also a producer of pecans!

Common issues like scab disease, seen in the United States, do not impact Australian pecans, making their products even simpler. 

The country ships many pecans during the off-season in the Americas, which sees pecans being shipped just in time for those popular winter holiday dishes like pecan pie and other pecan-flavored items.

Australians themselves enjoy a good pecan pie, their own variation on salads with pecans, and pecan-apple pull-apart.

South America – Peru

Since pecans originated in the North part of the Americas, it is no shock that this crop worked its way down to South America during colonization periods.

Peru is a producer of this drupe, as well, and represents the western part of the continent while many of its neighbors are not major players in pecan production.

Exports are gradually growing, as Peruvian pecans tend to be much larger in size than the native crops of North America.

Ají de gallina, a popular dish with peppers, chicken, and Peruvian pecans, is quite a popular dish in this country. You’ll also find sweets like chocotejas. These dumpling-like chocolates tend to have a fruit or nut center along with a caramel-type filling.

South America- Argentina, Brazil, and Uruguay

Peru is not the only part of South America where pecan trees can be found growing. Pecans grow in the countries of Argentina, Uruguay, and Brazil, which all happen to be in the same eastern region of South America. 

Brazil borders Uruguay to the north and Argentina sits in the western part of the tiny country. One thing they all have in common? Warm, subtropical environments where pecan trees can thrive. 

Uruguay’s classic sandwich, the chivito, can often be found with a chicken salad that has none other than pecans mixed in. Pecan pie is a staple in Argentina’s dessert world, and pecan truffles can be found in Brazil. 

Do Pecans Only Grow on Trees?

Pecan Trees. Green pecan nuts ripening on plantations of pecan trees on Cyprus near Paphos

Pecan trees are deciduous trees that are part of the hickory genus and produce a drupe that is often referred to as pecans or pecan nuts. 

Pecans only grow on these trees, which tend to grow quite tall and wide. Unlike some species, the pecan tree only grows as a tree, not a bush or any other type of plant. 

So, yes. You will only find pecans growing on trees in environments that are humid and subtropical, with sand that is loamy, fertile, and well-drained. 

How Do Pecans Actually Form and Grow on a Tree?

Pecan trees grow naturally in groves, where trees are close to one another. Their roots system can go for twice as far as their canopies – so close is a relative term. 

You may also see pecan trees growing in orchards, which are more organized, man-made, rows of pecan trees. With an orchard, pecans are able to be more quickly and methodically harvested. 

Generally, pecan trees that have matured enough to bear fruit will be between the ages of 4 and 12. The age of maturity will depend on factors like weather, planting time, and overall maintenance.

Breakdown of the Requirements To Grow A Pecan Tree

Now you know a bit more about the history of pecan trees, where they grow, and what temperatures they thrive in – let’s break it down, so you can easily remember some key facts about growing a pecan tree if you desire to do so!

  • Temperature: Your pecan tree will do best in a range of 40 to 80 degrees Fahrenheit, though it can survive in extremely low temperatures as low as -20 degrees Fahrenheit. 
  • Soil: Sandy, loamy soil, or even more clay-based soil is going to be best for growing a pecan tree successfully. Overall, fertile and well-drained soil is key!
  • Sun: Sunny conditions are great for pecans! They should get about 6-8 hours of sunlight a day, to keep them happy.
  • Timing: February, or another time close to late winter and early spring like March, is the best time you could plant your pecan tree. This allows the winter frost to have died out but enough time for your tree to settle in before the blooming season and warm weather sees soil getting drier.
  • Rainfall: 1-2 inches of rainfall a week is necessary to keep your pecan tree well. If the tree is still maturing, it will need more water. If it is a particularly dry summer, it will also need more water. Use a Flantor Garden Irrigation System if you need to help your tree get the proper amount of water.
  • Fertilizer: Pecan palm trees will thrive with a fertilizer like Carl Pool Pecan Special Fertilizer. Its NPK (nitrogen, phosphorus, potassium) balance is 18-6-6, so your tree gets some extra nitrogen and an otherwise balanced fertilizer to help it grow quickly.

Why Are Hardiness Zones Important?

As promised, before we go – I wanted to let you know a little more about hardiness zones and why they’re important!

Firstly, to understand hardiness zones, you should be familiar with the way that they are broken down!

Zones Are Split

Zones are split into 10-degree intervals with numbers to label them and then further broken up into 5-degree intervals noted by the sub-labels of A or B. 

For example, say you are looking at an area that is categorized as hardiness zone 8a. You know that 8 signifies the 10-degree (Fahrenheit) range of 10 to 20 degrees, but since you see a the area is actually in the narrowed-down range of 10 to 15 degrees Fahrenheit. 

They Tell You How Cold Hardy The Plant Is

The temperatures that you see in these hardiness zones are not just average temperatures, though.

The term hardiness refers to how cold hardy a plant is, or how viable it is that it will thrive in certain extreme cold temperatures. 

So, the hardiness zone 8a would mean that this area has extreme minimum temperatures, on average, of 10 to 15 degrees Fahrenheit. When you know what trees can survive this, including pecan trees, you’ll have an idea of what plants you can grow in your zone.

Hardiness Zones Help you See Which Plants Can Survive A Winter

Keep in mind that this is an average extreme low temperature, so hardiness zones don’t just refer to the typical cold weather of a region.

These zones are specifically designed to see what plants will be able to survive during a winter where temperatures hit extreme lows. 

Generally, pecan trees like low temperatures of about 40 degrees and prefer not to go over 80 degrees in the summer. 

However, based on what they can physically withstand, the average extremely low temperature a pecan tree can handle ranges from -20 to 30 degrees Fahrenheit. 

Now that you know more about where pecan trees grow – it’s time to go!

It’s Time To Go

Pecan trees prefer areas that are hot and humid, bordering on subtropical. 

First found in what is now Mexico and the United States, these trees have been around for a long time, and served as a great source of food far before European populations began to cultivate them. 

These trees have since spread across the world, but are a very common plant to find in much of their native continent of North America.

Here are the 7 most common places where pecan trees grow:

  • United States- Southeast 
  • Mexico- North
  • South Africa- North
  • China
  • Australia
  • Peru
  • Argentina, Brazil, Uruguay

With that, happy planting. Oh, and best of luck as you continue on your tree journey!

References

Onunkwo, I. M., & Epperson, J. E. (2000). Export demand for US pecans: Impacts of US export promotion programs. Agribusiness: An International Journal, 16(2), 253-265.

Orona Castillo, I., Sangerman-Jarquín, D. M., Cervantes Vázquez, M. G., Espinoza Arellano, J. D. J., & Núñez Moreno, J. H. (2019). The production and commercialization of pecan nut in Mexico. Revista mexicana de ciencias agrícolas, 10(8), 1797-1808.

Wood, B. W., Payne, J. A., & Grauke, L. J. (1994). An overview of the evolution of the US pecan industry. Pecan technology, 1-11.

In this day and age, people are wanting to become more self-reliant, especially with growing their food. Biting into a juicy peach or apple that you grew yourself can feel like the best thing in the world. But, if you grow your own, can you plant apple and peach trees together?

Apple and peach trees can be planted together! Both apple and peach trees have the same requirements of full sun, well-draining, and acidic soils. They can also both grow in the same USDA Hardiness Zones 4-8.

In this article, we’ll go into just why you can plant apple and peach trees together! Keep reading to learn why these fruit trees can be planted together!

Basic Apple Tree Care

Close-up of beautiful red apples hanging on branches of an apple tree in an autumn sunny day.

Despite what you might think, apple trees can grow in USDA Hardiness Zones 3-8. That was a shock to me since Zone 8 is most of the southern United States.

When we think of apple trees we picture apple orchards where you can go apple picking in the fall. But, did you know that there are dwarf varieties of apple trees that make it easy to grow in small or urban spaces?

Yes, dwarf apple tree varieties that reach only 10-12 feet tall instead of the standard, which is around 30 feet tall. 

If you want to start an apple tree of your very own from the start, consider getting something like this Big Pack Of Red Delicious Apple Seeds!

Additionally, according to the University of California, during the summertime, a mature apple tree can require 50 gallons of water per day!

Unlike some stone fruit trees, apple trees need what is referred to as cross-pollination. They require a different cultivar of apple trees to pollinate one another, so they also must flower at the same time! Without this, your apple tree may not produce much fruit, or you’ll get some wonky-shaped fruit.

Guide To Planting Apple Trees

When you go to plant an apple tree, there are a few things to be aware of to ensure the most success for your new fruit tree. 

Container-Grown Or Bare-Root

If you are planting an apple tree from a container, you can transplant it at any time during the growing season without worry. 

However, if you are planting a bare-root tree, you should plant it in the early spring to ensure your tree thrives. 

The only difference between a container-grown apple tree and a bare-root apple tree is that the container-grown apple tree will have soil around its roots, whereas the bare-root, hence, its name, will be stored without soil around its roots. 

Location, Location, Location

When planting your apple tree you want to make sure it’s in an area of full sun! This means that your apple tree will get at least six hours of sun every day. 

Apple trees also tolerate a variety of soils but will do best in well-draining soils, including sandy soil. They won’t do as well in soils that are poor-draining, with heavy clay content. Soils that are poor-draining and don’t allow airflow result in mold, and fungal diseases for fruit trees. 

Apple trees also prefer a neutral to acidic soil pH, so anywhere with a soil that is between pH 5.50-7.0 will do for your apple tree.

Planting Time!

Pink and white flowers and spring flowers. Malus domestica

So, you now know some key points before planting your apple tree, now let’s get to it!

If you have a container-grown apple tree then you’ll want to water your tree in the container and soak it well, and then you’re ready to plant!

If you have a bare-root tree, check the roots before planting. If they look as if they’ve dried out, you can soak the tree roots in water for 24 hours, before you plant the tree. If they look hydrated, then you’re ready to go!

Since apple trees need another apple tree to pollinate and produce fruit, you’ll want to leave 15-20 feet of spacing, for taller varieties, and 6-8 feet of spacing, for dwarf varieties.

So, you’ve got your ready to plant trees and the proper spacing. Next, you’ll want to dig a hole that is twice the size of the diameter of the roots and as deep as the roots. You can guesstimate, it doesn’t have to be perfect!

Put the tree in the hole you dig and cover up the roots with soil. You want to make sure when you fill the hole with the soil that it is fairly firm, but don’t pack it in too tightly. 

This is to ensure there aren’t any air pockets and that roots can grow, and water and nutrients can get to the tree without any issues. As long as you use your hands to pack it in, you should be good to go!

Make sure that the top of the soil, or the ground, doesn’t cover any higher than where the highest roots are, otherwise your tree will likely suffer. 

You can grow your apple tree along a fence, a trellis, or with posts in the ground, this will offer support for your apple tree as it grows to prevent uprooting. 

After your apple tree is planted, make sure to water it well, at this point you can flood it with water.

Water your young apple tree at least once a week, and in drought conditions or hot weather, you may have to water it once every 2-3 days. 

Apple trees are incredibly susceptible to pests, so you’ll want to use a pesticide to keep your apple tree healthy and limit the number of pests. We recommend Bonide (BND217) Chemical 217 Citrus Fruit and Nut Orchard Spray Concentrate, which not only prevents pests, but prevents fruit tree diseases, and is even a foliage protectant!

Basic Peach Tree Care

Branch of peach tree in closeup

Surprisingly, peach trees can grow in USDA Hardiness Zones 4-9. Why is this surprising? Because this includes the northeast United States, parts of Canada, and even the Colorado Rocky Mountains. I always thought it would be too cold in these regions to grow peach trees, but it’s not!

Just like apple trees, there are dwarf cultivars of peach trees that grow to only 8-10 feet! Or, the standard peach tree, which grows to 25 feet.

To start a peach tree of your very own, get something like this 10-Pack Dwarf Peach Tree Seeds.  

According to Rutgers University, mature peach trees require roughly 35-40 gallons of water per day during summertime!

Soil Type And Location For Peach Trees

Unlike apple trees, peach trees, like some stone fruit trees, are self-pollinators, meaning they don’t require cross-pollination as apple trees do. As long as there are pollinators, peach trees can produce fruit on their own. 

Like apple trees, peach trees are full of sun, with at least six hours of sunlight per day. 

Peach trees do best in sandy, well-draining soil. Just like apple trees, they won’t do well in soils that are poor-draining, with heavy clay content, due to lack of air and water flow. 

Peach trees also prefer a neutral to acidic soil pH, so anywhere with soil that is between pH 5.50-7.0 is ideal for your peach tree.

Want to learn more about soil pH? We’ve got you covered! Check out our article What pH Level Do Trees Like For Best Growth?

Planting Peach Trees

peaches on a branch in green nature background closeup with copyspace

Planting peach trees is just like planting apple trees. We’ll go over a few of the things we covered for apple trees so that you can have peace of mind when planting your peach tree. 

The same thing applies if you have a container-grown peach tree or a bare-root peach tree. Make sure to hydrate your tree before planting as we mentioned above, by either soaking your bare-root tree in water 24 hours before planting or watering/soaking your container-grown peach tree before planting. 

You won’t need to plant an additional peachtree for pollination, but if you are going to plant other fruit varieties, like apple trees along with your peach tree, you’ll want to leave 15-20 feet of spacing, for taller varieties, and 6-8 feet of spacing, for dwarf varieties.

Dig a hole that is twice the size of the diameter of the roots and as deep as the roots, this is pretty standard for most trees. 

Now you can put the tree in the hole you dug and cover up the roots with soil, packing it in firmly, but not too tightly. As long as you use your hands to pack it in, you should be good to go!

Again, just make sure that the top of the soil, or the ground, doesn’t cover any higher than where the highest roots are, otherwise your tree will likely suffer. 

Just like the apple tree, you can grow your peach tree along a fence, a trellis, or with stakes in the ground, this will offer the necessary support.

Now that it’s planted, water your peach tree well, at this point you can flood it with water.

Water your young peach tree at least once a week, and in drought conditions or hot weather, you may have to water it once every 2-3 days. 

So now that we’ve covered apple trees and peach trees, back to the question at hand, can apple and peach trees be planted together? Yes! 

Let’s break down the things we went over above as to why they can be planted together!

Apple And Peach Trees Can Be Planted Together Because They Have The Same Sun Requirements

So, as we mentioned, whatever tree or trees you decide to plant, they will do well in full sun. 

Because apple and peach trees both require full sun, they can be planted together. Now, if they had different light requirements, they could probably still be planted together, but it may complicate things.

Apple And Peach Trees Grow In The Same Zones

Apple and peach trees can be planted in USDA Hardiness Zones 4-8. Apple trees can be grown in Zones 3-8, and peach trees can be grown in Zones 4-9. 

When deciding what apple and peach trees to plant together, you’ll want to make sure you choose varieties that grow in the same zones. But because they both grow in a handful of the same zones, apple and peach trees can be planted together. 

Apple And Peach Trees Can Grow In The Same Types Of Soils

Orchard with fruit trees in a field in summer

This is another important reason that apple trees and peach trees can be planted together, both do well in sandy, well-draining soils that have neutral to acidic pH. 

If they grew in different types of soil, say sandy and clayey, then this would be an issue due to the water retention of the soil, the available nutrients, and overall differences in soil and its pH.

Apple And Peach Trees Can Be Planted Together Because They Require Similar Soil pH

Soil pH goes hand in hand with the type of soil it is. Both apple trees and peach trees require soils that are sandy and well-draining, which are generally neutral and acidic.

This makes sense that both types of trees require neutral to acidic, with pH anywhere from 5.5-7.0, since the soil they grow best in is the soil type with that pH.

Apple And Peach Trees Have Similar Water Requirements

Apple trees and peach trees both have similar water requirements, meaning that you don’t have to worry about one or the other sucking up all of the water causing the other tree to suffer. 

They both require quite a bit of water during summertime, with apple trees needing about 50 gallons of water per day and peach trees needing 35-40 gallons of water per day. 

Apple And Peach Trees Grow Similarly

Depending on the variety you choose, you don’t have to worry about either tree towering over the other and blocking out the sun. Both fruit trees have dwarf varieties that grow anywhere between 10-15 feet. 

But, before you go to plant, just make sure that you have apple and peach tree varieties that grow to similar heights, and not one a standard height (30 feet) and the other a dwarf height (10-15 feet). 

Wrapping Up!

Thanks for reading with us, we hope you learned why apple and peach trees can be planted together!

Let’s recap the main points of this article in case you forgot.

Apple and peach trees can be planted together! They can be planted together because apple and peach trees have the same growing requirements of full sun, well-draining, and acidic soils. Additionally, they can also both grow in the same USDA Hardiness Zones 4-8.

Unlike peach trees, which are self-pollinators, apple trees need what is referred to as cross-pollination. They require a different cultivar of apple trees to pollinate each other, meaning they also must flower at the same time. Otherwise, you’re liable to get some wonky fruit, if many at that.

After planting your trees together, we recommend something like Dr. Earth Organic Fruit Tree Fertilizer to keep them happy and healthy!

Lastly, when planting apple and peach trees together, make sure to get varieties that grow to similar heights and grow in the same zones!

If you want to learn more about fruit trees, check out our article 7 Best Fruit Trees for Rocky Soil (And How to Plant Them)! You could also check out a book such as Growing Fruit Trees: Novel Concepts And Practices.

References:

Byers, R. E., C. G. Lyons, K. S. Yoder, J. A. Barden, and R. W. Young. “Peach and apple thinning by shading and photosynthetic inhibition.” Journal of Horticultural Science 60, no. 4 (1985): 465-472.

Cullinan, F. P., & Batjer, L. P. (1943). Nitrogen, Phosphorus, and Potassium Inter-Relationships in Young Peach and Apple Trees. Soil Science, 55(1), 49-60.

Gur, A., & Sarig, P. (1982). Application of growth regulators to peach and apple trees growing under stress conditions in shallow and stony soils. Growth Regulators, XXI IHC 137, 153-168.

Piñero, Jaime C., and Silvia Dorn. “Response of female oriental fruit moth to volatiles from apple and peach trees at three phenological stages.” Entomologia Experimentalis et Applicata 131, no. 1 (2009): 67-74.

Remorini, D., & Massai, R. (2003). Comparison of water status indicators for young peach trees. Irrigation Science, 22(1), 39-46.

Birch sap from a tapped tree

By now we have all heard of maple syrup and probably have tasted the sweet, sugary, maple-y goodness. Whether as iconic maple syrup, maple candies or possibly maple cotton candy. But did you know you can also tap birch trees in much the same way? They certainly can, but which different birch trees can be tapped?

You can tap pretty much any species of birch tree. Although yellow birch sap contains the highest level of antioxidants, the paper birch tree contains the most sugar. The trees should be at least 8” in diameter, but larger, healthy trees are recommended. 

Now you know you can tap birch trees for their sap. How do you accomplish it, what equipment will you need, what can you do with the sap, and is it even worth it to collect? Let us dive into today’s topic. 

Why Should You Tap Birch Trees?

Ok, so you noticed some thick, papery bark-covered birch trees on your property and you now know you can tap them. You might collect gallons of sap from each tree. Why should you go through the hassle of tapping and collecting it all?

Birch Syrup Is Expensive

Maple syrup is rather expensive because of its limited supply and because it takes nearly 40 gallons of sap to make one gallon of syrup. Birch syrup requires much more sap, anywhere from 110 to 200 gallons of sap to cook down one gallon of syrup. This alone makes it expensive, but factor in other variables, and birch syrup skyrockets in price.

Cornell College of Agriculture and Life Sciences tells us birch syrup sells for 3 to 5 times more retail than maple syrup. Mainly because birch syrup is more costly to produce in Alaska and Canada, and it takes so much more birch sap than maple to make the same amount of syrup. Then factor in the high demand compared to the limited supply, and you have yourself an expensive product. 

If you want birch syrup, it’s worth it to harvest and cook it down yourself. 

Birch Sap Great If You Are Homesteading Or Living Off The Grid

If you are working on becoming self-sufficient, already are, or want to get off the grid, then it pays to know about all the alternative uses for nature and what is available to you.

You can collect birch tree sap for cleansing, vitamin, and mineral-infused hydration, syrup, or other items. There may not be any maple trees around your area, but you have plenty of birch trees lining the stream, and you can still make syrup from the sap.  

Surprisingly, Birch Sap Is Good For You

The tree itself uses the sap to kick-start the growth period, so it is packed full of vitamins, amino acids, minerals, and other nutrients. The sap is also low in sugar, and the sugar it contains—fructose and xylitol—will not spike your sugar like corn sugar and cane sugar. 

Do not worry about harming the tree by tapping it. When done the correct way, tapping it and collecting sap will not harm the tree. It will still grow fine, and a strong, healthy tree will recover easily from the hole drilled into it. 

You May Enjoy The Taste Of Birch Sap

Say you harvest several gallons of sap, take it home, and carefully cook it down into syrup. It will not taste like maple syrup and some people complain about birch syrup, but you may find that you like it. You will not know unless you try it, right? 

Why Else Should I Tap Birch Trees?

Football season is over, it’s a long time before it starts again, it’s too early to plant your garden, but you still want to do something outside. Instead of sitting inside with the “ho-hums”, go out there and start tapping some birch trees. Not only will you be out getting some exercise and sun after a long dreary winter, but you will learn a new skill with added benefits. 

Which Birch Trees Can Be Tapped? 

A autumn birch grove among orange grass

There are dozens of different birch trees, all of which can be tapped to collect their sap. Each one has different subtleties in flavor, sugar content, and amount of sap you can collect. 

The most popular birch trees for collecting sap include:

  • Yellow birch
  • Alaska birch
  • Paper birch
  • Silver birch
  • Black birch
  • White birch
  • River birch
  • Gray birch
  • European white birch

If you are not sure what kind of birch tree you have on your property, Do All Birch Trees Have White Bark? Identification Tips may give you some insight!

What To Look for Before Tapping

Obviously, you do not want to go drilling any birch tree and tapping your spile into the hole while hoping for the best. There are some factors to look out for when choosing the healthiest trees for the highest quality saps.

Look for healthy trees without a lot of dead and broken branches. Also, you want to choose a tree with a full canopy and the ability to soak up plenty of sunlight in the upper branches.

Sunlight is important to all photosynthesizing plants, but birch trees cannot grow in the shade. To learn more on this phenomenon check out 4 Reasons Why Birch Trees Can’t Grow In The Shade.

The bark around the tree needs to look clean and healthy as well. Be aware and avoid diseased or fungus-ridden trees, as these trees may be near the end of their life cycle.

You also want to tap trees that are at least 8” in diameter. You should err on the larger side as smaller trees produce bitter sap and less of it. Keep in mind a single birch tree will produce about a half to a gallon of sap per day, and the tapping season can last between 14 and 21 days. 

What To Avoid When Tapping A Birch Tree

When drilling your holes for the spile, once you are past the bark, if you get fresh, white drill shavings, you are good to go. However, if you drill and you are drilling out brown shavings, you have probably hit a dead spot.

Move to a different area and drill again or choose a different tree. You will not get any sap from a dead part of the tree, and if you did, you would not want to consume it. 

Avoid trees that have been treated with pesticides or areas on the ground that have been treated. You don’t want that stuff entering your body via birch sap. 

When Can You Tap Birch Trees?

If you are familiar with tapping maple trees, this is a simple question. When maple syrup season is over, it’s time to shift gears slightly and start tapping birch trees. 

The exact time frame for when you can tap birch trees will be different for varying climates. In your area, when the nights and days no longer dip into freezing temperatures, it’s time to tap birch trees. In many places, the time to tap and collect sap is in late March to early April, but it all depends on where you live.

You want to tap them while the leaf buds are still small nubs because once the leaves come out and turn green, the sap no longer has any sugar in it. You are looking for the break between winter and spring. 

How To Tap Birch Trees, And What Equipment Is Needed

vintage wicker wine bottle and birch tree with spigot and sap drops

Unless you have already been tapping maple trees, you will probably need a few specialized pieces of equipment. There are full kits for tapping trees like this Deluxe Maple Tree Tapping Kit. It comes with hooks, taps, buckets, filters, a drill bit, and even recipe cards!

Below is a list of everything you will need to tap your birch trees. 

  1. Portable drill
  2. Drill bits for taps/spiles. 7/16” or 5/16” size, depending on the diameter of spiles
  3. Tree taps/spiles
  4. Sap collection buckets that will hang on the taps
  5. Hammer or rubber mallet
  6. Filter paper or cloth
  7. Rubbing alcohol to sterilize the taps or boil them first

Step-By-Step Instructions For Birch Tapping

Start by sterilizing your taps/spiles by soaking them in rubbing alcohol or boiling them for a few minutes. 

Next, you want to drill your holes. You only need one hole per tree. Using the correct size drill bit, drill at a slightly upward angle and only into the tree about 1-½” deep.

It is a good idea to use a drill stop. Either mark the depth of the drill bit with a permanent marker or wrap a bit of electrical tape around the drill bit to prevent yourself from going too deep into the tree. 

You should try to keep from drilling into the side exposed to full sun, as birch sap is perishable. With the sun beating down on it, it could spoil faster. Drill and tap the north or east side of the tree and clear out any shavings from your hole. 

Gently tap the spiles into the tree using your hammer. If your spiles are plastic, we recommend using a rubber mallet. They only need to be tight enough to hold your sap containers. 

The sap coming out should be clear as water and taste slightly sweet. If the sap comes out cloudy, discolored, or tastes bitter or sour, remove the tap, discard what you have collected, and move to another tree. 

Gather your sap every day. Birch sap is highly perishable and needs to be collected daily. Strain your sap with filters to remove twigs, leaves, or anything else that might have fallen into your bucket.

Keep it refrigerated for up to 7 days or freeze it for a longer life. You can also pasteurize it or add citric acid or sugar to lengthen the shelf life. 

I always say, the fresher the better. If you have it, use it. Don’t wait for the sap to reach the end of its shelf life.  

Sap collecting season usually lasts about 14 to 21 days. When leaves start to “fluff” out of the tree, you’ll get no more sugar from the sap. Remove your equipment, clean out the hole with water and start planning what you’re going to do with all that sap. 

For the coming seasons, if you continue to tap your birch trees, move to a different area to collect your sap. You want to move at least 4” away from your last hole, and spiral upward as you go.

It’s also good practice to let a tapped tree rest after three years of tapping. Give it some time to rest and heal. 

What Can You Do With Birch Sap?

Fresh cold birch juice in a jug and glass and birch branches on a dark background.

With gallons of freshly tapped birch sap in hand, what can you do with it? Don’t worry, there are several uses, especially if you are handy and have the time. 

Drink it!

Birch sap all alone, filtered, and bottled up is a great, healthy drink early pioneers and indigenous peoples alike enjoyed in America’s younger years. It contains antioxidants, several amino acids, vitamins, minerals, and a load of other “good for you” stuff. Some people call birch sap or birch water an energizing early spring drink. 

FWS says birch sap was a well-known “traditional health elixir” consumed by Russians, Scandinavians, Asians, and wherever birch trees grow. Birch sap also has a history of being used in the treatment of hypertension, urinary disorders, arthritis, scurvy, and other ailments.  

(Obligatory disclaimer here. The above passage is for educational purposes only and should not be used to diagnose or treat any symptoms or ailments. If you have questions about your health and the potential benefits of birch sap, consult a professional such as your doctor.)

One note of caution here. Birch tree sap contains manganese. While it is an essential nutrient, too much manganese can cause toxicity.

Go ahead and drink the birch sap, but take it in moderation. Limit consumption to possibly one to two cups per day. 

If you have medical questions such as “Will this interfere with my medications?” consult your doctor to be safe. 

Make Birch Syrup

Making birch syrup is a tricky process because the sap contains fructose sugars as opposed to maple tree sap which contains sucrose. Fructose burns faster and will create a woody and molasses kind of taste if the cooking temperature is too high. 

The birch syrup manufacturers do not suggest putting this type of syrup on pancakes because it contains much less sugar than maple syrup. Some people report an almost savory, spicy taste. To each their own though, no one said the only topping for pancakes is maple syrup. 

My brothers and sister prefer peanut butter on their pancakes. While not my favorite, we all have our own preferences. 

You’ll need a lot more birch sap to make syrup. 

According to an article by the USDA, Tree to Table, it takes around 40 gallons of maple sap to make one gallon of syrup. It takes significantly more birch sap to make syrup. You will need anywhere from 100 to 200 gallons of birch sap to make a single gallon of birch syrup. 

The reason it takes so much birch sap to make such a small batch of syrup is the sugar content. Birch sap only contains about 1%-1.5% sugar compared to maple sap which has nearly 5% sugar.

What can you do with birch syrup if you are not supposed to pour it all over your pancakes you ask? You can use it in glazes, sauces, baking, and marinades for meats, especially lighter tasting meats sweetness complement well like chicken and pork.

Incredibly, there are a ton of recipes using birch syrup on the internet from glazed salmon to pecan squares, and even birch syrup cocktails. Sign me up!  

Crafting birch syrup from the sap is a difficult process because of its tendency to burn. The sap needs to be cooked down at a lower temperature than maple syrup does.

If you are interested in learning how to create your own birch syrup, contact the Alaska Birch Syrup Makers Association or the University of Alaska Cooperative Extension Service. They are the experts on birch syrup. 

Birch Beer Is A Great Use For Birch Sap

Birch beer is already a popular drink in Canada and is gaining popularity in northern states such as Vermont. This type of beer is the non-alcoholic kind, more closely related to ginger beer, or root beer. 

Birch beer is similar in taste to root beer because of the earthy, spicy flavors, but different because of a rich creaminess combined with an aftertaste of mint. 

Craft Birch Mead Or Wine

If the thought of birch beer has you craving the earthy, spicy, slightly sweet taste of something with a little more kick to it, then get to crafting some birch mead, or wine. You can easily ferment the sap into mead or wine just like you would using grapes or other fruits. 

What Does Birch Sap Taste Like?

I have not tasted birch sap or any other product from the sap, although I have to say I am very intrigued. The reports of taste vary as much as the trees themselves. Some people describe the taste as woody, slightly sweet, and refreshing, while others lean toward the taste of coconut water. 

The different varieties of trees could have their own characteristics of flavors, as well as soil conditions and when the birch tree was tapped or harvested. The first batch from the tap typically contains the most sugar, so it would be sweeter than later collections of the sap. 

The general consensus on the taste of birch sap is it is light tasting and slightly sweet with some hints of fruitiness and/or earthiness. Once you tap your birch trees, we would love to hear from you and your experience. Come on back and leave us a comment if you tried it. 

This Tree Is Tapped

That does it for this episode of Different Birch Trees That Can be Tapped and How to Tap Them. If you have birch trees on your property, collect some of the sap. It does not matter what kind of birch tree it is, as long as it is the correct time, the tree is healthy, and you have the equipment.

You can easily collect a good amount of sap each year. 

Birch sap has many uses and can be consumed on its own with little processing. Studies show many groups of people have enjoyed birch sap throughout history. If you are savvy and have the right equipment, you can make syrup, birch beer, or even ferment it into mead and wine. 

References:

Staniszewski P, Bilek M, Szwerc W, et al. The effect of tree age, daily sap volume and date of sap collection on the content of minerals and heavy metals in silver birch (Betula pendula Roth) tree sap. PLoS One. 2020;15(12):e0244435. Published 2020 Dec 29. doi:10.1371/journal.pone.0244435

Ana I. Sancho, Tina Birk, Juliane M. Gregersen, Tage Rønne, Sofie E. Hornslet, Anne M. Madsen, Katrine L. Bøgh, Microbial safety and protein composition of birch sap, Journal of Food Composition and Analysis, 10.1016/j.jfca.2021.104347, 107, (104347), (2022).

Jeong, S.-J., Lee, C.-H., Kim, H.-Y., Lee, S.-H., Hwang, I.-G., Shin, C.-S., … Jeong, H.-S. (2012, January 31). Quality Characteristics of the White Birch Sap with Varying Collection Periods. Journal of the Korean Society of Food Science and Nutrition. The Korean Society of Food Science and Nutrition. https://doi.org/10.3746/jkfn.2012.41.1.143

A wide spreading cedar tree grows from a rocky hillside against a blue sky.

If you have a cedar tree as a part of your yard, it’s likely to serve as a staple in your landscaping for decades to come. With all that potential curb appeal just sitting under your tree waiting to be discovered, we’ve got some recommendations on what you can plant under cedar trees to help make the area underneath come across as more than just an empty, unused space.

For a plant to be compatible with your cedar tree, it cannot take nutrients from your tree and has to be shade tolerant. So, what can you plant under a cedar tree?

  • Wintergreen
  • Bugleweed
  • Periwinkle
  • Hosta 
  • Bergenia
  • Columbine
  • Ice Plant
  • Chinese Lantern Plants
  • Oakleaf Hydrangea
  • Lungwort
  • Foam flower
  • Partridge berry 

So, sit back, relax, and let’s take a deeper dive into what to consider before you plant and how to pick the best plants from this list that will give your yard a pop of color while making your cedar more attractive. 

Can You Actually Grow Plants Under A Cedar Tree?

Since we’re writing this article, we hope you know the answer to this question is a resounding yes. You can plant a variety of flowers, shrubs, and other ground covers underneath a cedar tree and have them thrive!

Now don’t get us wrong, there are a handful of environmental factors out of our control. These can also affect what type of vegetation you can grow under your cedar, and in your yard in general. 

We already mentioned the shade these trees provide, but the soil composition and root systems, as well as the average rainfall in your area, are all also important aspects to take into consideration before planting under your cedar, or really anywhere in your yard. 

The U.S. Forest Service Pacific Northwest Research Station has conducted several studies on the importance of maintaining your cedar tree’s health through thinning and fertilization in its younger years. So, you want to make sure the plants you’re adding to the nearby soil don’t take away any of the key nutrients your cedar needs.

The different varieties of cedar trees should also be taken into consideration. However, lucky for you, our 12 recommended plants cover a wide variety of vegetation that will be able to thrive under these trees, all while your cedar maintains the nutrients it needs to stay healthy.

Maybe you are looking for advice on other varieties of trees. If so, check out our guides on what to plant under a pine, oak, and maple tree, just for a start!

5 Best Perennial Flowering Plants To Plant Under A Cedar Tree

A green and white variegated hosta grows from the roots of a cedar tree with moss and grass behind.
Hosta, also named Funkia, white leaves with green borders, favorite ornamental plant close-up

Considering I myself have trouble keeping the difference between annuals and perennials straight, let this note serve as your friendly reminder. A perennial is a plant that will live for more than one growing season. 

Since these plants go dormant during the winter months, this means there’s less work for you because you won’t have to replant them when the next growing season comes around!

Here are some of the best flowering plants to grow under your cedar tree:

  • Hosta
  • Bergenia
  • Columbine
  • Chinese Lantern Plants
  • Lungwort

Some of these plants may be unfamiliar names for you, and that’s okay. The goal is to pick the best plants for our yard, so we’ve also created a reference or cheat sheet on each of these plants and their various requirements so you can ensure you’re picking the right plant for your tree and have it grow successfully. 

1. Hosta

I have a handful of these plants on the side of my house, and I love them! They thrive with minimal sunlight, and they require nearly no maintenance. These low-key requirements mean Hosta plants would make a wonderful addition under your cedar tree.

Shade level: Partial shade to full shade

Water level: Well drained

Flower color: White 

2. Bergenia

These flowers are straight out of a fairy garden. With their thicker stems and large stems propping the flowers up when they’re in bloom, this plant makes a statement all on its own.

Shade level: Partial shade to full shade

Water level: Moist

Flower color: Pink, red, white

3. Columbine

Like the Bergenia, the Columbine plant has tall stalks that hold up their flowering blooms above the rest of the plant. These flowers are also bell-shaped which, other than just being nice to look at, helps to attract some additional winged creatures to your yard and can help with the pollination of your plants!

Shade level: Partial shade

Water level: Moist but well drained

Flower color: Red, orange, yellow, blue, purple

4. Chinese Lantern Plants

While these plants have flowers, the real draw to this plant is their seed pods, or -you guessed it- their lanterns. 

The lantern pod itself is a cover for the fruit this plant bears, but be aware that the fruit inside is toxic to people, so we would recommend that this plant be planted in a container instead of the ground itself in case it ever needs to be removed from your landscaping plan.

Shade level: Partial Shade

Water level: Moist but well drained

Flower color: White

5. Lungwort

Lungwort flowers are usually bell or funnel-shaped, making them another eye-appealing piece to add to your landscaping. While the flowers themselves can add a nice pop of color while in bloom, the speckled leaves of this plant are a fun addition that helps outlast the blooms for some added color throughout the warmer seasons.

Shade level: Partial shade to full shade

Water level: Moist but well drained

Flower color: Blue, pink, white

2 Best Shrubs To Plant Under A Cedar Tree

A close up of a shrub with small, round, green leaves, small flowers, and round pink berries.

Now when we say shrubs, I know our minds go picturing huge shrubs, bushes, hedges, and everything of the like that you would never imagine could grow successfully under a cedar. 

Rest assured, we’ve got a couple of less drastic shrub options that will work just as well under your cedar and not require much maintenance.

1. Wintergreen

These plants will sport red berries that are edible but are also so much more. Other than adding to your landscape, you can use the leaves themselves in tea. Also, when the holidays come around, propagating your wintergreen plant can make a splendid gift! 

Shade level: Partial shade

Water level: Well drained

Flower color: Small white flowers followed by red berries

2. Oakleaf Hydrangea

There are a variety of hydrangea shrubs to choose from, but the Oakleaf is one of my favorites because of its leaf shape, which resembles the leaves of an oak tree. Depending on the size of your cedar, this particular plant can bloom up to 6 feet tall, so do your best to plan accordingly. 

Like all other hydrangeas, these plants have higher toxicity to humans and our pets, so we recommend carefully creating your landscaping plans before you dig holes for your plants. 

Shade level: Partial shade

Water level: Moist but well drained

Flower color: White

5 Best Ground Covers To Plant Under A Cedar Tree

A close up of a honey plant with small clusters of purple flowers, and dark green leaves with fine white hairs in a forest.

I love a good ground covering plant. Their maintenance is low, and they thrive in a variety of different environments, which makes them a great option for covering up the open area under your cedar and adding that piece of color to keep it interesting.

There are a lot of options within this group, but here are our top five picks:

  • Bugleweed
  • Periwinkle
  • Ice plant
  • Foam flower
  • Partridge berry

Now, let’s check out the specifics for each plant so we know what could work best for our yard. 

1. Bugleweed

Don’t let the word “weed” in its name fool you- this plant looks nothing like a weed and is great at choking out any weeds that might be in the area. This plant can reach up to ten inches tall, so it’s a nice height option to use while blending and filling in the area with other plants.

Shade level: Partial shade

Water level: Well drained

Flower color: Blue, violet

2. Periwinkle

This is a plant we probably all know, but more as a flower as opposed to its ground-covering capabilities. While Periwinkle doesn’t grow more than six inches tall, it has trailing vines that can grow to a foot and a half in length once it’s fully mature.

Shade level: Partial shade to full shade

Water level: Dry

Flower color: Blue, purple, white

3. Ice Plant

Despite the chilly theme in its name, this plant prefers warmer weather. The Ice Plant gets its name from its tiny hairs that can reflect light and appear as ice crystals. This plant also has a unique, succulent style look to it, which is yet another reason it makes our list.

Shade level: Partial shade

Water level: Dry, well-drained

Flower color: Pink, red, purple, orange, yellow

4. Foam Flower

In addition to its long bloom period, this wildflower has some spectacular red-colored variations on its leaves. This plant loves the shade, which makes it a great option for being planted under your cedar. However, be careful to plan your use of this plant as it can grow up to three feet tall.

Shade level: Partial shade

Water level: Well drained

Flower color: White with pink

5. Partridge Berry

This plant is a treat for the eyes in the bitter days of winter because the partridge berry plant keeps its dark green leaves and red berries during the colder months. 

Similar to the Wintergreen plant, if you propagate this plant successfully, they can make a wonderful gift during the holiday or serve as a tasteful addition to your floral decorations during the Christmas season.

Shade level: Partial shade to full shade

Water level: Dry

Flower color: White

Some More Variables To Consider

We know we covered a lot of information, and you now have more plant options to choose from than could fit under even the largest of cedar trees. 

To that point, though, we wanted to highlight the differences between some requirements for these plants to make sure that you have the best planning guide for brightening up the area underneath your cedar tree.

For more tips on how to take care of your cedar tree, check out our guide to pruning your cedar without harming it.

Shade Preference

We’ve talked about the amount of shade that a cedar tree can provide, and the amount of shade trees provided grows right along with the tree itself. 

The closer you are to the base of the tree, the more shade you’ll be under. On the other hand, the closer you get to the edge of the tree, you’ll see the ground will get various peeks of sunshine throughout the day. 

For the plants on our list that prefer full shade, we would recommend that these plants be planted closer to the trunk of your tree.

For the plants that may thrive in partial shade, we recommend planting these closer to the outskirts of the canopy of the cedar so that the plants can get both sunlight and shade. 

Soil Type

This factor isn’t something that we can always control. Some areas have more clay or sand in their soil than other areas, and this is a factor to keep in mind, even if you can’t necessarily treat or rectify it.  

The thing to keep in mind about the type of soil you have is that it can ultimately affect the moisture level of the ground, and as a result, the amount of water that’s available for your plants.

Watering your plants and trees is important, but you should stick to a schedule! Read our article on exactly how much to water your plants to keep your garden healthy and thriving.

If too many plants are in a concentrated area, like under your cedar tree, these added plants might take nutrients and water away from your cedar tree. 

On the other side, if you notice the ground is always wet under your tree, adding more plants underneath should help absorb this excess moisture, and, as a result, your cedar tree and the newly added plants should equally thrive.

Do some digging–literally–to see what type of soil you have and how it retains water, and learn how to check your soil pH with our help tosee what could help your under-tree area come alive. 

You could also try a Luster Leaf Soil Test Kit to test your soil and gain additional information like pH and nitrogen levels.

Putting It All Together

At this point, we know that you’re ready to rock and roll and get to shopping and, ultimately, planting. 

Don’t forget to keep in mind the needs of each plant you’re adding to your yard, as well as underneath your cedar, to know how they’ll work together.

By carefully choosing and planting some suggestions from our list, and maybe even checking out The Well-Tended Perennial Garden book, you will keep the ground under your cedar looking like a glamor shot from a garden catalog!

References

Heathman, G. C., Cosh, M. H., Merwade, V., & Han, E. (2012). Multi-scale temporal stability analysis of surface and subsurface soil moisture within the Upper Cedar Creek Watershed, Indiana. Catena, 95, 91-103.

Sauer, T. J., Cambardella, C. A., & Meek, D. W. (2006). Spatial variation of soil properties relating to vegetation changes. Plant and soil, 280(1), 1-5.

Tan, F. C., & Swain, S. M. (2006). Genetics of flower initiation and development in annual and perennial plants. Physiologia Plantarum, 128(1), 8-17.

Although beautiful from afar, a Tree of Heaven can be problematic. In North America, the Tree of Heaven (Ailanthus Altissima) is considered to be an invasive species, due to its ability to shade out native trees. The female Tree of Heaven can produce as many as 300,000 seeds per year, all of which are dispersed by wind alone. With the Tree of Heaven’s quick growth rate, it consistently outcompetes native plants for sunlight, and when it wins, it forms dense colonies that cover the plants below it, causing them to deteriorate.

Since the Tree of Heaven is considered undesirable, it’s important to identify it from other trees. Similar-looking trees such as species of ash trees, hickory trees, and walnut trees, can be distinguished from the Tree of Heaven by the differences in leaflet shape, the fruits of the trees, or by seeds they produce. 

Below, we will go over the look-alike species that you may find, how to identify them, and how to get rid of the Tree of Heaven if you spot one on your property. So, keep on reading to find out more!

Where Does The Tree Of Heaven Grow?

The Tree of Heaven was introduced from China to North America in the late 1700s. First seen in Pennsylvania, the Tree of Heaven is considered ornamental as it’s aesthetically pleasing, although very ugly to nearby vegetation. The Tree of Heaven has since spread across the United States and can be found in hardiness zones 5 through 8, and parts of Eastern Canada.

The Tree of Heaven can be found in abundance around the Mediterranean area of Europe but has been limited in spreading to northern parts of Europe because of cold weather. The Tree of Heaven can also be found in the north and southern parts of Africa, southern South America, and Australia, although it is not widespread in any of those areas just yet. Further, in its native range, the Tree of Heaven grows in Northeast China, Central China, and Taiwan. 

Apart from just it’s location on the globe, the Tree of Heaven does not grow well in shade, and it usually grows after a site disturbance. After an environmental disturbance, like a forest fire or windstorm, sunlight is more able to reach a forest floor, and once the sunlight gets to any seeds of a Tree of Heaven – these trees will quickly outgrow anything else.

Why Is The Tree Of Heaven A Problem?

As beautiful as it is, the Tree of Heaven creates a lot of problems for surrounding vegetation around it!

The Tree Of Heaven Produces Invasive Root Suckers That Take Over Surrounding Vegetation

According to Pennsylvania State University, not only can the Tree of Heaven produce 300,000 wind dispersed seeds per year, it can also spread by root suckers. Root suckers are growths that arise from the roots, up to 50 feet from the parent Tree of Heaven, and those little root suckers will turn into full grown clones of the parent tree. Tree of Heaven root suckers can start producing seeds in as little as 2 years, and a lot of problems quickly come from it.

The Tree of Heaven is a problem because the abundance of seeds and root suckers it produces allows it to completely take over a site. Since the Tree of Heaven can grow 10 to 15 feet per year, they quickly outcompete the native vegetation in the area. The Tree of Heaven produces an allelochemical called Ailanthone, into the surrounding soil which prevents other plants from growing.

The Tree of Heaven isn’t the only invasive tree in the U.S. Read our article about invasive poplar trees and what to do if you have one in your yard.

The Tree Of Heaven Has An Unpleasant Odor

Another problem that arises with the Tree of Heaven is that it produces an unpleasant odor – from its flowers, and also from any part of the tree that is damaged.

Since the Tree of Heaven has little wildlife value, with most grazers finding it unpalatable, it causes major ecosystem disruptions by displacing not only other plants, but the wildlife that’s in the area that it takes over. 

Why Is It Called The Tree Of Heaven?

The branch of a tree with compound leaves and large clusters of flowers against a blue sky.

You may be wondering: why does an invasive tree that smells bad be referred to as the Tree of Heaven? Well, when the common name Tree of Heaven was given to the tree, it was due to its rapid growth rate towards the sky or Heaven.

Even the scientific name for the Tree of Heaven refers to its rapid growth rate. The genus name, Ailanthus, means ‘sky-tree’, and the specific epithet, Altissima, means ‘tallest’. 

However, it is also believed that the name Tree of Heaven was created as a marketing strategy to get homeowners to plant the Tree of Heaven.

For more info on where the title “tree” comes from – check out our article Why Trees Are Called Trees, it’s so interesting!

Trees That Look Like The Tree Of Heaven

There are many native and non-native trees in North America that resemble the Tree of Heaven.

Below we will discuss the features of each species or genus which looks like the Tree of Heaven and how they can be distinguished from one another. We will focus on the easiest characteristics that can be used to identify these similar looking trees from the Tree of Heaven.

1. Walnut Trees (Juglans spp.) Vs. Tree Of Heaven

The walnut tree looks like the Tree of Heaven, but there are a few differences between the two!

Both Trees Have Compound Leafs

Walnut trees are often confused with Tree of Heaven due to them both having pinnately compound leaves. A pinnately compound leaf is made up of a central elongated petiole called the rachis which has a row of leaflets on either side. Pinnately compound leaves may or may not have a leaflet at the tip. 

Walnut tree leaves differ from a Tree of Heaven by having serrated or toothed margins along the edges of each leaflet. The leaflets on the tree of heaven leaves have smooth margins except for one rounded tooth, called a glandular tooth, at the base of each leaflet. 

They Produce Different Fruits

Another major difference between walnut trees and Tree of Heaven is the type of fruit or seeds they produce. Walnut trees produce a nut that is covered by a shell and a husk (picture a walnut that is in the genus Juglans). Tree of heaven produces samara, which is a dry indehiscent seed with an elongated papery wing allowing it to be dispersed by wind. 

Two of the main walnut trees which are confused with the Tree of Heaven are the black walnut tree (Juglans Nigra) and the butternut tree (Juglans cinerea). The chart below lists walnut species in North America that can look like the Tree of Heaven.

Common NameScientific NameRange in North America
Japanese walnutJuglans ailantifoliaNortheast
Black walnutJuglans nigraEast, South, Midwest
ButternutJuglans cinereaEast
Northern California walnutJuglans hindsiiCalifornia
Southern California walnutJuglans californica S.California
Arizona walnutJuglans majorSouthwest
Little walnutJuglans microcarpaTX, OK, NM, KS
English walnutJuglans regiaWest, Northeast

Want to learn more about walnut trees? Check out our article on the 5 best places to plant your walnut tree!

2. Ash Trees (Fraxinus Spp.) Vs. Tree Of Heaven

Ash trees can also be confused with the Tree of Heaven due to both having pinnately compound leaves.

Ash leaves can be distinguished from the Tree of Heaven by the growth of the leaves on the branch. Ash tree leaves grow in an opposite pattern with one leaf directly across from the other on a branch. A Tree of Heaven’s leaves has an alternate pattern with leaves that never grow directly across from one another on a branch. 

There are many ash trees which can be confused with the Tree of Heaven due to the pinnately compound leaves including Green Ash (Fraxinus pennsylvanica) and White Ash (Fraxinus americana). Below is a list of ash trees found in North America which can look like the Tree of Heaven !

For more info on ash trees head over to our article on 5 Reasons Why Ash Trees Make Wonderful Shade Trees.

Common NameScientific NameRange in North America
Texas ashFraxinus albicansTX, OK
White ashFraxinus americanaEast
Singleleaf ashFraxinus anomalaSouthwest
Mexican ashFraxinus berlandierianaTX, LA, MS
Carolina ashFraxinus carolinianaSE
Fragrant ashFraxinus cuspidataTX, NM, AZ, NV
California ashFraxinus dipetalaWest
European ashFraxinus excelsiorNortheast
Goodding’s ashFraxinus gooddingiiAZ
Gregg’s ashFraxinus greggiiTX, NM, AZ
Oregon ashFraxinus oregonaWest coast
Black ashFraxinus nigraNortheast
Chihuahuan ashFraxinus papillosaTX, NM, AZ
Green ashFraxinus pennsylvanicaEast, South, Midwest
Pumpkin ashFraxinus profundaEast
Blue ashFraxinus quadrangulataEast
Shamel ashFraxinus uhdeiCA
Velvet ashFraxinus velutinaSouthwest

3. Hickory trees (Carya Spp.) Vs. Tree Of Heaven

A hand holding a compound leaf with pointed green leaflets against a blurred background of a forest and trees.
Hand holding a leaf of ailanthus (Ailanthus Altissima) in outdoor background

While hickory trees also have pinnately compound leaves like the Tree of Heaven, they typically have fewer than 11 leaflets per leaf which are fewer than the Tree of Heaven’s. The leaflets also have serrated margins while the Tree of Heaven’s leaflet is smooth with only a single tooth on each side of the base. 

A hickory tree’s fruits are also much different from that of the Tree of Heaven. The fruits of hickory are nuts which are encased in a hard shell and husk (think pecans which are also in the genus Carya).

Below is a list of other hickory trees found in North America that can look like tree of heaven. 

Common NameScientific NameRange in North America
Water hickoryCarya aquaticaSoutheast
Butternut hickoryCarya cordiformisEast, South
Scrub hickoryCarya floridanaFl
Pignut hickoryCarya glabraEast, South
PecanCarya illinoinensisEast, South
Shellbark hickoryCarya laciniosaEast, South
Nutmeg hickoryCarya myristiciformisSouth
Red hickoryCarya ovalisEast
Shagbark hickoryCarya ovataEast, South, Midwest
Sand hickoryCarya pallidaSoutheast
Black hickoryCarya texanaSoutheast, South
Mockernut hickoryCarya tomentosaEast, South

4. Sumac Shrubs (Rhus Spp.) Vs. Tree Of Heaven

Sumac shrubs are usually only confused with the Tree of Heaven when the Tree of Heaven is young, as it can be confused with other shrubs – however, there are some great ways to identify and tell them apart!

You Can Identify Them By Their Leaves

Both sumac and the Tree of Heaven have pinnately compound leaves. However, some sumacs such as Staghorn Sumac (Rhus Typhina) have serrated margins on the leaflets which distinguish it from the Tree of Heaven. The leaf petioles and stems of Staghorn Sumac are also covered with fine hairs which the Tree of Heaven does not have. 

Winged Sumac (Rhus Copallinum) leaflets are also smooth like the Tree of Heaven, but they have growths on the leaf rachis resembling wings which can help you distinguish winged sumac from the Tree of Heaven.

You Can Identify Them By Their Fruits

Sumacs can also be differentiated from the Tree of Heaven by their fruits. Sumacs produce drupes which are fleshy fruits with a hard seed in the center. Sumac drupes form large, tightly packed clusters which resemble a cone and are typically red in color when ripe. 

The drupes of sumac are easily differentiated from the papery samaras of the Tree of Heaven.

5. Kentucky Coffee Tree (Gymnocladus Dioicus) Vs. Tree Of Heaven

The bark of the Kentucky Coffee Tree is rough and scaly and will easily distinguish it from the much smoother cantaloupe-like bark of the Tree of Heaven, especially in mature trees. 

The fruit of the Kentucky Coffee Tree forms in pods, with 3 to 5 seeds per pod. These are easily differentiated from the samaras produced by the Tree of Heaven. 

6. Yellowwood (Cladrastis Lutea) Vs. Tree Of Heaven

Mature Yellowwood can be distinguished from the Tree of Heaven simply by the smooth bark it has versus the Tree of Heaven’s bark which has more of a cantaloupe texture to it. 

Yellowwood leaves are pinnately compound but typically have no more than 5 to 9 leaflets while the Tree of Heaven’s leaves rarely have fewer than 11 leaflets. 

The fruit of the yellowwood is also a key characteristic since it produces long brown pods in clusters with 6 seeds per pod similar to the Kentucky coffee tree, which are much different than the samaras of tree of heaven. 

7. Amur Cork Tree (Phellodendron Amurense) Vs. Tree Of Heaven

Amur cork trees are another non-native species in North America that resemble the Tree of Heaven. While it has pinnately compound leaves, the leaves are opposite to one another on the stem like ash trees. 

Amur Cork Trees also have corky bark which is easily distinguished from the much smoother cantaloupe-like pattern on the bark of the Tree of Heaven. 

Amur Cork Trees can also be distinguished from the Tree of Heaven by their fruits which are berries while the Tree of Heaven has samaras. 

The Tree Of Heaven Has An Unpleasant Odor That Can Help Identify It

A view of the top of a tree of heaven with pointed leaves against a blue sky.

There are many identifying characteristics of the Tree of Heaven which can be used to distinguish it from other plants. One characteristic that is present year round is from the odor which has been commonly described as rotten peanuts or dirty gym socks. The flowers will emit this odor in late May through July when they are present, but it is also produced when you crush the stems or any part of the tree. 

Since the sap can cause an allergic reaction in rare cases, you should not crush the stems or any part of the plant to smell them. Use the other diagnostic characters provided above to identify tree of heaven.

How To Get Rid Of The Tree Of Heaven

There are many strategies that can be used to get rid of the Tree of Heaven if you find it on your property. All of the strategies require that you monitor the area for several years after treatment in order to ensure that no further growth occurs from root suckers or seeds which remain in the soil. You will also likely need to use multiple methods together to get full control if you already have an established tree. 

Remember – any time you are removing a tree or using chemicals to control a pest, there can be significant risks involved. That’s why we recommend you use a professional to avoid creating an unsafe situation. Find a local ISA-certified arborist to ensure the job is done right. 

Mechanical Control

Mechanical control is a way you can get rid of the Tree of Heaven. Mechanical control is the use of barriers such as fences and the removal of a pest by mechanical means such as mowing. 

Mowing is a great mechanical control method for root suckers – which will pop up from the roots of an adult tree, even after the tree is removed.

If you continue to cut back newly emerging root suckers from the roots without allowing them to get too big, you can deplete the carbohydrate reserves in the roots and ultimately eliminate the Tree of Heaven completely. 

Chemical Control

Chemical control is the use of pesticides to control a pest. Chemical control is perhaps the most effective way to control mature Trees of Heaven. However, combining chemical control with the mechanical control of mowing is the most effective way to control the newly emerging Tree of Heaven on your property.

Remember, since the Tree of Heaven can grow new trees from its roots, if you cut down the tree, you will likely find more trees continuing to try and sprout up from the stump and remaining roots. You can eliminate these root suckers and stump sprouts using chemical control. 

If you have a large Tree of Heaven, it is best to have a professional cut the tree down for for safety purposes. Once the main trees are removed, spray the stumps and any new trees that emerge with glyphosate or triclopyr. Here are two of our favorite products to do so.

We like Round Up Pro Concentrate since it contains the higher concentration of glyphosate recommended by the Forest Service or this ITS Supply Triclopyr 4 which is a generic brand and more cost effective. 

Cultural Control

Cultural control refers to actions you can take to make the environment less suitable for the pest you are trying to control. The most effective way to culturally control the Tree of Heaven is to know how to identify it and remove it, by pulling it up as soon as you see it begin to grow. 

Make sure to wear protective gloves when pulling up the Tree of Heaven since the plant can cause allergic reactions in some people. We like these Cool Job Gardening Gloves for women, since they come in smaller sizes and have a rubber coating to prevent any contact with tree of heaven sap. These men’s Cool Job Gardening Gloves also have the rubber coating and are available in larger sizes.

You should also make sure that if you have been in an area where the Tree of Heaven is growing, you don’t take any seeds back to your property with you, since the seeds can spread by getting stuck to your car tires to the hair on your pets!

Biological Control

Biological control is the use of an introduced natural enemy or predator to eliminate an unwanted pest. While there currently isn’t an approved biological control agent for the Tree of Heaven in North America, there is ongoing research that is focused on certain insects which may be able to reduce the spread of these trees.

According to the USDA, researchers are hopeful to have a biological control method available for the Tree of Heaven in the near future. 

That’s A Wrap!

The Tree of Heaven has become an invasive tree species on every continent, except Antarctica, since its movement out of its native range in China and Taiwan. It can easily outcompete native plants and has little wildlife value allowing it to cause significant damage to ecosystems. 

There are many trees that look like the Tree of Heaven at various stages of growth. Often the leaves are most easily confused, but with the use of this guide, you should be able to easily distinguish other trees from the Tree of Heaven by using the leaves, bark, stems, and fruits. 

There are many different ways to get rid of the Tree of Heaven if you find it on your property. The most effective management strategies tend to use several of these methods together to get complete control of the Tree of Heaven. 

Remember, the earlier you identify and remove the Tree of Heaven from your property, the easier it is to remove it.

References

Ding, J., Wu, Y., Zheng, H., Fu, W., Reardon, R. and Liu, M., 2006. Assessing potential biological control of the invasive plant, tree-of-heaven, Ailanthus altissima. Biocontrol science and technology, 16(6), pp.547-566.

Enescu, C.M., Houston Durrant, T. and Caudullo, G., 2016. Ailanthus altissima in Europe: distribution, habitat, usage and threats. European Atlas of Forest Tree Species. Publications Office of the European Union, Luxembourg, pp. e01ca33.

Heisey, R.M., 1990. Evidence for allelopathy by tree-of-heaven (Ailanthus altissima). Journal of Chemical Ecology, 16(6), pp.2039-2055.

Sladonja, B., Sušek, M. and Guillermic, J., 2015. Review on invasive tree of heaven (Ailanthus altissima (Mill.) Swingle) conflicting values: assessment of its ecosystem services and potential biological threat. Environmental management, 56(4), pp.1009-1034.

Elm trees are a popular and common tree across North America and are favored for their ability to withstand harsh weather. If you are looking to plant some extra flora underneath your elm, you might think that any old plant would do – however, this isn’t quite the case!

Growing plants underneath your elm tree takes consideration. It’s important to know which plants will share nutrients and water with the elm tree so that all the plants will flourish. Plants like Daffodils, Japanese Ferns, and August Lilies are among those that do well underneath an elm tree. 

The main thing to consider when planting plants underneath an elm tree is that you found a plant that is a low-requirement species and does not require a lot to thrive. You also don’t want any plants that are going to spread out all over the place and get in the way of your root system, or in the way of other plants.

If you’re looking to learn more about the best plants underneath your elm tree, stick around for a while – and keep on reading!

Can You Even Grow Plants Underneath an Elm Tree?

So, after reading that intro section, you may have some questions…some concerns, even. Can you even grow plants underneath an elm tree, if there are so many requirements? The answer: Of course, you can!

You may need to be a bit more conscientious when choosing which plants to share soil with your beloved elm, but you can effectively add some pops of color to the ground if you choose the right plant! Growing any sort of plant is going to take some work, regardless of how ‘easy’ it may be to maintain. You always need to consider what your plant needs – from the amounts of water and sunlight to the type of nutrients and soil. 

Elm trees are popular for a reason, as they’re very easy to grow. However, they do take a bit of thought when it comes to maintaining the space that they grow in. 

So, Why Grow an Elm Tree?

On that note, let’s talk about why you might want an elm tree. After all, there are so many trees out there – so why an elm?

Elm trees might need a little consideration when it comes to sharing soil, but these trees truly are hard to beat. You can be sure that they will grow easily, and without too much extra work on your part. 

If you’re looking to find more info on elm trees, check out our article on the differences between elm and oak!

Elm Trees Are Cold Hardy And Grow In All Temperatures

The 20th century saw American Elms dominating the streets of both suburban and city landscapes thanks to their knack for providing shade and dealing with poor soil.

Elm Trees are a species that is incredibly cold hardy, which means that they can continue to thrive even in unprecedented, extremely low temperatures. Whereas many trees might not withstand such extremes, you have a better chance at success with your elm tree. 

Elms Are Tolerable To External Conditions Like Sidewalks

Elms are also very tolerant to external conditions, which makes them great street trees. While you’ll want to be aware of sidewalks that might be impacted by the elm tree roots, this is a species that will do well to provide shade on a busy street.

Or, perhaps you’ll choose to plant an elm tree in front of your home so that you can end up with that grandiose, towering look – as the tree matures. 

Check out our article on the 11 best low-maintenance shade trees for a more detailed list of what you could plant to add interest to your yard.

Elm Trees Are Long-Lasting And Durable

Speaking of maturity, elm trees are long-lasting and can grow to be around 300 years old. If that doesn’t give you an idea of their tolerance and durability, I’m not sure that anything else will!

These trees are not only durable themselves, but can help provide protection against the elements when needed. Favored by land developers and landscapers both for their ability to withstand harsh, urban conditions, these trees can also act as a windbreakers to protect homes and more open areas outside of the city.

When it comes down to it, elms are great trees and deserve to be cared for as such, and deserve some wonderful plants nearby! So, without further ado – here are the 6 best plants to grow under your elm!

6 Best Plants To Plant Under Your Elm Tree

Elm Tree Canopy seen from below, with a large brown trunk and branches full of green leaves.

As you might imagine, plants that do better in shade are going to do better underneath the dense canopy of an elm tree. Plants will also do better under an elm if they have similar needs to an elm.

So, let’s get to it!

1. Daffodils Will Grow Great Under Your Elm Tree

Daffodils are great for under your elm tree all thanks to their shallow roots and adaptable nature. 

We know that shallow roots are ideal when paired with the extensive root system of the elm, and it doesn’t hurt that daffodils are also a fairly flexible plant.

Daffodils self-seed, so they’ll spread on their own and can make their way to the area of the ground that best suits them overall – making them low maintenance and attainable.

Some Quick Things To Consider When Planting Daffodils

Light: Daffodils do like the sun, but will be able to grow in partial shade, which is possible if they are planted near the outer edges of the elm tree’s canopy. 

Soil: Daffodils do well in rich, moist soil and appreciate some extra water, especially as they are growing. 

Hardiness Zone: Daffodils grow in hardiness zones 3-8, which is very fitting when we consider that elms prefer zones 3-9. 

Overall, a Daffodil has many of the same needs as an elm tree, which makes it a great fit to share soil and an overall environment.

2. Virginia Bluebells Will Grow Wonderfully Under Your Elm Tree

Next up on our list, we have the Virginia Bluebell because of its affinity for growing in the shade, as well as its ability to adapt to the amount of water available, whether high or low.

Virginia Bluebells align with the needs of an elm tree because elms do tend to require more water than these flowers, so flexibility is a factor that helps these two plants coexist.

Some Quick Things To Consider When Planting Virginia Bluebells

Light: Virginia bluebells grow quite well in partial to full shade, meaning that the extensive and dense canopy of an elm tree is not a hindrance, but is actually beneficial to this flower. 

Soil: Just like elms, well-drained, rich, and loamy soil is best.

Hardiness Zone: Like daffodils, Virginia bluebells are also best suited for hardiness zones 3-8. This places Virginia bluebells right in the range of hardiness that an elm requires.. 

3. Periwinkles Will Flourish Underneath Your Elm Tree

Periwinkle is next on our list, and is another flower that is not only compatible with elm trees, but is also a pretty addition to your yard.

Periwinkles are easy to grow and manage. Periwinkles are ideal flowers to add a pop of color under your elm, without the extra work. 

Some Quick Things To Consider When Planting Periwinkles

Light: Periwinkle also prefers full shade, making it well-suited to grow underneath the canopy of an elm.

Soil: Yet again, moist, well-drained soil is ideal for periwinkle to grow and thrive.

Hardiness Zone: Periwinkles don’t have the largest hardiness zone that they fit in, as they prefer zones 7-9. However, this still fits in the range that elms grow in, so there is a chance that if you live in an area with an extreme low temperature that is a bit higher, you can plant periwinkle with confidence.

4. August Lilies Will Look Great Underneath Your Elm

August lilies are next, thanks to their flexibility, quick growth, and fragrance. 

They might not add a crazy pop of color, but if you like the smell of flowers, this is the one for you!

Some Quick Things To Consider When Planting August Lilies

Light: While these flowers do well in the sun, they also grow quite well in partial to full shade, an expression of their versatility.

Soil: As long as soil is rich, and well drained, august lily is going to do well underneath your elm.

Hardiness Zone: August lilies fit best within hardiness zones 3-9, which means that they have the exact same preference as elm trees do, making them a fitting combo for your yard!

5. Lilyturf Grows Perfectly Under Your Elm

Lilyturf is often used as ground cover and has some requirements that align quite well with those of elm trees.

If you want to cover some patchy grass, or simply hope to add some vibrance to your space, this is a solid option that you won’t regret.

Some Quick Things To Consider When Planting Lilyturf

Light: Lilyturf thrives in the shade, yet another option to go right under your elm with no concern for the lack of light.

Soil: Moist soil is also the ideal for this flower, so your elm and lily turf will not need different levels of water.

Hardiness Zone: The Lilyturf prefers hardiness zones 5-10, which means that it has a good deal of overlap with the zones 3-9 preferred by elm trees.

6. Japanese Ferns Will Grow Nicely Underneath Your Elm Tree

Finally, we have the Japanese fern, which is a slow-grower but can create a dense covering over the ground in a few years’ time. 

Japanese Ferns are an invasive species, so they will require a lot of maintenance, however, they will also grow thick and dense, creating a neat visual effect underneath your tree

Some Quick Things To Consider When Planting Japanese Ferns

Light: This type of fern can tolerate full sun or full shade, and its adaptability makes it a prime candidate for underneath your elm. 

Soil: Once again, moist, well-drained soil is perfect for this plant.

Hardiness Zone: The Japanese Fern is best suited to hardiness zones 5-8. While this gives a little less room for planting in certain environments that might get colder extreme low temperatures in winter, it still fits in a wide enough range that make it a fitting plant for under your elm.

Not only could you plant any single one of these types of plants underneath your elm tree, but you could also combine them to create beautiful yet functional foliage closer to ground level. 

Choosing A Plant For Underneath an Elm Tree

Elm Tree stands along in a large grass field with a forested hill in the background.

In this article, our main goal was to inform you about the 6 best plants to plant under your elm tree. However, properly growing those plants under your tree is also an important factor to be considered. 

There are many plants that will require a lot of water or nutrients from the soil and will take the water and nutrients away from your elm. Avoid hindering your tree by following some best practices, as well as choosing the best plants.

Let’s dive a little deeper and discuss some of the most important things to consider when it comes to planting underneath an elm tree.

Consider The Livelihood Of All Plants

Having a plant that can handle tough conditions like an elm is not the standard -so, when choosing a plant for underneath it, it’s best to choose plants that require similar conditions to grow and thrive as an elm.

It is more likely than not that your elm will be able to deal with most plants that are planted under it. However, thanks to the extensive root system and dense shade of the elm tree, many plants may not be able to survive underneath your elm – and considering the livelihood of all plants is important.  

Make Sure That Your Elm Is Away From Other Structures

The location of your elm tree makes a difference when it comes to its viability, as well as your ability to plant other plants underneath it. 

If you have an elm tree that is pretty close to a fence, another tree, a building, or any other structure, your elm may not have room to flourish. 

Though these are great urban trees to provide shade and act as windbreaks, the more space the better. Additionally, if you were hoping to plant some plants underneath your elm tree, it might not be possible if you have it planted too close to another structure or tree. 

Make Sure You Are Planting Your Elm In USDA Zones 3-9

Also, be sure to keep up with the USDA Plant Hardiness Zone Map to check that your location is fitting for whatever plants you want to place under your elm. 

Elm trees do best in hardiness zones 3-9, which means that the average extreme low temperature range they can survive a winter in is about -40 to 25 degrees Fahrenheit. 

However, you’ll want to check that the plants you hope to incorporate into the area below your tree have a similar level of cold hardiness, or resistance to extremely cold temperatures.

Don’t Overwhelm Your Elm

Even though Elm trees are adaptable and durable, it is important to set your tree up for success.

Part of that success will come from building conditions that allow the tree to flourish in its own environment. This is done by giving the tree the means to focus on its own growth and internal systems, as opposed to fighting for nutrients from other plants.

To do this, you want to start by doing some research. You can refer to our 6 best plants to plant under your elm tree, of course, but if there are any other species that you’re considering- always ask a specialist. 

For more tips on growing elms and other trees, check out our article on the 12 fastest growing deciduous trees.

Find The Best Route For Planting The Additional Plants

Once you know that your plant choice is going to be compatible with your elm, it’s time to think about planting the plant itself, and how much room is available to plant without damaging the roots.

To figure the spacing out, you can use a trowel like this Edward Tools Garden Trowel. It’s heavy-duty, made of carbon steel, and has an ergonomic grip. This is the perfect tool because you will avoid digging through the roots while being gentle and getting the job done!

Once you’ve established both the plant type and if you will be able to dig in between any roots and the space, it’s time to plant!

Techniques For Maintaining Your Elm Tree

While it is so important to know what plants are compatible with the soil and shade of an elm tree, there are also things that you can do to help maintain both your elm and the other plants that live underneath it. 

So, what are these things, exactly?

Water, Water, Water!

What is one of the best ways to offer support to your tree? Easy! Make sure it is getting enough water.

When it comes to watering, you may have concerns about providing the right amount of water, at the right frequency, and maybe even at the optimal time of day. 

One way to avoid these concerns is to use an irrigation system like this WATERHOOP Portable Water Sprinkler and Irrigation System. Unlike other, more extensive irrigation systems that work best for gardens and entire yards, this system will allow you to easily water trees and other outdoor plants thanks to the durable and adjustable hose.

No matter how you choose to maintain your watering practices, this is an easy and important bit of maintenance to give your tree and plants the best chance at success.

Fertilize to Maintain Life

Another piece of the puzzle to maintaining your tree has to do with the fertilizer that it is getting.

This goes back to the reason that some plants may not do as well under an elm tree as others, because not all plants will require the same nutrients that the elm will. So, that’s why we fertilize!

Trees and other plants are the same way. It’s crucial to have the water and nutrients they need in order to flourish.

Fertilizing Your Elm Is Essential

It is the best practice to fertilize elm trees once or twice a year, and then as needed in between. Slow-release, granular fertilizers are ideal, and you’ll want to keep an eye out for an NPK (nitrogen, phosphorus, potassium) ratio of 5-10-10 or 6-12-12. 

A great fertilizer option is the Lilly Miller Morcrop Tomato and Vegetable Food. Don’t worry about the fact that it is designated for vegetables, as long as your NPK number is right, you’ll be on the right track. 

Since that particular fertilizer has an NPK of 5-10-10, you can be sure that it will support your elm tree, and any plants underneath, in the right way.

Prune and You Won’t Face Doom

Pruning is another important way to make sure that your tree will be here to stay. 

Of course, in the case of disease, damage, or infection, you’ll want to prune any branches that are impacted to stop the spread of an issue. However, did you know that you can, and often should, prune perfectly healthy trees, too?

Pruning helps your tree put its energy toward growing taller and more evenly, as it won’t have as much outward growth to focus on, and can focus on growing from within. A healthy tree should only be pruned once every few years. Often, as branches grow longer, they grow slowly but the tree puts a lot of effort into continuing that slower growth, as opposed to growing bigger overall. 

If you are interested in learning more about pruning large trees the right way, we have an article just for you!

That’s A Wrap!

Alright friends, we’ve come to the end! As you work to add plants to your space, you might need to end up planting underneath your elm tree. 

Remember that there are 6 best plants to grow underneath an elm tree:

  • Daffodils
  • Virginia Bluebell
  • Periwinkle
  • August Lily
  • Lily Turf
  • Japanese Fern

These plants are all quite adaptable and don’t have many specific needs. This is important as elm trees take a lot of work on their own. Elm tree roots require a lot of moisture and nutrients from the soil, as the canopy shades much of the tree from getting sun. So, having a plant underneath your elm that can be compatible and that does not take away necessary water and nutrients is key. 

As usual, we wish you luck as you continue along your personal tree journey. Thanks for letting us be a part of it.

Until next time!

References

Sander, D. H. (1971). Soil properties and Siberian elm tree growth in Nebraska windbreaks. Soil Science, 112(5), 357-363.

Thomas, P. A., & Garber, M. P. (2009). Growing ferns.

Mulch has many practical uses. It protects your plants, suppresses weeds, retains moisture, and gives any garden or landscape that polished look. Maybe you have a few spruce trees on your property, or you have started seeing spruce mulch in the stores and you wonder; is spruce good for mulch?

Spruce mulch is typically a mixture of pine and spruce bark. This mixture has the same benefits as regular hardwood mulch, but it breaks down slower and can be aromatic. If you’re looking for a cost-effective, long-lasting much that smells like fresh pine forests, then spruce mulch is for you.

You can purchase spruce mulch from large retail chains or small, locally owned landscape suppliers. If you have some spruce trees on your property, you can even make your own spruce mulch. Depending on what you need it for, spruce mulch could be perfect for your landscape.

What Exactly Is Spruce Mulch?

Spruce mulch may sound pretty self-explanatory, but often it’s a mixture of spruce and pine tree bark. Spruce and pine trees are related after all, they are both evergreens, conifers, and produce needles instead of broad leaves.

The differences between the trees are somewhat subtle. Pine trees produce clusters of usually longer needles, whereas spruce trees produce small branches covered in short needles. Spruce trees also grow straighter and produce that conical, “Christmas tree shape.”

Pine and spruce mulch is made when machines strip the bark from the tree trunks when they are being processed for lumber. Pine and spruce lumber is often used for construction. Because of its availability and good workability, spruce lumber is the number one choice of construction wood in Europe.

Check out our article about the best spruce trees, for more information on spruce!

What Makes Spruce Mulch Special?

A forested path surrounded by spruce trees.

There are many benefits to using spruce mulch. As we said, spruce mulch is usually mixed with pine bark, but these nuggets make a great, long-lasting mulch. Even on its own, spruce mulch is a great mulch, here are the reasons why.

Spruce Mulch Lasts Longer

Most hardwood mulches are shredded into small pieces. Sometimes the mulch is even double or triple ground, making the pieces even smaller. Because of this, it breaks down and decomposes rather quickly.

Spruce mulch is mostly nuggets of bark, which are bigger than the ground up hardwood. The bigger pieces don’t have as much surface area exposed to the elements, and so it takes longer for them to decompose.

The bark is also naturally resistant to water and decomposition. Tree bark is much like our skin, it surrounds the living tissue of trees and protects the inside of the tree from water, air, insects, and illness. This natural resistance also keeps tree bark mulch from breaking down quickly.

Spruce Mulch Doesn’t Increase Soil Acidity

This is a myth that has been circulated for many years. Still many people swear that it’s true, but evergreen mulch does not increase the acidity of the soil. Pine needles won’t increase the acidity of the soil, and neither does pine or spruce mulch.

Pine needles are acidic, but they do not add that acidity to the soil. Pine trees grow in acidic soils, but don’t change the soil to suit their needs. The acidity in the needles is broken down by bacteria before it has a chance to alter the pH.

The reason plants have a hard time growing underneath pine trees is because of the thick, shallow roots, too much shade, and because the canopy is so thick, not much water can get through.

Trying to change the acidity of the soil by adding evergreen needles or mulch is like trying to change the color of a lake by pouring a few vials of food coloring.

Spruce Mulch Is Aromatic

If you enjoy the smell of fresh pine wood or the scents that perfume the air after cutting one down, you’ll probably enjoy the scent of spruce mulch. The scent comes from the oils and sap in the trees and it’s more aromatic the fresher it is.

The scent is similar to cedar shavings, but it’s not quite as strong and doesn’t have the “bite” that cedar wood does.

Spruce Mulch Has All The Benefits Of Hardwood Mulch

A thick bed of hardwood mulch offers benefits such as:

  • Weed prevention—weeds have a hard time penetrating through a layer of mulch. And when they actually do, it’s much easier to pull them out of mulch, than hard, dry, compacted soil. Mulch also prevents most weed seeds from germinating so you have fewer weeds overall.
  • Moisture retention—You won’t have to water your flowers or garden plants when you have a bed of mulch. It helps to keep moisture in the ground and prevents excess evaporation.
  • Ground and root protection—Mulch helps to keep the soil from getting too hot in the summer, and protects the roots from freezing during the winter. It’s like having a blanket when the weather gets cold and having a cooling fan during the heat of the summer.
  • Mulch adds organic material—Even though spruce mulch breaks down slower than typical mulch, it still decomposes. When mulch begins to decompose, it provides the plant’s roots with beneficial nutrients, which help to enrich the soil.
  • Breaks up clay—If you live in the south, you know all about the red clay soil and how hard it can be to grow certain plants in this dense dirt. You can add soil amendments to loosen it up, or just add some mulch. Over time, the mulch turns into rich soil that helps to alter the thick clay.

Spruce mulch does all of the above. So if you’re looking for a cheaper alternative or a longer-lasting organic mulch, you can’t go wrong with spruce mulch.

Did you know that pine needles can also be made into mulch? To learn more, check out our article all about it!

Can You Use Spruce Mulch In Your Vegetable Garden?

You certainly can. Mulch in your vegetable garden offers the same benefits as listed above, and can lead to stronger plants, soil enrichment, and bigger yields.

The only caveat here is to be careful using wood mulch under and around tomato plants. The wood chips can be sharp and damage the tender tomato stems. The best mulch for tomato plants is usually straw, shredded leaves, and grass clippings.

Can You Make Your Own Spruce Mulch?

Pallets full of clear plastic bags containing wood mulch in front of green trees.

If you are looking at the spruce trees on your property and are wondering if you can use them to make your own mulch, know that you certainly can. Depending on the equipment you have, or have access to, you can make your own mulch.

It can take some time and some methods are labor intensive, but it can certainly be done. If you are planning on cutting your spruce trees down, or they have been damaged by a storm, converting them to mulch is a viable option.

Let’s get into it and learn how to make your own spruce (and more) mulch.

Rent A Tree Chipper And Make Mulch For Yourself

Unless you have a tree cutting business, you probably don’t own a large wood chipper. For the 99% of us who don’t, you can rent them for a decent price. They generally rent for about $100 a day, depending on the size.

Chippers are usually sized by the diameter of the wood they can grind up. The smaller chippers usually can handle branches around 2 to 3 inches in diameter. These machines can fit in the back of a pickup truck or into a large SUV. 

Larger machines (which I recommend if you have access to a trailer hitch) can chip larger-diameter branches. These can be up to 6 to 8 inches in diameter. If you need a larger chipper, you’ll have to haul an industrial-sized wood chipper.

Before renting a chipper, we recommend always contacting a professional before starting.

Cheaper Isn’t Necessarily Better

I recently owned a piece of property that had been neglected for years. It had so much undergrowth and wild, unkempt trees that desperately needed heavy pruning. To save some money I trimmed them myself, but then ended up with a huge pile of limbs and brush.

To get rid of the expanding brush pile and create some free mulch, I decided to rent a wood chipper. I decided to go with the 2-inch chipper because most of the wood was smaller limbs and saplings that needed culling.

It made a very large pile of beneficial mulch that would have cost me more than what it cost to rent the chipper. The problem was, I was brutally sore for two days after. 

The Chipper Beat Me Up!

I think the blades were dull. I couldn’t tell because I have never used a chipper before, but if I threw the branch into the chipper and let it go, it could clog the machine up. Then I’d have to spend time removing the jam.

I solved this problem—probably unwisely—by holding tight to the branches to keep them from being dragged into the blades and clogging them up like rope around a mower. After a whole day of fighting with the chipper, I was in pain for days after.

Purchase Your Own Chipper For Small Branches

Again, maybe the machine I rented wasn’t the best and needed some maintenance. I was too hard headed to call the rental center to find out. But if you want to do it yourself you will probably have better luck with your own electric chipper.

These machines are relatively expensive, don’t require gas, or oil changes, and won’t produce foul smelling exhaust. The Sun Joe Cutting Diameter Electric Silent Wood Chipper/Shredder is a highly rated electric chipper.

It can shred lawn waste up to 1.7 inches in diameter and reduce the size of your brush pile. To handle all the spindly branches that are too small to burn, chip them into mulch. I’m sure this one won’t make you feel like you’re trying to wrestle the Kraken. 

Go Bigger If You Can

If I had it to do over again, I would have gone with a bigger machine. Even though none of the branches were over 2 inches in diameter, the smaller machine had trouble with them. 

As far as my personal experience, if you can afford, or are able to tow a larger chipper, go ahead and get it to save your back, shoulders, and arms, and save yourself a lot of frustration.

How To Make Spruce Mulch Without A Chipper

You can make your own wood mulch without a chipper, but it’s a tedious and very labor-intensive process. You will need a chainsaw, a sharp axe, and a hatchet.

The first step is to cut the spruce tree down. If you have never cut a tree before, or if it’s close to any buildings or structures, call a professional to cut it down for you. 

Now that the tree is down, cut the branches off the main trunk, and then cut the branches and trunk into smaller sections. Cutting them to about 24 inches in length will be sufficient.

Cut Several Grooves Through The Logs

When using your chainsaw, you want to make sure the blade is sharp and doesn’t have a lot of slack.

Now, take the sections of logs, and cut strips into the logs along the grain. The thicker the logs, the better for this process.

Tips For Cutting The Groove

You’re not trying to cut all the way through, what you are doing is cutting about halfway to three-quarters of the way through the log. After the first cut along the grain, you’ll probably notice a lot of thin wood shreds. This is part of the mulch you are looking for.

These shreds of wood tend to clog up the chain-drive gear, so you’ll have to shut off the saw and clean out the wood tendrils so it doesn’t cause the saw to overheat. Depending on the thickness of the log, you may have to clean it out after each cut, or every other cut.

Continue to cut several grooves through the logs and soon you’ll have a large pile of thin, shredded spruce mulch. Try to cut a deep groove about every inch or so. This way you get more out of each log.

Now It’s Time To Swing The Axe

Once the logs are grooved and you have a large pile of shredded spruce mulch, you can make your own wood chips with a hatchet or axe. Just take the axe of your choice and start chipping away at the logs. With the deep cuts in the logs, when you chop at them with your axe, you’ll get small wood chips you can add to your shredded mulch so it lasts longer.

This LEXIVON V28 Chopping Axe is a great, sharp, ergonomic axe that’s made for chopping up chunks of wood. You’ll have wood shavings and your own mulch in no time. 

Use the long chopping axe along with the WilFiks Chopping Axe, which comes highly rated. With these two tools, you can turn those spruce trees into mulch.

For tips on how to cut down a spruce tree, click to check out our article!

Don’t Have A Chainsaw?

You can still use an axe to chop up mulch from the tree. Just start chopping on the tree and let the wood chips fly. As I said, these methods are extremely labor intensive, but if you’ve been looking for that lumberjack body, this is certainly the way to get it.

Considering a truckload of mulch can cost $300 to $500, maybe cutting mulch yourself isn’t such a bad idea. Especially if you end up getting a ripped body as a result, just saying.

Is Fresh Wood Mulch Bad For My Garden?

A gardener wearing a plaid shirt, jeans, and yellow galoshes spreads mulch over yard fabric and rocks with trees in the background.

There is concern among many gardening enthusiasts that fresh wood chips, sawdust, and other woody mulch products—if they haven’t been aged appropriately—will tie up nitrogen from the soil.

Even if fresh wood chips were nitrogen-robbing thieves, they couldn’t remove enough of the nutrient to affect trees and shrubs that are already established. Plants that have established root systems could still get nitrogen from other areas of the soil. Remember, a tree’s roots can extend up to three times the size of the canopy.

The little nitrogen that is taken from the wood chips isn’t going to affect the tree. So if you put a two-foot ring of mulch around the tree, even if all the nitrogen was eliminated from under the mulch, it won’t harm the tree at all.

Leave The Wood Chips To Age

If you are still concerned about nitrogen being tied up for months, then just leave the fresh chips to age for 6 months to a year. After that time the fresh wood chips will have started the decomposition process, and started adding nitrogen to the soil.

Woody mulch actually increases nitrogen in the soil. Even freshly cut wood chips don’t absorb or remove nitrogen from the soil. If you are concerned about nitrogen levels, apply a layer of compost to the soil before laying the mulch.

By the time the compost is used up, the wood chips will start to biodegrade and continue to release nitrogen into the soil.

Use Mature Mulch For New Plants

If you are planting new bulbs, seeds, or just starting your garden, you may not want to use fresh cut mulch. “Aha!” you say, “it does affect the plants if it’s not aged.” There don’t appear to be many studies that support this theory.

The reason for using aged mulch with new plants is that they need more nutrients to get established. Their roots are trying to grow, and at the same time, new plants are expending a lot of energy in growing new leaves, branches, and stems.

Adding a mulch that decomposes quickly, or an aged compost is best to get these new plants started. Since fresh-cut mulch will take a long time to start decomposing, it may not be the best alternative for non-established plants.

Mulch won’t take the place of fertilizer, though. Check out our article on spruce tree fertilizers for more info on that!

What To Do With Leftover Mulch

If you have a lot of mulch left over and don’t have any more beds that need it you can store it until next year. Just store the leftover mulch in a dry area, outside and away from any structures.

It’s best to bag it up in thick, black plastic bags, but make sure the bags have several small holes in them so it’s able to breathe. You can also leave it in a pile if it’s too much to bag up, just be sure to “turn” it occasionally. Just like compost, the mulch will need to be stirred to prevent mold and let the mulch deep inside get sunlight and air.

Weed Before Applying Mulch

For mulch to be an effective weed barrier, you should get rid of existing weeds first. Getting rid of the weeds first assures you have fewer that will need to be pulled out later. After the mulch is applied, it makes it harder for seeds to germinate. It can still happen but at a much-reduced rate.

To get rid of the weeds, first, you can use a garden hoe and chop them out before adding a thick layer of mulch. You can also go the old-fashioned route and pull them straight out.

Another way to get rid of weeds is to pour boiling water on them. Be sure you don’t have any plants nearby that could be harmed because if the hot water hits the roots, it could damage them or prove fatal for the plant.

Why Mulch Might Attract Insects

Fresh and decomposed mulch does attract insects. There are a lot of bugs that are attracted to moisture such as pill bugs, crickets, earwigs, ants, spiders, millipedes, and centipedes.

Insects will come for the moisture, and places to hide, and then the predators will follow. I have seen centipedes, spiders, beetles, and others in mulch before, but I have yet to find termites in any beds of mulch. I’m not an expert on termites, I’m just reporting my findings.

If bugs and termites are prevalent in your area, or you just don’t want insects getting close to your house because of mulch, there are options. Applying a one to two foot barrier of inorganic mulch such as river rocks, or shredded tires around your house can reduce the number of insects that get into your house.

Let’s Wrap It Up!

Spruce mulch is just as good, if not better than other more expensive hardwood mulches. It can last longer, it’s usually less expensive and it provides the same benefits as more expensive mulch.

You can even make your own mulch by renting or buying a wood chipper, or cutting it up yourself. Just use your chainsaw, hatchet, and trusty chopping axe if you have the energy and physical stamina.

Go ahead and spruce up your landscape with some new mulch—sorry, I was holding that in this whole time and couldn’t resist.

References

Arentoft, B. W., et al. “A new method to evaluate the weed‐suppressing effect of mulches: a comparison between spruce bark and cocoa husk mulches.” Weed Research 53.3 (2013): 169-175.

Fang, Shengzuo, Baodong Xie, and Jiujun Liu. “Soil nutrient availability, poplar growth and biomass production on degraded agricultural soil under fresh grass mulch.” Forest Ecology and Management 255.5-6 (2008): 1802-1809.

Downer, Jim. “Mulch effects on trees.” Western Arborist 35 (2009): 30-34.

Ramakrishna, A., et al. “Effect of mulch on soil temperature, moisture, weed infestation and yield of groundnut in northern Vietnam.” Field crops research 95.2-3 (2006): 115-125.

Ash trees are a favorite landscape staple. But if you’ve just moved into a home with one, or it’s your first season owning one, there’s something you’re sure to notice—the mess! Unfortunately, this is just part of dealing with an ash tree.

Why are ash trees so messy? Ash trees disperse leaves and seeds seasonally. Not only that, but they also tend to shed bark and branches more than other trees. You can minimize your clean-up time with seed prevention treatments, sterilization, and regular pruning.

However, those are only some things that make an ash tree messy. In this guide, we’ll look deeper into why these trees make such a mess and what you can do about it!

Leaves, Seeds, And More Make Ash Trees So Messy

Before we get into what you can do about the mess, it’s important to take a look at the why behind it. You’re certainly used to the typical leafy clutter in the autumn that so many trees, like oaks and maples, leave on the ground.

Ash trees are deciduous, meaning they lose their leaves in cold weather.

Once their leaves drop, they go into a kind of dormancy to preserve their energy. When spring returns, deciduous trees start growing back their leaves and ramp up for new growth. Like many other deciduous trees, they also drop seeds in late summer and throughout autumn.

This is just the start of the mess from ash trees, however.

Ash Trees Lose Their Leaves In The Autumn

Yellow fallen ash leaves on a green grass lawn seen from above.

As we just reviewed, ash trees are deciduous and lose their leaves in autumn and winter. Although they have a lot of leaves, most people are used to raking and leaf blowing—a seasonal chore for every tree owner!

With that in mind, leaves are the most obvious (and the most expected) source of mess from an ash tree. Of course, this can be said for most trees that lose their leaves when the seasons change.

Interestingly, not all trees lose their leaves in the winter. Want to know more? Check out this article highlighting the types of deciduous trees that keep their leaves during the winter!

In The Late Fall Ash Trees Start Loosing Seeds

While they may not have the iconic look of the maple tree’s ‘helicopter’ seeds, ash trees do drop seeds in autumn. These usually drop to ground around the same time that the leaves have turned and the first of the leaves are beginning to fall.

Their seeds also have wings, which is important when you’re looking at the mess they make. 

Because ash trees have samaras (the term for winged seeds), the seeds don’t just fall directly under the tree. Instead they spread throughout your yard and everywhere the wind takes them. 

These seeds are also lighter than leaves, which means that in addition to their winged form, their weight makes it easy for them to travel quite a distance. 

An Ash Trees Brittle Bark Can Make A Big Mess

Ash trees have bark, stems, and branches that are often more delicate than many other trees. That’s why you might see bark littering the ground under your tree. 

Bits of bark isn’t the only side effect of ash trees’ brittle wood; they also have broken branches and twigs that frequently fall. 

Broken branches can happen at any time throughout the year. However, you may notice them more when the weather turns cold, and the wood becomes less pliable.

Because they’re delicate, they’re more likely to encounter natural damage. This is one factor contributing to the mess that you may be able to mitigate, and we’ll cover that in more depth later. 

Of course, if you’re familiar with your ash tree (especially if it’s established and you’ve had it for quite a while), you know that litter from falling bark probably isn’t the most significant burden you’ll encounter. Nonetheless, you can still take care of brittle bark and limbs to reduce your overall maintenance in your yard clean-up.

Ash Trees Produce A Lot of Pollen

Although pollen doesn’t necessarily contribute to the mess on your lawn, it is a mess you might notice on everything in and around your yard. This side effect of owning an ash tree becomes even more noticeable if you have allergies!

Male ash trees are the main culprits of this excessive pollen production, so if you can’t stop sneezing in the springtime and there’s an ash tree in your yard, that might be the cause.

Regulating pollen from male ash trees can be challenging, and pollen can be nearly impossible to eradicate entirely, as seen in this study from the University of Minnesota.

What To Do About The Mess From Ash Trees

Now that you know the cause, you might wonder how to take care of the mess. Fortunately, you can do plenty of things to clean up the mess. But, what about preventing the mess ash trees make in the first place?

Unfortunately, turning a natural tree into a mess-free plastic model is impossible. However, you can take some maintenance measures to reduce the mess when it does come—and it will!

Keep Ash Leaves Raked Up

Leaves are frustrating. By the time you finish one pass, a thousand more leaves have fallen. Even worse, there’s no way to stop it because you can’t control the life cycle of a tree.

That said, there may be some ways to make the job easier!

The Right Lawn Tools Can Make The Job Easier

When you have the right lawn tools, you’ll spend much less time dealing with leaves. Larger, no-clog rakes are excellent because they do more work in less time. Work smarter, not harder! 

Also, leaf blowers, vacuums, and mulchers are fantastic ways to get the job done faster!

Are you in need of a boss rake? Check out this Tabor Tools Adjustable Metal Rake. With up to 63 inches of reach and an adjustable head, raking won’t even feel like a chore!

Ways To Dispose Of Ash Leaves Once You’ve Raked Them

Now, when it comes to the leaves you gather, you have a few options. The first is gathering the leaves and letting your local disposal service pick them up. 

The second option is getting the leaves together and burning them. However, please check your local regulations to ensure you’re allowed and follow all the mandated procedures. 

The third, and most helpful option, is one that you may not have considered: turning your leaves into mulch or compost to enrich your garden

You can create this mulch yourself, although it can be a laborious task. It’s a good idea to get a mulcher, like this WORX Electric Leaf Mulcher, which will do all the work for you.

Landscaping and Mowing Can Help With Ash Seeds

A close up of the branch of an ash tree with green leaves and a large cluster of seeds against a blue sky.

In addition to leaves, seeds can be a massive pain. If you take a lot of pride in your lawn, the last thing you want is seeds littered around, causing saplings to grow.

You can deal with dropped seeds in several ways. The most natural way to deal with them (although you probably won’t like it) involves sweeping and raking them up.

But there are other options:

  • Plant male ash trees. Because male ash trees don’t produce seeds, you’ll never have to worry about them. Just keep in mind that male trees are more apt to irritate allergies due to excessive pollen.
  • Keep nearby gardens well mulched to prevent seedlings from growing. If seeds fall onto a bed of heavy mulch, there’s less chance they will root. If they do, simply pulling them up should help—but it can be a pain!
  • Mow your lawn regularly. Regular mowing helps mulch fallen seeds. The damaged pods won’t be able to root and will decompose. Additionally, attaching a mower bag like this Leaf Collector Bag for Riding Lawn Mowers will help you scoop up fallen seeds.
  • Cut down or relocate the tree. We know this might seem extreme, but if the seeds drive you crazy, it might be your only option!

If you think you’re ready to get out the chainsaw, first take a look at our article on the 5 reasons it might be time to cut down your ash tree, to be sure you’re making the right decision!

Hydration And Pruning Can Help Prevent Broken Branches

If you’re looking at the litter around your ash tree, you’re probably seeing plenty of bark chips, twigs, and even broken branches. 

Reduce this mess by ensuring your ash tree is well-hydrated and getting the correct nutrients. You can do this by fertilizing it frequently and using the right formula.

If you’re not sure how often you should be watering, we have an article that explains exactly how much to water your ash tree.

Like many other species, ash trees need plenty of nitrogen. Nitrogen is critical in keeping the leaves healthy, allowing optimal photosynthesis—which we know is how trees make food to fuel growth and replace old cells.

Pruning is another crucial step in preventing ash trees from making a mess with their broken branches. Pruning will help reduce mess, and it’s also good for the tree’s health. 

First, it keeps branches from rubbing against one another, which can eventually cause breakage. Next, taking care of problematic limbs now prevents more significant health problems in the future. And finally, pruning your tree helps air circulate through its canopy, which helps prevent mold and fungal issues. 

Is There Anything You Can Do To Reduce Pollen In Ash Trees?

The last type of mess from ash trees is pollen. If you’re an allergy sufferer, you might not see the pollen, but you certainly feel it.

It’s important to remember that male ash trees are the main culprits in producing pollen.   

Female ash trees do not release pollen. It’s the flowers from male ash trees that produce it. So, if you haven’t planted a tree yet, and you’re set on having an ash tree, planting a female tree will prevent allergy issues. 

Just remember, female trees are primarily responsible for seed pods.

Another thing you should know: while some ash trees are either male or female, it’s not uncommon to see hermaphrodite ash trees. In fact, some ash trees even go through a hermaphrodite phase, with some staying in that state.

There are products on the market that claim to sterilize trees and keep them from growing fruit in an attempt to procreate. However, we don’t recommend doing this yourself. Instead, please consult a trained specialist with significant knowledge about this subject.

How To Care For Your Ash Tree

Ash trees aren’t the most difficult to care for, but they still need regular care and maintenance to remain healthy. Keep in mind that different species may require additional care. That said, you can use the general guideline below for most ash trees.

Ash trees do well in most types of soil as long as the soil drains well while also retaining some moisture. 

Established trees are more drought tolerant, although they prefer somewhat damp soil. Ash trees also thrive in areas where they can get full sun, meaning at least six hours of direct sunlight throughout the day. Ash trees can grow in partial sun, although they will grow slowly and may not reach their maximum height. 

This type of tree also needs ample room to grow and to allow its root systems to spread out. Aside from not planting an ash tree too close to other trees, you should also take care to grow them away from homes, walls, and other structures.

As far as trees go, ash trees can survive quite well without extra fertilizer. That said, just because it can survive doesn’t mean you should ignore fertilizing altogether.

For the best health, fertilize your ash tree at least once a year. Always check the instructions on the fertilizer you buy, as some need to be diluted. Likewise, some formulas are designed for annual use, while others need to be used twice a year or more. 

How Big Do Ash Trees Get?

Ash trees can get reasonably big upon reaching maturity. In fact, most species reach heights between 60 and 120 feet tall. 

If you want to have a towering ash tree, you will need to provide it with optimal conditions to allow it to do so.

How quickly do ash trees grow, you may wonder. Well, ash trees aren’t the fastest growers, but they’re certainly not the slowest either. They’re considered to have a medium growth speed. You can expect your ash tree to add between one and two feet to its height yearly (until it’s fully grown).

If you want to know exactly how long it takes for an ash tree to grown, check out our ash tree timeline!

Why Keep An Ash Tree?

With all the mess they make, you might wonder why people plant ash trees in the first place.

Let’s find out!

They Add Visual Appeal To Your Lawn And Garden

They’re beautiful, add height to a landscape, and make excellent shade trees.

Between their bright green leaves, puffy white flowers, and lazy seed pods, ash trees are unique and beautiful. Moreover, because they grow in height and width, they can add height to a landscape and make excellent shade trees.

Ash Trees Are Beneficial To The Ecosystem Around Them

For example, if you live near a body of water (whether it’s a lake, river, or pond), ash trees can help maintain your shoreline.

A bare shoreline naturally deteriorates and gradually slips into the water surrounding it. The plants that grow near the water typically stabilize the land and prevent it from eroding. Ash trees have strong roots that seek out water, and as a result, they thread through the soil to get closer to the water source. Ultimately, this fortifies the ground around them.

Interestingly, ash trees are used in many alpine areas to prevent natural disasters (like landslides). It’s also becoming more commonplace in countries such as Switzerland according to science journal, Catena.

Local Wildlife Will Love Your Ash Trees

Ash trees can provide shelter to animals who might otherwise struggle to find a suitable habitat. Gardeners will be happy to know that many of the animal’s these trees attract prey on common garden pests.

For example, tadpoles often munch on ash leaves before growing into frogs that prey on pests like mosquitos and crop-eating insects. 

So if you’re sick of having your hard-grown plants eaten by pests, a water-side ash tree might be your solution. 

Protect Endangered Ash Trees

A green logging tractor sits in an open forest with standing and fallen trees surrounding it.

Another thing you should know is that many of the main ash tree species are endangered. By planting and maintaining them, you’re helping preserve biodiversity.

Unfortunately, Emerald Ash Borers are a non-native, invasive, and devastating pest that has decimated large populations of these helpful trees. Because of that, many species are considered critically endangered

If you can use our guide to manage the mess of an ash tree while still keeping your tree, you’re doing yourself and the ecosystem a favor.

Key Points

For those that want a quick summary of how to prevent the mess from ash trees, consider this list:

  • Keep your tree well hydrated to avoid excess bark shedding and broken branches
  • Prune branches before they fail to keep your tree healthy (and your yard clean)
  • Regular fertilization can prevent health issues that lead to extra mess
  • Consider using a product to sterilize your trees to reduce dropping seeds
  • Sterilization can also help reduce pollen production for allergy sufferers
  • Always consult a professional or arborist if you’re unsure which process or products to use

Conclusion

As we wrap up this guide, let’s examine the main things we’ve learned. Yes, ash trees are naturally messy. However, you can take measures to mitigate many of those issues, including seed prevention treatments, sterilization, planting female trees, and regular (as well as pre-emptive) pruning. 

Something important to remember is that trees, no matter what species, are an investment—even if the central part of the investment is your time. Once you take steps to prevent the mess from your ash tree, you’ll notice a reduction in the time you spend on yard cleanup. 

Don’t let a temporary mess prevent you from enjoying these amazing trees. Remember, if you’re unsure what to do, an arborist will help you properly treat your trees. An ash tree can make your yard more comfortable and help balance out the ecosystem surrounding it. 

Now that you know how to reduce its mess, why not head on over to our article explaining the best time to plant an ash tree and how to do it.

As always, thanks for reading, and good luck!

References

Hitz, O. M., Gärtner, H., Heinrich, I., & Monbaron, M. (2008). Application of ash (Fraxinus excelsior L.) roots to determine erosion rates in mountain torrents. Catena72(2), 248-258.

Niederberger, V., Purohit, A., Oster, J. P., Spitzauer, S., Valenta, R., & Pauli, G. (2002). The allergen profile of ash (Fraxinus excelsior) pollen: cross‐reactivity with allergens from various plant species. Clinical & Experimental Allergy32(6), 933-941.

Sawers, B. (2013). Regulating pollen. Minn. L. Rev. Headnotes98, 96.

Stephens, J. P., Berven, K. A., & Tiegs, S. D. (2013). Anthropogenic changes to leaf litter input affect the fitness of a larval amphibian. Freshwater Biology58(8), 1631-1646.

Maple trees are some of the most popular trees, not only because of their storied beautiful fall foliage but also because they grow quickly in most varieties and they are fairly easy to care for. But not all maple trees can be treated the same. Some are so different, in fact, that you might not even recognize that they are all actually types of maple trees.

Japanese maple trees differ from red maple trees mainly in their size. They also differ in the rate of their growth, the color of their leaves, and their ideal growing environment. Red maple trees and Japanese maple trees generally serve different purposes in a yard or garden.

Both types of maple trees are beautiful year-round, especially in the fall when their leaves are spectacular colors. And both types of maple trees can provide some useful elements to your yard, like shade in varying amounts or just general beauty for your garden. But there are some important differences that can affect not only what type of maple tree you plant, but also how you plant, care for, and place that maple tree. 

Read on for all the info you need to tell these two beautiful species of maple apart and decide whether you need one or both of these varieties in your yard!

Are All Maple Trees The Same?

A branch and red leaves of a Japanese maple tree backlit with the sun reflecting off the water behind.

There are many different varieties of maple trees, all of which have some version of the Latin name acer.

Maple trees are set apart from other groups of trees by a few defining characteristics:

  • Maple trees have distinctive leaves.
  • Maple trees have distinctive flowers.
  • Maple trees have samaras, which are helicopter-like seeds that spin down from the trees. 

Although today we are focusing on two amazing maple tree variations, there are a bunch more variations that you should consider if these don’t meet your needs! Head on over to our article about the best maple tree variations to plant, to learn more information.

They Have Iconic Leaves

Maple leaves are probably the most recognizable characteristics of maple trees of all varieties and are probably the easiest way to identify whether or not a tree is a maple.

The leaves of the maple tree, no matter the variety, are shaped with lobes; there can be a varying number of them, but the result is an iconic leaf with pointed ends on each lobe and all lobes of the same size. 

Maple leaves in most varieties are green through the spring and summer but turn yellow, orange, or red in the fall.

A Maple Tree’s Fruits And Flowers

The flowers of maple trees are very small, but their shape –a bud that looks almost like a honeysuckle– is also a distinctive quality. 

Lastly, maple trees produce samaras instead of acorns or exposed seeds. Samaras are like little wings that spin down from the maple trees with the seeds of the maple trees hidden inside. 

Once you are able to recognize some of the key elements of maple trees, you might be able to more easily see the similarities between two trees that, at first glance, seem very different: the Japanese maple tree and the red maple tree. 

Japanese Maple Trees

Japanese Maple Tree in Autumn with vivid orange and red leaves on a moss covered forest floor.

The Japanese maple is very popular in Japan, but it also enjoys a great deal of popularity in the United States.

Japanese maple trees originated in Japan, as their name indicates, but are also native to China, Korea, and the southeastern region of Russia.

But these trees have been used in gardens in the United States for a long time, and they grow very well in most U.S. climates. 

Japanese maple trees are often used as decorative trees, and they are frequently found in gardens or as accent features to larger yards. They can be grown in many climates, and they can endure a variety of types of sunlight exposure. They can even be grown indoors. 

There Are So Many Varieties Of Japanese Maple Trees

Japanese maple trees come in many different varieties, with some boasting green leaves most of the year that turns purple and red in the fall, or some that have purple and red leaves in the spring that turn green in summer then orange and red in the fall.

The colors throughout the year vary a good bit depending on the variety of Japanese maple, but almost all Japanese maple trees have something to offer by way of interesting colors to adorn your garden or yard. 

Red Maple Trees

A large maple tree with red fall leaves in front of snowy evergreen trees and a cloudy sky overhead.

The red maple is one of the most common and popular varieties of maple trees.

It grows naturally in forests all over the northeastern United States and has been planted in yards and gardens all over the country.

Red maple trees are very plentiful in the northeast part of the country, where huge numbers of them can be grouped together, creating a spectacular sight in the fall that many people travel long distances to see. 

Red maple trees are known for, as the name indicates, the distinctive, bright red color their leaves take during the autumn season.

Different varieties of red maple have been developed specifically for their beautiful fall colors. For example, the Autumn Blaze maple tree is, as its name indicates, a particularly bright tree in the fall, with leaves that turn brilliant orange or bright red. 

But They Don’t Get The Name Red From Only Their Leaves

Red maples didn’t get their name from just the color of their autumn foliage.

Red maple trees have many red components, from their red twigs in winter to their red flowers in springtime.

They also have red buds and even some red components in the summer, such as the petiole (that’s the part of the tree that holds onto the leaves until they are ready to fall in autumn)!

Red Maple Trees Have Many Perks To Planting

Red maple trees make great shade trees, as they grow a lot of leaves in their tall canopies, providing a lot of shade under their branches throughout all seasons except winter. 

Red maple trees are also very hardy trees, able to withstand variations in water, temperature, and sunlight.

They can survive very cold winters full of ice and snow, and they can live through heat and drought.

It is best, though, not to push the limits of your maple tree; in hot or dry weather, make sure to give even the red maple some extra water. 

Maple trees actually need a lot of water, and if you decide to plant a red or Japanese maple, you should head on over to our article about why maple trees need so much water, to make sure you give your tree the best chance of survival!

1. Japanese Maples Trees Are Smaller Than Red Maple Trees

A small maple tree with pinkish red leaves grows from the rocky edge of a creek in with green plants.

Japanese maple trees grow to a height of anywhere between six feet and 25 feet tall.

This is significantly smaller than most varieties of standard red maple which can grow to be as tall as 60 feet. 

If you want a large shade tree to take the prominent spot in your front yard, a red maple might be ideal. You can plant just one tree and achieve a huge focal point that provides a ton of shade, plus the tree grows quickly, meaning it gets big fast. 

Japanese Maples Are The Perfect Size For Gardens

Japanese maples, however, are very well suited to be grown in groups or placed in gardens where a tree with a smaller profile is best.

They work well near a bench, near other trees, next to a fence, or in a garden that has limited space.

If you live in a townhouse or condo, for example, your small back garden might be just right for a Japanese maple, which can fill the space and make it feel like your own little forest. 

Red Maples Are Better For Shade Because They Grow Large

If you are looking to create a big statement in your yard, provide a great amount of shade, or just grow a big tree because you like maple trees, red maple is your better choice.

Red maple trees have huge, leafy canopies, perfect for providing shade to a large area. T

Their large size means that you can plant a single tree to provide the same amount of colorful plant life and visual interest as you could achieve with several smaller trees. 

Of course, if the idea of several smaller plants or trees appeals to you, the Japanese maple will fit the bill best. It all depends on whether you want to plant multiple trees or just one, and on how much space you have in your yard or garden. 

If shade is what you’re after, take a look at our article on the 6 reasons maples make the best shade trees!

2. Japanese Maple Trees Can Be Grown In Containers

One interesting focal feature you can introduce to a yard or garden is a tree grown in a container.

Japanese maples can also make great additions to porches, decks, or the sides of walkways and driveways. Knowing what types of trees can live in containers, though, can be a little tricky.

The Japanese maple is a great contender for a container tree. Some varieties of Japanese maple only grow to be several feet tall, so the trees stay small enough to live their mature lives in containers, as opposed to larger trees like the red maple which would need to be transferred.

Perks Of Growing In A Container

Growing a Japanese maple tree in a container is as simple as choosing a container large enough to accommodate the variety of trees you have purchased and then making sure you water it adequately and place it in the right amount of sunlight. 

One bonus to putting your Japanese maple in a container is that you will be able to easily move it, meaning that if you need to adjust the tree’s sunlight or humidity, you can do so with ease.

You will also be able to move the Japanese maple indoors in the winter months, helping it stay healthier, especially in its early years when the young tree is most vulnerable to things like frost, ice, and snow. 

Red Maples Have To Be Moved From Containers

You can start a young red maple sapling in a container, but you probably have two years at most before you will need to move it into the ground.

Red maples grow very large very quickly, so if you do not move the tree in time, the lack of space for its root ball will probably cause the tree’s demise. 

3. Japanese Maple Trees Grow More Slowly Than Red Maple Trees

Red maple trees grow quite quickly. Red maple trees generally grow a foot or two every year. 

This is not the case with Japanese maple trees, which are notoriously slow growers; some Japanese maple trees grow less than one foot per year.

It can take a full decade before Japanese maple trees are just 15 feet tall.

While most of the time it might seem like you want trees to grow as quickly as possible, that is not necessarily the case with ornamental trees meant to provide color or a little shade to a garden or small yard. 

If you’re looking to create some shade fast, we have a helpful chart of the 8 fastest growing maple trees just for you!

4. They Require Different Amounts Of Sun

The red leaves and branches of a maple tree frame a still lake reflecting a snow capped volcano in the background.

Most varieties of maple trees do well in full sun, as long as they are not being grown in a very hot, dry climate that can scorch their leaves.

In their native environment, like the northeastern United States, red maple trees prefer plentiful sunlight. You just have to consider the best fit for your particular location. 

Choosing A Spot For A Japanese Maple

Japanese maple trees, however, grow best in partial shade or in complete shade in the afternoon. This means that you need to consider carefully the location of your tree before you plant it. 

To achieve partial shade, first, observe the area of your yard or garden where you want to plant your Japanese maple tree. You’ll need to see how much sunlight the spot gets and at what times of the day.

Usually, plants and trees that prefer some shade are able to tolerate morning sunlight better than afternoon sunlight, which coincides with hotter temperatures and can be more scorching and damaging to delicate plants. 

You can choose a sunny spot that is shaded in the afternoon, or you can choose a spot that gets indirect sunlight throughout the day.

The shady afternoon spot will probably be the result of your tree being planted near another tree, plant, or structure like your house, garage, or shed, where indirect light will probably occur if your tree is planted close enough to a larger tree (like a red maple, for example) that can shade it throughout all or most times of the day. 

Choosing A Spot For A Red Maple

To plant your red maple tree in direct sunlight, observation is also key.

Red maple trees can tolerate some shade, so you don’t need full sun all day long, but you can be more relaxed in choosing a spot for a red maple tree, as it is not as picky about the afternoon sun.

An Exception To The Rule

One exception to these sunlight guidelines is if you live in a very hot, dry climate with a great deal of sunshine and very little clouds or rain.

In these cases, your tree can get scorched, even with just a few hours of sunlight.

There are two important mitigating methods here to follow:

  1. Make sure your maple tree, no matter what variety, is getting plenty of water. Trees in this environment will need much more water than a maple would need in another climate, so pay careful attention and make sure you are watering your tree regularly.
  2. You can choose a shadier spot than the general recommendation. Try placing your Japanese maple tree in a spot that is shady more often than it is sunny. The indirect sunlight might be enough to help the tree grow without scorching its leaves.

All in all, maple trees in most climates will do well with varying amounts of sunlight, but the general difference is that Japanese maple trees need more shade while red maple trees need more sun. 

For a deeper dive into just how much sun your maple tree needs, check out our article all about it!

5. Japanese Maple Trees And Red Maple Trees Serve Different Purposes

A young maple tree with bright red leaves in a grass field surrounded by mature trees and fallen leaves.

You might have multiple reasons for your interest in planting a maple tree, so there is likely to be some overlap on your list of pros to both Japanese maple trees and red maple trees.

Both types of trees produce beautiful fall foliage, and both types of trees provide some amount of shade and both look beautiful in gardens or yards. 

But there are some differences that might be key in your consideration of these two types of maple trees. 

Japanese Maple Are Ornamental

Japanese maple trees are planted primarily for their aesthetic contributions to a yard or garden.

They are ornamental trees that do not produce any type of fruit or usable product, and they are not used for lumber. 

Japanese maple trees are very frequently favored by gardeners looking to add beauty and visual interest to a landscape or garden.

Because they are smaller than most maple trees, Japanese maples can be planted closer than standard maples to fences or gates, in corners, and closer to other plants and trees. They are also very colorful, giving extra vibrancy to any garden.

Red Maple Trees Have More Functions

Red maple trees are likely to be planted for different purposes. Like the Japanese maple, the red maple is very beautiful, especially in the fall, but it grows much bigger and will not fit in the same types of spots as a Japanese maple.

The red maple is also a hardier tree, meaning that it can be grown in more extreme conditions than the Japanese maple, so it might serve a different purpose in a less shaded area of a garden or yard. 

You are most likely to plant a red maple tree as a major focal point of a yard or to provide ample shade for your house or garden.

Red maple trees can also produce usable lumber or firewood, and they even produce sap that can be used for maple syrup. 

So, essentially, red maple trees are more functional while Japanese maple trees are more decorative. 

Planting A Maple Tree

You can choose whether a red maple or a Japanese maple is best suited for your yard or home.

Maybe you want to plant a container tree that you will not have to transport into the ground, so the Japanese maple is the clear choice for you. But maybe you are hoping to grow a large shade tree, so you should go with a red maple.

Either way, these are beautiful trees sure to enhance your yard or garden. If you decide to plant a tree, there are a few ways to go about it.

For more information on transporting maple trees, head on over to our article for the best ways to transport them! Although Japanese maple trees don’t have to be transported as often as the other variations, you still may want to eventually. This article is full of all the info you would need to know!

Ways To Plant

You can just get seeds and germinate them, then translate the seedlings into the ground or container.

If your budget permits and you would like to start further in the process, you can buy a seedling or sapling of varying sizes.

Some are even sold at several feet tall already, giving you quite the head start on growing your red or Japanese maple tree. 

You can buy Japanese maple tree seeds if you want to grow your tree from a seedling. Yunakesa Japanese Maple Seeds, for example, are available online. You can also order live saplings if you want to start later in the process, like with this DAS Farms Red Maple Sapling. 

That’s A Wrap!

Now you are ready to decide which type of maple tree is right for you. Or maybe you have decided to plant one of each. Either way, you now have enough information to tell these trees apart from each other and plant accordingly. 

Now that you’ve got all the detail about which maple to grow, make sure to check out our article on a maple tree timeline, to assist you on your tree journey!

If you are unsure which tree is best for your environment, we recommend heading on over to a local professional to assist you.

Enjoy your new maple tree or trees!

References

Frank, S. D., Klingeman III, W. E., White, S. A., & Fulcher, A. (2013). Biology, injury, and management of maple tree pests in nurseries and urban landscapes. Journal of Integrated Pest Management, 4(1), B1-B14.

Honma, A., Koyama, T., & Yazawa, K. (2010). Antihyperglycemic effects of Japanese maple Acer amoenum leaf extract and its constituent corilagin. Journal of wood science, 56(6), 507-512.

Popular because of both their breathtaking beauty and general hardiness (two qualities that make them excellent choices for adding to virtually any garden or landscape), Japanese maple trees are known primarily for their bright crimson foliage.

Even with their widespread popularity, however, many people don’t understand when Japanese maple trees turn red or even why they exhibit these dramatic color changes. The simple explanation for why Japanese maple trees change between red and green relates to the various pigments in the leaves and how certain weather and temperature conditions affect those pigments

In order to help you better understand this fascinating phenomenon, we’re going to discuss the matter in greater detail. We’ll go over not only the science behind these color changes but also share with you some information about what might trigger the switch from red to green (and vice versa). We hope you find this information interesting! 

Japanese Maples Begin Spring New Growth With Red Foliage

While it’s easy to say that, in general, Japanese maple trees start with red leaves in springtime, the reality is slightly more complex and depends on a few different factors. 

Some of the factors that can affect leaf pigmentation include (but are not limited to) the weather and temperature conditions where you live as well as what type of Japanese maple you are growing. 

Additionally, as we will discuss momentarily, not all maple trees are created equal when it comes to when they develop red leaves (or if they ever display red leaves at all) so it’s important to understand these details when learning about these marvelous trees. 

Only Specially Selected Japanese Maples Begin With Red Leaves

As mentioned above, not all Japanese maple trees begin with red leaves; rather, there are certain cultivars that possess this quality. Two of the most well-known of these varieties include Bloodgood and Suminagashi, both of which are known for their brilliant red and deep crimson foliage, but there are quite a few others as well. 

Naturally, the reverse of this is also true: some Japanese maples begin with green leaves and don’t turn red until a change of the seasons occurs. And there are other cultivars that never turn entirely red, instead displaying gold or orange leaves. 

The red color itself is the result of anthocyanins and carotenoids; these botanical pigments are responsible for the colors such as red, orange, purple, and blue when seen in plants, and it is the presence of these pigments that results in the distinctive shades of crimson seen in Japanese red maples.

Though, as we mentioned before, not all varieties of maples possess anthocyanins and carotenoids in such high quantities as to outshine the chlorophyll in the leaves (which is responsible for green coloring). 

As such, if your goal is to grow a Japanese maple with either red leaves or leaves that will eventually turn red, it’s important that you have at least a general understanding of these different cultivars. Understanding the type of maple tree you’re dealing with can help you better understand why and when its leaves may change color.

Some Trees Develop Red Leaves As The Weather Changes

While there are some varieties of Japanese maples that remain red all throughout the year, other cultivars begin with green foliage before changing color to red. This, of course, leads many people to ask: why do these trees change color? What triggers it? The answer in most cases is: because of the weather. Specifically, the weather and lighting changes that come with the changing of the seasons are often what cause trees to turn red. 

As mentioned earlier, the color of maple tree foliage in general relates to the various pigments found in the leaves; green comes from chlorophyll while the more vivid colors such as red and orange come from anthocyanins and carotenoids (which we discussed briefly earlier).

While these pigments are usually always physically present within the leaves during all seasons of the year, the brilliant red colors they create sometimes only become visible when the weather changes in the autumn and causes the green chlorophyll to break down. The longer nights that come during the fall and winter months can also be a contributing factor to this color change. 

Japanese Maples Begin To Turn Red And Orange During Fall

Close up of orange leaves on a Japanese maple (acer palmatum) tree in autumn

There are certain things that can trigger a color change in Japanese maples, but in many cases, it is safe to say that most maples turn red in the fall

On that note, let’s dive into this phenomenon. We’ll also go over a few exceptions to it. It is our hope that this information will help you to gain a greater understanding of these seasonal color changes. It can get confusing, but that’s why we are here!

Most Maples Turn Orange Or Red In The Fall Months

As we discussed earlier on in this article, the two most common triggers for a color change in Japanese maple foliage are temperature and light. (There are also certain types of damage that can cause color changes, but we will go over those types of situations a little later on.)

Since autumn is often the time of year when you have colder temperatures and short days with less light, it should come as no surprise that fall is the time of year when most maple trees begin to change color from green to red (as the chlorophyll begins to break down from reduced sunlight and warmth). 

Exceptions to this include varieties of Japanese maple that don’t usually turn red in any circumstances. Some cultivars, for example, typically exhibit green foliage that will change color to yellow or gold once autumn hits but never darken to orange or red. Any Japanese maple trees that are experiencing certain types of nutrient deficiency might also see an impact on their coloring.

Why Is Your Red Japanese Maple Turning Green?

Overlapping branches of a maple tree with backlit green leaves.

To have your Japanese maple tree suddenly begin to turn from red to green can be not only confusing but also alarming, leaving you to wonder if this change in coloring is normal or a sign of some problem with your tree. 

Generally speaking, Japanese maple trees are fairly hardy once they are well-established in their environment. That being said, when it comes to these marvelous trees, there are certain conditions or types of damage that can affect not only their health but also their coloring. 

In order to help you better understand these color changes, we will now discuss reasons why a red Japanese maple tree might turn red. It is our hope that this information can help you to better understand not only the color change process itself but also when to be concerned about it.

Red Maples Will Turn Green If There Isn’t Enough Sun

Japanese red maple trees are known for not only their vibrant foliage but also their love of sunlight. These trees prefer growing in full sun, although some varieties can grow alright in partial shade. In fact, these trees love sunlight so much that if they do not receive sufficient sunlight to remain healthy, they may begin to fade from red to green (or even pale yellow).

As such, when first planting a maple tree in your yard or garden, it’s important to place it somewhere where it will get plenty of sunlight not only as a sapling but also once it grows larger and reaches maturity.

Generally speaking, it’s best to avoid planting a Japanese maple tree too close to your home, outbuildings, or any other large trees that might block sunlight from reaching it. 

Check out our article on How To Get A Japanese Maple To Thrive In Full Sun.

Damage To Red Maples Can Cause Them To Turn Green

While the specific symptoms can vary depending on the actual underlying issue, certain types of damage and botanical diseases can sometimes cause leaf discoloration in Japanese maples, including a shift from vibrant red to green or even yellow.

According to the Iowa State University Extension, one of the most common causes of this sort of color change is Verticillium wilt. This fungus can cause a variety of different problems depending on the severity of the situation, but one of the most obvious symptoms is the leaves wilting and turning yellow or pale green at a time of year when they should not. 

Overwatering can also cause discoloration in Japanese maple tree foliage, although in most cases this will present as brown or black splotches at the tips of the leaves rather than green. Additionally, if a Japanese maple tree is still young and has not yet reached full maturity, new branches may produce green leaf growth rather than red. 

If you need help identifying concerning symptoms in your maple tree, check out our guide including the 9 reasons your maple’s leaves are brown.

Improper Fertilization Can Cause Red Maples To Turn Green

It might come as a surprise to the average at-home gardener, but fertilizer can impact more than your tree’s overall rate of growth. Specifically, the chemicals and minerals contained within certain fertilizers can impact not only your tree’s health but also its color.

One of the most common causes of red maple leaves turning green is a nutrient deficiency caused by inadequate fertilizer use; if you do not use enough fertilizer (or don’t fertilize frequently enough) your tree will not be receiving enough key nutrients, which in turn can impact the tree’s health and also cause the leaves to change color from red to green. 

Manganese in particular is an important nutrient for Japanese maple trees (manganese in general is a very important micronutrient for plants, and is critical for chloroplast development as well as photosynthesis), and not getting enough of it can cause leaves to turn green or sometimes even yellow.

As such, it’s important to use fertilizers that are both appropriate for Japanese maples and that have all the necessary nutrients. We will provide you with some fertilizer recommendations a little later on in the article; we hope you find them helpful. 

Read about our picks for the 5 Best Maple Tree Fertilizers (And How To Use Them.)

Too Much Heat Can Cause Red Maples To Turn Green

While Japanese maples are trees that typically thrive in conditions of full sun, environmental conditions involving too much heat can often have a detrimental effect.

Generally speaking, most Japanese maple trees do best in USDA Hardiness zones 5 through 8 (although there are some more delicate cultivars that prefer the more moderate temperature ranges of Zones 6 or 7 specifically). 

If you see the leaves of your Japanese maple tree begin to turn pale green or curl in at the edges, it could be a sign that it is enduring too much heat or experiencing too much intense sun exposure. 

For more help handling hot weather, take a look at our watering guidelines for your maple tree.

How Do You Get Japanese Maple Trees To Turn Red?

Japanese Maple Tree in Autumn with vivid orange and red leaves on a moss covered forest floor.

If you have a Japanese red maple tree that isn’t currently red for whatever reason, you’re probably asking yourself not only ‘why isn’t my maple tree red?’ but also ‘how can I get my maple tree to turn red?’

Since we’ve already gone over some potential causes for why your Japanese maple tree might turn green instead of red, we will now discuss some tips for encouraging red coloration in your tree’s foliage. 

Mild Days And Cold Nights Can Cause Japanese Maples To Turn Red

Generally speaking, Japanese maple trees do best when grown in conditions ideal for their health and development. In most cases, this means that they will display their signature red foliage when there are mild days with plenty of sunlight (but not too much heat) and when there are slightly longer nights with cooler temperatures. 

Since there is little you can do to actually control the weather, all you can really do is be patient and operate with the understanding that even if your Japanese maple tree has not turned red yet, it will most likely do so once the weather changes to the appropriate conditions; as discussed earlier, these weather changes normally occur in the autumn and winter months, so that is when you can expect to see more vibrant red and orange foliage appear. 

Certain Fertilizers Can Promote Red Growth In Japanese Maples

While fully mature Japanese maple trees do not usually need fertilizer (since their root systems should be sufficiently developed by that point to take in plenty of nutrients on their own) in some cases the use of fertilizer can help promote more robust growth and development in your trees.

In the case of Japanese maples, it’s important to make sure you select an appropriately balanced fertilizer that contains all the important nutrients they need to remain healthy

As discussed earlier, if your Japanese maple trees are not getting enough of key nutrients such as nitrogen and manganese, it could impact their overall health as well as their coloring. As such, it could be said that using proper fertilizers to keep your tree healthy can, by extension, also help promote that vivid red coloring which Japanese maple trees are known for. 

If you are in the market for effective and well-balanced fertilizers for Japanese maple trees, consider purchasing products such as FoxFarm Happy Frog Japanese Maple Fertilizer or TreeHelp Premium Fertilizer for Japanese Maples. You might also consider consulting with a botanist who is knowledgeable about Japanese maples since they should be able to offer you further recommendations for the care of your trees. 

Quick Recap

And there we have it!

To summarize:

  • Not all Japanese maple trees begin with red foliage; some begin with green leaves and only turn red in autumn, while other cultivars never turn red at all
  • In most cases, it is colder temperatures and shorter days that will trigger the color change from green to red; these conditions usually occur in fall or winter
  • The color change itself relates to the breakdown of the chlorophyll in the tree’s leaves, which leaves the brighter anthocyanins and carotenoids as the remaining visible pigments
  • Other triggers for a color change include certain types of damage as well as various nutrient deficiencies; since these types of color changes indicate that your tree is unwell, you should take steps to avoid them
  • When fertilizing your Japanese maple trees, it’s important to use a well-balanced fertilizer to ensure that your trees are getting all the key nutrients they need to remain healthy
  • When in doubt about the state of your Japanese maple tree, don’t hesitate to consult with an arborist, botanist, or Japanese maple tree specialist 

If you would like to know more about what is involved with growing Japanese maple trees, books such as Japanese Maples: The Complete Guide to Selection and Cultivation can be an excellent resource. 

You might also consider reaching out to an arborist who specializes in Japanese maple trees; they will be able to offer you reliable insight into all manner of things related to Japanese maple care, from watering to fertilizing to pruning. 

References:

Deal, D. L., J. C. Raulston, and L. E. Hinesley. “Leaf color retention, dark respiration, and growth of red-leafed Japanese maples under high night temperatures.” Journal of the American Society for Horticultural Science 115.1 (1990): 135-140.

Douglas, Sharon M. “Verticillium wilt of ornamental trees and shrubs.” The Connecticut Agricultural Experiment Station (2008)

Hansen, Sheriden M., Jaydee Gunnell, and Andra Emmertson. “Maples in the Landscape.” (2021): 1.

Niemiera, A. X. (2009). Japanese maple. Virginia Cooperative Extension.

Phillips, G. (2003, December 17). Culture and propagation of Japanese maple. VTechWorks Home.

Schmitzer, Valentina, et al. “Phase change modifies anthocyanin synthesis in Acer palmatum Thunb.(Japanese maple) cultivars.” Acta physiologiae plantarum 31.2 (2009): 415-418.

.

Your Competitors Are Already Running Ads. Are You?

This is for service business owners who are ready to SCALE.