Grow Your Business with Tree Journey

Our TradeWorks Revenue System™ builds a detailed advertising funnel that attracts, nurtures, and converts the right clients – so you can finally stop chasing leads and start scaling your business.

Ash trees are one of the most common trees in North America, with many varieties found in the United States.

While the number of ash trees in the country has been drastically reduced by the emerald ash borer infestation of the past two decades, many people are working to restore ash trees to their original numbers – and keep them growing as long as possible!

The average life of an ash tree is between 100 and 200 years, depending on the type of ash tree. And with proper preparation and care, some types of ash trees can live for as long as 300 years!

The best way to extend the lifespan of your ash tree is to learn just what it takes to keep it healthy and prevent pests and diseases.

Read on for all the info you need to grow your ash tree to its healthiest potential and set it up to live as long as possible–long enough even for future generations to enjoy. 

Why You Should Consider Planting An Ash Tree

Ash trees are lovely trees with beautiful green foliage in spring and summer, plus fall foliage that usually involves yellow leaves, though some trees can have varying autumnal colors.

Ash trees make great shade trees, too, so if you are looking to add some shade to your yard or garden, they can be a great pick.

But there are a number of other reasons to consider an ash tree for your yard. 

Ash Trees Are Critically Endangered

Another reason to consider planting an ash tree is that these trees are, in many parts of the country, officially designated as critically endangered.

The reason for their endangerment is the infestation of beetles called emerald ash borers (more on that below), but with the proper prevention and care, ash trees can survive this threat.

Planting an ash tree–or several–in your yard is a great way to help repopulate these once-prolific trees in the United States, particularly the eastern part of the United States. 

Ash Trees Produce Valuable Wood

Ash trees also produce valuable wood. If you want to plant just one or two around your home, this probably does not make a big difference to you, but if you are interested in planting lots of ash trees for their wood, you might consider the value of their lumber.

One of the most famous items made from ash wood is the good old baseball bat. Baseball bats have long been made from ash wood because the wood is rather soft and flexible, making it good for hitting baseballs without too much rigidity.

Specifically, baseball bats are most often made from the wood of white ash trees, which is one of the most common types of ash trees in North America

Ash Trees Are A Natural Habitat For Many Birds And Animals

Ash trees are a hospitable environment for many creatures, both birds and other types of woodland animals. 

Ash trees are also home to many North American creatures, including birds like woodpeckers. Woodpeckers even eat the emerald ash borers in ash trees, so they can be quite helpful in aiding the care of your new tree!

Too much activity on your ash tree from woodpeckers, though, can be a sign of emerald ash borer infestation, so keep an eye out.

A few woodpeckers might mean nothing, but a lot of woodpeckers attacking your tree on a regular basis is probably a red flag.

Other animals live in ash trees, too, like squirrels.

The samaras of ash trees–the little whirling seeds that fall in a spiral from the tree–are eaten by many forest animals like foxes, mice, and wood ducks. And the bark is eaten by animals such as rabbits and porcupines.

Ash trees are an important part of many forest ecosystems, and even one planted in your yard can contribute.  

Plus, ash trees are extremely fast-growing. For more information on an ash tree’s growth timeline – head on over to our article!

Now that you have considered whether ash trees are right for your land or yard, keep reading to find out how to best plant your ash tree seedling and get it growing strong and healthy from the very beginning. 

Planting Your Ash Tree

A close up of the small yellow compound leaves of an ash tree with a blurred green background.

There are a number of things to consider before you plant your ash tree, like location, time of year to plant, proximity to your house or other buildings, proximity to other plants and trees, and the likelihood of your being able to properly care for the tree as it grows to maturity. 

The ash tree is easy to grow and is not picky about where it is planted, so most of these decisions are fairly easy. You mainly get to decide for yourself where you would like your tree to grow!

The best time to plant your ash tree may actually surprise you! In fact, head on over to our article to learn more in-depth information about when to plant your ash tree!

The Best Time Of Year To Plant

The best time of year to plant is usually springtime, as this will give your ash tree the longest possible period of time to establish its roots in the ground.

Having a great base will help the tree withstand the cold, harsh winter months. If you cannot plant in springtime, or perhaps just do not want to wait that long, fall is another great season for planting trees. 

Planting In The Spring

To plant in springtime, wait until you are confident that your yard will not undergo another freeze or frost. This time will vary depending on where you live or even what kind of spring season you are having. 

Look out for what is commonly called “blackberry winters,” when the temperatures have been very mild or even warm, and then there is a sudden cold snap. If this happens after you have planted your tree, don’t panic. All is not lost.

As soon as you see in the forecast that a cold snap is coming, make the necessary preparations by covering your tree with bags like these Refasen Plant Covers you can help protect it from frost or even ice and snow, for freeze protection.

Planting In The Fall

If you choose to plant in autumn instead of spring, you give your tree the advantage of establishing its roots before the heat and drought of summertime.

So planting in the spring might be a good choice for cooler climates, whereas planting in fall might be advantageous if you live in a very hot and/or very dry environment. 

The process of planting in the fall is very similar to the process of planting in the spring. You still have to look out for early frosts and freezes, so try to plant once the heat of summer has passed but before snow and ice arrive.

If a sudden cold snap does appear on your weather forecast, follow the same tips as you would use for planting in springtime: water the plant before the cold arrives, cover the tree, and protect it from the cover. 

What To Do Before The Cold Weather Comes

Before the cold weather comes, water the tree so it can take in as much water as possible. This may seem counterintuitive, but it will keep the tree hydrated throughout the time you cannot water it due to freezing temperatures, and it will actually help the tree stay warmer

Make sure that, when you cover your tree, you use some type of frame to keep the bag from pressing too much on the leaves, especially if there is snow or ice in your forecast.

Your goal is to keep the tree warm and insulated inside the bag, but not to let the bag damage the leaves (if there are any yet) or branches. Once the weather warms again, remove the bag from your tree and, if the ground is not frozen, water it again. 

Where To Plant Your New Ash Tree

The top of an ash tree beginning to turn yellow in the fall is visible against a blue sky background.

Ash trees can live most anywhere, so you do not have to worry about picking the exact right spot. In fact, you can mostly make this decision based on where you want the tree to go, as the tree is able to flourish just about anywhere.

Don’t plant an ash tree too close to your house, though. When the branches reach maturity, you don’t want them touching any buildings.

According to New Mexico State University, it is best to aim to plant your tree about 20 feet from your house. This will keep the branches safely away. 

Choose A Spot That Needs Shade

Ash trees are amazing shade trees – so amazing, that we have an entire article about why ash trees make amazing shade trees! Since they have huge canopies, are versatile, and grow fast – they’re amazing at providing shade.

Knowing this you should choose a spot where you need more shade or that you would like to make cooler, like a patio or backyard area to plant your ash tree in.

Keep in mind that the shady area will grow as the tree does, so be aware of places where you may have carefully cultivated a garden of sun-loving flowers so that you do not eventually have to move it when the tree reaches maturity and its canopy shades your once-sunny spot. 

Caring For Your Ash Tree

Ash trees are very hardy trees that require almost no routine care. They grow well with varying amounts of water, and they do not require special soil or care. You can prune them (more on that below), but you do not have to.

Basic care of your ash tree comes down to one very important thing: insect control. 

Protecting Your Ash Tree From Emerald Ash Borers

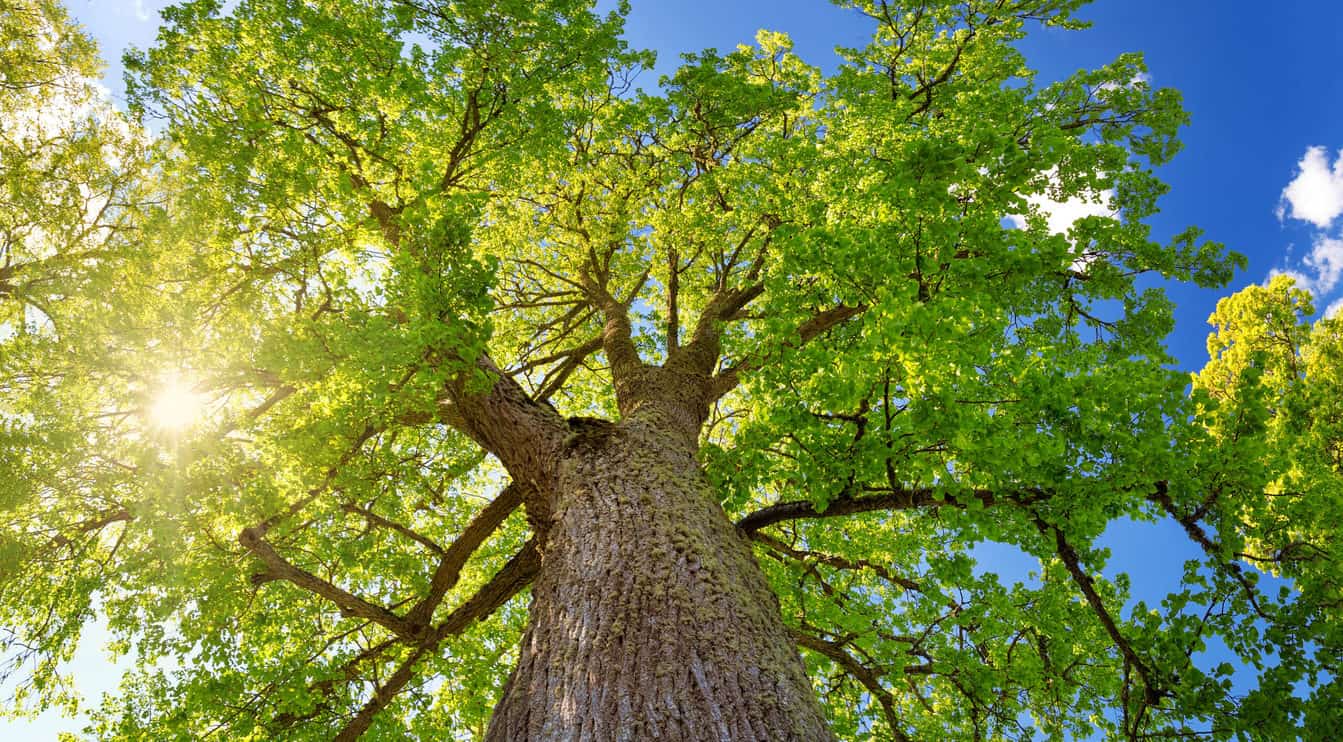
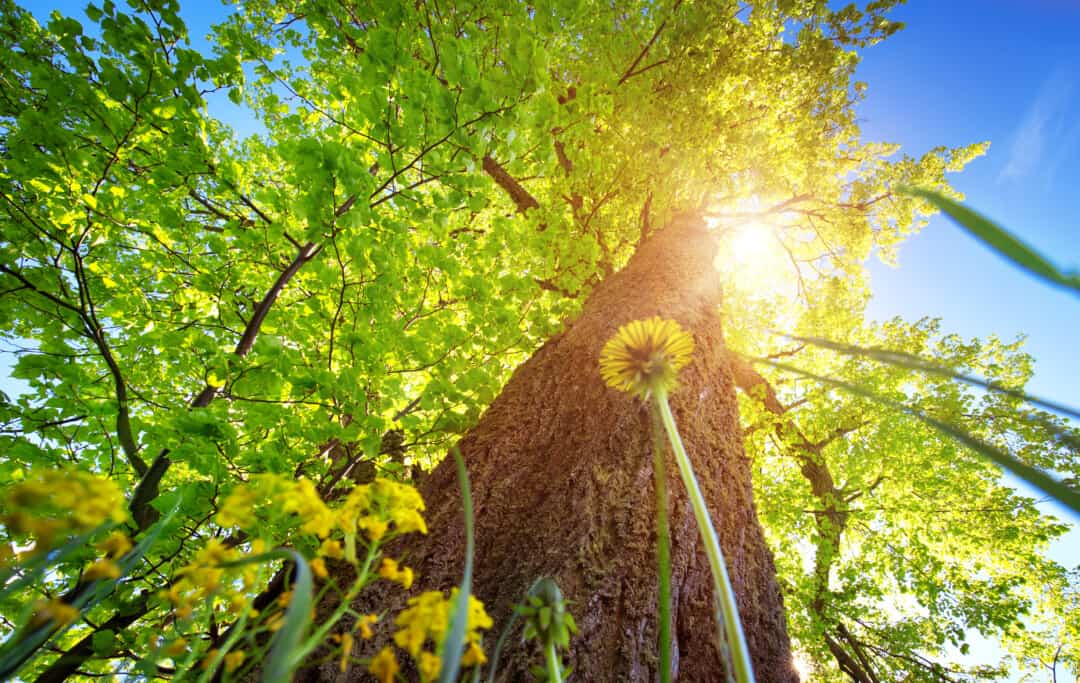
An ash tree from below, with the brown bark of the trunk and branches full of green leaves.

The number one thing that will shorten the lifespan of your ash tree is an infestation of emerald ash borers. Emerald ash borers are beetles that were discovered in the United States (first in Michigan) in 2002.

In the twenty years since they were first discovered, these little beetles have quickly and drastically impacted the population of many varieties of ash trees in the United States.

The number of ash trees killed by emerald ash borers is in the millions. Infestations have also impacted the number of seeds being produced, meaning that fewer new ash trees are growing in the forests. 

But despite the severity of the infestation, progress is being made in restoring ash tree populations. While you might hear a lot of negative information about planting ash trees because of this insect threat, you can successfully grow a healthy ash tree with the right preparation and care. 

The Best Method To Keep Your Ash Tree Safe From Emerald Ash Borers

The only proven way to protect ash trees from emerald ash borers is to use insecticides that kill the emerald ash borers.

There are a number of products you can choose from, like BioAdvanced 12 Month Tree & Shrub Protect & Feed, which specifically addresses emerald ash borers. 

If you have recently planted your ash tree, you should start as soon as possible treating it for emerald ash borers to prevent them from setting up their homes in your new tree. If you are reading this to help care for and elongate the life of an already-mature ash tree, these products will work just as well. 

What To Do If Your Ash Tree Is Already Infested With Emerald Ash Borers

If your ash tree is already infested with emerald ash borers, you do need to take the situation very seriously, as many ash trees are killed this way. 

One tactic you can take is to employ the help of a professional.

Tree professionals can help get rid of the emerald ash borers with specialized methods like injecting treatments into the trunk of your tree. You can also employ professionals to regularly treat your tree with preventative measures so that another infestation does not occur. 

If you want to try treating the tree yourself, move quickly, and don’t delay in seeking professional help if your methods do not seem to be working fast enough. Ash trees can die very quickly once emerald ash borers have set up in their trunks, so do not wait too long. 

How To Tell If There Are Emerald Ash Borers In Your Tree

Emerald ash borers are difficult to see, as they usually live underneath the bark of ash trees. To determine whether there are emerald ash borers in your tree, there are some telltale signs to look for.

These are some symptoms of ash trees infested with emerald ash borers:

  • Leaves are dying in the canopy of your ash tree (not due to normal winter leaf fall).
  • New leaves or twigs are sprouting when it is not the normal season for them to do so. 
  • Your ash tree is suffering a great deal of damage from woodpeckers. This could be because the woodpeckers are intensely pecking your tree as they try to reach emerald ash borers under the bark. 
  • There are holes in your ash tree in the shape of the letter “D.”
  • The bark is splitting on your ash tree’s trunk, and underneath you can see s-shaped paths that have been carved by the emerald ash borers. 

Some Final Takeaways About Emerald Ash Borer Infestation

While infestation in your ash tree of emerald ash borers is very serious, it does not always mean the death of your tree.

But in order to keep your tree living as long as possible, you need to take measures to prevent the emerald ash borers from killing your ash tree or to remove them if they are already there and make sure you prevent their return. 

Other Ways To Extend The Life Of Your Ash Tree

The branches and yellow leaves of an ash tree in fall against a blue sky background with light wispy clouds.

Ash trees grow wild in forests all over North America, so they are trees that are very capable of doing well without any intervention from humans at all (except for emerald ash borer infestation).

But while the following methods are not absolutely necessary for the care of your ash tree, they can help it grow faster and stronger, and they can help not only set the tree up for a long, healthy life but also keep the tree looking healthy for as long as possible, too. 

Pruning Your Ash Tree

It is not actually necessary to prune your ash tree, but doing so can help in a couple of different ways.

Ash trees actually produce a fair number of dead branches, especially in the lower parts of the tree. This is not a sign of the tree’s death, but just a normal process throughout the tree’s life. 

A reason to remove dead branches from your ash tree is that they will remove dead weight from the tree, which can help its branches survive events like ice storms or heavy snowfall. 

The best time to prune trees is in late winter, so depending on where you live, probably be February or even March. You can also hire a professional tree service to remove the dead branches for you. 

Using Fertilizer To Help Your Tree Grow And Stay Healthy

Another tactic that is not necessary but might give your tree a special advantage is to use fertilizer or plant food, like Miracle-Gro Tree & Shrub Plant Food Spikes.

These are easy to use and do not have to be replaced very often, so you might find them to be a great supplementary tool to help give your ash tree some extra nutrition. 

Enjoying Your Ash Tree’s Long Life

With proper preventive care for its biggest threat, the emerald ash borer, an ash tree can live a very long life with very little maintenance. Ash trees have been known to live for hundreds of years, so the probability of yours becoming a legacy tree is very high.

Ash trees are one of the most prolific trees in North America, populating many forests and lining many suburban streets. You can benefit from this versatile tree by planting one or more near your own home. 

For more information about enjoying the beauty of an ash tree in your yard, check out our posts on “10 Plants To Plant Under Your Ash Tree” and “8 Plants Not To Plant Under Your Ash Tree” (links TBD). 

Now enjoy this new shady addition to your yard for years to come!

References

Herms, D. A., & McCullough, D. G. (2014). Emerald ash borer invasion of North America: history, biology, ecology, impacts, and management. Annual review of entomology, 59(1), 13-30.

Klooster, Wendy S., Kamal J. K. Gandhi, Lawrence C. Long, Kayla I. Perry, Kevin B. Rice, and Daniel A. Herms (2018). “Ecological Impacts of Emerald Ash Borer in Forests at the Epicenter of the Invasion in North America” Forests 9, 5: 250. https://doi.org/10.3390/f9050250 

Papaya trees (Carica papaya) are native to Central America and are grown commercially throughout the world in tropical and subtropical climates. If you’re interested in growing a new fruit tree in your yard, a papaya tree might be a great choice for you due to its rapid growth and fruit production. 

Papaya trees will start producing fruit in about 6 months after the seed is planted!

While papaya trees will grow and produce fruit quickly, fruit production only lasts a few years. Most farmers replace trees every 3 to 4 years, so it’s a good thing papaya trees are easily grown from seed!

Even though production decreases, a mature and healthy papaya tree can live for over 40 years.

In this article, we’re going to cover the growth timeline and provide details about what you can expect from each stage of your papaya tree’s life cycle. If you want to grow your own papaya tree, this article will teach you everything you need to know about papaya trees and how to grow them. 

What Does A Papaya Tree Look Like?

A papaya tree from below, with a large cluster of fruit and large green leaves against a blue sky.

You probably recognize the large, yellow, pear-shaped fruit of the papaya tree you’ve seen at the grocery store, but what does the tree look like?

Papaya trees are tropical plants that can grow up to 30 feet tall. Generally, it has a single main trunk but can develop secondary shoots if the main trunk is damaged at the top or as it ages. 

The leaves are palmately lobed with leaf blades growing between 18 to 23 inches long. The petiole of a leaf can be 1 to 4 feet long and grows directly from the trunk.

Papaya Flowers: Male, Female, Or Both!

Papaya trees can either be male, female, or bisexual. Bisexual papaya trees have both male and female flowers on a single tree. 

Male flowers are small, yellowish to white, and grow in groups along a 10 to 40-inch-long shoot called a cyme. The stamens in the center of the flower are yellow due to the pollen they produce.

Female flowers are yellowish to white, much larger than the male flowers, and grow directly from leaf axils at the trunk.


Papaya leaves can also be both male and female at the same time. This leaf looks very similar to female flowers, grows from the leaf axils, and has a yellow stamen.

Papaya Tree Pollination: The Birds And The Bees Of Producing Papaya Fruit

As we mentioned above, papaya trees have both male and female flowers. How does that impact your papaya tree growing efforts?

Well, if you aren’t worried about getting fruit from your papaya tree then the flowers don’t really matter. But we’re guessing you’d like to reap the fruits of your labor while growing your papaya tree!

In order for the female flowers to produce an edible fruit, you have to have a male flower present to fertilize the female flower. Unfortunately, you can’t tell by the seeds if your tree is female or male.

That is why we recommend you plant at least 3 or 4 trees to ensure you end up with both male and female flowers so you can get fruit from your papaya trees. 

Where Can I Grow A Papaya Tree?

Papaya trees are native to Central America and therefore grow best in tropical to subtropical regions. In North America, papaya trees grow best in hardiness zones 9b through 11. 

If you’re not sure what hardiness zone you live in, you can plug your address into the USDA Plant Hardiness Zone Map to find out! 

Don’t live in zones 9b through 11 but have your heart set on growing a papaya tree? You can try your hand at growing one indoors if you plant a dwarf variety, or grow your papaya tree in a greenhouse like the Ohuhu Greenhouse. This greenhouse is easy to set up and move if needed.

 For more information about where you should grow your papaya tree – head on over to our article about where papaya trees grow! Mainly, you need a spot with a lot of sunlight – and a spot away from other trees!

What Time Of Year Should You Start Growing A Papaya Tree?

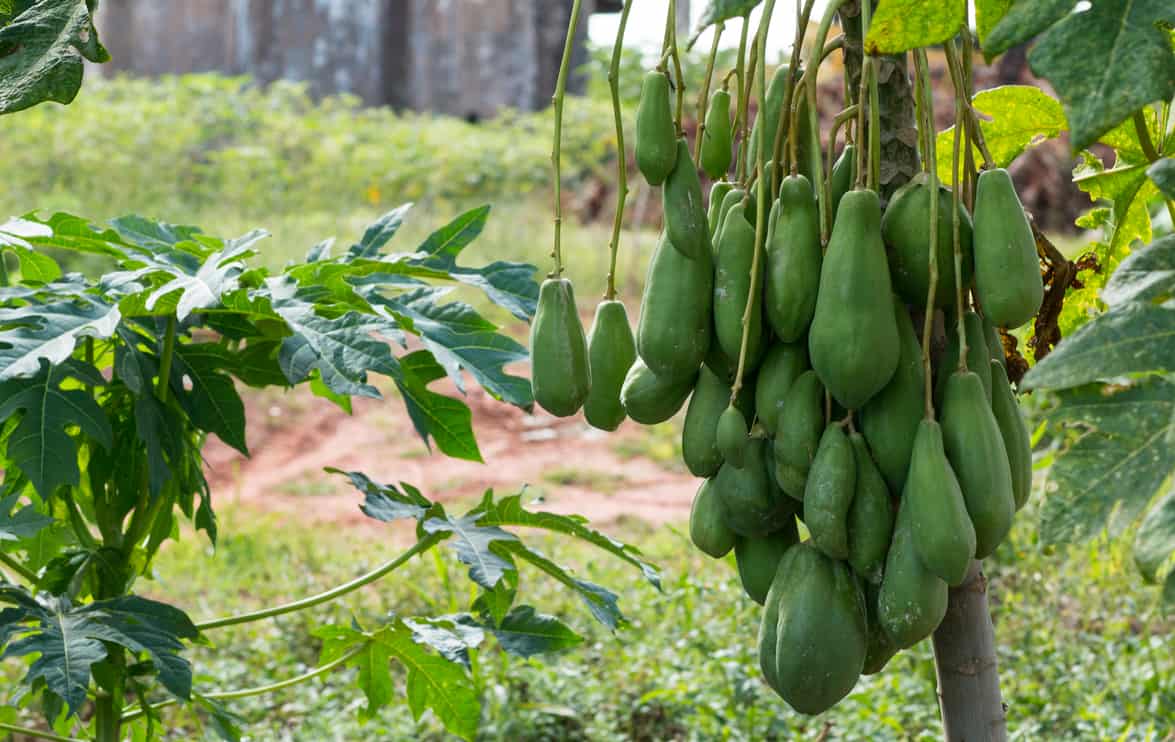
A close up of a large cluster of green papaya fruit.

The best time to start growing your papaya tree from seed depends on where you live.

Your papaya tree will need 6 to 8 hours of full sunlight per day and soil temperatures should be at least 55 degrees Fahrenheit. 

The two most important factors that will affect the time of year you start growing your tree are sunlight and soil temperature.

If you’re wondering how long your papaya tree will last, head on over to our article about how long papaya trees last to find out more information! Surprisingly, it’s less time than you think!

Growing Papaya Trees Outside

If you live in the right hardiness zone, you should have the right growing conditions for most of the year and can start planting your papaya trees at almost any time. 

Since papaya trees produce fruit during the first year, you can treat them like an annual plant if you don’t live in the right hardiness zone for them to survive winter.

Growing Papaya Trees Inside (Or In A Greenhouse)

If you don’t live in the correct hardiness zone, you will want to consider growing your papaya tree indoors or in a greenhouse. We discuss dwarf varieties which are best suited for this below.

When you’re growing your trees indoors, you can control your temperatures and sunlight. The temperature will be controlled by the thermostat in your house, or by the heat produced by solar radiation in your greenhouse. 

If you live in hardiness zones 1 through 6, a greenhouse may not collect enough solar radiation to heat your greenhouse to the required temperatures. While most commercial growers will install a heating system, this may not be cost-effective for you. Don’t worry, there are some other options to heat the greenhouse. 

If you need to generate more light indoors or in your greenhouse, you can use grow lights. 

We like this FRENAN Grow Light since it comes with an adjustable stand, 3 light modes, 10 brightness settings, and a timer. 

How Long Does It Take To Grow A Papaya Tree From Seed? (Full Timeline)

A cluster of green papaya fruits hangs from a tree with blurred papaya trees in the background.

Now that you know where and when to plant your papaya tree, here’s what you can expect from your papaya tree growing journey!

Unlike most other fruit trees, you won’t have to wait too long until you have some delicious papayas you can enjoy from your very own tree!

Day 0: Choosing The Seeds And The Planting Site

Before you can start growing your papaya tree, there are two important decisions you will need to make: what seeds are you going to plant, and where are you going to plant them? 

If you’re lucky enough to live in the right hardiness zone, 9b through 11, you can simply purchase a papaya fruit from your grocery store and use its seeds to start growing a tree.

Papaya trees cannot survive freezing temperatures

If you live in colder hardiness zones, you’ll need to consider either growing your papaya tree indoors or in a greenhouse.

However, some papaya trees can grow up to 30 feet tall, which isn’t going to work for you in this situation (unless you have really high ceilings in your house), so you may need to plant a dwarf variety.

According to the Colorado State University dwarf papayas only grew to a maximum of 6.5 feet tall.

Whether you decide to grow your papaya tree outside, from seeds you collect from papaya fruit, or indoors, from seeds you purchase online, we will discuss the full growth timeline for both methods below. 

Day 1: Preparing Your Papaya Seeds

If you’re growing your papaya tree outside and collecting seeds from a fruit you purchase, you will need to prep the seeds before planting. After removing the seeds from the center of the papaya fruit, place them in a colander. 

There will be a gelatinous sac around the seed (the sarcotesta) that needs to be removed before you plant it. 

Press the seed against the side of the colander and it should pop out of the surrounding sac. After removing all of the sacs, rinse the seeds thoroughly and let them air dry on a paper towel that is not in direct sunlight. 

If you’re growing your papaya tree indoors, the dwarf papaya seeds you purchased online should be ready to go without any further preparation needed. 

Day 1: Planting Your Papaya Seeds

Whether you’re growing your papaya tree outside or indoors, you’ll want to start the seeds in 1-gallon pots.

Fill the pots with a sterile, well-draining potting mix and add 4 seeds, evenly spread out, in each pot. Cover the seeds with ½ inch of potting mix and water thoroughly. 

We recommend planting at least 32 seeds, in 8 different 1-gallon pots. This ensures you get enough germination, and healthy seedlings, to end up with 3-4 seedlings to transplant. 

Remember, you should plant 3-4 papaya trees to ensure you have both male and female flowers for fruit production.

Where To Place Them

Place your 1-gallon pots in the location where you will be planting them so they won’t have to acclimate when you transplant your seedlings. This should be a place that gets plenty of direct sunlight to ensure optimal growth and fruit production. 

Make sure you keep the soil moist but not too wet to give your seedlings the best chance of emerging. 

Now you just have to wait for your seedlings to emerge! This can take anywhere from 2 to 6 weeks.

Day 1 (Seedling Emergence) To Day 45: Growing Healthy Papaya Seedlings

Since there is such a large range of when your seedling will emerge, whenever you spot that first bit of green peeking out of the soil, consider that your emergence day (Day 1).

Papaya trees grow quickly so you’ll have to keep them well-fed with fertilizer for the best results. Once your seedling is 1-2 inches tall, start adding fertilizer to the water you water your papaya tree with every time you water. 

Use a mixture of ¼ teaspoon of a balanced, water-soluble fertilizer to 1 gallon of water. 

We like this Miracle Gro All Purpose Plant Food which comes in various sizes and can be used on a wide variety of plants you may be growing. 

Remove Any Weaker Seedlings

Once your seedlings start reaching 3 to 4 inches tall, you will notice some growing more quickly and looking healthier than others. You will want to start removing the weaker smaller seedlings from each pot at this stage by cutting them off at the soil line.

Make sure to cut these seedlings and not pull them up by the roots, because papaya trees don’t handle root disruptions well. 

The goal here is to end up with one healthy seedling in each pot by the time the seedlings reach 8 to 12 inches tall.

Day 45 To 4 Months: Transplanting Your Papaya Tree And Watching It Grow

Green papaya fruits hang from a tree with large green leaves and a forest in the background.

Your papaya trees are now 8 to 12 inches tall and hopefully, you have at least 3 to 4 healthy seedlings. Now it’s time to transplant them! 

You can transplant as many seedlings as you’d like but remember, we recommend you have at least 3-4 to ensure both male and female flowers are present for fruit production. 

Preparing The Area For Transplanting Your Papaya Tree

If you’re growing your papaya tree outside, you’ll need to prepare your planting site. You’ll want to plant your seedlings 7 to 12 feet apart so they have enough space to grow. 

Papayas grow best in well-drained soil with a good amount of organic matter. 

If you live in an area with high clay content, you’ll want to dig a hole with a 3-foot diameter and 1-foot deep. Then, fill the hole with well-draining garden soil. Don’t use potting soil as it may retain too much moisture.

A 50:50 mix of regular potting soil and cactus potting soil works well. 

If you’re growing your papaya tree indoors or in a greenhouse, you’ll want to transplant it into a 20-gallon container filled with well-draining potting soil like the 50:50 mix mentioned above.

How To Transplant Your Papaya Tree

The most important part of transplanting your papaya tree seedling is to cause as little root disruption as possible. 

Dig a hole in the center of the planting area (either the soil you prepared in your yard or the 20-gallon pot if you’re growing indoors) that is slightly bigger than the pot your seedling is in. Gently remove your seedling from its current pot and place it in the hole. 

Don’t dig the hole too deep. The base of the seedling should not get covered by more than a ½ inch of soil when you fill in the hole after transplanting. Papaya trees have shallow roots and if you bury them too deep your tree will struggle. 

Fill in the hole with dirt, gently press down the soil around your seedling, and water thoroughly. Add a layer of mulch 3-4 inches deep to help with moisture retention and weed suppression, but keep the mulch away from the trunk.

Continue keeping your papaya tree watered regularly, every 3 to 4 days, and add a ¼ pound of complete (10-10-10 or 14-14-14) fertilizer every 4 weeks. 

4 Months To 6 Months: Papaya Tree Flowering And Pollination

If your papaya tree is healthy and happy, it should start producing flowers in 4 to 6 months.

You’ll finally be able to determine if your tree is male, female, or both at this point using our flower description at the beginning of this article. 

Male/Female papaya trees will self-pollinate. Female flowers have to be cross-pollinated by male flowers either by insects or manually using hand pollination. 

How Indoor Or Outdoor Papaya Trees Are Pollinated

If you’re growing your papaya tree outside, the flowers will be pollinated by a variety of insects. You can still hand pollinate them, to ensure pollination occurs, if your tree isn’t too tall. 

If you’re growing your papaya tree indoors, you’ll need to hand-pollinate your female plants using the male flowers. 

How Do You Hand-Pollinate Your Papaya Tree?

To hand pollinate your papaya flowers, gently remove several opened male flowers from a male plant. Remove the petals from the male flower by gently pulling them straight down.

The petals will detach just below the yellow anthers which are covered in pollen. 

Now, gently press the yellow anther of the male flowers into the white stigmas of the female flower which are sticking up from the middle of the open female flower. Make sure to thoroughly cover all of the stigmas with the anthers to fully pollinate. 

6 Months To 11 Months: Papaya Tree Fruit Production And Harvesting

A papaya tree from below, looking up at a cluster of fruit and green leaves with a blue sky in the background.

If pollination of the female flowers was successful, you should start having fruit on your papaya tree at this point! Your tree will be several feet tall, depending on the variety you planted, and can produce up to 80 pounds of fruit each year. 

If insects become an issue on your ripening fruits, you can place a paper bag over the developing fruit and secure it with a rubber band to keep insects away. 

You can harvest your papayas while they are green, and use them as a vegetable, or wait until they begin to turn yellow. The more yellow that develops on the skin, while the fruit is on the tree, the more sugars the fruit will contain. 

Papayas are typically harvested once 1/10th to 1/3rd of the skin is yellow, then placed in a cool dry place to fully ripen indoors. You can allow your papayas to fully ripen on the tree, however, insects may become more of a problem as they become fully ripened. 

1 Year To 3 Years: Maintaining A Healthy, Productive Papaya Tree

Your papaya tree will grow 6 to 10 feet in the first year. If you planted a dwarf variety, the height at this point will depend on which variety you planted. Most varieties will reach their maximum height by the end of year 2 or 3 depending on how healthy the tree is. 

Remember to keep watering and fertilizing your papaya tree regularly to keep it healthy and growing. You can increase your fertilizer rate to ½ pound per month.

Some Papaya Tree Pests

There are also several insects and diseases that can impact your papaya tree as it ages. 

Insects of concern include papaya fruit flies, papaya whitefly, papaya webworm, nematodes, and two-spotted spider mites. Diseases include powdery mildew, anthracnose, papaya ringspot, phythoptera, and leaf spot. 

Since papaya trees are short-lived and easy to grow, we recommend you remove any infested trees and replace them with new healthy trees, however, if you want to learn about some ways to use plants to get rid of whiteflies – head on over to our article!

Year 3 And Beyond: Papaya Fruit Production Decreases

After 3 to 4 years, papaya tree fruit production will significantly decrease or stop altogether. You can still enjoy the beauty of your full-grown papaya tree or you can replace it with a new tree to keep producing fruit. Your mature papaya tree will live for about 20 years!

Papaya trees grown in perfect conditions have lived for as many as 40 years. However, most trees will either succumb to diseases such as root rot or be toppled over by the wind well before they reach 40 years old. 

Make sure you keep your papaya tree watered and fertilized to keep it healthy and happy! And, if you are unsure how to properly care for your papaya tree, we recommend checking in with a professional!

That’s A Wrap!

With this timeline, you now know how long it takes to grow a papaya tree and what to expect from each phase of the papaya tree’s life.

Papaya trees can be one of the most rewarding fruit trees to grow due to their ability to produce fruit in the first year!

Whether you grow your papaya tree outside or inside, we’re sure you’ll have plenty of delicious papayas for yourself and probably your neighbors too!

References

Nishina, M., Zee, F., Ebesu, R., Arakaki, A., Hamasaki, R., Fukuda, S., Nagata, N., Chia, C.L., Nishijima, W., Mau, R. and Uchida, R., 2000. Papaya production in Hawaii.

Salinas, I., Hueso, J.J. and Cuevas, J., 2021. Active Control of Greenhouse Climate Enhances Papaya Growth and Yield at an Affordable Cost. Agronomy 2021, 11, 378.

Storey, W.B., 1972. Why papaya trees fail to fruit.

Coconuts are well known throughout the world. They are the iconic symbol of a tropical environment, hanging in bunches on enormous coconut palm trees. Did you ever stop to wonder where in the world coconuts grow?

Coconuts grow on the coconut palm tree. These trees typically only grow in tropical regions from 25 degrees north latitude to 25 degrees south latitude. Coconut palms grow in places like Australia, the Pacific Islands, Florida, the Caribbean, and Indonesia.

Read on to learn about all the regions of the world where coconut palm trees grow. We’ll also go over the best conditions to grow one yourself!

Why Coconut Palm Trees Only Grow In Certain Places

Coconut palms on the beach near the blue ocean

Before we get into all the places where you can find coconut trees, let’s talk about some of the basics of a coconut palm tree so you can understand just why they grow where they do.

Let’s get into it!

Coconut Tree Characteristics

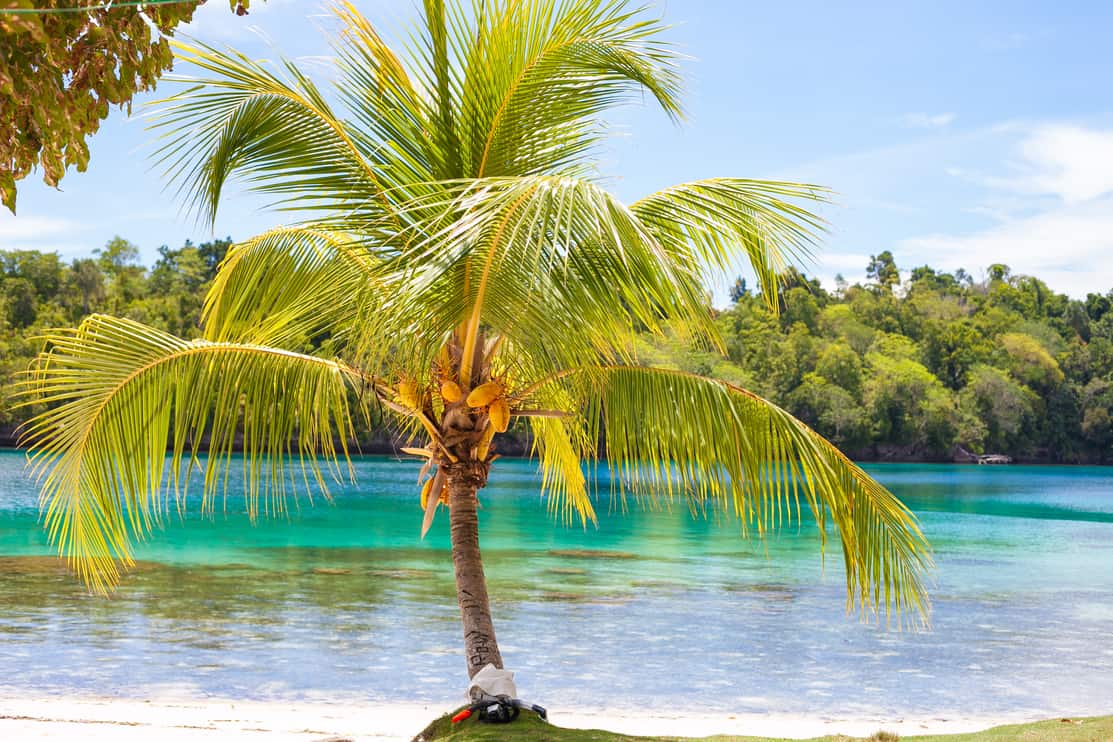
Photo Untouched Tropical Beach in Bali Island. Palm with fruits. Vertical Picture. Fishboat Blurred Background. Snorkeling Equipment

There are two varieties of coconut trees: tall and dwarf. The tall version of this tree is the one we are all most familiar with. According to the University of Florida, it can reach heights of 100 feet!

For a more in-depth look at the coconut tree’s potential height, check out our article about how tall coconut trees grow.

Because coconut palms often live near shorelines, the trunk is usually bending one way or the other due to the wind. In addition, the coconut palm is thicker at its base to better withstand the wind without being knocked over.

The leaves of a coconut palm tree are huge. They can grow up to 18 feet long. That’s almost as long as your average giraffe is tall! The leaves are arranged in a spiraling pattern, each containing leaflets that can extend up to 5 feet long.

How Do Coconuts Form On The Coconut Palm Tree?

If you’ve ever seen a coconut, it’s hard to imagine how something like that could grow on a tree. Coconuts are big, weighing in at about 3 pounds when fully mature. The enormous size of the coconut palm tree is the only thing that allows it to handle such heavy fruit.

Wait…fruit? Yes, coconuts are considered a fruit. And just to add to the confusion, they’re also considered a tree nut!

Coconuts form from a canoe-shaped flower pod. When the flower pods open, it contains both the male and female flowers on the same pod. The male flowers open first, and then the female flowers.

The flowers contain sweet nectar that attracts bees, which often travel between the male and female flowers. If the female flower gets pollinated, it will eventually turn into a coconut.

The entire process takes about 6 months before the coconut can be harvested for drinking. However, this is not a fully mature coconut. Those can take over a year, and will typically turn brown and fall to the ground on their own.

Coconut palm trees have a huge advantage over non-tropical trees – they produce fruit year-round. Every lunar cycle new flowers will emerge. As long as they are pollinated, new coconuts will form.

If you are looking at a coconut palm tree from below, you’ll be looking at the oldest coconuts. The new coconuts form in a spiraling pattern, similar to the leaves, and continue to spiral upward as they form.

Climate And Soil Requirements To Grow A Coconut Palm Tree

If you happen to live in one of the regions discussed below, you might be interested in growing a coconut palm tree yourself. Additionally, this will also clarify the common places where coconuts grow as well.

Without further ado, what exactly is needed to grow a coconut palm tree?

Temperature: The best temperature for germination happens around 95℉, however, according to Penn State University anywhere that has an average temp around 80℉ will do just fine. If the temperature drops below 72℉ while growing, growth could be stunted.

Soil: Coconut palm trees prefer soil that has a pH between 5.0 and 8.0. They can grow in just about any soil as long as it is well-draining. 

Sun: Coconut palms love the sun! They prefer full sun and do not grow well under shady conditions.

Timing: Since coconut palms grow in tropical regions, they can be planted at any time of the year. However, the warm and wet summer months tend to yield the best results. 

Rainfall: The amount of water a tree receives naturally is an important factor in where it can thrive. Coconut trees prefer areas with a little heavier rainfall, around 30-50 inches per year. 

For more information about watering your coconut tree, check out our article on watering requirements for your coconut tree.

Fertilizer: Coconut palm trees will thrive with a fertilizer like Miracle-Gro Shake ‘N Feed Palm Plant Food. It is rich in magnesium, iron, and manganese, which help palm trees grow quickly. According to a study published in the Journal of Soil Science and Plant Nutrition, boron is also a highly effective fertilizer.

9 Common Places That Coconuts Grow

Now that we know a little more about the amazing coconut palm tree, let’s check out where it grows!

Florida

Sunrise on the Smathers beach - Key West, Florida

Florida is one of only two states in the United States that can grow coconut palm trees. The other is Hawaii, but we’ll get to Hawaii later.

Coconut palm trees grow best in humid environments where the temperature averages around 80℉. They love the sun and prefer to grow on ocean shores since they are tolerant of salty conditions.

Sounds like Florida to me! 

Even though Florida has a lot of good stuff to offer coconut palm trees, only the southern tip of the state offers optimal growing conditions.

Natural coconut palms are rarely found inland because they evolved to disperse via the ocean currents. The only way you will find them inland is if a human carried the coconut seed and planted it. 

Needless to say, coconuts prefer to live on coastal shores. In Florida, you can find coconut palm trees on the east coast from Stuart down to Key West and on the west coast from Punta Gorda down to Key West.

Did you know that palm trees can grow in New Orleans? Typically however, coconut trees are not commonly grown there.

Hawaii

Honolulu, Hawaii. Waikiki beach and Honolulu's skyline.

Hawaii may be a part of the United States, but the islands have a very rich, deep-rooted culture that differs vastly from that of folks living in the contiguous states. 

The coconut palm tree is not native to Hawaii. It was first brought over by the original Polynesian settlers and thrived in the tropical climate.

Nowadays, coconut palm trees can be found on all 8 islands of Hawaii – Ni’ihau, Kaua’i, O’ahu, Moloka’i, Lana’i, Maui, Kaho’olawe, and Hawai’i. They can also be found on the uninhabited island of Kauo.

Many of the ancient coconut palm trees on the islands were planted at the request of kings or chiefs of the island to shade their royal fish ponds. Some ancient groves like the Kapuaiwa Coconut Grove are forbidden to walk through due to the dangers of falling coconuts!

Coconut trees provided early settlers with an abundance of material. They used every inch of the tree to make things like: 

  • Buttons
  • Rope
  • Musical Instruments
  • Brooms
  • Roofing Material

They also used the coconut tree for food such as coconut milk, meat, and oil.

Africa

View to historic city at the Goree island in Dakar, Senegal. It is small island near Dakar. It was was the largest slave trade center on the African coast. It is beautiful view.

Unless you have a deep understanding of geography, many of us think of Africa as a big desert interspersed with savannahs and jungles. We think of elephants, cheetahs, crocodiles, and gazelles. 

But Africa has much more to offer than deserts and savannahs. Surrounding the famous Congo River is the world’s second-largest rainforest. And, along its warmer coasts, you can find coconut palm trees.

Since the equator runs directly across Africa, it’s no surprise that coconut palm trees have flourished along the warm, tropical coasts of Africa. 

However, just like Hawaii, coconut palms are not native to Africa. 

They were brought by traders and colonists who often used coconuts as a means of fresh water on long voyages across the sea. Coconuts contain the most water when they are young and green. 

It’s possible that older coconuts were chucked overboard and floated until they reached the coasts. According to the University of Florida, coconuts can float for months before reaching shore and still be able to germinate into a tree.

In Africa, you can find coconut palm trees in the western and eastern coastal regions.

West Coast: You can find coconut palms from the west coast of Senegal down to the northern and central coastal regions of Angola. 

East Coast: Starting along the southern tip of Somalia, you can find coconut palm trees down to the northern regions of South Africa.

Why not the southern and northern coasts? 

Mostly because it is out of the coconut palm’s preferred comfort zone. They like to stick to the 25°N and 25°S latitudes, and the northern and southern coasts of Africa are a bit out of range. 

However, some coconut palms can be found in areas as far north as Egypt and Tunisia and as far south as the southern tip of South Africa. 

Asia

Palm tree shadow on tropical tranquil beach with powdery white sand, crystal clear blue ocean lagoon and palm trees in background. Vacation and lifestyle concept.

Asia is a huge continent but most of it cannot be inhabited by our beloved coconut palm tree. Any country above Pakistan and China is just too cold for the coconut tree to survive.

According to Duke University, despite this, Asia produces over 80% of the global coconut production.

The three largest producers of coconuts include:

  • Indonesia – #1
  • Philippines – #2
  • India – #3

But these aren’t the only regions in Asia that have coconut palm trees swaying in the wind and giving off those tropical vibes.

Sri Lanka is the world’s 4th largest producer of coconuts. Located just below India, this warm, humid island contains the perfect environment to make coconut palm trees happy.

You can also find coconut palm trees in southern Bangladesh, western and southern Myanmar, and along the coastal regions of Malaysia

On the eastern coast of Asia, coconut palm trees grow along the coasts of Vietnam and eastern China up to about Quanzhou. They also grow on the island of Taiwan.

Papua New Guinea

Port Douglas beach and ocean on sunny day, Queensland, Australia

Australia has a lot going on – scary spiders, scary snakes, scary sharks. Luckily, there is something that grows on the island of New Guinea that’s not so scary – coconuts!

Papua New Guinea is located north of Australia, and thriving with coconut trees.

Coconut palm trees grace the coasts of this entire island and can be found inland as well since Papua New Guinea is the 7th largest producer of coconuts in the world!

Located just below the equator, Papua New Guinea has all the right conditions for coconut trees – warmth all year round, humidity, and plenty of rainfall.

Mexico & Central America

Paradise Sunny beach with palms and turquoise sea. Summer vacation and tropical beach concept.

Mexico and the countries of Central America have optimal growing conditions for the coconut palm tree. Though both are located in North America, the countries of Central America contain a distinct regional difference in both culture and history.

Coconut palm trees are not native to Mexico or Central America. Don’t worry, we’ll get to where coconuts originated from later.

According to the Washington University in St. Louis, coconuts were probably brought to Mexico during the colonial period, when travelers from the Philippines brought them to the west coast of Mexico.

Jalisco, located on the west coast of Mexico, is one of the largest producers of coconuts in the country. Coconut trees can also be found on the east coast of Mexico, but are easier to find on the west coast.

The countries of Central America include Belize, Guatemala, El Salvador, Honduras, Nicaragua, Costa Rica, and Panama. 

Coconut palm trees can be found in all of Central America. The warm, humid, tropical climate provides the perfect habitat for coconut trees to thrive.

South America

The Cathedral of the Immaculate Conception in Cuenca in Ecuador

South America is well known for its production and distribution of coffee beans. What would we do without our morning cup of joe! But South America also produces a lot of coconuts from various countries.

You can find the tropical coconut palm tree along the northwestern, northern, and eastern coast of South America. Specifically, coconuts grow in the following countries:

  • Ecuador
  • Peru
  • Venezuela
  • Guyana
  • Suriname
  • French Guiana
  • Brazil
  • Columbia

The equator runs right through the top of the continent, making it the perfect climate for coconut palms. 

Although areas like Argentina and Uruguay have warm temperatures throughout the year, the average temperature in Argentina during the summer season is 75℉ and even colder in Uruguay at 65℉. These temperatures cannot sustain the coconut tree.

Europe

View of Santa Catalina beach and mountains with Tenerife island in the background, La Gomera island, Spain

It almost feels like cheating to include Europe. The continent is definitely too cold for coconut palm trees, right? Right?

Every part of Europe is too cold for coconut palm trees except the Canary Islands, which are a part of Spain but located closer to Africa.

The Canary Islands are located west of Africa, directly across from the border separating Morocco from Western Sahara. The islands are located a bit out of the coconut palm’s comfort zone, but you can still find them on the island.

Tenerife is probably the most well-known area of the Canary Islands for having coconut trees. The volcanic island provides coconut palms with coastal areas and many sunny days.

Where Did Coconut Trees Originally Come From?

Exotic tropical palm trees at summer, view from bottom up to the sky at sunny day

You may have noticed that for most of the areas mentioned above, we said that coconut palm trees were not native to the area. But we were suspiciously quiet about Asia…

A plant evolutionary biologist at Washington University in St. Louis took a look at the DNA from over a thousand coconuts collected all over the world. What he found was that there are two distinct coconut DNAs. 

One from the Pacific Ocean Basin and the other from the Indian Ocean Basin. This led to the conclusion that coconut palm trees probably originated in two regions: the Philippine islands and southern India/Sri Lanka. 

From those two regions, coconuts have spread to pretty much everywhere they can possibly grow, and for good reason.

The amount of things you can get from a single coconut is amazing:

  • Food
  • Potable Water
  • Rope
  • Charcoal
  • Flotation Device

That list might not seem as impressive nowadays with our advanced technology, but to pioneers, travelers, and native people, the coconut was a fruit of life. 

So, naturally, wherever people went they wanted to take this amazing fruit with them! That’s how the coconut spread from two single regions to pretty much everywhere spanning just above the Tropic of Cancer and just below the Tropic of Capricorn.

For a closer look at how coconuts spread from these two regions, you can check out the map from the DNA study mentioned above.

Do All Palm Trees Grow Coconuts?

If you’re cruising along somewhere in central or northern Florida, you may be wondering why there are no coconuts on the palm trees?

There are over 2,000 species of palm trees, but only one grows coconuts: the coconut palm tree. Other palm trees have different fruits that we are familiar with such as dates, acai berries, and peach palms.

If you live in a region where coconut trees can survive, or if you would like one indoors, you can purchase them online like Root 98 Warehouse’s Coconut Tree. If you live near coconut trees, you can also plant one simply by burying a viable coconut in the ground. In 3-6 months it will sprout into a whole new tree.

Did you know that you can even grow certain types of palm trees in New York? Unfortunately, you can’t grow a tropical coconut tree in the climate, however.

That’s A Wrap!

Tropical Indian village with coconut palm trees near the road and blue ocean in Varkala, Kerala, India

Coconut palm trees are found mostly between the latitudes of 25°N and 25°S. They prefer areas along the coast that are sunny, humid, and warm.

These amazing trees provided so much to early settlers and colonists who used the coconut for water, food, rope, and so much more.

Although the coconut tree originated in the Philippines and southern India and Sri Lanka, it has spread far and wide, covering every continent except Antarctica. 

Here are the 9 most common places that coconuts grow:

  • Florida – Southern tip
  • Hawaii
  • West- and East-coasts of Africa
  • Asia – Especially in the Philippines, Indonesia, and India
  • Papua New Guinea
  • Mexico – Especially in Jalisco
  • Central America
  • South America – Especially in Brazil
  • Europe – The Canary Islands only

If you’re looking for the world’s largest concentration of coconut palm trees, you’ll want to look at the Philippines, Indonesia, or India. 

But if you’d rather stay local in the United States, you can hit up any of the islands of Hawaii or the southern tip of Florida.

References

Ahmed, A., Ibrahim, A., & Hussein, S. (2019). Detection of Palm Tree Pests Using Thermal Imaging: A Review. Machine Learning Paradigms: Theory and Application, 801.

Ledo, A. d. S., Passos, E. E. M., Fontes, H. R., Ferreira, J. M. S., Talamini, V., & Vendrame, W. A. (2019). Advances in Coconut palm propagation. Propagation, 41(2).

Marina, A. M., Che Man, Y. B., & Amin, I. (2009, October). Virgin coconut oil: emerging functional food oil. Trends in Food Science & Technology, 20(10), 481-487.

Moura, J. Z., Prado, R. M., Benvindo, R. N., & Alencar, L. C. (2013, February 06). Applying boron to coconut palm plants: effects on the soil, on the plant nutritional status and on productivity boron to coconut palm trees. Journal of Soil Science and Plant Nutrition, 13(1).

Linden trees are gorgeous, pyramidal-shaped, sap-filled trees that have been cultivated for centuries for their wood and flowers. But linden trees are notably messy! Despite popular belief, linden trees aren’t responsible for their mess, can you guess what is?

Linden trees are so messy because of aphids! Linden flowers secrete a substance that attracts aphids, who then excrete a honeydew, leaving things covered and messy. There are a few trees you can grow in place of linden trees, such as Allegheny serviceberry, dogwood, river birch, magnolia, or redbud.

Keep reading to learn more about what trees you can plant instead of linden trees, and why lindens are so messy.

What Causes Linden Trees To Be So Messy?

Linden Tree Blossom

Linden trees are beautiful flowering trees that contain sweet sap that attracts insects of all sorts.

Linden trees are one of a bee’s favorite trees, but today we’re going to be talking about aphids. Aphids are actually what is responsible for making linden trees so messy. Aphids suck up sap from the tree and their excretion is what leaves the mess.

Once they ingest it, they excrete a liquid that’s rich in sugar, called honeydew, which coats the linden leaves. This honeydew is known to cover sidewalks, roads, and even cars, and becomes a nuisance very quickly.

Imagine spilling a sugary drink and not cleaning it up, you are left with a big, sticky mess. Well, that’s the result of these aphids!

As if that wasn’t enough, once honeydew appears, sooty mold comes in. This is a fungal disease that grows specifically on plants that are covered by honeydew. 

Sooty mold, however, doesn’t necessarily hurt the plant, but if it covers the entire plant surface, then sunlight can no longer penetrate it, which reduces the plant’s ability to grow.

If you decide to do any maintenance to your tree the Tanglefoot Tree Pruning Sealer is a great option to have on hand. It helps to minimize sap loss after pruning cuts or other tree injuries by creating a flexible and weatherproof seal. It also will help protect against insects and diseases when you have cuts on your tree.

We’ve got another article dedicated to messy trees, check out our piece on the 14 Dirtiest & Messiest Trees To Not Plant In Your Yard!

How Can I Clean Up My Linden Tree?

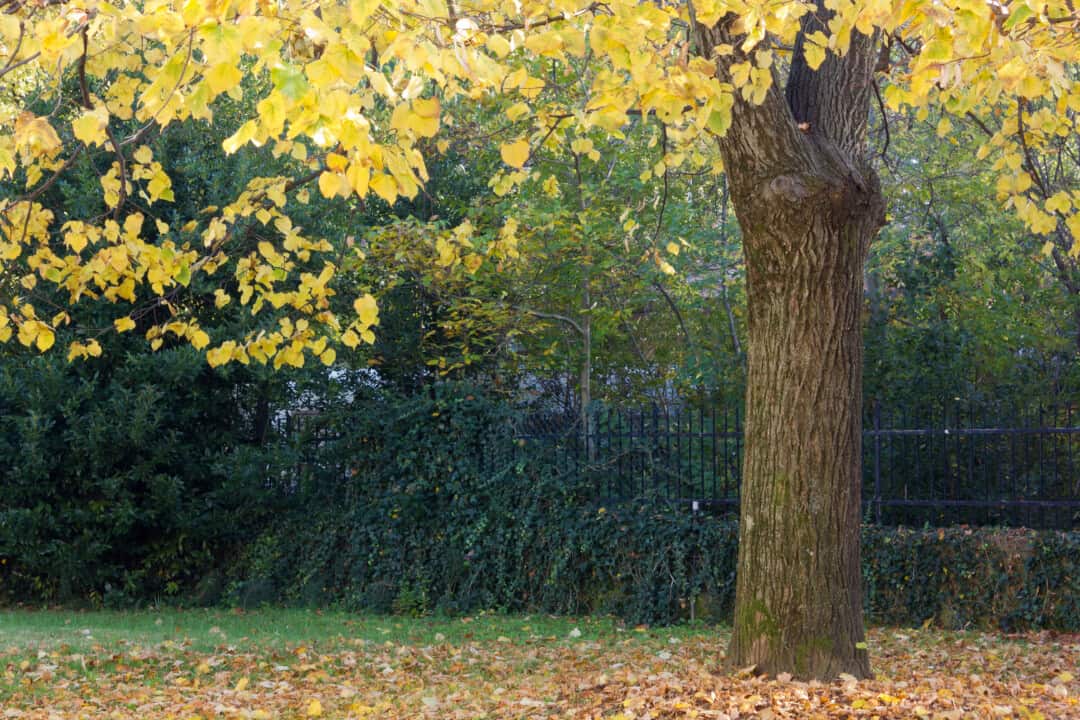
Under the linden tree in autumn in the garden

The first step in cleaning up your linden tree is to get rid of the aphids and any other honeydew-producing insects.

You might be asking yourself, how would you even do that in the first place?

Spray It With A Hose

There are two ways you can treat aphids, the first one is spraying down your tree with a hose. Using a hand sprayer from the hose, as often as possible will help get rid of aphids, making it difficult for them to come back to the tree.

If you want to use this method, the Flexi Hose with 8 Function Nozzle Expandable Garden Hose is a perfect choice. I love these hoses because they are lightweight, easy to use, and don’t kink!

Use An Insecticidal Soap

Second, you can use an insecticidal soap or horticultural oil, but with this method, aside from reading the label before applying, you’ll want to get a bee-friendly one. Bees are often very attracted to the sweet, fragrant flowers of the linden tree, and populations usually become decimated after feeding on linden trees that have been sprayed with insecticides.

You can use a product like Safer Brand 5118-6 Insect Soap Concentrate 16oz to control aphids. It’s an insecticidal soap that is made up of potassium salts of fatty acids, made from natural plant extracts, and will not persist in the environment.

Before using, make sure to read the label first! Additionally, because linden trees are pollinator-attractive plants, you’ll want to spray your tree in the very early morning or the evening, after pollinators are not active.

Use A Natural Aphid Control

Another product to try to control aphids is Trifecta’s Crop Control. This is a natural solution made up of essential oils, soap, isopropyl alcohol, and vinegar.

With a guarantee to work, you can have peace of mind when you use it. Another great thing about this product is that it is pet-friendly and food-grade, so bring on the sigh of relief!

This product is said to work on powdery mildew, spitter mites, russet mites, broad mites, botrytis, grey mold, aphids, fungal, and parasitic species. What a powerhouse! All you have to do is mix the solution with water and spray! But of course, always read the label before applying.

So if you have a linden tree in your yard and you don’t want to get rid of it anytime soon (we know how much it costs to remove a tree), these are some efficient methods you can use to keep honeydew-producing insects at bay.

6 Trees To Plant Instead Of Linden Trees

Linden Tree With Flowers Growing Around

If you are deciding on landscaping ideas and want a different type of tree, other than a linden, we’ve got some great options for any landscape. Here we’ve got a list of flowering trees that do well in the same zones as lindens and grow roughly to the same size.

Furthermore, some people get linden and basswood trees mixed up – so feel free to read up a bit more on their differences before diving deeper below.

1. Allegheny Serviceberry, Amelanchier laevis

The first tree on our list is the Allegheny serviceberry, which is a great option for smaller landscapes.

the Allegheny serviceberry reaches about 15-25 feet high and wide and does well in partial sun and partial shade. This is a great choice that does well in moist, and well-draining soils, similar to the linden.

This tree does well in USDA Hardiness Zones 4-8. Don’t worry if you don’t have moist, acidic, or well-draining soils, this tree is also tolerant of alkaline and clayey soils.

If you don’t want to sacrifice the beautiful showy flowers of the linden tree, well don’t worry! The serviceberry offers year-round interest with its fragrant, white flowers, and small, dark purple berries.

2. Flowering Dogwood, Cornus florida

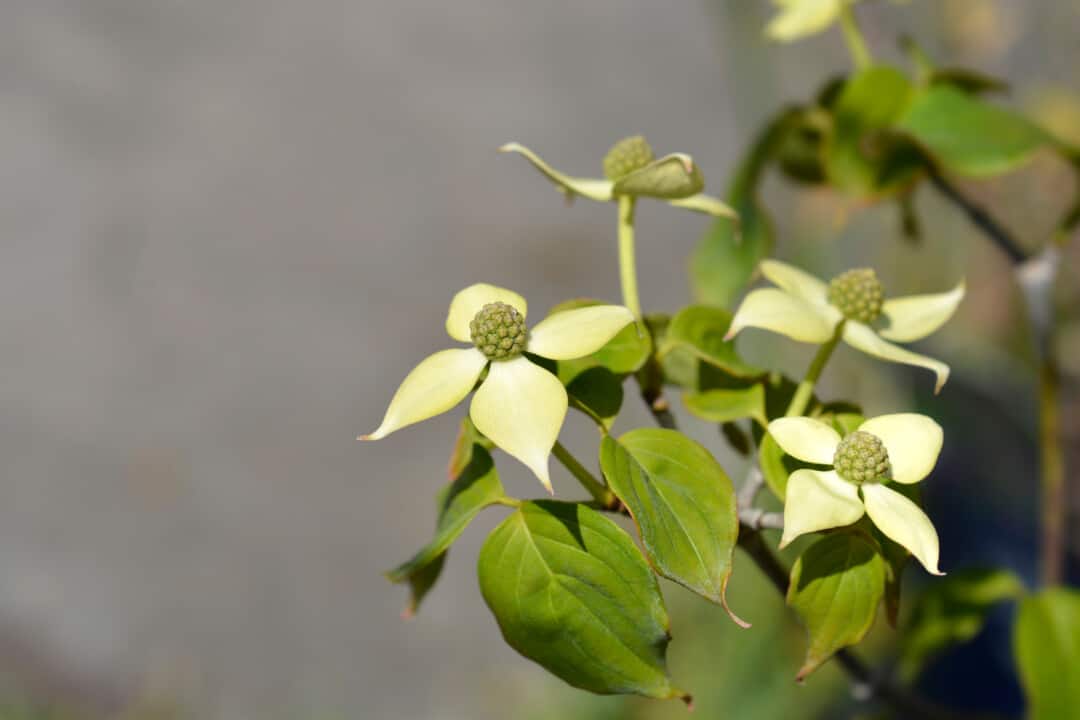
Flowering dogwood Teutonia - Latin name - Cornus kousa Teutonia

Dogwoods are another great choice for just about any landscape. The flowering dogwood is probably the most common, but the kousa dogwood is close behind. Today though, we’ll touch on the flowering dogwood. 

This is another great tree choice for most landscapes since they vary in height.

Smaller dogwood trees reach 15-25 feet tall and 20 feet wide, while medium dogwood trees reach anywhere from 25-40 feet tall and 20 feet wide. The flowering dogwood, like all of the trees we’ll cover, has similar requirements to the linden tree. 

The flowering dogwood does well in all light requirements, including full sun to full shade. This tree also grows well in acidic, moist, and well-draining soils. 

You can easily grow this tree in USDA Hardiness Zones 5-9. Don’t worry about flowers! Flowering dogwoods have bracts that act as their flowers, which are modified leaf clusters.

These bracts come in white, pink, and a beautiful red, and attract lots of birds, pollinators, and mammals. 

3. River Birch, Betula nigra

Next up on our list, we have the river birch! While this tree might not have the flowers you’re hoping for, it makes up with its beautiful bark. The river birch also offers year-round interest.

The river birch is a little larger than the previous trees we talked about. It grows anywhere between 25-40 feet tall and 20-30 feet wide. This tree is a powerhouse with what it tolerates, including acidic soils, well-draining, and even wet soils. It also tolerates clayey soils, occasional flooding, and wet areas. 

This tree has a fast growth rate so you can expect it to reach its full size in 15-20 years! This tree needs full sun and attracts songbirds, pollinators, and mammals. 

You may be interested in learning that not all birch trees have white bark – you can thank the paper birch tree for that!

4. Loebner’s Magnolia ‘Leonard Messel’, Magnolia x loebneri

The Loebner’s magnolia is an excellent hybrid magnolia to plant instead of a linden tree. It grows well in USDA Hardiness Zones 5-9 and grows anywhere from full sun to part shade. This magnolia hybrid grows best in moist and well-draining soils and is tolerant of acidic soils. 

If you’ve ever seen a regular magnolia tree, you probably remember its size and its flowers. Magnolia trees are known to grow to great heights, and we mean huge, like over 70 feet tall! They are also known for their beautiful, large, showy flowers.

What’s so great about this magnolia tree hybrid is its size. In contrast to the large magnolia, this magnolia hybrid is a small to medium-sized, compact, rounded tree that grows to a height and width of 20-30 feet. It also has beautiful showy and fragrant white and pink flowers. 

5. Redbud, Cercis canadensis

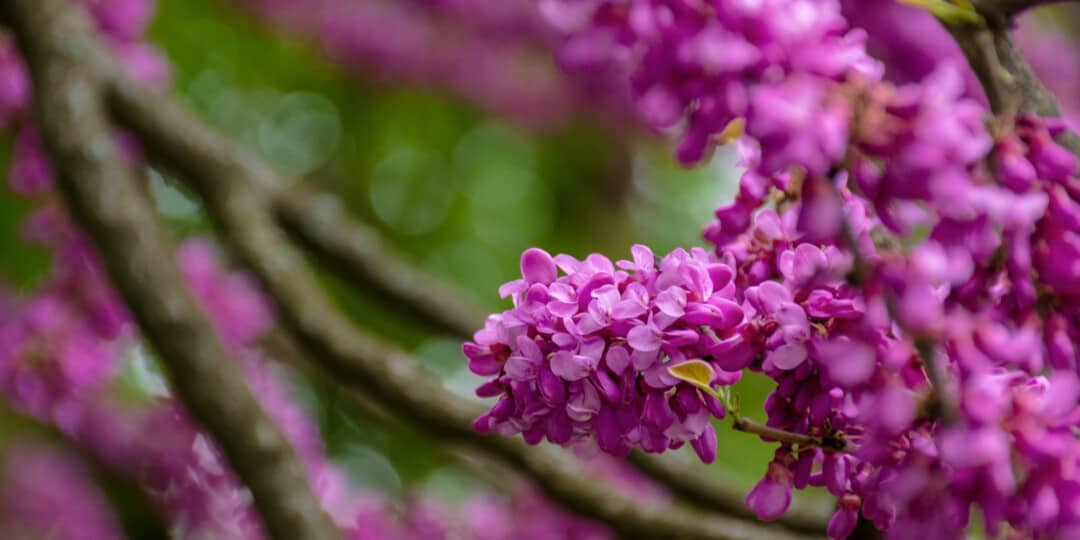
judas tree in blossom. purple flowers on the twigs. beautiful redbud background.

Ah, the redbud! These trees are serious show stoppers, especially in the early spring. Before the redbud’s leaves emerge, bright pink and purple flowers are seen in early spring against their dark brown bark, making this tree a showstopper for your yard. 

The redbud grows in USDA Hardiness Zones 4-9. It grows best in full sun, partial sun, and partial shade. Redbuds also do well in moist, well-draining soils, but can tolerate alkaline and clay soils.

This tree is a small to medium-sized tree, growing anywhere from 15-40 feet tall and wide, making it ideal for any small space.

That’s A Wrap!

That’s all we’ve got for you today on why linden trees are so messy. Let’s recap just why that is and what you can plant instead of a linden tree!

Linden trees are messy because of aphids! Linden flowers secrete a sap that aphids love. 

Once they suck up all that sap, they excrete what’s called honeydew, which leaves things covered in a sugary mess. 

Aphids aren’t the only honeydew-producing insect, but they are the most common culprit of why linden trees are so messy. 

There are two ways you can get rid of aphids, the first one is spraying down your tree with a hard spraying hose as often as you can. This will help get rid of aphids, by making it difficult for them to come back to the tree, and they most likely won’t.

The second is using insecticidal soap or horticultural oil to get rid of aphids. By using a spray as we mentioned above, you can have peace of mind treating your tree, knowing aphids won’t come back!

The last thing we covered was what to plant instead of linden trees if you’re thinking of adding to your landscape.

Some trees you can plant instead of linden trees are:

  • Allegheny Serviceberry, Amelanchier laevis
  • Flowering Dogwood, Cornus florida
  • River Birch, Betula nigra
  • Loebner’s Magnolia ‘Leonard Messel’, Magnolia x loebneri
  • Redbud, Cercis canadensis

Well, that’s all we have today on why linden trees are so messy and what you can plant instead.

Thanks for sticking around with us on your tree journey, and we wish you the best of luck on your Tree Journey!

References 

Braun, Mihály, Zita Margitai, Albert Tóth, and Martine Leermakers. “Environmental monitoring using linden tree leaves as natural traps of atmospheric deposition: A pilot study in Transilvania, Romania.” Landscape & Environment 1, no. 1 (2007): 24-35.

Dahlsten, D., A. Hajek, D. Clair, S. Dreistadt, D. Rowney, and V. Lewis. “Pest management in the urban forest.” California Agriculture 39, no. 1 (1985): 21-22.

Evert, R. F., W. Eschrich, J. T. Medler, and F. J. Alfieri. “Observations on penetration of linden branches by stylets of the aphid Longistigma caryae.” American Journal of Botany 55, no. 7 (1968): 860-874.

Koch, Hauke, and Philip C. Stevenson. “Do linden trees kill bees? Reviewing the causes of bee deaths on silver linden (Tilia tomentosa).” Biology letters 13, no. 9 (2017): 20170484.

Olkowski, W., H. Olkowski, and R. VanDen Bosch. “Linden aphid parasite establishment.” Environmental Entomology 11, no. 5 (1982): 1023-1025.

Growing citrus trees is a process with its own challenges. However, you can prevent a lot of them by maintaining and pruning your orange tree properly!

In general, it’s best to prune your orange tree either before the blossoms appear or before the fruit begins to show.

You will need to take off suckers, damaged branches, and branches that interfere with growth. Pruning your orange tree is not just for superficial purposes—it’s also crucial to keep it healthy.

If you’re not sure where to start, keep reading this simple guide to pruning orange trees!

Steps For Pruning Your Orange Tree

Why Do You Even Need To Prune Your Orange Tree?

When you prune your orange tree, you need to make sure you know how to do it properly. If you take off too many branches (or don’t take enough), the health of your orange tree will suffer.

While there are general guidelines to follow when pruning trees in general, citrus trees also have certain requirements that other trees don’t.

A lot of people prune their trees to keep them looking nice and from becoming a neighborhood burden. While pruning your orange tree will accomplish that, there are many other reasons it’s a necessary task.

Pruning Will Enhance Your Orange Tree’s Longevity

While it’s not the first thing that might come to mind, pruning your orange tree will actually help it live longer.

If you’re going to put forth the time and effort to even have a citrus tree in the first place, it’s essential to take care of your investment!

Another thing that will help prolong your orange tree’s longevity is making sure that you plant it in the best possible place.

Pruning Helps Manage Sunlight Distribution

Carefully selecting which branches to remove helps your tree receive light equally throughout. Otherwise, some branches might not ever see the sun!

Remember, plants use the sunlight that reaches their leaves to convert nutrients into usable food. Ensuring the leaves on your citrus tree get enough light helps your tree stay healthy.

Here’s a bit more detail on why orange trees need full sun if you’d like more info on that.

Prevent Problems In Your Orange Tree By Pruning

If you notice problematic branches, removing them allows the rest of your tree to continue
growing healthily. That may seem counterintuitive, but it’s true!

Otherwise, your tree will spend unnecessary energy trying to repair and send resources to these damaged branches!

Pruning Gives You Bigger, Better Fruit Harvests

You might think that removing branches from orange trees results in less fruit. However, the opposite is actually true.

By pruning extra branches, you give your orange tree the opportunity to spend its energy growing more oranges. Not only that, your orange tree produces bigger, better fruit.

In short, if you want to get more oranges, better quality fruit, and want to keep your tree growing a long, healthy life, you need to prune it.

But what’s the best way to do this?

A close up of three oranges on a leafy branch of a tree.

1. Choose The Right Time To Prune

If your tree is growing outdoors, you have a tighter timeline in which to prune your orange tree. This will also depend on where you live, and the climate in your area.

The short answer is you should prune your orange tree between February and April.

The more accurate answer is that orange trees in cool climates are best pruned when the weather starts to warm around the end of February, or even late March. If you live in a hotter climate, you can often start pruning earlier if the weather is right.

If you really have to prune in winter, only take off small branches. However, it really depends on your specific orange tree.

You can choose between two options: prune just after you see fruit beginning to appear or prior to seeing blooms on your tree.

For a deeper dive into timing, check out our full article on the absolute best time to prune large trees.

2. Get The Right Pruning Supplies

Once the time is right, you need to make sure you have the right supplies on hand. Most
gardeners have at least one set of pruning shears on.

However, to properly prune your orange tree, you should have a few different tools.

(Remember, you’ll be trimming branches of various sizes, and the shears you use for your rose bush can’t hope to take on a thick tree branch.)

You will need:

  • Hand shears (for smaller branches under 1” thick)
  • Pole pruning shears (these are necessary to remove branches higher in the canopy)
  • Pruning saw (for use when removing much larger, thicker branches)
  • Loppers (these are for moderately thick branches that need more force to remove)
  • Safety glasses (you might not see this on every supply list, but they are crucial to
    keeping flying wood shards off the most sensitive parts of your face

While it may sound like a large investment, high-quality tools can last you throughout the lifespan of your tree (and are equally useful throughout your garden).

3. Clean Your Tools

Even if you purchase brand-new tools to prune orange trees, it’s still important to give them a good clean before you start.

Sure, you might think they’re clean because you don’t see any gunk or dirt on them. Unfortunately, microbes and other small pests can linger and go unnoticed.

If you do see some build-up on your shears, carefully wipe it off with a damp cloth, and dry
thoroughly. To sterilize your shears, isopropyl alcohol is the tried and true solution to use.

If you need further proof, the University of Florida touts this as the recommended method to sterilize gardening tools.

Note: While alcohol is useful for sterilizing gardening tools, it’s important to keep your tools well lubricated and treated to avoid rust. This not only keeps your pruning shears in good shape, but it also helps them smoothly slice through branches (preventing unnecessary damage to your tree).

It’s also a good idea to use clean protective gloves before you prune orange trees. This serves two purposes. First, it protects your hands from splinters, flying debris, and other accidents.

Second, it also helps prevent the potential spread of bacteria or pests to your tree. (This means, don’t use the same gloves you used for weeding last week to prune your orange tree today).

4. Assess Your Tree’s Pruning Needs

This is the part where a lot of gardeners struggle, and for good reason.

Now, there are some circumstances where you’ll know that certain branches need to be pruned off. For example, if you see a broken branch, you need to remove it before it causes further issues.

Or, if the tree is struggling to support the weight of a certain branch (and it is, therefore, likely to splinter or break in the future), pruning it can prevent damage before it happens.

In other cases, you may notice a sickly-looking branch. Again, that’s a branch that needs to go before it spreads damage to the rest of the tree.

Don’t Be A “Sucker”

Another part of your tree that needs tending? Suckers.

Because most orange trees (and citrus trees in general) are grafted from another plant (the rootstock), they often develop suckers, which are branches that often grow from the lower parts of the main stem of a tree.

It’s important to remove these as soon as you see them, lest they take essential resources from the main tree.

Remove branches that cross into the space of other main branches. Not only are these extra branches taking up sunlight from productive branches, but they can also run against or damage otherwise healthy branches!

Of course, there are also different steps you’ll take when pruning mature orange trees, versus pruning sapling orange trees.

Pruning A Mature Tree

Mature trees don’t often need pruning. In fact, pruning your mature orange try should be more of a rarity than a regular practice.

However, if you notice problematic branches or suckers, you still need to prune them to maintain your tree’s health.

It’s important to inspect your orange tree, even if it isn’t currently producing fruit.

Even if your tree is fully grown, you’ll still need to water it correctly. For a detailed guide on how, read our article on how often you should actually water an orange tree.

Pruning Saplings And Nursery Trees

These young citrus trees are where you really need to focus more on shaping and pruning.

The younger the tree, the less incidence of scarring and permanent damage from pruning and making large cuts.

When you prune a young orange tree, you’re removing extra, unnecessary branches that stray from the main branch of the bulk of the canopy. This is also a crucial time to inspect your tree and thin out weaker or sickly-looking branches.

There are a few other pruning tasks you’ll need to put on your checklist for a juvenile orange tree.

If you’re getting your orange tree from a nursery, this next part may, in fact, already be done for you. If not, you’re going to need to cut back the branches significantly. (Yes, it sounds harsh, but it’s best for the overall longevity of orange trees!)

Try to cut the branches as close to one-half and one foot as possible. Next is a guideline most new orange tree growers really struggle with. Cut off the first fruits.

You’re surely thinking, “but aren’t the oranges the reason I’m growing this tree?” And, of course, they are. However, if your young tree is focused on producing fruit, it’s spending its limited resources on creating a few oranges, rather than on vegetative growth.

Vegetative growth is the stage before plants begin flowering, fruiting, and reproductive stages. If any plant does not have enough vegetative growth, it ultimately won’t be able to produce as good of a harvest as a plant that has had time to fully develop through the vegetative stage.

Two hands wearing yellow gardening gloves use small pruners to prune a small branch from a young tree or shrub with smooth bark.

5. Start Removing Branches!

Once your gear is ready and you’ve inspected your tree for areas that need maintenance, it’s time to get down to the real work: removing branches from your orange tree.

Before you get started, there are a few things you need to know. We’re going to discuss not only the different types and widths of branches you remove but also the tools you need to handle each.

There are a few categories of branches, according to diameter, that you need to consider.

Small Branches

We will consider branches that are thinner than one inch (about two and a half centimeters) in diameter to be “little”.

These can typically undergo pruning with a set of sharp, well-maintained, hand shears.

Medium Branches

Once stems and branches are thicker (up to a few inches in diameter) long-handled shears, often called loppers, are the tool to use.

Loppers often have larger blades, and the elongated handle makes it easier to gain the leverage you need to cut through woody growth.

Large Branches

To remove even larger branches, you will likely need to use a pruning saw. You can choose different lengths and shapes to best suit the needs of the branches you need to remove.

If you don’t feel comfortable using a pruning saw or climbing high on a ladder, remember that there is no shame in hiring an arborist!

6. Get Rid Of Suckers And Small Branches

You will want to start pruning the branches of your orange tree in an orderly manner. To keep track of where you are in the pruning process, many people choose to work from smallest to largest.

We will also follow the steps of pruning from the smallest branches to the largest. We will begin with the suckers.

Suckers are small shoots of growth that often appear near the base of your tree. Because many citrus trees are cultivated through grafting, it’s very common to see suckers on your orange tree.

Remove suckers as soon as you notice them. You can usually use a small pair of hand shears to snip them off near the base. If you allow them to grow, they often end up taking away nutrients from the rest of the orange tree.

When pruning a young tree, you will also remove smaller branches to help shape the tree.
However, when dealing with an older tree, removing smaller branches, especially those that emerge from larger branches, keeps your tree’s resources going to the most important parts.

7. Remove Larger Branches

There are multiple reasons to remove larger branches. One major reason is to keep other
branches and limbs healthy. As branches grow, they tend to damage, rub against, or even steal sunlight and other resources from the other branches.

Removing medium to large branches from the lower parts of the main trunk is often done to keep the orange tree looking good. In mature trees, these branches often don’t come back after pruning.

As you move to prune the canopy, you won’t often cut off an entire branch. The only
reason you would do this is the case of significant damage or illness.

Canopy branches can be harder to reach (and are often more established branches) so you’ll need to use your tools for big branches (many of these may be too big even for loppers, so a pruning saw or a pole saw may be necessary).

Special Considerations For Cutting Large Branches

If you’re pruning the canopy for maintenance, you only need to remove the last third of the branch. This keeps the shape of your tree intact and often frees up enough space to prevent issues with other canopy branches.

However, if you’re removing a branch that causes a lot of issues because it’s too overgrown,
you can remove the entire branch. You simply won’t have that branch available to produce fruit in the next growing season.

If you do need to remove the entire branch, make your cut just at the collar of the branch.

What is the collar? It’s simply the spot where the branch raises out from the main stem. The
reason to cut here is to encourage better healing and prevent issues that can result from
making drastic cuts.

8. Remove Damaged Or Dying Orange Tree Branches

When you remove damaged or diseased branches from your orange tree, you’re likely to be getting rid of larger branches. So you can keep the same tools at hand. Removing large,
damaged branches is a bit different than removing big branches to maintain the canopy.

You’ll also cut the branch differently. Rather than removing the outer third of the branch, you’ll take off the entire thing. And, rather than cutting the branch at the collar, you’ll remove the branch flush with the collar.

Basically, you’re cutting the entire branch off, and from the origin. When you cut off the branch, you should be able to see healthy wood from the main trunk or stem on the other side of your cut.

Because this is a very drastic cut, you may need to cover the remaining area with protective tree paint to allow your orange tree time to heal and prevent infection. You can also use a spray like the Tanglefoot Tree Pruning Sealer for convenience.

9. Remove Orange Fruit

There are two different instances in which you’ll remove the fruit: thinning out and harvesting.

Harvests can happen all at once, or a couple of times throughout the season, depending on the maturity of your oranges.

Don’t rely on color alone to determine when to pick an orange. Oranges are rarely the same perfect shade of orange you might imagine. Not only that, but different varieties of orange trees also produce fruits that have different coloring.

If you know how large your oranges should grow, you can use that as one indicator. Another way to tell if your oranges are ripe is by smell. Ripe oranges have a sweet smell that you can pick up as you walk around your tree.

It’s easy to make the mistake of thinking there’s one specific month in which you’ll harvest. Just as different varieties of oranges produce different fruit, they also have different timelines for a typical harvest.

For example, Valencia oranges may be ready in March, while Clementines are often ready around October. When your oranges are ready, you can easily pull the fruit from the tree by hand.

Of course, for fruits higher in the canopy, you may need a ladder or a tool like the Achort Fruit Picker Tool to help you grab oranges from the high branches.

A cluster of small ripe oranges at the end of a tree branch full of green leaves.

Thinning Out Fruit Can Bring A Better Harvest

Thinning out oranges is just as important as pruning if you want a bountiful harvest. Those that are new to growing orange trees may find themselves aghast at the thought of removing fruit before it goes to harvest.

However, by sacrificing a few fruits early on, you do get a better harvest later.

Too many underdeveloped fruits put strain on the branches (which can also lead to damage). Not only that, but when you thin out fruit, you allow your tree the resources it needs to grow better oranges this season.

Simply remove some of the oranges when you notice them beginning to grow, and target those on branches if they seem to sag with too much weight. In the next growing season, you’ll notice a higher yield and better quality oranges.

The one exception to this rule is when you grow orange trees in containers. If growing orange trees indoors, only remove fruit as needed, and when ready to harvest.

If you’re thinking of growing a tree indoors, first read up with our article on the 7 easiest fruits to grow indoors.

Bonus: How To Prune An Orange Hedge!

Not all oranges come from the typical orange tree often we think of. While still technically orange trees, they can be grown as hedges!

Essentially, it comes down to selective shaping and pruning. You can prune your orange hedge in much the same way you prune an orange tree. However, you also use some of the techniques you do for pruning hedges.

With orange hedges, the goal is to allow sunlight to reach as many parts of the plant as possible. Keep branches near the bottom longer, and decrease their length as you near the top. This allows lower branches to continue receiving enough light to keep growing quality fruit.

We have all the info on the most common places where orange trees grow. Is your home located in one of these places?

Pruning Orange Trees—It Really Is That Simple

If you correctly prune orange trees, as we’ve shown in this guide, you can look forward to a tree with many good harvests to come. Remember, always use the right safety gear and clean tools. Then, just follow the simple steps above and enjoy your orange tree for all the years to come.

References

Burns, R. M., Boswell, S. B., & Atkin, D. R. (1970). Influences of skirt pruning on orange tree
yield. Citrograph, 55, 413-14.

Kallsen, C. E. (2005). Topping and manual pruning effects on the production of commercially valuable fruit in a midseason Navel Orange variety. HortTechnology, 15(2), 335-341.

Kumar, E. V., Srivenkataramana, T., & Sundararaj, N. (1985). Branch sampling for estimating
the number of fruit on a tree. Journal of the American Society for Horticultural Science, 110(3), 451-454.

Popular for its symmetrical shape and beautiful blue needles, the Colorado Blue Spruce lives up to its name as it displays a vibrant blue hue among the forests of their native region in the Rocky Mountains. For decades, lovers of this spruce have searched for ways to speed up the growth to harness this same beauty to display in their own yards.

Tending to the basic everyday needs of your blue spruce is the best way to encourage faster growth. At least one inch of water per week, six hours of full sunlight per day, and shallow soil acidic in nature are the simplest ways to send your blue spruce towering towards the sky.

Simply said, there is no secret serum to make your blue spruce grow faster. There are, however, simple tips and tricks to ensure that your blue spruce is reaching its fullest potential!

How Long Does It Actually Take For A Blue Spruce To Grow?

Small Blue Spruce Sapling Ready to be Planted

From seed to sapling, the growth of the blue spruce is slow. It’s actually one of the slowest starting conifers in the ground, but not the slowest growing. As the blue spruce starts to mature, the growth starts to accelerate. 

On average, a blue spruce grows at a slow to medium rate inching upwards at 12 to 24 inches per year.

At this rate, the blue spruce requires 5 to 10 years to reach just 10 feet, usually maxing out around 60 feet in just 30 to 60 years.

In the forest, the blue spruce can grow as tall as 75 to 100 feet thriving in the rocky, mountainous terrain. Old-growth spruce forests are home to spruce trees ranging from 200-600 years old.

It is important to note that there are a few different varieties of the blue spruce, and some are genetically grown to max out at smaller heights. If your blue spruce seems to have maxed out on height, it is possible that you have one of the other types of blue spruce trees growing in your yard, such as the Fat Albert Spruce!

For the spruce in your yard, the growth and age also tend to be slower and younger because of the environment around it. It’s no secret that the Colorado Blue Spruce grows best in the mountains of Colorado! 

It may even take close to 20 years for the spruce tree in your yard to start bearing cones.

So, how exactly can you make your blue spruce grow faster? 

Growth Requirements and Growth Rates For Blue Spruce

Types of Blue SprucesWater RequirementLight RequirementSoil PreferenceGrowth RateAverage Annual GrowthMature Height in Landscape
Colorado Blue Spruce (Picea pungens)Moist, drainedFull Sun6.8-7.2Medium12 to 24 inches30 to 60 feet
Lucretia Colorado Spruce (Picea pungens ‘Lucretia’)Moist, drainedFull Sun5.5-7.1Slow2 to 3 inches 2 to 6 feet
Weeping Colorado Spruce (Picea pungens ‘Pendula’)Moist, drainedFull sun5.1-7.3Medium12 or more inches30 to 60 feet
Fat Albert Colorado Spruce (Picea pungens ‘Fat Albert’)Moist, drainedFull sun5.5-7.1Medium12 or more inches10 to 15 feet

If the blue spruce in your yard has been growing for decades and still hasn’t reached its mature height, follow this chart and post religiously to ensure your blue spruce is properly taken care of.

This chart will help your blue spruce grow beyond its years when followed from seed to sapling and from sapling to tree!

Ways To Make Your Blue Spruce Grow Faster

Close Up Of Bright Blue Spruce Branches

To make your blue spruce grow faster, it is important to plant your spruce in the proper place – an open area at least 20 feet from any structure with full sun exposure and in well-drained acidic soil, preferably in a place with regular rainfall.

If your spruce is properly planted, receiving enough sunlight and water, and still needs a little boost, fertilizing, mulching, and pruning are a few other ways to accelerate the growth of your blue spruce.

It is also important to note that sudden temperature changes can stunt the growth of your blue spruce, so depending on the area you live in, greatly depends on the speed your blue spruce grows. Mulching can help eliminate this problem!

If you think that the climate you live in is not optimal for blue spruce, don’t be discouraged. There are still ways to grow this little piece of the mountains around your home. 

Studies have shown that starting your blue spruce in a container and exceeding their daily needs while they’re young can greatly influence their rate of growth and health once you plant them in the ground. The nursery you pick your blue spruce from is important!

OR you can continue to container-grow your blue spruce and make it your next Christmas tree!

But even if your blue spruce is already growing in your yard, you’ll still find all of the simple tips you need to speed up the growth of your blue spruce below!

1. Lots of Sunlight Will Help Your Blue Spruce Grow Faster

Foggy Spruce Forest With Sunlight Shining Through The Canopy

Spruce trees love sunlight. If there’s only one simple tip to take away from this entire post, it would be this one right here. Well, I mean, the rest of them are important too.

Blue spruce trees require at least six hours of sunlight per day. They’d be happy if they had sunlight all day long, and they would even grow faster.

Like most plants green and growing, the blue spruce uses the energy from the sun as its own external energy source. Without enough energy, your spruce will simply grow slower. But that’s obvious, right? Proper energy and nutrition are necessary to keep your body and your blue spruce growing.

Although they can tolerate some shade, the blue spruce needs full sun to reach its top growth potential.

Bright sunlight even allows the colors of your blue spruce to develop more vibrantly.

If the canopy of other trees around your home is not allowing your blue spruce to receive full sun for at least half the day, it is time to consider thinning the trees around your spruce.

2. Water Your Blue Spruce Often To Speed Up Growth

Watering your blue spruce regularly is also an important factor in speeding up the growth of your tree. A typical blue spruce requires at least one inch of water per week but thrives with moist soil that penetrates and remains moist at least two inches down.

The soil beneath your blue spruce should be well-drained and allow even moisture throughout.

Blue spruce will not do well in standing water, so be sure to plant your blue spruce in an area that is not prone to flooding.

A climate with an average annual rainfall of 18 to 24 inches per year is adequate for fast-growing spruce. Blue spruce trees are more drought tolerant than any other spruce, but still prefer their fair share of water to grow at their best.

Promote the growth of your blue spruce by watering it in times of drought… even if it does have some drought resistance.

In their natural habitat, you’ll find that blue spruce trees grow along streams and river banks near the valleys of the Rocky Mountains. This is because the blue spruce requires constant water to tower upwards at faster rates.

3. Mulch Around Your Blue Spruce To Promote Faster Growth

In areas common to drought, or even as an extra safety net to promote faster growth, consider mulching around the base of your blue spruce.

It is recommended that you mulch your blue spruce directly after planting to help your tree become established and further its growth later on.

By applying two to four inches of mulch around your blue spruce, you allow the moisture to retain and reach the root of your tree. Mulching around your spruce tree will also promote overall soil health and nutrition. 

Mulch also reduces the growth of weeds around your spruce tree which will absorb nutrients and water from your blue spruce, slowing its growth.

Simply said, applying mulch at the base of your blue spruce will help it grow faster.

4. Test Your Soil To Ensure Your Blue Spruce Can Properly Grow

Also found in the Rocky Mountain terrain, home to the Colorado Blue Spruce, is rocky, acidic soil. To help your blue spruce grow properly, and faster, it is important that the soil beneath your tree is acidic.

For any blue spruce, the soil pH should range anywhere from 5.1-7.8 sliding between acidic and neutral. Find a happy medium between those numbers to speed up the growth of your blue spruce.

A happy tree is a fast-growing tree!

If you’re unsure what the soil is like beneath your spruce tree, you can easily test your own at home! This Digital Soil pH Meter by BioLogic makes testing your soil at home quick and simple!

Simply place the meter in the soil near your spruce tree and wait for the numbers to appear. If they fall between 5.1 and 7.8, the soil for your blue spruce is perfect.

However, if the numbers do not fall between them, it is time to amend the soil around your blue spruce. You can add compost, coffee grounds, or fertilizer to your soil to increase its acidity. After fixing the soil, you’ll watch your blue spruce grow faster!

If you already know that your soil is acidic and your blue spruce still isn’t growing to its fullest potential, it is possible that your blue spruce is planted too deep in the soil.

The Utah State University Cooperative Extension found that 80% of struggling spruce trees submitted were diagnosed with environmental stress due to deep planting or drought stress.

A spruce tree develops well when planted shallowly, allowing the roots to travel easily through rocky terrains. Even when planted in your yard, it is important to not plant them deeply in the soil to allow them to mimic their natural habitat.

The best way to produce any healthy houseplant, tree, or shrub, is to mimic nature to the best of your ability.

Your blue spruce tree will grow faster if you cater to its simplest needs and resemble its rocky nature whenever possible.

5. Fertilizing Your Blue Spruce Will Help It Grow Faster

If your green thumb is the most vibrant it can be, and you’re still looking to help your blue spruce grow faster, perhaps it’s time to spread some fertilizer around your spruce tree.

Fertilizing your blue spruce can be simple! Simply add compost beneath your blue spruce and as it gradually amends the soil, your blue spruce will gradually adapt to a faster growth rate.

I have found that the best fertilizer outside of compost is Espoma Organic Evergreen-Tone which is an all-natural fertilizer that supports acidity and promotes overall growth. This fertilizer contains the minerals and bacteria necessary to keep your spruce thriving!

This fertilizer is easy and ready to use! It is recommended that you feed twice a year in the early spring and late fall.

It is important to note that your blue spruce must already be established (beyond its sapling years) to produce the best results.

6. Prune Lightly To Encourage Blue Spruce Growth

Pruning A Blue Spruce Tree

Often overlooked, pruning is essential to promote proper growth.

The blue spruce is naturally symmetric, which is often what its beauty is known for, but it still requires some light pruning to create beautiful, dense foliage.

If your blue spruce was properly planted – at least 20 feet from structures, far from other trees, and placed for full sunlight, then it requires very little pruning.

Your blue spruce, however, will respond well to light pruning allowing the foliage to become denser. Pruning the tips of older trees (not young ones!) will inspire growth from lateral branches.

Pruning young trees can stunt the overall growth, so let your sapling be!

It is possible that the most pruning your blue spruce will ever need is simply removing the broken or dead branches. This is actually super important.

By removing dead or broken branches, your blue spruce is able to place its energy elsewhere, such as in its growth instead of expelling energy on useless branches.

Not only will the aesthetic and airflow of your blue spruce improve, but so will its growth.

There are many small things that your blue spruce can be placing its energy into that is unnecessary and stopping your tree from growing faster.

Technically, you can follow 6 simple steps to keep your blue spruce small, if you prefer it that way.

7. Check Your Blue Spruce Often To Remove Pests

More often than not, if your blue spruce is not looking its usual blue color or growing as fast as you’d like, it is possible that your blue spruce is being invaded. Bagworms and spider mites are common pests that slow the growth of your tree.

If you find any bagworms (brown cocoon-like bags hanging off the branches), remove them by hand immediately. Once they hatch in June, it’s game over if there are too many of them.

Usually, signs of pests are signs of environmental stress. Underwatering, soil compaction, competition, root damage, and other outside factors can be the underlying factor of these new invaders.

It is important that you check your blue spruce often for any signs of pests, stress, and damage to ensure proper growth. Catching and solving the problem at the root will prove to be more effective over time.

Freeing your blue spruce from these annoyances is just another simple trick to speeding up the growth of your spruce tree.

8. Avoid Transplanting Your Blue Spruce To Speed Up Growth

When planting your blue spruce, it is important that you choose an adequate spot from the start. Plan and prepare, weighing out your options and locations before ever planting your tree.

Although blue spruce trees are relatively easy to transplant because of their shallow roots, they do not respond well to transplanting sometimes even years after.

It is highly recommended that you amend the soil and environment around your blue spruce before weighing the option to transplant it.

However, if you absolutely must transplant your blue spruce to kickstart its growth journey, it is best to transplant it in late winter or early spring. If you transplant your blue spruce in the summer, the needles will turn brown, and the tree will not survive.

Also, transplanting your blue spruce while the young shoots are showing signs of growth will damage the development of your blue spruce overall.

Honestly, there are more cons than pros when deciding whether or not you should transplant your blue spruce. If you’re looking for it to grow faster, transplanting is not the answer.

Wrapping Up!

Remember, a happy tree is a fast-growing tree! If you’re looking to send your blue spruce soaring, be sure to cover their basic needs and then some.

One of the benefits of blue spruces is that they are incredibly good at telling you when they are happy or not. For instance, if your spruce is turning red, or is starting to have droopy needles, you know it is time to help it out!

The time you put into caring for your blue spruce will be in direct proportion to its growth journey. Grandma was right when she said talking to the plants helps them grow faster – a little extra love and care go a long way!

These are the most simple tips to make your blue spruce grow faster:

  • Your blue spruce needs 6 hours of sunlight per day, allowing them to grow in full sunlight will make them grow faster.
  • Provide at least one inch of water per week, two is best!
  • Apply two to four inches of mulch around your blue spruce.
  • Test your soil and be sure it falls between 5.1-7.8 pH.
  • Fertilize your blue spruce twice a year!
  • Lightly prune your blue spruce, ensuring there are no broken branches in sight.
  • Check your blue spruce often for pests and signs of stress.
  • Avoid transplanting your blue spruce; amend the soil instead!

And just remember that growth takes time! 

References

Bongarten, B. C., & Hanover, J. W. (1985). Accelerating seedling growth through photoperiod extension for genetic testing: a case study with blue spruce (Picea pungens). Forest science, 31(3), 631-643.

Erhart, E., & Hartl, W. (2003). Mulching with compost improves growth of blue spruce in Christmas tree plantations. European Journal of Soil Biology, 39(3), 149-156.

Hanover, J. W. (1975). Genetics of blue spruce (Vol. 28). Forest Service, US Department of Agriculture.

Tinus, R. W. (1974, August). Characteristics of seedlings with high survival potential. In Proc, North American Containerized Forest Tree Seedling Symposium. Publ (Vol. 68, p. 276â).

Wenny, D. L. (1990). Spruce Seedlings.

Young, E., & Hanover, J. W. (1978). Effects of temperature, nutrient, and moisture stresses on dormancy of blue spruce seedlings under continuous light. Forest Science, 24(4), 458-467.

Do you want a unique indoor tree? Are you also incredibly impatient? Don’t fret! We’ve got just the list for you.

Some of the fastest-growing indoor trees include the fiddle leaf fig, rubber tree, yucca tree, money tree, and bird of paradise. Some of these trees require a daily misting to increase humidity, while others love for their soil to dry out completely. Any of these trees would be a great choice!

Keep reading to explore the world of fast-growing indoor trees!

What Are The Most Common Indoor Tree Varieties?

The most common fast-growing indoor tree varieties include:

  • Fiddle leaf fig
  • Rubber tree
  • Yucca tree
  • Majesty palm
  • Kumquat
  • Umbrella tree
  • Money tree
  • Bamboo
  • Bird of paradise

Fiddle Leaf Fig

Surprisingly, the fiddle leaf fig is in the mulberry family. It comes from west Africa and, in the wild, grows in tropical rainforests. In their native habitat, fiddle leaf figs can reach 50 feet tall!

They get their name because their leaves look like fiddles. They have a thick texture with prominent veins.

Fiddle leaf figs are used ornamentally in tropical and subtropical gardens, but can also be grown indoors in more temperate climates. 

Fiddle leaf figs are, well, finicky! If you’re working on your green thumb, this is a tree that requires a lot of careful attention and intuition.

Ficus lyrata tree in a pot stands on a wooden floor

What Does A Fiddle Leaf Fig Need To Thrive?

Fiddle leaf figs need well-lit locations. Under the right conditions, they can grow to be incredibly large, up to 10 feet indoors! 

But if they’re grown incorrectly they’ll become leggy, have a dull color, and just generally look unhappy. If you don’t have a bright room where they can thrive, you may want to rethink this particular tree. 

Likewise, fiddle leaf figs aren’t fans of drafts. So even if you place them by a sunny window- old, poorly-insulated windows can ruin the plan.

Be sure to use porous soil with a pH between 5.5 and 7.0. This range promotes the best nutrient uptake and availability for the fiddle leaf fig.

You can propagate fiddle leaf figs via division, air layering, or stem cuttings.

Rubber Tree

The rubber tree originates from the Amazon basin, although now lives in the wild pantropically. Rubber trees are vital to the economy because their leaves’ extract produces natural rubber.

Rubber trees can reach up to 140 feet in the wild, but are of course much smaller in indoor cultivation.

Rubber plants are known for their beautiful, multicolor leaves that almost appear to be painted. Colors vary from dark green to deep purple to cream. Rubber trees are great plants for beginners and thrive in many conditions.

Rubber Plant, Rubber fig, Ficus elastica at the cloth store

What Will Help A Rubber Tree Grow Best?

They can grow up to over 10 feet tall indoors, but you can also prune them if you want a smaller tree.

Rubber plants do best with bright light, but will tolerate low light as well.

Water thoroughly, but let the soil dry out between waterings. The pot must have good drainage. Empty extra water out of the saucer after watering.

Fertilize often with a houseplant fertilizer in the spring and summer- as often as every two weeks! If your plant is receiving less light, don’t fertilize quite as often.

It’s not a bad idea to support your rubber tree with a stake.

Yucca Tree

Yucca is actually a genus of plants with almost 50 species and (to be exact) 24 subspecies! 

They cover a very large portion of the Americas, from Mexico to Guatemala to California and the southwest. You can even find yuccas as far north as southern Canada!

Not only that, but they’re also native to the coastlands of the southeast.

Yucca trees are impossible to mistake due to their leaves that readily resemble swords. While some yucca have leaves reaching up to 2 feet long, larger yucca can have 4-foot-long leaves! 

yucca tree

What Conditions Does A Yucca Tree Need?

Yuccas do okay with low humidity and temperatures, but they need a lot of light when grown indoors.

Potting mix needs to be strong enough to support their canes but light enough to be full of aeration. An example is a 3:1 mixture of peat:sand. Yucca trees do best with pH levels between 5.5 and 6.5.

Yucca Moths

According to a study found in Ecological Entomology of the Royal Entomological Society, yuccas have a very interesting relationship with their pollinators. They are specifically pollinated by “yucca moths”.

Yucca moths bring pollen from the stamen of one yucca to the stigma of another yucca. Meanwhile, they lay an egg in the flower. 

Next, the moth eats some of the seeds but leaves enough for the yucca to continue its lifecycle.

Interestingly, some yucca moths have turned the tables and evolved to continue to use the yucca’s flowers as protection…without pollinating in return!

Majesty Palm

The majesty palm is native to Madagascar and can grow to be almost 100 feet in the wild. (Are you sensing a theme here? Even though these plants grow enormous outdoors, they can be kept in a smaller size in your home!)

Although the majesty palm is becoming harder and harder to come by in its natural habitat, it is widely grown as an indoor tree where it can reach just a tenth of its potential size.

The majesty palm is one of the harder palms to grow indoors, as it requires humidity, lots of light, and regular moisture. This plant is not exactly beginner-friendly, to say the least!

Two decorative vases on wooden table and Majesty Palm in sunlight - cozy home scene

What Does A Majesty Palm Need?

To successfully grow a majesty palm indoors you need a bright corner, lots of water, and minimal fertilizer. 

Majesty palms like soils as acidic as 5.0. According to the University of Agriculture Faisalabad, majesty palms do best in typical potting mixes combined with peat. Good drainage is mandatory!

The lower leaves of your palm will drop if the soil dries out too much between waterings.

If you live somewhere where the humidity drops in the winter, consider getting a humidifier and misting your plant every day.

Funnily enough, cacti fertilizer mixes work well for majesty palms. We’ve had a lot of luck with the Espoma Organic Cactus! Plant Food.

Kumquat

Kumquats are native to tropical regions where they’re used to heat, high humidity, and slightly acidic soil.

Because of this, they need a minimum of six hours of direct sunlight, although they do best with up to 10 hours. 

Put your kumquat tree by the brightest window in your home and rotate it every week so all the leaves get the same amount of sunlight. Don’t be afraid to bring your plant outdoors during the summer so it gets all the sun it needs!

To get your kumquat tree to branch, prune above leaf nodes. This is a general rule of thumb for most plants!

Be ready to hand-pollinate your trees in lieu of bees and butterflies. Be very careful and gentle, using a paintbrush, makeup brush, or q-tip.

tree with many orange fruits calle kumquat similar to clementines but smaller and very sweet to eat

What Does A Kumquat Need To Succeed?

If you don’t have enough natural light through a window, supplemental artificial light may be required. Your grow light should be about a foot above your tree and left on for 12 hours each day. 

The Yadoker LED Growing Light for Indoor Plants is a good grow light that lots of people use for citrus trees! 

Surprisingly, kumquats have a wide range of temperature tolerance, with anything from 55 to 85 degrees F being sufficient. Avoid having air conditioners or heaters blow directly onto your tree to avoid temperature fluctuation. Likewise, be wary of drafty windows.

Kumquats like moist (but not wet or soggy) soil. When your soil has dried out two inches below the surface, that’s a good indicator that your tree needs to be watered again. A citrus-specific fertilizer is your best bet.

Umbrella Tree

The umbrella tree is native to Taiwanese forests and can reach up to 30 feet in height outdoors. It usually maxes out at around 10 feet indoors. 

You can also get dwarf umbrella trees that are well-loved among bonsai enthusiasts.

Umbrella plants enjoy bright and indirect light, although in medium/low light they just tend to grow more slowly and can get to be quite leggy. 

Schefflera background. Variagated leaves with whitish-yellow pattern. Umbrella tree or octopus tree closeup. Lush foliage of schefflera actinophylla. Subtropical and tropical flora

What Does My Umbrella Tree Need To Thrive?

While humidity doesn’t affect their growth much, dry air makes umbrella plants more susceptible to spider mites and scale.

Umbrella trees do best growing in a mix of potting soil and a lot of peat moss. They need good drainage and should be repotted every couple of years during the springtime months.

Water deeply when the soil dries out, and then let it dry out again before another watering. They can withstand dry spells more than they can withstand wet soil. Be sure to empty the saucer after you water!

Depending on how large your umbrella tree grows, it may benefit from being staked.

Money Tree

The money tree got its name from an interesting tale. A poor man prayed to have more money. He found an interesting-looking plant, took it home, and eventually became rich by selling the plants that he grew from its seeds!

The money tree can grow up to 60 feet in the wild. It’s native to Central and South America where it traditionally can be found in swamps. 

Its species name, P. aquatica, means “aquatic” in Latin.

Money trees grow well as ornamental plants in tropical regions. They need bright light but suffer in direct sunlight, as the leaves burn quite easily. Rotate your money tree on occasion so that all leaves are provided equal amounts of light.

You can often find money trees for sale that have braided trunks, a tradition that can be traced back to the mid-1980s in Taiwan.

Although we’re talking about the fastest-growing indoor trees, it’s worth noting that, according to Penn State’s Urbane Jungle blog, the money tree can be as small as 20 cm tall when trained as a bonsai. 

Pachira aquatica, llamada popularmente castaño de Guayana, ​ es una especie arbórea de la familia Bombaceae. Es nativa del norte de Sudamérica y América Central

What Does A Money Tree Need In Order To Grow Best?

Money trees actually thrive in dry soil, although they don’t like dry air and should be misted every day. Potting mix designed for succulents and cacti will suffice, made of peat moss, river sand, and vermiculite. 

These porous, aerating materials let water pass quickly and easily through the growing medium and also prevent root rot.

Large money trees require repotting every couple of years to avoid becoming rootbound as their roots grow in size to support the quickly-growing tree.

Feel free to prune your money tree with sharp shears in order to shape it to your liking, and you can keep braiding the stems of your tree until they eventually become too stiff to do so.

Who knows, maybe growing a money tree will bring some good fortune your way!

Bamboo

There are 7,000-year-old scriptures recounting the usage of bamboo in books, construction, and more. This is an important plant! Sometimes it is even used to make paper!

While technically not a tree, we’re including it on this list because it’s commonly grown and used in the same ways that trees are. It’s also one of the most rapidly growing plants in the entire world!

Some species in the wild can grow as quickly as 1 ½ inches every hour, according to Guinness World Records!

Bamboo is believed to have originated in China and, through evolution, transformed from prehistoric grasses into the bamboo we know and love today. 

Bamboo needs the greenest of thumbs to thrive indoors, but it’s certainly possible with enough know-how, patience, and attention to detail.

Green bamboo plant in a pot on a white chair. Small plants in a vase to decorate the house and office building. Space for text

How Can I Keep Bamboo Alive Indoors?

Bamboo needs a lot of moisture, so misting daily is a must. This is extra important when winter heat units dry the air out further. Humidifiers aren’t a bad idea either!

Ideally, bamboo would get indirect, bright natural light all day long. A couple of hours of direct sun will do wonders. More sun equals faster growth!

Bamboo needs impeccable drainage so that the soil dries out quickly and has good aeration. You should also place gravel at the bottom of the pot as a precautionary measure to fully avoid the soil from coming into contact with potential water that pools up in the saucer.

Your bamboo soil should never be soggy after watering. Let the top couple of inches dry out before you water it again. But the soil a few inches down should be slightly moist all the time.

Open windows are good for bamboo to increase airflow.

A 14-14-14 slow-release fertilizer is perfect for growing bamboo indoors.

Bird of Paradise

Can you guess how the bird of paradise got its name? It has stunning flowers that look so similar to birds that you have to do a double-take!

According to the University of Wisconsin-Madison, the bird of paradise is a vital source of nectar for birds in the wild. The bird of paradise is native to South Africa, although it has been naturalized in tropical areas around the world such as Florida and Hawaii.

A fun fact is that the bird of paradise is the official flower of Los Angeles!

Upon first glance, the bird of paradise tree resembles a banana tree when not in bloom. But a trained eye can tell the difference. Even when not in bloom, these trees provide a tropical atmosphere that is perfect for certain interior designs.

An important thing to keep in mind is that bird of paradise seedlings and pups will take multiple years before flowering, and even then, they need the perfect conditions to produce blooms. So don’t be afraid to buy a full-sized bird of paradise that’s already in bloom!

Tropical flower strelitzia or bird of paradise on Madeira Island, Portugal.

How Do I Take Care Of A Bird Of Paradise?

The bird of paradise does best with well-draining soil that’s rich in humus (organic matter). Be sure to maintain its root ball at the top of your soil because planting too deeply can prevent future blooms.

Interestingly enough, the bird of paradise is actually more inclined to bloom when it’s potbound because it hates when its roots are disturbed.

Fastest Growing Indoor Trees Ranked: Complete Growth Chart

TreeAnnual GrowthLifespanFull HeightBest Place To Grow
Fiddle leaf fig2′25-50 years10′Well-lit, away from drafty windows
Rubber tree2′100 years6-10′Bright or low light
Yucca tree2′20 years1-30′Wide area for large leaves, well-lit
Majesty palm1′10 years3-5′Well-lit, humid
Kumquat2′50 years10′Bright window or under artificial lights, away from air conditioners or heaters
Umbrella tree1′25 years8-10′Bright, indirect light with some humidity
Money tree2′10-15 years8′Bright, indirect light, humid
Bamboo3′10 years5-8′Bright, indirect light, humid
Bird of paradise2′50-150 years6′Bright, indirect light

Which Indoor Tree Should I Grow In My Home?

Let’s talk about different reasons you may want an indoor tree, and which tree best fits the occasion!

To Be A Statement Piece

The bird of paradise is easily the best statement piece out of all the trees discussed.

The bright-colored petals truly look like tropical birds, bringing a piece of paradise into your living room.

You’ll feel like you’re in the middle of a tropical rainforest with its large, banana-shaped leaves and exotic flowers!

For A Lazy Gardener

Rubber trees are great for lazy gardeners or for people whose thumbs are…well…not so green.

They’re tolerant of a wide variety of conditions such as high or low light levels, and can even grow up to 10 feet tall with little upkeep!

Although this isn’t completely a plant-it-and-forget-about-it tree, as you should fertilize it every 2 weeks during the growing season for best results, it doesn’t have intensive water needs and is hard to mess up.

As A Challenge

Kumquats require a little more upkeep than some of the other trees we’ve discussed, but the challenge is well worth it.

They need up to 10 hours of bright light (or supplemental lighting), need to be rotated frequently, can’t be by air conditioners or heaters, and even need to be hand pollinated!

That being said, growing your own kumquats indoors is an incredibly rewarding journey that you won’t regret!

Giving As A Gift

The money tree is easily the best tree to give as a gift.

Along with a little note about the tale behind the money tree’s reputation, this thoughtful gift is great for anyone in your life who’s a little superstitious.

If the person you’re gifting to is incredibly logical, however, they may enjoy bamboo more. The fact that bamboo is essentially prehistoric grass is sure to grab any intellectual’s attention, so be sure to let them know!

To Feel Tropical

A lot of the trees we’ve talked about will provide a tropical atmosphere to any room. Majesty palms, kumquats, and birds of paradise are all great options if you’re looking to bring some of the tropics indoors.

Truth be told, none of these trees are great for beginners (unless they’re very stubborn, determined, and educated). 

A good workaround solution to this dilemma is buying a tree that’s already very established so that you’re off to a good start before you even begin!

Common Indoor Tree Pests

Let’s take a look at some common indoor tree pests.

Aphids

One common indoor tree pest is aphids. Aphids may be reaching your plants by:

  • Catching a ride on other plants
  • A preexisting infestation
  • Excessive nitrogen
  • Clinging to your clothing
  • Entering through a window
  • It’s their favorite time of year

Some ways to get rid of aphids include:

  • Removing aphids from leaves
  • Treating your tree with extracts or chemicals
  • Using sticky traps
  • Checking your trees frequently
  • Isolating infested plants
  • Spray with oils as a preventative measure
  • Use low-nitrogen fertilizers
  • Only opening windows that have screens
  • Changing your clothes after working outdoors

Pill Bugs

What we call “pill bugs” are what you likely called “roly-polies” as a kid playing outdoors. They’re nocturnal isopods that originate from Europe and have become invasive worldwide.

To remove pill bugs from your potted plants:

  • Wait them out
  • Dry them out
  • Change the soil
  • Use a potato trap
  • Increase the heat near your tree
  • Use a dehumidifier 
  • Use a fan

Scale

Scale is common on leafy trees, unfortunate for us indoor tree lovers. 

Here are some things that we can learn about scale:

  • It loves to spread to other plants
  • Scale infestations spread when they’ve finished with one plant
  • They spread by crawling or attaching to old pots that you might use again

To avoid the spread of scale, you can:

  • Isolate infested plants
  • Treat and prune infected plants
  • Wash old pots before use
  • Inspect old soil before you use it again
  • Avoid insecticides

Leaf Beetle

The Lily Leaf Beetle is an invasive insect originating from Europe that can devastate gardens and houseplants.

To get rid of leaf beetle larvae:

  • Remove eggs by hand
  • Spray them off in the shower or with a hose
  • Use castile soap
  • Use dish soap
  • Use neem oil
  • Use a sticky trap in your potting soil

That’s A Wrap!

The fastest-growing indoor trees are:

  • Fiddle leaf fig
  • Rubber tree
  • Yucca tree
  • Majesty palm
  • Kumquat
  • Umbrella tree
  • Money tree
  • Bamboo
  • Bird of paradise

Many, but not all, of these trees grow in tropical environments. 

Nearly all of them enjoy bright, indirect light.

If you would rather grow a tree that produces fruit, make sure to try one of the easiest fruit trees that grow indoors (and where to put them!)

References

Lesniewicz, P. (2021). Indoor Bonsai. Cassell.

Gawrońska, H., & Bakera, B. (2015). Phytoremediation of particulate matter from indoor air by Chlorophytum comosum L. plants. Air Quality, Atmosphere & Health8(3), 265-272.

Pine trees are a common tree associated with the holidays and winter, but these handsome plants provide interest all year long with different-colored barks, pine cones, and needles. It’s always exciting to plant a new tree, but it can be frustrating waiting for it to grow.

The fastest-growing pine trees include Loblolly, Canary Island, Eastern White, and Jack Pine. These grow 2 feet or more per year. A few more quick-growing pines include Austrian, Scotch, Lodgepole, Ponderosa, Mondell, and Japanese Black pine, all of which grow between 1 and 2 feet per year.

Below, we’ll go over which pine trees grow the fastest, where they grow, and what kind of conditions they need to reach their full potential.

What Are Pine Trees?

Pine trees are often confused with other evergreen trees such as hemlock, fir, and spruce. It’s understandable and can be difficult to tell them apart. I remember as a kid I called everything with needles a pine tree! 

A few distinct characteristics separate pine trees from other evergreen trees:

  • Needles: Pine tree needles grow in clusters whereas other evergreens like spruce and fir have single needles attached to the branches.
  • Cones: Pine cones are usually more rigid than cones from other evergreens. The scales are hard and rough, while other evergreen cones are smooth and flexible.

These are the two significant differences between pine trees and other evergreens, with the needles being the easiest to identify. 

Pine trees are part of the conifer group and are evergreen, meaning they do not shed their leaves each fall like deciduous trees. 

In general, you will find more pine trees in the northern hemisphere than in the southern. They are very tolerant of the cold as well as high elevations.

The growth rate and height of pine trees vary considerably with each species. The good news is, we’re here to debunk which pine trees grow the fastest and which one is the best for your yard!

Which Pine Trees Will Grow The Fastest In My Yard?

Picking out a new tree for the yard can be an exciting time. It’s not so exciting waiting for them to grow. Whether you’re looking for a statement piece, a way to make your yard more private, or to enjoy the birds and squirrels in your new tree, pine trees are a great choice. 

Below, we’ll check out some of the fastest-growing pine trees. No matter where you live or what kind of conditions you have in your yard, there is a pine tree that’s right for you!

Austrian Pine

Austrian pines start out as cute Christmas-tree-shaped trees and as they grow older they spread out and fill in to make a fantastic landscape tree. As the name suggests, Austrian pines are not native to the United States.

You can expect your Austrian pine tree to survive almost anything nature throws. It is very tolerant of urban conditions, soil type, drought, and water level. That being said, Austrian pines prefer sandy and loamy soil over clay when possible.

Pinus cembra coniferous trees
  • Sun: Austrian pines prefer full sun.
  • Hardiness Zone: 3b – 7. Austrian pines prefer cooler climates such as eastern Oregon across to New York and even up into parts of Vermont, New Hampshire, and Maine.
  • Maintenance: Austrian pines are tolerant of a variety of conditions, making them relatively low maintenance. They can withstand dry conditions as well as slightly moist conditions.
  • Height: 50-60 feet.
  • Width: 20-40 feet.
  • Growth Rate: Austrian pines have a moderate growth rate, typically growing 1-2 feet per year.

If you want a dense, full-looking tree in your yard, Austrian pine is a good choice. These are best planted in yards where the tree can receive full sun and have plenty of space to become the talking piece of your yard!

If you end up having trouble growing your Austrian pine tree, you can read about why it isn’t growing here.

Scotch Pine

Scotch Pine is another non-native pine that looks beautiful in the yard. Its orange bark makes it even more attractive during the drab months of winter. Scotch Pine does best in well-draining soil such as sandy soils.

Like Austrian pines, Scotch pines start out pyramidal in shape but spread out as they age and have a flatter top at full maturity. Scotch pines are not very tolerant of heat, drought, or flooding.

Is a species of pine that is native to Eurasia, ranging from Western Europe to Eastern Siberia, south to the Caucasus Mountains and Anatolia, and north to well inside the Arctic Circle in Scandinavia.
  • Sun: Full sun
  • Hardiness Zone: Scotch pine thrives in zones 3a-7, growing best in the same states as the Austrian pine, though Scotch pine can travel a little further north.
  • Maintenance: When grown under the right conditions, Scotch pines are low maintenance. However, they can be trouble if planted in areas that receive drought or flooding.
  • Height: According to Iowa State University, Scotch Pines can grow between 30 and 60 feet.
  • Width: 20 to 40 feet
  • Growth Rate: 1 to 2 feet per year.

Scotch pines are a good choice for the yard if you can grow them under their ideal conditions. These lovely pine trees are great as ornamental trees for the yard but aren’t the best for privacy as the branches will thin as the tree ages. Scotch pine comes in a dwarf variety that can be good for gardens or small urban yards.

If you live in an area with porcupines, they will come from all over to munch on your scotch pine. To protect your tree when it is young, consider using a tree guard like UGarden Plant and Tree Guard to keep deer, porcupines, and other troublesome critters from destroying your prized pine tree.

Loblolly Pine

Also known as Bull Pine and Oldfield Pine, the Loblolly Pine has a very straight trunk with an overall oval shape at maturity. These massive trees differ from most pines as they prefer poorly-drained soils.

Loblolly pines prefer warmer climates and do not do well in areas with cold winters. If you’re looking for a fast-growing pine, this is it! According to North Carolina State University, Loblolly pines are the fastest-growing pine species.

Loblolly pine (Pinus taeda). Called Bull Pine and Old-field Pine also. Pollen cones
  • Sun: Like most pines, Loblollies prefer full sun.
  • Hardiness Zone: 6b through 9a. This includes areas from around North Carolina down to northern Florida and across to northern Arizona.
  • Maintenance: Low
  • Height: 60-90 feet
  • Width: 20-40 feet
  • Growth Rate: Loblolly pines grow fast, typically greater than 2 feet per year.

Loblolly pines are used more for timber than for landscaping, but if you want the fastest-growing pine, loblolly is the way to go! Just be sure to plant this tree away from your home if you live in areas that are commonly plagued with wildfires.

Since loblolly pines are more accustomed to southern climates, they may have problems with nutrient deficiencies. According to an article in the Southern Journal of Applied Forestry, most southern soils have Nitrogen (N) and Phosphorous (P) deficiencies. 

In this case, consider using a fertilizer such as Scotts Evergreen Flowering Tree & Shrub Continuous Release Plant Food. This will help keep your loblolly healthy and growing!

Lodgepole Pine

Lodgepole pines are one of the most adaptive pine trees on our list. They do just fine in water-logged soil as they do in dry conditions. These pines are tall and slender, making them great ornamental trees but a poor choice for a privacy barrier between you and your neighbor.

If you live in an area with wildfires, just know that lodgepole pines are not fire-tolerant. Otherwise, these trees can be planted on rocky slopes just as readily as in coastal regions.

Canary Island pines Pinus canariensis and full moon at dawn. Alsandara. Natural Reserve of Inagua. Tejeda. Gran Canaria. Canary Islands. Spain.
  • Sun: Full sun
  • Hardiness Zone: 4 to 8. You’ll find more lodgepole pines in the western half of the United States than in the eastern. They’re common in such states as Colorado, Utah, California, Oregon, and Washington.
  • Maintenance: Low
  • Height: There are a few different varieties of lodgepole pine, with the tallest able to reach 100 feet (Sierra) and the shortest growing to only 5 feet tall (Mendocino White Plains).
  • Width: 20 feet (Sierra).
  • Growth Rate: Lodgepole pines grow at a moderate rate, usually between 12 – 24 inches per year.

Lodgepole pines are a good choice for a yard if you’re looking to fill in space or if you want a large, long-lived ornamental tree. They can grow in a wide range of conditions but tend to flourish in the West.

Ponderosa Pine

Also known as the Western Yellow pine, Ponderosa pines are very drought-tolerant and are found more heavily on the western side of the United States. In addition to dry conditions, Ponderosa pine is also fire-resistant due to its thick bark.

Ponderosa pines are tall and upright, similar to lodgepole pines, but slightly wider at the top. They self-prune themselves so that when they are mature they rarely have branches at the bottom.

Sunlight though a ponderosa pine forest, Pinus ponderosa, in Wawona. Early morning light in Yosemite National Park, California, USA
  • Sun: Full sun.
  • Hardiness zone: 3 through 7. The most common states where Ponderosa Pines grow include as far east as Nebraska and Oklahoma to as far west as the Pacific Coast in California, Washington, and Oregon.
  • Maintenance: Low
  • Height: According to the University of California, Ponderosa pines usually reach mature heights of around 90-130 feet
  • Width: 25-30 feet
  • Growth rate: Moderate, growing between 12-24” per year.

Ponderosa pines are best grown in a yard where they will be the only tree in the area or else grown at the same time with other Ponderosa pines. They will not grow well in shade, so make sure to plant them in full sun away from other trees that might shade them.

Canary Island Pine

A lot of times pine trees are associated with cold weather, but not all pine trees are found in the cold regions of the United States. Canary Island pines are an excellent choice if you’re looking for a pine tree and live in a warmer climate!

As the name suggests, these trees are native to the Canary Islands of Spain. There’s not a lot to dislike about this tree. It has attractive bark, large pine cones, and an overall cone shape at maturity that makes a great statement piece in your yard.

Canary Island pines Pinus canariensis and full moon at dawn. Alsandara. Natural Reserve of Inagua. Tejeda. Gran Canaria. Canary Islands. Spain.
  • Sun: Canary Island pines can withstand partial shade, but they grow best in full sun.
  • Hardiness Zone: 9 through 10. This warm-loving pine thrives in climates such as Florida, Louisiana, Texas, southern Arizona, and along the Pacific coast.
  • Maintenance: Canary Island pines are tolerant of a variety of soil pH and textures as well as salt. It is also drought-tolerant, making it a very low-maintenance tree.
  • Height: 50 to 80 feet.
  • Width: 20 to 35 feet.
  • Growth Rate: Considered fast-growing, Canary Island pines usually grow 2 or more feet per year.

If you have enough space, Canary Island pines are a great choice for the yard even if you live in a drier climate. These pines aren’t a good choice for small urban yards.

Eastern White Pine

The Eastern White Pine is a US native, originating in the northeast and Canada. It makes an excellent landscape tree and can be used as a border when planted with other White Pines or as a single tree.

Sandy, well-drained soils are preferred, but the Eastern White Pine can survive in a variety of soil conditions as long as the soil is slightly acidic. This tree is not very tolerant of urban or coastal conditions.

Eastern white pine - Latin name - Pinus strobus
  • Sun: Full Sun
  • Hardiness Zone: 3a to 8a which includes much of the United States except for the extreme south, extreme north, and the Pacific coast.
  • Maintenance: Like most pines, Eastern White pine is low maintenance.
  • Height: 50-80 feet.
  • Width: 20-40 feet.
  • Growth Rate: According to North Carolina State University, the Eastern White Pine has a rapid growth rate, meaning 2 or more feet per year.

Even if you don’t have enough room for a full-size white pine, some varieties can fit in small yards and even containers. This is an excellent ornamental tree and should be grown in the yard where it can receive full sun.

Jack Pine

If you can’t seem to grow anything in your yard, you may have luck with a Jack Pine. These trees can grow on the poorest of soils and can withstand drought and extreme cold.

That is, as long as you’re willing to put up with a scraggly-looking landscape tree. Jack Pines have long, spreading branches that create an open crown. If you’ve ever seen a Christmas Tree after a cat’s climbed through it, then you have an idea of what a Jack Pine looks like!

Despite this, they are very hardy and easy to grow.

Pine cones on the green pine branch. Close up.
  • Sun: Full sun
  • Hardiness Zone: According to Iowa State University, Jack Pines thrive in hardiness zones 3 through 7 which include most of the United States except the extreme south and the warmer parts of the Pacific Coast states.
  • Maintenance: Low. Jack Pines can survive in almost any condition.
  • Height: 30 to 50 feet.
  • Width: 10 to 18 feet.
  • Growth Rate: Jack Pines have a rapid growth rate, meaning 2 or more feet per year.

Jack Pines may not be the most attractive pine tree, but they are great to plant in yards located on poor, dry soil. 

Mondell Pine

On the opposite side of the spectrum from Jack Pine, Mondell Pines are quite attractive and have an upright appearance throughout their lifetime. It has dense branches, making it a great tree to use as a privacy border or as a grand ornamental tree in the yard by itself.

Mondell Pines are another tree that is more suited to warmer climates. It is drought resistant and does well in hot, arid conditions. It can thrive in a variety of soil conditions from sand to clay and anything in between. Mondell Pines also have little preference for soil pH.

  • Sun: Mondell Pines prefer full sun, but they can still survive in partial shade. If grown in partial shade, don’t expect them to grow as fast as those planted in full sun.
  • Hardiness Zone: 6a to 8b, including much of the southern United States such as Texas, Oklahoma, Arkansas, Louisiana, Alabama, Tennessee, and North and South Carolina. It can also thrive in parts of the Northeast and a few places in the far west.
  • Maintenance: Low
  • Height: According to the University of Florida, Mondell Pines usually reach around 30-40 feet.
  • Width: 25-30 feet.
  • Growth Rate: Medium, usually growing between 12-24 inches per year.

Like most pines, Mondell pines are low maintenance and easy to grow when given the right conditions. This is a good choice for your yard if you have the space to grow it or want to create a natural privacy fence as Mondell Pines have thick branches that can be used as screens.

Japanese Black Pine

Many of the pine trees on our list so far are large and unsuited for small yards. That’s where the Japanese Black Pine comes in! This tree can be used as a bonsai tree or planted in a garden or small yard.

The Japanese Black Pine is known for its interesting look. It does not have a centralized trunk but rather grows with spreading branches. This handsome tree will not be conical or pyramid-shaped like most pines, but rather has a flat-top appearance.

Pinus thunbergii or Japanese black pine (Kuromatsu) On an islet near Kinkaku-ji (Golden Pavilion) temple. Autumn colors and Fall foliage in the background. Kyoto, Japan
  • Sun: Full sun
  • Hardiness Zone: 5b – 8a. This makes it a good fit for most states in a central belt across the U.S. such as from central Pennsylvania down to North Carolina and across to Kansas and Oklahoma. They can also survive along the eastern side of Washington and Oregon.
  • Maintenance: Low
  • Height: Japanese Black Pines can be kept small, but they may reach a maximum height of around 20-60 feet.
  • Width: 12-20 feet.
  • Growth Rate: Moderate, growing between 12-24 inches per year.

The Japanese Black Pine is a great choice for those who want a smaller pine tree for their yard and don’t mind a non-traditional appearance. These trees are tolerant of drought and heat as well as coastal sandy and salty conditions.

Fastest Growing Pine Trees Ranked: Complete Growth Chart

Now, for the part you’ve been waiting for! We’ve compiled everything we discussed above into a neat little chart to give you an idea of the fastest-growing pine trees. You’ll also see how long they live, their maximum height, and the best-growing zones for each pine tree.

TreeAnnual GrowthLifespanFull HeightBest Hardiness Zone
Loblolly PineMore than 24”100-300 years90 feet6b-9a
Canary Island PineMore than 24”180 years80 feet9-10
Eastern White PineMore than 24”200 years80 feet3a-8a
Jack PineMore than 24”100-200 years50 feet3-7
Austrian Pine12-24”>500 years60 feet3b-7
Scotch Pine12-24”150-300 years60 feet3a-7
Lodgepole Pine12-24”150-200 years100 feet4-8
Ponderosa Pine12-24”>500 years130 feet3-7
Mondell Pine12-24”N/A40 feet6a-8b
Japanese Black Pine12-24”150 years60 feet5b-8a

Which Pine Tree Should I Plant In My Yard?

Based on the chart above, you may want to grab a Loblolly pine or Eastern White pine and get to planting! However, some of these pines may not be suitable for your yard depending on where you live and what kind of soil you have. 

Don’t worry, we’re here to break down which pine trees are the best for your yard so you can plant with confidence.

Best Pine Trees For Cold Climates

If you live somewhere where you have to put two pairs of socks on in the winter, you can’t exactly plant a Canary Island pine or Loblolly. You’ll want to go for a pine tree that’s cold-tolerant and doesn’t mind a few cloudy days.

The best pine trees for cold climates include:

  • Eastern White Pine
  • Jack Pine
  • Austrian Pine
  • Scotch Pine
  • Lodgepole Pine
  • Ponderosa Pine

Best Pine Trees For Warm Climates

If you live somewhere where you can wear sandals in the winter, you may want to consider a pine tree that does well in year-round warm weather.

Consider these pine trees if you live in the south where winters are mild and summers are warm:

  • Loblolly Pine
  • Canary Island Pine

Mondell and Black Japanese Pines fall somewhere in the middle, doing well in the centralized region of the United States.

Best Pine Trees For Small Yards

There’s nothing wrong with wanting to bring a little nature into the city. If you have a small yard, you can’t exactly plant a gigantic Lodgepole or Ponderosa pine. Instead, you’ll want to look for some of the smaller varieties:

  • Japanese Black Pine
  • Dwarf Scotch Pine
  • Mondell Pine
  • Dwarf Eastern White Pine
  • Small varieties of Lodgepole Pine

Best Pine Trees For Privacy Screens

Pine trees are great to use as privacy screens between you and your neighbors. It’s a natural border that doesn’t require a ton of maintenance like a fence would. Some pine trees are either too thin or self-prune their branches, making them a poor choice. You want a pine tree that’s dense and full.

Some of the best pine trees on our list for privacy screens include:

  • Austrian Pine
  • Eastern White Pine
  • Mondell Pine

Best Pine Trees For Poor Soil

Not all yards are bursting with nutrients or packed with well-draining soil. Some places like arid desert climates or rocky yards have a hard time letting anything grow. The good news is that there are a few pine trees on our list that will grow in just about any condition!

  • Jack Pine
  • Loblolly Pine
  • Mondell Pine

Even though these pines can grow on poor soil, you’ll still want to check their hardiness zone to make sure they can grow in your area.

That’s A Wrap!

Pine trees are a great choice to plant in the yard. They are evergreen, meaning they will bring color to your yard when your other deciduous trees have lost their leaves. They are low maintenance and come in a variety of shapes and sizes to fit just about any yard out there.

One thing that can be frustrating about planting a tree is waiting for it to grow. To recap, the 10 fastest-growing pine trees include:

  • Austrian Pine
  • Loblolly
  • Lodgepole Pine
  • Ponderosa Pine (Western Yellow Pine)
  • Eastern White Pine
  • Jack Pine
  • Scotch Pine
  • Canary Island Pine
  • Mondell Pine
  • Japanese Black Pine

Whether you live in a cold or hot climate, have sandy or clay soil, or have a big or small yard, there is a pine tree on our list that will fit your situation!

If you’re not sure about which pine tree to plant, you can always reach out to your local arborist to get directions on what grows best in your area.

References

Bruce E. Borders, Robert L. Bailey, Loblolly Pine—Pushing the Limits of Growth, Southern Journal of Applied Forestry, Volume 25, Issue 2, May 2001, Pages 69–74, https://doi.org/10.1093/sjaf/25.2.69

Dobbertin, M. Tree growth as indicator of tree vitality and of tree reaction to environmental stress: a review. Eur J Forest Res 124, 319–333 (2005). https://doi.org/10.1007/s10342-005-0085-3

Makinen, H., & Isomaki, A. (2004, November 15). Thinning intensity and growth of Scots pine stands in Finland. Forest Ecology and Management201(2-3), 311-325. https://www.sciencedirect.com/science/article/abs/pii/S0378112704005328

Thomas R. Fox, H. Lee Allen, Timothy J. Albaugh, Rafael Rubilar, Colleen A. Carlson, Tree Nutrition and Forest Fertilization of Pine Plantations in the Southern United States, Southern Journal of Applied Forestry, Volume 31, Issue 1, February 2007, Pages 5–11, https://doi.org/10.1093/sjaf/31.1.5

With over 35 different species of spruce trees sprouting among the states, it can be hard to narrow down which spruce tree is best suited for your yard. If you’re searching for a quick start to your spruce tree journey, there are a few species that will start soaring once you send them into the soil.

The fastest growing among the spruce tree species is the Norway Spruce. Closely following this towering monster in its footsteps is the Sitka Spruce, the White Spruce, the Colorado Blue Spruce, the Engelmann Spruce, the Serbian Spruce and the Red Spruce. All of these spruce varieties will grow fast!

While the majority of the spruce tree species grow just under one foot per year, these seven species grow beyond twelve inches annually, allowing you to quickly jump-start your spruce journey. 

What Is A Spruce Tree?

A spruce tree is a coniferous evergreen that naturally sprouts from the soils of mountainous regions and boreal forests across the map.

Spruce trees are one of the most sought-out coniferous trees for residential planting. Once you get a glimpse of them, you’ll understand why! You’ll often find them as part of the landscape for design and functionality, as they can often be used for windbreaks and even Christmas trees!

Coniferous, often referred to as a conifer, simply means that the tree bears cones. Each variety of spruce tree will develop cones as they mature.

Evergreen simply means that the foliage of the spruce will remain green throughout the seasons. As the trees begin to lose their leaves, the needles of the spruce will hold strong and stay green, which is different from the average deciduous tree that displays a darling show during the fall!

In other words, a spruce tree is a pyramidal-shaped tree with evergreen needles that develop seed-bearing cones that droop down from the branches.

Among a few other species of trees that can be described the same way, there are few specifics to the nature of the spruce.

Pines Trees vs. Fir Trees vs. Spruce Trees: The Pinpointed Difference 

Spruce trees are most commonly misidentified as a fir or pine trees. 

Unless you’re up close and personal, or have the encyclopedia of trees memorized, it’s hard to distinguish the differences without any delay. 

Look At The Needles

First and foremost, proper identification of any coniferous evergreen begins with the needles. 

When examining the needles of any evergreen tree, pay close attention to the points at which the needles attach to the twigs. If the needles appear to be long and soft and attach in clusters of two, three, or five, you’re looking at a pine.

If the needles are attached individually, you could be looking at a spruce tree or a fir. To determine the difference between the two, you’ll have to take a closer look at the needles.

Fir needles are generally flat, friendly, and flexible while spruce needles are spiny, square, and sensitive. 

If you were to place a needle in your hand, the spruce needle would roll between your fingers and likely break, while the fir needles would not budge and have a bit more flexibility to them.

Study The Cones

Without touching the tree, you’d be able to tell the difference between a fir and a spruce through the characteristics of their cones. 

Spruce cones droop down from the branches while fir cones stick straight up and fall apart before falling to the ground with signs of sap.

Generally, evergreen trees found in landscapes are likely going to be spruce trees, but if you have an evergreen growing in your yard that you can’t identify, try those tips!

Which Spruce Trees Will Grow The Fastest In My Yard?

Spruce trees are often slow to moderate-growing evergreens… with an emphasis on slow. There are, however, a few species that are faster growing than the rest and would make the perfect addition to your yard.

Norway Spruce

The Norway Spruce is the fastest-growing spruce tree. The Norway Spruce is known for its rapid growth and droopy branches allowing it to become one of the most commonly planted spruce trees for ornamental use.

The Norway Spruce can grow up to 60 inches per year, but on average inches upward at two to three feet per year. At maturity, the Norway Spruce reaches 45 to 70 feet tall and can continue to grow up to 100 feet in height. It has a typical spread of 30 to 50 feet wide, so it needs a bit more growing room than the average spruce tree.

This spruce is easily grown and adapts well to a variety of climates and soil conditions, but does best when planted in acidic, well-drained soils with access to full sun. 

Although, it is not among the drought-tolerant spruce species… so keep the water coming! Here are some tips for watering your spruce tree (and when to do it).

The Norway Spruce can also be known for its longevity. While the majority of this species lives for only a few hundred years, several Norway Spruce trees have been carbon-dated to be over 9000 years old according to Bates College Research.

There are many valuable uses for the Norway Spruce beyond its growth timeline, but if you’re just looking to harness its quick growth to watch it reach a mature height in your lifetime, it’s the perfect spruce tree for your yard.

The Norway Spruce can be found just about anywhere and is often found in landscapes throughout the map.

Sitka Spruce 

Next, in the order of fastest growing spruce trees is the Sitka Spruce. It is actually known as one of the largest trees in the family of spruces and is the largest tree to grow in Alaska.

At first, growth may be slow. As the Sitka Spruce begins to mature, it can grow up to 60 inches per year, but on average, tops out at just over two feet per year. Mature trees often reach heights beyond 200 feet.

The Sitka Spruce is naturally found in landscapes and foggy forests along the Pacific Northwest Coast. It does have very little use in landscape because of its hardiness and size, but if you’re looking to grow the tallest tree around, give it a go!

Because of its limited use and hardiness, it may be hard to find a Sitka spruce at your local nursery. However, you can purchase your very own Jonsteen Sitka Spruce Sapling here! These natural saplings are grown organically and are even backed with a growing guarantee! If your sapling isn’t looking too hot, they’ll send you a new one!

When you go to plant your new Sitka Spruce sapling, be mindful that it still requires full sun, wet soils, and a misty environment, preferably near the ocean.

White Spruce

Known for its beautiful needles and ability to add elegance around your home, the white spruce is the next on the list for fastest growing spruce trees.

Perhaps the most common use for the White Spruce is during the holidays. This spruce is often grown as a Christmas Tree! If you’re searching for a tree to decorate or cut down for the holidays, it would make the perfect addition to your yard.

The White Spruce grows at a steady rate of 13 to 24 inches per year. At maturity, the white spruce reaches just over 40 feet tall with a spread of 10 to 20 feet.

This spruce tree is native to much colder climates than the average spruce and is one of the most valuable trees in Alaska. 

In your yard, this spruce tree requires direct sunlight and acidic and well-drained soils.

Colorado Blue Spruce

And of course, the most versatile spruce tree of them all is the Colorado Blue Spruce. This spruce is well known throughout the states for its beautiful bluish-green needles and perfectly symmetrical shape.

Although this spruce isn’t labeled as the fastest growing, it still grows quicker than the rest of the spruces listed below.

The Colorado Blue Spruce inches upward at one to two feet per year, reaching its average mature height of around 60 feet in 30 to 50 years. Like most other spruces, the Colorado Blue Spruce will have a spread of about 10 to 20 feet at maturity.

This beauty is also often grown for use as a Christmas tree. It has a delicate aroma and beautiful blue needles. It’s important to note that the blue spruce isn’t known for its needle retention, but if you’re looking for an outdoor Christmas Tree, this is a great option!

The Colorado Blue Spruce, like the rest, needs full sun, acidic soil, and temperate climates to grow at its best.

Native to the Rocky Mountains of Colorado, this Colorado Blue Spruce can grow in yards just about anywhere, including warmer climates in the plains of the United States. It is not the most drought-tolerant, so if it is to be grown in warmer climates, be sure to keep the first two inches of soil consistently moist.

Engelmann Spruce

Unless you’ve ventured out into the timberline among the mountains, it’s possible that you have yet to encounter the Engelmann Spruce. The Engelmann Spruce is still sometimes used as an ornamental landscape tree often as a windbreak, and sometimes just an evergreen statement tree that stands slender and tall.

The Engelmann Spruce grows at an average of one to two feet per year reaching its mature height between 40 to 80 feet with a spread of 10 to 15 feet. This spruce starts out slow, as the majority of spruce trees often do when grown from seed, but has been known to take 20 years just to reach 4 to 5 feet when grown in lower altitudes. 

After it gets going, it will easily grow up to two feet per year when planted in acidic soils with direct sunlight.

This species of spruce tree often lives longer than the rest. It is not rare for an Engelmann spruce to live beyond 500 years of age, so try adding a piece of history to your yard to be admired for years to come!

Serbian Spruce

The Serbian Spruce is an elegant evergreen that grows at an average rate but is perfect for landscape use. 

Since the Serbian Spruce can grow in hardiness zones 4 to 7 (quite similar to the Colorado Blue Spruce which grows from 3 to 7), it is perfect for most yards that don’t see the desert sun.

On average, the Serbian Spruce grows at least 12 inches per year reaching an average height of 40 to 60 feet with a 20 to 25-foot spread in under 50 years. It has even been noted that at its best, the Serbian Spruce can grow up to three feet in a good year.

This spruce is often a darker green than the rest and can grow quickly with only four hours of sunlight per day. It still requires consistent rainfall, and acidic soils to grow quickly.

The droopy nature of the Serbian Spruce can add lots of character to your yard, so if you’re looking for a show-stopper, try planting a Serbian Spruce!

Red Spruce

Last, but certainly not least on the list of fast-growing spruces is the Red Spruce. The Red Spruce is one of the most common spruce trees to grow along subalpine regions of the world.

The Red Spruce is native to the Eastern portions of North America but still grows abundantly in other mountainous regions just below the timberline.

In good conditions, the Red Spruce can grow just beyond one foot per year on average and maxes out at an average height of 60 to 80 feet with a spread of 20 to 30 feet.

The Red Spruce is named after its resilient, reddish bark, often even referred to as a “red fir” instead of spruce, although it is clearly part of the spruce family.

If you’re looking to grow a red spruce, it does best in areas with constant rainfall, cool summers, direct sunlight, and acidic soils.

Its staggered pyramidal shape and red tint makes it an earthy addition to your yard. 

If your spruce tree’s needles is turning red, here’s why (and how to fix it!)

Fastest Growing Spruce Trees Ranked: Complete Growth Chart

TreeAnnual GrowthLifespanFull HeightBest Hardiness Zone
Norway Spruce (Picea abies)13” to 60” 300 – 900+ years75’ – 100’ 2b to 7a
Sitka Spruce (Picea sitchensis)12” to 60” 400 – 800+ years40’ – 230’ 7b to 8b
White Spruce (Picea glauca)13” to 24” 250 – 300+ years40’ – 60’ 2 to 6
Colorado Blue Spruce (Picea pungens)12” to 24” 600 – 800+ years30’ – 135’ 3 to 7
Engelmann Spruce (Picea engelmannii)12” to 24” 500 – 600+ years40’ – 80’ 2 to 8
Serbian Spruce (Picea omorika)12” 60 – 100+ years40’ – 60’ 4 to 7
Red Spruce (Picea rubens)12” 250 – 450+ years60’ – 80’ 2 to 5

*growth may vary based on conditions

Which Spruce Tree Should I Plant In My Backyard?

Each tree journey is specific to your own aspirations, aesthetics, and availability. 

It is important to note that spruce trees are best suited for large, open spaces in your yard with full sun. 

You’ll want to be sure that you plant your spruce at least 20 feet from other structures, buildings, and trees for it to reach its fullest potential and grow at its fastest rate.

According to the Montana State University Extension Service, it is possible that specific spruce species can grow too large for average-sized yards. Selecting a smaller, fast-growing variety from the list above might be the best option for your yard.

Check out these ideas below for the spruce tree that best suits your tree journey!

What Are You Searching For In A Spruce Tree?

Have an average-sized yard and still want a towering spruce? The Colorado Blue Spruce is the best option for smaller yards, but remember, it still needs lots of space to grow!

Are you looking to grow the fastest forest of spruce trees around your home? The Norway spruce is the quickest-growing spruce variety of them all. You could have the start of a forest of spruces at a decent height in under 5 years!

Searching to grow the tallest spruce tree around? The Sitka Spruce is the third-tallest growing tree in the world, try planting one!

Are you looking to catch the eyes of those driving past your home? The Colorado Blue Spruce produces the most striking bluish-green needles and is known to be one of the most beautiful landscape trees around!

What is the fastest-growing spruce tree for privacy? If you’re looking for a beautiful evergreen that also serves a function, the Norway Spruce makes the list as one of the best evergreen trees for privacy since its branches are widespread and the tree can reach a towering height!

Do you need to add some elegance to your yard? The White Spruce of Alaska has a stunning variation called the Weeping White Spruce, which grows just like the White Spruce and can elevate any yard! The Serbian Spruce is also another great option for adding a hint of elegance.

Want to bring home a piece of the mountains? The Engelmann Spruce and Red Spruce are the most abundant spruce trees in the mountainous regions of the Cascades and Rockies. Plant one of these species in your yard to bring a piece of the mountains home!

Live in a warmer climate and need the most drought-resistant spruce? The Colorado Blue Spruce is one of the most versatile spruce varieties of them all. Honestly, it’s probably the best option for any landscape tree! 

Does your spruce tree just need some help reaching its fullest potential? Try this Epsoma Organic Evergreen Tone Fertilizer to promote growth in your spruce! Sprinkle this natural fertilizer around the base of your spruce once in the early spring and once in the late fall and watch your spruce soar!

That’s A Wrap!

Among the 35 species of spruce trees, there are really only seven that are considered to be fast-growing when compared to the rest. If you’re looking to harness the beauty of a spruce in a few short years, consider planting one of the seven!

In order for these spruce species to be considered fast-growing, be sure to start your spruce from a sapling and not a seed. When grown from seed to sapling, it can take years. Only when your spruce reaches the sapling stage will these growth rates be accurate.

To review, here are the seven fastest-growing spruce trees for your yard, listed in order of growth:

  • Norway Spruce
  • Sitka Spruce
  • White Spruce
  • Colorado Blue Spruce
  • Engelmann Spruce
  • Serbian Spruce
  • Red Spruce

Each of these seven spruce trees grows over a foot per year which deems them the fastest growing. Most other species in the spruce family grow less than a foot per year, which doesn’t make them as sought out as these seven!

Consider the chart and the requirements needed to keep your spruce tree happy and healthy when deciding which spruce tree is best suited for your yard.

And don’t forget to enjoy the journey along the way!

References

Barber, V. A., Juday, G. P., & Finney, B. P. (2000). Reduced growth of Alaskan white spruce in the twentieth century from temperature-induced drought stress. Nature405(6787), 668-673.

Bousquet, J., Isabel, N., Pelgas, B., Cottrell, J., Rungis, D., & Ritland, K. (2007). Spruce. In Forest Trees (pp. 93-114). Springer, Berlin, Heidelberg.

Cienciala, E., Altman, J., Doležal, J., Kopáček, J., Štěpánek, P., Ståhl, G., & Tumajer, J. (2018). Increased spruce tree growth in Central Europe since 1960s. Science of the Total Environment619, 1637-1647.

Miller, B. D., & Hawkins, B. J. (2003). Nitrogen uptake and utilization by slow-and fast-growing families of interior spruce under contrasting fertility regimes. Canadian Journal of Forest Research33(6), 959-966.

Tjoelker, M. G., Boratynski, A., & Bugala, W. (Eds.). (2007). Biology and ecology of Norway spruce (Vol. 78). Springer Science & Business Media.

Wardle, P. (1968). Engelmann spruce (Picea engelmannii Engel.) at its upper limits on the Front Range, Colorado. Ecology49(3), 483-495.

There are many elm trees you can grow in your yard depending on where you live, what size elm tree you want, and the overall look you prefer.

Another important consideration is how quickly your elm tree will grow. While some species can grow slower, most elm tree varieties grow 3 to 6 feet per year.

Here we will cover what to expect during each stage of an elm tree’s life from seed to mature tree. We will also help you determine which species is best for your yard and give you some tips on how to keep your tree healthy and happy for its lifetime and yours!

Full Timeline Of An Elm From Seed To Tree

An elm tree that has been trained to have low hanging branches. The canopy of the tree hangs low enough to almost brush the grass.

So you’re thinking about growing an elm tree of your own to add beauty and shade to your yard? But how long will it take? What can you expect?

Since most elm species grow at about the same rate per year, the time to reach maturity mostly depends on how tall the tree gets.

We’ve done the research for you and put together a full description of what to expect and how to grow your very own elm tree from seed to a fully mature tree!

The American elm can reach a height of 80 to 130 feet tall and will reach maturity (full height) in 30 to 40 years. The Chinese elm can reach a height of 40 to 50 feet tall and will reach maturity in 20 to 25 years.

If you have considered planting an elm tree, oak trees might have crossed your mind as well. To learn more about the differences between elm and oak trees, check out this article!

Day 0: Selecting Your Seed Or Sapling Species

Before you grow an elm tree, you’ll have to decide what species and/or variety of elm tree you want to grow. We cover how big different species get and where they grow best later in this article.

Keep in mind, Dutch Elm Disease (DED) can harm many of the native elm species in North America and Europe. If you decide to grow one of these species, there are several cultivars which have been selected and bred to resist DED. Clemson University has a list of some of the resistant American elm cultivars that are currently available.

You can easily grow a healthy, beautiful elm tree from a seed, or you can start with a small sapling.

If you’re looking for seeds, mature elm trees will drop several hundred seeds within a 300-foot radius of the tree. If you don’t have an elm tree nearby to collect seeds from, you can usually find a sapling at your local garden center.

Day 1 To Day 90: How To Plant Your New Elm Tree Seedling

If you decide to go the seed route, be prepared to sow a lot of seeds to get a few to sprout. Elm seeds do not remain viable for long after falling from the adult tree. You should try to collect them within a few weeks of them falling from the adult tree in spring for the best results.

Here are the steps you’ll need to take to get your elm tree seeds to grow into a tree:

  • Dry the seeds: After you collect your elm tree seeds, allow them to air dry indoors on a paper towel for 1 to 3 days.
  • Prepare your potting mix: You want to have well-drained soil for good germination. You can do this by adding equal parts of regular potting soil together with sand and mixing well.
  • Prepare your planting tray: Fill a shallow tray with 2 to 3 inches of your potting mix and thoroughly water it. Make sure the tray has drainage holes in the bottom to keep the potting mix well drained.
  • Plant your seeds: Simply lay the elm tree seeds you’ve collected about 1 inch apart from each other across the top of the potting mix. Barely cover the seeds with extra potting mix by sprinkling a thin layer over them. Gently water the top layer of soil so it is moist.
  • Place the container in a dark area: You don’t want to expose your tray to sunlight until your seedlings grow. Keep your planting tray in a dark cool area of your house and check every couple of days to see if the seeds have sprouted. Keep the soil moist without over watering or the seeds will rot.

In 2 weeks to 2 months, you should start to see your elm trees sprouting. After they begin to sprout, you can move them to a window that gets around 6 hours of sunlight per day. Once the saplings reach about 2 inches tall, you’ll want to thin them out so that the seedlings are 2 to 3 inches apart.

Once the seedlings have several leaves on them, they are ready to be planted in individual pots. Use the same potting mix as you did for germinating the seeds (equal parts of potting soil and sand) and transfer your seedlings into individual pots. It’s best to get a 1-gallon pot with drainage holes and a saucer.

The HC Companies 8″ Classic Planter and their matching 8″ Classic Saucer are perfect for your seedling to grow into a sapling. They also come in several colors so you can match them to your personal style.  

You can now move your seedling outside!

Day 90 To 1 Year: Watching Your Seedling Become A Sapling

During the first year of the seedling’s life, you will want to keep your seedling from getting too much direct sun. While adult trees thrive in full sunlight, seedlings do better in partial sunlight. Make sure the seedling doesn’t get over 2 to 2.5 hours of direct sunlight per day, preferably earlier in the day.

Also, make sure that you keep your seedling watered without over-watering. Having the seedling in a pot with drainage holes will help prevent over-watering.

The first year of life for an elm tree is a vulnerable time when it is most susceptible to dying. Watch for any signs of declining health, such as yellowing leaves or stunting, and make sure you follow the recommendations for sunlight and water.

Depending on where you live, you will want to bring your seedling inside if there is a sudden drop in temperatures below freezing. The seedling will harden and become tolerant to the cold after experiencing several weeks of temperatures between 32°F and 50°F.

If your seedling hasn’t had enough exposure to temperatures that will harden and protect it from freezing cold temperatures, you will want to move it inside if temperatures suddenly drop below freezing.

Year 1 to Year 3: Transplanting Your Elm Sapling And Watching It Grow

If you started out with a sapling instead of a seed, this is where your elm tree journey will begin.

Getting to the sapling stage requires a fair amount of effort and care. You may want to start out with a sapling instead of a seed, depending on the time and effort you want to spend growing your elm tree early on.

Timing is critical when transplanting your sapling. You’ll want to transplant your elm tree sapling in early spring after the threat of frost has passed. You will also want to transplant before temperatures get too warm so that your new sapling has time to get used to its new environment before summer weather becomes too harsh.

The act of transplanting a sapling is stressful for the plant no matter how good of a job you do. By transplanting at the right time, you prevent the added stress of environmental factors such as temperature from further stressing the sapling.

Finding the right location in your yard to plant your sapling is also critical. After the first year, elm saplings grow best in full sunlight and well-drained soil. Elm trees are pretty hardy, are drought tolerant, and shouldn’t require annual fertilizer in most situations.

Make sure the spot you plan to plant your elm tree sapling gets plenty of sunlight and provides enough space for the adult tree to grow into. Keep in mind that planting your elm tree too close to sidewalks or driveways may lead to concrete damage as the tree becomes larger. Later in this article, we go over how big different adult elm tree species grow.

It is normal to see your elm tree sapling become a little stressed after being transplanted because of the environmental changes it experiences by being moved into the ground and getting direct sunlight.

Don’t worry, as long as you pick the right spot and make sure it has the correct amount of sunlight and water, it will thrive before you know it!

To minimize the amount of stress your elm tree sapling undergoes during transplanting, follow these steps:

  • Dig the hole at least twice as wide as the pot the sapling is currently in. This will ensure that when you place your sapling, and fill the hole back in with the loosened dirt you dug up, the roots have room to grow into some new soil that isn’t already compacted.
  • Place your sapling in the hole. You may need to add some dirt back into the hole if you dug it too deep. That’s okay, you want to have some loosened dirt below the root ball as well. Make sure when you fill in the hole, the dirt does not go more than an inch above where the soil level was on the trunk while in the pot. This will help ensure roots which have been developing near the surface of the soil in the pot don’t get buried so deep that they get stressed.
  • Fill the hole with dirt and press it down gently. It may be helpful to have a second person hold the sapling straight while you fill the hole with dirt to ensure it doesn’t move.
  • Water the elm tree thoroughly immediately after transplanting it.
  • Mulch the area right around your new tree. This will help the soil retain moisture and reduce competition from weeds. Use 3 inches of pine bark mulch for the best results.

Make sure you continue to water your newly transplanted elm tree weekly if you don’t get rain. Stop weekly watering once temperatures drop during fall.

You’re now one step closer to having yourself a fantastic, large shade tree that you can enjoy for decades to come!

Eager to see your tree mature? Check out our article on the 12 fastest growing deciduous trees for a complete list.

Year 3 To 10: Maintain The Shape Of Your Elm Tree

By the third year of growth, and possibly before depending on the individual tree and how healthy it is, pruning will become extremely important to ensure you end up with a gorgeous elm tree when it is fully grown.

Pruning, when done correctly, will eliminate limbs while they are still a manageable size to remove. Pruning also helps ensure you end up with a straight, symmetrical tree.

Not sure how to go about pruning? Luckily, we have created a guide on just when and how to prune large trees with plenty of helpful tips!

If you are not comfortable or knowledgeable about pruning, it is best to reach out to an ISA-certified arborist for help. While the correct pruning will insure a beautiful tree, incorrect pruning can cause a dead tree. Pruning can also be dangerous, so do not hesitate to call in a professional.

You should also fertilize your new elm tree in the spring one year after you transplant it. After that, your elm tree shouldn’t need fertilizer unless your soil quality is extremely poor. Follow the fertilizer directions exactly because too much fertilizer can harm your new elm tree.

Make sure you continue to replace the mulch around your elm tree annually to help retain soil moisture, reduce competition from weeds, and provide extra nutrients and organic matter to the soil as it decomposes.

Year 10 And Beyond: Sit Back And Enjoy The Shade

Around age 10, the need for annual pruning should be over as the tree is now maturing and should have a good form at this point. It may still be a good idea to have a professional come out every few years to assess your elm tree’s health and remove any branches that may be damaged during severe weather.

Your elm tree will start producing flowers and seeds around year 15. This will attract many birds which you can enjoy watching while you sit in the shade of your elm tree. 

Check out the information below regarding pests that might attack your elm tree so you know what to look out for and how to manage those pests if they hurt your elm tree.

Did you know that elms are one of the faster growing shade trees? To see the other 10 easy to plant shade trees, take a look at our article where we reveal them all!

What Type Of Elm Tree Is Right For Your Yard?

A close up of the branch of an elm tree full of green leaves and seeds.

With over 30 elm tree species available to choose from, there are plenty of unique leaves, bark textures, and overall shapes and sizes to consider. However, the two most important factors to consider are (1) the space you have available to grow the tree and (2) if the species grows in your USDA plant hardiness zone.  

Where And How Tall Do Elm Trees Grow?

Most elm tree species grow to be 30 to 70 feet tall and 30 to 60 feet wide. However, the American elm can grow up to 130 feet tall and 120 feet wide! 

Below is a chart you can reference for the mature tree size, hardiness zone, and DED resistance status when choosing the elm tree species you want to grow. Remember, some species also have multiple cultivars available if you want an elm tree that is resistant to DED or certain insect pests. 

SpeciesMaximum Height (feet)Maximum Width (feet)Hardiness ZoneDED Resistance
American elm (Ulmus americana)80-13060-1202a – 9bCertain cultivars are resistant to DED
Chinese lacebark elm (Ulmus parvifolia)40-5035-505b-10aYes
Slippery elm (Ulmus rubra)40-6035-506a-9aNo
Scotch elm(Ulmus glabra)70-10050-704a-6aNo
Siberian elm(Ulmus pumila)50-7035-504a-9aYes

How Long Do Elm Trees Live?

Elm trees have an average lifespan of 100 to 150 years. Shorter-lived species such as the Chinese elm may only live for 50 years. On the other hand, American elms can live much longer with some trees being over 300 years old!

How To Keep Your Elm Tree Healthy And Happy

An elm tree looking at the canopy from below. The moss covered trunk is prominent with the branches full of leaves above.

One of the biggest concerns homeowners have about planting elm trees is the well-known Dutch Elm Disease (DED). DED first hit North America in the early 1900s and wiped out millions of elm trees. It is estimated that DED has affected between 20 and 40 million elm trees in North America since its arrival.

DED is spread to elm trees by tiny bark beetles that carry DED and spread it when they burrow into the tree to lay their eggs. The most common sign of DED infection is leaf wilting usually on a single branch of the tree. DED will slowly move throughout the tree, sometimes taking years, causing the tree to ultimately perish if it has no resistance to DED.

The best prevention for DED in your elm tree is to plant a resistant species. 

Resistant elm species can still be infected, but they can often overcome DED. To add a layer of protection to your elm tree, try to keep your elm tree healthy by properly pruning, fertilizing, and watering it early on. The beetles that spread DED to elm trees are often more attracted to stressed elm trees.

Several other pathogens can cause damage to your elm tree. Most of them are transmitted by insects just like DED. To keep insects from feeding on and damaging your elm tree, it is recommended to use insecticides.

The easiest method for this is to use an insecticide you can apply using soil drenches.

Soil drenching is a method for applying insecticide where you pour the insecticide around the base of the tree and water it in. Soil drenches can usually be applied once a year and provide protection all year from various insect pests.

Soil drenching is preferred to foliar sprays, especially once trees reach maturity when it is extremely difficult to get the entire tree sufficiently covered to prevent insect damage.

With a soil drench, the insecticide is absorbed through the roots into all the parts of the tree, so when insects ingest any part of the tree, they are ingesting the insecticide.

We recommend Bonide Annual Tree and Shrub Insect Control, which will provide year-long insect control for your elm tree. 

Make sure you read and follow all the label directions when applying any insecticide to prevent damage to your plants and/or to yourself. 

References

Harvey, R. B. 1980. Length of exposure to low temperatures as a factor in the hardening process in tree seedlings. Journal of Forestry 28:50-53.

Merkle, S.A., Andrade, G.M., Nairn, C.J., Powell, W.A. and Maynard, C.A., 2007. Restoration of threatened species: a noble cause for transgenic trees. Tree Genetics & Genomes, 3(2), pp.111-118.

Strobel, G.A. and Lanier, G.N., 1981. Dutch elm disease. Scientific American, 245(2), pp.56-67.

Maple trees are one of the most popular types of trees throughout the United States and Canada! Maple trees are known not only for the syrup they produce but for their beautiful, leafy canopies and brilliantly bright fall foliage.

If you want to plant a maple tree in your yard or garden, there is no need to purchase a sapling or young maple tree – you can grow a maple tree from just a seed. 

As long as you are adequately prepared with the right knowledge to help you cultivate your maple tree from day one, you can grow a fully mature maple tree from just one seed.

Read on for four simple steps to growing a maple tree from a seed, including some pointers about which type of maple tree to choose, how to plant the seed, and how to care for your maple tree well into its adult life!

1. Choose A Type Of Maple Tree

There are a number of different varieties of a maple tree, including some of the more popular like the sugar maple, red maple, and silver maple.

How to grow a maple tree from a seed infographic

Which type you choose depends on what you’re looking for your tree to provide!

Let’s take a look at a few different examples to give you an idea of what might work best in your yard. 

Growing Sugar Maple Trees From Seed

The sugar maple is identified by leaves with sparse teeth, a pale green color on the underside of the leaves, and a greenish-yellow flower that grows at the same time as spring leaf growth. 

Sugar maple leaves turn yellow, red, or dark orange in autumn, and these trees are known for their beautiful fall foliage.

A grove of sugar maples with yellow fall foliage.

Sugar maples can grow to as high as 75 feet with a canopy that can be 50 feet wide when the trees are fully grown. 

Sugar Maples Grow Slowly

One potential downside of planting a sugar maple tree from a seed is that the sugar maple is a fairly slow-growing tree, growing only a foot or two per year.

But if you are not in a hurry to see a mature sugar maple tree, this might work well for you, giving you lots of time to enjoy the tree’s growth and make sure it is in the right spot, as you can move it more easily the smaller it is.

Sugar Maples Like Humidity

Like most varieties of a maple tree, the sugar maple prefers a lot of sun, though in super hot and dry climates, it might grow better as a sapling with some afternoon shade.

Sugar maple trees prefer to live in climates that are cool and experience a good deal of rain and humidity, so this tree variety may not be ideal for the southwestern states, which are normally very sunny, dry, and often hot. 

Sugar Maples Make Great Shade Trees

Sugar maples make great shade trees, so if this is part of your desire to plant a tree, this might be the right variety for you.

The sugar maple grows abundant leaves, making the space under the tree very shady in all seasons except winter, and the number of leaves when they start to change color makes for a beautiful display of fall foliage. 

If it’s shade you’re looking for, maple trees are some of the best. In fact, we listed 6 more reasons maple trees make amazing shade trees!

And, lastly, sugar maples do live up to their name, producing a sweet sap that can be used to make maple syrup.

While you probably don’t plan to collect the maple sap from your tree and eat it, it’s good to be aware that it is there, as it can leak if the tree breaks or you cut a branch from it. So, in that case, be prepared with a bucket or container to catch sap so you don’t end up with a lot of sticky syrup in your yard!

For Fall Color Choose A Red Maple Tree

Red maple trees are named for the brilliant red color their leaves turn in the fall. This bright autumn foliage is a draw for many people who travel many miles to see leaves changing color in the fall.

There are sub-varieties of red maples, such as the aptly named Autumn Blaze maple tree, which looks as though its leaves are a bright, colorful fire throughout the autumn months. 

Red maples are particularly plentiful in the northeast United States, where their bright fall colors are well-known. In fact, while it might seem like continued development of areas of the U.S. in the past decades would have meant fewer trees, the population of red maple trees in the northeast has grown quite a bit during the twentieth century. 

Red Maples Do Well In Urban Environments

Also, red maples are among the species of trees that have been found to do well in urban environments, so this tree can work very well for a yard in a more populated city. 

While red maples are frequently found in New England and surrounding parts of the country, they can be planted in most gardening zones provided they have the right initial planting conditions and are planted at the right time of year.

If you are interested in planting a maple tree with particularly brilliant fall leaves, a variety of red maple might be right for you. 

Planting A Silver Maple Tree

A single red and orange maple leaf on an otherwise bare branch.

Silver maple trees are fast-growing and they do best in very moist soil, so keep that in mind if you live in a dry climate.

Like most maple trees, the silver maple can be grown in a number of environments, but it may not do well in a dry, hot climate, and it will need special care anywhere that is not naturally rainy with a lot of cooler or even cold weather.

Silver maple trees grow quickly, and they can grow to be as tall as 80 feet. Like other maples, they are great to plant as shade trees. If you do decide to grow this variety, bookmark our guide on the best places to plant sugar maple trees.

Silver Maples Have Beautiful Colors

Silver maples earned their name because of the silvery color found on the underside of the leaves. The leaves of the silver maple turn yellow in the fall, and the underneath of the leaves stays silver. 

While these trees are not known to be as spectacularly bright in autumn as some other types of maple trees, you might consider a silver maple tree if you want something interesting in your yard for fall or something a little more subdued to pair with a brighter tree. 

Here’s our full sugar maple tree growth timeline if you’d like more info on growing one!

Choosing Other Varieties Of Maple Tree

There are many other varieties of maple trees, too, like Japanese maple, a popular tree that is very different from the standard maple trees you are likely to find in a northeastern United States forest.

For more standard varieties, there are Norway maples, paperbark maples, and boxelder maples.

You can choose whichever type of maple tree works best for what you want, whether that be the size of the mature tree, the color of the fall leaves, or the rate at which the tree grows. If you’re curious about the pros and cons of different types of maple trees, head on over to our article for a full list of maple tree variations!

Most maple trees have similar needs regarding soil, water, and sunlight, so with only a few exceptions, our general guidelines here are applicable to the type of maple tree you decide to grow from seed. If you’d like a specific fast growing maple, take a peak at our guide on the fastest growing maple trees as well.

2. Choose A Spot To Plant Your Maple Tree

Two maple trees in a park behind a grass field. One tree has yellow foliage and the other has orange foliage.

Once you have chosen the type of maple tree you want to plant and have acquired the seeds, the next step is to choose a spot to plant your maple tree.

Most maple trees want to be located in a cooler climate and they need a lot of water, plus some moisture in the air. In fact, maple trees should be watered twice a week! For more information, check out our article on why maple trees need so much water!

If you have determined that you live in a suitable climate, you can plant the seeds directly in your yard. 

Starting Your Tree In A Container

If you are concerned about the location of your maple tree, or you want to have more control over the soil, water, water drainage, and sunlight in your tree’s first year or so, you can start by planting your maple tree seedling in a container, like a large pot.

There are a number of advantages to this method, all of which relate to giving you more control over the maple seedling’s environment from day one. 

More Control Over Soil Makes For A Healthier Tree

Maple trees like a certain level of acidity in their soil, and that is not always compatible with some parts of the country, like the southwest.

If you want to give your maple seedling the best possible start, you can start by growing it in potting soil, which will be ideally formulated to help your seedling grow as well as possible. 

Potting soil, like this Miracle-Gro Garden Soil Trees & Shrubs, often also contains fertilizer and other nutrients to help your plants, like maple trees, grow faster and healthier from the very beginning.

A healthy seedling is the best possible start to a long-lived, healthy maple tree. 

Ensuring A Proper Watering Schedule

A common problem with planting maple tree seedlings, or any tree seedlings, especially in a part of the country where there may not be as many native maple trees, is controlling the amount of water your tree gets.

Planting your maple tree in a container will help you ensure that the tree is not only adequately watered but also that the water is draining properly from the roots of the tree. Too much water can be a bad thing.

To make sure your container drains well, you can start by buying a container that includes a drain at the bottom of the container itself. Then, help drainage even more by adding a layer of bark or even rocks at the bottom of the pot before you put in any soil. This can help your tree’s roots stay hydrated but healthy as you water them. 

Controlling The Location Of Your Tree

Choosing where to plant your tree can be a difficult decision. The tree will need a lot of sunlight, but, depending on how much sun your home normally gets, it might need a little shade, especially at the beginning of its life when it is just starting to establish its roots and branches. 

Being Able To Move Your Maple Tree

If you plant your maple tree in a container, you can place it in the best possible place to begin with, and you will be able to move the tree without having to dig it up and replant it, if you determine the location is not good.

A tip here is to put your container on a wheeled plant stand so you can move it more easily, as a large container full of wet soil is extremely heavy. 

Another bonus of being able to move your maple tree seedling in the first year or so of its life is that you will be able to take it indoors for the winter if you want to make sure it is not shocked or harmed by snow, ice, and extreme temperatures.

You Can Bring The Tree In For The Cold

While maple trees are very hardy trees able to withstand and even thrive in cold weather, as made evident by their native locations of the northeast United States and in Canada, young trees are more vulnerable than those that have been established. 

Rather than cover the seedling with burlap or a tree bag in the winter, if you have a maple tree in a pot, you can simply bring it indoors. This will also allow you to place the plant somewhere where it is easier to control the humidity around it, not just the temperature. This can be particularly valuable if you live in a very dry climate, as maple trees prefer moist air. 

Whether you plant your tree in a container or directly in the ground of your yard, picking a good location from the beginning can be the difference between a maple tree seedling that thrives and one that does not even survive. 

3. Turn Your Maple Tree Seeds Into Seedlings

A large maple tree with red fall leaves in front of snowy evergreen trees and a cloudy sky overhead.

Once you have chosen a location, you could just put the seeds in the ground and walk away, as this is, after all, how they grow naturally in forests.

The best time to germinate maple tree seeds is in the fall, and the best time to plant the seedlings will be in the spring, so plan accordingly.

While you might think that you will just be digging a hole and putting the maple tree seeds in, it is actually best to germinate the seeds first, which means to let them grow a little bit and start their roots, before you put them in the ground.

Building A Seedbed

To do this, you can build a seedbed. That can be a container you have built out of wood or it can be pots or containers, but you want to be able to control the environment, as the seeds will initially only be planted an inch or so under the soil. 

You should make sure all the soil around the area you want to plant the seed has been broken up, and you should remove any rocks or other objects that are not dirt.

You should begin your seedbed with nothing but the soil that was already there. 

When you are ready to plant, you might think that one tree equals one seed, but because so many seeds may not survive, it’s actually best to plant quite a few–as many as 50. Put the seeds about one inch below the surface of the soil.

Waiting For Seeds To Germinate

The process at this point can take a couple of months.

While your seeds are germinating, your main job is to keep the soil moist.

Sunlight is not as important at this stage, as the seeds are completed underground. 

Planting Your Tiny Maple Tree Seedlings

After a couple of months, when your seedling is several inches tall and has roots, you can move it to a more permanent location, be that outdoors in the ground or in a container as discussed above. 

If you are planting the tree outdoors in your chosen location, wait until early spring, after the winter has passed, then dig a hole that will cover the roots.

If your sapling is very small, it’s probably a good idea to put some type of fencing or protection around it so it doesn’t get accidentally walked on or hit with a lawnmower.  

Water the tree carefully, making sure to use a very gentle setting on your garden hose so the pressure of the water does not damage the tree. 

4. Caring For Your Maple Tree Sapling

The red leaves of a Japanese maple tree partially framing a snow capped Mount Fuji in the background.
Japanese red maple leaves in autumn

Once your tree has been planted, the basic care of your maple tree sapling can begin.

This really just means making sure the tree is protected from the elements and has plenty of water. But if you want to give your tree some added advantages, or you want it to grow faster, there are a few additional steps you can take. 

Using Fertilizer To Make Your Maple Tree Grow Faster

One way to boost the growth of your maple tree is to add some plant food to the soil around it, like these Miracle-Gro Tree and Shrub Plant Food Spikes.

These spikes go into the soil around your tree, providing added nutrients to the sapling as it grows.

Another option for a fertilizer that can easily be placed around growing trees is Jobe’s Fertilizer Spikes for Trees & Shrubs, which also provide added nutrients in the soil around the base of your tree. 

For a deeper dive into the world of fertilizers, check out our list of the 5 best maple tree fertilizers!

Protecting Your Maple Tree From Wildlife and Accidents

One easy way to keep people from accidentally harming your tiny maple tree is to place a small garden fence around it.

This will keep anyone from walking on it or keeping any garden vehicles away.

If you are concerned about wildlife, you can also use fencing to keep animals away. Wildlife is not a big concern for a young maple tree at this point, but you might want to use fencing to discourage even your pets from trampling your tree. 

Long-Term Care Of Your Maple Tree

Maple trees are easy to care for once they are well-established in the ground, as long as you live in the right environment.

If you live in a hot, dry climate, you may find that the leaves experience some health issues and that you have to work very hard to give your tree enough water.

But in most parts of the United States, many varieties of maple trees will flourish without any extra help from you.

That’s A Wrap!

Now you are ready to choose the type of maple tree best for your yard, germinate seeds, and watch one of those new seedlings grow into a mature maple tree.

The different varieties of maple trees grow at different rates, so how quickly you see your tree mature will depend a lot on whether you have chosen a slow-growing or fast-growing maple tree.

But either way, your tree will eventually mature into a classic shade tree with beautiful fall foliage. 

For more information about growing your maple tree, check out our post on the full life of a maple tree, Maple Tree Timeline: How Long It Takes For Full Growth

Happy planting!

References

Abrams, M. D. (1998). “The red maple paradox.” BioScience, 48(5), 355-364.

Sonti, N. F., Hallett, R. A., Griffin, K. L., & Sullivan, J. H. (2019). “White oak and red maple tree ring analysis reveals enhanced productivity in urban forest patches.” Forest Ecology and Management, 453, 117626.

The sugar maple is a very prolific and important tree in the United States. There are more sugar maple trees in the forests of the northeastern United States than any other species of hardwood tree!

If you’re looking to grow a sugar maple, look no further, today we are sharing a full sugar maple growth timeline!

Sugar maple trees may not be the fastest-growing trees, growing only one-two feet each year, but their spectacular canopies at full maturity, especially in the fall, are worth the wait.

Read on for more information about the growth timeline of the sugar maple tree and how to aid this tree in growing to its fullest potential in your yard, and if you are unsure of how to go about growing your sugar maple – make sure to check in with a local professional.

The Sugar Maple: An American and Canadian Stalwart

A grove of sugar maple trees with yellow foliage.

Sugar maple trees are, of course, a variety of maple tree. They are deciduous trees, meaning that their leaves change color, die, and fall off every autumn and are replaced by new budding leaves every spring. The sugar maple also has flowers that appear before the new leaves. 

Sugar maples are most often seen in the southeastern part of Canada (a country that features a maple leaf on its flag) and the northeastern region of the United States. 

There are more sugar maple trees in the forests of these regions than any other type of hardwood tree, and sugar maples are so popular that they are honored as the state tree of four different U.S. states, plus they appear on Vermont’s commemorative quarter. 

Uses Of Sugar Maple Trees

A grove of maple trees in maple syrup production. The trunks of the trees are visible with silver buckets collecting sap from the trunks surrounded by snowpack.

Sugar maples are used for myriad purposes. They are harvested for lumber, as their hardwood is famously durable. In fact, these trees are sometimes referred to as “hard maple trees.” The wood is used for many purposes, including furniture, bowling pins, and baseball bats.

Sugar maple trees are also used, as you might guess, for maple syrup.

This sap was used by Native Americans as one of their main sources of sweeteners for food.

Sugar Maple Sap Is Super Sweet

Sugar maple tree sap is among the sweetest types of sap that comes from maple trees, and it is often harvested to make the sweet syrups used for pancakes around the world. And you need a lot of sugar maple sap for that!

According to the Ohio State University, you need to harvest 40 liters of sugar maple sap to make just one liter of maple syrup!

And it’s none of our business if you wanted to eat maple syrup straight from the tree itself, but just in case you were wondering how – we made sure to write an article about it!

Sugar Maples Provide Shade

Another very popular use of sugar maple trees is for shade.

These trees produce very large and full leafy canopies, lending a wide swath of shade to everything beneath them in three seasons of the year. 

We think maple trees are so good at providing shade, we wrote a whole article about it!

Sugar Maples Help The Wildlife

Sugar maples are also important for the wildlife of the northeastern United States, where these iconic trees are home to a number of types of birds that like to build their nests there, including orioles, cardinals, and woodpeckers, among many others.

Some birds also eat insects from sugar maples. Other animals that eat parts of the sugar maple, like the bark, seeds, and leaves, include deer, squirrels, rabbits, and even porcupines and moose. 

Distinguishing Characteristics Of Sugar Maples

The sugar maple, which has the scientific name acer saccharum, boasts the characteristic lobed leaves of all maple trees.

The sugar maple’s leaves usually have five lobes, but they can sometimes have three. The lobes have points, forming that famous almost star-shaped appearance that you can see on Canada’s national flag or the jerseys of the Toronto Maple Leafs NHL team.

The leaves of the sugar maple are green in the spring and summer, but in the fall, sugar maples famously put on an autumn show with their bright yellow, orange, and red leaves. 

Sugar maple trees have smooth, gray bark when they are young that changes to a coarse, darker bark as the trees mature. Like most maple trees, the sugar maple’s seeds are contained in samaras, those helicopter-like seed pods that spiral down from the tree’s branches. 

Where Do Sugar Maple Trees Grow?

A close up of a cluster of red and yellow maple leaf on a branch with a blurred background of a tree and leaf littered lawn.

According to the Harvard University, there are about 31 million acres of land on which sugar maples currently grow. 

Sugar maple trees are very hardy trees, able to bounce back from damaging events like drought. They are therefore found in a number of different environments.

They appear frequently in forests, including very dense forests, as they are able to tolerate shade and can therefore grow alongside other trees that block some of the sunlight. 

They Are Often Found In Towns And Cities

Sugar maple trees are also often grown in towns and cities and yards, though some of the common characteristics of urban environments, like salt, lack of space, and lack of water, make it more difficult for sugar maples to grow there than in forests.

But some parts of residential neighborhoods have fewer of these problems, so sugar maples often grow very well there!

Sugar maple trees are frequently planted in both urban and suburban environments, and we will give you tips on how to make your sugar maple tree feel so at home in your yard it will think it is in a forest!

The Life Timeline Of A Sugar Maple Tree

It takes about 20 to 30 years for a sugar maple tree to be considered fully mature.

During those first few decades, the tree goes through its normal cycles, and after that time, the tree spends decades in a steady state before its eventual late-life decline. 

For more information on other types of maple trees and their growth timeline, check out our other article for comparison!

Timeline From Bud To Mature Tree

Sugar maple trees begin life as seeds in samaras, which grow in spring and fall to the ground in the fall.

The seed of a sugar maple tree has its best chance at germinating (which is sprouting the initial growth that will turn it into a sugar maple seedling) if it lands on the moist ground of the deep forest when the weather is cool but not too cold. 

The seeds usually fall in the autumn, then the sprouts of successful seedlings emerge in the fall. Those sprouts take hold in the ground, forming the roots that become a maple tree sapling. 

Saplings Grow Slow

Sugar maple saplings grow at a somewhat slow rate that ranges from less than one foot per year to up to two feet per year.

A sugar maple will be mature, meaning it will stop growing and be at its full height, after about 30 to 40 years.

Once the tree has established itself, though, it can live for up to 200 or even 300 years! Planting this type of tree definitely qualifies as what is known as planting a legacy tree for many generations to enjoy. 

Growing Your Own Sugar Maple Tree

You can plant your sugar maple tree anywhere in your yard that has enough space for such a large tree and is able to be watered regularly, particularly if you live in a dry climate. 

It should be noted that, if you do live in a very dry or hot climate, you might want to consider a different tree than the sugar maple.

Sugar maple trees really only like to live in places where the temperatures stay quite cool and there is lots of rain and humidity.

This is why these trees are generally found in the northeast United States and are rarely found much further south than Tennessee. 

There are other types of maple trees that might be easier for you to grow. Check out our other post on the best maple trees to plant, to help you decide the best variety of maple tree for your needs and your environment. 

Where To Plant A Sugar Maple Tree In Your Yard

Once you have determined that a sugar maple tree is right for your yard and can thrive there, it’s time to figure out where exactly to plant it.

Keep in mind that this tree will eventually be very large, so choose your spot carefully!

Finding The Right Light For Your Sugar Maple Tree

Sugar maple trees do well in the shade, which is how they often naturally grow in very dense forests, so you can plant a sugar maple near other trees that may take some of its sunlight; just make sure they are not planted too close for their root systems and canopies. 

In general, it’s best to plant a sugar maple tree about 30 feet away from another large tree. 

Finding The Right Spacing Between The Tree And Your Home

You should also keep in mind the tree’s proximity to your house. Once the canopy spreads and the branches grow, you don’t want them scraping up against the side of your house or roof; this can damage not only your house but also the tree. 

You can also take into consideration whether you want the tree to shade a particular part of your house.

In many parts of the country, where air conditioning is not a given in some houses, people rely on shade from trees to help keep their homes cool in the summer. You might want to consider this added bonus.

And even if you do have air conditioning, shade from a sugar maple tree could go a long way toward helping lower your summer electricity bill!

Finding The Right Spacing Between The Tree And The Street

If you are planting your tree close to the street, you should also consider whether any obstacles will arise once the tree has reached its full height.

Are there power lines running down your street? Is there a street light nearby that could be blocked by high-reaching foliage years down the road?

If you plant your tree where it blocks power lines or other types of utility lines, the city or county in which you live may be able to prune your tree away from those lines, which can result in an ugly shape of your tree’s canopy or even permanent damage to your tree. 

Try to plant your sugar maple so that it is clear now of any obstacles and will still be clear of them 30 years down the road when it is a fully mature tree. 

Helping Your Sugar Maple Tree Grow Faster

A grove of sugar maples with yellow fall foliage.

Sugar maple trees may not grow as fast as other types of maples, but this is because of the density of their wood.

They are hardwood trees, which means that the wood of the trees is very hard and difficult to break!

Typically, trees with softer wood might grow faster, but they are not as durable. Their branches and limbs are more susceptible to damage from even natural causes like wind or ice.

Hardwood maples, however, like the sugar maple, grow more slowly but are less likely to break in these types of environments. 

Give It Some More Sun!

One way to help your sugar maple sapling grow faster is to give it more sunlight than it might get in a dense forest.

Do be careful, though, because sugar maple trees are susceptible to having their leaves scorched by too much direct light or heat. 

Using A Container To Grow Your Sugar Maple Sapling

If you want to try growing your sugar maple tree with a little extra light, it is important to make sure it isn’t getting too much light.

This can be a difficult balance to achieve in your yard, where the tree is immobile. 

If you would like to try a method of light variation, you can begin by planting your sugar maple tree in a container, then moving it to its permanent location in the ground a year or two later, after it has established itself and experienced perhaps some expedited growth due to extra sunlight. 

A container is also an easy way to provide extra rich soil, something else that really helps speed up sugar tree maple growth. 

Using Fertilizer

One of the main ways to speed up growth in your tree is to make sure its processes of photosynthesis are as optimized as possible. This optimization is the goal of most plant fertilizers.

Fertilizer can help young trees grow faster, and the best type to use is one that slowly releases nutrients into the soil around your tree. 

An organic option is to use organic fertilizer spikes around the base of your sugar maple tree, like Purely Organic Molasses and Soy Fertilizer Spikes

Using fertilizer can be a great way to maximize growth, particularly while your sugar maple tree is young. 

Fertilizer Can Be Used In A Container Too

If you have chosen to begin your sugar maple tree’s growth in a container, using fertilizer may be even easier.

You can pot the entire container with potting soil that contains growth-aiding nutrients, like this Miracle-Gro Potting Mix that claims to make plants grow much bigger. 

The best time to use fertilizer is in the summer. 

For a more in depth fertilizer guide, read our article on how and when to fertilize your maple tree.

Using Plant Food

The amount of nutrients in the soil in which a sugar maple tree is growing is incredibly important, more so than with other types of trees.

This can be a good case for using some products that can enhance the nutrients of the soil in which you have planted your sugar maple tree. 

For example, Espoma Organic Tree-Tone Fruit and Shade Tree Food are formulated specifically for shade trees, like maple trees. 

You can also try speeding up the growth of your sugar maple tree with a concentrated tree food, like Covington Naturals Chelated Liquid Iron Plus Concentrate Blend, but this type of food should only be used on a mature tree, as it contains nitrogen. Young trees that get too much nitrogen can grow leaves faster than their roots can keep up, leaving them dehydrated. 

The best time to apply plant food is in the spring. 

Expediting Growth And Preserving Healthy By Preventing Insect Infestation

Sugar maple trees are susceptible to some types of pests, most notably, insects that are known to bore into the tree and a pest called the cottony maple scale, which can damage the tree by eating its sap. 

Even though sugar maples do not usually suffer much from infestations, any setback could be enough to slow the growth you are trying to accelerate. 

To feed your tree some extra nutrients while also giving it some protection against infestation from potentially harmful insects, you can try a product like BioAdvanced 12 Months Tree and Shrub Protect and Feed.

This can rid your sugar maple tree of current infestations or prevent future ones. 

If you’d rather plant a quicker growing maple tree, take a gander at our guide on the fastest growing maple trees here!

Using Mulch To Keep The Ground Moist

Sugar maple trees do not do well in dry soil, so it is very important not only to keep your sugar maple tree well watered but also to make sure that the soil is able to retain that moisture at all times.

One of the best ways to do this is to put mulch around your tree. 

To mulch your sugar maple tree, follow these simple guidelines:

  • Start a circle of mulch that begins ways out from the trunk of your sugar maple tree. Do not pile the mulch into a mound around the base of the tree. Keep the entire flare at the bottom of the trunk free of mulch. 
  • Mulch helps keep the moisture in, but too much mulch can keep the oxygen out, so make sure that you only put down a layer of mulch about 2 to 4 inches thick and no thicker
  • Check the mulch every few months and be prepared to re-mulch about once a year. Mulch will naturally get dispersed, spread out, and thin over time, so you will have to do a little maintenance every several months or so. 
  • Use a high-quality mulch made from all-natural materials, like this Organic Mechanics All Natural Hardwood Bark Mulch.

That’s A Wrap!

Now you are ready to decide whether a sugar maple tree is right for your yard, and when and how you want to plant one. While the growth rate might not be the fastest, these trees have a spectacular payoff with large canopies, beautiful leaves, and long lives. 

You can also speed up their growth with some of the methods explained here. 

Enjoy your new sugar maple tree!

References

Bal, T. L., Storer, A. J., Jurgensen, M. F., Doskey, P. V., & Amacher, M. C. (2015). Nutrient stress predisposes and contributes to sugar maple dieback across its northern range: a review. Forestry: An International Journal of Forest Research, 88(1), 64-83.

Lovett, G. M., & Mitchell, M. J. (2004). Sugar maple and nitrogen cycling in the forests of eastern North America. Frontiers in Ecology and the Environment, 2(2), 81-88.

Payette, S., Fortin, M. J., & Morneau, C. (1996). The recent sugar maple decline in southern Quebec: probable causes deduced from tree rings. Canadian Journal of Forest Research, 26(6), 1069-1078.

Your Competitors Are Already Running Ads. Are You?

This is for service business owners who are ready to SCALE.