Grow Your Business with Tree Journey

Our TradeWorks Revenue System™ builds a detailed advertising funnel that attracts, nurtures, and converts the right clients – so you can finally stop chasing leads and start scaling your business.

Fig trees produce delicious fruits, have full blooms, and are an overall great choice for your space whether that is indoor or outdoor. When deciding to plant a fig tree, especially in your yard, you must consider how much sunlight the area receives, in order to best sustain your fig tree. 

Fig trees grow their best in full sun because it supports fruit production and flower production, and promotes an even, rapid growth rate. After winter dormancy, full sunlight is what helps the fig tree become active and productive once again. This condition for growth should not be overlooked.

With so many different growing requirements, you may be wondering why fig trees need full sunlight when other tree species prefer partial sunlight or even more shade than sunlight

This is a great question, and it has to do with the needs of each individual species, really. 

Sunlight is key for almost all life. It certainly makes a big difference when it comes to people, animals, plants, and anything else that is living and out during some daylight hours.

Unless we’re talking deep sea creatures or organisms that live underground, sunlight is non-negotiable!

Most trees and plants need partial to full sunlight in order to go through the process of photosynthesis which is central to their ability to grow and develop. Fig trees benefit most from full sunlight conditions, meaning that they need at least 8 hours of direct sunlight per day according to the University of Georgia.

There are many reasons that fig trees do best in full sunlight, and we’ll go over them here.

1. Fig Trees Grow Much Faster In Full Sun

Every single tree has a specific environment in which it grows the best. An evergreen tree like a pine tree could never last in the conditions of a tropical island, just as a coconut tree wouldn’t ever be found in the winters of North Dakota. 

Fig trees, like every other tree, have their preferred habitats that will best meet their growing requirements.

Photosynthesis is an essential process for a tree to create energy and sustain new growth. This process is triggered by sunlight, which helps to explain why the amount of sun that a plant receives is so important.

Why Is Photosynthesis So Important?

Photosynthesis is a process where plants use sunlight, water, and the gases in the air to make glucose. This is a form of sugar that plants need to survive, and which helps to effectively feed the tree. 

All plants, algae, and even some microorganisms are known to go through photosynthesis. 

Sunlight is one of three main factors needed to complete the process of photosynthesis, among carbon dioxide from the air and water.

It is not surprising, then, to learn that the more sun a leaf gets, the more energy it will produce through photosynthesis. 

The more sugars that a fig tree is able to produce, the more energy it will be able to put toward its growth. The more any tree can focus on growing, the stronger, taller, and more adaptable the tree will be. 

Three figs on the branch of a fig tree one with the inside of the fruit exposed

2. Sunlight Helps Shape Your Fig Tree

The shape of a tree is not merely an aesthetic property. It also influences the overall health of the organism.

Of course, it’s natural to want a tree to look its best, but, more than that, we want it to grow well and be strong. The overall health of the tree circles back to its appearance, because a healthy tree will lose less branches and will only drop its leaves during the proper season.

Sunlight plays such a big part in the process of shaping your tree. New growth inherently gravitates toward sunny areas, so if your fig tree is growing in an area with partial shade, it will begin to lean toward the area where it can get the most sun, most consistently.

Think, for example, of a different kind of plant. Maybe you have some mint growing on the windowsill above your kitchen sink. Have you noticed that it will lean toward the window?

The plant naturally gravitates toward the window, the source of its sunlight, because it needs sunlight to thrive.

It is no different when it comes to trees. They will try to lean toward the sunniest spot that they can find to make sure that their growth is maintained in a positive, constant way.

When your tree is growing outdoors with full, unobstructed sunlight, your fig tree will grow in an even, uniform manner with a canopy that is full and upright.

A fig tree that grows in partial shade may experience some unwanted effects:

  • Weak Branches: Any branches that are more shaded than not will be weaker due to their need to reach farther to access sunlight. These branches also may end up with weaker attachments to the trunk due to their reaching away from the base of the tree and toward the sunlight.
  • A Lopsided Tree: If sunlight is only available in a few concentrated spots, such as through a gap in canopies of other trees. The appearance of the tree will end up being rather lopsided because the majority of growth will occur in the few sunny spots.
  • Less Canopy Space: Due to the gaps in growth that your tree will experience, the canopy is also going to be thinner and less even. The unevenness of the canopy will also lead to less shade and fruit production. 

When met with plenty of unobstructed sunlight, your fig tree will grow into a strong, productive, reliable tree. Without this basic necessity, it will struggle and provide you with fewer of its benefits.

To combat this, many gardeners decide to grow a fig tree inside of pots in their actual home. If you’d like to go that route, take a look at our guide on the best potted fig tree soils to help get you started.

3. Fig Trees Produce More Figs In Full Sun

Fig trees not only need sunlight in order to grow taller, but also to grow fruit. 

Photosynthesis helps to produce energy that does so much more than catalyze the growth of a tree. It helps the tree to be healthier, less prone to disease, and produce more fruit, nuts, or whatever the specific tree may grow.

In the case of a fig tree, the more sunlight the more, and better, figs. 

Here are a few reasons why fig trees are able to produce more figs when they receive more sunlight:

  • Higher energy levels: Trees that have less energy have to prioritize more, and often they put all their energy toward simply surviving. A healthy tree that receives enough sun can redirect energy toward producing fruit that will taste better and be larger.
  • Fewer structural issues: Full sun conditions help to dry out trees after rain and other watering. This will ultimately help any tree, including your fig, be less susceptible to pests infesting it and disease forming.

Almost all fruit trees do better in full sun, including cherry, olive, lime, lemon, peach, and apple trees! Selecting a sunny spot in the yard to plant your fig tree is super important!

Ripe red figs sit in a wooden bowl and cutting board atop a table with scattered figs surrounding

4. Fig Trees Bloom Better In Full Sun

The growth and strength of a tree are some of the benefits of full sun, along with the fruit that a tree is able to produce. There’s more, though.

Fig trees will also bloom better when they receive full sunlight. 

You might expect that all trees would have a higher number of flowers when they experience full sun conditions, but this idea does not extend to all plants. 

Many plants love shade and can grow better in those conditions. In the case of plants like geraniums and primrose will actually bloom less if they receive too much sunlight. 

This is why it is so important to know the specific needs of your plants. This gives them the best chance at thriving under the conditions they require. 

If you want to know more about choosing the best fig tree for your yard, and how to plant it to give it the best chance at success, check out our planting guide specifically about fig trees!

5. Sunny Conditions Promote A Healthier Fig Tree

So, we know that sunlight can obviously help dry off the leaves and branches of a tree that has been recently watered. This is actually quite important to the success of a fig tree.

Wondering how so? Let’s go over a few reasons why the drying of leaves and branches promotes a healthier fig tree:

  • More resistance to disease and rot: Wet conditions promote disease, the growth of fungus, and the eventual rot of your tree. Keeping a tree that is meant to receive full sunlight dry means keeping it strong, and resistant to these potentially fatal problems.
  • Avoiding pests: Insects and pests are often drawn to areas that are damp or have begun to rot. The more water that is left to sit on your tree, the more potential for an infestation that could cripple the tree.
  • Stronger skin of the fruit: If water is allowed to sit on the fruit for too long, it can cause the outer layer of the fruit to crack. This will render your figs unusable (unless you wish to feed the birds or other little critters that frequent your space).

Of course, water is a necessity for your fig tree, but the amount of water matters. 

If you are worried about overwatering your tree, even if it is in full sun, you can invest in an irrigation system like the CARPATHEN Drip Irrigation Kit. With ¼ tubing, drip connectors, and drip emitters, this is a full irrigation system that is adjustable to your needs and space.

Ultimately, if your fig tree is planted in an area where it receives the proper amount of sunlight, it will dry thoroughly after watering. If not, pruning is another solution for a tree that might be retaining a bit too much water on its surface.

The Gonicc 8.5” Professional Titanium Coated Pruning Shears can help you thin out your fig tree’s branches, which will allow better air circulation and more sunlight to reach all parts of your tree.

How Can I Tell If My Fig Tree Has Too Much Sun?

You’d expect that there’s no such thing as too much sun since fig trees clearly need full sun to thrive. 

Is that right, though? Not exactly. 

There are some negative aspects to having too many sunny, hot days in a row. 

Now, it should be noted that it is often the heat and dryness that accompanies it, on top of sunlight, that most directly impact a fig tree. So, the sun itself is not to blame. However, the effects of too much sun can still negatively impact your tree.

​​Fig tree leaves are hardier than most, and can withstand levels of sunlight and heat that might scorch other trees like cherries or even the more tropical bananas. There is still such a thing as too much sun and heat, eventually.

There is one sign in particular that your fig tree may be getting too much sun which, in turn, leads to too much heat and dryness. 

Your Fig Tree Can Get A Sunburn

Did you know that, like humans, trees can get sunburned? It’s true! If a tree is under direct sunlight for too long, especially when it is extra hot out and there is a high UV level, it can end up with a sunburn.

What might a sunburn on a tree look like, you ask?

Tree sunburns manifest somewhat similarly to human sunburns in that the bark may become discolored and look drier than usual. Bark may also end up becoming loose and even peeling, much like your skin when you receive a particularly harsh sunburn.

Water Stress Can Harm A Fig Tree

Another difficulty that can occur in fig trees that have received too much sun has to do with the tree’s basic needs.

A tree that is under water stress may appear droopy, have discolored leaves that have begun to dry, and may appear weaker overall.

On top of impacting the bark of a tree, too much heat and direct exposure to sun can dry out the soil beneath the tree. This will put your tree under water stress, which will hinder it from absorbing all the nutrients it needs.

If you are looking to learn more about how to maintain a healthy fig tree throughout the spring and summer, check out our post on caring for your fig tree.

How (And When) To Protect Your Fig Tree From Too Much Sun

If your area happens to be always sunny, it is going to be great for a fig tree. How do you, then, protect your tree from receiving too much sunlight, though?

To find that sweet spot, the balance between full sunlight and sunburn or water stress, you’ll want to focus on certain areas of the tree that may be affected more than others.

According to the University of Illinois, plants have evolved a version of sun protection that acts in a similar way to people putting on sunglasses in bright conditions. 

This is called photoprotection, and it is activated in full sunlight but turned off when a leaf is shaded. This shade could come from a building, a cloud, or even just another leaf. 

Photoprotection is the process that keeps leaves from being what we call sunburnt, or oxidated and bleached by full, direct sunlight.

Okay, that is great but how can we help to protect our trees, too? After all, we normally wear sunglasses and some sort of other sun protection, like sunscreen.

That’s easy!

You can utilize tree wraps when looking to help protect your tree from getting the negative effects of direct, full sunlight.

Dalen’s Protective Tree Wrap and Breathable Material is light-colored in order to reflect the harsh sunlight, and acts in the same way as sunscreen might. 

Between the natural “sunglasses” of photoprotection, and the “sunscreen” of tree wraps, your tree will be prepared for whatever a hot, sunny day might throw at it.

The best part is, that these won’t hold in any moisture that the sunlight is working to dry up, so your tree will be protected without being otherwise hindered.

A pile of figs whole and cut in half

How Do Fig Trees Respond To Cloudy Days?

We know now how important sunlight is to a fig tree. Regardless of whether there is such a thing as too much sunlight, it’s clear that too little sunlight could be negative for your fig tree. 

How do fig trees fare, then, on days that are cloudy?

Might they begin to wilt? Maybe fig trees will start to produce fruit that is less developed if there are enough cloudy days in a season? Just because a day is cloudy does not mean that your fig tree is going to suddenly lose all of its energy, or that it won’t still be able to produce some energy. 

Ever had a sunburn that you got on a cloudy day? 

This is because the sun is still shining through, just not as intensely. Cloudy days may not be as productive for fig trees as bright, sunny days are, but the odd day with less sunshine will not have a significant impact on your tree. 

The less energy produced on cloudy days will be put toward the overall survival of the tree, so blooming and fruit production may be slightly slowed down. 

What Can I Do If My Fig Tree Is Not Getting Enough Sunlight?

The main concern is if the cloudy days become consistent for any reason. Over time, the minimal impacts of a day or two without sunshine will add up, and if you have a certain amount of days with less sunshine, your tree may begin to decline in its fruit production.

Say you live in an area that does experience many cloudy days, should you be concerned?

Not really. 

You’ll just need to understand that your fig tree will grow slower, and produce less fruit due to the amount of energy it is able to produce.

Indoor trees can become the same way, if there is not enough light coming through the windows, or you have nowhere to take your tree outside. 

That is where LED lights come in!

Artificial grow lights are a great supplement to your indoor plants, and can be the source of light that your fig tree needs to thrive and be more productive.

WTINTELL LED Plant Grow Light with Stand comes with 4 adjustable lights and the option to set them on a timer. Think of your irrigation system, but for light.

Even Indoor Fig Trees Need Enough Sun

If you don’t have space in your yard to plant a fig tree, you are not alone.

In fact, many people do not have the outdoor space available to plant a full-grown fig tree.

The solution?

Grow an indoor fig tree!

Now wait a minute, how on earth is this possible? We’ve just spent an entire article talking about how imperative it is that fig trees get full sunlight. An indoor plant couldn’t possibly have its needs met, could it?

There are many species of fig tree, particularly miniature or self-pollinating species, that grow quite well indoors. 

We never said it was easy to maintain a fig tree indoors, but following a few simple steps will lead you to success. 

Growing a fig tree indoors can be tricky, but we have you covered when it comes to choosing the best soil to ensure a healthy tree.

That’s A Wrap!

Sunlight is incredibly important, and knowing how much your plant needs can be the difference between a lush, thriving plant and a wilting, declining one.

Fig trees benefit hugely from being planted in an area that receives full sun, at least 6 hours of sunlight a day is a good rule of thumb. 

If you are not confident in your ability to evaluate your tree, rely on a local arborist to help you make sure you are caring for your tree in the best way.

References

Compton, S.G., Wiebes, J.T. and Berg, C.C., 1996. The biology of fig trees and their associated animals. Journal of Biogeography, 23(4), pp.405-407 

Kim, K. M., Kim, M. Y., Yun, P. Y., Chandrasekhar, T., Lee, H. Y., & Song, P. S. (2007). Production of multiple shoots and plant regeneration from leaf segments of fig tree (Ficus carica L.). Journal of Plant Biology, 50(4), 440-446.
Stover, E., Aradhya, M., Ferguson, L., & Crisosto, C. H. (2007). The fig: overview of an ancient fruit. HortScience, 42(5), 1083-1087.

Ash trees are among the most popular and common trees in the country. If you have chosen to plant an ash tree, you are not alone, as there are millions and millions of these trees in the United States, not only in people’s yards all over but also in many wild forests, particularly in the northeastern parts of the country. 

You can plant ash trees in your backyard to shade your home, in your front yard to provide beauty in all four seasons, and in forested areas or tree lots on your property. Ash trees are resilient and can handle circumstances like drought, shade, and poor soil quality that might hurt other trees.

We have all the information you need to help you choose a variety of ash tree to plant, the right location for planting it, and the method for actually putting the tree in the ground. So read on to get started on adding an ash tree to your yard. 

Why Should I Plant An Ash Tree?

Ash trees are beautiful trees that are prized for both their appearance and their value in lumber. Ash wood is used for a number of products, from baseball bats to musical instruments. 

The trees themselves have beautiful foliage that is green in the spring and summer then turns to a lovely yellow in the fall. 

There are so many types of trees to choose from when you are thinking of adding one to your yard that it might be overwhelming when you try to choose one. So let’s take a look at some reasons for this particular type of tree. 

There are a number of reasons to consider planting an ash tree. Here are a few of those reasons in detail. 

Ash Trees Are Great Shade Trees

One of the biggest reasons people may choose to plant ash trees is that they are terrific for providing shade.

If you want a place in your yard to relax in the summer without the harsh rays of the sun, or if you are hoping to cut down on air conditioning costs by cooling your home with shade from a large tree, an ash tree might be perfect. 

The University of Florida encourages people to plant ash trees as fast-growing shade trees. Some other types of trees might also be great for shade but you may have to wait decades for them to reach maturity. 

Ash trees can grow as much as two feet every year, meaning you can have shade much sooner than if you plant a more slowly growing tree. If shade is what you are after, you probably want the tree to grow as quickly as possible. 

After all, a tiny sapling does not provide much shade! So choosing a tree that grows quickly is probably a good idea if you want a shade tree. 

The Ash Tree Population Needs Help

Another reason to consider an ash tree is that ash trees are, in many parts of the United States, critically endangered trees.

Planting one in your yard can help boost the ash tree population. While ash trees used to be extremely prolific, especially in the northeastern United States, they are now in trouble because of the horrifying effects of emerald ash borers, a beetle introduced from China just a couple of decades ago that has, in such a short time, decimated the ash tree population in this country. 

Planting an ash tree in your yard means that there is one more ash tree in the country to help keep this tree’s population from declining even more than it already has. So while you get a beautiful, hardy, shady tree, the ash tree numbers get a boost. 

Ash Trees Are Very Hardy Trees

Ash trees are also desirable because they are very hardy and can withstand extreme temperatures and climates. They are also hardy against drought, wind, and variations in sunlight. 

Apart from the emerald ash borer problem, ash trees are pretty hard to kill, so many people enjoy growing these trees because they are so likely to thrive and do well as long as you take care of the insect problem, which we will discuss later in the planting section.

Ash Trees Are Home To Many Types Of Wildlife

 Ash trees are homes to wildlife including squirrels, and they aid in providing food for a number of animals like foxes, wood ducks, and mice, according to Henry Ford College. Even the bark of an ash tree is valuable for the animal kingdom, as it provides nutrition to rabbits and porcupines. 

Providing food for these creatures not only helps them out, but it gives you the opportunity to site some cool wildlife from time to time in your yard. 

Ash Trees Are Perfect For Woodpeckers

Ash trees are also home to a number of birds, like bullfinches. Another type of bird that lives in ash trees is the woodpecker, which actually eats emerald ash borers, so that’s a useful addition to your tree for sure. In fact, the woodpecker population of your tree can help you determine how healthy it is. 

One woodpecker is great. Two is also okay. But if a whole bunch of woodpeckers take up residence in your tree, that can only mean that they have found a plentiful food supply, and that is bad news for you and your ash tree, as that means there are a lot of emerald ash borers in your tree, signaling a potentially deadly infestation. 

To learn more about how far an emerald ash borer infestation can go before your tree is lost, take a look at our article detailing reasons to cut down your ash tree (and when to do it). This article has some good information to keep in mind throughout the life of your new ash tree, both to help you prevent having to cut the tree down and to help you know what some of the biggest threats to ash trees are. 

Where To Plant An Ash Tree

You can plant an ash tree almost anywhere. Ash trees are even somewhat resistant to the negative growing conditions brought about by climate change.

They can endure extreme cold, heat, and even drought. They like sunlight but can also grow with some partial shade. And their roots are not a huge problem for foundations or buildings as long as you give them some space. 

But there are some varying factors to consider when choosing a location, so we have broken down three of the most popular options for ash tree locations and provided a quick reference chart to help you decide. Think about the purpose you want your ash tree to serve and see how these locations best apply to your home and yard or even wooded areas of your property. 

Plant An Ash Tree To Shade Your House

Ash trees provide ample shade with their dense foliage in the spring and summer months, and even in the early autumn before their leaves fall, but you do have to be careful about planting an ash tree close to your house.

According to New Mexico State University, you should leave at least 20 feet between the ash tree and your home to prevent the roots and branches from causing problems. 

Planting a shade tree has a number of benefits, from cost savings on heating and cooling to making your yard more enjoyable in the warm months.

You can also use a shade tree for plants that do not grow well in full sun. The ash tree can be the perfect protection from the sun for plants like ferns or hostas that require shielding from the sun’s harsh rays. Keep in mind that it can shade more than just a house or patio. 

Plant An Ash Tree In Your Front Yard 

Ash trees are very pretty trees with dense, green leafy foliage. They also change color in the fall, mostly turning yellow but with some variation in ash tree species regarding fall colors. 

If you want to plant your ash tree in your front yard, consider not just the distance of the tree from your house but also any other impediments to its growth, like overhead power lines or other trees. Keep in mind that ash trees need plenty of sunlight and room to grow, so do not plant them too close to other trees. 

Likewise, be mindful of how close to the sidewalk you plant your ash tree. The roots are not particularly disruptive, but if you have ever taken a walk on a sidewalk that has been literally uprooted by a tree, you know how destructive they can be. 

It is also a problem that is difficult to correct once it has happened, so it is best to prevent it by putting some space between your ash tree and the sidewalk. 

Plant An Ash Tree In A Forest

You might be thinking, who has a forest they need to plant a tree in? But many people live in rural areas with wooded sections of land, and those forests need upkeep at times just like many yards and gardens do. 

So why plant an ash tree in this case?

Ash trees are important parts of many forests in the United States, and planting one in your wooded area is a great idea if you want to encourage animal habitats, increase the forest canopy, or simply replace some ash trees that may have died due to emerald ash borer infestation. 

No matter where you need a tree, an ash tree might be the perfect one. To recap, here is a quick reference chart for choosing a location for your ash tree.

If you want:Plant your tree here:Not here:
ShadeNear your homeCloser than 20 feet from your house
LumberIn a forestIn your front yard
Scenic foliageIn your yardIn a forest
Variety in treesAnywhere!Not Applicable

When To Plant An Ash Tree

Ash trees are normally planted in the spring, when the ground has thawed and the freezing temperatures have departed for the year.

Planting in the spring means that the tree will have the longest possible window of time without super cold temperatures, which helps the tree set up its roots and grow before having to withstand its first outdoor winter. 

But if you missed that springtime window, you can plant your tree in the fall instead, but do so as soon as possible after the heat of summer but ahead of the first frost. This way, your tree will have some time to get established before the temperatures drop too much. 

What If There Is A Risk Of Frost When Planting An Ash Tree?

If you are concerned about frost, you can always use a tree covering to protect your tree from snow and ice. Simply cover the tree when the temperature starts to drop. 

Also, make sure to water your tree thoroughly before any frost or snow so the tree will be well hydrated before the freezing temperatures prevent it from getting water to its roots. 

Give your tree a boost by using fertilizer, like these Purely Organic Tree and Shrub Fertilizer Plant Food Spikes, which come in a box of six and are made specifically for trees, like your new ash tree. 

How To Plant An Ash Tree

Now it’s time to get to the actual work of planting the ash tree. To start, purchase an ash tree in whatever state and size you desire. 

You can start with a seed, but our directions here will focus on planting a seedling or sapling. These are available in many sizes, so the size of your young ash tree just depends on what you have chosen. 

Preparing The Planting Site

Before you dig, you need to clear the planting area of any debris such as rocks, plants, roots, any tree stumps, and excessive numbers of pine needles or leaves. You can also use this opportunity to take a look at the wildlife and insects that have been near the site. 

Additionally, you can use this moment to make sure you are in full sun (at least six hours a day, preferably in the morning) and that the location is not too close to any structures or other trees. 

It is okay if other plants are nearby. In fact, it’s a great idea to plant some plants under your ash tree. If you need help with ideas for this, make sure you don’t plant the wrong plants by reading our post about plants you should not grow under your ash tree.  

Once you have prepped the site, it’s time to grab your shovel and start digging. 

Planting The Ash Tree

Dig a hole that is about two times as big as the root ball of your young ash tree. Make sure the hole is clear of rocks, roots, and other debris. 

Then gently lower the tree into the hole, making sure that the base of the trunk is even with the ground. Gently replace the soil you dug up, loosening it with your hands along the way to get rid of clumps.

When you have loosely replaced the soil, pat it down gently with your hands or your shovel. If you need more soil, add it on top, but do not mound it around the trunk of the tree. 

Last Steps Of Planting Your Ash Tree

When you have planted the tree, it’s time to water it and make sure the soil around it retains moisture. Begin by using a garden hose, soaker hose, or sprinkler to thoroughly water the tree. 

Then apply mulch in a circle around the trunk of the tree, leaving some space between the trunk and the mulch. The idea is that the mulch will cover the part of the ground that eventually will be over the ash tree’s roots. 

Now you have successfully planted your ash tree! Treat it soon with insecticide, though. Let’s learn more about that now. 

Ash Tree Enemy #1: The Emerald Ash Borer

No article on ash trees is complete without at least a little information on the emerald ash borer, the deadly insect that has been destroying the United States’ ash tree population for two decades. 

The emerald ash borer is a small beetle that is green, hence its name, that, also as indicated by its name, bores into the trunks of ash trees. It was introduced to the United States in 2002 from China and, soon after it was discovered, its destructive nature became obvious. 

The insect is very efficient at destroying ash trees, as almost any ash tree infested by emerald ash borers will die in a matter of years if not treated. And even some treated trees are unable to be saved. 

So far, millions of ash trees have been killed by emerald ash borer infestation, and the insects have also prevented ash trees from producing the seeds necessary to grow new ash trees. The result is a decimation of ash tree forests in the United States. 

How To Prevent Emerald Ash Borer Infestation

The only way to protect your ash tree from these destructive bugs is to treat your tree ahead of time, before even a single emerald ash borer appears, with an insecticide. 

Many people are opposed to using insecticides, and if you are one of those, an ash tree is probably not a good choice for you. To plant one without treating it is essentially to sentence it to death. 

If you are going to plant an ash tree, it is imperative for the life of your tree that you take preventative measures against emerald ash borer infestation.

Begin by using an insecticide before the first emerald ash borer appears. Try something like BioAdvanced 12-Month Tree and Shrub Protect and Feed Insect Killer and Fertilizer, which specifically work on emerald ash borers. 


All this talk of emerald ash borers might make you think that you do not want to plant an ash tree, but don’t like this scare you off. All plants have quirks and needs, and the ash tree is just like those. 

If you are willing to treat your tree ahead of time and keep an eye on it, plus treat it periodically over the course of its life, you can easily care for an ash tree and keep it free of emerald ash borers.

In fact, the Colorado State Forest Service encourages people to plant ash trees to replace the ones that have been or may eventually be lost to emerald as borer infestation. 

That’s A Wrap!

Now you are ready to plant an ash tree, a beautiful and stately addition to just about any home. With the right knowledge and preparation, having an ash tree can be an easy process.  

Happy tree planting!

References

Greig-Smith, P. W., & Wilson, M. F. (1985). Influences of seed size, nutrient composition and phenolic content on the preferences of bullfinches feeding in ash trees. Oikos, 47-54.

Varol, T., Canturk, U., Cetin, M., Ozel, H. B., & Sevik, H. (2021). Impacts of climate change scenarios on European ash tree (Fraxinus excelsior L.) in Turkey. Forest Ecology and Management, 491, 119199.

While the willow tree may be famous for giving the appearance that it is weeping because of the long droop of its branches, it is a tree that brings joy to many people. The willow tree is a tree that can be a wonderful addition to your yard or garden if you choose the right place to plant it. 

Willow trees do well in several different locations as long as they can get enough water. For instance, you can plant your willows as a fenceline, near a pond, or simply in your backyard. Willows can prevent erosion, add shade, or just add to the curb appeal of your home. 

Whatever your reason for planting one, willow trees are often a great choice. Read on for all the info you need to choose a spot to plant your new willow tree. 

What To Know About Willow Trees

We are also including tips on how to plant your willow tree and how to care for it long-term. So let’s get started so you can soon start enjoying your new willow tree. 

There are many different types of willows, including some that are more like shrubs or bushes than trees. And then there are also the tree-type willows, like the weeping willow, which is the iconic tree you probably think of when you hear “willow tree.”

Weeping Willows: The Most Famous Willows Of All

Weeping willow trees are very distinctive trees, as there are not any other types of trees that have those same long, slender, flexible branches that reach to the ground and can sway and bend in the wind, rain, and even snow.

There are many types of willow trees, though the most popular type is almost certainly the weeping willow. 

How Did The Weeping Willow Get its Name?

The weeping willow got its name because its branches slope to the ground so that raindrops run down them and off onto the ground, giving the appearance that the tree is crying or weeping. While they have a sad name, weeping willow trees are both distinctive and beautiful.

Things To Know About Weeping Willow Trees

According to Brandeis University, weeping willow trees often grow near lakes, ponds, or rivers. You might have seen them in parks near ponds or lining the banks of rivers. 

And, according to Bates College, weeping willow trees do not live very long compared to other trees, especially long-living trees like oaks which have been known to live for hundreds of years. If you are looking for a tree that is not a legacy tree and that does not have to last as long in your yard or garden, a weeping willow might be a good choice. 

Weeping willow trees are also sort of messy trees because their leaves are quite small and a lot of leaves fall throughout the growing process. So, if you do not want to have leaves in your yard, you might have some extra raking to do to keep your yard tidy if you decide to plant a weeping willow.  

Root Systems Of Willow Trees

According to the University of Minnesota Landscape Arboretum, willow trees have very shallow root systems, which means that their roots grow close under the surface of the ground instead of deep in the soil. This can cause problems with mowing or digging near willow trees, as these types of activities have the potential to damage the willow tree’s roots. 

If you plant any type of willow tree, be careful with how you mow your lawn or what kind of planting and digging you do. If you want to plant other plants under your willow tree, for example, you will need to keep the willow tree’s root system in mind as you dig and as you choose what type of plant to place beneath it. 

Trees With A Purpose

In New Zealand, willow trees are used to stop soil erosion on hillsides. Sometimes rain on hillsides can cause the soil to come loose and slide downhill, resulting in a loss of soil all down the side of the hill. 

If a plant is planted there with a good root system, that can help the soil stay intact, as it is held together by roots. Then there is less erosion.

This is something that willow trees are so good at that they are specifically planted in New Zealand to keep the soil from eroding down the hillside. 

While many weeping willows are planted on flat ground, you might consider this tree if you have a hill or area where you want the roots of a tree to keep the rain from washing away soil. Many rainy areas of the country might be interested in this use of willow trees. 

An Important Tree For Science

Willow trees were the subject of what is considered by some to have been the first experiment that studied how plants get their nutrition; the experiment was conducted by Jean Baptista van Helmont in the 1630s. 

So willow trees also have a historical significance in that they were instrumental in scientists’ first abilities to learn about what keeps trees and plants alive. Trees need nutrients from the soil, sunshine, and water, and this willow tree study was a big deal in helping people learn about the needs that trees have. 

Choosing a willow tree might not only be good for your yard, but it also comes with a great story about its history in scientific experimentation!

Types Of Willow Trees

Yellow Weeping Willow Tree

There are several different types of willow trees. Here is a quick reference chart to help you distinguish between some of the more popular varieties. 

Type of Willow TreePlace of OriginCharacteristicGrowthEnvironment
Weeping Willow TreeChinaLong, flexible branches that sway in the wind and can reach the groundUp to 50 feet tallFull sun
White Willow TreeEurope and parts of AsiaUnderside of leaves are white; frequently used for weaving basketsUp to 100 feet tallFull sun or partial shade
Goat Willow TreeEurope and parts of AsiaActually a shrub or hedgeBetween about 12 to 30 feet tallPartial shade or full sun
Purple Osier WillowEurope, parts of Asia, north AfricaA shrub; purple stems with leaves that are blue greenUp to 15 feet tallFull sun
Narrowleaf Willow or Coyote WillowNorth America A shrub version of a willow tree; used to build furniture; gray barkUp to 15 feetFull sun or partial shade
Peach Leaf Willow North AmericaLeaves look like the leaves of peach trees; does not live longUp to 50 feet tallPartial shade or full sun
Dappled WillowChina, Korea, Japan, and RussiaLeaves that are pink, white, and green; red branches; also a shrubJust 4 to 6 feetFull sun or partial shade
Corkscrew Willow or Twisted WillowChinaTwisted branches; used as a bonsai tree; Up to 50 feet tallFull sun or partial shade
Bebb WillowNorth America (northern areas)Shrub used in woodworking; does not live long; dies easilyBetween 10 and 30 feet tallFull sun or even full shade
Scouler’s WillowNorth America (northern areas)Sometimes just called “willow;” provides food for wildlife; used as a hedgeBetween 20 and 50 feet tallPartial shade or full sun

Where To Plant A Willow Tree 

If you are interested in learning more about the most likely places you will see willow trees, take a look at our post on 8 Common Places Where Willow Trees Grow.

You might decide that you want to plant your willow tree in a traditional spot like one of those in our other article, or you might decide that the unconventional route is best for you. Whatever you decide, many places will work great for a willow tree. 

Planting A Willow Tree Near A Pond

Bodies of water are natural habitats for willow trees. If you have a pond on your property, which many people who live on farms do, the willow tree might work great.

Willows are so fond of water that you can commonly find them growing alongside ponds or stream in public parks.

You might also consider a willow tree if you are in charge of making planting decisions for a public space like a park or if you have a pond or river near your place of business. Choosing to plant a willow tree near water is a great idea, as the water source can be instrumental in keeping your willow tree healthy. 

Planting A Willow Tree In A Residential Yard

You can plant a willow tree in your front yard. But you do need to keep in mind the exact location and some of the qualities of your yard before you can know if the willow tree will grow well there or if it will cause problems. 

For example, you should not plant a weeping willow close to the sidewalk or street. The long, hanging branches will eventually grow down to the ground, causing a nuisance or hazard for pedestrians on the sidewalk or cars on the street. 

Also, make sure your willow tree is planted far enough away from your house that the branches will not droop onto the roof. A willow tree in a residential yard is best for a larger yard where the tree can have plenty of space for its branches all the way around to reach the ground without any obstacles in the way. 

Planting Willows Along A Fenceline

As the chart above indicates, many types of willows are more like shrubs than trees and are therefore very well suited for use as hedges on property lines or fence lines. 

If you had your heart set on a weeping willow, this may not be your first pick, but if what you are looking for is a natural barrier around your yard for privacy or just aesthetics, this is a great option. You will need to choose your willow tree wisely, so use our chart above as a reference to help you pick a willow that works well as a bush, shrub, or hedge. 

How To Plant A Willow Tree

Man Digging Hole

Planting a willow tree is very similar to planting any other type of tree, so if you have planted trees before, you have a head start. But, whether this is the first tree you have planted or the one hundredth, these tips can help you with some instructions and reminders along the way. 

Prepare The Location For Planting Your Willow Tree

Before you plant, you should get the site ready where you are going to plant your willow tree. Doing this will help you make sure that you don’t run into any obstacles early in the process of planting. 

First, check to see if the location is still as good as it was when you first chose it. Make sure sunlight levels, wind exposure, and proximity to your house, the street, the sidewalk, and other structures are all still acceptable.

Then clear the planting area of any debris like sticks, twigs, branches, excessive amounts of leaves or needles, weeds, and, of course, any litter or trash. Once you have cleared the area where you plan to plant your willow tree, you are ready to dig the hole for planting. 

Digging The Hole For Your New Willow Tree

Once you have prepared the site, it is time to dig the hole in which you will plant your new willow tree. You will need a spade or a large shovel, depending on how large the willow tree is when you plant it. 

Dig a hole that is about twice as large as the root ball of the new willow tree. 

Make sure to allow enough depth so that the willow tree’s root ball is completely covered, but do not dig the hole so deep that too much of the tree’s trunk is covered; the bottom of the willow’s trunk should be level with the surface of the ground after you replace the soil you just removed. 

At this point, you might want to spread a tarp before digging the hole so that you can place the soil you shovel out on top of the tarp. This way, when you finish replacing the soil around your tree, any excess soil that was displaced by the tree itself can easily be scooped up on the tarp for quick and easy removal from your yard. 

Placing Your New Willow Tree In The Ground

When you have dug the hole for planting, then prepare your willow tree to go into the ground. First, you will need to remove it from the container it arrived in (if that is a plastic pot container, which is very common). 

Remove The Tree From Its Original Container

.Do this gently, as this process is probably the time your new tree is most vulnerable to breaks or damage. The trees can be packed tightly in these containers, so this can be tricky. 

First, try gently squeezing the outside of the container all the way around, then give the tree a slight wiggle to see if it will come loose from the container. If it will not, you might need to try the next step.

Use a pair of garden shears to cut a slit on the side of the plastic pot; do the same on the other side. This will expand the size of the pot, allowing you to easily and gently remove the willow tree without breaking any branches or disturbing the root ball. 

Plant The Tree

Place the new willow tree gently in the center of the hole you dug, and lightly hold the tree trunk with one hand while you use the other to spade some soil all around until the tree will stand by itself. Then you can use your spade or shovel to continue replacing soil. 

Work in a circle around the tree trunk to keep the soil level even and prevent the tree from bending over in any direction. Pat the soil gently periodically to make sure you replace enough soil. 

When the pressed soil is even with the ground, you are finished! Congratulations on planting a willow tree!

Finishing The Planting Process

But you do have a couple more tasks before you are finished. The last step is to water the tree so it gets plenty of water on the first day to help it settle into its new space and acclimate to its new environment. 

Using a garden hose is the easiest way to accomplish this task, but you can use a sprinkler if you prefer. Set your hose to a gentle spraying setting at first and water the whole tree, including the branches and any leaves.

Next, use any setting that does not damage the tree to thoroughly water the tree’s roots. Some people like to place a running hose or soaker hose on the planting site for an hour or so to make sure the tree gets plenty of water on its first day in the ground. 

Set Your Willow Tree Up For Success

Once you have planted and watered your willow tree, you can give it a little extra protection for its first days in the ground, no matter where you planted it. These steps are usually using fertilizer or placing mulch. 

Placing Mulch Around Your Willow Tree

Mulch can help prevent weeds from growing around the bottom of your willow tree, and it can help the soil around your tree retain water. These are important steps for tree health, so this is a step you should consider implementing on the first day you plant your new willow tree.

Place mulch around your willow tree in a circle, making sure that the mulch covers any ground that might have willow roots beneath it. But make sure to leave a gap between the tree trunk and the beginning of your circle of mulch, as you mustn’t pile mulch onto the actual tree trunk. 

Using Fertilizer For Your Willow Tree

Don’t fertilize your tree in its first year, but after that, you can fertilize it to make sure it is getting the nutrients it needs. There are a couple of different types of fertilizer that you might want to consider. 

For a fertilizer that does not use granules, you have to spread it around, you might want to try a fertilizer specific to trees, like Miracle-Gro Tree and Shrub Plant Food Spikes, which are just spikes you can stick in the ground around your willow tree, which means you do not have to worry about loose granules.

These are also good options if you want to choose spikes that are not just generic fertilizer but that are specifically meant to be used on trees, like your willow tree. 

If you are open to using granules and would like to try something that is even more specific to your willow tree, not just trees and shrubs in general, you can try a plant food like Nelson Plant Food Crape Myrtle Food, which works for all flowering trees and claims to include willow trees.

With fertilizing, there is the possibility of other plants wanting to grow nearby. Take a look at the 8 best plants to grow under your willow tree!

There are lots of fertilizer options out there, so you should be able to find something that is a good fit for your new willow tree and your yard. 

That’s A Wrap!

Now you are ready to choose a spot for planting and put these planting tips to good use so you can enjoy your new willow tree. Remember to take into account the type of willow tree you have chosen when you choose the place to plant it and how to care for it. 

You can use a willow tree for decoration, shade, or even a border fence. These versatile trees and shrubs have a lot of potential when chosen for your yard or garden, or public parks and recreation areas. 

Happy planting!

References

Hershey, D. R. (1991). Digging deeper into Helmont’s famous willow tree experiment. The American Biology Teacher53(8), 458-460.

McIvor, I., Douglas, G., Dymond, J., Eyles, G., & Marden, M. (2011). Pastoral hill slope erosion in New Zealand and the role of poplar and willow trees in its reduction. Soil erosion issues in agriculture, 257-278.

Have you been dreaming during the cold winter months of ways to add some life and color to your houseplants? If so, a lemon tree might be perfect! 

Lemon trees can be grown in a variety of locations, but it is very important to choose the right spot. Try growing your lemon tree in a garden, an orchard, or even indoors! Make sure the location has enough light, is warm enough, has the right humidity, and provides the tree with enough water.

Read on for all the info you need to choose a great spot, plant your lemon tree, and enjoy it for years to come. 

Why You Should Plant A Lemon Tree 

Lemon trees may not grow just anywhere, but lemons are a fruit enjoyed all year long around the world. People love to grow lemons themselves so they can enjoy not just the fruit, but also the tree that bears those yummy lemons.

You can use lemons to make lemonade, of course, but they are also great for baking pies and tarts, seasoning fish dishes, and just refreshing a plain glass of water.

Whatever your reason for planting a lemon tree, we have some tips to help you get started, so keep reading for ways to choose a location for planting and the actual steps for how to plant your new lemon tree. 

Types Of Lemon Trees 

Like most trees, lemon trees have multiple varieties. Some varieties do better in different types of environments and some are tolerant of colder temperatures.

Some types of lemon trees are smaller than others, and some types of lemon trees are harder to take care of than others.

It is important for the health and success of your lemon tree that you choose wisely when you purchase your lemon tree. 

Here is a quick reference table you can use to determine the type of lemon tree that is right for you. 

Desired CharacteristicType Of Lemon Tree To PlantType of Lemon Tree To Avoid
Grows well indoors in heat and humidityAny typeNone
Easy to care forVariegated pink lemon treePonderosa lemon tree
Grows in locations with colder temperaturesVerna lemon tree or primofiori lemon tree or Genoa lemon treeAvalon lemon tree or Dorshapo lemon tree
Fast growingBearss lemon tree or Meyer lemon treeDependent on sunlight and water

As you can see, there is a type of lemon tree for almost every situation.

You can grow some indoors and some outdoors, even in colder climates. You can grow some in containers and some produce fruit in as little as two years. You can choose a variety that is very easy to care for or you can choose one that requires a little more effort.

No matter what you choose, the following tips will apply to almost every lemon tree when it’s time for you to choose a planting location. 

Planting A Meyer Lemon Tree 

Let’s focus for a moment on one of the most popular types of lemon trees that amateur gardeners like to grow, particularly indoors: the Meyer lemon.

Meyer lemons are very popular, though you may be surprised to learn that you don’t see them as often in supermarkets as you may think. Meyer lemons are very small, so they don’t usually get piled into the grocery store shelves the way other, larger lemons used more frequently in kitchens do. 

According to the University of Wisconsin-Madison Extension, Meyer lemons were brought from China in the early 20th century.

Does A Meyer Lemon Tree Need Anything Special?

Meyer lemon trees are popular because they are small and easy to grow in pots, meaning that people who live anywhere can grow them, not just people who live in tropical climates.

According to the Penn State Extension Office, you can grow Meyer lemons indoors in a pot easily with the right care and preparation as long as you can put the tree in a spot that gets several hours of sunlight each day. 

Also, unlike lemon trees that are planted outside, an indoor Meyer lemon tree will need fertilizer or to begin with fertilized potting soil. According to the University of Maryland Extension, indoor plants need extra nitrogen, which fertilizer will provide. 

Places To Plant A Lemon Tree 

Most lemon trees like heat and sunshine, as they are native to tropical regions, but there are some types that grow in much cooler places, so don’t think that you cannot grow a lemon tree just because you do not live in Florida or somewhere like it. 

To choose a good location for your lemon tree, first think about the purpose of your tree.

Do you want the tree as decoration? Do you want to use the lemons? Do you want to have a statement piece in your garden, or do you want to add some color and life to an indoor room or sunroom?

Whatever the purpose, knowing what you hope to get out of planting a lemon tree will help you choose the right location. 

The following tips will show you three great options for places to plant your new lemon tree, then we will examine the exact steps for planting. So let’s get started!

Plant A Lemon Tree In A Garden 

Lemon trees of any size can make great additions to gardens, whether planted in the middle of a flower bed or as a corner piece for a decorative pathway through your flowers. To plant a lemon tree in a garden, you must first consider the outdoor environment of the lemon tree. 

While there are some trees that flourish in cooler temperatures, it is unlikely that a lemon tree will do particularly well in super cold areas that experience extended months of freezes and snows. If this applies to you, you might want to skip down to our tips on growing a lemon tree indoors. 

Plant A Lemon Tree In An Orchard 

If growing multiple trees is what you’re after, whether that be all the same type of lemon tree or multiple varieties, planting an orchard is a wonderful idea if you have enough land and space.

First, you will need to consider the climate of your proposed orchard, just as if you were planting a lemon tree in a garden.

If your climate is too cold, you might need to consider a different type of orchard like one that grows apples, for example. But if you have enough sunlight and warm weather, a lemon orchard might be in your future. 

To scout the location of your orchard, consider the number of trees you wish to plant. Then think about the variety of lemon tree you have chosen, as some lemon trees grow to be much larger than others. 

If you want to plant multiple lemon trees but you do not have a lot of outdoor space, you can consider switching to a dwarf variety of lemon tree. Then you can plant multiple trees in a smaller area of land.

Dwarf trees also have the benefit of sometimes growing faster and producing fruit sooner than their standard-sized counterparts. 

Plant A Lemon Tree Indoors 

This might be the most popular option, particularly for those who have never grown a lemon tree before. Growing

a tree indoors has a number of advantages. Growing your lemon tree inside your house allows you to control the temperature in which the tree grows, and this is perhaps the most important factor, as temperature is key in growing lemon trees. 

Growing a tree indoors also allows you to control the water that the tree gets and even the humidity of the tree’s environment, as there are several ways to change that even inside.

How Can I Ensure My Lemon Tree Has The Proper Humidity?

You can mist the leaves of your tree for humidity, you can place a container full of water under or near your tree so that the water’s evaporated mist goes straight to the tree.

You can even use an electric room humidifier to add moisture to the air around your tree!

Planting a tree indoors is a little different from planting one outside, so we have included some information about both methods.

Read on for the steps you need to plant your lemon tree, either outdoors in your yard or in a container that can move between indoors and outdoors. 

How To Plant A Lemon Tree

Lemon trees are easy to acquire. You can find them at your local home improvement store, garden nursery, or even online, like this Brighter Blooms Meyer Lemon Tree that comes in a pot and is already a few feet tall.

Once you have purchased your lemon tree and have decided whether this variety is best grown indoors or outdoors, choose the appropriate method from those below and get to planting!

Planting A Lemon Tree Outdoors In Your Yard Or Garden

Planting a lemon tree outdoors is not very different from planting any other type of tree except that you might have to take more consideration of sunlight than with some other types of trees.

Your lemon tree needs at least six hours per day of full sunlight, preferably in the morning hours.

You can scout outdoor locations ahead of time by observing on a sunny day which areas of your yard or garden get the most morning sun. You can literally time the sun to make sure it equals at least six hours.

If it doesn’t, you should choose another spot so you do not have to have this sunlight struggle throughout your tree’s life or, even worse, so that the tree does not die from being too shaded. 

Check out some of the other reasons why lemon trees grow best in full sun!

Once you have found the right sunny location, you are ready to begin planting. 

Digging The Hole And Planting The Tree

Before you do any digging at all, clear any debris from your planting site. This includes rocks, tree bark, other plants, weeds, and anything else that is not just plain soil.

Once you have done this, begin digging a hole, removing any rocks or roots you encounter along the way. 

The hole should be about twice the size of the root ball of your lemon tree, and it should only be deep enough that it covers the root ball, no more and no less.

Be sure to test the location by gently placing the tree in the hole before you start to replace the soil.

Make sure that the base of the tree trunk will be just barely covered with soil and that the root ball will be completely buried. 

You can learn more about the process of planting a lemon tree in our comprehensive lemon tree timeline!

Fertilizing The Tree

Don’t use fertilizer right away. Fertilizer can actually have the opposite of its intended effect when used on plants and trees that are too young.

But, once your lemon tree has gone through a full growth and fruit production cycle, you can start using fertilizer to give your lemon tree an extra boost. Some manufacturers even make fertilizer that is specifically tailored to citrus trees, like this Miracle-Gro Shake ‘n Feed Citrus, Avocado, and Mango Plant Food

Learn more about the best lemon tree fertilizers (and how to use them) here!

Watering The Tree

Once you have replaced all the soil around your lemon tree’s trunk, it is time to water the tree. Give the tree a thorough soaking with your garden hose, either by using a sprayer on a gentle setting or by placing a soaker hose on the ground for a while.

Make sure the ground is fully saturated with water for the first time. Then, if you live in an area with significant rainfall that is not a very dry climate, you probably will not have to water the tree very often, if at all. 

Planting A Lemon Tree In A Container

There are two main methods of growing a lemon tree in a container. The first is to grow the tree in a container that stays outdoors in the warmer months of spring and summer then is moved indoors for the cold weather of the fall and winter.

The second is to grow the tree in a container that stays indoors year-round. Which method you choose is up to you, the locations available to keep a container, and the method by which you might hypothetically move the container around. 

Before you make a decision, consider that container plants are usually very heavy, especially large plants like trees. The pots or containers that these plants grow in are very large, meaning that on top of the weight of the tree itself, there will also be the weight of the container, the soil inside, and, most significantly, the water held in that soil. 

A container plant can easily get extremely heavy, so, if you plan to move the tree at all, and especially if you plan to move it frequently, you should definitely invest in a plant stand with wheels on the bottom.

This way, you can simply roll your tree around from location to location. This might get a little tricky when going in and out of doorways, or if you have to navigate any stairs, but it is much preferable to having your plant stuck in one location or to pick up such a large container full of tree, soil, and water. 

Now let’s look at the steps to planting a lemon tree in a container, no matter where the container will be kept. 

Choosing A Container

Lemon trees are available for purchase in a number of sizes, but you should not necessarily choose a container based on the size of your tree at the time you plant it.

Rather, think about the size of the tree when it has reached maturity, or at least in a few years. You want to transplant your container lemon tree as few times as possible, as you do not want the lemon tree to go into shock.

Try to choose a container large enough for a mature tree of the variety you have chosen. 

Also, choose a container with adequate drainage. An old, vintage plant container with a solid base might seem like a great idea based on how good it will look in your living room, but you need to choose a container that has holes in the bottom. Otherwise, your lemon tree will be at risk of root rot from sitting water in the soil near the roots. 

Planting Your Lemon Tree In The Container

Once you have chosen a container, purchase a good-quality potting soil. You can pick one that already has a fertilizer in it, especially if that fertilizer is specific to houseplants or even indoor trees. Make sure you buy plenty of potting soil for your container.

A large container like one needed for a lemon tree will require a lot of potting soil. 

Before you put any potting soil in the container, use some rocks or bark to create a loose layer at the bottom of your container that will provide some space for water to drain even more effectively.

Once you have layered some drainage materials in the bottom of the container, begin adding potting soil. Add enough so that it looks like your tree will sit a few inches from the top of the container.

You do not want to fill the container to the brim with potting soil. Rather, leave some room for mulch or peat moss, which we will discuss in just a little while.

When the soil level looks right, gently place your lemon tree in the middle of the container and loosely surround the root ball with the soil until the tree sits centered and upright on its own.

Continue to gently put potting soil around the root ball until the root ball is completely covered. Then place some peat moss or mulch on top as an added layer to help your tree retain moisture. This is a particularly important step for the winter months when artificial heat makes the indoor air very dry. 

Caring For Your Indoor Lemon Tree

Again, make sure to place your indoor tree somewhere that gets several hours of light per day, preferably a southern-facing window. Then make sure to check the water level at least once a week.

If the soil feels moist, you do not need to water the tree, but if the top level of soil starts to seem dry, it is time for some water.

Use a mister to provide extra moisture for your tree by misting the leaves with plain water.

These steps will help keep your tree healthy inside and you will start to see some lemons growing before too long!

Some Final Tips For Growing Your Lemon Tree Long Term

If your tree is planted outside, pay attention to the weather. Heat waves are bad for lemon trees and have a very negative impact on their health and growth. Drought is also very bad for most trees, including lemon trees.

If drought becomes a problem or extreme heat is a problem for more than a couple of days, you should consider watering your tree with a garden hose or sprinkler to make sure it survives these extreme conditions. 

Also, keep in mind that in many states it is now illegal to transport citrus fruit across state borders. This is because there are diseases that can kill large groves of citrus trees if they are introduced from other locations, so the rule is in place to keep everyone’s citrus trees safe and healthy. 

That’s A Wrap!

Now you are ready to choose a location for your lemon tree and start growing lemons.

Whether you live in a warm part of the country and are planting your lemon tree outside or you plan to enjoy the bright, sunny sight of a healthy lemon tree indoors while the blizzards rage outside your house, you can be well on your way to growing your own lemons in just a few months with the right plan and care. 

Once you know what to expect from growing a lemon tree, and you have learned the proper ways to plant and care for your tree, you will be enjoying your lemon tree and its fruit in no time. 

Enjoy your new tree! 

References

Boaretto, R. M., Hippler, F. W., Ferreira, G. A., Azevedo, R. A., Quaggio, J. A., & Mattos, D. (2020). The possible role of extra magnesium and nitrogen supply to alleviate stress caused by high irradiation and temperature in lemon trees. Plant and Soil, 457(1), 57-70.

French, B. C., & Bressler, R. G. (1962). The lemon cycle. Journal of Farm Economics, 44(4), 1021-1036.

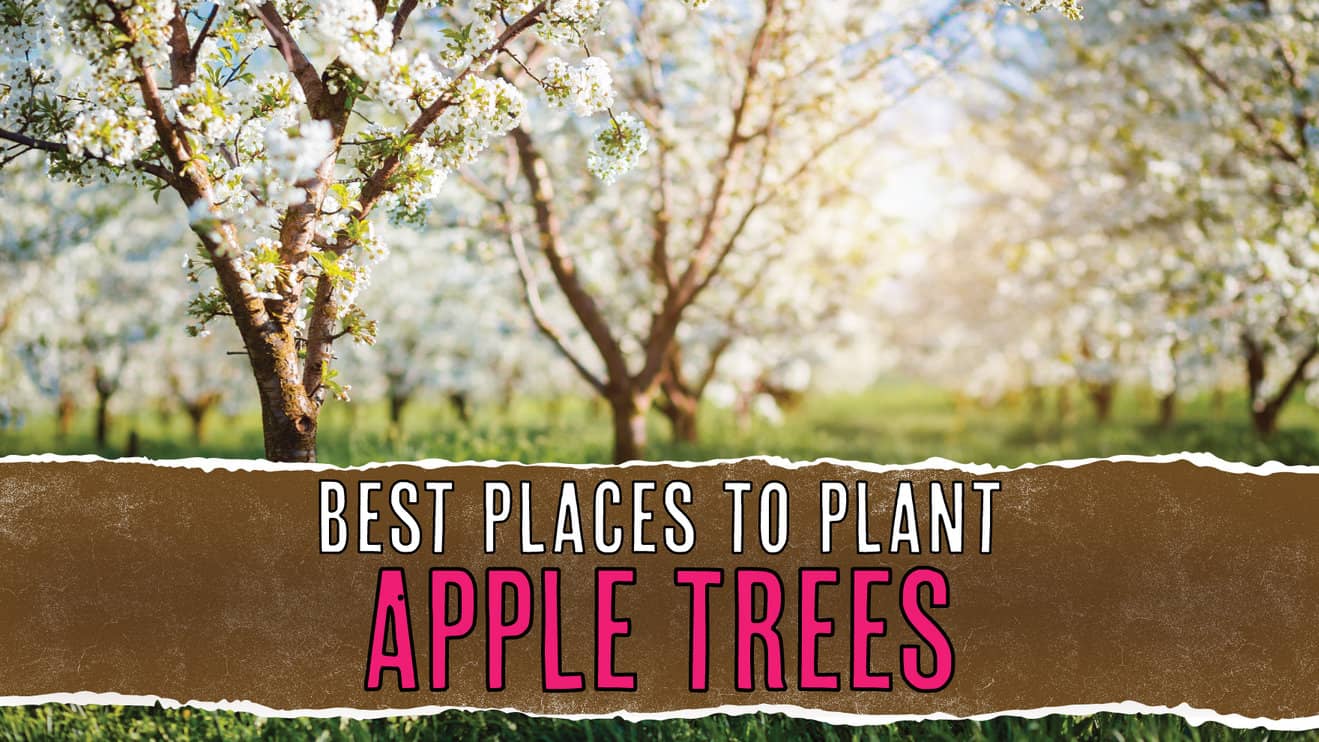
Apple trees are some of the best trees to plant near your home for several reasons. For instance, they have lovely leaves that change color in the fall and are usually very hardy trees that work well in several climates. And, of course, they produce delicious apples every year!

If you want to plant an apple tree near your home, these are some of the best places to plant your tree to make sure it grows healthy and strong, producing lots of delicious apples year after year. Deciding where to plant an apple tree is a very important decision that will affect your tree and the fruit it produces for the entirety of the tree’s life.

Choosing The Best Planting Location For Your Apple Tree

There are many different varieties of apple trees, and before you get started, you will want to note what is probably the most important piece of information you can gather about planting and growing an apple tree. 

An apple tree, no matter what variety it is, can only produce fruit if it is planted within about 100 feet of another apple tree, and that second apple tree has to be a different variety of apple. 

That’s right; to grow apples on one apple tree, you have to have two apple trees, unless you happen to have a neighbor who also has apple trees.

It is of note that crab apple trees, which are very common although rarely used for their fruit, do count, so if you have a crab apple tree, or you have a neighbor close by who has one, you are in luck. 

Using A Crabapple As Your Secondary Apple Tree

Many rare crab apples in the apple orchard.

There are some benefits to planting a crabapple tree, apart from the obvious benefit of providing that secondary variety of apple tree you need for your primary apple tree to produce fruit each year. 

For starters, crabapple trees have very pretty blossoms that might be a wonderful addition to your garden.

They also produce fruit that is usually discarded as not very tasty, but in fact, crabapples are great for making jams and jellies. If you are a fan of canning or just want to make some apple jam, a crab apple might be a great tree for you. 

Another benefit of the crabapple tree is that it is very easily planted in many climates and environments. No matter what kind of soil you have at your home, it is likely that a crabapple tree will grow well there. They are very hardy and durable trees!

You can also scope out your neighborhood to see if there is already a crabapple tree somewhere close by.

Chances are, depending on the part of the country in which you live, someone has planted a crabapple at some point, But if they haven’t, this might be a good solution for you if you need a second tree so your primary apple tree can produce fruit. 

The 5 Best Places To Plant An Apple Tree

Sometimes, the best place to plant an apple tree depends on the type of tree you have chosen. Sometimes, it depends on the reason you have planted an apple tree; after all, not everyone chooses an apple tree for the fruit alone.

Sometimes, the best place to plant the tree depends on where you live, the type of climate you live in, and the type of garden you already have. 

Before you can choose where to plant your tree, there are several factors you should consider. Do you live in a dry, hot climate? Do you have a very small yard? How many apple trees are you planning to plant? What is the purpose of your tree?

These are all questions you should consider before planting your new apple tree. These five tips will help you determine the best place to plant your apple tree, no matter the reason you have chosen to plant one. 

1. Planting An Apple Tree Where You Need Shade

One of the biggest reasons that people may choose to plant trees of any sort is to provide shade. Nothing is better than a giant leafy tree when you need a shady place or need to provide some sun cover for your home, yard, or other plants. 

Areas of the country lacking natural trees may particularly benefit from the planting of shade trees.

If you live in one of those, be careful that you plant where your tree will survive or that you are prepared to take the extra precautions required to care for your tree throughout the year. For example, these trees will need extra water. 

Picking The Best Spot To Provide Shade

Picking the best spot depends on where you want the shade to be focused.

If you want to provide some shade for your house, for example, to help keep it cool in the summer, you will need to determine the right distance from your home that will provide shade but will not make the tree’s roots grow under your house. 

Apple trees have very deep roots, but, especially compared to some other trees, the roots of apple trees do not grow out very wide. 

So while the tree’s roots will go very far into the ground, apple trees are great shade trees for houses because it is less of a threat that the roots will grow out and under the house itself. Just provide about ten feet or so of space between your tree and your house and all should be well!

When choosing your spot, keep in mind that the tree will eventually reach its full height of 30 feet or more, so the canopy will be quite large. This means that you can choose which side of your house you want to shade and plant your tree there without having to worry about a very specific spot in the yard. 

To shade your house best in the summer from the harsh and hot afternoon sun, plant the tree on the west side of your house. This way, the tree will keep the afternoon sun at bay.

You can also plant additional trees on other sides of your home to provide shade throughout the entire day. This might be a good way to incorporate additional trees if you need a second variety of apple tree to ensure that your trees produce fruit. 

2. Planting An Apple Tree Near Other Plants

Blooming apple trees in a row on a flower meadow

Why settle for one variety of apple tree when you could be eating two, three, or more different types of apples every harvest season? Some people plan to plant not just one or two but many apple trees and create a mini orchard in their backyards. You can do this, too, with a little careful planning. 

First, make sure you space your trees far enough apart that they will have plenty of room once they reach their full growth potential. Most apple trees grow to be about 30 feet tall, give or take several feet. They also have large canopies, so you also have to account for the width of your trees. 

You don’t want the branches of your apple trees to overlap. A general rule of thumb is to plant apple trees about 20 feet apart but no more than 100 feet apart.

Keeping them in this general vicinity will ensure that they have enough room to grow but are also close enough to provide the fertilization needed for fruit production each year. 

Arranging Your Apple Trees

You can place the trees in rows to achieve that classic orchard look, or you can plant them a little more sporadically to achieve a natural look that you might find in a forest or grove. Either way, if the spacing is right, you can have many different varieties of apples in your yard. 

If you want to plant several different trees, but you do not have a lot of yard space, you can consider planting dwarf varieties of apple tree instead of standard-sized apple trees.

This will allow you to plant the trees closer together so you can have more trees and more types of apples. 

Taking Care Of Your Mini-Orchard

Take care of your new mini orchard by looking into some of the more nuanced things about growing apple trees.

For example, some apple trees’ growth can be affected by whether or not the fruit is picked or whether the blossoms of the tree are removed, so look into your variety to see whether this is something you want to consider when choosing multiple apple tree varieties. 

You can also sometimes affect the production of fruit based on the removal of shoots from your trees, so this also might be something to look into if you plan to become an amateur (or even professional!) orchardist. 

3. Planting An Apple Tree In A Container

There are some reasons that it might not work well for you to plant an apple tree in your yard. Maybe you don’t have the space or maybe you don’t live in a climate conducive to growing fruit trees easily.

Maybe you are renting your home and don’t want to leave your tree behind when you move or your landlord has not approved a new tree in the year. 

Whatever your reason, you can still grow an apple tree even if you are not able to plant it in your yard. You can just plant it in a container!

This method works best with dwarf varieties of apple trees, but luckily, there are quite a few of those. You still have lots of options. According to Iowa State University Extension and Outreach, dwarf varieties usually grow to be between 10 and 15 feet tall. 

They are also easier to care for than larger trees, so this type of tree might be good for you if you are new to growing trees. 

To grow your apple tree in a container, you will need to follow some of the steps for planting a tree outside, but some aspects will be a little different. So don’t use the chart below on its own. Instead, incorporate these steps to make sure your container apple tree is just as healthy as if you had planted it in an outdoor orchard.

How To Plant An Apple Tree In A Container

First, choose a large container. A bigger container will help you grow the tree as long as possible before you have to move it. If you choose a container large enough, you might not ever have to move the tree at all! 

If you want to keep your tree indoors, you can get a rolling plant stand that will make it easier for you to move the tree from room to room, as the potted tree will be very heavy once it is planted and especially after it is watered. 

Being able to roll your tree is also beneficial because it can help you move the tree from spot to spot in your house as conditions change. If the tree needs more or less sun, you can move it.

You can also move it away from heat sources or air conditioning throughout the year to keep its environment at a more consistent temperature. 

Plant your tree in the container using potting soil, and water it thoroughly right after planting.

From there, the care of your apple tree is much like it would be with an outdoor tree, with one huge and very important exception: you have to water your tree! Don’t forget that this indoor tree doesn’t get rain or snow like an outdoor tree, so it depends on you for water. 

And make sure that your container tree, just like one that is outside, stays within 100 feet of another apple tree so it can produce fruit when it matures.

Unless you are keeping your container outdoors year-round, you will probably want to have multiple container trees or consider placing your container tree indoors in the winter months but outside for spring and summer. 

4. Planting An Apple Tree In Full Sun

Apple tree in a sunset

Apple trees love the sunshine. If you live in an area where the sunshine is not too harsh, you usually cannot go wrong with planting your tree in the full sunshine. 

Apple trees need lots of sunlight to produce apples, and the most important time for a tree to get sun is in the morning when the drying properties of sunlight will help keep disease at bay. 

To find a good location, scout areas around your house that are not shaded for most of the day. Choose a sunny day when the cloud cover is unlikely to affect how you see the shade and sun near your house.

If one of the spots you located is far enough away from other trees but close enough to that second apple tree needed for your new tree to produce fruit, you may have found the perfect spot!

5. Planting An Apple Tree In Partial Shade

This one is a specific location tip for those who live in harsh, dry, sunny climates like the southwest United States. The sun in these parts of the country can be too sunny for many plants, even apple trees that normally love full sun. 

If you live somewhere with very harsh sun or you live at a high elevation where the UV rays are significantly more intense than in other parts of the country, you should consider providing some partial shade for your apple tree (and for most of your plants except those native to the area where you live). 

How To Plant An Apple Tree In The Shade

To choose a location that will provide a healthy environment for your apple tree, the key is to pick somewhere that gets some sun but not all the sun all day.

For many people, this means planting the apple tree in a location that will be shaded by your house. It is best for your apple tree to get sunshine in the morning hours and to have shade in the harsh afternoon sun. 

Determining Where To Plant Your Apple Tree For The Best Shade

To figure out where to plant your tree, you will need to do a little detective work. Before you plant anything, take some time to observe the sun at your home. Step outside and walk around a little bit in the morning. Where is the sun?

Make note of the sunniest locations. Then go back outside again in the afternoon on the same day and check the spots you marked earlier that morning.

It is important to do this on a day when there is no cloud cover, as that can affect how the shady and sunny spots of your yard look. If you find the weather has changed throughout the day, it might be worth it to start over another day when you are sure to get an accurate picture of the sun and shade around your home. 

If you find a spot that was sunny that morning but is now in the shade, you may have found the perfect location for planting your apple tree. 

How To Plant An Apple Tree After You’ve Chosen The Best Spot

Tree Planting

Now that you have chosen a location for your apple tree, it is time to get to planting! If you have never planted a tree before (or even if you have!), you might find the process a little daunting.

Never fear; we are here to help you learn how to plant a tree with some quick tips that will make the process simple and set your tree up for health and success. 

When To Plant Your Apple Tree

Before you buy your new apple tree seeds, sapling, or seedling, think about the time of year you are going to plant it.

Because you can damage or even kill the tree by waiting too long to plant it, it is best to make sure you have everything in order, including the location of planting and time of year, before you even purchase the tree. 

The best time to plant your apple tree depends to some extent on where you live. Different parts of the country can experience wildly different climates regarding temperature, humidity, precipitation, and elevation. You should consider where you live before you decide what time of year to plant. 

In general, you’ll want to plan your apple tree either in the early Spring just as the ground thaws, OR you’ll want to plant it in the late Fall just before the ground freezes. Either option gives the tree’s roots ample time to get established with minimal pest damage.

Steps For Planting Your Apple Tree

To best set your apple tree up for success, you can use this checklist as you go through the planting process. This way, you won’t miss any steps and everything will be clear as you work on planting your apple tree. 

STEPSTIPS
Dig a holeMake sure the hole is deep enough for the entire root ball of the tree, but not any deeper. 
Place the treeThe roots should be buried, but the area just above the roots of the tree should be visible. 
Fill the holePack the soil in and then evaluate to see if you need to add more. The replaced soil should be even with the surrounding ground. 
Water your treeMake sure to thoroughly water the tree once you have replaced the soil. The ground should be fully saturated. 
Skip the fertilizerIt may seem like a good idea, but it can hurt a young tree!

Using Fertilizer Or Fertilized Soil For Your New Apple Tree

It might seem like using fertilizer is a good idea for a new tree, as it might provide extra nutrients and help the tree grow better and faster. But fertilizer is usually actually bad for young apple trees.

Fertilizer that is used on new trees can burn the roots, causing the tree’s growth to slow or stop. So don’t use fertilizer on your brand new, young apple tree! When you plant your tree, fill the hole with only replaced soil and water. 

When And How To Fertilize An Apple Tree

You can, however, and probably should, use fertilizer on mature apple trees. So once your tree has established itself and is mature, it’s a good idea to add fertilizer.

If you use fertilizer, consider using one specifically made for fruit trees, like this Down to Earth Organic Fruit Tree Fertilizer Mix. You can also supplement the soil around the tree while you are planting with fertilized soil like Miracle Gro Garden Soil for Trees and Shrubs

We recommend adding fertilizer twice a year, starting the year after you plant the tree. Put the fertilizer away from the trunk, though, starting at least 18 inches away from the trunk. Fertilizer is placed under the branches but not at the literal base of the tree. 

Using products like these can give your apple tree an extra boost as it produces fruit. But read the directions first, and look into the specifications for the type of apple tree you have chosen before you apply fertilizer or fertilizing soil. And, as always, keep fertilizers and fertilizer soil away from children and pets. 

That’s A Wrap!

Now you are ready to choose a location for your new apple tree and plant it when the time is right. 

Be sure that you don’t buy your tree too early, as you want to plant it as soon as you can rather than leave it in its temporary container or bag for very long. Ideally, try to plant a new tree within a day or two of purchasing it, whether it is a larger tree or a sapling. 

Younger trees need to be planted even sooner, though, as they are more vulnerable than more established trees. 

Keep in mind that, if you want a head start, you can choose to purchase a tree that has already grown quite a bit. Some gardening sources even provide trees that are already several feet tall or may even already bear some fruit. If you are in a hurry to grow your apples, you can start there. 

It is more cost-efficient, though, to start with a younger tree like a seedling or sapling. You will have to wait longer to see apples, but it might be more satisfying to grow your tree from a very young age. 

And if you are struggling to decide exactly what type of apple tree you want to plant, check out our post on the easiest apple tree varieties to grow! 

Happy planting!

References

Maggs, D. H. (1963). The reduction in growth of apple trees brought about by fruiting. Journal of Horticultural Science38(2), 119-128.

Quinlan, J. D., & Preston, A. P. (1971). The influence of shoot competition on fruit retention and cropping of apple trees. Journal of Horticultural Science46(4), 525-534.

Roussos, P. A., & Gasparatos, D. (2009). Apple tree growth and overall fruit quality under organic and conventional orchard management. Scientia Horticulturae123(2), 247-252.

Merwin, I. A., & Stiles, W. C. (1994). Orchard groundcover management impacts on apple tree growth and yield, and nutrient availability and uptake. Journal of the American Society for Horticultural Science119(2), 209-215.

Papaya fruit can be decadently delicious and refreshingly juicy, which makes it no great surprise that many people try their hand at growing their own papaya trees. Certain questions often arise, however, such as “why do papaya trees grow best in full sun?” and “what should I do to take care of my papaya tree properly?”

Generally speaking, papaya trees need full sun for reasons that include (but are not limited to) the following: robust leaf production, accelerated growth, fruit production, the prevention of illnesses and fungal infections, and just the overall health and well-being of the trees themselves

Within this article, we are going to discuss these different benefits a little more in-depth, and also go over not only the sorts of growing conditions that papaya trees like but also how to best take care of them. We hope you find this information helpful for growing papaya trees of your own. 

What Do Papaya Trees Like? 

In order to successfully grow papaya trees that are both healthy and productive it is important to understand the sorts of conditions that these trees prefer. With that in mind, we’re now going to go over what papaya trees like. 

Papayas Adore Full Sun 

Native to South and Central America, papaya trees are accustomed to growing in tropical climates with plenty of bright natural light. As such, in order to thrive papaya trees need direct sunlight and plenty of it. 

Generally speaking, papaya trees prefer growing in full sun; this means that they will grow best when planted in a location that gets six to eight hours of direct light a day. 

Papaya trees can be grown in partial shade, but will typically not exhibit the same robust growth or fruit productivity as trees grown in full sun.

Papayas Love Warm Temperatures 

As a species native to tropical climates, it should come as no surprise that papaya trees love growing in warm temperatures.

According to this Papaya Growing Guide, papaya trees do best in temperatures ranging from 70°F to 90°F. Furthermore, these trees generally can’t grow well in any of the colder regions of the world; they only thrive and successfully produce fruit when grown in USDA Hardiness Zones 9 through 11

Because of its temperature preferences, the papaya species as a whole often does best in the southern regions of the United States; Hawaii, Florida, Texas, and some parts of California are often considered to be the best choices when it comes to growing papaya trees at home. 

Papayas Like Moisture (But Not Drowning) 

Papaya trees are like most plants in that they do best (particularly during the blooming season) when they get the right amount of water. 

It’s worth noting, however, that while papayas like a certain amount of moisture in their soil they do not like to grow in thoroughly soggy soil

Soil that contains too much moisture and is waterlogged can have a detrimental effect on the overall health of the tree because of its incredibly shallow root system (potentially leading to harmful conditions such as root rot), so it’s important to make sure that the soil your tree is growing in is well-draining. 

In addition to the risk of root rot, papaya trees that are waterlogged can experience extreme stress which has the potential to leave them vulnerable to other sorts of problems.

Generally speaking, the preferred method of watering papaya trees is drip irrigation, since it allows the grower to carefully regulate how much moisture their papaya trees receive. This allows greater control over the watering regimen while also ensuring that the trees do not get overwatered. 

Papayas Love Fertilizer 

Papaya trees are notable for being one of the species of fruit trees that require frequent fertilizing in order to achieve optimal growth. They are what are known as “heavy-feeders”. 

According to the University of Vermont, heavy-feeders by definition are plants that require lots of minerals and nutrients in order to successfully grow; tomatoes, squash, and corn are some of the most well-known heavy-feeders, but it’s important to know that papaya trees also fall into this category of plants. 

It’s also important to understand that papaya trees typically require special types of fertilizer that contain specific minerals and nutrients that are key to the healthy development of the papaya plants.

We will be discussing further details relating to the subject of successfully fertilizing your papaya trees later on in the Care section of this article, so stay tuned!

Why Do Papayas Need Full Sun To Grow Best? 

It’s one thing to know that papaya trees need full sun, and it’s another thing entirely to understand why that is the case.

Since understanding is often the key to success when it comes to successfully growing your own fruit trees, we’re now going to go over the reasons why papayas need full sun to grow best. We hope you find these explanations helpful and informative. 

They Need To Produce Many Leaves 

According to the University of Minnesota (in an article that primarily discusses house plants but also contains important information regarding the importance of sunlight for plant growth), all plants require sunlight to grow.

The process of photosynthesis that they rely on for producing energy necessitates the intake of sunlight. The energy that plants produce via photosynthesis is used for not only overall growth but also the production of fruit and flowers; this is particularly relevant when it comes to papaya trees

In order to successfully produce fruit and a lot of it, papaya trees will correspondingly need a lot of energy; this in turn means they will need to have lots of leaves. 

The best way to make sure that your papaya tree will achieve its maximum growth potential and have plenty of leaves when fruiting season rolls around is to make sure it gets lots of direct natural sunlight. 

As mentioned earlier, papaya trees do best in conditions of full sun, where they can get 6 to 8 hours of bright sunlight a day. 

When initially planting your papaya trees, make sure they are spaced a fair distance apart from both each other and other trees, so as to avoid competition for both sunlight and water. It’s also advisable to plant them away from your house or any other structures that might cast too much shade on them. 

Full Sun Allows Them To Grow Super Fast 

The more sunlight that papaya trees get, the faster they are able to grow. If you truly want your papaya tree to experience robust growth and reach maturity as quickly as possible, it is imperative that it is grown in conditions of full sun that will provide it with plenty of direct sunlight. 

Papaya trees grown in locations where they receive less than six hours of direct sunlight a day will still grow, but not as fast as those grown in full sun. Similarly, it may take longer for papaya trees grown in partially shady conditions to both flower and produce fruit. 

Therefore, if you want your tree to mature and be productive as soon as possible, full sun is a must. 

Fruit Production Requires A Lot Of Sun 

As mentioned a moment ago, fruit production for plants requires a great deal of energy; since this energy comes from the process of photosynthesis (of which sunlight is a key component), it would not be incorrect to state that fruit production requires a lot of sunlight. 

Papaya trees in particular require a great deal of energy to successfully produce healthy and tasty papaya fruit. 

Additionally, while papaya trees themselves can grow and produce some fruit when grown in partially shady conditions, any fruit that is produced will be significantly less sweet in comparison to the fruit that comes from trees grown in full sun

Sun Prevents Sickness And Fungal Infections 

Making sure that your papaya tree is getting plenty of direct natural light is one of the easiest ways to keep your tree healthy and prevent certain illnesses from taking hold. 

Primarily, this is because your tree will be at its healthiest when getting plenty of sunlight and as such will be capable of fending off (or more easily recovering from) any potential illnesses it might contract

Papaya trees grown in the shade are sometimes more stressed than those grown in full sun; this stress leaves them slightly weaker, and more vulnerable to potentially harmful infections. 

Additionally, various studies have shown that sunlight can sometimes help inhibit the growth of certain powdery mildews and fungal infections that can prove harmful to trees, shrubs, and many other types of plants.

While the specific level of effectiveness can vary depending on a whole slew of different circumstances (including the age and relative health of the affected tree), there’s no denying the fact that sunlight can be incredibly helpful for preventing illness in your papaya trees.

That being said, if one or more of your papaya trees begin to exhibit symptoms of illness that you cannot identify or that are not responding to treatment, it’s highly recommended that you consult with a specialty trained individual, such as a professional arborist or botanist. 

Full Sun Helps Keep Papayas Warm And Happy 

As discussed earlier, papaya trees are native to warm and sunny climates. As such, these trees are happiest (and exhibit the most growth and productivity!) in locations where they can bask in plenty of direct sunlight. 

Papaya trees grown in conditions other than full sun often exhibit stunted growth and subpar fruit productivity. As such, it is in the best interests of both you and your trees to grow them in warm and sunny locations that will keep them happy and productive. 

How To Care For A Papaya Tree 

Now that we’ve discussed the ideal conditions for papaya trees, it’s time to go over some of the specifics relating to their care. 

In this section of the article, we’re going to talk about certain things (such as fertilizing regularly and utilizing mulch) that you can do to ensure the good health of your own papaya trees. 

Regularly Fertilize 

As mentioned previously, papaya trees are what are known as “heavy-feeders”, which means that they need plenty of certain nutrients in order to remain healthy and grow. 

While the precise timing of one to fertilize can vary slightly depending on your soil conditions and the overall health of your tree, it’s generally recommended that you use fertilizer every other month.

Do be aware that you may sometimes need to adjust the timing of your fertilizer use depending on the relative age of your tree; younger trees do not generally need a lot of fertilizer, but once a papaya tree reaches full maturity and begins producing fruit it will need those extra nutrients. 

Additionally, while your papaya trees are young (in the seedling and sapling stages)  composts are typically best, but once your tree matures you will need to transition to specialized fertilizers that are designed to provide your papaya trees with precisely the right nutrients to encourage both robust growth and plentiful fruit production

Most agree that the best type of fertilizer for papaya trees is a 14-14-14 blend. Also known as a “triple-14” fertilizer, this variety is ideal because of the high levels of key nutrients it contains.

Specifically, fertilizers of this type contain 14% phosphorus, 14% potassium, and 14% nitrogen. This higher concentration of vital nutrients can help to encourage robust growth in all manner of plants, but is particularly good for heavy-feeders such as papaya trees. 

Products such as TreeHelp Premium Fertilizer for Papaya and Osmocote Classic Fertilizer can be excellent choices for making sure your papaya tree is getting all the nutrients it needs to stay healthy and be productive. 

Make Sure It Has Some Water 

As discussed earlier, it’s important that papaya trees get enough water to remain healthy. That being said, remember not to go overboard! 

Papaya trees have a shallow root system that is susceptible to root rot and other similar problems when the soil has too much moisture, so be sure you don’t overwater your trees. 

Knowing precisely when to water your papaya trees can depend on a variety of different factors (the cultivar you’ve chosen to grow, the type of soil and how well it drains, the time of year, and so on) but generally speaking, it’s a good idea to water your papaya trees every few days (or at the very least check the soil, to gauge current moisture content).

Watering is particularly important during the blooming and fruiting season since your trees might drop the flowers or fruit prematurely if they aren’t getting enough water

It can sometimes be a challenge to find the unique balance for watering papaya trees (too much water can cause root rot, but not enough water can cause drought stress) but we’re confident that you’ll be able to succeed as long as you remember what we’ve discussed today.

Mulch Around Your Papaya 

As mentioned earlier on in the article, papaya trees do best when there is a certain amount of moisture in their soil. This can be difficult to achieve sometimes, however, given that papaya trees are often only grown domestically in the hottest of regions, where the moisture in the soil will often evaporate during the day. 

Mulch can be extremely helpful in this regard. According to the University of Nebraska-Lincoln, mulch can offer many various benefits, including the ability to help retain moisture in the soil. As such, it is recommended that you apply mulch to the area immediately around your papaya tree in order to help keep the soil moist. 

Monitor It For Bugs And Pests 

Bugs and pests can not only cause harm to your papaya tree on their own, but the stress they can cause your tree may leave it vulnerable to other types of harm. 

As such, it is very important to monitor your tree for any signs of a potentially harmful insect presence

Papaya mealy bugs can be a particularly damaging nuisance, as can certain species of fruit flies and mites, so you should definitely keep an eye out for those. 

Products such as BioAdvanced  Fruit & Citrus Tree Insect Control can be helpful for dealing with damaging insects, but if you end up with a serious pest infestation on your hands you should definitely consider taking the time to consult with a specialist.  

Protect It From Cold Temperatures and Damaging Weather Conditions

As we’ve repeatedly discussed throughout this article, papaya trees love warm and sunny weather. It’s also important to understand, however, that the inverse of this is also true: papaya trees hate cold conditions

Papaya trees will exhibit stunted growth in temperatures below 70°F or so (the lower end of their ideal temperature range) and can be seriously damaged if temperatures ever approach or drop below freezing (32°F). 

As such it’s important to either grow your papaya trees in regions where these temperature drops do not occur or take steps to protect your trees in the event of cold conditions. 

Additionally, you should be aware of the fact that harsh weather conditions such as strong gusty winds can also be harmful to your papaya trees. If you suspect an incoming storm might pose a risk to your tree, it’s recommended that you take steps to protect your trees from excessive wind damage

That’s A Wrap!

And there we have it! We hope that you’ve found this information helpful for understanding both how to take care of your papaya trees and why they need full sun in order to thrive. 

Remember, when it comes to the question of ‘why do papaya trees grow best in full sun?’ the answers include:

  • Faster overall growth
  • Faster and more robust leaf production
  • Better fruit production
  • Preventing illnesses and fungal infections
  • Better health and productivity

Additionally, don’t forget the key care tips we’ve discussed today. In general, papaya trees prefer:

  • Full sun
  • Sufficient moisture
  • Warm temperatures
  • Well-draining soil
  • Plenty of fertilizer

As always, should you need additional information on caring for a papaya tree, we recommend consulting with a specialist who is well-versed in tropical fruit tree care; they should be able to offer additional insight into how to best care for your papaya tree and ensure its overall health and productivity. 

References

Collier, K. F. S., Lima, J. O. G. de, & Albuquerque, G. S. (2004, December 1). Predacious mites in papaya (carica papaya L.) orchards: In search of a biological control agent of phytophagous mite pests. Neotropical Entomology. https://www.scielo.br/j/ne/a/mg5tygP6C4Vrb9Y4gfZ9W6y/?format=html&lang=en 

M. Masri, A. S. Razak, & M. Z. Ghazall. (n.d.). Response of papaya (Carica papala L.) to limited soil moisture at reproductive stage. http://jtafs.mardi.gov.my/jtafs/18-2/Response%20of%20papaya.pdf 

Salinas, I., Hueso, J. J., & Cuevas, J. (2021, February 20). Active control of greenhouse climate enhances papaya growth and yield at an affordable cost. MDPI. https://www.mdpi.com/2073-4395/11/2/378 

Storey, W. B. (1972, June 1). Why papaya trees fail to fruit. ScholarSpace. https://scholarspace.manoa.hawaii.edu/items/dc55d9ef-d71f-4d1f-a5c8-e14f3400aee7 

Tropical fruit pests and pollinators: Pests of Papaya. (n.d.). http://sherekashmir.informaticspublishing.com/378/1/9780851994345.pdf#page=155 

Magnolia trees are some of the most beautiful trees you can plant at your home. They have huge leaves that are dark green on one side and velvety brown on the other. They also produce those signature white blooms with huge flowering petals that can last for weeks.

So where do you plant a magnolia tree to make sure it achieves that epic beauty? Magnolia trees are very hardy trees that can be planted in a variety of places, but they thrive in warm locations with plenty of water. 

Read on for all the info you need to choose a location for your magnolia tree, plus some tips and information about how to plant a magnolia to ensure you see those beautiful blooms as often as possible. 

Why You Should Plant A Magnolia Tree

There are many types of magnolia trees, eight of which originated in the United States. The most famous and popular type of magnolia tree is probably the Southern magnolia, which is known for its prolificacy in the American South, a region known for its huge, iconic magnolias.

Parts of the South are defined by the magnolia tree. The state of Mississippi is officially The Magnolia State.

The magnolia is also Mississippi’s state flower, a decision that was made by the vote of school children in Mississippi over a hundred years ago. The magnolia is also the state flower of the state of Louisiana. 

Not only are magnolia trees beautiful and stately, but they are very hardy trees that survive the extreme weather conditions of the Southern United States. This tree is a great addition to many yards and gardens not only for its beauty but also for its endurance capabilities. 

Choosing A Type Of Magnolia Tree

There are several different types of magnolia trees, and it is fairly easy to acquire most varieties no matter where you live.

For example, you can purchase a Southern Magnolia Tree online, just as you can also purchase the Little Gem variety of magnolia and have it delivered straight to your home, ready to plant. 

According to the Clemson University Cooperative Extension Home and Garden Information Center, magnolia trees work well for some purposes, such as privacy hedges and decorative plants. The fact that there are so many different types of magnolias makes them a great species for varying uses. 

This chart can give you a quick sense of the type of magnolia tree that might be right for you. 

UseSizeType Of Magnolia
PrivacyMedium to largeLittle gem magnolia (a variety of Southern magnolia)
Indoor greenerySmallTeddy bear magnolia (another variety of Southern magnolia)
ShadeLargeMagnolia grandiflora, AKA the Southern magnolia
Year-round greenery outdoorsAny sizeSweetbay magnolia

Once you think a bit about how you want to use your magnolia tree, you can make the best decision about what type to buy, plus you can use that information to help you find the ideal spot to plant your new magnolia tree. 

Here are some more details about some of the best varieties of magnolia trees. 

Magnolia Grandiflora, Or The Southern Magnolia

Magnolia Grandiflora Close up Bloom

The Southern Magnolia, whose formal name is Magnolia Grandiflora, is probably the tree you think of when you picture a magnolia tree.

With its big, dark green leaves and huge, white blossoms, this enormous tree is a majestic staple of the South. There are several different varieties of the Southern magnolia, including a few of the more popular types of magnolias found in yards in gardens. 

Planting a Southern magnolia is a big commitment, as you need the space for a truly enormous tree. But if you have the room, this tree can quickly become a showpiece in your yard. 

According to the National Park Service, Southern magnolia trees grow very quickly and are one of the oldest types of trees found in the United States.  

Little Gem Magnolia Trees

The little gem is one of the more popular varieties of Southern magnolia. It is particularly useful for making hedges or planting in containers. 

Little gems are much smaller than the standard Southern magnolia and are considered a dwarf variety. But they still have that signature dark green foliage and those white blooms, so they are a great alternative if you want the quintessential magnolia but do not have the space for a huge tree. 

Little gem magnolia trees grow to only about 25 feet at full height, and many might grow to be even smaller than that, so these are a good option for a smaller yard or garden. 

Sweet Bay Magnolia Trees

Smaller than the Southern magnolia, the sweet bay magnolia tree is found a little further north than the Southern magnolia, though still in the area of the United States that is considered the South. 

One interesting property of the sweet bay magnolia is that it is deciduous or evergreen, depending on the part of the country in which it is planted. Sweet bay magnolias planted a little further north tend to lose their leaves in fall whereas sweet bay magnolias planted further south stay evergreen.

If evergreen magnolias are important to you, keep this in mind when choosing a type of magnolia tree, as where you live is a very important factor here. 

Saucer magnolia trees 

Some magnolia trees have blooms that are shaped like large round saucers, hence the name of this type of tree. These magnolias are not as hardy as the other varieties, but some people find their interesting blooms worth the tradeoff. 

Next, we’ll take a look at some of the qualities of magnolia trees that make them so special. 

Properties Of Magnolia Trees

Because there are varying types of magnolias, the size and properties can vary from type to type, but there are some distinguishing features of this magnificent tree.

According to the City of Augusta, Georgia, magnolias can be as tall as 90 feet, like the magnolia Grandiflora, also known as the Southern magnolia. As its name indicates, it is native to and most popular in the Southern states. 

The Southern magnolia, perhaps the most popular and most indicative of the species, has dark green leaves and big white flowers.

According to the USDA, Southern magnolias can be found all across the Southern United States, from parts of Texas to South Carolina, and in the southern areas of all the states in between. 

Some magnolia trees lose their leaves in the fall, but some are evergreen, including the Southern magnolia. All varieties are known for their big, beautiful blooms (usually white, but sometimes pink) and their wonderful floral fragrance. 

Where To Plant A Magnolia Tree

Blooming Magnolia Tree

When considering where to plant a magnolia tree, many factors come into play. Do you need shade or just want something that looks nice in your yard?

Are you trying to create privacy for your home or do you want to cool down a particular area of your garden? These and other ideas can help you determine the best place to plant your new magnolia tree. 

Some magnolias’ growth is affected by the location in which they are planted, depending on parts of a region or the climates. Magnolia blooms can quickly be scorched by sunshine or heat that is too intense, so be careful if you are planting a magnolia in such a climate, like the southwest. 

The leaves can be scorched, too, so if you live in this type of environment, consider planting your magnolia tree in a container (more information on that below) or in an area of your yard that is shaded in the afternoon. 

According to the University of Georgia Cooperative Extension, Southern magnolia trees can be planted in many different types of soil, making them easy for lots of environments. They also are very durable when it comes to pests or diseases, so they are very hardy and easy to grow. 

Here are five places that are among the best when considering locations for a magnolia tree in your yard, garden, or even inside your home. 

Planting Your Magnolia Near Other Trees

Magnolia trees have very widespread root systems, so they are capable of moving as much as 40 feet away from the trunk of the tree. Therefore, it is important to account for those roots when considering a location for your magnolia tree. 

Don’t plant it too close to another tree where the roots might have to compete for nutrients and water. 

Another thing to consider when planting your magnolia near other trees is the light. Magnolia trees like sunlight, so don’t plant your new tree in the shade of another tree, or near enough to another tree that the magnolia might be shaded too much when the other tree reaches maturity. 

Always consider the full growth potential of your trees and remember that their size when you plant them is nothing like what it will be just a few years down the road!

One benefit to planting your magnolia near other trees is that the magnolia can provide shade for trees that don’t do as well in full sun.

Also, if you have a lot of deciduous trees in your yard, you might find that while it is beautiful when the leaves are green and spring and summer, and it is also lovely when the leaves change color in the fall, things start to look sort of dreary in the winter months when the branches are bare.

Many varieties of magnolia are evergreen, so this tree will be a leafy, green feature in your yard year-round. 

Planting Your Magnolia To Shade Your Yard

If your yard requires some shade, the dense, evergreen foliage of a magnolia tree might be the perfect fit for your needs. 

Magnolia trees have very large canopies that grow not only up and out but also down. This means that they create a lot of shade. They also have the added magical quality of creating a tree house feel without anyone having to climb the tree. But their branches are great for climbing, too! 

To plant your tree in an area that provides shade, you will need to determine the area you want to be shaded and the time of day you most want shade there. 

This is most easily achieved by going outside at the time of day you want to shade and checking to see where the sun is. Then choose the spot that best blocks that sunlight. 

Remember that it will be several years before your magnolia tree reaches maturity and provides a lot of coverage, but it might be well worth the waitAlso, keep in mind that the root systems of these majestic trees can get very large, so be careful about planting your magnolia tree too close to your house or other buildings where the root systems might disrupt foundations.

Lastly, consider the aesthetics of your yard and home, as a giant tree might not always look as good as a smaller one, so consider the final product and what it will look like once your magnolia tree reaches its full growth potential. 

Planting Your Magnolia Tree In A Container

Several varieties of magnolia trees work particularly well in large containers. The Little Gem magnolia, for example, is a variety of Southern magnolia that can be planted in containers for its entire life span, given the right care and a large enough container. 

Planting in a container has many advantages, notably that you can move your magnolia to various spots depending on the weather and what you need your tree to do. 

Magnolia trees are generally healthy outdoors even in cold winters, but they will thrive in a more temperate climate like that inside your house, so bringing your magnolia indoors for the winter in its container can help it be extra healthy. 

To plant a magnolia in a container, follow these steps:

  • Choose a very large container. This way, you will not have to transfer the magnolia to a larger pot before it is well-established or mature. 
  • Put some rocks in the bottom of the container before you add any soil. This will help ensure that the soil gets very good drainage and therefore helps you avoid root rot, which can kill your magnolia tree. 
  • Use rich potting soil, like Miracle Gro Indoor Potting Mix. Using potting soil instead of soil from your garden might give your magnolia tree an advantage early in its life in the container. 
  • Water the tree thoroughly as soon as you have planted it. The rocks underneath will help the soil drain, so you do not have to be as concerned about root rot as if you were planting your tree in a less controlled environment. 
  • Put the container on a rolling plant stand. This will allow you to move it easily indoors so you can find the optimal location for light, humidity, and temperature. 
  • Care for your container magnolia tree by watering it regularly but not too often and by keeping it in a room that gets plenty of sunlight but avoid direct harsh light in the afternoon. 
  • Enjoy your magnolia tree! 

Keeping a magnolia tree In a container is fairly easy as these trees do not require a great deal of attention. If you keep them watered and give them some light, you can easily enjoy these beautiful trees for years and years. 

Planting A Magnolia As A Privacy Fence

This option is more aptly titled “planting magnolias,” with “magnolias” plural, as the best privacy option here will line multiple magnolias next to each other for dense fencing. What other kind of fence produces hundreds of beautiful fragrant blooms every year?

Many types of magnolia provide great fencing, as they grow densely and quickly. Plus, you can choose an evergreen magnolia that won’t lose its leaves in the fall and winter.

This means that you won’t lose the coverage of your privacy fence at any time of the year as you would with a deciduous hedge or plant. 

To plant magnolias for privacy, first, consider the length of the fencing or property line you want to cover. 

Magnolia trees can be planted somewhat close together, but your best bet is to choose magnolia varieties that make good fencing to begin with, like the little gem magnolia, which is a smaller variety of the Southern magnolia. Plant your magnolia trees in this case about three to five feet apart, depending on how dense you want the coverage to be. 

Planting Your Magnolia As A Garden Or Yard Feature

Gorgeous White Magnolia Tree

It might be that you have no use in mind at all for your new magnolia tree other than to create a beautiful feature in your yard or garden. And that’s perfectly okay! 

Magnolia trees are stunning trees that are known for their beauty and the wonderful smell of their blooms. 

A small variety of magnolia works well in a smaller garden, where it can be used as a corner feature or to provide a little shade for some less sun-tolerant flowers or plants. Or you can plant a big, classic Southern magnolia just to watch its enormous branches fill your yard.

One idea, as proposed by the University of Georgia Cooperative Extension, is to plant your magnolia tree in a flower bed so the leaves it loses can provide mulch for other plants and flowers. This also helps with the mess of the leaves, as you don’t have to rake or sweep them if they are used on the ground as they fall. 

When To Plant Your Magnolia Tree

Magnolia trees can be planted at various times of the year, depending on where they are planted. Container trees, for example, can be planted at any time, especially if you plan to keep the container indoors year-round. 

To plant a magnolia tree outdoors, consider the temperature and precipitation where you live. It is best to wait until the most intense heat of summer is over but the frosts of fall and winter have not yet arrived.

Also, according to the University of Georgia Cooperative Extension, it is normal for your magnolia tree to lose a lot of leaves in its first year, and this does not mean that the tree is unhealthy. So don’t be alarmed!

Planting Your New Magnolia Tree

To plant your new magnolia tree outside in your yard, you have already completed the first step–choosing the right spot. Now it’s time to get to the planting part. Here is a breakdown of the steps to follow as you plant your magnolia tree. 

  • Dig a hole for your magnolia tree that is significantly bigger than the root ball of your magnolia tree. You don’t want to plant the root ball too far below the surface of the ground, but you also want to avoid having any of it above the surface, either. If you need to adjust as you go, make sure to keep the soil loose until you have the root ball perfectly placed. 
  • Next, fill the hole with soil loosely around the root ball, then gently pat it down. If you need to add more or remove some, do so until the ground looks fairly even. 
  • It is now time to water the tree. The University of Washington Botanic Gardens library suggests that you should not water the hole you have dug while planting your magnolia, as this could potentially rot the roots. Note where you live and how dry the soil is. Keep the soil around your magnolia moist, but don’t over-water it. 
  • To complete the process, add some mulch around the base of your newly planted magnolia tree. This will help keep the soil moist and stop weeds from growing around your new tree’s roots. 
  • Do not apply fertilizer, as that can cause problems for young trees. Later in the tree’s life, though, you might consider adding fertilizer to help your mature magnolia tree grow healthy and strong. Wait until the tree has gone through a complete first-year cycle and is growing new leaves in its new home, then consider adding a fertilizer. 

Final Planting And Care Tips

As you finish planting your magnolia tree and care for it in the years ahead, keep these tips in mind.

  • Keep an eye on the water level of your magnolia tree, whether it is planted in the ground outdoors or kept in a container. If the soil is too dry, the tree is not getting enough water, but if the soil gets too wet, that can hurt the roots and cause them to rot. Good soil drainage is key! 
  • Avoid planting your magnolia tree in areas that have high winds. While magnolia trees can withstand a lot of varying weather conditions, wind is of particular concern because the magnolia’s branches are apt to break in strong winds. Consider this when choosing a planting site or when leaving a container magnolia outside during storms. 

That’s A Wrap!

Now you are ready to choose a type of magnolia tree, plant it, and watch those beautiful characteristic blooms emerge. Magnolia trees are a great addition to most yards or gardens, as they are easy to grow, very hardy and durable, and often provide year-round green leaves and frequent large blooms. 

If you are looking specifically for a shade tree, you might want to read more about a certain type of magnolia that is particularly well suited to that purpose.

For more specific information about a certain type of magnolia, the sweetbay magnolia, check out our post on the 19 Fastest Growing Shade Trees For Large Yards. If shade is what you’re after, this particular magnolia might be perfect for your yard. 

Enjoy your new magnolia tree!

References

Maisenhelder, L. C. (1970). Magnolia (Vol. 245). US Department of Agriculture, Forest Service.

Shu, X., Yang, Z., Yang, X., Duan, H., Gan, G., & Yu, H. (2009). Variation of leaf characters and seedling growth of Magnolia officinalis with different provenances. Journal of Ecology and Rural Environment25(4), 19-25.

Niemiera, A. X. (2009). Southern Magnolia.

Erdeljac, D. (2001). Magnolia. History16(3).

Wade, G. L. (2009). Growing southern magnolia. University of Georgia.

Also known as yellow poplar, tulip trees are a tall and visually grandiose tree, blooming each spring and creating a beautiful and fragrant addition to your yard and garden. Even better, their high boughs provide ample space for planting a shade-loving garden underneath. But just what are the best plants to plant under your favorite tulip tree?

The best plants to plant under a tulip tree are those that love moist, slightly acidic soil and grow well in shady conditions. These include plants like hostas, impatiens, Virginia bluebells, foamflower, Jacob’s ladder, bee balm, bleeding hearts, epimedium, ferns, and shade tolerant herbs.

Interested in learning more about what plants to plant under a tulip tree or what conditions a tulip tree thrives under? Read on for more!

11 Best Plants To Plant Under Your Tulip Tree
Take a look at this graphic in a new tab to save and share!

Why Tulip Trees Can Be Great Yard Trees

At least, it might make a good yard tree, depending on the makeup of your yard!

The Missouri Department of Conservation reports a single tulip tree can grow to over 100 feet tall, with a 40-foot spread of branches. So if you have a large piece of property and plenty of empty space, a tulip tree might be an excellent option for you.

Tulip trees are also considered hardwood trees, which you can learn more about in this article on the topic!

If you like the look of the tulip tree but not the size, you don’t have to give up hope of a gorgeous flowering tulip tree just yet. If you want something smaller in your yard, it is possible to keep it from growing to quite that height.

You may choose to keep trees small by pruning them every other year. Although you can trim it at any time, the Journal of the American Society for Horticultural Science reports that little to no root growth happens in the fall, and the greatest amount occurs in the spring after winter has passed.

This means trimming during slow growth periods in the fall and winter will keep your tree the healthiest when there is the lowest risk of pests or infections.

Why Put A Yellow Poplar (Tulip Tree) In Your Yard?

The simple answer is that these tulip trees produce beautiful blooms in the spring! They also attract bees and ruby-throated hummingbirds, making them a great way to encourage natural fauna and pollinators to stick around your yard habitat.

However, there are other things to consider before you plant. For example, a study by researchers at Virginia Tech showed that tulip trees are intolerant of shade and are vulnerable to drought when compared to other trees.

This means depending on the natural climate where you live (as well as how your yard is set up), the tulip tree may or may not thrive for you.

Read on below for other things to consider before planting a tulip tree.

The Depth Of Tulip Tree Roots Can Vary

For the most part, tulip tree roots grow in the top three feet of soil, preferring to stick in the shallowest foot if possible. But their growing depth entirely depends on the type of soil they’re in.

If the soil is very loose, the roots will penetrate deeper. If the ground is squished and compacted together, tulip tree roots will stay near the surface.

So why does this matter to you?

Before planting a tulip tree, you’ll want to be sure that the roots won’t penetrate too deeply, affecting any piping or structures on your home and property. You’ll also want to avoid soil that’s too compact, which may create a shallow root system and a tree that’s prone to tip in high winds (especially once it grows to its full height!)

The location of your future tulip tree will not only matter for the tree itself, but also for any plants you would like to plant under it. If the tree’s roots are extremely shallow, you risk affecting the soil and upsetting the root systems of any future plants as well.

Tulip Tree Roots Can Spread Quite Far

You might think that since tulip tree root systems are relatively shallow, they also don’t spread very wide either.

However, roots can expand as far as three times the width of the branch spread. So, even if you aren’t planting directly beneath the tulip tree itself, any nearby plants can still be affected by the root system.

This also means you’ll need to take care when planting near structures, sidewalks, or anything that might lay underground like piping or wires.

If you’d like to encourage your tulip tree to grow as big and beautiful as possible, consider using a product such as Miracle-Gro Tree & Shrub Plant Food Spikes. Fertilizers such as this can help supplement poor growing conditions, encourage trees to remain healthy, and produce better blooms in the spring.

If you think your tulip trees roots are spread too far, it may be a good reason to cut it down.

These Are The Best Places To Plant a Tulip Tree

Flowering tulip tree (Liriodendron Tulipifera, Tulip Tree, American Tulip Tree, Tuliptree) in one of the city's parks.

We’ve already mentioned considering soil density (although soil can often be compacted or loosened as required). But it’s not enough to only consider the type of soil you’ll encounter. You’ll want to think about the quality as well.

According to the North Carolina State Extension Gardener Plant Toolbox, tulip trees prefer moist, well-drained soil. This means avoiding installing them in a low-lying area of your yard where standing water gathers and stays.

You also may need to mix the soil with another substance (such as sand or rocks) to encourage extra water to drain away and avoid collecting around roots.

Tulip trees also thrive in slightly acidic soil, a fact you’ll want to remember when you consider future companion plantings. Although most plants prefer acidic soil, some flowers and garden shrubbery prefers alkaline soil and may not be a good match for underneath a tulip tree. Here’s a full tulip tree timeline if you’d like to learn more about how long they take to grow.

So What About Shade Versus Sun?

We already mentioned that the research shows tulip trees are not shade-tolerant plants. Instead, they want full sun to grow big and strong and spread wide.

This means planting well away from other trees, avoiding shaded areas from buildings, and ensuring that the tree won’t be blocked by any other tulip trees you may plant at the same time.

Finally, when you consider a location for your tulip tree, you’ll want a place that is well away from pavement, walls, and known piping for sewer, water, electrical lines, etc. This is to avoid future complications where root systems may invade piping or crack concrete and cement sidewalks or barriers.

If you’d like to plant underneath your tulip tree, you’ll need to give yourself plenty of room to do so. Although we’ve chosen plants that are contained and easy to maintain, you’ll want some space for plants to spread out and grow after planting.

Interested in planting and growing your own tulip three? This Tree Seed Grow Kit has everything you might need in one box. With it, you can be well on your way to enjoying the smells and sights of a full-grown tulip tree.

Plants You Can Grow Under Tulip Trees

Although most shade-loving plants can be planted underneath the boughs and limbs of a tulip tree, not all of them will thrive. You’ll want to choose a plant that tolerates little to no sunlight, likes moist conditions, and does best in slightly acidic soil to best match the conditions the plant will find underneath your tulip tree.

Before you plant anything, you might use a product such as this 3-in-1 Soil Tester. This tester will tell you the pH, moisture levels, and light levels of any soil you’re considering using for a garden, taking the guesswork out of the planting process. 

Below are our favorite options for your future shady garden. These plants are not only beautiful, but they require little maintenance, and they all will happily grow underneath your tulip tree for years to come.

Hostas

Also known as “plantain lilies,” these plants are a shade-tolerant option that requires very little maintenance and will return year after year.

Hostas love the same type of soil as tulip trees (moist and slightly acidic), which makes them a great option to plant under your tree.

Impatiens

Close up shot of the beautiful Impatiens balsamina blossom at Tapei, Taiwan

Unlike hostas, impatiens like partial shade, so if you have a spot that will receive a few hours of sunlight a day, these gorgeous blooms may be a better option. Don’t worry if it’s a little shadier than you expected, though; the plants will still grow but will bloom less frequently!

Here’s one more important thing to know about impatiens: How closely you plant them together affects their growing height. Plants that are close together will grow taller, while those farther apart will stay low.

This is something to consider if you are planning to include several heights in your garden. Although impatiens are beautiful, you don’t want them blocking your view of all the pretty plants in the back.

Virginia Bluebells

These woodland plants are a brilliant choice to plant under your tulip tree, as they can be easily grown in full shade to partial shade.

However, because they are so good at proliferating, they can quickly outgrow the area under the tree and may need to be occasionally trimmed back.

Epimedium

More commonly called “Barrenwort,” epimedium is known as a semi-evergreen plant that makes for excellent ground cover under trees. These plants grow quickly, spreading to up to 36 inches wide and around 6 inches tall.

Although they won’t travel as far as the Virginia Bluebells, epimedium may still need to be occasionally trimmed to look their best before blooming the following spring.

Foamflower

Featuring bright white, towering blooms, foamflower is a tall perennial (meaning you only need to plant it once) that can tolerate partial to full shade.

In addition, this plant will grow well in moist conditions and requires no maintenance once planted (though you may choose to cut off blooms at the end of the season for cosmetic reasons).

Ferns

With so many varieties to choose from, ferns are a great shade-loving option for those who want a plant that will not spread far and will stay green year-round. The one downside? Ferns like moist, humid conditions that may be too wet for your tulip tree to enjoy.

You may also consider searching for a local variety of fern that already grows readily in your area to avoid taking the chance on delicate ferns that are better suited to other types of climates.

Bleeding Hearts

Dicentra makes for a beautiful choice for those looking for a colorful addition to their shade garden.

Bleeding hearts may require some watering if there is a particularly dry spring and summer, but otherwise can be left alone. Pair this plant with another choice from the list, as dicentra is not good as ground cover.

Shade Loving Herbs

Having a small herb garden can do more than just provide you with fresh spices for your cooking and baking; it can help keep your tree healthy and ward off pests!

Unfortunately, tulip trees not only frequently suffer from aphid and fungal infestations but can attract large numbers of wasps as well. Tulip trees affected with scale will secrete honeydew (a substance that wasps love), meaning you may have a wasp problem even if your tree isn’t actively blooming.

To discourage wasps from hanging around your tulip tree, consider planting herbs that wasps hate, which thrive in the shade. Possible ideas are Corsican or Stone mint, or something that is partially sun tolerant, like citronella or sage.

Bee Balm

A red bee balm closeup in full bloom.

Interested in attracting more pollinators? This shade-loving plant will help encourage bees to hang around your yard and garden.

Not only is this great for the planet, but the rest of your gardens will benefit from having bees around, as they pollinate both veggies and flowers alike.

Jacob’s Ladder

This low-maintenance plant has both beautiful leaves and gorgeous blooms. Best of all, it not only does well in the shade, but it’s a favorite of bees, helping to turn your garden into a pollinator haven.

Other Tulip Trees!

If you love one tulip tree, you might even want more! Although you can’t technically plant one tree underneath one another, you can plant other tulip trees nearby.

Tulip tree groves can be created by planting multiple trees in one area and can make for a stunning visual display in gardens and landscaping. 

Just be sure to keep up on trimming so the trees do not block one another from receiving a healthy dose of sunlight.

That’s A Wrap!

With careful planning and consideration, you can not only have a happy, healthy tulip tree in your yard and around your home but one with a variety of beautiful plants underneath its boughs.

Just be sure you’re taking care to plant your garden with soil quality, expected light levels, and future growth in mind, and you’ll be able to have a gorgeous yard for years to come.

References

Carter, David R., Robert T. Fahey, and Margaret B. Bialecki. “Tree growth and resilience to extreme drought across an urban land-use gradient.” (2013).

Kelly, R. J., and B. C. Moser. “Root regeneration of Liriodendron tulipifera in response to auxin, stem pruning, and environmental conditions.” Journal of the American Society for Horticultural Science 108.6 (1983): 1085-1090.

Krombein, Karl V. “Wasp Visitors of Tulip-Tree Honeydew at Dunn Loring, Virginia (Hymenoptera Aculeata).” Annals of the Entomological Society of America 44.1 (1951): 141-143.

Cherry trees make a great addition to any landscape. These hardy little trees offer shade, windbreaks, delicious fruit, and exceptional beauty. That said, you can’t simply plant a cherry tree wherever you like without considering a few factors first. So, where are the best places to plant a cherry tree?

You can plant a cherry tree in a garden or lawn, by a road, near water, on the edge of your property, or with other trees. However, make sure any space you choose gets at least 6-8 hours of sunlight and is at least 15ft, if not more, away from structures and other trees.

If you want to learn more about the potential benefits of planting a cherry tree—and where and how to do it—we’ve got you covered! Join us as we take a deeper look at whether or not a cherry tree would be the right choice for your garden.

Why Should You Plant A Cherry Tree In Your Yard?

Cherry trees can be a great addition to any yard or garden (provided you have the space for them, of course). Not only can you get delicious fruit from them if you select a suitable variety (more on that later), but these trees can provide quite a few other benefits as well.

Let’s take a closer look at some of the best reasons to plant a cherry tree!

1. Cherry Trees Offer Shade And Shelter

One of the benefits of planting a cherry tree on your property is shade. With their tall growth habit and long branches, cherry trees provide excellent shade, making them a great choice for a front yard or backyard where you need an effective shade tree—and who dosen’t like shade? The shelter these trees can provide during the hot and sunny days makes them an excellent choice for any yard that can accommodate a tree of this size. 

Cherry trees can also provide shelter for local wildlife, creating homes for the birds in your region. That said, you may need to protect your tree from birds and rodents during the fruiting season. But despite this, cherry trees will bring in plenty of beautiful songbirds, which can brighten up any yard or garden with their presence!

Additionally, according to the National Audubon Society, attracting birds to your yard can be very beneficial. Not only can birds help with pest control (eating irritating and potentially harmful insects), but they are also a vital part of the ecosystem they inhabit.

2. You Can Add Beauty And Value To Your Property With A Cherry Tree

Alley of blossoming cherry trees

Whether fruit-producing or flowering ornamental, cherry trees are well known for their beauty. Even the varieties with an otherwise mundane appearance will typically exhibit absolutely gorgeous flower blooms during the springtime, which can add a great deal of beauty to your yard and garden.

Additionally, some research has shown that the presence of trees and other forms of vegetation can have a tangible positive effect on a person’s emotional and mental health.

Depending on where you live, adding any tree (including fruit trees) to your landscape can also increase the overall property value of your home. It may cost a little bit right now, but it could be a worthwhile investment in the future!

That said, you should know that cherry trees may not live as long as other fruit trees. On average, they’ll survive between ten to forty years. However, according to the United States Department of Agriculture, black cherry trees can live upwards of 250 years! Make sure to take age into account when making any long-term landscaping plans.

Should you desire further insight or inspiration when it comes to successfully incorporating a tree into your yard or garden and landscaping in general, books such as the Encyclopedia of Landscape Design: Planning, Building, and Planting Your Perfect Outdoor Space can prove to be an excellent resource.

3. There Are Several Varieties Of Cherry Tree To Choose From

In addition to being beautiful, cherry trees are popular because there are so many varieties to choose from. Whether you want a fruit-producing tree or strictly ornamental, there’s a cultivar out there that will suit your needs.

Some of the most popular fruit-producing cherry trees include bing, rainier, montmorency, morello, and lapins.

Like fruit-bearing trees, there are hundreds of ornamental cherry trees to choose from—however, some of the most popular ones include:

  • Yoshino: known for its adaptability and lovely white blossoms
  • Weeping Cherry: known for its drooping branches and white/pink flowers
  • Kwanzan: know for its double blooms and vibrant pink color

Just be sure to research and find a tree that will grow in your area and has the right aesthetic for your landscape.

How To Pick The Perfect Area To Plant A Cherry Tree

As mentioned earlier, there’s more to planting and successfully growing a cherry tree than simply picking a spot randomly and putting your sapling in the ground. Not only do you need to factor in what the cherry tree needs to reach optimum growth potential and remain healthy, but you also need to consider the tree’s potential impact on everything around it. 

To better help you understand how to pick the right spot for your cherry tree, we’ll review some questions to ask yourself when you begin the process. 

How Big Will My Cherry Tree Grow? 

One of the most important things to remember when adding a cherry tree (or any fruit tree) to your landscape is that your sapling will grow. That might seem obvious, yet people will often add a tree to their landscape without determining how its size will change over time.

Cherry trees typically grow pretty tall and have wide-reaching branches. In fact, according to Clemson Universitya Yoshino cherry tree can grow up to 50 feet tall and wide! But even smaller varieties can reach heights of 30 feet. Because of this, it’s important to consider how a tree that size could impact your yard, garden, house, and outbuildings.

Because of their height and the breath of their limbs, cherry trees are not suitable for planting near power lines or telephone poles. It’s also advised to plant a cherry tree at least thirty or forty feet away from your house to mitigate the risk of falling limbs damaging your home.

If you’re concerned about space, there are dwarf and semi-dwarf varieties available. Dwarf varieties of the popular Bing cultivar are particularly popular, usually reaching only twelve to fifteen feet in height while producing delicious cherries known for their sweet flavor and juiciness. 

How Much Sunlight Does A Cherry Tree Need?

When picking a location for your cherry tree, it’s important to factor in how much sunlight your tree needs to grow and remain healthy and choose an appropriate spot accordingly.

Cherry trees, in general, typically do best when they get full sun (take a look at our guide on why cherry trees need full sun if you’d like more info.) Subsequently, you should do your best to plant your cherry tree in a location where it will receive at least six to eight hours of direct natural light every day

Avoid planting your tree in the shadow of your home or other trees. Doing this might impact how much natural light it gets, which could stunt or delay its growth.

How Large is the Root System of a Cherry Tree?

In addition to its size above ground, you’ll want to consider how big a tree will get below ground. After all, the root systems of trees can impact a wide variety of things, including (but not limited to) sidewalks, underground pipes, or even the foundation of your home.

The root system of a cherry tree can be expansive (sometimes stretching out over thirty square feet), so be sure to factor that in when planting your sapling. Make sure to place your cherry tree safely away from any underground utilities and paved areas that larger surface roots could potentially impact. 

The Best Places To Plant Cherry Trees On Your Property

While the location of where you plant your new cherry tree is ultimately up to you, we’ve listed here for you a few of what we consider to be the best places to plant a cherry tree

Naturally, depending upon the capacities and limitations of your property, not all of these ideas may be viable for you. Even so, we hope that these suggestions are helpful.

1. A Cherry Tree Can Add Something Special To A Garden

This type of tree adds a lot of beauty to a space, especially during the blooming season. Whether they serve as a centerpiece or something more on the outskirts, cherry trees make an excellent addition to any garden.

That being said, with their broad reach and leafy branches, most cherry trees cast quite a lot of shade in their immediate vicinity. As such, you must be mindful of the plants you attempt to grow under or near your cherry tree. 

Anything that requires full sun should probably not be planted close to your cherry tree since the shade from the tree will likely impact the amount of sunlight it can absorb, potentially stunting its growth. 

2. A Backyard Is A Great Place For A Large Cherry Tree

Cherry trees can be an excellent addition to any yard, with sufficient space to accommodate them. They can offer shade, beauty, and even fruit when grown correctly.

And (as discussed earlier) there are plenty of cultivars to choose from, giving you a wide range of options for selecting the right aesthetic for your backyard. Cherry trees can also provide shelter for local songbirds and other wildlife, helping to turn your backyard into a thriving ecosystem

Be aware, however, that if you are planting a cherry tree in the hopes of it bearing fruit, you may need to grow more than one solitary tree. Quite a few varieties of cherry trees are not self-pollinating, meaning that cross-pollination with another cherry tree is required for flower fertilization and fruit production

As such, you will need to plant at least two cherry trees in your backyard (unless, of course, there is someone else in your neighborhood with cherry trees). Alternatively, if you have sufficient space, you could plant one tree in your backyard and another in your front yard.

3. Larger Front Yards Can Accommodate Cherry Trees

Cherry trees can be an excellent choice for the front yard, especially if you want a particularly eye-catching tree during the spring. Depending on the design and coloring of your house, planting a cherry tree out front could be the perfect accent to your home’s external aesthetic. 

Just be careful where in your yard you plant the tree!

We already learned that cherry trees have root systems that can grow quite large, and they can damage paved areas. Be sure to take note of any driveways, walkways, or public sidewalks in the area and plant your tree safely away from these types of infrastructures.

4. Cherry Trees Can Provide Privacy At The Edge Of Your Property

A cherry tree can be an excellent choice for a border tree on the edge of your property. Their branches provide a windbreak, and they can keep nosey neighbors from seeing into your yard.

That being said, it’s important to remember that their long branches are prone to breaking and falling if they take too much wind damage. The last thing you want is your tree falling into a neighbor’s yard and damaging their property. 

Because of this, when planting a cherry tree on your property line, you should be mindful of how close that tree is to your neighbor’s land. If damage to their yard is possible, plant the tree farther back on your side of the property line. 

5. Block Road Noise With Cherry Trees

Planting a cherry tree near the road can offer some of the same benefits as growing it near the property line you share with a neighbor. Specifically, a tree between you and a nearby road can provide privacy from passing cars while also providing some insulation from the wind and road noise.

However, there are a few things to consider when planting a cherry tree in such a location. The foremost of which is the presence of power lines.

If a tree grows too close to a power line, its branches can become entangled—especially during stormy weather. Because of this, try to avoid planting your cherry tree anywhere near power or utility lines of any kind. 

And remember, even if your cherry tree sapling is small when you plant it, several species can grow to great sizes with wide-reaching branches. As such, you should err on the side of caution when planting your tree near power lines and ensure there’s plenty of space for your tree to grow without posing any safety risks. 

Pruning an established tree can help you avoid problems. Formore information, check out our guide explaining how to prune a cherry tree!

6. Cherry Trees Look Gorgeous Near Water

Cherry trees near a river

A pond can be a wonderful addition to any landscape in and of itself, but even more so when you put a tree nearby. Cherry trees, in particular, can be an excellent choice for planting in such a location because the reflections on the surface of a nearby pond often accentuate the beauty of their blossoms.

But be sure to check the type of soil around your pond (and its overall quality) before planting a cherry tree.

According to the California Foundation For Agriculture In The Classroom,  cherry trees typically grow best in deep, well-drained loamy soils. If the soil around your pond doesn’t have good drainage, consider planting your cherry tree somewhere else to avoid root rot and other related conditions. 

Cherry trees aren’t the only tress that looks nice near water. To learn more, here are some reasons why you should plant weeping willows near water!

7. Plant Your Cherry Tree Near Other Trees

Because their bright springtime blooms add a splash of color to your yard, cherry trees can be a great addition to your landscape—even if you have other trees on your property!

Additionally, planting multiple trees will ensure pollination occurs, which is essential if you’re planting fruit-bearing trees that cannot self-pollinate.

Just remember that cherry trees (and most other trees) need plenty of room to grow. Smaller plants and shrubs may be okay, but keep at least twenty feet between a cherry tree and other full-size trees (or anything that requires full sun).

Leaving space helps mitigate competition for resources between the trees while also ensuring that your cherry trees aren’t crowded and are getting plenty of sunlight.

How To Plant A Cherry Tree

While where to plant your cherry tree is open to a bit of debate, how to plant a cherry tree is not. Regardless of where you grow your tree, there are some key things to keep in mind once it’s time to put your sapling into the ground.

Alright, let’s learn how to plant a cherry tree!

Step 1: Select Your Tree And Your Plant Site

You have to have a tree to plant it, and choosing the right tree is just as important as selecting the perfect place to grow it. 

Your first step should be researching different cherry trees so that you can choose a species that will respond well to your climate. Additionally, take the time to ask yourself why you want the tree. Are you hoping to harvest fruit someday, or is the tree to enhance your landscape?

Another goal in this step is to find a suitable growing location. Remember, cherry trees prefer full sun and deep soil with good drainage, so choose your planting area accordingly

Step 2: Prepare Your Cherry Tree Sapling For Planting

Once you’ve chosen your tree and planting site, it’s time to move on to the next step: preparing to plant your young tree. Please be aware the specifics of this stage can vary slightly depending on whether your tree arrives with bare roots or in a container. 

Trees that arrive with bare roots should be soaked in water for an hour or two before planting. In contrast, trees that come in a container should be watered, then removed from that container so you can loosen up the roots before planting

When loosening the roots, do your best not to damage or bend them unnaturally since this could impact the tree’s ability to absorb water and nutrients after transplant. 

Step 3: Put Your Sapling Into The Ground

For cherry trees to develop correctly, they need to be able to spread their roots out. When planting your tree, make sure the hole you dig is big enough to accommodate the entire root ball without crushing or squeezing the roots together. 

Additionally, you can use the graft union on the tree’s trunk to gauge how deep to dig your hole. According to Ohio State University, the graft union is essentially a scar that forms where the scion and rootstock are fused. You can recognize it by its bumpy ridge-like appearance.

Generally, it’s recommended that the graft union of a standard-size tree sit a couple of inches below the soil level, while the graft union of smaller dwarf trees goes a few inches above the soil level.

Once your sapling is in the ground, carefully fill the hole with dirt. Finish by gently tapping down the soil to eliminate any excess air that might cause problems later.

Step 4: Give Your Sapling Love And Care

Once your cherry tree is in the ground, give it a head start with some love and attention.

Start by giving it a deep soaking—a layer of DIY pine needle mulch added to the topsoil will help increase moisture retention. Because new trees need more water than established trees, you should continue to water the sapling once a day for at least two weeks. After two weeks, you can reduce it to every two to three days.

Additionally, it’s strongly recommended not to fertilize your cherry tree during the first few weeks after transplant since the roots at this stage will be slightly too young and sensitive.

Mature trees can withstand powerful winds, but young trees may bend or break. If you live in an area with strong winds, or your sapling is particularly young, consider staking your cherry tree.

Staking a tree can be a chore, but kits like this Heavy Duty Tree Stake Kit make it much easier!

Things To Watch Out For When Planting A Cherry Tree

There are several things to watch for when planting a cherry tree—and we’ve got you covered!

Although safety’s important when trimming around any tree, you should take special care when mowing around a young tree. According to Purdue University, lawn equipment damage to roots and bark can be dangerous to a tree’s overall health and well-being.

During fruiting season, you may need to protect your tree from opportunistic birds and rodents. This Plastic Garden Netting from Ruolan can help by covering your tree and making it less accessible to hungry wildlife.

Remember to plant your cherry tree a safe distance away from your home, paved areas such as sidewalks and driveways, power and utility lines, underground pipes, and any other structures that falling branches or encroaching roots might damage.

Finally, avoid planting your tree in soil with poor drainage, and take care not to damage the roots when transplanting the young sapling into your lawn or garden.

Cherry tree in orchard

Should you desire a more thorough guide on growing and caring for cherry trees, books such as Growing Fruit Trees: Novel Concepts and Practices For Successful Care and Management can be very helpful in understanding the intricacies of the matter.

That’s All We’ve Got!

And there we have it! We hope you’ve found this article helpful and informative; as you can see, cherry trees can be a great addition to any landscape. 

And remember, some of the best places to plant a cherry tree include (but are not limited to):

  • In your garden
  • In your backyard
  • In your front yard
  • On the edge of your property
  • Near the road
  • By a pond
  • With other trees

Of course, as discussed earlier, where specifically you choose to plant your tree is contingent upon several factors, such as:

  • How much sun the tree needs
  • How much space it needs to grow (both above ground and below ground)
  • Whether it will potentially impact any buildings, power lines, utilities, paved areas, or other types of property or infrastructure

And as always, we strongly recommend consulting a professional if you have any further questions or concerns. Arborists and fruit tree specialists can offer a wealth of knowledge when it comes to caring for cherry trees and will be more than happy to assist you if you have any questions. 

If you’re thinking about planting a cherry tree for shade, but don’t want to wait for it to grow, check out these fast growing shade trees for large yards!

References

Blodgett, E. C. E. C., Johnson, D. A. D. A., Grove, G. G., & Beers, E. H. E. H. (1990). Why cherry trees die.

Mircetich, S. M., & Matheron, M. E. (1976). Phytophthora root and crown rot of cherry trees. Phytopathology66(5), 549-558.

Patten, K. D., & Proebsting, E. L. (1986). Effect of different artificial shading times and natural light intensities on the fruit quality of ‘Bing’sweet cherry. Journal of the American Society for Horticultural Science111(3), 360-363.

Ulrich, R. S. (1986). Human responses to vegetation and landscapes. Landscape and urban planning13, 29-44.

There are around 400 different varieties of willow trees (part of the salix genus) scattered all around the Northern hemisphere. They originated in China but now can be found in nurseries all over. These trees are incredibly easy to grow, but how long does it take to grow a willow tree?

Willow trees are a very fast-growing species, some will grow 6 to 9 feet in a single growing season. They can be grown easily from seeds or even cuttings when planted in damp, rich soil. Willow trees can reach their full height of about 30 to 50 feet in height in as few as 15 to 20 years.

Let’s take a stroll through the willow tree timeline. We’ll go over how to grow them from seeds, cuttings, or saplings and what to expect every step of the way. Along the way, we will also go over best growth practices and some pests that may want to snack on your willow trees.

How Quickly Does A Willow Tree Grow?

Most willows are incredibly fast-growing trees that can grow as much as 10 feet in a single year. If you’re looking for a tree that will provide ample shade in the least amount of time, you can’t go wrong with willows.

With so many varieties though, you can find smaller shrubs that grow slower. Of course, you may choose the iconic weeping willow that will hit heights of 30 to 50 feet in a very short time. At least when it relates to trees.

Even the seeds grow fast. Some willow seeds will germinate in 12 to 24 hours when they find damp, rich soil. This quick germination means the seeds only stay viable for a short period.

When seeds are stored, after 10 days they quickly lose viability. The best way to start your own willow trees is to collect the seeds yourself or propagate them from cuttings. 

Full Timeline Of A Willow–From Seed To Full-Grown Tree

Close-up of blooming willows with delicate fibers and yellow pollen against a green and dark background

Let’s say you really want to start a willow tree from seeds, first, you need to collect them before they fall to the ground. Willow seeds tend to ripen between April and July. When the pods pop open, cotton-like seeds are dispersed by the wind.

You want to collect the seeds before they have a chance of floating to the next county. When the seed pod changes to a yellow color from green, cut them off and store them in a brown paper grocery bag.

This helps to “ripen” the seeds while keeping them contained. If you absolutely must store them before planting, you can put them in a plastic container with only slightly damp sand.

According to Washington State University, willow seeds lose viability quickly if they are not refrigerated. While it’s not recommended to store willow seeds, they can be held for up to 6 weeks if they are stored in sealed containers. 

Cuttings, on the other hand, can be stored for a few months if they are kept in moist sawdust, or wrapped in damp paper towels.

The sooner you can plant the willow seeds, the better. You don’t need to scarify them, and you don’t need to soak them like other seeds. You don’t even have to let them dry out before you can use them.

These seeds are ready to go as soon as they pop out of the pods.

How To Collect Willow Tree Cuttings

Cuttings from willow trees root very easily. You can root them in a moist growing medium or even straight in the water. 

First, though, you need to collect your cuttings. Wait until late winter or early spring, before the tree emerges from dormancy and cut some branches that are about half an inch in diameter.

A good pair of garden shears like these Gonicc 8″ Professional Premium Titanium Bypass Pruning Shears will make collecting your cuttings easy. It’s good to use a sharp pair of shears to prevent secondary injury to the tree.

Next, trim these branches into smaller, easier-to-handle sections. You’ll want pieces about 1 foot to 18 inches long. Now you can place them in a container with water and wait for the roots to grow.

Be sure you change the water so it doesn’t become stagnant about once per week. In 3 to 4 weeks you should start seeing new roots appear. When the stalks have a sound root system, gently plant them in a mixture of commercial potting soil and sand or peat moss.

You can also plant the newly cut stalks into the potting mix and let them grow from there. Be sure to mix in a handful or two of sand or peat moss per gallon of soil for extra drainage and to allow the roots to grow.

Keep the soil moist but not soggy and you’ll have a few willow saplings in no time. 

First Days To Year One

You’ll want to keep your germinating seeds or rooting stock indoors until the temperatures outside are consistently above freezing. Put them in a sunny room where they get plenty of indirect sunlight. Too much sunlight right off the bat could damage them.

Keep the soil slightly moist and when the seedlings reach about 6 inches in height, transfer them to a 1-gallon pot with good-quality potting soil. Now you can increase the sunlight they get and put them outside. They still aren’t ready for full sun, but they will do well in a shady area with dappled sunlight.

When To Plant Cuttings Outside

Follow the same steps outlined above for increasing the sunlight your cuttings receive. Over a few weeks, gradually increase the sunlight they receive until they are getting full sun. Once they are acclimated to full sunlight, you can plant them in the ground.

Assuming you got your cutting in late winter to early spring, it should still be spring when you plant the cuttings. If you’re approaching summer, you may want to wait until the following spring to plant them outside.

A hot, dry summer could quickly scorch and/or dry out your cuttings, leaving you to start over.

When To Plant Your Seedlings Outside

After you collect the willow seeds in early to mid-summer, in only a few weeks to a few months you should have a nice willow sapling growing in a 1-gallon pot. While most trees do well getting planted in the fall, you should wait until spring to plant willow saplings.

Once the threat of frost has evaporated, you can plant your willow outdoors. Once you have your willow sapling in its permanent spot, be sure to water it frequently for the first year.

Keep Your Willow Tree Watered

Willow trees love water. It’s one of the reasons they can grow so quickly. For the first year, you will need to water your willow sapling frequently.

Be sure to give your willow sapling a deep watering weekly for the first year. This is doubly important during the hot summer months when your willow tree could quickly dry out.

You don’t want your willow tree floating in the water, but be wary of the soil drying out. If it does not get enough water it will start dropping leaves early. Willow trees don’t lose too many leaves until autumn.

If you are noticing leaf drop, especially during summer, increase your watering schedule. Adding a 2 to 3-inch layer of mulch around your tree is a great way to keep moisture in the ground and protect your newly growing sapling.

Willow Trees From Year 2 Through Year 5 (The Adolescent Years)

After the formative first year of your willow tree’s life, the biggest danger is over. Now you can scale back on watering your tree. The roots should be sprawling enough to get enough water for themselves.

Of course, if your area is hit by a drought, you’ll need to water your willow occasionally to keep it healthy. Be sure to water the willow tree when the soil dries out, especially if you start to see premature leaf drop.

Keep a thick layer of mulch around your willow tree, but be sure to keep it away from the trunk. Leave a few inches clear of mulch around the trunk, because this could cause the tree to start to root or introduce illness.

Most willow trees don’t need supplemental fertilizer, but if it’s starting to look weak, or the leaves appear drab instead of a vibrant green you can add a little fertilizer. Be sure to use an even 10-10-10 fertilizer such as Southern Ag 10-10-10 – All-purpose Granular Fertilizer.

This even fertilizer is perfect for your willow trees as it feeds from the roots to the leaves. Spread about half a cup underneath the canopy of the tree in the spring.

During these early years, your willow tree should shoot up into the sky, and will probably reach heights around 20 to 30 feet.

Willow Trees Five Years To Ten Years

Part of that care is proper pruning. Willow trees can get very thick and unruly. When the canopy is too thick, the air isn’t able to circulate which can lead to fungus growth.

Plan on pruning your willow tree during late winter or early spring. A lot of sap can ooze out if you prune during the summer which could weaken the tree and introduce pests.

What To Prune Off Your Willow

In the instance of weeping willow trees, prune off any branches that are touching the ground. How high you want to trim them is up to you, but generally, you want to keep branches 3 to 4 feet off the ground.

Look for any damaged, dried-out, or brittle branches and cut them out. Any limbs that are rubbing against each other need to be cut away too. The rubbing can open wounds that will attract bugs and sickness in the tree.

Along with branches that rub against each other, trim out any branches that are intertwined together. While they may not be rubbing yet, it’s only a matter of time before they do, so go ahead and remove the possibility.

Trim off any suckers from the main trunk of the tree, and get rid of water sprouts. Water sprouts are branches on tree branches that grow straight up from the limb.

The reason you want to get rid of water sprouts is they grow incredibly fast, and will often break off, or let water pool up on the branch. Both can decrease the health of your tree.

Willow trees, especially the weeping variety, develop what is called lateral growths. These are extra buds or branches that stick out from the side of the trunk and leading branches.

If you let these go, the tree canopy can become very dense and restrict airflow. Snip these off, or you can even pinch the buds off while they are young and soft.

Willow Trees Ten Years And Beyond

Weeping willow on the shore of Alster lake

Near about the 10-year mark you should start to see flowers that eventually lead to seed pods. The flowers on willow trees are called catkins, and there are both male and female willow trees.

These flowers look similar to caterpillars. Some willow trees are wind pollinated, while others produce nectar to attract pollinators.

When you plant willow trees you are ultimately helping out pollinators such as honeybees, butterflies, and moths. You may see a plethora of buzzing activity around your willow trees between April and May.

Once the flowers are pollinated they will begin to create seed pods. You may be able to grow new willow trees from these pods but it’s best to wait until your willow tree has seeded a few times. Older trees tend to make more viable seeds.

Seed production continues after 10 years and reaches peak production around 25 years old and then starts to decline.

Willow trees are very fast-growing trees that typically last around 30 years in the wild. In your landscape, with proper care, they may last over 50 years.

Possible Willow Tree Pests

Willow flea beetle, Crepidodera aurata on a flower

According to the University of Kentucky Department of Entomology, some pests that are attracted to willow trees include:

  • Fall webworms
  • Willow leaf beetles
  • Willow sawflies
  • Mourning cloak caterpillar
  • Cottonwood leaf beetle
  • Aphids
  • Cottony cushion scale
  • Carpenter worms
  • Cottonwood borer

None of these pests are truly life-threatening to willow trees. The most damage they do is cosmetic, although some of the borers can cause internal structural damage if their populations go unchecked.

Aphids and scale can attract ants and other pests because they secrete a sticky, waxy substance called honeydew. The ants eat this secretion and defend the aphids from other insects. The honeydew can also cause black sooty mold.

Aphid control isn’t difficult, but it may require some specialized techniques to get rid of them. For more information on controlling aphids, check out this post here, 11 scents that aphids hate.

Keeping your trees healthy and well cared for is the best defense against insect and fungal pests. Healthy trees are able to fight off these attacks and thrive afterward, plus, most insects are attracted to weakened trees, just like wolves and predatory animals go after the weak and the old. 

Where Should You Plant Willow Trees?

Contrary to popular belief, you shouldn’t plant willow trees directly in areas that constantly have standing water. Though these trees love water, they will suffer if planted in perpetually wet soil.

If you’re wanting to help get rid of the low-lying puddles, plant a weeping willow near these areas, but keep it on an elevated area that has good drainage. The willow’s roots will eventually be drawn to the low-lying areas.

We have an article on the 8 most common places willow trees grow if you are interested in doing some more research.

Willow Trees Need Full Sun

Along with needing a lot of water, these trees require at least 8 hours of sunlight a day. Plant them in areas that receive plenty of light, otherwise, they will be stunted and won’t look as healthy.

Keep Willow Trees Away From Septic And Other Water Lines

Willow trees are known for having water-seeking roots, and they can find tiny cracks in pipes and wiggle their way inside. Next thing you know, you have a clogged drain or damaged supply lines because the roots have integrated the pipes.

To prevent this, be sure to plant willow trees at least 35 feet away from any possible water lines. Although to be safe, I would still keep willow trees 50 feet away for added protection.

If you have a lake or pond on your property the perfect place to plant weeping willow trees is near a body of water. For more information on planting willow trees near water, check out this article on why you should plant weeping willows near water.

Keep Willow Trees Away From Your House

While you never want to plant trees, especially very tall trees near your house, this is especially true of willow trees. Since they are so fast-growing, this makes the wood weak, and susceptible to breakage.

Be sure to put at least 50 feet of space between your structures and willow trees. This will protect you from falling trees, branches, and searching, invasive roots.

Also, since the roots on willow trees are rather shallow, don’t plant them close to driveways, walkways, or other hardscapes. The roots could raise concrete, pavers, or asphalt and cause unsightly cracks.

How Far Should You Space Multiple Willow Trees?

Are you looking for a cluster of willow trees, a line of them, or do you want a naturalized area around a small pond? When planting willow trees together you should space them about 20 to 30 feet apart from each other.

It really depends on the variety of willow trees. Weeping willows can spread up to 50 feet wide, so they need at least 30 feet between each other, but ideally a little more space.

Keep in mind how wide the canopy will grow at full maturity so you don’t plant them so close that they eventually crowd each other. There are also certain plants you should not grow under your willow tree.

Wrapping It Up

Now that you know how to grow your own willow trees, and how easy it is to do so, get outside and start planting. Once you have your willow trees towering above you, check out the best plants to grow under your willow tree.

Willow trees are beautiful, very fast-growing trees that can liven up a dull yard and possibly even increase the value of your property. You can start them from seeds or cuttings and in about a decade you’ve got a large shade tree.

References:

Morgenson, Greg. “Vegetative propagation of poplar and willow.” Proceedings, Intermountain Forest Nursery Association: August 12-16, 1991, Park City, Utah 211 (1992): 84. https://books.google.com/books?hl=en&lr=&id=NlVULroUHvEC&oi=fnd&pg=PA84&dq=willow+tree+propagation&ots=ITJwUzJmz3&sig=9xbcKZl5O8It4dWnHfJ3_OdD7WQ#v=onepage&q=willow%20tree%20propagation&f=false

Young, James A., and Charlie D. Clements. “Seed germination of willow species from a desert riparian ecosystem.” Rangeland Ecology & Management/Journal of Range Management Archives 56.5 (2003): 496-500. https://journals.uair.arizona.edu/index.php/jrm/article/download/9833/9445

COLLINS, C. MATILDA, RUI G. ROSADO, and SIMON R. LEATHER. “The impact of the aphids Tuberolachnus salignus and Pterocomma salicis on willow trees.” Annals of Applied Biology 138.2 (2001): 133-140. https://onlinelibrary.wiley.com/doi/abs/10.1111/j.1744-7348.2001.tb00095.x

So you have planted a maple tree, and it is growing beautifully. It has lovely green foliage in the spring and summer, and its leaves turn a blazing orange or red in the fall. Your tree provides shade and lends some beauty to your yard. But at the base of your tree, there are all these unsightly weeds! How do you get rid of them? 

Weeds are not only unsightly under maple trees, but they are also potentially dangerous for your tree, so it is important to get rid of them, and there are a number of methods you can use. Some methods are easier than others, and some methods are more expensive than others, so it can be difficult to determine the best way to get rid of weeds for you and your specific circumstances. We have gathered three of the easiest ways to get rid of weeds under your maple tree, or to stop them from growing altogether. 

If you want to keep your maple tree healthy, keep it free of weeds. Read on to learn about ways to stop weeds from growing under your maple tree, how to kill weeds that are already there and the various pros and cons of different methods. 

Why You Need To Stop Weeds From Growing Under Your Maple Tree

Alley of maple trees in autumn in Alexander park, Tsarskoe Selo (Pushkin), Saint Petersburg, Russia

It is very important to get rid of the weeds that grow underneath your maple tree for a number of reasons. Weeds can hinder the growth of your tree in a couple of ways, and they can cause problems for you and your home. Here are some key reasons to prevent your maple tree from having weeds grow underneath its branches. 

Weeds Will Compete With Your Maple Tree For Nutrients

All trees and plants need nutrients from the sun and soil, even and especially weeds! And not all areas of your yard have enough nutrients in the soil for all the plants that grow there. So if there are weeds under your maple tree, those weeds are using nutrients that could be going to your tree instead. 

Weeds Will Compete With Your Maple Tree For Water

Maple trees need lots of water. But weeds need water, too. If the weeds under your maple tree drain the soil underneath the tree of its moisture, that means less water for your maple tree. 

It could even be possible for the weeds to cause drought-like conditions for your maple tree without you realizing it. Then you might be watering the tree with the regular same amount of water as always but less of it is reaching your maple tree. 

Weeds Usually Do Not Look Very Nice

And, finally, you probably want to get rid of the weeks under your maple tree because weeds are unsightly and make your yard or garden look messy and unkempt. Some cities and counties have ordinances to prevent weeds from growing too tall because they are such a nuisance for neighbors. 

Weeds Can House Rodents, Insects, And Snakes

Weeds can also harbor unwanted insects or even wildlife like rodents or snakes. They can also hide in areas of standing water that produce mosquitos. Having rodents around is a health hazard for your house, and having snakes around is not only something you might find creepy but it is also potentially dangerous, depending on the type of snake. Also, mosquitos are more than just pests; they can carry diseases.

So, for many reasons, it is a good idea to get rid of the weeds under your maple tree. Here, we have outlined some of the most effective means of weed prevention and removal. We also discuss some of the pros and cons of each method. 

Removing Weeds: The Basics 

Weed removal is sometimes easy and simple, but it can often be frustrating and require multiple attempts or methods before the weeds are under control. 

Keep in mind that weeds are more prevalent in the summer months than at other times of the year. Also, weeds tend to grow bigger and in larger numbers right after a period of rain. Knowing these trends for weed growth can help you be prepared to deal with the weeds when they are at their worst. 

There are a couple of ways to approach weed control. You can try to keep the weeds from growing at all. You can also kill or remove the weeds after they appear. Or you can try both. Either way, we have options for you.

3 Ways To Keep Weeds From Growing Under Your Maple Tree

Use A Weed Barrier To Prevent Weeds From Growing At All

If you are opposed to the use of any type of chemical, you still have quite a few options for weed prevention and removal. Here are a couple of ways you can implement a physical barrier under the soil near your tree to stop weeds from growing. 

Using A Plastic Barrier Under Your Tree

One way to prevent weeds from growing at all is to literally place a barrier on top of the ground to keep weeds from being able to grow. There are some different ways to accomplish this. One method is to use plastic, like a black plastic tarp. There are plastic barriers made for this purpose, but these plastic barriers can easily tear with rocks and sticks, plus they do not allow air to get through to the soil underneath.

Using A Fabric Barrier Under Your Tree

If you want to try a different type of barrier, you can also consider a fabric barrier. For example, you can find lots of options for weed barrier fabric, like this Garden Weed Barrier Landscape Fabric

These fabrics, sometimes called geotextiles or weed barriers, are usually black but sometimes come in white. They are laid underneath a layer of rocks, pebbles, or even turf but on top of the natural soil. The idea is that water and air can still get through them but weeds cannot, so the grass on top can grow but weeds cannot grow through the geotextile.

According to Clemson University Extension’s Home and Garden Information Center, these textiles work well for weeds that grow annually, like those that just grow in the summer or spring. But if you have a problem with, for example, crabgrass, it can still germinate under the textile and grow up through the tiny holes in the geotextiles. It is also harder to keep weeds that return year after year from growing through these types of barriers. 

Placing Your Barrier 

These types of plastic or fabric barriers are placed under a layer of turf or rocks in your yard, depending on what type of yard you have. If you are interested in xeriscaping, which is landscaping that requires little to no water, you might consider replacing the sod or grass under your maple tree with a physical fabric or plastic barrier that is covered with rocks or pebbles, or even bark. Many flower beds feature this type of barrier under bark, as do the areas around the trunks of many trees, so this is a popular way to keep weeds at bay under your maple tree. 

Another benefit of barriers like these is that they keep weeds away but they also function much like mulch in helping the soil under your maple tree retain water. Barriers like these, whether plastic or fabric, also help keep heat in the soil, which is very beneficial in the winter months. The barriers work like insulating layers to keep heat in and keep the frost out. 

So, consider a barrier if you want weed prevention that also serves some other purposes like keeping in moisture and heat, and that looks good as an aesthetic feature when used in conjunction with xeriscaping methods like rocks, pebbles, or bark. You can also plant plants through the barrier, so having it placed doesn’t mean that you can’t have some strategically placed decorative plants under your maple tree; in fact, the barrier will help protect those plants by preventing them from having to compete with weeds, too. 

Use A Herbicide For Weeds That Have Already Grown

Spraying weed killer herbicide to control unwanted plants and grass on a backyard. Building exterior

You can target the weeds themselves with a product that includes a focused nozzle for spraying just the weeds you want to kill, like Roundup Ready-to-Use Weed and Grass Killer III, which includes a Sure Shot Wand to help you target just the areas you want to spray with herbicide and not the other plants or grass around your maple tree. 

Another option is an insecticide made for areas that are highly trafficked in your yard or garden like pathways, sidewalks, and other areas that you want to avoid spraying but that tend to have lots of weeks around them. One such product is Spectracide Weed and Grass Killer, which claims to have a targeting sprayer that can help you spray driveways but also the areas around trees, like the base of your maple tree. 

Some types of herbicides that are applied after the weeds have already grown are 100% effective at killing the weeds. This alone is a great case for these types of treatment, but there are still some drawbacks that make people choose a method that might be less effective but that suits their needs better.

If you are not as concerned about the potential hazards and feel confident that you can keep everyone safe while using these products, they are often the most effective means of ridding your maple tree of weeds. 

Use A Herbicide That Prevents Weed Growth

Some herbicides can be used during the parts of the year when the weeds’ growth is dormant, like Monterey Horticultural Oil, which is also certified for use in organic gardens. While maple trees do not produce fruit, if you plan to grow any type of organic fruit tree, you probably want to pay close attention to the ingredients in any fertilizer, herbicide, or insecticide that you use on your trees, yard, and garden.

This type of product, certified for organic gardens, might be a good fit because you can use it anywhere, plus you do not have to worry about cross-contamination from your maple tree’s herbicide to any other plants or trees. 

You can also prevent weeds with other types of herbicide, like Preen Extended Control Weed Preventer, which claims to stop weed growth for as long as six months and is safe to use around many other types of plants and trees. This herbicide, however, is not safe for use around food you plan to eat, so although it will work well around the base of a maple tree but not if you have a nearby vegetable garden or fruit tree. If this applies to you, consider another method of weed prevention and removal. 

If you want to try a product that has multiple purposes, you might want to consider a weed preventer that also provides some extra nutrients for your maple tree at the same time.

One such example is Preen Garden Weed Preventer Plus Plant Food, which will keep weeds from growing under your tree while also delivering as long as three months of protection from weeds and nutrients for your maple tree. This product claims to be particularly good for the roots of your tree and is safe for a number of types of plants, so you might buy enough to use on your maple tree plus other trees or plants in your yard or garden. 

Other Ways To Prevent Weed Growth

According to Utah State University Extension Yard and Garden, you can also prevent weeds from growing by avoiding tilling around the soil near the trunk of your maple tree, using mulch to keep weeds from growing, and removing the turf about two to four feet from your tree. 

Weeds are notorious for growing in inhospitable conditions, so it does not always work to just make the soil around your maple tree a less-than-nice place for weeds to grow. But by avoiding tilling, you make it harder for anything to germinate and grow, including weeds.

Also, mulch can accomplish something similar to bio textiles in that it physically blocks the weeds from pushing up to get sunlight and grow. Lastly, removing the turf from around your tree will give the weeds fewer nutrients and a less hospitable place to grow, which is always helpful. 

And One Not-So-Easy Way To Get Rid Of Weeds Under Your Maple Tree

Weeds and grass in the hands of a farmer after working in the garden.

The methods above require some expense but, with the exception of landscaping your yard with plastic or fabric, they are relatively quick and easy to implement. But if you want to go with a method that is totally free of costs and does not require any equipment or chemicals, you do have one other option. 

You can always pull the weeds by hand. This is certainly not the easiest way to get rid of weeds, as it involves a lot of hard and tedious work, but it is a surefire way to make sure you do not expose any people or pets to potentially dangerous chemicals, to make sure you do not kill any plants you do not mean to kill, and to avoid having to spend any money at all. 

You might think that this method seems self-explanatory, but there are actually some tips that can help you weed the area under your maple tree by hand a little easier. Here are some ideas to keep in mind:

  • Make sure to wear gloves. Not only will they protect your hands, but they can help you get a better grip on the weeds. 
  • Make sure you remove the entire weed, including all the roots. Even a little bit of root left behind will just regrow the weed again. Your goal is to remove the entire plant. 
  • Put the weeds you pull into a bucket or bag; don’t lay them on the ground. This will make your cleanup easier, but it also prevents the weeds from spreading seeds around while you are working on weed removal. 
  • Weed when the soil is moist. You don’t want it to be soaking wet, but wait until shortly after a rain or your sprinklers have run. The moist soil will make it easier for you to remove the entire weed, including the root. 
  • Don’t wait too long to start removing weeds. The bigger they are, the harder they are to pull.
  • Get a stool or garden pad to protect your knees while you are weeding. 
  • Keep a spade handy in case you have to dig a weed out that is difficult to pull. 

Use these tips to make your weeding as easy, quick, and effective as possible. 

A Quick Reference For Weed Removal And Prevention

You can use this chart as a quick reference to help you think about methods of both weed removal and weed prevention to keep the ground around the trunk of your maple tree free of weeds at all times. 

Method of Weed Removal/PreventionProsCons
Herbicide (non-organic)Fast acting; a high likelihood of success; long-lasting in many casesHarmful to people and pets; difficult to use with accuracy at times; might kill plants that you do not want to kill.
Organic HerbicidePreserves the organic status of fruits, vegetables, and plants; can be less harmful to pets and people (but not always!)May not be as effective or fast-acting as non-organic herbicides.
Ground CoverDoes not require chemicals or harmful substances; safe for people and pets; long-lasting.Laborious to install; some weeds may still grow through, requiring additional treatment or gardening.
Manual LaborNo chemicals or harmful substances are used; no cost other than your time and effort. Tedious and difficult work.

You might find that you have to use multiple methods together or that one method works better than another depending on the type of weed or the time of year. It will take some experimentation to see what works best overall, but sometimes you might find that just one treatment is all you need for some of the weeds under your maple tree. 

A Few More Things Of Note

While you are learning about how to prevent weeds from growing under your maple tree, you might want to learn more about what types of plants do and do not work well under maple trees, whether or not you consider them weeds. So check out our post on 15 Plants Not To Grow Under A Maple Tree.

On that note, though, there are some plants that you should try to plant around your maple, which we talk about in our piece called 11 Best Plants To Plant Under Your Maple Tree.

That’s A Wrap!

Once you have chosen the weed removal or prevention method that works best for you and your family and home, you can start implementing it right away to aid the growth and health of your maple tree. Choose products carefully, and make sure that you always read the directions carefully. 

As always, remember that insecticides, herbicides, poisons, traps, and any other dangerous type of pest or weed removal should be kept away from pets and people–especially children–at all times. 

Enjoy your weed-free maple tree! 

References

Ahrens, J. F. (1960). Combinations of herbicides for weed control in Maple tree nurseries. In Proceedings of the Northeastern Weed Control Conference, 1960 (pp. 131-6).

Ingram, D. L. (2012). Life cycle assessment of a field-grown red maple tree to estimate its carbon footprint components. The International Journal of Life Cycle Assessment, 17(4), 453-462.

Willow trees are beautiful additions to any property and have been regarded as one of the world’s most lovely trees. You probably want to ensure it has a long healthy life as an asset on your property. Discovering yellow leaves may send you into a panic. Don’t worry; we’ve got you covered.

The most common reason a willow tree has yellow leaves is over or underwatering. Willows like moist soil, so drought and extreme heat will cause leaves to wilt and discolor. Prolonged periods of wetness, such as flooding, can also cause yellow leaves.

Willow trees may have yellow leaves for three additional reasons; pests, fungal problems, or environmental issues. Continue reading for more in-depth information on common willow tree problems that can cause yellowing leaves.

How Does Watering Affect Willow Leaf Color?

According to the University of Arizonamature willow trees should be watered once every ten to twenty days during extreme temperatures or drought. The variability here depends on the type of soil in your area.

Areas with sandy soil and excellent drainage will need to water more often than areas with clay soil and poor drainage. 

If you have planted a new willow tree in the last two years, you should water your young tree more often. According to the Univesity of Arizona, newly planted trees should be watered ten gallons for every inch of trunk diameter every three days.

Proper watering includes watering your tree outside the drip line. The drip line is the line around the circumference of the tree’s canopy or where water drips off the tree’s leaves. 

Watering outside this circle allows water to flow towards deeper roots. Following this method will prevent you from overwatering the tree. 

How To Prevent Your Willow Tree From Having Yellow Leaves

The best way to keep your willow tree happy is to choose a location that will meet its needs. For example, each species of willow tree may prefer slightly different growing conditions.

Generally, willow trees grow best in rich loamy soil in a moist environment. That is why we see so many graceful weeping willows on the banks of rivers, streams, and ponds!

While your willow tree may like moist soil, too much water could become a problem. If the tree’s roots are constantly under water, it never has a chance to dry out and access the oxygen and other elements in the soil.

Your young willow tree will do the best in full sun, but it is essential to water it consistently throughout its first two years on your property.

Under these conditions, a willow tree will grow in almost any environment. However, there is one more important consideration when finding the perfect location for your new willow tree. 

Willow trees have long drooping branches that can be susceptible to storms and strong winds. If possible, a location in the dip of a valley or other wind-protected site will make it even happier. 

Caring For A Willow Tree With Yellow Leaves

Willow Tree With Yellowing Leaves

If you have noticed yellow leaves on your tree, and you made sure you are properly watering your tree, it’s time to look at some of the other reasons your tree’s leaves may be yellowing. 

Willow tree leaves are yellow for three main reasons besides watering; pests, fungal problems, and environmental issues. Let’s review each of these three in more detail and find solutions. 

According to the University of California’s Department of Agriculture and Natural Resources, three common problems can occur a willow three and turn its leaves yellow, pests, fungus, and environmental issues.

Additionally, when you are first planting your tree, you want to make sure that you are planting a willow tree where it will actually want to grow. Planting them in good spots can ensure that its leaves will stay green and healthy!

Common Willow Tree Pests That can Cause Yellow Leaves

The following is a list of willow tree pests. We will go into greater detail into each further into the article.

  • Aphids
  • Armored scales
  • Carpenterworm
  • Boring insects
  • Foliage-eating caterpillars
  • Leaf eating beetles

Aphids

Aphids are small insects with long strawlike mouths that they use to pierce the tender parts of the plant and suck out the fluids. 

 Aphids are widespread plant pests, and most plants can become susceptible. For example, large colonies of aphids can turn the leaves of your willow tree yellow.

There are many types of aphids, but three kinds are known to prey upon willow trees:

  • Giant bark aphid
  • Giant willow aphid
  • Melon aphid

Aphids alone are not a big enough pest to significantly harm a mature willow tree. However, if you have a big aphid problem, consider controlling them without pesticides by introducing lady beetles to your tree.

Also, consider applying Pre-Fed Live Ladybugs to your willow to help with aphid population control.

Armored Scales

Scale Bugs On a Leaf

Similar to aphids, scales are sucking insects that suck the juices out of the bark or leaves of a willow tree. They are unique-looking bugs that can be easily missed. 

Some species can seriously damage their host plant turning the leaves yellow and causing them to drop before the fall season.

There are many kinds of armored scales, but three have been known to feed on a willow tree:

  • Greedy scale
  • Latania scale
  • Oystershell scale
  • San Jose scale

An early application of Monterey Horticultural Oil applied early in the spring can reduce the prevalence of armored scales.

Carpenterworm

Carpenterworms in the larva stage are large caterpillars that bore into willow wood and feed on their inner bark. Willow trees along river banks are the most susceptible to the carpenter worm.

The best management of carpenter worms is prevention. Take good care of your tree and limit injury to its bark. 

Wounds on the bark of the willow tree can become significant targets for this woodboring worm. Unfortunately, conventional insecticides are ineffective against pests underneath the bark.

Nematodes are an excellent option for controlling carpenter worms. Check out NaturesGoodGuys Live Beneficial Nematodes and follow the instructions for application.

Borers

Several different species of insects can dig tunnels into the trunk of a tree, called boring, and wreak havoc.

Some of these can prey on a willow tree. Dying limbs, gnarled bark, and swelling around branches and twigs are reasonable indications of a boring insect.

These insects burrow into the tree and leave behind a tiny tunnel that may exude destroyed plant matter. These insects can kill entire branches of trees, turning the leaves yellow before they fall to the ground.

Mature trees can usually recover quickly from a few boring insects, but if you have a bigger problem, you may want to apply nematodes. 

Insecticides such as Bio Advanced Tree and Shrub Protect and Feed applied in the spring when the insects are in their reproductive cycle can work if you get the timing right.

Foliage-Feeding Caterpillars

Caterpillars are butterflies and moths in their larval stage. They often eat the leaves of trees and shrubs such as the willow. This type of damage can turn leaves yellow.

Foliage-feeding caterpillars that could prey upon your willow tree include:

  • One-eyed Sphinx
  • Fruit tree leafroller
  • Omnivorous looper
  • Redhumped caterpillar
  • Tent caterpillars
  • Western Tiger Swallowtail

These larvae feed on the young leaves of the willow tree and may chew down to the mid-rib of each leaf. This pest is the hardest on young plants, while mature trees fare better.

Manage foliage-feeding caterpillars by cutting off infested leaves. Then, scrape the caterpillars and their nests and eggs into a bucket of soapy water or burn the removed foliage. Again, prevention is the best tool for keeping your tree well-pruned.

Leaf-Eating Beatles

According to Cornell’s School of Integrative Plant Sciences, Leaf feeding insects such as the Japanese beetle can chew the leaves right off the plant. In addition to the Japanese beetle, other kinds of beetles also eat willow trees.

Additional types of leaf-eating beetles include:

  • Willow beetle
  • Cottonwood leaf beetle

This type of bug damage causes the leaf to curl at the edges and may slow the tree’s growth. 

Harmful Willow Tree Fungi That Cause Yellowing

Fungus Growing On Willow Tree

The following is a list of funguses that affect willow trees in the United States and may cause yellowing leaves:

  • Powdery mildew
  • Rusts
  • Scab
  • Crown Gall
  • Black Canker

Certain plants can even attract pests to attack your willow tree, which may cause them to have yellow leaves. Check out our article to learn more about the plants that you should not grow with a willow tree.

Powdery Mildew

This willow fungus can be recognized by a white powdery substance on the leaf’s surface. It can be particularly hard on young woody trees and shrubs like the willow. New growth may appear stunted, shriveled, and discolored. Infected leaves turn yellow and die off before healthy leaves.

To handle powdery mildew, situate your tree in a sunny area with good air circulation. Consider applying a natural fungicide such as Natiria Neem Oil Spray.

Rust

Rust looks like small orange pustules on the leaf’s surface. This fungal problem needs an alternate host to reproduce but can infect and reinfect your willow all summer long and may overwinter on the dead leaves, ready to reinfect your tree next spring.

Rust usually occurs on a willow tree’s young twigs and green leaves. Rust infects plants when they are wet, and temperatures are cool. 

Prevent rust by watering outside the dripline and only watering the recommended amount.

Avoid overwatering your willow tree to avoid rust. Instead, collect infected leaves as they fall on the ground and discard them far away from any other plant.

Scab

Willow Scab, an additional fungal enemy of the willow, appears as small green-brown-yellow masses on leaves and twigs of the willow tree. It can cause the leaves to turn yellow, wither, and drop to the ground prematurely.

Scab infections in a single year do not pose a significant threat to a willow tree; however, conditions that occur year after year can reduce the tree’s overall growth. Limited growth may appear as twigs and branches dying off. 

This problem may not be the cause of a dying tree, but it does make it more susceptible to the other issues and pests on this list.

In most cases, Scab can be tolerated by a mature willow tree. Remove fallen leaves and debris quickly. Most fungus thrives in moisture, so water your tree early in the day so that it has time to dry out in the sun.

Crown Gall

According to Pennsylvania State Extension, Crown Gall forms rough bulging growths, called galls on stems, roots, or at the soil line. Bacteria cause this problem.

The best control tactic is to remove severely affected trees and replace the trees with trees that are not susceptible to crown gall.

Black Canker

Have you ever seen an unusual growth on a willow tree and wondered what it was? Black Canker is a problem that can occur in a willow tree. 

It forms black areas on leaves and may spread to kill larger twigs and branches in the summer, yellowing the leaves as the branch dies. If the weather is particularly wet, pink masses form on the blackened twigs. 

Black canker often occurs on trees with blight. Manage this disease by avoiding planting susceptible trees in this area or applying a fungicide.

Environmental Concerns That Can Cause Willow Yellowing

Yellow And Orange Willow Tree

The following is a list of environmental problems that could turn your willow tree’s leaves yellow:

  • Frost
  • Nutrient deficiencies
  • Poor watering
  • Sunburn
  • Small Mammals
  • Weeds

Frost

Freezing temperatures can damage the leaves, bark, and buds. This damage is most common during the coldest times of spring and fall, especially if the temperature quickly declines after a warm spell.

 Unfortunately, you may not notice your willow has been injured until days have passed and the edges of the leaves have gone yellow.

Choose a willow tree that thrives in your climate to prevent frost damage from hurting your tree and causing yellow leaves. 

Soak the top three inches of soil with water when unseasonably cold weather is expected. 

Soaking will help the soil retain heat, protecting the tree’s roots.

Nutrient Deficiencies

For healthy growth, willow trees need to absorb certain mineral nutrients from the soil. A nutrient deficiency may result in discolored and faded foliage.

If your willow tree is planted in landscaped soil, it probably has all the nutrients it needs. However, if your soil is sandy, the tree may need fertilizers to ensure it has all it needs to grow healthy and strong. 

If you suspect your willow may suffer from a nutrient deficiency, consider testing your soil with the Luster Leaf Rapitest Soil Test Kit. This kit tests for PH level, Nitrogen, Phosphorus, and Potash, all critical soil nutrients.

Poor Watering

As we have already discussed, too much or too little water is the most common cause of yellow leaves on a willow tree.

Signs of a poor watering schedule can include wilting land and discolored leaves. Because it is so common, ensure your tree is appropriately watered before investigating any other causes in this article.

If you live in an area susceptible to drought, water your willow tree at least during the drought season. If you have clay soil with little drainage, be extra careful not to overwater your willow tree.

Sunburn

Sunburn is common in newly planted young trees. It can damage the bark, leaves, and any other part of the tree above the ground. Sunburnt leaves will yellow and fall to the ground.

 Often the damage is from too much sun during unseasonably warm weather. Sunburn can get worse if the tree needs to be watered. In addition, a sunburned tree is more susceptible to pests.

While the tree is still young, keep the lower branches intact to shade the soil around the plant’s root ball. Shade around the base of the tree will keep the ground there moist and cool and reduce sunburn.

Avoid sunburn by planting your willow tree with enough room to grow as they get larger. In addition, you can prevent sunburn in young tees by whitewashing their trunks with a diluted interior white paint!

Small Mammals

Mice, chipmunks, and rabbits all have a habit of chewing on the tasty young bark of a willow tree. If one of these animals chews its way around the base of the tree, it is called girdling. Fortunately, mature trees have bark that is too tough for these animals.

A young tree that has been girdled will have wilting and yellowed leaves. Look at the base of your tree. If you see a ring of missing bark, your tree has been girdled.

Use Dimex EasyFlex Plastic Tree Trunk Protectors To protect your young willow trees from girdling by small mammals.

Weeds

Weeds near the base of a willow tree will suck the nutrients out of the soil and make the tree compete for precious water. In addition, weeds could result in yellowing leaves that fall to the ground prematurely.

A mature willow tree will not be bothered by the weeks at the base of its trunk, but if you have a newly planted young willow tree, you will want to keep weeds and other plants away from the bottom of the tree. Place two to three inches of mulch around the tree to prevent weeds.

If mulch isn’t your thing, consider using ECOgardener Premium Five Ounce Pro Garden Weed Barrier and Landscape Fabric instead. Make sure to leave plenty of room around the base of your tree to account for yearly growth.

Lets Review!

Willow trees add drama and whimsy to any property, but no one wants to see their favorite tree’s leaves turning yellow and falling to the ground prematurely.

If your willow tree’s leaves turn yellow, the most likely reason is over or underwatering. Young trees should be watered ten gallons for every inch of trunk diameter every three days. 

Avoid overwatering your tree by applying the water outside the drip line. Mature willow trees only need watering during times of extreme heat or drought. 

If watering is not the problem for your yellowing willow leaves, it may be another common pest, fungal or environmental problem.

Come back to this article to review these after you have ruled out a watering problem. If the problem persists, don’t hesitate to reach out to your local arborist!

Most willow trees will never need the kinds of intervention described here, but with the right tips and tools, you will be ready to tackle any willow tree problem that comes your way.

References

Charles, J. G., Nef, L., Allegro, G., Collins, C. M., Delplanque, A., Gimenez, R., … & Augustin, S. (2014). Insects and other pests of poplars and willows. Poplars and willows: trees for society and the environment. CABI, Oxford, 459-526.

De Vos, B., Huvenne, H., Messens, E., & Maes, M. (2007). The nutritional imbalance caused by nitrogen excess is correlated with the occurrence of watermark disease in white willow. Plant and Soil301(1), 215-232.

Isebrands, J. G., & Richardson, J. (Eds.). (2014). Poplars and willows: trees for society and the environment. CABI.

Your Competitors Are Already Running Ads. Are You?

This is for service business owners who are ready to SCALE.