Trees

Beech trees are an iconic staple in many landscapes, whether man-made or natural. However, one of the key factors in growing a healthy, beautiful tree is allowing it enough space to reach its full potential. No matter the amount of care you put in otherwise, a tree needs a certain amount of space for its roots to spread.

How much space do beech trees need? Mature beech trees generally need between 40 and 50 feet of space. Juveniles being transplanted may need less, although they will struggle if not moved to an area with more available space. 

A common mistake is assuming that because beech trees have shallow roots they need less space than other trees with deeper root systems. However, beech trees are right on par with other species of large trees- and 40 to 50 feet of space is perfectly average. As we go through this guide, you’ll learn more about planting and spacing beech trees, as well as the different species you can select for the best fit. 

Let’s Talk About Beech Trees

perfect single beech tree in meadow at spring

To begin, let’s take a look at beech trees in general. Beech trees are known for their silver to gray-toned bark, which tends to be thinner than other types of trees. It’s this bark that can also make them an ideal contrast to many landscapes as the seasons change. 

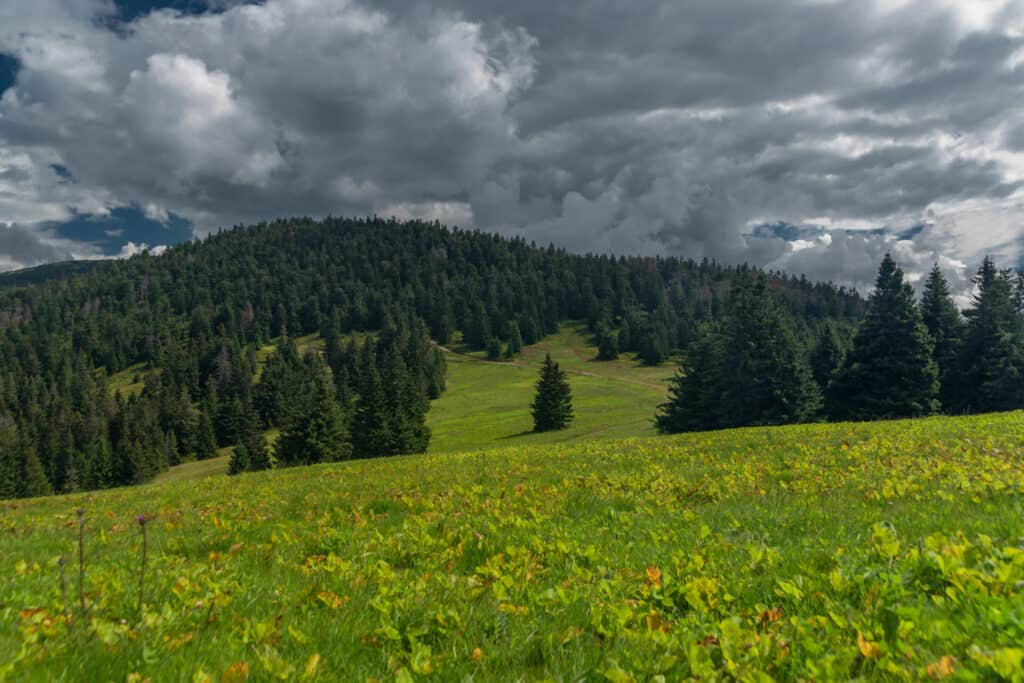
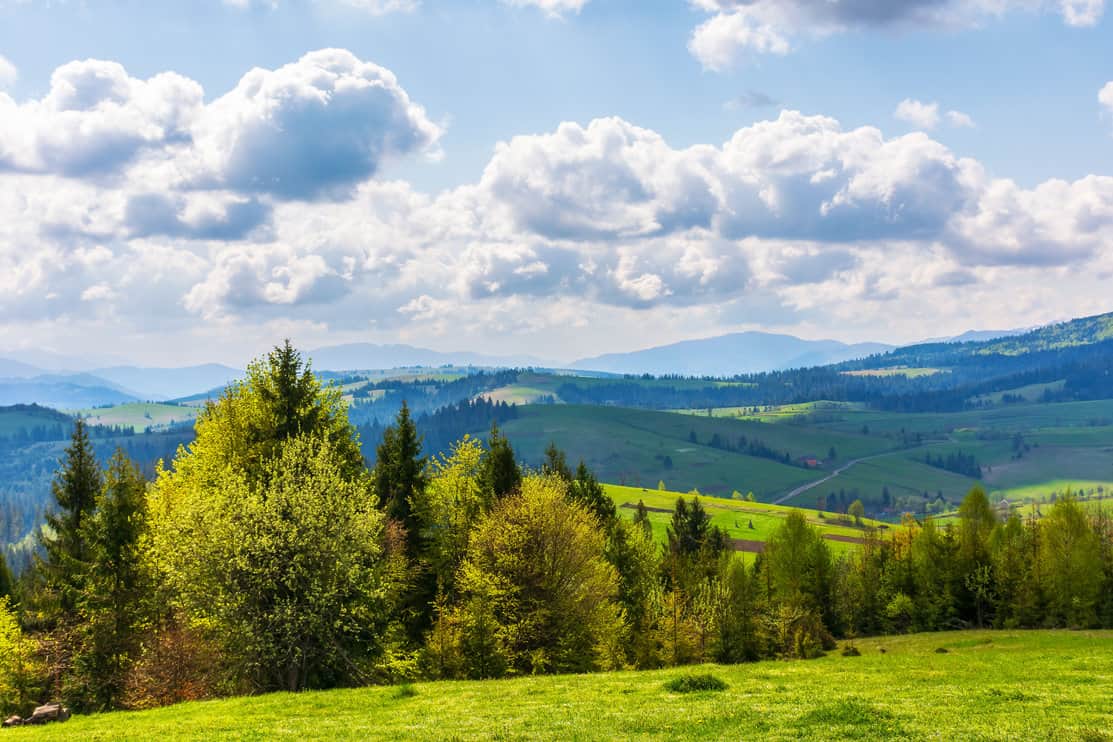
Another notable aspect of beech trees is their wide-spreading habit. This makes them ideal for filling up empty spaces in the landscape, as well as providing plenty of shade (and shelter) for humans and wildlife alike. 

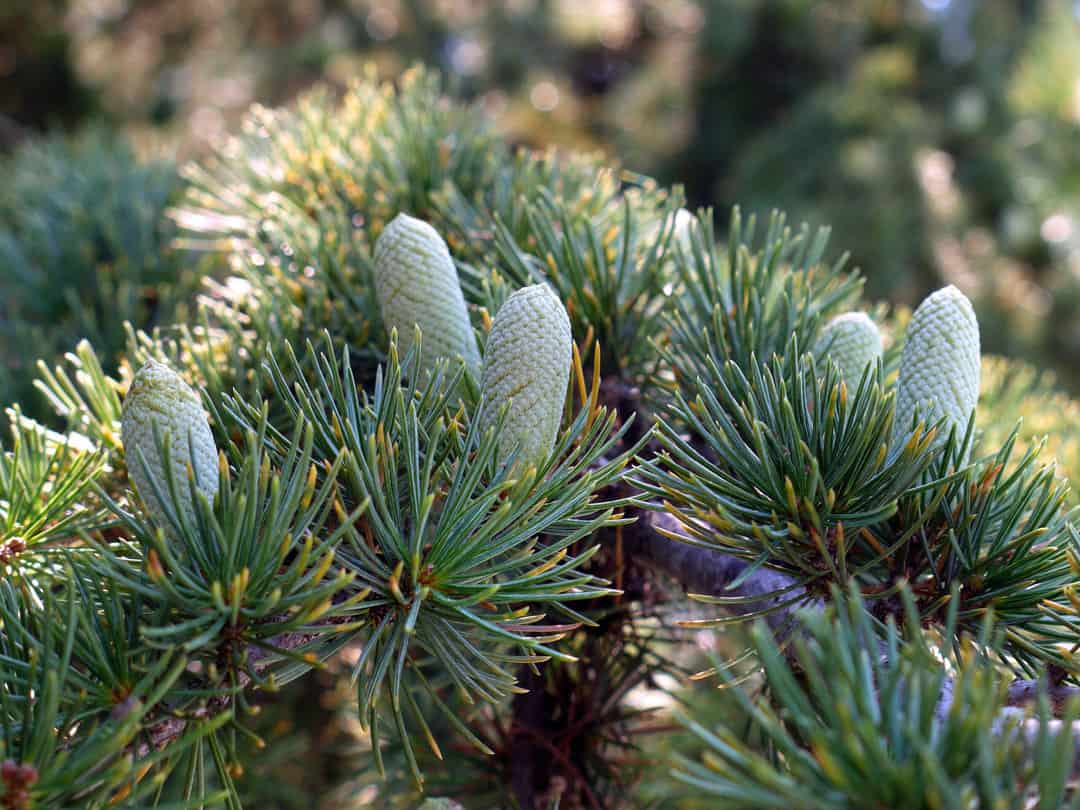
Beech trees typically have serrated leaves (meaning you can see ‘teeth’ or ridges along the edges), although the rest of the leaves are relatively smooth in texture with a classic green hue. When trees flower in the spring, they grow male flowers that have a yellowish-green color. 

The Space Beech Trees Need

As we mentioned, most beech trees need at least 40 to 50 feet of space to grow properly. This isn’t surprising, as most large trees should have at least this much space to remain healthy as they grow into maturity. 

There are some crucial reasons behind this ample spacing that you should take note of. 

Spacing beech trees properly isn’t solely to make sure that they get as wide and as tall as possible. And spacing beech trees far from other trees also doesn’t mean they can’t have other neighboring plants near them. 

One reason that beech trees need so much space is that they have a shallow root system. If you plant other trees or very large plants too close to them, beech trees often grow suckers. 

Suckers are growths that are extensions of the tree itself. You can think of these as the ‘mini me’ of the tree. This might not seem like an issue, although the more suckers that grow, the more nutrients are taken away from the main tree itself. Not only that, but it can cause some problems while doing the rest of your landscaping. 

Another reason beech trees need space is also due to their shallow root systems. These shallow roots can be unintentionally damaged by planting too close to the tree’s main trunk. To help prevent accidental damage, it’s a good idea to mulch around your beech tree as a signal not to interfere with the critical root zone. 

Keep in mind that beech trees don’t just grow to be very tall. They also grow to be very wide. 

The mature spread (also known as the width) of beech trees can reach up to 80 feet! If you plant other trees in the proximity of this spread, chances are that either one or both of the trees will end up being damaged. As branches collide and rub against each other, it opens up several different opportunities for breakage and scrapes that can lead to greater issues later on. 

By placing beech trees far enough away from other trees, you can reduce extra pruning (due to damaged limbs) and allow each tree to get enough light and resources to properly grow. Annals of Botany shows the effects on beech trees when they’re surrounded by other trees. 

Give Them Space From Foundations

Although beech trees have a shallow root system, that doesn’t mean that they’re good company for man-made structures. That doesn’t mean you can’t plant a beech in your yard, but you need to be mindful of the space. 

At the least, you should plant beech trees no less than 20 feet away from your home, although you should give them 35 feet or more. 

Remember that beech trees have root systems that expand far from their trunks. The more space away from foundations, sidewalks, and roads that you can give your beech tree the better.  

Benefits Of Having a Beech Tree

There are obvious aesthetic benefits to having a beech tree. These towering trees are a seamless addition to many landscapes and provide visually pleasing pops of color wherever they’re planted. 

While you may be most interested in the size and appearance of the beech tree, there are plenty of other reasons to plant a beech tree as well. 

Shelter For Wildlife

Beech trees are well known for providing shelter to local wildlife. It’s an even bigger bonus if you’re a fan of spotting different species of birds or enjoy seeing little critters run about. 

However, the fact is, beech trees provide crucial shelter for a variety of wildlife, all of which are important to the balance of the ecosystem. 

As more trees are taken down, large trees like the beech can provide homes for many species. Not only that, they’re a beacon in the summer due to the vast amounts of shade they create. 

As an added bonus, the beechnuts they grow are a favorite source of nutrition for several species of wildlife. So consider planting a beech tree for the greater good of the surrounding ecosystem. You’ll provide food, shelter, shade, and ultimately, some measure of safety. 

Easier Maintenance

For as large as they are, you might be surprised to find that beech trees actually require less maintenance than many other large tree species. 

In particular, beech trees don’t need trimming as frequently as many other trees. For many tree owners, this is a huge relief- trimming is often one of the biggest chores you have to worry about when you’re caring for your tree.

Of course, that doesn’t mean you can neglect to prune your beech tree altogether. However, you can limit a lot of the pruning and trim to that which is strictly necessary. 

For instance, you don’t need to worry about trimming back limbs when they’re perfectly healthy and growing normally. You should, however, prune branches that rub against others or have visible damage. 

How To Plant A Beech Tree

sprout of beech growing in forest

If you’re thinking about how much space beech trees need, you’re probably also considering planting one. Planting a beech tree isn’t too difficult, although you do need to consider more than just spacing before you start digging. 

Beech trees can live between 200 and 300 years. 

That means that where you plant should be a careful decision. It’s not as though you’re planting a tree with a shorter lifespan of only 40 to 60 years. This tree is going to last for several generations and through many changes to the surrounding landscape.

Beech trees, like any other tree species, must compete with their neighbors if they’re too close together. In a publication from Oecologia, however, beech trees were seen overtaking oaks when their roots were competing for resources.  

Soon, we’ll cover exactly what requirements you need to fulfill to keep your beech tree healthy. But for now, let’s get to the foundations of what makes planting a beech tree successful. 

Find The Right Soil

Fortunately, beech trees can tolerate a wide variety of different soil types. That’s a bonus if you have soil that may not be ideal for other species of trees. If you really want to optimize your tree’s growth, it’s best to plant in the ideal soil type. 

Beech trees prefer soil that is slightly acidic, with plenty of nutrients (although you can add nutrients if your soil is somewhat lacking). With that said, beech trees can tolerate soil types including more acidic, loamy, clay, slightly sandy, and more. 

The best soil for beech trees is slightly acidic, rich in nutrients, and well-draining. 

You can test your soil with a kit like the Moistenland 4-in-1 soil meter. It allows you to detect pH (acidity or alkalinity), moisture levels, nutrient density, and light that reaches the area.   

Planting The Tree

You can plant beech trees from seed. However, it will take significantly longer for the tree to reach a substantial height. Juvenile trees also require somewhat more care than established trees. Consider this when you choose to grow a beech tree from seed (although it’s certainly possible to choose this route). 

Your other option is to buy a young tree from a nursery. This is the route the majority of people choose because it gives you a head start on the tree’s growth, and makes the early years more manageable. 

Before you start getting ready to plant, make sure you select a site with plenty of room for the tree to spread out. 

That means you should ensure your tree will have at least 40 feet to spread out in any direction. 

When you’re ready to plant, it’s just a few steps until you can put your tree into the ground. Now, it’s time to start digging. Take note of the size of your tree’s root ball. The hole you dig should be larger than the root ball by two or three times, at least. 

Digging a larger hole serves many purposes, although the largest is to allow the dense root ball to spread out. Because digging inevitably loosens the soil, you’ll be making it easier for the root system to become established. 

You should always check nutrient levels in your soil before you plant. If your soil isn’t exactly nutrient-dense, you can add compost to the bottom of the hole, and the soil you’ll fill the hole with. 

You can use a compost like Charlie’s Compost if you don’t want to make your own, or don’t have time to.

Once you have these steps finished, go ahead and gently place your beech tree in the hole. Try to keep it even and level to allow it to grow straight more easily. Fill in the hole with the remaining soil around the tree. You don’t need to pack the dirt too tightly- you still want to give the roots some wiggle room. 

Beech Tree Requirements

Old Beech Tree from below, full autumn foliage

So, once you’ve planted your beech tree, what else do you need to do to ensure its health? Beech tree requirements aren’t exceptionally hard to manage, although you do need to take care of a few key factors.

Soil and space are important- but so are proper watering, nutrient enrichment, and the right amount of sunlight. 

If you have naturally nutrient-dense soil, then you’re lucky. However, trees will certainly use up many of these nutrients over time. Fertilize your beech tree at least once annually once it’s established. 

Use a fertilizer with equal parts nitrogen (N), potassium (K), and phosphorus (P). These nutrients are the main parts of the NPK formula, which should be listed on any fertilizer you buy. Look for a fertilizer with a ratio that shows all of these in equal parts (ex. 5-5-5 or 10-10-10). 

Then, measure the root zone of your tree. For most beech trees, this is an area that extends around 12 inches beyond the canopy of your tree. 

You only need to spread fertilizer over the root zone. Once you apply the fertilizer, make sure to water the soil where the application is to allow it to seep down to the roots. 

Another thing you should know is- beech trees are somewhat sensitive to drought, and even more so when they’re younger. 

Young beech trees need more frequent watering than established trees. As the tree matures, you won’t have to water it quite as often. However, juvenile beech trees should be watered weekly unless there’s rain. 

This is another category in which mulch becomes important. As we mentioned earlier, mulch helps protect beech trees from accidental damage to their naturally shallow root zones. In the case of juvenile beech trees, mulch also helps retain moisture in the soil- which they very much need. An added benefit of mulching is that it slowly releases nutrients into the soil. 

Are There Smaller Types Of Beech Trees?

Let’s say you love the look and the benefits of beech trees, but you’re not sure if you can handle such a large tree. You’re certainly not alone. 

Are there smaller varieties of beech trees? In fact, there are small species of beech trees which include:

  • Dwarf beech (many varieties and cultivars)
  • Tricolor beech
  • Tortuosa beech
  • Purple Beech
  • Parasol beech

Up next, we’ll look at these smaller beech species and what you should know about each of them. 

Dwarf Beech

As the common name indicates, this species is much like the traditional beech tree, although smaller. Like other species of beech trees, the dwarf beech group has many different cultivars.

Cultivars of dwarf beech trees vary greatly in size, appearance, and coloring, as well as requirements, and tolerances. 

This is fortunate for people that don’t have space for a full-size beech tree. There are cultivars to fit every landscape and every preference. Next, we’ll look at some of the most popular and most common varieties of dwarf beeches. 

Tri-Color Beech

The tri-color beech (Fagus sylvatica Purpurea and Fagus sylvatica Roseomarginata) stays true to its name with leaves that vary in color from green to pinkish purple and white along variegated edges. As the seasons turn, the spectacle of color becomes even more compelling when the leaves take on warm golden and bronze hues. 

These trees need less sun than other varieties- partial sun is ideal. If they receive too much sun, the leaves become discolored. 

If you like beech trees but have less space to plant, tri-color beech trees might be the right fit. 

These trees reach a maximum height of 30 feet and have a spread of about 20 to 25 feet at the most. Because of this, they also require much less room than larger species of beech. Aside from that, they have many of the same requirements as other beech trees, 

Tri-color beech trees grow best in USDA zones 4 to 7.

Tortuosa Beech

Fagus sylvatica Tortuosa or Tortuosa beech is one of the smallest varieties of beech trees. It reaches only 10 to 15 feet upon reaching maturity, making it suitable for smaller landscapes and yards. 

Tortuosa beech trees are easily recognized by their twisting, contorted growth habit. 

This small beech species has the sleek, silvery bark of larger beech trees, with smooth, somewhat shiny green foliage. They have a fair spreading habit, although their crown tends to grow closer to the ground. The somewhat weeping form and dense canopy of the tree add to its appeal. 

Tortuosa beech trees still provide plenty of shade and remain a spectacle in the landscape no matter the time of year. 

Tortuosa beech trees are best suited to USDA zones 5a to 9b. 

Purple Beech

Fagus sylvatica ‘Dawyck Purple,’ or the ‘Purple Beech’ are easy to care for, even with how low maintenance the typical beech is. As you might glean from the name, they’re known for their eye-catching purple hues. However, this tree isn’t limited to purple alone. 

Purple beech trees begin with warm red foliage in springtime, and progress to green violet by summer. By winter, they go through another color change to gold and bronze. 

This particular cultivar of purple beech does well with both full and partial sun. If you want to optimize the color, however, it’s best to plant them where they can get full sun. Dawyck purple beech trees typically reach around 25 to 30 feet at maturity, although they can be pruned as they grow to maintain a smaller size. 

They’re low maintenance and have very few problems- as a bonus, they’re even deer resistant. As long as they’re in well-draining soil, and receive proper nutrients, you can expect an easy tree to care for. 

Dawyck purple beech trees grow best in USDA zones 4a through 7b. 

Note: there are many cultivars of purple beech, and not all of them are dwarf varieties. Make sure to check the specific species you’re looking to plant. Even established varieties may have different characteristics, depending on how they were grafted (University of Belgrade, Faculty of Forestry).

Parasol Beech

Fagus sylvatica ‘Tortuosa Purpurea,’ or the Parasol Beech, is similar to the Dawyck purple beech in a few ways. Not only that, but it combines some of the most unique characteristics of other dwarf beech cultivars. 

Parasol beeches grow to only about 10 to 15 feet tall at the very most. In fact, many of these trees can reach only 5 to 10 feet tall and are often wider than they are tall. Like other purple beeches, they have violet to reddish leaves which transition to gold and bronze once autumn arrives. The leaves also have a smooth, shiny texture that adds another aspect to their visual interest. 

Another notable characteristic of the parasol beech is that it combines purple foliage with contorting, twisting branches and has a nearly weeping habit. 

Like the other purple beeches, it does well in full or partial sun, although full sun exposure is a requirement to maximize the foliage’s color. 

These trees are hardy to USDA zones 4 to 7. 

Wrapping It Up

The most important thing to remember when you plant a beech tree is to give it at least 50 feet of space. Dwarf beech cultivars are smaller and therefore have less space requirements. However, you should always check the needs of your specific species. 

These trees will be a lasting fixture in your landscape for hundreds of years if you tend them properly, and it all starts with finding the right space. 

Resources

Leuschner, C., Hertel, D., Coners, H., & Büttner, V. (2001). Root competition between beech and oak: a hypothesis. Oecologia, 126(2), 276-284.

Nicolini, E., Chanson, B., & Bonne, F. (2001). Stem growth and epicormic branch formation in understorey beech trees (Fagus sylvatica L.). Annals of botany, 87(6), 737-750.

NONIĆ, M. Ž., SKOČAJIĆ, D. M., GRBIĆ, M. N., & ŠIJAČIĆ-NIKOLIĆ, M. T. (2017). Variability of Quantitative and Qualitative Characteristics of Fagus sylvatica ‘Purpurea’ Clones Produced by Grafting. Notulae Botanicae Horti Agrobotanici Cluj-Napoca, 45(2), 400-407.

We all know that conifers have beautiful cones. Many of us even take them indoors in the wintertime to liven up our homes with their fragrance and appearance. But have you ever considered their purpose?

Spruce trees get cones so that they can reproduce. Cones are a protective housing for their seeds to prevent animals from eating them before they’re fully developed. Cones drop when the temperature is ready for new trees to grow!

Read on for an extensive guide on the purpose of spruce tree cones and how they work!

Spruce Trees Make Cones For Reproduction

On conifers, you will find both female and male cones on the same tree.

Male cones release pollen. Female cones capture the pollen while it blows in the wind. How cool!

Eventually, the pollen and “megaspore” combine and grow into a baby conifer. The baby conifer is all tucked away in a seed, just waiting to grow into a new tree.

Cones Act As A Protective Housing For Seeds

Now that you know how the baby conifers end up in the seeds, it only makes sense that they need to be protected.

Cones are like the ultimate seed armor. They’re strong and tuck the seeds safely away.

Just try opening up a closed cone and you’ll see how stubborn they are!

Nature is always full of surprises, and the cone is truly a work of art.

Putting It Together

Let’s recap those last two sections into one cohesive story!

  1. Pollen from male cones gets caught in the wind and captured by female cones.
  2. A baby tree is formed and tucked away in the seed.
  3. The cone protects a bunch of seeds by staying tightly shut.

Awesome! Now onto the next stage of the cycle.

When Do Spruce Tree Cones Drop?

Spruce Tree Branches With Tender Young Cones

We all know the feeling of walking through the woods in awe at all the beautiful cones on the forest floor with their scent floating in the air.

Cones Begin To Drop In Late Summer

Spruce cones ripen between late August and early September.

Cones start to fall after they’ve dried and opened up, releasing their seeds.

Spruce cones dry out when the sap flow gets cut off. Then, the stem that the cone is attached to closes up.

Spruce Trees Tend To Stop Dropping Cones In Early Fall

Once the temperatures start to drop, the dropping stops!

By early fall, most of the cones have dropped and opened up in the hopes of creating new spruce trees.

It Takes Two: A Two-Year Cycle of Cone Production, That Is!

Spruce trees take two years for their cones to mature.

Buds form during the first year. In fact, many species of baby spruce cones are edible in at the beginning of their life cycle!

Then, the cones develop and drop during the second year. This is what leads to the new trees really being established.

Spruce Trees May Drop Cones At Other Times If Weather Patterns Change

So we’ve already learned that spruce trees drop their cones between late August and September.

But if temperatures stay too hot, the spruce trees won’t get the message to drop their cones.

On the same token, if temperatures cool down early, the spruce trees will think it’s time to drop much earlier than they usually would.

High Temperatures And Drought Can Lead To A Lot Of Cones

According to Michigan State University, heat and drought can lead to “bumper crops” of cones.

In response to stress, the trees create excessive buds in an attempt to protect their species and make sure it lives on.

Because of the two-year cycle, many cones will be produced in the year following any stressful weather.

Similarly, other stressful conditions can also stimulate spruce trees to drop more cones. For instance, if they aren’t in their optimal acidic pH soil, they may create more cones.

How Do Spruce Tree Seeds Work In Cones?

Now that we’ve covered cones, let’s talk about the spruce tree seeds! Although they may seem like simple structures, cones can be incredibly complex, and are usually adapted to specific dispersal methods.

Cones Simply Act As Initial Protection

Decoration of Norway spruce and Japanese black pine cones.

Cones are like the ultimate armor.

Seeds are tucked away as snug as a bug in a rug, surrounded by strong woody material that won’t open even if you try to rip it apart with your bare hands! Try getting through that, squirrels!

It’s quite genius how cones originally act to capture pollen and then go on to close up and protect the baby trees while they do their thing.

When Dry, Cones And Seeds Can Fall To The Ground

Cones fall to the ground once they’ve dried up enough to open.

By drying out, the tension in the cones is released and they open all their treasures into the world.

Once they’re dry, they have no purpose left on the tree and fall to the ground when shaken by the wind.

Especially when the ground is fertilized, they’ll establish themselves in the soil. Read our piece on the 5 best spruce tree fertilizers (and how to use them.)

Falling To The Ground Can Help Disperse Seeds

While the cone is falling, seeds begin to fly out of the cone and sprinkle into the surrounding area. Kind of like a dandelion, except not as extreme.

Likewise, when the cone hits the ground, the pure shock of the impact rattles some seeds around and sends them flying in all directions.

Animal Activity Can Help Seeds Spread

Close Up Of Spruce Tree With New Needles Growing

Now comes the best part- the animals!

Squirrels love to collect and bury seeds. Since cones fall during late summer, it’s the perfect time for squirrels to start collecting for the upcoming winter.

Likewise, birds will peck at the seeds and then transport them to different locations (you know how)!

How Long Does It Take Fresh Spruce Seeds To Germinate?

Since the whole point of cones is to protect the seeds (although we may like to think it’s to make us happy), it’s important to go over the germination process.

Most Spruce Seeds Require A Cold Dormant Period

Though spruce trees need more sun than shade, they also require periods of cold to balance out the warm, sunny weather that keeps them energized. Just like many plants, spruce seeds need a period of dormancy in order to germinate.

This is similar to cacti, which need to “winter over.”

You can think of it like hibernation, where the seeds are waiting for the right weather to wake up.

All seeds are technically alive, complete with food reserves and everything!

When Temperatures Rise, It Can Take 1-3 Weeks

Once temperatures rise, this tells the spruce seeds to germinate and “wake up” as discussed before.

A set of enzyme and protein reactions start to take place within the seed, eating up the food reserves and beginning the process of growing roots and a shoot.

Spruce seeds usually depend on animals to bury them or stomp them into the ground in order to germinate.

You can read our article about the 8 best plants to plant under your spruce tree because it makes a difference which plants are sharing your spruce’s soil.

In that same vein, there are also 13 plants not to plant under your spruce tree.

Stored Spruce Seeds Can Last A Long Time

If you store spruce seeds in a cool, dry place, they can last for quite some time!

Knowing how to store seeds is a good skill to have in general. It can save you money in a vegetable garden and make you feel more self-sufficient.

Tightly sealed glass containers are a wonderful vehicle for storing your seeds.

Really, storing spruce seeds is just one more way to reach self-sufficiency! You can use a container like this ZENS Airtight Glass Jar to make sure that your seeds stay properly stored.

Plus, people who are reforesting areas need a way to preserve seeds for their research and environmental efforts.

Quick Recap

Now that we’ve gone over the essentials, there is really only one thing left to do.

Time to recap!

  • Spruce trees develop cones in order to reproduce
  • The cones contain seeds
  • Cones drop and open up in late summer
  • Seeds require a period of dormancy
  • Seeds store well and can help reforestation efforts

I hope that this piece helped you to feel more informed about spruce trees and their workings. We’ll see you next time, friends.

References

Aniszewska, M., Gendek, A., & Zychowicz, W. (2018). Analysis of selected physical properties of conifer cones with relevance to energy production efficiency. Forests9(7), 405.

Kerzenmacher, T., & Gardiner, B. (1998). A mathematical model to describe the dynamic response of a spruce tree to the wind. Trees, 12(6), 385-394.

Huang, J., Hammerbacher, A., Gershenzon, J., van Dam, N. M., Sala, A., McDowell, N. G., … & Hartmann, H. (2021). Storage of carbon reserves in spruce trees is prioritized over growth in the face of carbon limitation. Proceedings of the National Academy of Sciences, 118(33), e2023297118.

Castagneri, D., Storaunet, K. O., & Rolstad, J. (2013). Age and growth patterns of old Norway spruce trees in Trillemarka forest, Norway. Scandinavian Journal of Forest Research, 28(3), 232-240.

Throughout the changing seasons, the spruce tree still displays an unchanged hue of green. Because of this, spruce trees make the perfect ornamental tree, Christmas tree, and backdrop to the Rocky Mountains no matter the season. Even when the last of the leaves finally drop, the needles of the evergreen spruce don’t miss a beat. 

But did you know that spruce trees naturally root in regions of higher elevations and colder climates?

They have the unique ability to adapt to different soil pH levels but prefer acidic soil. Spruce trees love acidic soil because it creates an environment that allows better nutrient absorption and overall tree growth.

The pH of your soil can greatly affect the development of your spruce tree from the ground up. If your spruce is struggling, consider testing your soil to uncover the root of the problem.

Do Spruce Trees Like Acidic Soil?

Summer Day In A Thriving Spruce Forest

Yes, spruce trees like acidic soil. They actually prefer it.

Spruce trees are native to colder regions, which is why you see forests of them in the coldest and most northern climates of the United States.

In these colder, elevated regions of heavy rainfall, certain nutrients in the soil begin to dissolve creating conditions of acidic soil beneath them.

If you are considering planting a spruce tree, make sure to head on over to our article about the best spruce trees to plant! That way if you currently have acidic soil, or if you have a different kind, you can find the best spruce to match your environment!

Spruce Trees Adapt To The Soil

Spruce trees have learned to adapt to these ever-changing soil conditions and can thrive in different pH values ranging anywhere from alkaline to acidic. You’ll most likely find them growing on mountain slopes, along rivers, and sometimes even in your neighbor’s yard!

A study conducted by the Scandinavian Journal Of Forest Research discovered that when compared to ash, beech, elm, hornbeam, and oak trees, spruce trees generated the most acidic soil.

If you find that your soil doesn’t meet their standards, keep reading to learn ways to make your soil more acidic.

Why Do Spruce Trees Love Acidic Soil?

Spruce Forest Covered In Thick Snow

Soil pH is measured on a scale of 0 to 14 where any number under 7 means acidic and anything above means alkaline. For spruce trees, a soil pH of anywhere between 5.0 and 8.0 is optimal for growth.

With the ability to slide between slightly alkaline and strongly acidic, spruce trees are extremely adaptable.

The pH of the soil determines the availability of essential nutrients taken up by each tree which can greatly influence the overall growth of any tree. 

Acidic soil generates the optimal environment for your spruce tree to tower over all of the others while containing all the nutrients it needs to thrive.

Acidic Soil Helps Spruce Trees Absorb Nutrients

The soil beneath your spree tree becomes acidic as a result of the environment around it.

Heavy rainfall can drain your soil of minerals that are more abundant in alkaline soils, such as calcium and magnesium.

Spruce trees love acidic soil because of the nutrients available to reach their roots. Acidity allows for more nutrient absorption into the trees. Hence why you see a lot of spruce trees on mountains and in snowy areas!

Acidic Soil Has More Moisture

Acidic soils also hold moisture better. Because spruce trees have shallow roots, dry and humid climates can easily damage them. Be sure you’re staying on top of watering your spruce tree!

Moisture and nutrient uptake are the two most important factors in spruce growth, which is why spruce trees love acidic soil.

In fact, the waxy coating on the needles of your spruce conserves water, so when the soil below is frozen, they are still getting the water they need during those cold, mountain winters!

As you can tell, spruce trees need a lot of water to survive as well – which is why acidic soil is so perfect for them! Head on over to our article about watering spruce trees, to find out the best ways to do it, and how much water they will need!

Acidic Soil Speeds Up the Spruce Tree Growth Timeline

Research from Michigan State University indicates that conifers grow best in acidic soil, and an increase in soil pH may dramatically slow spruce tree growth.

A conifer is any tree that bears cones instead of flowers and forms needle-like foliage instead of leaves. Spruce trees are conifers and are also evergreens.

With the proper acidic soil environment, the spruce tree can focus on sunlight intake to shoot up towards the sky as the roots that are spread down below worry less about fighting for essential nutrients.

Spruce trees also need sunlight to grow, and may not do as well without ample enough sun. For more info on why spruce trees need sunlight, head on over to our article to learn more!

How To Make Soil Around Your Spruce Trees More Acidic

Small spruce tree in the snow against a winter forest

There are very few trees and plants that can tolerate acidic soil. Luckily, your spruce tree can tolerate acidic and alkaline soil.

However, if you want your spruce tree to look and grow its best, you’ll want to create an acidic environment around it, which starts in the soil.

To make your soil acidic, you can add compost, coffee grounds, and fertilizers to the soil beneath your spruce.

Spruce needles themselves are also acidic! As they drop from the tree, they will decompose and add hints of acidity to the soil.

Monitoring the health of your spruce is important, especially if it pertains to soil health. For instance, soil issues such as poor nutrients or improper pH can cause a slew of issues such as tree reddening and needle drop.

Apply Compost To Increase Spruce Tree Acidity

If you’re looking to organically increase the acidity of your soil, add compost.

Well-decomposed compost will slowly increase the pH of your soil and the overall growth of your spruce tree.

Compost is composed of decomposed organic matter, such as leaves, twigs, kitchen scraps, and other organic materials.

You can create your own compost by saving leftover scraps, fruit and vegetable peelings, and the mountains of leaves that are starting to pile up around your home.

Compost May Take A Long Time To Work

Although adding compost to your soil improves the overall soil structure, it is not the quickest fix to your soil acidity.

Compost only increases soil acidity over time, so throughout the growing season, you will see a gradual increase in acidity and the health of your spruce.

This is still an amazing option to increase your soil acidity and overall growth and can be used in combination with other options!

Spread Coffee Grounds Around Your Spruce Trees To Help Acidity

It takes time to craft a compost pile and allow the organic material to decompose properly before use. If you’re looking for something to increase the acidity of your soil this morning, go grab those coffee grounds from your freshly brewed pot of coffee!

Spreading coffee grounds throughout the soil under your spruce tree can increase soil acidity.

You can simply sprinkle the coffee grounds on the soil, add them to your compost pile for an extra acidic boost, or cultivate the coffee grounds into the soil beneath your spruce to help the acidity.

Coffee grounds also contain up to 2% nitrogen, which is beneficial to the overall growth of your spruce! They do not, however, contain any phosphorus or potassium.

Try Using Fertilizer To Make Your Soil More Acidic

If you’re searching for a quick, full-proof way to increase the acidity of your soil, consider purchasing an acidifying fertilizer.

Many premade fertilizers contain macronutrients, micronutrients, minerals, and beneficial bacteria that can help acidify your soil and promote growth.

Espoma Organic Evergreen-Tone is an all-natural fertilizer proven to increase acidity and promote the overall growth of your spruce tree. This fertilizer contains the minerals and bacteria necessary to keep your spruce thriving!

Evergreen-Tone Fertilizer is formulated specifically for your at-home evergreen trees, including your spruce tree. It is ready to use, and recommended that you feed your tree once in early spring and once in the late fall.

Here’s a full list of our top recommended spruce tree fertilizers if you’d like to take a look!

How To Test Your Own Soil At Home

Bright landscape with a variety of spruce and other conifer trees

If you’re unsure if the soil is the reason your spruce is struggling, it is best to test your soil before trying to amend it.

Of course, it is always best to test your soil before ever planting your spruce tree!

There are many ways to test your soil at home. You can even test your soil without leaving your home by using items found in your cabinets!

Buy A Basic Soil Testing Kit To Test Your Soil At Home

The simplest way to test your soil is with an at-home soil testing kit.

In many states, you can simply contact or visit your local conservation department to secure a soil testing kit! If you opt for this route, you’ll likely have to mail or drop off the soil sample and wait for the results.

For a quick at-home test, you can purchase a simple soil testing kit online. In a matter of minutes, you can have the pH of your soil in your hands! No mailing or waiting is required.

Here Are Some Great PH Testers!

Luster Leaf is a brand that has created two different kits to quickly test your soil however you prefer.

This Luster Leaf BioLogic Soil pH Tester is a simple rapid test that displays the exact pH of your soil. This kit even contains ten different tests!

They also have a Digital Soil pH Meter that you can stick in the soil and receive the results within minutes! These options require minimal preparation, test quickly, and come at an affordable price.

The optimal pH for a spruce tree should be between 5.0 and 8.0, and each of these tests will provide readings for you to determine if your spruce’s soil falls between these numbers.

Add Baking Soda To Soil As An At-Home Acidity Test

You can test your soil at home with baking soda.

This soil test does not provide exact readings, but it will give you an idea about the type of soil that is underneath your spruce.

How To Test With Baking Soda

  1. To prepare for this soil test, you’ll need at least 2 tablespoons of moistened soil from your spruce tree and ½ cup of baking soda.
  2. Once you have gathered these materials, place your soil in a bowl and moisten it with distilled water. Tap water may provide skewed results, so be sure to apply distilled water to your soil.
  3. After you’ve moistened your soil, add ½ cup of baking soda. If the mixture fizzes in any way, you have acidic soil.

Of course, you won’t know just how acidic your soil is. If the acidity falls below 5.0, it is possible that your spruce will start showing signs of disease or deficiencies.

Add Vinegar To Your Soil To Alter Acidity

This test is just as simple as the one above but includes vinegar instead of baking soda. Surely you have one of the two!

You can quickly test your soil at home with vinegar! Here are the steps:

  1. To prepare this soil test, you’ll need at least 2 tablespoons of soil and ½ cup of vinegar.
  2. Once you’ve gathered soil from your spruce, add it to a bowl. The soil does not have to be moistened for this test.
  3. Lastly, you’ll add ½ cup of vinegar to your bowl of soil. In this case, if the mixture fizzes, you have alkaline soil.

For most plants and trees, this is good news! For your spruce tree, this could be the reason your spruce is struggling.

BUT – spruce trees can still grow healthy in alkaline soil! They just don’t love it. If your spruce doesn’t seem to be thriving, consider diving into the options above to make your soil more acidic!

Wrapping Up!

To sum up, spruce trees love acidic soil. Not only are their needles themselves acidic in composition, but the climate in which spruce trees thrive is a breeding ground for acidic soil.

Most importantly, acidic soil allows your spruce tree to absorb nutrients better and speed up the growth timeline.

In order to fully understand the soil beneath your spruce, it is encouraged that you test the soil. Purchase an at-home soil testing kit or grab some items from your pantry and get testing!

Now as you journey through nature and encounter a forest of spruce trees, you’ll be able to connect with a better understanding of why spruce trees love acidic soil and how to establish an environment at home for one of your own!

References

Badalucco, L., Grego, S., Dell’Orco, S., & Nannipieri, P. (1992). Effect of liming on some chemical, biochemical, and microbiological properties of acid soils under spruce (Picea abies L.). Biology and Fertility of Soils, 14(2), 76-83.

Mund, M., Kummetz, E., Hein, M., Bauer, G. A., & Schulze, E. D. (2002). Growth and carbon stocks of a spruce forest chronosequence in central Europe. Forest Ecology and Management, 171(3), 275-296.

Oostra, S., Majdi, H., & Olsson, M. (2006). Impact of tree species on soil carbon stocks and soil acidity in southern Sweden. Scandinavian Journal of Forest Research, 21(5), 364-371.

Puhe, J. (2003). Growth and development of the root system of Norway spruce (Picea abies) in forest stands—a review. Forest ecology and management, 175(1-3), 253-273.

Schulze, E. D. (1989). Air pollution and forest decline in a spruce (Picea abies) forest. Science, 244(4906), 776-783.

Camphor trees are large trees with large canopies that grow in the United States in several parts of the country but are native to Asia, especially Japan and China. These trees have varied purposes, so there are several places you might find them. 

Some of the most common places where camphor trees grow include streets, yards, and forests, so their locations are very versatile. Camphor trees are very controversial among gardeners and homeowners because the trees have a lot of positive attributes but they also have some problems. 

Read on to learn more about camphor trees, their uses and purposes, and why you might see them anywhere from lining your sidewalk to your neighbor’s front yard or an ancient forest in Japan. 

Some Key Facts About Camphor Trees

Camphor trees are a tree you may not have heard of, as they aren’t as common as oaks or maples, but they are still a common tree found in many parts of the country. 

They make great shade trees and their oil is valued for its medicinal properties. But camphor oil is toxic to humans and pets, so use extreme caution when considering this tree. 

Camphor trees are a part of the laurel family, which also includes magnolia trees, another species of evergreen that does not have needles. Because of this, many people like to plant them so they can enjoy their foliage year-round. 

The Controversy Of Camphor Trees

Most of the controversy regarding camphor trees comes about because the trees are great for some purposes but they are extremely invasive and problematic for many reasons, so while some people love them and want to plant and grow them, other people hate camphor trees and want to eliminate them. 

Camphor trees are not native to the United States, but they can now be found in a number of areas of the country since they were introduced from Asia.

The same thing has also happened to Australia, where camphor trees were introduced from Asia and were originally grown on purpose as ornamental trees in yards and gardens, but the trees soon took over other plants and trees and now most people in Australia consider camphor trees to be like unwanted weeds. 

Camphor trees are fast-growing and aggressive, and they can kill other plants in their way as they spread and grow. But camphor trees are also huge, beautiful evergreens that provide beauty and shade, so many people welcome them into their neighborhoods. 

To decide which side you are on, read on for some more information about camphor trees, including their benefits and uses. Then ponder the common places these trees grow and decide for yourself which side of the argument you support. 

Camphor Oil 

Camphor trees are the source of camphor oil, which is prized among those who believe in herbal treatments for their anti-inflammatory properties. Camphor trees are from the laurel family and their leaves have a distinct smell when crushed. 

According to one of our other articles on 5 Reasons Why Lavender Needs Full Sun And Not Shade, camphor smells somewhat similar to French lavender. So the oil itself might remind some people of lavender oil, which is alleged to have a calming property and is sometimes recommended to help people sleep better. 

Camphor oil is not scientifically proven to have benefits, but it is used widely in natural remedy circles.

Like all things of this nature, make sure to check with your doctor and read all pertinent information before using camphor oil, and remember to always keep it far away from kids and pets!

Camphor Trees Are Invasive

According to the University of Florida, camphor trees are invasive, which means that they will take root and grow in many areas, including those where they are not wanted or might damage other plants or trees. Their roots are aggressive, which means they will continue to grow quickly and intensely even if there are other roots or objects in their way. 

If you want to plant a camphor tree, this is something to keep in mind, as you need to keep your new camphor tree away from any other plants, trees, or structures the roots might disrupt.

These also include the foundations of buildings, driveways, or the sidewalk, which might seem like a contradiction since camphor trees so often are used to line streets. 

Camphor trees spread very easily, even if you try to stop the spread by mowing the seeds, pulling the seedlings, or cutting down the saplings; they have been known to continue to grow even after they have been burned! Their fruit is picked up by birds that carry it all over the place, and the seedlings are really difficult to kill. 

Camphor Trees Are Not Native To The United States

Young Camphor With Bright Green Leaves

According to the University of West Alabama and the Alabama Herbarium Consortium’s Alabama Plant Atlas, camphor trees are evergreen trees that came to the United States from Asia in the late nineteenth century.

They do not look like many evergreen trees we are used to here in America, as they have leaves instead of needles, but, like the magnolia tree, they are evergreens nonetheless. 

Camphor trees were introduced to Florida from Asia in the 1870s when they were meant to be used for decoration. After that, they began to spread and now can be found in many southern states. 

Camphor Leaves Have A Distinct Smell

One of the easiest ways to identify a camphor tree is to crush one of its leaves and see how it smells. If you smell something similar to mint or lavender, it’s probably a camphor tree. 

Since most tree identification requires you to know specifics like the type of bark, the shape of the leaves, or even very detailed specifics like how the leaf attaches to its stem, this is a very easy way to identify a tree! 

The smell is described as the smell of camphor, but, if you have never smelled camphor, you won’t know what to look for. Some people compare it to mint, others to lavender, others to menthol, but these sorts of smells can help you with your initial identification and then, once you have smelled it, you will know what to smell for in the future. 

Other Characteristics Of Camphor Trees

Camphor trees grow to be a huge 150 feet tall with canopies that can be as wide as 300 feet; they often grow to a smaller size than that, but they still have canopies as wide as the trees are tall, which makes them great trees for visual impact and shade. 

They grow best in full sun, like most trees, and they are tolerant of drought but they prefer very moist soil with low acidity. 

Camphor trees have green leaves that stay green year-round, and their scientific name is cinnamomum camphora. The camphor also has mostly white flowers and show up in late spring, and it has berries that are black and are spread widely by birds, making control of this invasive tree’s growth very difficult. 

Camphor trees do attract some wildlife, including birds, which are known to spread camphor seeds far and wide, and butterflies and deer. They are not particularly susceptible to pests or diseases, so they are quite hardy trees that can survive in several environments and through many harsh conditions. 

Where Do Camphor Trees Grow?

Now let’s take a look at some common places where camphor trees grow, including urban locations, residential locations, and widely varied parts of the world.

These locations can vary widely from area to area, and the uses of the camphor tree are quite varied, so this list is fairly eclectic. 

1. Along City Streets

Camphor Trees Growing Along City Streets

Camphor trees are commonly found growing along streets to line them or line the sidewalks. This is because camphor trees are great for shade and therefore work well to help shade walkways and the streets that people drive on as well as the areas where people frequently walk or ride bicycles.

Camphor trees are used to line streets because they can tolerate the conditions of the city, like pollution, for example.

But camphor trees can take over other trees that are nearby, so while they work well along streets, you have to be careful that they do not grow too close to other species of trees or plants. 

Some camphor trees can live to be over 100 years old, so they are also chosen to line streets sometimes because they do not have to be replaced for a long time, meaning they can mature and provide shade to residents of those streets for decades.

Also, the evergreen nature of camphor trees makes them great for street shade because the shade is not lost in the winter when shade is still needed but leaves are sometimes scarce. 

2. In Residential Yards

Camphor trees, because they provide great shade, are commonly found in people’s yards. If you are looking for a large, evergreen shade tree, the camphor is a popular option, though there are some important things to beware of as you plant a camphor tree near your home. 

Camphor trees grow very quickly, so they are popular with homeowners for that reason.

If you want to grow a tree fast and you want some shade or even just the yard decoration of a mature tree very quickly, a camphor tree, which can grow about two feet each year, might be a great choice. 

As we have discussed, planting camphor is a controversial choice, so here are some of the pros and cons of planting a camphor tree in your yard. But, before we get into the details, here is a quick chart to sum it all up.

Planting LocationProsCons
YardGreat shade; beautiful ornamentation; evergreen leavesInvasive species; aggressive root system; difficult to control
Public Spaces (Parks, streets, etc.)Big canopies for lots of shade; evergreen leaves; long lives of the trees means replacement is rare; hardy in many conditionsMight kill nearby trees or plants; more trees will grow in the space easily

Some Benefits Of Growing Camphor Trees In Your Yard

Camphor trees are very pretty trees with glossy leaves and huge canopies, so they can look quite beautiful and impressive in a front or back yard.

If you are looking to plant a large shade tree or large ornamental tree, you might consider a camphor tree, especially if you want an evergreen tree that does not have needles. 

Camphor trees are prized for their resilience, which is a negative when you are trying to get rid of them but a positive when you want to plant a tree that can survive in harsh conditions. Camphor trees can grow around fences, other roots, structures, and obstacles. 

Another reason that people like to grow camphor trees is for their smell, which, as we mentioned earlier, is similar to that of French lavender, which many people enjoy. There are, however, other options for fragrant trees if you want to avoid a tree species that is so problematic. 

Some Cautions Of Growing Camphor Trees In Your Yard

Camphor trees are beautiful, huge trees with enormous canopies that can be as wide as 300 feet! This is an enormous canopy, so you can probably see the appeal for homeowners and gardeners looking for a fast-growing tree that can provide a lot of shade. 

But camphor trees produce tons of seeds, and those seeds often grow into trees, so unless you want multiple camphor trees, you can pull the seedlings or get rid of the seeds each year. The tradeoff for this is that camphor trees are evergreen, so there are fewer leaves to rake in the fall.

 Camphor trees also should not be planted very close to anything with a foundation or to other trees, as the roots of the camphor tree are very aggressive and can disrupt or destroy other things they encounter underground.

Avoid having to repave your driveway or fix a sidewalk break by planting your camphor tree far enough away from these things. 

3. In The Forests of Asia (And Australia)

Large Camphor Tree Pictured From Underneath

Camphor trees are very common in the forests of the lands to which they are native, including parts of Asia such as China, Japan, and Korea. The trees also grow naturally in Australia. 

These trees prefer wet environments like forests with lots of rain, so they are found in abundance in their native habitats like the more warm and humid areas of Asia.

They are also found in eastern Australia, where they have become invasive and are more like weeds to many than trees. 

Camphor trees can grow in forests of varying elevations, and they can grow in forests that are near the coasts. They are very versatile and hardy trees, so while the forests of Asia and Australia are very common, they are certainly not the only places to find camphor trees. 

Camphor Trees Are Grown In Commercial Forests, Too

In Asia, camphor trees are also grown purposefully so their oil can be harvested and sold. As we already mentioned, camphor oil is highly touted for its medicinal uses, so it can be sold easily. 

4. In The United States

Camphor trees may not have originated here, but they grow here now in large numbers, mostly in southern states with high humidity like Florida, Georgia, and parts of Texas.

Because the camphor tree is an invasive species, it has now posed a threat to the Florida jujube tree, and it has been categorized as a level I invasive species in the state of Florida. 

If the invasive nature of camphor trees is a problem for you, one thing that can help is to mow any area where there may be camphor seeds, as this can stop them from growing into trees. You can also use herbicides to kill camphor seedlings before they grow into camphor trees. 

But some people plant camphor trees on purpose, as their huge canopies are great for shade and the massive size of these trees is something many people want in their yards, especially if they have larger yards.

So while some people are trying to get rid of camphor trees, others are encouraging their growth; it all depends on your goals for your yard. 

Camphor Trees Are Commonly Planted In Public Spaces

Camphor trees are also used frequently in public spaces like parks because they live a very long time. Some camphor trees are alleged to have lived for 1,000 years!

In Japan, there is even a camphor tree that is supposed to be 3,000 years old. Most camphor trees do not live this long, of course, but their long lives are an asset when people think about planting them in areas where you probably don’t want to have to frequently replace trees, like parks and public spaces. 

If you live near a park with a camphor tree, be aware that any seedlings you see in your yard probably need to be pulled quickly and you might need to start using a herbicide on them if you are sure they are camphor trees. Otherwise, you might end up with your unintentional camphor forest!

Important Toxicity Information Regarding Camphor Trees

Camphor oil, despite its frequent use in natural remedies, is toxic, especially to people, cats, and dogs. So if you have children or pets, you should avoid camphor oil. 

Some Common Ways To Give Extra Care To Camphor Trees

If you do want to plant a camphor tree, keep in mind the invasive nature of its seeds and the aggressive nature of its roots. This might mean that you mow regularly around your camphor tree to prevent seedlings from sprouting or that you keep your camphor tree’s roots far away from other trees or structures. 

To aid the health of your camphor tree, you can consider using fertilizer in the tree’s mature years.

Some types of fertilizer are formulated specifically for trees, like Scotts Evergreen, Flowering Tree, and Shrub Continuous Release Plant Food. Or, for a fertilizer option that does not have to be scattered along the ground, there are spikes, like Jobe’s Fertilizer Spikes for Tree and Shrub

Getting Rid Of Camphor Trees

Maybe you are here because you want to read not about how to plant a camphor tree but about how to get rid of one.

Camphor trees are, after all, an invasive species that can harm other trees, so not everyone is always happy to see them growing up out of the ground. 

If you are dealing with a problematic camphor tree, you can replace it with a tree that is not invasive but has similar properties, like a magnolia tree. Magnolia trees are large, evergreen trees with leaves instead of needles, plus they have huge white blooms, so these trees might be the perfect substitute for the invasive camphor tree. 

Another option is to use herbicide on top of seedlings and saplings, as the camphor tree is so invasive that it can still grow even if you have cut or mowed it.

Simply apply some herbicide directly to the place where you cut the camphor trees or the area where they were growing. 

That’s A Wrap!

Now that you have learned more about camphor trees, you may have either made up your mind to plant one or changed your mind about this controversial tree species.

Either way, you now have more information to help you analyze the uses of these huge trees and consider how their invasive nature impacts gardens, yards, and forests in the United States. 

References

Hamidpour, R., Hamidpour, S., Hamidpour, M., & Shahlari, M. (2013). Camphor (Cinnamomum camphora), is a traditional remedy with the history of treating several diseases. Int. J. Case Rep. Images4(2), 86-89.

Malabadi, R. B., Kolkar, K. P., Meti, N. T., & Chalannavar, R. K. (2021). An age old botanical weapon for herbal therapy: Camphor tree, Cinnamomum camphora. Int. J. Innov. Sci. Res3, 1518-1523.

Zhou, Y., & Yan, W. (2016). Conservation and applications of camphor tree (Cinnamomum camphora) in China: ethnobotany and genetic resources. Genetic Resources and Crop Evolution63, 1049-1061.

Have you ever wondered about the strength of a walnut tree, and how likely they might be to fall? I hope you haven’t had to consider this first-hand, but in the case that this situation of a fallen walnut tree does come up, we want you to be prepared!

The strength of a walnut tree partly has to do with the genetic traits of this tree and partly with the maintenance and care of each individual walnut tree.

Typically though, walnut trees are very strong and it takes significant damage to cause a walnut tree to fall.

Walnut trees are part of a genus of about 20 different species of walnut trees. This deciduous tree may be strong and adaptable, but to what end? What has the power to topple this gentle giant?

Let’s get into the specifics of walnut trees, before we go that far, though.

What Makes A Walnut Tree A Walnut Tree?

A close up of unripe green walnuts on a branch surrounded by green leaves.

A walnut tree is a deciduous tree, which means that it loses its leaves in the fall months to prepare for winter before regaining them again in the springtime. 

Walnut trees tend to be large, vigorous organisms with a canopy that spreads rapidly and far across. 

Perhaps the most well-known aspect of a walnut tree is its, well…walnuts. 

This nut is classified as a true nut, which means that it is a specific kind of dry fruit that contains one seed, the walnut itself, surrounded by a hard shell and a protective husk. That pretty much fits the description of a walnut, hence this classification. 

What’s more, walnuts are rich in antioxidants, help to decrease inflammation, and can help to reduce the risk of heart disease. These benefits make this a very popular nut used in many common dishes found across regions and countries. 

How Strong Are Walnut Trees?

Looking up at the trunk and branches of a walnut tree full of pointed green leaves.

It’s great that walnuts are so beneficial, but what does this have to do with the resiliency of the tree itself? Is a walnut tree strong? If so, how strong?

These are all great questions, and very valid when it comes to defining the features of this common plant.

The wood of walnut trees is extremely durable, so no wonder it was a favorite back when people more commonly built log cabins and other styles of wood houses by hand. 

This is a good sign when it comes to the sturdiness of the tree itself, too. The black walnut can grow up to around 75 feet tall when left to grow completely in the open, so this tree is not only durable but is also a giant among its kind. 

If you want to learn more about walnut trees, check out our article Here’s How Often Walnut Trees Actually Bear Walnuts!

What Might Cause A Walnut Tree To Fall?

A walnut tree with orange and yellow fall leaves in a park with trees in the background and a clear blue sky.

So, if walnut trees are so strong, what might cause this tree to fall? 

There are many factors, mostly natural ones, that can cause this. While human interference can of course topple even the tallest and strongest of trees, we know that is probably of lesser interest to you. This article is about knowing what to expect when it comes to the possibility of your tree falling, so that is what we will focus on here today.

Let’s get into it!

Storm Damage Could Cause A Walnut Tree To Fall

Storm damage is often an unexpected, unplanned at the least, an occurrence that can be detrimental to any plants that you have, as well as to structures, livestock, and other parts of your property. 

If a tornado comes plowing through your region, extreme winds could surely cause your walnut tree to fall. Mother nature has little regard for even the largest and most adaptable of trees. 

In a situation like this, unfortunately not much prevention is possible. Knowing that this is a possibility to expect is going to be the best preparation you can give yourself. 

Extreme Decay Caused By Infestation Or Disease Could Cause A Walnut Tree To Fall

This next possibility can be both prevented and remedied, in certain cases. 

As this is an example of a situation that would take place over a longer period of time, you have more agency in what happens to your tree. 

Let’s say that your tree is infested by insects. Depending on the situation you could prune certain branches, spray solutions, take preventative measures, or practice other remedial techniques. 

When it comes to disease, again, your response will depend on the disease, the severity, and how long the issue has been taking place. 

There are things you can do like general maintenance and preventative care to help curb this type of scenario before it even begins. 

While disease and infestation are not ideal, they are certainly more manageable than a natural disaster or some sort of freak storm. 

A Combination Of Situations Could Cause A Walnut Tree To Fall

A close up of ripe and split walnuts on a branch with green leaves.

There is always the possibility that this long-term situation like disease or infestation (or diseased caused by infestation) can lead a tree to decay and weaken. Then, when any sort of natural disaster or event occurs, the tree will not be as readily able to resist the forces of nature. 

A weakened tree is much more likely to fall in a storm than a strong, healthy, and well-maintained tree. 

So, that being said, how do you make sure your walnut tree remains one of the latter?

Sometimes, you just need to go ahead and cut down your tree. Check out our article on the 7 reasons you might need to remove your walnut tree.

How To Keep Your Walnut Tree Healthy

A walnut tree with a full canopy of green leaves sits alone in a grass field with a clear blue sky in the background.

There are a few simple steps to follow that will ensure you are caring for your tree in a sustainable, encouraging manner. Following these steps may not save your tree from every possible accident or scenario that might occur, but it will help you to know that you have done what you can in preparing your tree to thrive for the duration of its long lifespan.

General Maintenance Of Your Walnut Tree

First, you can set your walnut tree up for success by making sure to keep an eye on it in a very general sense. Paying attention to your tree will help you to notice early on if there are signs of disease, infestation, or malnourishment in any way. 

General maintenance includes pruning your tree as needed, making sure that nothing obstructs your tree from the roots to the branches, and protecting your tree from any pests that may cause it harm. 

Especially if your walnut tree happens to be a young one, using something like this MTB Green Garden Border Folding Fence can make all the difference and ensure that nothing weakens the young exterior of your tree.

Water Your Walnut Tree

Watering your walnut tree, or any kind of tree that you might care for is a crucial and easy step to ensuring that your tree has all the possible tools for success.

An under-watered tree, just like a person or animal, is going to be extremely dehydrated and much less able to put its energy to growing taller and stronger. Instead, the focus will turn to surviving rather than thriving. 

If you’re concerned about remembering to thoroughly water your tree, you can always rely on an irrigation system such as this Flantor Drip Irrigation Kit to ensure that water is provided to your tree at regular intervals as set by you ahead of time.

If you’re interested in learning more about walnut trees, you can find more in our article 8 Differences Between Black Walnut Trees and Walnut Trees!

Fertilize To Save A Life

Fertilizing your tree is important in all scenarios, but especially when you are trying to promote growth and sustain healthy habits within your tree. 

Walnut trees tend to need a pretty nitrogen-heavy fertilizer. So, you can easily opt for an NPK 20-10-10 and know that you have made a solid choice. 

If you’re relatively new here, NPK stands for nitrogen, phosphorus, potassium and refers to the balance of these different elements in a given type of fertilizer. 

You can easily find this kind of fertilizer online, and opting for a product like this Voluntary Purchasing Group Fertilome Tree and Shrub Food (NPK 19-8-10) can also keep you from breaking the bank!

That’s All For Today!

A walnut tree with a full green canopy grows near a fence in a green grass lawn.

Alright, thanks for sticking around with us. If you do what you can to keep your walnut tree healthy and stable, hopefully, it will be less susceptible to falling during a bad storm. 

However, it’s worth mentioning that these sorts of situations are not always preventable!

Remember, we are all on this tree journey together. 

So, keep on keeping on and we’ll see you soon!

References:

Appleton, B. L., Berrier, R., Harris, R., Alleman, D., & Swanson, L. (2000). The walnut tree: allelopathic effects and tolerant plants.

Karczmarz, K. (2010). Numerical strength dynamics of Chromaphis juglandicola (Kalt. 1843) on common walnut (Juglans regia L.) in Lublin town plantings. Acta Scientirum Polonorum Hortorum Cultus, 9(4), 121-132.

McMahon, L. (2001). To a Fallen Walnut Tree. The Southern Review, 37(2), 305.

Pecan trees can be one of the easiest nut-producing trees to grow if you live in the right area and pick the right cultivar. They make beautiful shade trees and, if you water them correctly, you’ll be rewarded with enough pecans to enjoy for the entire year!

There are really only 6 steps you need to follow to plant a pecan tree. First, dig the correct size hole. Next, inspect the roots and prune if needed, place the seedling at the correct depth, and fill the hole with dirt and water.

After planting, make sure to protect the trunk and add mulch. If cared for, pecan trees can produce 50 lbs of pecans per year!

Before you dive right into planting, you will want to consider the climate you live in, the pecan cultivar you want to grow, and the best place to plant your pecan tree in your yard.

Don’t worry, we’ve got all of that info for you in this article too!

Where Exactly Do Pecan Trees Grow?

Before you set out on your journey to grow a pecan tree at home, you’ll want to make sure you live in the right area for your tree to be successful. One of the biggest factors that limits pecan tree success is temperature.

For a pecan tree to produce pecans, it needs at least 180 frost-free days and enough heat to ripen the nuts. 

The heat needed for ripening pecans, and other plants, is referred to as cooling degree days. Cooling degree days are calculated as the number of degrees the average temperature is above 65 degrees Fahrenheit.  

To calculate cooling degree days, you take the average temperature for the day and subtract 65. The resulting number is your cooling degree days. 

For example, if the low is 70, and the high is 90, your average temperature is 80. Subtract 65 from 80 and you get 15 cooling degree days for that day.

Pecans require 1,000 cooling degree days for the nuts to fully ripen

You can use the High Plains Regional Climate Center’s interactive map to see how many cooling degree days your area receives.

Starting From Seed Vs. Seedling

A young sapling pecan tree in a nursery pot sits on the ground where it will be planted among other trees and grass.

You may think about simply collecting a recently fallen pecan seed to start your pecan tree journey, but there are a few things you should know.

You may see a gorgeous pecan tree that produces tons of pecans each year and assume that planting one of those pecans will give you the same results. However, with pecans, the seed can fall very far from the tree.

Pecan seeds on the same tree can be highly variable genetically, meaning nut production and quality can vary among seeds collected from a single tree.

This high level of genetic variability has led to the cultivation of over 500 cultivars of pecan trees!

Therefore, most nurseries will start with a seedling to provide root stock and graft on buds or shoots from a parent tree with the desired pecan qualities. This ensures the resulting tree provides high-quality nuts in large quantities.

Pecan trees also have some pretty serious pests which can ruin both the pecans and the tree itself. Grafting allows you to choose parent trees that are resistant to many of these pests, decreasing the amount of work required to keep the tree healthy.

You can attempt to grow your own seedling from a pecan seed, then graft it on the desired parent tree yourself, but this can be difficult. We recommend you start with a seedling that has already been grafted to ensure your pecan tree gets started on the right foot.

We also recommend you plant more than one pecan tree in your yard to ensure good pollination and pecan production.

Read more on the best time to plant pecan trees and how you should do it in our in-depth article.

Why You Need To Plant More Than One Pecan Tree

As mentioned above, pecan trees have a high level of genetic variability. This is, in part, due to pecans being dichogamous plants.

Dichogamous plants have both male and female flowers, which mature at different times. This keeps dichogamous plants from self-pollinating.

Preventing self-pollination is a survival strategy as it increases the plant population’s genetic diversity. This allows for quicker adaptation to changes such as climate and pests. 

So you need to plant multiple pecan trees, that are two different cultivars.

Here’s why: female flowers of pecan trees grow on the current year’s growth, while male flowers grow from the previous year’s growth.

Some pecan tree cultivars will produce their female flowers first while others will produce their male flowers first. That’s why pecan tree cultivars are considered either Type 1 or Type 2, based on their flowering pattern.

Type 1 pecan tree cultivars produce mature male flowers first, followed by the maturing of the female flowers. This is known as protandrous flowering.

Type 2 pecan tree cultivars produce mature female flowers first, followed by the maturing of the male flowers. This is known as protogynous flowering.

So if you have a type 1 pecan tree and a type 2 pecan tree, you will have male and female flowers present at the same time for cross-pollination, leading to a plentiful pecan harvest later!

Therefore, we recommend you plant at least 2 pecan trees on your property, and that one is a type 1 cultivar and the other is a type 2 cultivar.

Best Pecan Tree Cultivars For Your Yard (By State)

Below is a table of the recommended pecan tree cultivars to grow in each state. We also added the pollination type (1 or 2) for most of the cultivars to make the selection process easier for you!

StateRecommended Cultivar (Pollination Type)
AlabamaCaddo (1), Cape Fear (1), Creek (1), Desirable (1), Elliott (2), Forkert (2), Gloria Grande (2), Jenkins, McMillan (2), Moreland (2), Oconee (1), Pawnee (1), Stuart (2)
ArkansasAmling (1), Caddo (1), Elliot, Kanza (2), Lakota (2), Oconee (1), Pawnee (1), Stuart (2)
FloridaElliott (2), Excel (2), Sumner (2)
GeorgiaAmling (1), Caddo (1), Desirable (1), Elliot, Forkert (2), Kanza (2), Oconee (1), Pawnee (1), Sumner (2)
KansasColby (2), Dooley, Giles (1), Greenriver, Hirschi, Kanza (2), Major, Maramec (2), Norton, Pawnee (1), Peruque (1), Posey (2), Starking (1)
KentuckyColby (2), Fisher, Greenriver, Hirschi, Kanza (2), Major, Mandan (1), Pawnee (1), Posey (2)
LouisianaCaddo (1), Candy (2), Elliott (2), Jackson (1), Melrose, Oconee (1), Sumner (2)
MississippiCape Fear (1), Elliott (2), Forkert (2), Jackson (1), Kiowa (2), Melrose, Owens, Sumner (2)
MissouriCaddo (1), Canton (1), Chetopa, Colby (2), Giles (1), Goosepond, Greenriver, Hirschi, Kanza (2), Lucas (2), Major, Maramec (2), Norton, Pawnee (1), Peruque (1), Posey (2), Shepherd, Wiese, Witte
New MexicoBradley, Burkett (2), Colby (2), Lucas (2), Pawnee (1), Western Schley (1), Witte
North CarolinaAmling (1), Caddo (1), Cape Fear (1), Chickasaw (2), Elliot, Forkert (2), Gloria Grande (2), Kanza (2), Kiowa (2), Lakota (2), Lipan, Mandan (1), Pawnee (1), Stuart (2), Sumner (2)
OklahomaCaddo (1), Colby (2), Giles (1), Kanza (2), Lakota (2), Maramec (2), Oconee (1), Pawnee (1), Peruque (1)
South CarolinaCaddo (1), Cape Fear (1), Creek (1), Elliott (2), Gloria Grande (2), Kanza (2), Oconee (1), Pawnee (1), Stuart (2), Sumner (2)
TennesseeAmling (1), Caddo (1), Lakota (2), Kanza (2), Oconee (1)
TexasCaddo (1), Cape Fear (1), Desirable (1), Kiowa (2), Oconee (1), Pawnee (1)
WashingtonColby (2), Peruque (1), Stark Hardy Giant (1)

Choosing Where To Plant Your Pecan Trees

A grove of mature pecan trees on in a grass field.

Before you decide to plant a pecan tree in your yard, you’ll want to make sure you have enough room. Pecan trees can grow up to 100 feet tall and 70 feet wide!

Make sure you consider the size your pecan tree will ultimately be and keep it away from your house and any power lines. 

Since you’ll likely be planting more than one pecan tree, so you can have good pollination, you want to leave enough space between trees as well. The University of Georgia recommends leaving at least 60 feet between pecan trees to prevent misshapen trees and the need for pruning as they grow bigger.

By avoiding planting near structures, power lines, and other trees, you’ll ensure that your mature pecan tree will get plenty of sunlight and produce a ton of pecans!

How To Plant Your Pecan Tree Seedling

Now that you’ve decided what pecan cultivar to plant, and where to plant it, it’s time to get your new tree into the ground! It is best to plant container seedlings in the ground in the early fall from September to October.

Step 1: Digging The Hole

To start, dig a hole that is slightly larger than the container your seedling is in. 

By not digging the hole too large, you will have fewer issues with settling soil which could cause your pecan tree to be planted too deep.

You can save the soil removed from the hole to fill it back in after placing the seedling. 

Step 2: Inspecting The Roots (And Pruning If Needed)

Next, remove the seedling from the pot it has been growing in. 

If you have pot-bound roots, you will want to pull them away from the outer soil gently and prune them. Don’t prune them back to the soil. Just prune a few inches, at most, to encourage new growth.

These Fiskars Gardening Tools: Bypass Pruning Shears are the perfect tool for cutting your roots and any small branches. 

For a more in depth pruning guide as your tree grows, check out our article on pruning large trees.

Also, inspect the tap root on the bottom of the soil. If the taproot has become twisted, due to hitting the bottom of the container, you will want to straighten it out and prune off the twisted part.

Now your seedling is ready for planting!

Step 3: Placing The Seedling At The Correct Depth

This is one of the most important parts of planting your pecan seedling. You want to avoid planting the seedling too deep or it could damage the roots due to a lack of oxygen.

Gently sit your seedling in the hole to see if the surface of the seedling soil is the recommended 1 inch lower than the surface of the soil surrounding your hole.

The goal is to only add one inch of soil on top of the soil your seedling came in once the tree is fully planted. More than an inch may cause the roots to suffocate.

Once you have the hole to the correct depth, it’s time to fill it all in!

Step 4: Filling The Hole With Dirt And Water

Filling with dirt and water may sound strange, but this method avoids leaving any air pockets around the roots.

Typically, when you plant something new, you eliminate air pockets by pressing the soil down around the plant. You don’t want to do that with pecan seedlings.

Place your seedling in the center of the hole and double check the hole is the correct depth. Using a garden hose, begin filling the hole with water. 

Don’t run the water on full blast or you may disrupt the soil too much.

Once the hole is filled ½ to ¾ of the way full, you can begin pushing dirt into the hole. Keep the water running as you fill in the hole with dirt. When the water reaches the top of the hole, you can turn it off and fill in the remainder of the hole with dirt. 

Using this method allows the wet soil to fill in around the roots without creating any air pockets.

You can level out the soil around the seedling if any settling occurs, but avoid being tempted to press the soil down.

Step 5: Protect The Trunk

The trunk of your seedling will be small and delicate at this stage and needs to be protected. Young, green trunks can get sunscald or be damaged by wildlife if you don’t protect them. 

You can protect the trunk using a tree wrap, tree guard, or grow tubes. We like these EasyFlex Tree Trunk Protectors because they’re easy to install and allow for airflow around the trunk while protecting it.

Step 6: Add ‘Mulch’

Now that your pecan seedling is in the ground, you’ll want to add a layer of pine straw 4 to 6 inches deep, 6 feet around the base of your pecan seedling.

Keeping weeds and grasses from growing within 6 feet of your pecan seedling will help eliminate competition for resources such as nutrients and water. 

You don’t want other plants stealing what your pecan seedling needs to grow!

Now that you’ve successfully planted your pecan seedlings, you’ll want to keep them healthy!

You don’t need an expensive mulch for a thriving tree, in fact, you can make your own! Read our article on how to make pine needle mulch for more info.

Watering Your Pecan Tree

Rows of pecan trees with bare branches in a field of brown and green grass with a bright blue, clear sky in the background.

Watering your pecan tree is one of the most important factors to keeping your pecan tree healthy.

If you don’t provide your pecan tree with enough water during each life stage, it will not grow as well as it should. Watering helps the root system grow and helps ensure pecans develop correctly.

Pecan trees can only survive 3 weeks without water. That’s why we recommend, at a bare minimum, watering your pecan tree every two weeks to keep it alive. However, you will need more water if you want to produce good quality pecans from your tree.

Watering Young Pecan Trees

After planting, you’ll want to water it weekly with 10 to 15 gallons of water.

Continue this watering routine until your tree produces flowers.

The root system is small during the first few years of growth and must be continually supplied with water, especially during the hottest parts of the year. 

Watering Fruit Producing Pecan Trees

Once your pecan tree produces flowers, you’ll need to use the deep watering method during the growing season to stimulate root and pecan growth.

Some pecan tree cultivars will start putting on a few nuts in year 3 or 4. Most will start producing a decent amount of pecans by year 7. 

The amount of water your pecan tree gets during the production season directly affects the quality of the pecans.

 If you want to ensure you get high-quality pecans from your tree, start watering using the deep watering method during the growing season.

Deep Watering Method

Deep watering means watering the soil to a depth of three to four feet, from the trunk to three feet past the tree’s drip line. 

You’ll want to make sure you give your trees at least the equivalent of 2 inches of rain each week. On average, a sprinkler puts out 1 inch of water per hour. 

You want the watering process to be slow since most of the roots for taking in water are in the top 1-2 feet of soil. Give the water time to soak into the ground rather than watering it so quickly the water runs off.

You can achieve this either with a soaker hose, or a sprinkler. If you decide to water by hand, water from the edge of the tree’s drip line. Don’t just water it at the base of the trunk.

Deep watering should be done from around March, when the buds start to swell, until October. Frequency depends on the soil type you have in your area. 

Water every 15 to 21 days for clay soils. For loam soils, water every 14 to 18 days. For sand soils, water every 7 to 10 days.

Once the growing season ends, around October, you can scale back on watering your mature pecan tree.

Fertilizing Your Pecan Tree

Along with proper watering, fertilizing your pecan tree will provide it with the nutrients it needs for optimal growth. 

During the first June after planting, it is recommended to add one pound of 5-10-15 fertilizer in a 5-foot by 5-foot area around the tree. Make sure you don’t get the fertilizer within 12 inches of the trunk or it could cause damage to the tree. 

During the second year, it is recommended to add one pound of 10-10-10 fertilizer to the same area twice in March and June. Continue this fertilizing schedule until your pecan trees start producing flowers.

Once your pecan tree produces flowers, you’ll want to add four pounds of 10-10-10 fertilizer per inch of trunk diameter at 4.5 feet above the ground. However, don’t add over 25 pounds per tree, no matter how big the trunk is. This should be done every March.

Soon you’ll be rewarded with plenty of delicious pecans!

Harvesting The ‘Fruits’ Of Your Labor

Yes, pecans are a fruit (botanically speaking)! They are classified as drupes which have a single stone or pit in the middle surrounded by a husk. Cherries, peaches, and plums are also drupes. 

Make sure you harvest your pecans as quickly as you can once they’re on the ground. Otherwise, you may lose them to animals or rot if the ground is wet. Store them in a cool dark place for 9 to 12 months. 

To learn more on other varieties of nuts, check out our article on 4 more varieties of hard nuts you can grow.

Summary

Now you know everything about how to select and plant your own pecan tree!

As long as you choose the right cultivar for your area, and keep it watered throughout the year, you will have a bountiful crop of pecans for years to come!

References

Fronza, D., Hamann, J.J., Both, V., Anese, R.D.O. and Meyer, E.A., 2018. Pecan cultivation: general aspects. Ciência Rural, 48.

Grauke, L.J. and Thompson, T.E., 1996. Variability in pecan flowering. Fruit Varieties Journal, 50, pp.140-150.

Olive trees are beautiful, evergreen trees with a unique twisting bark that adds beauty and interest to the home or landscape. Tree maintenance can be tricky though, and you may be struggling to figure out how and when to prune your olive tree. 

There are steps to take to prune your olive tree. First , you should wait until the tree is four years old before you even think about pruning!

You should prune your tree in late spring or early summer before it flowers. Make sure to use the right tools, make clean, correct cuts, and prune to thin the middle section of the tree to let in more light.

While this sounds like a lot, pruning really is a simple process, and going in with the right tools and knowledge will help you to grow a beautiful tree and maybe even produce some olives.

Keep reading to learn about these eight simple steps to pruning your olive tree. 

What Defines An Olive Tree?

Olea europaea, or the European olive tree, is a beautiful fruit-bearing tree that originated from Asia Minor, including the Mediterranean and parts of Asia and Africa. The olive tree has been cultivated by humans over centuries to produce food and medicine and has existed in the region for over 6000 years.  

The olive tree can grow up to 20-30 feet tall outdoors, and is drought tolerant when mature. They grow best in zones 8-10 and can tolerate some freezing, but prefer a warmer climate and a place in full sun. 

For a full timeline on olive trees, check out our article all about olive tree growth.

North American Olive Trees Do Not Produce Fruit

European olive trees should not be confused with North American olive trees that do not bear fruit and are strictly ornamental. Fruiting olive trees will produce fruit in alternating years, with large harvests one year followed by years of lower production.

Another important fact is that olive trees will not produce fruit from the same place on the stem, meaning pruning will be an important tool if your goal is to produce fruit on your tree. 

Indoor Olive Trees Require More Maintenance

Olive trees do not typically grow well indoors. While they can survive many years in a pot, eventually you might want to think about moving your olive tree outdoors where it can be planted directly in the ground. 

Olive Tree Production Needs Balance

One reason for this is that olive tree production, like other types of trees, depends on the balance between the canopy and root system. An indoor olive tree is constrained by the size of the pot, restricting how much the roots can grow. 

Since tree roots do the important job of delivering nutrients to the branches, leaves, fruit, and flowers, this restriction could prevent the tree from getting enough nutrients to produce fruit at all when indoors. 

Olive Trees Need Well Draining Soil

Olive trees prefer very well-draining soil and little moisture. Olive trees are particularly susceptible to root rot and other moisture-related ailments, so make sure to avoid overwatering an indoor olive tree. 

Prune Your Indoor Olive Tree

Pruning your indoor olive tree will be important to contain it from growing too large in your home. Place the tree in a well-lit window where it will receive eight to ten hours of direct sunlight and consider heading your tree to contain its height (more on this later!)

For more information, check out our article on pruning olive trees in pots!

Ingredients For A Healthy Olive Tree

For a healthy olive tree, try to mimic the environment it is native to. This means choosing a location for your tree that has sandy or well-draining soil, direct sunlight without competing trees nearby, and a moderate amount of rainfall or watering. 

Indoors, this means a large pot with very well-draining soil, a place next to a south-facing window that gets eight to ten hours of direct sunlight, careful pruning, and occasional fertilizers and soil amendments. 

Keep in mind that too much fertilizer can actually contribute to excessive shoot growth, causing your tree to focus on adding branches rather than producing flowers and fruit. 

Keep your tree’s soil consistently moist but not overwatered, and finally, learn how and when to prune the tree to stimulate growth, let light in, control size and shape, and achieve the aesthetic look you prefer. 

For more information on watering, check out our article about watering olive trees.

What Is Pruning And Why Do We Do It?

A large, wide canopied olive tree in an olive tree grove in bare dirt with blue sky.

Pruning is an important skill for anyone who is growing or caring for a tree. Olive trees have evolved over centuries with humans and are used for food production, medicine, and cultural and religious significance. As a result of this coevolution, olive trees require careful pruning to produce and flower. 

The University of Georgia describes pruning as an “invigorating process.” What they mean by this is that pruning wakes up the mechanisms in the plant that cause it to grow. This growth will be focused on the location where you make a cut, as the plant rushes resources to heal that area and rebalance the canopy in relation to the root mass. 

Two Types Of Pruning That Can Be Done To Your Olive Tree

There are two types of pruning categorized as thinning or heading cuts. These two methods will stimulate different regrowth patterns in your olive tree. 

Heading cuts will stimulate more branching, leading to a bushier, fuller tree, while thinning cuts will stimulate less new growth and instead will allow light to reach deeper into the plant, and as a result the tree will generate more fruit. 

Now that you understand the basics, let’s dive deeper into the art and science of pruning, with eight simple steps you can follow for a healthy and productive olive tree. 

Without further ado – let’s get to some steps to pruning an olive tree!

Don’t Prune A Young Tree 

Looking between rows of olive trees in an olive tree grove with bare dirt paths.

The first step to pruning your olive tree is actually not to prune it at all- within the first four years that is! Young olive trees are still trying to become established, and putting all of their energy and resources into getting a solid foundation in the world. 

Leave your young olive tree alone until it is at least four years old. Because a young olive tree is reliant on its foliage for photosynthesis, leaving as much on as possible is ideal for a young and hungry tree. 

Focus instead on providing the right environment, and plenty of water, and let it do its thing while it becomes established. Pruning too soon can ultimately stunt its growth or cause an infection that the young tree isn’t able to recover from.

Prune Your Olive Tree At The Right Time

Olive trees bear flowers and fruit in the late summer, and are ready for harvest sometimes as early as September, but more generally in late fall, November and even December. This is because the olive fruits take a long time to ripen on the tree, transforming from a light green to a dark, almost black color at peak ripeness. 

Olive trees are also sensitive to cold, having originated in the warm and temperate Mediterranean region, so pruning them too early in spring or winter could result in freezing or infection in the cut branches. 

The best time to prune your olive tree is in late spring or early summer, when there is no longer any threat of frost and before the tree begins to flower. 

Prune Your Olive Tree In Alternating Years

Earlier, we discussed how olive trees are productive in alternating years. This means that the tree will produce a lot of fruit every other year, taking a full summer to devote more resources to growing branches and foliage. 

To avoid taking energy away from fruit production, prune your olive tree on its off year. Because pruning redirects energy to branch and shoots growth, this timing will align with the tree’s natural cycles. 

On years when your olive tree is producing fruit, keep the pruning to a minimum. Remove suckers from the main trunk and remove any dead or diseased branches, but leave the rest alone. 

Define Your Goal 

Before you even make your first cut, establish what your goal is for the tree. Consider whether you want to encourage more growth, thin branches to allow in more light, or reduce the height or width of the tree. 

In pruning basics, we talked about the two types of pruning, and this is where you can put that knowledge to work. 

Using Heading Prune To Prune Your Olive Tree

A heading prune means that you cut the leading stalk or trunk. When you do this to a branch, it encourages it to branch off and become fuller at the cut, resulting in a fuller, bushier tree. You can do this to stimulate the olive tree to fill in large gaps in the foliage. 

When you head the main trunk of the olive tree, you will effectively reduce its height. Trees grow from the top, so by heading the trunk, you prevent the tree from growing taller. You may use this type of cut if you are keeping your olive tree indoors or if the tree is at risk of growing into a power line or other height restraint. 

Using Thinning Prune To Prune Your Olive Tree

A thinning prune will stimulate less growth than a heading prune. You can prune large branches off of the main trunk, or off of leading branches to open up more space in the tree for light to reach. This type of cut is helpful if you want to encourage more fruit production. 

Olives need sunlight to grow fruit, so failing to thin will eventually cause all of the fruit to grow in the upper canopy, where the light can reach, but you will probably have trouble reaching this area yourself to harvest. 

Use The Right Tools

Pruning can be physically taxing, especially when making large cuts that require a saw. Using the right tools will set you up for success. First, look at the branches you want to prune, and figure out what the right sized tool is for the job (you may need more than one!)

Pruning Smaller Branches

For younger, smaller branches, you may only need a lopper or pruner, like this Edward Tools Lopper and Pruner Set. These types of tools are great to prune branches up to about three inches in diameter. 

Using a pruner or lopper on a smaller branch is great because you can cut off the branch in one clean motion. On a larger branch though, you risk mangling or damaging the branch, which could lead to infection. 

Pruning Larger Branches

For these larger branches, move up to a larger tool, such as a handsaw like this Coher Folding Saw. A saw is a better tool to help you cut through larger branches. For the largest branches, you may even need a chainsaw like this Craftsman V20 Cordless Chainsaw.

When using any sharp tool, make sure you are wearing proper safety equipment. Opt for long pants and long sleeves, and don’t wear loose-fitting clothing that could get caught in the blade. Gardening gloves and safety glasses are recommended, especially when using saws that send sawdust into the air, and potentially into your eyes. 

Use earplugs when operating a chainsaw and always call a professional if the job is outside of your skillset. It’s better to do it right for the sake of your safety and the health of your olive tree! 

Make Clean Cuts 

Using the right tool will help you to make clean cuts when pruning your olive tree. Pruning, while good for your tree, is still an injury that your olive tree will need to heal using energy and resources. 

Clean cuts are important to ensure that you don’t hurt your tree or invite infection into the tree. Prune the branch as close as possible to its base while avoiding nicking or scraping the leading branch. 

Jagged cuts leave more surface area to invite infections into the wound, and larger stumps will decay on the tree. Both of these scenarios will lead your olive tree to send excess energy and resources to the area instead of flowering or fruiting. 

Make Sure Your Tools Are Sharp When Pruning

Making sure your tools are clean and sharp is another way to make cleaner cuts. After you use your tools, you should always clean and dry the blade before storing the tools in a clean, dry place where they won’t become rusted or dull.

Regular tool maintenance is a great habit to get into, by either periodically sharpening the blade yourself or taking it to a professional to do so. 

Make Correct Cuts 

Since you spent time figuring out what your goal was for pruning your olive tree, you are now equipped to make correct cuts. We already discussed the two main types of cuts which are heading and thinning cuts. 

Before you get to cutting, see if you can identify the node on the branch. Nodes are the places on the tree where the branch grows from the trunk, or smaller branches from larger ones, or leaves from the branch. The area just above that joint is the node and is the location of specialized cells that will form a new branch if cut. 

Making A Heading Cut

Heading cuts will occur at the node between the leading branch and its smaller branches. When you cut the leading branch, the tree will respond by putting out more small branches, making the tree fuller and wider.

This type of cut is good for filling in sparse areas or creating new growth for more flowers and fruit. 

Heading the trunk of your olive tree is an extreme form of pruning that will prevent your tree from growing taller. This may be a useful cut for an indoor tree, or one that you want to keep smaller. 

Making A Thinning Cut

Thinning cuts are made at the joint between the leading branches and the trunk, or where smaller branches meet the leading one. As its name suggests, this type of cut is made to thin the branches to allow more light in. 

Thinning is also a good option for damaged or diseased branches. Brown or spotted leaves and brittle bark and limbs are an indication of an unhealthy branch. Prune these damaged branches to prevent the disease from spreading, and to allow your tree to focus its energy on producing. 

Pruning For Fruit And Flower Production

We have discussed the whys and the hows of pruning olive trees, but pruning for production deserves its own spot on this list. Olive trees will begin putting out fruit at around three years old, and are alternate-year-producing plants.

This means that olive trees are very productive every other year, with low production years in between. 

In addition, olive trees will never flower or grow fruit in the same place twice. So, it is important to prune your olive tree to encourage new growth if your goal is to increase flower and fruit production. 

Tips For Pruning Every Other Year

Prune your olive tree for the first time when it reaches four years old, after its first year of producing olives. Then, try to follow its natural rhythm, pruning more aggressively on slow-producing years, and less on high-producing years. 

On the off-years, make your bigger thinning cuts, letting more sun into the inner branches, encouraging production throughout the whole tree instead of just the outer canopy.

In the on-years, before the tree flowers, in late spring or early summer, make heading cuts on smaller branches to encourage new growth to fill out the tree. 

Don’t wait for an off-year to cut off dead or diseased branches. It is more important to prevent the ailment from spreading throughout the rest of the tree. 

Watch For Pests 

Olive trees can be susceptible to damage from pests, especially the Olive Fruit Fly. If your olive tree has become infested with pests, you will want to prune any excessively damaged branches to prevent the spread of flies or related diseases. 

Pruning may not be enough in the case of olive fruit flies, so you will likely need other mitigation methods including sticky tape or pest sprays like this Monterey Olive Fruit Fly Trap and Lure.

As always, consult a professional if the infestation is beyond home remedies.

Pruning Lets You Grow A Healthy And Productive Olive Tree

Olive trees grow in a widely spaced olive tree grove with grass paths and a setting sun over a cloudy sky.

Olive trees offer beauty and interest to your home or garden, and produce beautiful, fragrant blossoms in the summer. They have been cultivated throughout human history, for their medicinal and agricultural use as well as their beauty and cultural and religious significance. 

In order to grow a healthy and productive olive tree, learn some simple steps to pruning your olive tree.

These include waiting until the tree is at least four years old, pruning in late spring or early summer before it flowers, using the right tools, making clean, correct cuts, and pruning to thin the middle section of the tree to let in more light. 

You shouldn’t be intimidated by pruning, and in fact, once you get the hang of it, it is actually pretty fun! Pruning is an art as much as it is a science, so don’t be afraid of getting creative and making mistakes. You will get more confident with practice, and your olive tree will thank you. 

Thank You For Reading!

I hope you have learned some helpful tips and tricks to pruning your olive tree. Pruning can seem confusing to novice gardeners, but it is essential to the health and production of your olive tree. By educating yourself on olive tree pruning, including how to prune, why you should prune, and when you should prune, you are halfway to having a healthy and abundant tree. 

To recap what we learned, let’s go over the 8 simple steps to pruning your olive tree:

  • Wait to prune your tree until it is at least four years old. 
  • Prune your tree in late spring or early summer, after the danger of frost has passed and before it begins to flower. 
  • Define your goal, whether it is thinning to let light in, heading to create more volume, reducing height, or removing diseased branches. 
  • Use the right tools for the job, and clean and maintain them regularly. 
  • Make clean cuts, close to the node to prevent injury, disease, or rot. 
  • Make the correct cuts to achieve the goal you set.
  • Keep the natural alternate-year-production cycle in mind to optimize flowering and fruiting. 
  • Watch for pests and take steps to prevent or eliminate olive fruit flies or other pests. 

References:

  1. Boskou, Dimitrios. (2006) Characteristics of the Olive Tree and Olive Fruit. Chemistry and Technology. 2, 13-19.
  2. Jiménez-Brenes, F.M., et. al. (2017) Quantifying pruning impacts on olive tree architecture and annual canopy growth by using UAV-based 3D modeling. Plant Methods. 13.55. 
  3. Rapoport, H.F., Fabbri, A., Sebastiani, L. (2016). Olive Biology. The Olive Tree Genome. Compendium of Plant Genomes. Springer. 13-25.
  4. Rodrigues M.A., et. al. (2021) Use of commercial mycorrhizal fungi in stress-free growing conditions of potted olive cuttings. Scientia Horticulturae.  275.3.

While we all enjoy a nice sunny day, sometimes you just really need some shade. Imagine a hot summer day where you’ve been outside and finally, just get to sit for a moment under a huge tree. So, relaxing isn’t it? The temperature drops, you can appreciate the breeze, and all is well.

Birch trees can be the perfect tree to give you some shade on those sunny days. Let’s talk about why.

Birch trees are wonderful shade trees. They are both fast-growing and adaptable, have large canopies, and can grow to be quite tall. These trees are found in most areas across North America and are reliable and resourceful trees, that can be used for shade!

If you’ve spent some time considering what tree might be best as a shade tree, look no further! The birch tree may just be the option for you.

Intrigued? Stick around to find out more about the reasons that birch trees are wonderful shade trees!

Characteristics Of Birch Trees That Make Them Good Shade Trees

Birch trees are generally large trees. They have canopies that are both dense and wide, which are two attributes in ensuring that you have the most shade possible. 

Any tree is going to provide you with some sort of shade, that’s a given. However, the difference between any tree and a birch tree lies in the canopy. 

With leaves that do happen to be denser, widths that span for wider distances, and even trunks that happen to be taller, birch trees are in a prime position to cover more ground and provide you with more shade. 

Birch Trees Will Grow In All Environments That Are Not Dry 

Birch trees do have some preferences about the environment in which they live – as they don’t do as well in drier areas. So they’re a no-go for any desert habitats. 

Birches tend to grow anywhere from 40 to 70 feet tall, and their canopies can span anywhere from 35 to 60 feet wide. So, although these trees may not be the tallest that you’ve ever seen, their delicate looks pair well with a tall, sturdy structure. 

The combination of a birch tree’s height and canopy spread make for a wide area of shade.

Birch Trees Grow Really Fast

Birch trees are known to be fast-growing, reaching about 3 feet, or 36 inches, per year at times.

Because these birch trees are able to grow quickly, in many environments, they are a wonderful contender to be your next shade tree!

Birch trees thrive in USDA Hardiness Zones 2-9, making them fit to grow in much of the United States.

Birch trees are considered one of the best shade trees thanks to their canopy, adaptability, and plethora of uses. Let’s talk more about that below!

Birch Trees Can Grow Across Most Of The United States

A grove of birch trees in a grassy, open forest provide shade to the forest floor.

There are over 60 types of birch trees, but USDA Hardiness Zones 2-9 encompass the areas where most birch trees can grow best. 

With zones ranging from 1-13, this means that birch trees cover a lot of ground.

But wait a second. What in the world is a hardiness zone and why is it important? Well, let’s get talking!

What Does Hardiness Zone Mean, Anyway?

Easy! The hardiness of a plant refers to how ‘cold hardy’ it is, which is really just a fancy way of saying, “Okay, so how cold can it get before the tree starts struggling?”

The USDA hardiness zones help to determine the coldest temperature it can get in any given zone. 

So, for example, in zone 2, the average extreme low temperature would be -50 degrees Fahrenheit. In zone 9, the coldest extreme temperature that you can expect would be a balmy 20 degrees Fahrenheit. 

What Are The Hardiness Zones For Common Birch Trees?

Depending on which birch tree you intend to plant, the hardiness zone differs. We’re going to discuss the most common birch trees below, and how their hardiness zones may differ. 

River Birch

This species grows best in USDA hardiness zones 4-9. 

The range of average extreme low temperatures for a river birch is -30 to 25 degrees Fahrenheit.

Silver Birch

This type of birch prefers USDA hardiness zones 2-7. 

The range of average extreme low temperatures for the silver birch species is anywhere from -50 to 5 degrees Fahrenheit.

Gray Birch

Our third example species most often resides in USDA hardiness zones 3-8. 

The range of average extreme low temperatures for the gray birch can be seen as a middle point between the first two birches, at -40 to 15 degrees Fahrenheit.

Paper Birch

Finally, we have the paper birch species, which can be found in USDA hardiness zones 2-7. 

Just like silver birch, that means that paper birch prefers an average extreme low-temperature range of -50 to 5 degrees Fahrenheit.

You can learn more about the best places to plant oak trees in our article about the best places to plant a birch tree and where they grow best.

Birch Trees Have Large Canopies That Provide Shade

Birch trees, like oaks, maples, and other trees, happen to have a very large canopy that is perfect for casting shade on even the sunniest of days. 

While the birch tree, on average, has a canopy that spans from 35 to 60 feet wide, we should take a look at our few different example species of birch. 

The Canopy Sizes Of Different Birch Trees

River Birch

This tree grows to a height of 40 to 70 feet tall, with a canopy that spans from 40 to 60 feet wide.

Silver Birch

A silver birch grows to be closer to 40 feet tall, with a canopy that is anywhere from 15 to 30 feet wide. Smaller than its counterparts, this is why it is important to do research on the species of tree and not just the general type of tree. 

Gray Birch

This one gets to be about 30 feet, even shorter than the silver birch. The canopy is also a bit more compact, at 10 to 20 feet wide. 

Paper Birch

The paper birch will grow to 50 to 80 feet tall, with a canopy that is a bit smaller, at 35 feet wide, on average. This happens to be the tallest one on our list, though the canopy is not quite as wide as that of the river birch. 

We hope that these examples help to show you how the averages are given for a type of tree truly do vary by each specific species. It helps to see what you are getting into, which is why we recommend seeing what species best fits your growing zone, and going from there to research size. For more help, always contact a professional as they will know the best. 

Birch Trees Grow Quite Quickly

The white and brown trunks of birch trees grow on the bank of a river with a small evergreen sapling between them.

Most birch trees also grow rather quickly, which means that even when you plant them from seedlings or saplings, you’ll have a shade tree fast!

Of course, it will take some time for your tree to mature to those heights of 40 to 70 feet (give or take), but at nearly 3 feet per year, it would only take about 6 years to have a tree that is beginning to tower over your space. 

The Rate Of Growth Of Different Birch Trees

River Birch

With a medium growth rate, the river birch grows anywhere from 13-24 inches, or just over 1-2 feet, per year. Sometimes, it can grow over 2 feet per year, depending on environmental conditions.

Silver Birch

The silver birch has a similar growth rate and can be expected to grow about 1-2 feet per year, more or less.

Gray Birch

This one skews a bit toward the faster side, at closer to 1.5-2 feet per year.

Paper Birch

Our final birch is the same as the first two, growing about 1-2 feet per year.

As you can see, unlike the hardiness zones and potential size of the different species, the growth rate of birch trees tends to vary a bit less.

To learn more about the different types of birch trees, read our article on how to identify different varieties!

Birch Trees Have Medicinal Properties

Birch trees are well-known for their medicinal qualities used by professionals and in ancient times. They often received medicinal benefits by drinking sap or making tea from the leaves and/or the sap of the tree. However, we do not suggest you do this, and always talk to your healthcare provider if you have any questions. 

These trees are great at providing anti-inflammatory assistance, as well as helping with some other ailments. 

Helpful Uses Of Birch Trees

Let’s keep in mind that there isn’t a ton of scientific research done on this. However, in many cultures, birch trees have been used to treat the following:

  • First and foremost, birch trees are great at helping treat pain and inflammation like headaches and sinus infections
  • Have heartburn? Drink some birch tree tea!
  • Birch trees can even help to ease the process of passing kidney stones. If you’ve had one, you know how important pain relief is to the process
  • Skin conditions, including eczema and fungal and parasitic conditions can be helped by making a sort of salve out of birch sap
  • Cuts, scratches, and minor wounds
  • Infections of the urinary tract are also something that a birch tree tea can help eliminate

Read our article to learn more about how and when to harvest sap from your birch tree!

Birch Trees Do Well In Many Soil Types

Birch trees are not only cold hardy with wide canopies and medicinal properties, but they also do well in most soil types. As we mentioned above, dry-air conditions are not the best for these trees, so the desert may not be the right place to rely on birch as a shade tree. 

If you do have a birch that is already growing in a drier climate, we recommend utilizing an irrigation system like this MIXC 226FT Greenhouse Micro Drip Irrigation Kit Automatic Irrigation System Patio Misting Plant Watering System to help keep you, and your tree, on track.

Birch trees do prefer moist, sandy, and loamy soil, when possible. However, they can adapt to conditions that are less ideal. In this case, we recommend helping give your birch a boost with some fertilizer. 

If you need to help provide some nutrients for your tree due to soil conditions, an NPK of 30-10-10 is ideal. 

What Exactly Is An NPK, You Might Be Asking? 

Good question, let’s talk about it!

NPK is an acronym that stands for nitrogen, phosphorus, and potassium. It reflects the ratio of each of these important elements to one another. 

So, we see that birch trees need about 3 times as much nitrogen as they do phosphorus or potassium and that the second two elements can be given in equal parts. 

The Southern Ag Max Acid Water Soluble Fertilizer comes in a 1LB bag and is a great deal at under $20! We recommend this as a well-balanced fertilizer option to get you started.

Birch Trees Have Multifaceted Uses

Other than their medicinal properties, birch trees really do knock it out of the park when it comes to versatility

Renowned by survivalists for the ability to produce food, medicine, shelter, tools like rope, and food storage like bowls and bins, birch trees are phenomenal providers. 

Birch Trees Provide Tools 

As needed, things like medicine and rope can be made from the bark. Other things like bowls and bins can be made from the bark as well.

Birch Trees Provide Food 

When it comes to food, the inner layer of birch bark is where it’s at. There is a high starch content that can be turned into bread or pasta, and added to soups to give them more texture and thickness – however, definitely contact a professional before doing this on your own. 

The leaves of a birch tree can also be eaten. You can think of them a bit like spinach because they can be cooked or eaten raw, even if a bit bitter.

While you likely won’t need to utilize your birch in this way, it helps to understand that the option is there for your birch to provide a whole lot more than just shade, and why it was such an important tree for our earlier settlers. 

Birch trees can offer great environments to plant shade loving plants. For more ideas on what to plant under your birch trees, check out our article!

Should I Plant A Birch Tree?

Birch trees and shrubs line a pond in a grassy park with a bright blue, clear sky.

As you look at all of the reasons why birch trees make such wonderful shade trees, you may be left with one question – should I really plant a birch tree? Well, let’s talk about why you shouldn’t! 

Why Shouldn’t I Plant An Oak Tree?

There are a few things to keep in mind when it comes to potential problems that a birch tree might have.

Like any tree, there are pros and cons to consider as you decide what to plant.We want you to have both sides of the story, even though most of the cons can be applied to other similar trees. 

Reasons why you may not want to plant a birch tree as a shade tree:

  • Birch trees sometimes have to fight off birch borers, leaf-miners, and aphids, along with other infestations. 
  • There is a possibility of branch dieback. This is when all of the leaves on a couple branches will stop growing and, eventually, the entire branch will die. This problem would significantly hinder your supply of shade.
  • Birch trees are messy.
    • Birch trees, namely river birches, are ‘bleeders.’ This means that birches release large amounts of sap. 

While most trees have the possibility of infestation or dieback, these things will most definitely hinder your tree’s ability to provide you with the shade that you planted it for. You’ll want to be aware of the pros and cons anytime you decide whether to plant a new tree.

You can also learn more about birch trees and sap by reading our piece on why birch trees are so messy.

That’s A Wrap!

Alright, that’s our cue. 

To give you a final answer, with a nice little bow on top, birch trees are wonderful shade trees and well worth the investment of time and care that you will put into them.

Let’s take a second to recap exactly why we say this.

Birch Trees Make Great Shade Trees

  • Birch trees can grow across most of the United States
  • Birch trees have large canopies that provide shade
  • Birch trees grow quite quickly
  • Birch trees have medicinal properties
  • Birch trees do well in many soil types
  • Birch trees have multifaceted uses

Birch trees are a great shade tree, thanks to their canopies that range from 35 to 60 feet in width, their ability to grow quickly, and all of their other many uses. These trees can help sustain life, provide shelter from the sun, and can grow across the North American continent.

With the potential to reach around 70 feet tall, birch trees provide a large, sturdy shelter from the sun while also being able to thrive across growing zones 2-9. Chances are that this could be the right tree for you!

We want to wish you the best of luck as you continue along your tree journey. It may take some time to hit your stride, but we are confident that you will plant the best shade tree for you and your space. 

Until next time, friends!

References:

Lachowicz, H., Sajdak, M., Paschalis-Jakubowicz, P., Cichy, W., Wojtan, R., & Witczak, M. (2018). The influence of location, tree age and forest habitat type on basic fuel properties of the wood of the silver birch (Betula pendula Roth.) in Poland. BioEnergy Research, 11(3), 638-651.

Penn State Extension. (2019, September 22). Planting in Sun or Shade. Penn State Extension. 

REY, A., & JARVIS, P. G. (1997). Growth Response of Young Birch Trees (Betula pendulaRoth.) After Four and a Half Years of CO2Exposure. Annals of Botany, 80(6), 809-816.

Originally cultivated in China and Central Asia before spreading to South and West Asia, North Africa, Japan, and eventually Europe, apricots are accustomed to growing in climates where they receive plenty of sunlight every day.

But even so, you might find yourself asking questions such as “why do apricots grow best in full sun?” and “how important is it really that my apricot trees get enough sunlight?” Well – let’s talk about it!

Apricot trees need full sun in order to have enough energy to absorb nutrients and reach their full growth potential.

Full sun is incredibly important when it comes to the healthy development of flowers, which in turn are vital to the production of fruit. Plenty of sunlight is also important for fruit ripening. 

In this article, we will further expand upon these points and also give you some helpful tips and additional information in the hopes that this might help you take care of your own apricot trees. 

3 Reasons Why Apricot Trees Grow Best In Full Sunlight 

An apricot tree in a grass field with ripe yellow fruit in the branches.

While there are plenty of reasons why apricots grow best in full sun (which in the agriculture and gardening world means getting a minimum of six hours of direct sunlight on a daily basis), we’ve listed here some of the more important reasons! Let’s get to it!

1. Better Overall Growth

As you likely already know, sunlight is important for all plants and trees; the process of photosynthesis that they use to produce energy, absorb nutrients, and perform many other vital functions depends upon receiving an adequate amount of sunlight. 

And while some apricot tree cultivars can adapt to grow in partial shade, for the most part the majority of apricot trees need plenty of sunlight to grow, remain healthy, and reach their maximum potential. 

Like with most trees that prefer full sun, apricot trees that get adequate sunlight typically exhibit better growth and healthier foliage in comparison to apricot trees that do not receive enough direct natural light. 

2. Development of Flowers

As mentioned above, apricot trees need plenty of direct sunlight in order to grow properly and perform key biological functions. One of these processes is the development of flowers.  

Not only are the lovely blossoms that bloom on apricot trees aesthetically pleasing with a pleasant aroma, but they are also absolutely vital when it comes to the production of fruit (something which we will discuss next). 

Apricot trees that do not receive sufficient sunlight will often not bloom correctly, which in turn will have an impact on both your tree’s aesthetic appearance (something that can indeed be disappointing, particularly if you chose your apricot tree for landscaping purposes) as well as its overall productivity in terms of fruit. 

3. Fruit Production & Ripening 

Stone fruits such as apricots are also known by the more formal botanical name – Drupes. A Drupe, by definition, is a fruit that consists of soft flesh around a hardened pit. 

Since most varieties of apricot trees are self-pollinating, you shouldn’t need to worry about fertilization when it comes to fruit production (although in some cases cross-pollination can help increase overall productivity). You do, however, need to make sure that your trees receive plenty of sunlight in order for fruit to form. 

This is because (as we stated a moment ago) you need plenty of sunlight in order for your apricot trees to bloom. And apricot flowers, in turn, are absolutely necessary for the production of fruit. 

You Need Flowers To Produce Fruit

After all, apricot fruit is only ever produced as a result of flowers blooming. The flower then transitions into the reproductive stage once sufficient pollination has occurred! In fact, botanically speaking, the pits of these stone fruits are in fact the transformed ovaries of the apricot flowers themselves. 

Therefore, if your tree never flowers or those flowers don’t develop correctly due to a lack of direct sunlight, your tree will not produce fruit properly.

Furthermore, plenty of sunlight is important for not only fruit production but also fruit ripening. If your tree is not receiving enough direct sunlight it can become stressed, which in turn can lead to the apricots themselves not ripening properly. 

However, do be aware that new apricot trees will likely not flower or produce fruit and that this is nothing to be alarmed about. New trees, particularly young saplings, can take anywhere from two to four years to begin successfully producing fruit.

Care Tips For Growing Your Own Apricot Trees: Besides Sunlight, What Else Is Important? 

A close up of a branch with a cluster of nine ripe orange-yellow apricots and green leaves with a blue sky.

While making sure that your apricot tree gets enough sunlight is undoubtedly one of the most crucial parts of not only keeping your tree healthy but also ensuring optimum fruit production, there are plenty of other factors to keep in mind as well. 

Given that, we’ve listed here for you some of our top care tips for growing and maintaining apricot trees. 

Also, check out our article about trees that can damage your home, and guess what – apricots are actually a safe choice!

Pick The Right Tree For You

We’ll be discussing this particular subject more in-depth momentarily, but to start with it’s important to understand that there are quite a few different varieties of apricot trees.

You should make sure to select the type that will do best in your climate and planting conditions – and if you need help with this, contacting a professional will be your best plan of action.

Make Sure Your Tree Gets Enough Water

One of the most common stressors for apricot trees is drought; not getting enough water can have a seriously negative impact on your tree’s overall health as well as its ability to grow and produce fruit so always do your best to ensure adequate watering. 

Generally speaking, a good rule of thumb with apricot trees is to make sure they get an inch of water weekly.

In most cases, drip irrigation is the preferred method of watering for fruit trees such as apricots because it allows you a greater level of precision while also helping to get water directly to your tree’s root zone without splashing the bark and leaves. 

Ensure Proper Drainage

While apricot trees need plenty of water to remain healthy and productive, it’s also of critical importance that the soil they reside in does not become waterlogged. Soggy soil can result in serious damage to your tree’s roots, which in turn can have a negative impact on your trees overall health and wellbeing. 

If a tree’s roots are damaged, it will not be able to absorb oxygen and key nutrients; this can result in stunted growth, wilting, and other problems that have the potential to become long-term issues if not addressed. 

If necessary, consider using a soil amendment to promote better soil drainage. 

To learn more about apricot trees and how they can grow in rocky soil – click to check out our article!

Use Specialized Fertilizers To Encourage Growth And Fruit Production 

Depending on the quality of your native soil, sometimes using a fertilizer designed for fruit trees can help encourage more robust growth while also bolstering fruit production. 

Products such as Dr. Earth 708 P Organic 9 Fruit Tree Fertilizer and Winchester Gardens Fruit and Citrus Fertilizer Spikes can be very helpful when it comes to ensuring that your apricot tree gets all the nutrients it needs to remain healthy and provide you with plenty of delicious fruit. 

Make Sure Your Tree Is Well-Established Before Allowing It To Produce Fruit

As mentioned above, young and newly planted apricot trees will typically not produce fruit for the first couple of years; they need time to mature. 

That being said, sometimes you will see trees younger than two years begin to flower in preparation for producing fruit. While you can let this occur, if your tree is still quite young it’s strongly recommended that you remove the blossoms before they fully bloom and begin the fruit formation process. 

Why Should You Remove The Blossoms Early?

This is because allowing an apricot tree to flower before it is sufficiently mature has the potential to weaken the overall health of the tree. 

The reason is that a great deal of energy and nutrients goes into the formation of flowers and fruit, which in turn can have a detrimental effect on a young tree that is not yet fully established in its environment. 

Since that energy would be more useful for foliage growth and overall development at this stage of the tree’s life, it’s better to nip those flowers in the bud (rather literally in this case!). 

If you are unsure of your tree’s age or want to verify that it is mature enough to safely bear fruit, don’t hesitate to consult with an arborist or a fruit tree specialist. 

Thin Out The Fruit If Necessary

Once your tree is fully mature and begins producing fruit, in all likelihood (and assuming your tree is healthy) your tree will begin producing a lot of fruit. 

Depending on what size you want this fruit to ultimately be, you may want to thin the fruit out as it comes in; thinning out the fruit helps to prevent overcrowding and will allow the fruit left remaining on the branches of your tree to grow larger.

Be Aware Of Your Tree’s Temperature And Dormancy Requirements 

Some varieties of apricot trees require a period of dormancy or a certain number of chilling hours before they can flower and produce fruit; likewise, sometimes certain cultivars need temperatures high enough to break dormancy and flower. 

Make sure you do your research to determine what your tree needs and when during the year to expect it to both go dormant and reawaken to bloom. 

Growing Apricot Trees Indoors: Can It Be Done? 

Many people often ask “can apricot trees be grown indoors?”. Since these trees need plenty of sunlight, it’s a perfectly reasonable question, albeit one with an answer you might not expect: yes! Apricot trees can be grown indoors!

When growing apricot trees indoors, it’s strongly recommended that you select a dwarf cultivar rather than a full-size variety.

This is because you will be growing your tree in a pot or other large container, and dwarf trees are more suited to that than full-size trees.

Additionally, there is rarely space for a full-size fruit tree in the average person’s home, making dwarf cultivars the obvious choice for that reason as well. 

For more on growing fruit indoors, check out our helpful guide of the 7 best indoor fruit trees!

Looking up into the branches of an apricot tree with green leaves and ripe orange apricots.

That’s A Wrap!

As you can see, while there can be a bit of variation in care depending upon the specific cultivar you choose to grow, it’s very important for all types of apricot trees to get plenty of direct natural light. 

As a reminder, some reasons for why apricot trees grow best in full sun include (but are not limited to) the following:

  • Better overall health and growth 
  • Better flowers during blooming season (trees that do not get enough sun often don’t flower correctly)
  • Better fruit productivity 
  • Fruit ripens faster and more thoroughly 

Additionally, when growing your own apricot trees, it’s advisable to keep in mind the following tips:

  • Select the right cultivar for your climate and region (for example, choose one of the more cold-hardy varieties if you live in an area that experiences colder temperatures)
  • Plant your tree in a location where it will receive six to eight hours of direct sunlight a day (and if growing your apricot tree indoors, place it in or near a south-facing window)
  • Make sure your tree gets enough water (an inch a week is the norm)
  • Ensure good drainage; waterlogged soil can cause root damage
  • Give your tree the necessary time to mature before bearing fruit
  • Fertilize as necessary to ensure optimal growth and encourage flower/fruit production
  • If you want larger apricots, thin out the fruit so they have more space to grow on the branches
  • When in doubt (or if your tree begins to do poorly without explanation) consult with an arborist. Books such as The Fruit Gardener’s Bible: A Complete Guide to Growing Fruits and Nuts in the Home Garden and Backyard Fruit Production can also be a good resource for anyone looking for extra reading material on the subject of growing fruit trees such as apricots at home. 

We hope that you found this information helpful for understanding not only why full sun is important for apricot trees but also what other steps you should take to keep your own trees healthy and productive. 

References:

Person. (1995, August 18). Apricot: 20: Handbook of Fruit Science and Technology: V. M. Ghorpa. Taylor & Francis. 

Khasawneh, A. E.-R., Alsmairat, N., Othman, Y. A., Ayad, J. Y., Al-Hajaj, H., & Qrunfleh, I. M. (2022, May 26). Controlled-release nitrogen fertilizers for improving yield and fruit quality of young Apricot Trees. Scientia Horticulturae.

Ruiz, D., Campoy, J. A., & Egea, J. (2007, June 23). Chilling and heat requirements of apricot cultivars for flowering. Environmental and Experimental Botany.

Growing your own apple trees can be a great feeling. Especially when you see the plump fruits growing, or you’re able to pluck one off and enjoy its sweet, crunchy goodness.

However, did you know the plants growing under your apple tree can affect its growth, and prevent it from fruiting? Many plants, even innocuous grass will compete for nutrients and water when planted under apple trees.

Weeds, vines, and other trees can stunt the growth of apple trees because of their aggressive growth and thick roots. Some plants can be so aggressive they can even destroy your apple trees.

Most times, removing all vegetation under your apple trees for at least two to three feet in diameter will help your apple trees grow more vigorously. The following list highlights some of the worst plants to grow under your apple trees.

If you want a strong tree heavy with juicy fruit, don’t plant these 10 plants under your apple trees!

1. Don’t Plant Grass Under Your Apple Trees

You would think that something as simple as grass would not harm a big apple tree, but in fact, grass will compete heavily for moisture and nutrients. Grass growing directly adjacent to apple tree trunks pose many disadvantages.

These include depriving your apple trees of the water and nutrients they need. Grass roots are excellent at soaking up water and removing nutrients before they reach tree roots.

Lawn Maintenance Can Cause Damage To Your Apple Tree

Another reason it’s a bad idea to plant grass under your apple trees is the damage that can happen when doing lawn maintenance. Mowers and trimmers can damage the bark around the bottom of the tree trunk. String trimmers especially can cause a lot of damage.

I’ve seen trimmers so powerful they actually girdle the tree. Girdling of a tree damages the living tissue all the way around a tree trunk, leaving it unable to get nutrients and water to the branches and leaves. This is often fatal to the tree.

Grass Causes Trees To Grow Slower

When grass is planted or allowed to grow underneath trees, the trees develop and grow slower. The trunk doesn’t grow as wide as it could, nor does the tree grow as tall. The grass could delay the production of fruit on your apple trees if you’re growing them from saplings.

To give your trees a better chance at growth, remove the grass at least two feet away from the trunk. Once the grass is removed, cover the bare area with organic material such as mulch. Just keep the mulch a few inches away from the trunk so it can “breathe.”

When trees don’t have to compete with the thick grass roots soaking up all the nutrients, they grow faster and stronger. And your apple trees will produce bigger, tastier fruits.

Speaking of fruit, apple trees come in many varieties. If you are deciding which to grow in your yard, read up on the 10 easiest apple tree varieties to grow!

2. Don’t Plant Oriental Bittersweet Vine Under Your Apple Trees

Bittersweet vines are often beautiful sights because they open up their autumn colors when most other plants are dropping leaves and going dormant.

They have intense red fruits that are surrounded by orange or yellowish petals. These vines can be stunning while running along a fence row, or up a power line.

Bittersweet Will Wrap Around The Apple Tree

The problem with oriental bittersweet is the vigorous growth. These vines are fast-growing, woody vines that can wrap around and harm your apple trees. The vines will quickly spread horizontally, or climb as tall as 90 feet in the air.

Bittersweet vines may look beautiful as they wrap around your apple trees, especially when the fruits pop open. But the vine will literally choke your apple tree to deterioration.

For example: Have you ever seen a piece of wire or rope left around a tree’s branch or trunk? Do you remember how the tree swelled up around the rope and eventually the branch deteriorated? That’s the same thing bittersweet vines can do, except they cover the entire tree!

Bittersweet Can Topple Trees

There have been instances where oriental bittersweet has toppled trees because the vine grew so thick and heavy. When you add in snow or ice storms, the vines become even more destructive. The added weight of snow or ice can uproot or snap tree trunks.

Once bittersweet vines get to the top of the canopy, they will start competing for sunlight. As the vines get thicker, less sunlight is able to reach the host tree. It gets strangled from the vine, and then ends up receiving less essential sunlight.

Bittersweet Vine is a fatal one-two knockout punch for any tree. Unless the invasive vine is cut out and eradicated, the tree that’s effected will eventually succumb to the bittersweet.

Check out our article about why apple trees need sunlight for more info!

Bittersweet Spreads Very Quickly 

The fairy tale concerning Jack and the Beanstalk must have been based on bittersweet vines. They have been known to cover half-acre lots in less than a decade.

Not only does this plant grow quickly, but it can spread and be very difficult to eradicate. The roots grow deep and are hard to dig out. They will spread out, and then grow more vines when they reach something they can climb, such as fence posts or trees.

Birds, squirrels, and deer will consume the berries. This aids the plant’s ability to spread because when the animals eat the berries they will drop viable seeds where they defecate.

3. You Shouldn’t Plant Running Bamboo Under Your Apple Trees

Running bamboo is the tall, quick-growing plant most of us think of when we hear the word “bamboo.” The reason it’s called running bamboo is because it likes to “overrun” any area it grows. This fast-growing plant spreads by sending out rhizomes and shoots that stick out of the ground and form new plants.

Even when grown in containers, this type of bamboo tends to get out easily. Once it starts growing in the ground, it’s extremely difficult to contain or control.

When this plant is grown near or around apple trees, the bamboo will end up taking over the area. The bamboo roots will soak up most of the water in the ground and take away any nutrients before the apple tree can get to them.

Bamboo Grows Fast

Bamboo is an extremely fast-growing plant. It holds the record for being the fastest-growing plant on the planet. Certain varieties can grow up to three feet in a single day. All that growth requires a lot of nutrients.

Not only will the bamboo take away all the nutrients, but it will outpace the growth of apple trees and end up covering them in shade. Apple trees need plenty of sun. If they are grown in shade, the fruits will be affected.

If apples grow on shady trees they could be tasteless, or hard and bitter. Once deprived of sunlight, the apple tree itself gets weaker, causing it to become more susceptible to insect invasion and disease.

4. Japanese Honeysuckle Will Choke Apple Trees

I remember loving honeysuckle when I was a child. The sweet fragrance perfumed the air, signaling a sweet treat was available if I was willing to do the work. I would spend hours plucking the flowers off of the plant, hoping for a tiny drop of flowery, sweet nectar.

Little did I know how invasive and destructive these ambiguous vines were. It may feel nostalgic to plant these around your apple trees, but they can heavily compete for life sustaining nutrients, by smothering out other plants.

Honeysuckle Competes For Pollinators

Apple trees need pollinators in order to bear fruit. The flowers often bloom in early spring to the summer months depending on the variety. This is the same time honeysuckle flowers bloom.

The vines can grow so thick that they crowd out the apple blossoms. The honeysuckle flowers will also attract pollinators like butterflies, bees, and moths which might not get to the apple blossoms. This will result in fewer apples on your tree.

While honeysuckle nectar is a sweet treat, apples are much better and have a lot more nutrition to them. Plus, apple pie or cobbler is hands down exponentially better than a minuscule drop of nectar.

5. Don’t Plant English Ivy Anywhere Near Apple Trees

Another vigorous, invasive vine that can look very attractive, but will destroy other vegetation is – English ivy. This evergreen ivy can look beautiful as it climbs up brick façades. When the dark green leaves contrast with the red brick, the image can conjure up quaint villages, and simpler times.

That’s where the novelty of this invasive vine ends. English Ivy can quickly overtake nearly any tree, shrub, or ground cover and completely cover it. If this plant is placed anywhere near your apple trees, it will soon completely cover them.

You will end up with an English Ivy topiary and have no apples because this plant will completely crowd it out. The leaves are evergreen so the apple tree will not get but a few slivers of sunlight. Eventually, the apple tree will be a distant memory.

What If You Trim The Ivy To Keep It From Climbing?

While trimming the English Ivy is one way to keep it contained, it’s only a temporary solution. I’ll admit that this ivy can make an attractive ground cover, but the leaves and roots will get so dense that your apple tree will be getting very little water and nutrients.

Besides, do you constantly want to have to trim the vines away from the tree and keep it contained to the ground? You’ve got better things to spend your time on than keeping a fast-growing vine in check.

Another consideration is that birds will devour the seeds and then deposit them all over your property. You don’t want to come outside one day and see a sea of ivy. Maybe that’s a little dramatic, but save yourself some trouble and stay away from English ivy.

6. Don’t Plant Black Walnut Trees Near Your Apple Trees

All walnut trees produce a toxin called juglone that can be harmful to other plants and trees, but the Black Walnut produces the most. While most trees can deal with this toxin, this substance can still stunt growth.

According to the Iowa State University, juglone is produced in all parts of the plant. Even the roots will excrete the toxin into the soil. Not to mention, when the walnut trees are allowed to grow they will start competing with other trees for water, nutrients, and sunlight. Walnut trees, especially black walnuts, can tower over apple trees.

Apple trees often top out at 30 feet in height, while black walnut trees can grow three times as tall. When they get so big, not only do they inhibit growth with their toxins, but they start throwing massive amounts of shade wherever they grow. Your apple trees won’t be able to cope with so much stress.

For more information check out our article about Black Walnut trees!

7. Don’t Let Weeds Grow Under Your Apple Trees

Whether they are broad-leafed or thin, spindly weeds, both are detrimental to your apple tree. Just like grass, weeds will compete heavily for water and nutrients. Since the roots tend to grow closer to the surface, weeds will end up getting most of the water and nutrients that your apple trees need.

Apple trees require a lot of water and nutrients, especially when they are producing bright, crunchy apples. When you let weeds grow rampant underneath the canopy of apple trees, you’ll end up having to water and fertilize them much more frequently.

If you do need to fertilize your tree, check out our article on the 7 best apple tree fertilizers.

8. Be Wary Of Wisteria Under Your Apple Tree

Trees covered in wisteria blooms that have waterfalls of purple and white flowers are a sight to behold. They can be absolutely stunning, but this beauty hides a dark secret. As wisteria dazzles you with its cluster of cascading blooms, it’s slowly harming the tree underneath.

This pernicious plant can send out thick tendrils of vines throughout your trees. Not only does it smother the tree by blocking out the sunlight, but these vines can cause a ton of stress as the weight increases.

Limbs can break and trunks can snap, leaving the tree struggling for its life while the wisteria continues to grow un-phased.

Wisteria vines are also quite toxic. The entire plant is poisonous, but the mass of seed pods that drop after the flowers fade are sometimes ingested by pets. Even if you cut, prune, or pull these plants out from the ground, you should wash your hands afterward just to be safe.

9. Watch Out For Mint Under Your Apple Trees

While it may seem innocent enough with the small leaves, pleasing fragrance, and refreshing taste—mint juleps are wonderful—the mint plant is incredibly invasive. It can grow so thick it will crowd out most weeds and grass.

Mint plants also create thick and deep networks of roots. Apple trees tend to send most of their tiny feeder roots close to the surface of the soil. Mint roots can grow so fast and thick that they will hog up most of the water and food in the dirt.

Your apple trees will be starving and struggling for water. Even if you water the ground deeply and fertilize often, the mint roots will take most of it.

Mint Is Hard To Get Rid Of

Even if you only have a few plants, the mint will quickly replicate itself and take over any amount of soil. You can keep mint in containers, but if it goes to seed, the seeds can fall out of the container, and then you’ll be battling this plant for a long time.

You can pull it up out of the ground but the roots go deep. If you don’t get it all, the remaining roots will just send out new runners and make new plants. Herbicides can be effective, but you’ll have to reapply often as the plant continues to duplicate itself.

10. Don’t Plant Tubers Under Your Apple Trees

Potatoes, sweet potatoes, and other root vegetables like carrots, parsnips, or beets are a bad idea to plant under your apple trees. These plants need deep soil to grow, and they will disturb the apple tree’s roots.

When you go to harvest these crops, you will inevitably end up cutting and damaging a lot of the apple tree’s roots. Besides, potatoes and sweet potatoes will end up getting tangled in the tree’s roots. You’ll end up with either a smaller crop of potatoes or a damaged and weak apple tree.

What Can You Plant Under Your Apple Trees?

Ripe yellow and red apples lay fallen beneath and apple tree with more apples hanging from the branches. The tree sits in an orchard surrounded by grass.

When it comes to planting under your apple trees you want to look for companion plants. These are plants that will help or offer benefits to your apple trees. These can be plants that attract pollinators, add nutrients to the soil, or help to fend off disease and harmful insects. 

Plants That Attract Pollinators

The following plants can be grown under your apple trees in an effort to help attract pollinators that will help your apple crop be the best it’s ever been. 

  • Daisies
  • Poppies 
  • Yarrow
  • Bee balm
  • Coneflowers
  • Black-eyed Susans
  • Lupine
  • Queen Anne’s Lace

Plants That Repel Pests

Planting certain herbs and other plants can help to deter insects and four-legged pests. Rosemary, hyssop, lavender, marigolds, basil, garlic, chives, and onions all help to repel hungry, destructive insects and even deer that might eat all your apples before you can harvest them.

Planting herbs is a great way to ward off detrimental insects while attracting beneficial ones like ladybugs. This Sustainable Sprout 10- Pack Culinary Herb Seeds has a variety of herbs that won’t harm your apple trees. What’s more, you can harvest these herbs and add extra nutrition and flavor to your favorite dishes.

Nasturtiums Are Great To Plant Under Your Apple Tree

Nasturtiums are great flowers that attract aphids. Wait, you don’t want to attract aphids right? Well, think about it this way, if the aphids are feeding on the nasturtiums, they aren’t ruining your apples.

Nasturtiums can usually keep up with aphid damage. If the plants become extremely damaged, simply dispose of them, aphids and all, then plant more. Find Nasturtium seeds and more plants that are beneficial to apple trees here, Sustainable Sprout Edible Flower Seeds Variety 7 Pack.

More Beneficial Plants

  • Chamomile—this plant attracts pollinators and beneficial insects such as ladybugs and green lacewings. 
  • Chives—these have already been mentioned, but an added benefit to these plants is they deter rabbits and help prevent apple scab. 
  • Coriander—helps to deter pests and bring in beneficial insects.
  • Daffodils—early bloomers that help to deter rabbits and add nutrients to the soil
  • Comfrey—this plant is beneficial because it’s a nitrogen fixer. Nitrogen fixing plants help to enrich the soil by creating a symbiotic relationship with soil bacteria. These plants are extremely beneficial to soil health.
  • Tansy—nitrogen fixer and can be mulched into the ground. 

For more ideas, we have dedicated a whole article on the 7 best things to plant under your apple tree!

Sometimes Nothing Is Best

Rows of trellised apple trees in a grassy orchard have bright red apples hanging from the branches.

To be safe, and to prevent a lot of work down the line, often it’s best to let nothing grow underneath your apple trees. By clearing out two feet or more of space away from the apple tree trunk, you help it grow better and stronger. 

Cut out any grass, pull out weeds and leave the bare soil around your apple tree. Then fill it in with three or four inches of organic mulch. Doing this ensures that your tree gets plenty of water and nutrients, and does not have to compete with other plants.

Whenever grass or weeds try to grow underneath the tree, simply pull them up, roots and all, and throw them into the compost heap. 

That’s A Wrap!

When you’re growing apple trees, you have to be careful what you plant or let grow under the canopy. The wrong plants can leave your apple tree weak and struggling. Depending on the plant, certain vines or trees can be fatal to your precious apple tree. 

Planting beneficial plants such as chamomile, garlic, chives, or nasturtiums can help deter pests, enrich the soil, or help to bring in pollinators. All of these will help your apple tree in the long run. 

All in all, if you are unsure about what to plant and how to do it – contact a professional! They can assist you every step of the way.

If you’re looking to simply grow an apple tree head on over to our article about how to grow apple trees in your yard!

References:

Bowen, Joanna K., et al. “Venturia inaequalis: the causal agent of apple scab.” Molecular plant pathology 12.2 (2011): 105-122.

Green, S. R., et al. “Modelling water uptake by a mature apple tree.” Soil Research 41.3 (2003): 365-380. 

Roussos, Peter A., and Dionisios Gasparatos. “Apple tree growth and overall fruit quality under organic and conventional orchard management.” Scientia Horticulturae 123.2 (2009): 247-252.

Tang, Guang Bo, et al. “Repellent and attractive effects of herbs on insects in pear orchards intercropped with aromatic plants.” Agroforestry Systems 87.2 (2013): 273-285.

Your Competitors Are Already Running Ads. Are You?

This is for landscaping business owners who are: