Grow Your Business with Tree Journey

Our TradeWorks Revenue System™ builds a detailed advertising funnel that attracts, nurtures, and converts the right clients – so you can finally stop chasing leads and start scaling your business.

Maple syrup, molasses, treacle, pancake syrup; whatever you may refer to this product as maple syrup is a widely beloved addition to many dishes across North America. The sweet flavor is delicious without being too thick and sugary, making this a staple in many households.

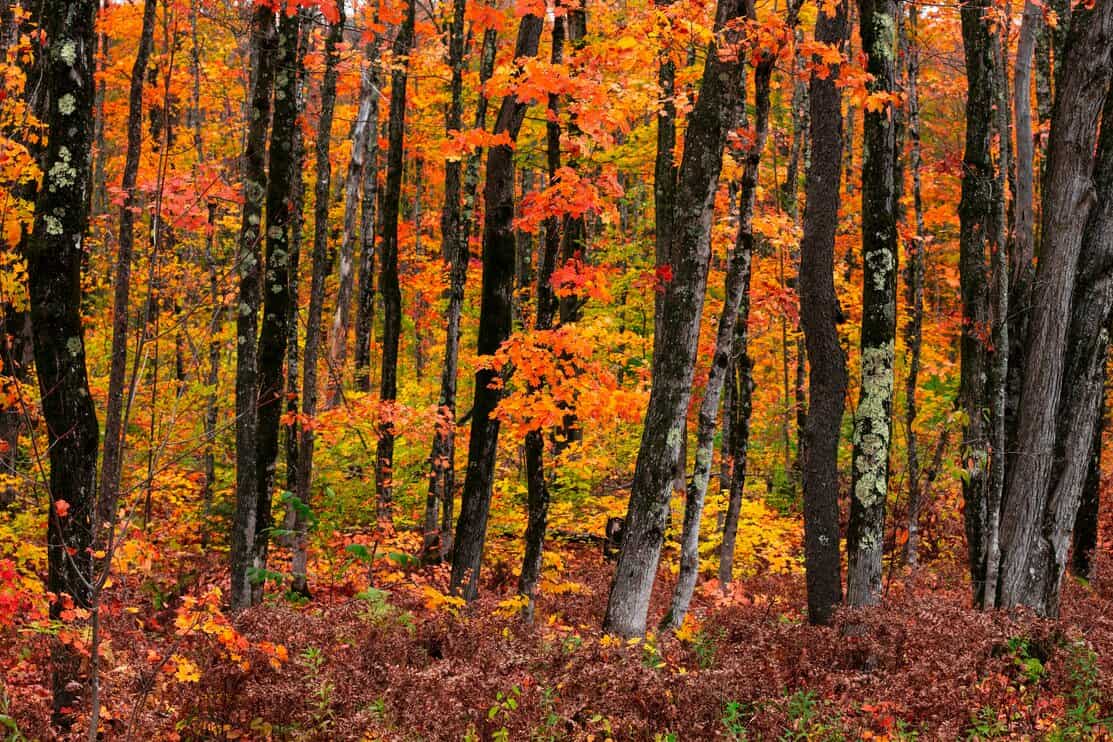
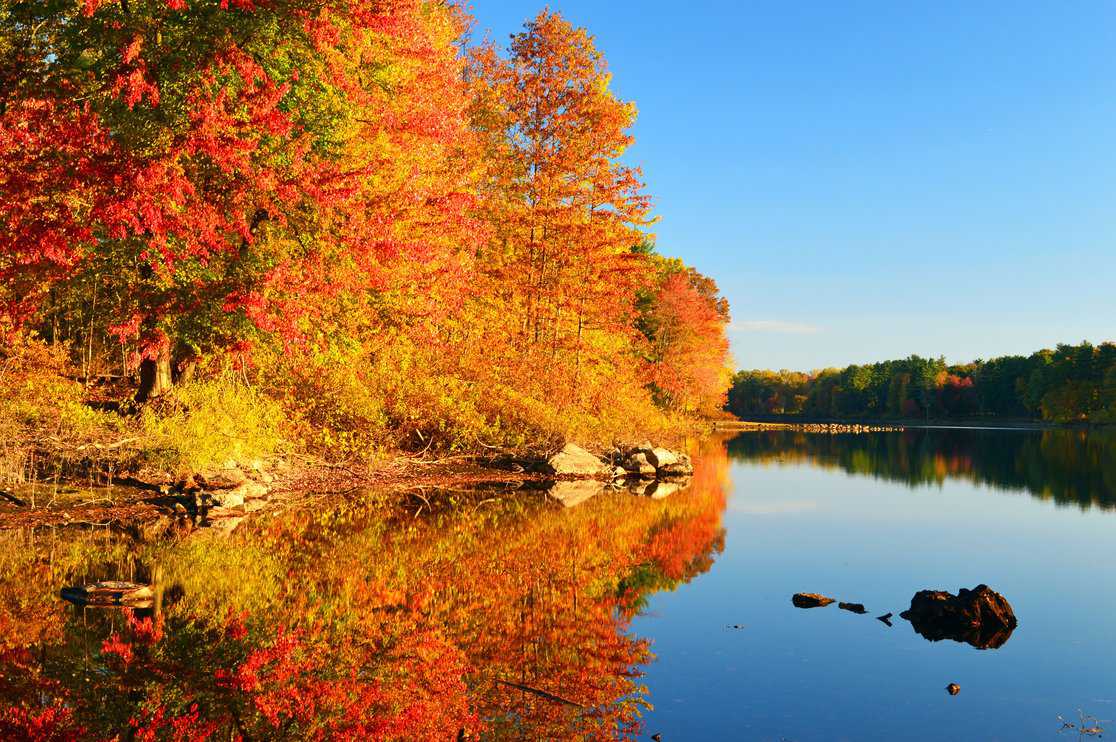
Maple syrup is made from the sap of a maple tree, while only a few subspecies can produce sap for maple syrup. Sugar, black, red, silver, and boxelder maple trees all produce the kind of sap that can be turned into maple syrup. You should tap these trees during early spring for best results.

So, which species of maple produce sap that can be turned into syrup and are there any major differences? Truthfully, the sugar maple is only one of the many species that can produce sap, and there are many similarities and differences between it and its relatives. Don’t take our word for it; keep reading and learn for yourself!

Which 5 Maple Trees Are Best For Syrup?

While sugar maples are going to be the most obvious choice, there are also four other trees that fit into this category. In reality, syrup can come from many different types of trees, but maple syrup is a rare commodity when compared to all the varieties of trees out there that cannot produce it.

So, which other trees can produce sap that turns into maple syrup?  Here are the most common maple trees that can be tapped for maple syrup.
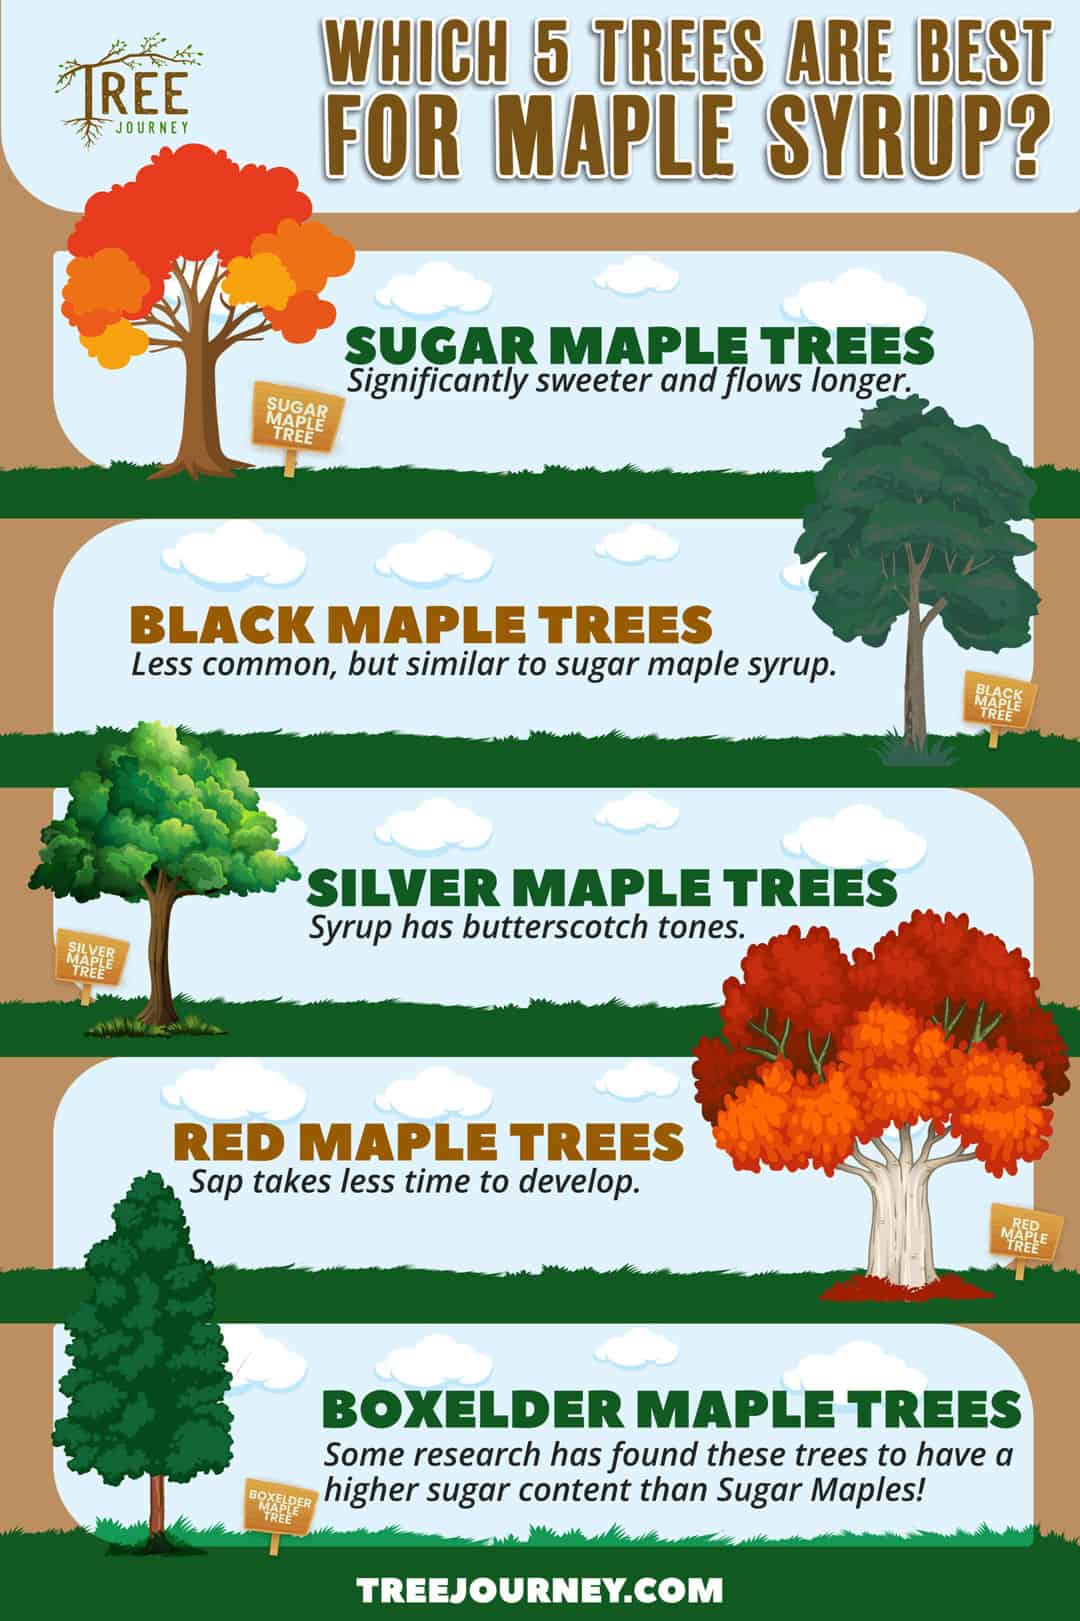
Trees That Produce Maple Syrup
Save and share this graphic if you’d like!

Boxelder Maple Tree

Acer negundo, also known as box elder, boxelder maple, ash-leaved maple, and maple ash, covered by snow during a cold winter day

Research from Saint John’s University found that boxelder maples actually have a higher sugar content than even sugar maples do, at 2.59% average sugar concentration versus a sugar maple’s 1.72%. However, the sugar content does not necessarily mean that the flavor is going to be up to par with the expectations of the masses. Unless you’re fond of a sort of leafy addition to the flavor complexity of the syrup, that is.

Of course, depending on your methods of turning sap into syrup, this could potentially be eradicated to create equally delicious maple syrup.

This species can be picked out of the crowd by looking at the leaves. As opposed to the symmetrically lobed leaves of most maples, those of a boxelder tend to be much more compounded and clustered together. So, if you see a tree that sounds like it might be a boxelder, perhaps you will look elsewhere before tapping it for its sap.

Red Maple Tree

red maple acer (Acer Rubrum) aka swamp maple, water maple or soft maple tree

In something of a similar fashion to the boxelder maple, the red maple sap is less sweet. Due to its buds breaking, or expanding into flowers in the spring, earlier than those of the sugar maple, the red maple has less time for the sweetness of its sap to fully develop into a mature flavor.

This flowering early in the season not only gives the sap less time to develop but also means that the harvesting time for the sap is going to be shorter than that of some other maple trees.

You may be wondering how you can tell the difference between the species of maple tree, and one telltale sign of a red maple tree is the color of their samaras, often known as ‘helicopters,’ which are their double-winged seeds.

You can read more on the major differences between oak trees and maple trees here.

On many maples, the samaras are green during the springtime, while they are a noticeably brighter shade of red on their aptly named host, the red maple tree.

Silver Maple Tree

Spring view of Silver Maple Trees in a sunny day, Green Park, London

Silver maples grow quickly and can get pretty large, so they are a common species of maple across North America. The flavor of this tree’s syrup yield is often described as having butterscotch tones. Unlike some other species that may have a bitter or less developed flavor, the silver maple does well enough when it comes to holding its own. 

How can a silver maple tree be distinguished from its many relatives? The underside of the leaf holds the key to this question. The leaf itself is more similar to the shape of other maple leaves, boxelder’s aside, but its coloring is what helps to distinguish it as the silver maple. 

Haven’t you guessed it yet? That’s okay! The silver maple leaf, when viewed from the underside, has a silvery hue that sets it far apart from maple species like red and black.

So, not only is the hue this the tree’s namesake but a feature that helps define that it is, in fact, a silver maple tree. 

Black Maple Tree

This is an interesting one because it is sometimes referred to as the ‘black sugar maple.’ Why is that, exactly? 

Well, the University of Maine notes some authorities say that rather than being a completely separate species, the black oak maybe a subspecies of the sugar maple. 

The black maple is a bit less common than the sugar maple, but they do come from the eastern parts of North America, so it is not surprising to learn that they may be more related than once believed. 

Additionally, these trees have the ability to cross and form hybrids—just one more thing to make classification a little trickier at times, even more, the professionals. 

Let’s go back to the real question at hand. Does that mean anything when it comes to the black maple tree’s sap?

Yes and no.

The sap of a black maple is actually fairly similar to that of the closely related sugar maple, but it does produce less sap overall. So, though the flavor is similar, if you are factoring in the amount of sap yielded overall, sugar maple is going to be the standout choice.

Sugar Maple Trees Are Best For Syrup

Looking up under a sugar maple tree during the fall or autumn, beautiful orange and yellow leaves

Okay, so we keep talking about sugar maples but let’s really get into why they are so popular when it comes to producing sap and, in turn, syrup.

Sugar maples can be tapped just as any other broadleaf deciduous tree can, most commonly maples, but there are a few reasons why this is a better choice when it comes to all of your sap-related needs. 

Sugar maples have a sugar content that is close to 3%. It has been shown that, on average, 2.59% sugar content can be expected. 

Doesn’t sound like much? We get it, but in comparison to the 1% range of average sugar concentration in other syrups, it is clear that the sugar maple is the most popular for a reason. 

When it comes to both yield and flavor, sugar maple sap is sweeter and flows for longer than some others. 

Can You Eat Maple Syrup Straight From The Tree?

People have been eating raw sap in many capacities for longer than we know of, and it can be okay.

However, you’ll want to follow this good tip when it comes to tapping trees for sap. As you drill the hole for your tap, pay close attention to the color of the shavings. Light wood shavings indicate a healthy sap will come next, while dark shavings are a sign of sap that is no longer desirable for production of any kind.

Not only does this apply to wanting to use raw sap, but to ensure that you are not wasting your time processing sap that is not ideal.

There are a few other nuances you should follow if you’re going to eat maple sap straight from the tree. Better yet, take a peek at our guide on how to eat syrup straight from the tree!

4 Steps To Tapping For Maple Syrup

Maple syrup is delicious and amazing, but the sap has to be retrieved before this wonderful sweet treat can be enjoyed.

If you already have a sugar maple, tapping the tree is a great thing to do. However, planting new sugar maples is not recommended due to the hindrance they cause in the growth of other tree species. 

Luckily, we are going to break down the steps for you below. If you’re interested in tapping trees locally (of course, you definitely are,) go and search your state’s local governance pages for guides on the deciduous trees near you and get tapping instructions!

1. Tap Your Tree During Early Spring

The early spring months are the best time to tap for sap. This is because the fluctuation in temperatures during this early stage of the season helps the sap to run more easily when a tree is being tapped. 

At night, temperatures will ideally fall near or below freezing while the daylight hours are a bit more temperate, in the 40 to 50-degree range. 

Any time as early as January, depending on the extremity of the weather in your area, through as late as April is going to be the ideal period to tap your tree. March, realistically, is going to be the safest bet if you are just tapping a tree or two. The sap runs more easily during the late winter/spring.

If you’ve got multiple on your property and are hoping to yield a bunch of syrup in the end, go ahead and start early. It’s all up to you!

When does the maple tapping season end?

When temperatures stay above freezing and leaf buds appear, the season is over. This is why red maples are not nearly as reliable; their buds appear early on in the season, leaving next to no time to procure their sap.

Keep in mind that you should follow the weather in your area, more so than a specific month, to decide when you are going to tap your trees.

2. Find The Right Sized Maple Tree to Tap

You’ll want a tree that is mature enough to be tapped. If the tree is too young, you could severely harm or even kill it by drilling into it in the way that is necessary for tapping. 

The Missouri Department of Conservation tells us that a maple tree that has matured to at least 4 feet tall and 10 inches in diameter is alright to start being tapped for sap. While fully mature trees can handle a few taps at once, but no more than 3 is advised, using a single tap is thought to yield the best results. 

By using one tap, the tree will not be overworked and can provide sap more quickly and of better quality in the long run.

3. Place The Tap To Get Syrup

Now, onto the fun part.

Your hole for tapping sap should be drilled between 2 to 4 feet off the ground, hence the reason that a tree needs to be at least 4 feet to be safely and successfully tapped. You’ll want to be able to place your spile (the spout that drains the sap) in a bit of an upward direction, as well. 

The spile should go a few inches into the tree in order to reach the sap but not go too far, which might cause extra stress on the tree. This placement will allow the sap to flow directly into your bucket with ease.

4. Check Your Bucket Frequently For Sap

Speaking of your bucket, you’ll want to check at least one time a day. Some days, you may have plenty of space in your bucket and not need to collect anything, but other days might require you to collect sap more frequently. 

This also all depends on the size of the bucket you are using. Something between 1 and 2 gallons will need to be checked much more regularly than a 3 to 4-gallon bucket. That extra gallon or two is the difference between collecting sap multiple times a day and being able to check once daily, even taking a day off here and there.

Now, processing the sap is a whole different story. This will depend more upon which type of tree you obtained your sap from and what you want your syrup to turn out like, among other factors. But we hope this helps you find a good starting point in your syrup production journey!

That’s All For Now!

Now that we’ve learned a little more about the tree tapping process, from which trees produce sap to how to obtain the sap, it’s clear that this is a relatively rare opportunity. Not all trees produce sap and, while there are other tappable trees, maples are a species to be celebrated for their delicious sugary production.

Remember that sugar maples are always going to be your best bet when it comes to producing and tapping for syrup.

However, black, red, silver, and boxelder maple trees can also produce syrup. There are a few other maple trees that can produce maple syrup – but these are your best bet!

They may yield less sap than sugar maples, but they’ll do the trick well enough. Especially if you’ve got one of these species in your backyard and are not looking to produce a large quantity of syrup but rather want a fun family project or simply your own jar of maple syrup.

Maple sap, maple syrup, and any product of these baser items are relatively easy to make but are fun and add some flavor to any spring day.

References

Malone, C. (1976). Tapping the Sugar Maple–Learning and Appreciating. Communicator.

Perkins, T. D., & van den Berg, A. K. (2009). Maple syrup—Production, composition, chemistry, and sensory characteristics. Advances in food and nutrition research56, 101-143. 

van den Berg, A. K., Perkins, T. D., Isselhardt, M. L., & Wilmot, T. R. (2016). Growth rates of sugar maple trees tapped for maple syrup production using high-yield sap collection practices. Forest Science62(1), 107-114.

Maple trees are known for their beautiful fall foliage and for providing shade in the backyard. This American icon is relatively easy to grow and care for, but choosing the right time to fertilize is important to your maple tree’s health!

The best time to fertilize an established maple tree is in early spring before the buds break or late fall after the leaves have already dropped. When first planting a maple tree, fertilizer should not be used until the tree becomes established. Slow-release fertilizers are the best type to use.

Even though established maple trees do okay on their own, an application of fertilizer can help them thrive. Below, we’ll go over when to fertilize your maple tree and which fertilizers to use!

When To Fertilize Your Maple Tree
Feel free to save and share this graphic! You can hold down on the image on mobile to save it.

Do Maple Trees Like Fertilizer?

Before we get into when to fertilize your maple tree, let’s establish if you even need to fertilize it!

Maple trees can grow in a variety of conditions, soil types, pH levels, and hardiness zones. There are over a hundred different species, some ranging from just 8 feet tall to over 100 feet tall.

Despite this vast diversity, all maple trees have a few things in common when it comes to fertilizer.

Established Maples Don’t Need Too Much Fertilizer

When first planting a maple tree, the little seedling has a tough few years ahead of it. It must adjust to the new soil type, grow roots to anchor the tree, and gather enough nutrients to start growing.

Established maples don’t have this problem and can focus more on vertical canopy growth rather than root growth.

Once a maple tree is established, it doesn’t need much to survive. Usually, the nutrients in the native soil will be enough to keep your maple tree healthy.

That being said, if you want your maple tree to grow at its absolute fastest growth rate, a dose of fertilizer can help. Fertilizers that contain nitrogen will encourage your maple tree to grow taller and produce more leaves, giving your maple a fuller appearance.

If your maple tree seems to be growing slower than it should be, it might need a dose of nitrogen-containing fertilizer along with probably a TON of water.

Close View of Sugar Maple Leaves

Newly Planted Maple Trees Do Not Need Fertilizer

Planting a new tree is always an exciting time. You stand back and just imagine all the shade and fall foliage you’ll get to benefit from when the tree is fully grown.

While exciting, planting a new tree can also be a bit tricky. You may be tempted to provide your new maple tree with fertilizer to help it grow, but this can do more harm than good.

In general, fertilizers encourage the tree to grow new shoots and leaves, but it does not encourage root growth very much. 

When maple trees are first getting established, they need to focus on root growth instead of shoot growth.

It can be especially tempting to fertilize new maple trees that don’t seem to be growing fast. Don’t worry, this is totally normal! When maples focus on root growth, they will have a slower growth rate.

According to an article in the Journal of Arboriculture & Urban Forestry, fertilizing newly planted red maples does not speed up establishment periods, increase trunk growth, or increase shoot growth.

If you’d like to learn more, take a look at our maple tree timeline to see how long it takes for full growth.

Fertilizing Can Be Beneficial

Just because maple trees can survive without fertilizer doesn’t mean they will thrive. Fertilizer can be beneficial for maple trees for a few different reasons:

  • Iron deficiency: Maples, in particular, have trouble getting enough iron from high-pH soils. In this case, an iron fertilizer can help spruce your maple right up!

Southern Ag’s Chelated Liquid Iron comes in a 16-ounce container. The liquid must be diluted with water and then can be applied around the maple tree’s drip line or applied directly to any yellowing leaves.

  • Faster growth: If you want to encourage your maple tree to grow faster, fertilizers can help give your tree enough nutrients to speed up its growth rate.
  • General maintenance: Even if your maple tree is not experiencing any nutrient deficiencies, a regular application of fertilizer can improve the overall health of your tree, making it more resistant to pests and other unwanted ailments.
Colorful Maple trees in autumn time in Western Michigan Upper peninsula wilderness.

How Often Should I Fertilize My Maple Tree?

Fertilizers provide maple trees with the nutrients they need to grow and thrive, but fertilizing at the wrong time can be harmful to maples and have unwanted consequences.

Let’s take a closer look at the best time to fertilize your maple tree and how often to do it. 

Fertilize Your Maple Tree Annually

Some trees (such as citrus fruit trees) need fertilized multiple times a year. Maple trees are a little different and will benefit from just a single yearly application of fertilizer.

Fertilizing more than once a year can overburden the roots of your maple tree, giving them more nutrients than they could use. This can cause root burn. Some of the symptoms of root burn include:

  • Stunted growth
  • Brown coloration on edge of leaves
  • Discolored roots

A single application of fertilizer will benefit most maple trees. Following the directions on the label can help you avoid giving too little or too much fertilizer to your tree.

According to Colorado State University, slow-release fertilizers are better than water-soluble fertilizers for shade trees such as maples.

If you find fertilizing isn’t helping your maple tree, then you may have a reason to cut it down.

Some Maples Need Fertilization Twice A Year

We mentioned before that most established maple trees do not need a ton of fertilizer. However, there are some instances where maples may need fertilizing twice a year.

The main reason you would fertilize your maple tree twice a year is if there is a nutrient deficiency in the soil where it is planted.

You can perform a soil test to see what kind of nutrients are lacking in your backyard’s soil. Alternatively, you can wait and see what kind of symptoms pop up on your maple tree before deciding to apply fertilizer once or twice a year.

Some of the symptoms that your maple tree is nutrient deficient include:

  • Stunted growth
  • Distorted, discolored, or small leaves
  • Early leaf drop
  • Yellowing leaves
  • Brittle branches or leaves

It’s more important to catch these symptoms on young trees than on old ones, but even older trees can benefit from fertilizer when they are showing signs of stress.

Fertilize Your Maple When All The Leaves Have Fallen

Some maples may need to be fertilized twice a year while others may not need any fertilizer. If you decide to fertilize your maple, you’ll want to make sure to do it at the right time.

One of the best times to fertilize your maple tree is in the late fall after all the leaves have fallen off.

It’s important to wait until the leaves have fallen. Fertilizing before this will prevent your maple tree from hardening off for the winter. Applying fertilizer after the maple has been prepared for winter will allow the roots to absorb and then store the nutrients for use during the winter.

Fertilize Before Periods Of Rapid Growth

Spring is a time when everything is waking back up for the year. New shoots, buds, and flowers are forming and the surrounding landscape finally looks alive again!

If you decide to fertilize your maple tree in the spring, you’ll want to fertilize well before any buds break open.

It’s recommended to fertilize in early spring to give your maple tree the nutrients it needs to form flowers and continue to grow.

You should avoid fertilizing your maple tree in late spring, summer, and early fall.

What Are The Best Maple Tree Fertilizers?

Nitrogen is one of the most important nutrients when it comes to maple trees, but not all nitrogen is the same when it comes to fertilizers.

Slow Release Organic Fertilizers Work Great

There are two broad categories of fertilizers available—slow-release and quick-release. One is water-soluble (quick release) while the other is not water-soluble (slow release).

Quick-release fertilizers may sound better because the nutrients are immediately available, but these types of fertilizers aren’t great for trees like maples that do not require a lot of fertilizer.

Instead of quick-releasing water-soluble fertilizers, you’ll want a slow-release fertilizer such as Milorganite 32 lb. Slow-Release Nitrogen Fertilizer. It comes as granules that can be spread on the soil around your maple tree.

No matter which fertilizer you choose, it’s important to make sure your maple tree has enough water to dilute the nutrients. Learn more about why maple trees need so much water (and when to water them).

Fertilizer Spikes Work Well Too

Fertilizer spikes aren’t any different than normal fertilizer except for how you deliver the fertilizer to your maple tree. While many fertilizers come as granules, spikes are driven into the ground.

Jobe’s Fertilizer Spikes comes with 15 spikes and has an NPK ratio of 16-4-4 (16% nitrogen, 4% phosphorous, 4% potassium).

Spikes are an excellent choice for a maple tree fertilizer because they release nutrients slowly and they’re good for the environment. Spikes are far less likely to enter stormwater runoff than granular fertilizers.

You can read more here about the best maple tree fertilizers and how to use them.

Autumn Calm In New England

That’s A Wrap!

Maple trees might be bumping elbows with dogwood and oaks for the #1 spot for backyard trees. They provide shade and plenty of interesting colors in the fall.

In general, maple trees do not require a lot of fertilizer to stay healthy. However, an annual application can benefit some maples.

The best times to fertilize your maple tree include early spring, about 5 weeks before buds break, or late fall after the leaves have fallen off the tree.

Some maple trees may need applications both in the spring and the fall, but most only need one per year. 

Maple trees will benefit more from slow-release fertilizers or spikes than water-soluble fertilizers. You can always contact your local arborist to get a better idea of what kind of fertilizer you should be using and how often to use it.

If you’re considering planting a new maple tree, take a peak at our list of the best maple trees to plant!

References

Day, S. D., & Harris, J. R. (2007). Fertilization of Red Maple (Acer rubrum) and littleleaf Linden (Tilia cordata) Trees at Recommended Rates Does Not Aid Tree Establishment. Arboriculture & Urban Forestry, 33(2), 113-121.

Lee, JS. Relationship of root biomass and soil respiration in a stand of deciduous broadleaved trees—a case study in a maple tree. j ecology environ 42, 19 (2018).

R A Lautenschlager, John H Pedlar, John A Winters, and Cathy M Nielsen. Ice storm damage: Effects of competition and fertilization on the growth of sugar maple trees. The Forestry Chronicle. 79(1): 63-69.

Smith LJ, Stephan K. Nitrogen Fertilization, Stand Age, and Overstory Tree Species Impact the Herbaceous Layer in a Central Appalachian Hardwood Forest. Forests. 2021; 12(7):829.

Let’s face it, we all love fresh fruit, and there’s hardly anything better than being able to pick some straight from your very own tree! Of course, there are a couple of barriers that often keep people from planting a fruit tree in their own backyard. The other common concern with growing your own fruit tree is how difficult it will take you to actually get to enjoy that fruit.

So, what are the easiest fruit trees to grow indoors? Meyer lemons are one of the fastest to grow fruit, although other easy to grow fruit trees include:

  • Lime trees 
  • Fig trees 
  • Olive trees
  • Apricot trees 
  • Avocado trees 

If you’re not sure which one to grow, or how to grow fruit trees indoors, we’ll be covering the details of each tree on our list. Of course, you’ll also learn just how long (and difficult) it will be for you to harvest fruit.

What Makes A Fruit Tree Good For Growing Indoors?

It might seem obvious, but like any other indoor plant, you need to be able to keep it in a container. Naturally, you’ll need to provide a container that’s an appropriate size for your tree. You can either buy a container sized to fit your tree at mature size, or you can periodically replant them into larger containers, although that can be more work.

Next, the tree in question should be adaptable to variable light. The fact is, that even if you have a very well-situated window indoors, it still might not provide the same amount of light that the location otherwise would if it were located outside.

Another thing you should look at is whether or not you can provide the heat and humidity the tree requires. Some fruit trees are best adapted to tropical environments and therefore need consistently warm and humid environments. Unless you have a greenhouse or special growing area, these may be harder to provide optimal conditions for.

The last thing that makes certain trees better for growing indoors is size

We’ve all seen orchards with towering trees, but it would be a hard sell to try and fit one of those into your living room. Because of this, many fruit trees that are suited to growing indoors are either rather short by nature, or they are ‘dwarf’ versions of their larger cousins.

Picking The Best Easy To Grow Fruit Tree For Your Home

Meyer lemons are common enough to see in someone’s home. However, there are plenty of other fruit trees you never imagined you’d be able to grow on your own indoors. Depending on your preferences, there’s probably at least one kind of fruit tree in each family that you can grow indoors. 

You can grow everything you might expect, like lemons and limes, to more unexpected varieties, like olives, avocados, and beyond. Next up, we’re going to review the best, fast-growing fruit trees to grow indoors. Keep in mind that while there are other kinds of fruit trees you can grow indoors, we’ve created our list with the easiest, and fastest-growing ones in mind. 

Another thing you should remember is that most indoor fruit trees are actually dwarf varieties – so be sure to take that into consideration when planning!

Easiest Fruit Trees To Grow Indoors

NAMEMATURE HEIGHTTIME TO FRUITSUNLIGHTPRUNING NEEDSFERTILIZATION

Meyer Lemons Are One Of The Easiest To Grow Indoor Fruit Trees

ripe yellow-orange Meyer lemons on a lemon tree

Meyer lemons are similar to the lemons you’ll typically buy in the grocery store, but these are a bit sweeter than the others. 

What Makes Meyer Lemon Trees Good For Growing Indoors?

To start with, these trees take up relatively little space, which means you don’t have to create an area specific to them. Not only that, they grow faster than most other indoor fruit trees, so you won’t have to wait as long to see the fruits of your labor. 

Upon maturity of two to three years, Meyer lemon trees begin producing fruit. With that said, these fruits can also take between three to six months to mature once they appear on the tree. However, some people do like to pick fruits earlier for a more tart flavor rather than wait for them to sweeten up. 

If you plan on growing a Meyer lemon tree from seed, you may have to wait between three to seven years to get fruit.

Another good thing about these lemon trees is that, at most, they grow to a mature height of only 6-10 feet tall if they’re the standard variety, and can be as small as 5-7 feet tall for mature dwarf varieties. You can check out this piece to learn more about the timeline of a lemon tree.

How To Care For Meyer Lemon Trees

These trees are pretty low maintenance as far as indoor fruit trees go. Keep them at temperatures around 65 degrees Fahrenheit, with moderate humidity, and in partial to full sun. Allow the soil to be moist, but don’t overwater it enough to soak it. 

These trees require periodic fertilizing, with a nitrogen-rich fertilizer every couple of months. Trees that are outdoors for the warmer months (particularly, April through September, when the plant is putting more energy toward growth), often do best when fertilized at least once a month. These trees need full sunlight, and we’ve shared 7 Reasons Why Lemon Trees Grow Best in Full Sun.

You also need to prune Meyer lemon trees occasionally. Look for long leads. These are basically branches that grow out from the tree but don’t have the potential to produce fruit. Taking these branches away allows your tree to put resources into the branches that are producing fruit.

Pruning away branches that begin growing downwards is important, especially those that have a habit of growing close to the trunk. This does a couple of things.First, it takes stress off the other branches and the tree in general. It also helps increase airflow throughout the tree. This helps reduce the possibility of fungi and other health issues that can occur due to excess humidity. 

Lime Trees Grow Fast And Easy

Green limes on a tree, Fresh lime citrus fruit high vitamin C in the garden farm agricultural with nature green blur background at summer

Lime trees are another popular indoor fruit tree, and they’re easy to graft to get a kickstart on your own! A lot of potted lime trees are also called ‘porch limes,’  because you can take them outside (or set them on the porch) when it’s warm out to increase fruit yields.

Indoor lime trees typically take a few years to grow fruit, although you can speed this up if you take them outside during the summer.

Keep in mind that, like with any other fruit tree, the time until you can harvest fruit depends on not only the variety, but also the age you buy it at, or the method of propagation.

Sometimes you can even buy a tree at a nursery that’s already fruiting, or close to the age to produce fruit. Most porch limes grow to about 6 feet tall. Regular lime trees can reach 12 feet or taller, so it’s important to make sure you select a dwarf lime tree. 

How To Care For Lime Trees Indoors

As a disclaimer, the specific details of limes trees’ care can vary slightly depending on the variety. This follows for pretty much any other fruit tree: while certain types of fruit trees have general guidelines for care, the specifics can and will vary depending on the exact variety you get.

Lime trees, as another member of the citrus family, need very similar care to that of lemon trees. 65 degrees is a good average temperature for them indoors, and it’s best to lower the temperature by around 10 degrees at night. Lime trees need plenty of sunlight, and ideally six hours of sun every day. You can read about 7 Reasons Why Lime Trees Grow Best in Full Sun.

Make sure your planter drains well, as lime trees do best with well-draining soil. These aren’t indoor fruit trees that need to be watered every day. As long as you give them a deep watering, you can limit it to once or twice a week. 

Olive Trees Are Quick & Easy To Grow

You might be surprised to learn that not only can you grow your own olive trees, but you can also grow them indoors! Olive trees seem like an exotic option, which makes them even more fun to grow in your home. In fact, if you live in an area with a variable climate, it’s better to grow them indoors than outside. 

Olive trees can produce fruit even faster when grown indoors- sometimes they take as little as a year!

While you won’t want to grow a full-size olive tree indoors (they can reach 30 feet tall!), a dwarf variety will only grow to around 5 or 6 feet and is a perfect indoor fixture. 

How To Care For Olive Trees

Like most indoor fruit trees, olive trees need plenty of sunlight. Olive trees by nature are very ‘light hungry,’ so the more direct light you can give them, the better. Learn more about the main reasons why olives grow best in full sun to make sure you place your olive tree in the right spot in your home!

You should also take care to provide them with plenty of water, but make sure the container you plant them in drains efficiently. Keep the soil slightly moist, and water your olive trees early if you notice the soil is dry. 

Prune olive trees as needed to maintain their shape and keep extra branches from weighing down the tree. You can also prune some branches to allow the tree to produce a better harvest for the next season. Take a look at some of the reasons to prune olive trees in pots, if you are interested in learning more!

Calamondin Orange Trees Grow Easier And Faster Than Other Orange Trees

Calamondin Viva Verde, Citrus Madurensis citrus hybrid predominantly. Small citrus fruit for foods and drinks. Southeast Asian cuisine. Concept My garden

Why not simply say ‘orange trees’? Well, calamondin orange trees are a special type of citrus. Calamondin oranges resemble the fruit you’re familiar with, but with a special twist. 

They’re kind of like a mix between tangerines, kumquats, and mandarin oranges. Plus, they’re easier to peel since they have thinner skin than many other citrus fruits.At their full height, they’ll reach about 7 feet at most, and can produce fruit as early as two years. Calamondin orange trees also produce fruit nearly all year, especially when kept inside. 

With all this said, there’s an extensive study on mandarin trees (closely related to calamondin orange trees), from The Journal of Horticultural Study, and the effects of various factors affecting growth and fruit production when grown indoors. 

How To Care For Calamondin Orange Trees

These are a very cold hardy type of fruit tree, so they’ll easily adapt to any conditions within your home. They can even handle an environment of mostly shade. However, if you want to harvest more fruit, it’s better to give them full sun when possible. 

These trees need intermittent watering, although it’s very important not to over-water calamondin orange trees. 

These trees also don’t need heavy fertilization; a weakened solution a couple of times per year is good maintenance for growing them indoors. You can also check out the 4 Most Common Places Orange Trees Grow, as a reference of where you might want to plant.

Geez, Do Nectarine Trees Grow Quickly!

Ripe nectarine fruit on branch summer background

Nectarines are a favorite among stone fruits. With a sweet and tangy flavor, they’re a refreshing treat in any season. However, you might not always be able to find them in the produce section. The good news is that you can grow dwarf nectarine trees indoors, and still get the fruit of the same size. 

Dwarf nectarine trees only reach about 5 or 6 feet at maturity, making them exceptionally manageable. 

If you choose to grow them from the seed, or pit, it can take around 3 to 4 years before they bear fruit. However, if you want a more established tree (which will produce fruit faster), you can buy a juvenile tree from your local nursery.

How To Care For Nectarine Trees

Nectarine trees love plenty of water, and they’ll certainly use a lot of it. Just make sure that you’re not letting them sit in over-watered soil. That’s why you need to make sure the soil (and planter) drains well. 

Nectarine trees, whether they’re a dwarf variety or not, need a lot of sun. At the very least, you need to make sure they get at least 6 hours of direct sunlight every day. 

The good news is, that like some other stone fruit trees, you only need to fertilize nectarine trees once a year or so. It’s also a good idea to get a variety that is self-pollinating. Otherwise, you can pollinate flowers by hand using a small, soft paintbrush. 

Apricot Trees Are Simple And Fast To Grow

ripe apricots hanging on branch with green blurred background

Most stone fruit trees, including apricots, nectarines, and peaches, have many of the same requirements and needs. While there are subtle differences when it comes to fruit and care, there are more similarities than not.

If you grow apricot trees from seed, it can take 3 to 4 years to bear fruit, although grafted trees can produce much sooner. At the very tallest, these trees reach 6’ tall, as long as you select a dwarf variety. Much like with nectarine trees, it’s better to select a self-fertile variety to ensure you get fruit without having to hand pollinate.

Once your tree is established, it’s fairly easy to harvest fruit for long stretches of time without many breaks in between (since you’ll grow it in a consistent climate, there’s little to tell the tree to take a break from producing fruit). 

How To Care For Apricot Trees

When you read the requirements for taking care of nectarine trees, it’s nearly the same instructions you should follow for apricot trees. 

It’s best to plant them near a south-facing window where they’re more likely to receive at least 6, or ideally 8, hours of direct sunlight daily. 

Keep the soil moist, but be careful of overwatering, which can cause root rot in the long term. Much like nectarine trees, they only need thorough fertilizing about once a year. 

Fig Trees Grow Fast Inside Your House

Fresh Figs fruit  hanging on the branch of tree

Fig trees are a type of ficus tree, which means that there are tons of varieties. Fortunately, there are plenty of different fig trees that are especially well suited to growing indoors.  A lot of people like to grow Audrey, Weeping, and Fiddle leaf varieties. But, like the other indoor fruit trees on our list, it’s important to make sure you select a dwarf variety.

After planting from seed, most varieties of fig trees take around 3 to 5 years to bear fruit, although some varieties can develop fruit much more quickly or slowly. Just make sure you check the details on the variety you plant to grow. Like many other types of indoor fruit trees, you can hasten the time before you harvest your figs by purchasing a growing fig tree from a nursery or grafting a tree

Fig trees, unlike many other fruit trees, can be controlled in size mainly by pruning. With that said, certain varieties do grow more vigorously than others and can reach up to 10 feet indoors without regular pruning. However, if you do keep up with pruning, you can keep them around 6 feet tall.

How To Care For Fig Trees

As we just mentioned, pruning is a huge part of caring for fig trees, and for keeping them manageable within your home. If you do need to re-pot your fig tree because of size, you’re going to need to do something you may find unusual, which is cutting roots.

Typically, you don’t want to cut the roots on trees, but when repotting fig trees you may need to cut a quarter of the root mass to maintain size. 

Fig trees like somewhat moist soil, but too much water (that won’t drain away) can be extremely bad for their health. They do like more humid environments, and unlike many other indoor fruit trees, they aren’t too picky about how much direct sunlight they get.

Fig trees do need some direct sunlight throughout the day, although, as long as they get plenty of indirect sunlight they can still thrive. We’ve shared 13 Tips For Planting a Fig Tree, that can help you along this journey!

Using a tailored fertilizer, like this Fiddle Leaf Tree Fertilizer from Aquatic Arts is a good way to ensure your fig tree can produce as much fruit as possible. You can use this every six months to promote optimal production. 

Ground Cherries Won’t Leave You Waiting Long For Fruit

A unique plant that all parts harmony with greenish. Showing the calyx which beautiful margenta pattern, covered fruit inside.

If you’re not familiar with the term ground cherries, you might know this fruit by the term Cape gooseberries. Whatever name you know them by, these fruits are the same thing, and just as easy to grow on your own- at home.

Still not sure what we’re talking about? Ground cherries go by many names: Cape gooseberries, poha berries, husk tomatoes, and sweet tomatillos. In any case, the best way to describe their flavor is by combining the zing of citrus, the tang of pineapple, and the upper sweet notes of strawberry.

These plants typically grow to a rather manageable four feet tall, which is a bonus if you don’t have the room to grow some of the other fruit trees on our list that top out at six or seven feet. There are plenty of different varieties to choose from, and most carry similar flavors and have equally similar requirements.

How To Care For Ground Cherries Inside

At a minimum, these small fruit plants need a planter that’s at least 10 inches in diameter, although you may need to replant them as they grow larger. In many ways, ground cherries (cape gooseberries) are much easier than other fruit trees.

You seldom, if ever, need to fertilize them and simply need to provide them with plenty of sunshine. These plants need full sun and then some- meaning that 6-10 hours of direct sunlight is ideal. There are 6 Reasons Why Cherry Trees Grow Best in Full Sun.

Cape gooseberries aren’t even picky about their soil, so you don’t need to purchase expensive planting soil from your local plant store. In fact, they absolutely thrive in soil that’s difficult for other fruit-bearing trees to survive. That means that sand, gravel, and even some clay are tolerable, so long as it drains well. 

While they like plenty of water, be careful not to overdo it. If the soil gets too dry, it’ll go dormant. If they are left standing in water, they risk developing root rot. This means you may need to water them daily, although in smaller amounts. You just want to give your plants as much as they can use. This also depends on the season: when your plants are getting more light, they will also need more water. When sunlight diminishes, you can step back on your watering routine a little bit. 

Mulberry Bushes Grow Easily And Fast

Close up of mulberries (Morus nigra) hanging in clusters on a bush ready to be harvested.

While technically not a tree, mulberry bushes are a dwarf variant of the ever-popular mulberry tree. They’re fairly easy to grow indoors, and once they start producing fruit, the harvests can be prolific.

It takes only a couple of years to start seeing fruit, although this can be much less if you purchase your plant as a juvenile from a nursery.

Note: once your mulberry bush does begin producing fruit, you may want to put a tarp underneath the plant if you can’t harvest ripe fruits daily. Another benefit of growing mulberries indoors is that you don’t have to worry about birds and wildlife taking a large part of your harvest.

How To Care For Indoor Mulberry Bushes

Much like outdoor, regular varieties of mulberry bushes, these plants do best with full sun. Sure, they’ll still bear fruit with partial sun, but they won’t produce as much fruit, and the quality will be diminished. 

Mulberry bushes also need plenty of fertilizer, so it’s a good idea to add compost to the soil before you plant them. You should also fertilize them a couple of times a year with a fertilizer like the TreeHelp Premium Fertilizer for Mulberry.

Since many of the dwarf varieties only grow to about 6 feet tall, you don’t need much space, although you do need a large enough planter. You can also prune the tree to maintain shape and size, and enhance productivity for the coming season.

Other Important Notes 

Indoor fruit trees have a long and storied past, as you can explore further in the publication from Kocaeli University, by Gundogdu and Demirarslan

These are often seen as a luxury when in reality, they simply need proper care. In fact, many times, they need the proper temperatures and proper amounts of sunlight. Of course, pollination is an important part of the fruiting process, so you will need to select self-pollinating varieties, or be prepared to hand-pollinate them yourself.

Another important note is to consider something which nearly every indoor fruit tree needs, the provision of well-draining soil. After that, you can enjoy a bountiful harvest, right from within your home!

References

Atkinson, R. E. (1972). Dwarf fruit trees indoors and outdoors.

DEMIRARSLAN, S. G. D. (2021). INDOOR PLANTS: THEIR USE AND IMPORTANCE. Housing Architecture and Design From the Past to the Future, 405.

Yahata, D., Oba, Y., Kuwahara, M., & Matsumoto, K. (1995). Effects of crop load on water stress, fruit quality, yield and flower bud formation on root-restricted wase satsuma mandarin trees grown indoors. Journal of the Japanese Society for Horticultural Science, 63(4), 745-752.

Mango trees have long lifespans, can grow quite tall, and provide so much more than just their fruit- the delicious mango. If you are considering planting a tree, this might just be the one for you. What does the timeline look like, though?

It takes mango trees 4 to 8 years to begin producing fruit. Fruit will come in on the faster end of the spectrum if the mango trees are planted as saplings. Plant a mango seed, and it may take up to 10 years to start seeing your work come to fruition.

Let’s walk through the full timeline of a mango tree’s life so that you know exactly what to expect as you grow your tree.

We’ll also cover some tips about how to ensure that your tree grows fast, produces good fruit, and stays protected from pests and disease. Follow along for a while to find out all of the basics!

What is a Mango?

close up of mango fruit on a mango tree

The mango is an edible stone fruit that can range in its exterior color, from yellow to red, orange to purple, and green when not yet ripe.

The interior tends to be a yellow-orange color and there is a stone, or pit, located right in the center of the fruit- from which many new trees can grow.

According to the University of Hawaii at Manoa’s College of Tropical Agriculture & HR, there are over 1,000 species of mangoes, over half of which are located in India. 

Often seen as an addition to salsas, smoothies, or main dishes, and even eaten alone, mangoes are a popular, well-loved fruit around the world. This versatile fruit grows in warm locations, but where exactly can you expect to see a mango tree thrive?

What is a Stone Fruit?

A stone fruit, as you might be guessing, contains a stone, or a pit, in the middle of the edible fleshy part. 

The stone itself is not the seed but is home to it. You have to cut open the pit in order to get to the seed that you can plant. Otherwise, you’ll have put a mango pit in the ground, and might wonder why on earth nothing ever grows from it.

Apricots, cherries, dates, nectarines, and plums are all other examples of stone fruits, which follow a similar planting process.

Where do Mangoes Grow?

According to the USDA’s Wisconsin Department of Public Instruction, mangoes originated in India, which makes sense as this is the most mango-dense location in the world.

The trees made their way across Southeast Asia as Buddhism spread and people migrated with the fruit, planting new trees across the continent. 

Today, Asia still grows the majority of the world’s mangoes. However, the majority of mangoes you’ll find in stores are from South America, Mexico, Haiti, and Florida.

Florida, California, Arizona, and parts of Southern Alabama are the main United States regions where mango trees will thrive in. However, there are also conditions in other warm areas that can be considered tropical and will sustain mango tree growth and production.

How Quickly Does A Mango Tree Grow?

mango tree and mango garden,mango  tree

It takes a mango tree some time to fully mature, but there are many milestones that we can use to track the different stages of the tree’s life up until that point.

Growth rates will also depend on how your tree began its life, either as a seed (the pit of the mango) or as a sapling (a cutting from another tree, most often.)

A mango tree will take only 4-10 years to begin producing fruit as a stable and maturing tree.

Sometimes, Fruit Can Start Growing Even Quicker!

In some cases of quick growth, and when planted as a sapling, we might even see fruit as early as year 3, although, this is an outlier.

You might be wondering why the difference in the fruit production timeline is about 2-6 years, and it really depends on the way your tree was planted.

Well, trees that are grafted from already-mature trees will not have to do nearly as much work to establish themselves in an environment, which means they can direct more energy toward creating fruit, earlier on in life.

These versatile, flexible trees do well when given a little extra time, attention, and care. So, let’s dive into the timeline you will be following as your tree matures and begins to eventually bear the fruit that you are so patiently waiting for.

Day 1: Finding The Right Mango Seed (or Sapling)

The very first day of our timeline includes finding a seed to plant. You could, of course, also start your growing process with a sapling.

This simply depends on your preference, timeline, and familiarity with plants.

If you decide to begin with a seed, this can be as simple as keeping the pit of a mango you’ve eaten. Ideally, you want to know the specific variety to best care for your new plant, if possible.

Don’t forget that, as a stone fruit, you have to cut the pit open to retrieve the seed that you will plant.

Steps for Planting a Mango Seed

  1. Cut open your mango to access the stone, AKA the pit.
  2. Clean the pit until you can see that the husk does not have much extra mango left on it.
  3. Use some heavy-duty scissors to cut the pit open.
  4. Squeeze the mango seed out of the husk of the pit.
  5. Clean any extra coating off the seed, if you see residue.
  6. Use a wet paper towel to wrap around your seed. Place it in a bag until the seed sprouts. Check the bag often, to avoid waiting too long to retrieve the sprout.
  7. Plant the seed in potting soil. 
  8. Watch your mango tree begin to grow.
  9. Eventually, re-pot the mango tree as it grows. If you want, you will eventually place the tree directly in the ground.

Mango seeds should germinate in 2-4 weeks. So, by that stage, you should see some sprouting happen. If you don’t see this by 4-5 weeks, it may be that your seed just isn’t viable. That isn’t necessarily your fault, though – sometimes these things just happen. 

For that reason, we recommend following the steps above with a few different mango seeds, to ensure that at least one sprouts and is viable.

Day 1 – Day 90: Planting a Mango Seed

Eventually, as the seed sprouts, roots grow thicker, and your stem has some leaves, your seed is ready to be officially planted.

Begin by placing your seedling into a pot of soil that is able to drain well. You want your roots covered and will choose a small pot first before you can size up down the road.

You can also plant a sprouted mango seed directly outdoors if you want the plant to begin in the place where it will ultimately mature and spend its life. In this case, you’ll want to ensure that there are about 3-4 inches of soil covering the entire root area.

April Through June Is The Best Time To Plant A Mango Tree

April through June is the best time of year to plant your seedling, as this will give it the most time to establish itself before winter hits.

This holds true whether your seedling is potted indoors or outdoors. There are many aspects of winter weather that do not lend to the best progress for newly-planted seeds.

Where to Plant your Mango Seed

Mango trees can thrive in a variety of soils but prefer those that are loamy, moist, and well-drained. They need to be in environments that are generally tropical or sub-tropical. One main component to keep in mind is that a place should have a very low chance of frost.

If you are based in the United States and want to find the best region to plant mango trees, or want to check whether your region is suitable, you can utilize the USDA Plant Hardiness Zone map.

The USDA hardiness zone that mango trees will do best in ranges from zones 9-11.

The Early Months – Year 1: Watching your Mango Tree Grow

Tropical ripe yellow mango fruit hanging on tree branch with beautiful farm and sunlight on background. Mango product and Dessert concept.

The first year is going to be a relatively vulnerable period for your mango tree as a seedling, so watch for any potential lulls in growth.

If you’ve planted as a sapling, you can bypass this more delicate step and watch your tree begin to grow larger more quickly.

There is always a risk with a young tree, regardless of how you’ve chosen to plant it. This is why monitoring your tree is important at all stages. You might consider this, though, as you determine how much risk you want to take on.

Planting In A Pot First Is Recommended

While you can plant directly outdoors, we recommend keeping your seedling or sapling in a pot at this early stage.

Unless you deem it large enough or strong enough to transplant outdoors, utilizing the control that you have over a potted mango tree will help it thrive during its early stage of life.

Year 2 – Year 3: Focusing on Sustaining a Healthy Tree

At this point, regardless of what stage you planted at, you will be dealing with a sapling in one stage or another. So, we will refer to your mango tree as a sapling only, in this section. 

During the first few years, if you choose to transplant your tree, you may see some changes in growth.

This is normal, and there are certainly more environmental factors to consider when growing an outdoor tree as opposed to a potted, indoor tree. 

Differences Between Indoor and Outdoor Growth

Indoors, you will have the chance to provide a climate-controlled experience for your sapling.

You can maintain a warm and slightly humid environment year-round, as long as you don’t mind your home feeling that way.

There is also the ability to keep your tree in the sunlight without being overexposed at any point.

Outdoors May Be Harder To Control

Outdoors, the air may be a bit drier (or too humid) for your tree at times, the sun may feel just a bit too bright, or there might not be quite as much even sunlight as there had been in front of a certain window indoors.

If you take a tree out of an extremely controlled climate, it might take some time to get re-established in a slightly more volatile growing environment.

If your region is in the growing zones, you shouldn’t see too many differences, but you do want to be prepared for a period of slowed progress as the mango tree adapts.

How to Transplant your Mango Tree Sapling

Transplanting a mango tree should be an easy process, but there are a few things to consider to set your tree up for success.

Follow these steps to ensure that you correctly transplant your mango tree, if you choose to do so:

  • Location is key! Make sure that the tree gets lots of even, direct sunlight.
  • Dig a hole that can fit your roots, and remember that at least 3-4 inches of dirt should cover them at all times. Fill in any cracks in the dirt, to ensure an even coating.
  • Water and fertilize your tree to help it acclimate to its new growing location.

Year 4 – Year 8: Mango Production Begins

Once your tree hits a certain stage of maturity and is established in whichever location you intend to keep it for the majority of its lifespan, it should be smooth sailing. Again, this period of time, years 4-8, will look different depending on how your tree was first planted.

While a tree that was planted from the seed may still be focusing the majority of its energy on growing taller and wider, one that was grafted and planted as a sapling will now be able to switch to producing fruit with some of its energy. 

This is the earliest that you will likely see mango being produced, and your first year or two of fruit may not be the best that you ever get. Don’t worry! Over time, your tree will find its groove, and so will you.

Year 9 – Year 10: Delayed Mango Production Begins

Remember, if you’ve planted your mango tree from a seed, you might not see any fruit produced until you hit year 9 or 10.

This is because your tree has to spend its first few years growing into a sapling and then learning to sustain itself. This is, of course, as opposed to a sapling that has already gone through that initial growth, or was grafted from a mature tree, and can start growing fruit for you earlier on. 

In the same way as a tree that begins producing fruit during years 4-8, you’ll want to help your tree maintain its basic health so that you can get the best, and highest quantity of mangoes.

The First Few Years Is Important For Tweaking

Regardless of the planting method, you should be seeing fruit during this stage of your mango tree’s life.

Use these first years of fruit production to learn what works and tweak the maintenance of your tree.

This will help you, and your tree, down the road as it continues to grow and produce mangoes.

Year 11 – Year 100 (and Beyond): A Mature Mango Tree Produces Fruit

Green mango picking on mango tree. Men picking stole mango on his hand.

Mango trees may produce fruit for 40+ years after they begin, but there is potential for your tree to produce fruit for decades longer than that when properly maintained and cared for, in fact, we have a whole article dedicated to a mango tree’s lifespan that’s a must-read!

One way to give your mango tree the extra boost to produce fruit for longer? Fertilizing!

We’ll talk about this more below, but fertilizer is always a good way to go when looking to sustain a tree and its production levels.

Just Make Sure To Not Overfertilize

Keep in mind that overfertilizing can lead to a similar lack in production as overfertilizing, so consulting an expert is recommended.

As a mango tree gets older, it may slowly start declining in its production or there could be a more sudden end to the mango growth.

Overall, this period of maturity and production in your mango tree should be relatively easy when it comes to maintenance.

Is It Better To Grow a Mango Tree From a Seedling or From a Sapling?

This one is ultimately dependent on preference, related to how you want to grow your tree and what you want to get out of it.

There are pros and cons to both routes, and your environment will play a big role in choosing, as will the species of the mango tree that you have decided to grow.

If you want fruit sooner, maybe you opt for a sapling. If your preference is to grow from the very beginning of it all, a seed may be your choice. 

Ultimately, both styles of growing a mango tree have their place. If you are unsure what might work best for you, talk to a professional and get some advice. For example, you could stop in at your local nursery – they are there to help you.

Can Mangoes Be Grown Solely in Pots?

In short, yes. Mango trees can be grown solely in pots. You can always transplant saplings from pots to the ground outdoors, but you don’t always have to.

Clay pots tend to be best, and you can always bank on starting off with something like these 6-Inch Clay Pots that come with saucers to promote good drainage.

With over 1,000 varieties of mango trees, many of them dwarf species, quite a few mango trees actually thrive in pots.

Make Sure The Roots Breathe

These pots can be located indoors and sustained as houseplants when given proper light. They can also do well on a patio or balcony, in many locations. 

If you choose to grow your mango tree in a container, make sure to choose one that allows the roots some room to breathe.

Don’t be afraid to size up as necessary, either. This will help ensure that your tree does not begin to lose its source of nutrients and that it will continue to bear delicious, plentiful fruits.

Keeping your Mango Tree Healthy

Remember, mango trees to best in the tropical climates that they have originated from.

Make sure to grow your mango tree in a warm, sunny area with low rainfall and low relative humidity. This especially makes a difference during the period of time that your tree is growing in the pot, and becoming large enough to transplant to your outdoor space.

You should live in an area that is warm, sunny, and overall tropical enough to sustain your mango tree.

Make Sure You Have A Suitable Environment

If you begin the growth in an indoor pot, you could eventually transplant the mango tree in a suitable climate.

Pay attention to how well your soil drains, because your tree needs to be watered regularly but will do best with soil that stays dry for the most part.

If your goal is to sustain a fuller appearance of your tree, you can prune it, make sure that it receives even sunlight, and fertilize it once in a while.

DR EARTH Natural Wonder Fruit Tree 5-2-2 Fertilizer is a great way to help maintain the health and aesthetics of your mango tree.

We Have to Man-Go Now

Okay, that might not have been our best pun, but we do need to wrap it up! We hope that this timeline helps you as you work to understand the early life and growth of a mango tree. 

As a reminder, the timeline looks like this:

  • Day 1
    • Pick your mango seed or sapling
  • Year 1
    • Plant your mango tree and watch it grow
  • Years 2-3
    • Sustain the early growth of your mango tree
  • Years 4-8
    • Fruit production begins, when planted from a sapling
  • Years 9-10
    • Fruit production begins, when planted from a seed
  • Years 11-100 (and Beyond)
    • Your mango tree is mature, produces fruit, and needs to be maintained

The process can be a fun and exciting one, no matter whether you have started from a seed or a sapling. It doesn’t even matter if you have much experience growing trees. We know that you’ll enjoy your mangoes a little way down the road.

Happy growing! Remember, we are here to support you along your tree journey as best as we can. We sincerely thank you for trusting us to be a part of the journey. 

Until next time!

References

Boudon, F., Persello, S., Jestin, A., Briand, A. S., Grechi, I., Fernique, P., … & Normand, F. (2020). V-Mango: a functional–structural model of mango tree growth, development and fruit production. Annals of Botany, 126(4), 745-763.

Lakshminarayana, S., Subhadra, N. V., & Subramanyam, H. (1970). Some aspects of developmental physiology of the mango fruit. Journal of Horticultural Science, 45(2), 133-142.

Legave, J. M., Normand, F., & Lauri, P. E. (2013, June). Climate change and its probable effects on mango production and cultivation. In X International Mango Symposium 1075 (pp. 21-31).

Mulberry trees are beautiful in and of themselves, although for most people, there’s another reason to grow one. Of course, that would be the mulberries from which the tree gets its name. You may however be wondering, how long does it take until a mulberry tree grows to produce fruit?

Mulberry trees purchased from a nursery can produce fruit in as little as 2 to 3 years. However, other mulberry trees, namely those grown from seed, can take between 5 to 10 years to produce fruit.

With that said, the time to produce fruit can also depend on the specific variety of mulberry trees you choose to grow. Coming up, we’re going to review everything you need to know about estimating your tree’s time to fruit, and how to care for it best so that it produces a good harvest.

Remember, if you are unsure about the fruit of a mulberry tree, if your tree is a mulberry tree, or if you have any questions about planting one – we recommend contacting a professional.

What Are Mulberries?

Mulberry trees might be a staple in some yards, but mulberries aren’t typically something you’ll find in your supermarket’s produce section. However, if you’re lucky, you might be able to find them at your local farmer’s market or a smaller family-owned store.

Mulberries look a lot like blackberries once they’re ready for harvest. And, like blackberries, when fully ripened, they have a sweet and aromatic taste.

Likewise, if mulberries are picked before they’re ready, they still have that distinct flavor but are a little more tart.

What Affects The Mulberries From Growing?

Black and red mulberries on the branch of tree.Fresh mulberry.

Next up, we’re going to talk about why it’s difficult to give an exact timeline for when any given mulberry tree will produce fruit. While if you purchase your tree from a nursery, they may give you different answers, the important thing to remember is that the variety, method of propagation, and growing conditions affect that timeline.

These are all really nuanced factors, of course, and unless you’re a specialist, you might be guessing and waiting for mulberry fruit for years.

However, during the time in which you’re waiting for that fruit to appear, the best thing you can do is provide your tree with the ideal growing conditions. And if you’re wondering, yes, we’ll be going into details about that in this guide as well.

Mulberry Tree Varieties Can Affect The Growth

Just like any other tree, there are certain varieties of the mulberry tree that grow faster or slower than others.

With 64 variations (so far identified) as you might imagine, covering every single one of these species and their estimated time to grow fruit would be incredibly tedious (and it would be a huge pain for you to find the information you need).

So let’s cover some common examples! And if you’re not sure, contact the nursery or grower that you’re buying your mulberry tree from for more info.

  • Red Mulberry – as little as four years, as many as ten years.
  • Everbearing varieties (this does include many species) – can begin fruiting in as little as two to three years, and continue production

Note: many of the mulberry varieties still often take at least five years to begin blooming and producing fruit.

Method Of Propagation Affects The Growth

There’s nothing wrong with growing plants, and trees especially, from seed. However, if you choose to use this method, be prepared to wait a little longer to see your trees reach an age that’s advanced enough for them to begin flowering and fruiting.

If you want to get mulberries faster, plant a tree that’s already been growing in a nursery, or start your tree from a cutting.

Planting from seed may be more economical, but it can also add a couple of years onto the timeline for when you can expect to harvest fruit. Likewise, if you get a young tree from a nursery, you can get a mulberry harvest a few years earlier.

So, When Do Mulberries Appear?

If you’re lucky enough to have a mulberry tree that’s already producing fruit or is due to produce fruit soon, you’re probably wondering when to expect your crop.

Mulberries start appearing on trees in June, and harvesting usually lasts at least a month, even extending through August.

Keep in mind that this is just a general guide for any mulberry tree’s timeline. The actual harvest time can vary depending on the variety of mulberry trees you grow, and your USDA Growing Zone.

How Many Mulberries Will A Tree Produce?

Mulberry trees are known for their fruits and the impressive quantity of them that they can produce.

Once you start seeing a few mulberries, there is a bounty of them that will follow soon after. In fact, a single mulberry tree will produce over 10 pounds of mulberries in one season, and continue to significantly up the count from there.

The harvests tend to be so large that manual picking isn’t necessary for gathering much of the berries. Some people even leave containers or tarps below the trees to catch the excess fruits.

However, the number of mulberries available for harvest may be impacted by birds! Let’s talk about that below.

Wildlife May Eat Your Mulberries

The gray catbird (Dumetella carolinensis) on mulberry tree.

Mulberry trees take a pretty long time before they produce fruit, so you’ll be understandably frustrated if wildlife is taking some of your hard-earned berries.

What can you do about wildlife and birds eating your mulberries? Unfortunately, there’s not much you can do, but there’s good news. Even if birds eat a ton of mulberries, there’s still going to be plenty left for you.

If you want to protect your hoard, one of the best things you can do is harvest as soon as the mulberries are ready. With that being said, birds aren’t above taking the berries before they’re fully ripened.

And although wildlife eating your mulberries isn’t pleasant, when birds eat your mulberries, according to the Ecological Society of America, wildlife actually contributes to the seed distribution of the species, according to this publication from

How To Stop Birds From Eating Your Mulberries

Here are some things you can try to reduce the number of berries bird’s eat:

  • Using nets – this is basically a net that covers the entire tree. While it isn’t the most attractive solution, birds can’t get into the tree to take more berries. We recommend using the Agfabric Garden Insect Netting Plant Cover. It may be marketed to prevent insects, but it’ll keep birds away too. Not only that, but it’s also big enough for fully matured trees, and it has a zipper to make harvesting easy for you.
  • Predatory bird decoys – set up a hawk, owl, or another predatory bird decoy to scare birds off. Some of these even move and have motion-triggered sounds.
  • Use a decoy crop (or food) – while mulberry trees are often decoy crops themselves, you can plant other decoy crops to attract birds elsewhere. Likewise, you can leave bird food out to try and keep them from your tree.
  • Try sound repellents – these aren’t a proven solution, but they’re worth a try. They produce noise at high frequencies that disturb birds and other small creatures.

For more information on how to keep birds away from your trees, head on over to our article on our sister site PestPointers on how to deter birds using sounds such as windchimes!

What Do Mulberry Trees Need To Grow?

Mulberry trees are great producers if you’re looking for a harvest. However, without the proper growing conditions, you can’t hope to get a good yield.

What do mulberry trees need to grow? Don’t worry, we’re about to cover the most crucial requirements for a healthy, well-performing mulberry tree.

Well Drained Soil Is A Must

Mulberry trees aren’t incredibly picky about their soil conditions. You can even plant them in soil that’s too poor for other plants and trees. However, there is one aspect you can’t neglect:

Mulberry trees need well-drained soil to grow. This means that you should be able to deeply water the soil, and there shouldn’t be any standing water when you’re done.

While these trees do best in slightly acidic soil, they also tolerate neutral soil, as long the pH doesn’t vary too greatly. You can even grow mulberry trees in sandy soil, or soil with a larger clay composition.

Full Or Partial Sun Is Needed

Another nice thing about mulberry trees is they do well in either full sun or partial sun. So, if you don’t have a place that gets a full six hours of intense sunlight (or more), you can still grow a mulberry tree. Just make sure the tree does get at least four full hours of direct sunlight every day.

With that said, we should also mention that it’s ideal to ensure your mulberry tree gets full sun. It’s not a requirement, however, and you’ll still be able to harvest mulberries when your tree is ready.

The more sun you can give your mulberry tree, the better the quantity and quality of your berry yield will be once it’s time to harvest.

Mulberry Trees Need Adequate Water

Even though mulberry trees like well-draining soil, that doesn’t mean they don’t like plenty of water. Their water requirements work much like their sunlight requirements.

More water is ideal, although mature mulberry trees are hardy enough to tolerate drought within reason.

When you water young mulberry trees, giving them enough water is even more important. It’s a vital stage of their growth, so make sure you don’t let the soil completely dry out. As a general guideline, a young mulberry tree should be getting at least a few gallons of water weekly.

However, if you notice that the soil is drying out even after watering a few gallons, that’s a sign that you need to provide your tree with more water.

Fertilizer Can Be Necessary

Mulberry trees can handle different soils, even with poor nutrient content – but that doesn’t mean that they should.

This is just like water and full sun; the more you put into your tree, the more you’ll get out of your harvest, and you may need to consider a fertilizer if your tree is lacking.

Mulberry trees prefer higher levels of nitrogen, potassium, and phosphorus. Ideally, in equal amounts. For instance, it’s a good idea to look for a fertilizer with an NPK formula that shows equal, or close to equal numbers for each of the main nutrients (ex: 5-5-5, or 6-5-6).

If you’re searching for a good fertilizer to use with mulberry trees, try TreeHelp Premium Fertilizer for Mulberry Trees.

Should You Prune Mulberry Trees?

Organic Mulberry fruit tree and green leaves. mulberries on the branch of tree. fresh mulberry provides fiber and nutrients highly beneficial.

If you have any kind of tree, you know that pruning trees are a pretty regular part of maintenance. A lot of people do at least some kind of light pruning on their trees annually. Sure, you’re thinking, that’s obvious. And it is- for many kinds of trees.

Mulberry trees still need to be pruned. However, they do tend to need longer healing periods after they’re pruned. When you prune your mulberry tree, do it very carefully, and only make small cuts where necessary.

Unless there’s damage, only prune your mulberry tree every few years. And don’t take more than a handful of branches, unless you need to for the health of the rest of the tree.

When Should You Prune Mulberry Trees?

Aside from the recommended two to three years, there are other things you should pay attention to when you decide when to prune your mulberry tree.

A lot of people prune other trees in the spring. That’s pretty normal. However, because mulberry trees are so sensitive, you need to be very careful about the cuts you make, and winter is ideal!

If not in winter, autumn is a good time. You won’t have to worry about leaves obstructing your view. Not only that, but because the tree is dormant, it’s healthier for the tree too.

How To Plant A Mulberry Tree

However, if you decide to grow a mulberry tree (whether from a seed, a cutting, or if you purchase one from a nursery) there are some key things you need to know when you start to plant it.

  • Make sure the soil in the area drains well, has a decent amount of nutrients, and gets full sun (if possible).
  • Mulberry trees have very extensive root systems. Make sure you give your mulberry tree at least 25 feet of space. If you can give your tree more, then all the better.
  • In many cases (and growing zones), planting in early spring is a perfectly acceptable time to plant. If you’re in an area with exceptionally hot summers, planting in autumn is also a good idea. The goal is to plant your tree when there won’t be drastic fluctuations in temperature.

Just make sure that when you plant, there won’t be frost coming anytime soon!

That’s A Wrap!

A mulberry seed can take up to 10 years to grow into a fruit-producing tree. Using a cutting can reduce that by a couple of years. However, if you buy an older tree from a nursery, it could be as little as two or three years.

And remember, giving your tree the ideal conditions will always result in better growth, and ultimately a better yield come harvest time. The care you put into your tree will be repaid by the gallon full when it’s time to harvest your fresh, homegrown mulberries.

Resources

Jiang, Y., Huang, R., Yan, X., Jia, C., Jiang, S., & Long, T. (2017). Mulberry for environmental protection. Pakistan Journal of Botany, 49(2), 781-788.

Stapanian, M. A. (1982). A model for fruiting display: seed dispersal by birds for mulberry trees. Ecology, 63(5), 1432-1443.

Yamashita, T. (1984). Effect of top pruning on stem carbohydrates reserves and foliar 14CO2 assimilation in mulberry trees during autumn. Plant and cell physiology, 25(4), 677-681.

Apple trees are an amazing addition to the yard that provide beautiful spring blossoms, summer shade, and fall fruit harvests. Whether you have an established apple tree or you’re thinking of planting one, you may be wondering what the best apple tree fertilizers are for your needs!

The most important nutrients in apple tree fertilizers are nitrogen, potassium, and calcium. The best apple tree fertilizer types are:

  • General-purpose fertilizer
  • Sulfate of potash (0-0-50)
  • Potash-magnesium (0-0-22)
  • Organic fertilizer
  • Fertilizer spikes
  • Liquid fertilizer
  • Boron (only needed every 3-4 years)

Fertilizers are an important part of keeping your apple tree healthy. Below, we’ll go over the BEST apple tree fertilizers and give you some tips on how (and when) to use them!

How Does Fertilizer Help Apple Trees?

All trees require 16 essential nutrients to grow, produce fruits and flowers, and generally remain healthy. While this is true of all trees, each tree species relies a little more heavily on certain nutrients.

Apple trees require lots and lots of nitrogen, potassium, and calcium. These nutrients are used to create energy that is used to make fruits, flowers, new shoots, and root growth.

As an apple tree uses the nutrients from the soil, they are not always replaced as quickly as they are taken up. That’s where fertilizers come into play. 

Fruit Production Requires A Lot Of Nutrients

Not all trees require fertilizer, but apple trees and fruit trees in general usually need an application of fertilizer once or twice a year.

The reason is fruit production. Growing fruit requires a LOT of energy and nutrients! During the growing season, these nutrients are used faster than they can be replaced.

Fertilizers help replace the nutrients that the apple tree uses so that it can continue to grow and produce fruit without pause.

When there is a lack of nutrients in the soil, apple trees will slow fruit production and focus more on low-energy costs such as shoot growth or leaf production.

Red and green apples growing on an apple tree in the garden. Apples on a branch. concept of harvest, organic is not treated with pesticides apples

Apple Trees Are Nutrient Hogs

Apple trees can be pretty demanding of the environment where they are growing. They have five basic systems that need nutrients:

  • Shoot growth
  • Root growth
  • Flowers
  • Fruit
  • Leaves

All of these systems require nutrients and water to continue growing and to stay healthy.

While almost all trees have the same five systems, apple trees are more demanding than most because they produce such large fruits.

According to Oregon State University, most fruit trees are considered ‘heavy feeders’ that displace a high volume of macronutrients. Macronutrients include nitrogen, phosphorus, and potassium.

Each macronutrient helps the apple tree in different ways. For example, nitrogen is used more for growth while potassium is more involved in resisting pests and hardening off for winter.

As you can see, every nutrient plays a role in the health and fruit production of an apple tree, and these hogs will use every bit of nutrients they can find in the soil!

Apple Trees Must Make A Lot Of Leaves

Apples may be the most important part of the tree for most gardeners, but there’s a lot that goes into an apple tree producing a fresh, ripe apple that isn’t spoiled or sunburnt.

Leaves play a big part in the overall health of an apple tree as well as proper fruit production. To make leaves, apples need nutrients!

Fertilizers help apple trees to fill out and produce plenty of leaves. In turn, these leaves protect ripening apples from getting sunburned.

Yes, fruit can get sunburned!

According to the University of Minnesota, sunburn happens most frequently during hot, sunny weather and is more likely to affect apples on the outside of the tree than the inside. This is because the apples on the inside of the tree are protected by the leaves.

Apple Trees Need Strong Roots

Roots are an important part of every tree. We don’t usually see roots, so sometimes we forget how important they are!

Fertilizers help encourage growth both above and below the soil.

Roots are important to apple trees for a few reasons:

  • Anchor the apple tree in place
  • Stabilize the apple tree so it doesn’t blow over in a storm
  • Absorb water
  • Absorb nutrients

Adding fertilizer to the soil can help roots grow faster, thicker, deeper, and wider so that even when there is a dry spell, the tree will be able to reach a water source.

You must also make sure that your apple tree has PLENTY of sunlight.

Best Fertilizers For Apple Trees

The best way to tell what nutrients your apple tree needs is by doing a soil test. This will not only tell you what the soil is lacking, but it will also tell you the pH of your soil.

For apple trees, you want the soil to be a little bit acidic, around 6-6.5. If your soil pH is higher, you can use something like Bloom City Professional pH Down Liquid Fertilizer to bring the pH down.

If the pH is less than 6, you can apply lime to help bring it up. Check the pH often after applying either lime or an acidifier to make sure you’re in the right pH range.

Once you get the pH figured out, it’s time to move on to fertilizers. 

We’ll go over the specifics below, but you can refer to this table as a general overview of all the different kinds of fertilizers:

COMPARISON OF COMMON APPLE TREE FERTILIZERS

FERTILIZER TYPEWHEN TO USEWHEN NOT TO USENOTES

General Purpose Fertilizers Work Great

Not everyone has the time or funds to take a soil test. Sometimes, you just want to give your apple tree a boost without worrying about specific nutrients.

We totally get it!

That’s where general-purpose fertilizers come in. They are an excellent choice if you’re not sure what kind of soil you have in the yard.

Southern Ag All Purpose Granular Fertilizer has an NPK ratio (%nitrogen, %phosphorous, %potassium) of 10-10-10 which is very typical of all-purpose fertilizers. 

This particular fertilizer comes as granules that look like small pellets. They can be spread around the dripline of your tree.

Follow the directions on the label for the proper amount to apply. This is generally equal to ½ cup for every inch of trunk diameter.

General-purpose fertilizers are great to use when your apple tree isn’t growing as fast as you’d like. According to the University of New Hampshire, any apple tree that grows less than 8 inches per year should be treated with a general-purpose fertilizer.

Potassium Sulfate Works Great For Apple Trees

We’ve established that apple trees benefit from fertilizer, but choosing the right fertilizer can be a tricky topic!

Potassium sulfate is a type of fertilizer that contains both potassium and sulfur that are ready to be absorbed by the tree as soon as it enters the soil.

Unlike general-purpose fertilizers, potassium sulfate should only be used if there is a potassium deficiency in the soil. Potassium sulfate, also called sulfate of potash, has an NPK ratio of 0-0-50, meaning it doesn’t have any nitrogen or phosphorous.

Alpha Chemical’s 5 Pounds – Potassium Sulfate comes as granules that can be applied to the soil around your apple tree to improve potassium and sulfur deficiencies.

There are a few advantages to using potassium sulfate over other potassium fertilizers:

  • Contains less chloride: apple trees, along with many other fruit trees, are sensitive to the chlorides that get added to many other fertilizers.
  • Improves yield: potassium sulfate can help increase the number of apples produced each year and provide firmer apples.
  • Sulfur: sulfur is not as important as the 3 big macronutrients, but it’s considered a secondary nutrient that helps in seed formation and the overall health of apple trees.

Potash-Magnesium Can Work Well On Apple Trees

Potash-magnesium, also known as sul-po-mag, has an NPK ratio of 0-0-22. Again, it contains no nitrogen or phosphorous.

The difference between potash-magnesium and sulfate of potash is that this fertilizer contains magnesium. Like sulfur, magnesium is not as important as the macronutrients but it’s still considered more important than the micronutrients.

Potash-magnesium is another fertilizer that should be used only when there is a deficiency in the soil. However, even if you didn’t get a soil test, there are some tell-tale signs that you need this type of fertilizer:

  • Early fruit drop: This is not uncommon on healthy apple trees, but if premature fruit drop occurs in combination with other signs, it may be because the soil is deficient in magnesium.
  • Tiny fruit: If your apples look more like grapes than apples, there may be a magnesium deficiency.
  • Early ripening: Apples should be ripe enough to pick around September, give or take a month. If your apples appear to ripen in the middle of summer, it may be due to a lack of magnesium.

If you’re noticing any of these signs on your beloved apple tree, it might be time to stock up on some sul-po-mag!

Greenway Biotech’s Sul-Po-Mag 0-0-21.5 Sulfate of Potash Magnesia comes in a 3-pound bag with crystal granules that appear similar to coarse salt.

Read the label and directions for the proper amount to apply to your apple tree.

Organic Fertilizers Can Be Used For Apple Trees

Most of the fertilizers we’ve talked about so far are inorganic, meaning, they’re synthesized in a lab or factory.

Organic fertilizers are made from natural things like plants, animals, and animal waste. They’re a great choice if you want to skip all the synthetic and chemical fertilizers out there and go for a more natural approach.

Down To Earth’s Organic Fruit Tree Fertilizer Mix is designed specifically for fruit trees. It has an NPK ratio of 6-2-4 and comes in a 5lb box made of recycled cardboard.

Some of the ingredients in this fertilizer include natural items like:

  • Feather meal
  • Fish bone meal
  • Calcium carbonate
  • Alfalfa meal
  • Kelp meal

This specific fertilizer also contains calcium and magnesium, two nutrients that are essential to the health of your apple tree.

Fertilizer Spikes Are An Easy Option

Fertilizers can be annoying to deal with. The granules must be spread around the dripline and can be dusty while liquid fertilizers must be added to water.

Fertilizer spikes are probably the simplest of ways to fertilize. You simply place the spikes in the ground and let them slowly dissolve in the soil, providing your apple tree with nutrients over a longer period.

Spikes are a good choice if you’d rather employ a ‘set and forget’ method of fertilizing. Miracle-Gro’s Fruit & Citrus Plant Food Spikes come with 12 spikes. The number of spikes needed will depend on the diameter of your apple tree’s drip line.

For example, an apple tree with a 10-foot diameter drip line will need 7 spikes according to the package directions.

The NPK ratio of these spikes is 15-5-10, which is close to a general-purpose fertilizer but has the added benefit of slowly releasing the nutrients over time instead of a quick burst.

The only time fertilizer spikes are not the best option would be if you have a specific nutrient deficiency or if you want a quick fix. These spikes are meant to be slow-releasing and will not fix a severe nutrient deficiency anytime soon!

Liquid Fertilizer Is A Good Option

Fertilizers come in all sorts of shapes and sizes. Some are in pellet form, others crystal, and still, others come in liquid form.

Liquid fertilizers are meant to be diluted with water and applied to the soil or sometimes directly to the leaves of your apple tree. These types of fertilizers are water soluble, meaning they can be absorbed directly into the tree for a quick boost of nutrients.

Liquid fertilizers are a good choice if you notice a specific nutrient deficiency in your apple tree and want a fertilizer option that will be immediately available to your tree. 

In essence, liquid fertilizers are a “quick fix’”fertilizer.

AgroThrive Fruit and Flower Organic Liquid Fertilizer comes in a 32 oz bottle and has an NPK ratio of 3-3-5. This fertilizer must first be diluted with water before applying it to the soil.

Honorable Mention: You Might Need Boron!

While boron isn’t exactly a fertilizer, it’s worth mentioning that apple trees, specifically, will need a boost of boron once every 3-4 years.

If you’re opening your apples and seeing small, round, brown splotches in the flesh, your apple tree is deficient in boron. To fix this issue, it’s recommended to spread 1 cup of borax every 3-4 years or when you notice brown spots inside your apples.

How And When To Fertilize Your Apple Tree

Knowing how to use your fertilizer is almost as important as choosing the right fertilizer. Most commercial fertilizers will come with directions on the package label, so be sure to give those a look before using them on your apple tree.

According to Clemson University, the main roots that use fertilizer will typically be located in the top 10 to 14 inches of soil. This is a good thing to keep in mind as you do not need the fertilizer to sink deeply into the soil.

Additionally, if you’d like some suggestions, here are some of the easiest apple tree varieties to grow!

Water After Fertilizing

No matter which kind of fertilizer you decide to go with, it’s a good idea to water the soil after you apply it to the soil.

Watering will help work the fertilizer into the soil so that it becomes available to the roots of your apple tree.

If you don’t water the soil soon after fertilizing, it’s possible for the fertilizer to either blow away or react with the elements in the air and morph into something unusable by your apple tree.

Alternatively, you can wait to use fertilizer until you know it will rain and let nature take care of it!

Create A Regular Fertilizing Schedule

Getting on a regular fertilizing schedule will help keep your apple tree healthy.

Apple trees should be fertilized twice a year. It’s recommended to apply once in April and again in June.

Fertilizer applied in April should be before the tree begins to bloom. The fertilizer will help give your apple tree the nutrients it needs to produce flowers without running out of the nutrients it has stored up since winter.

The application of fertilizer in early June will help with fruit production. Apples take a lot of nutrients to make! Fertilizers will help your apple tree obtain the necessary nutrients to make those delicious red apples!

By applying fertilizers on a regular schedule, you’ll be providing your apple tree with the nutrients it needs at the right time.

Do Apple Trees Need Fertilizer Every Year?

So far, we’ve talked a lot about all the different fertilizers for apple trees and how to apply them, but we never talked about IF you should apply them.

Under normal circumstances, an application of fertilizer twice per year is great for your apple tree. However, there are some instances when you do not need to apply any fertilizer to your apple tree.

Identifying when and if you need fertilizer can be just as important to your apple tree’s health.

Apple Tree Growth Is An Indicator 

The overall growth of your apple tree is an excellent indicator of the need for fertilizer. If you apply fertilizer when the tree already has enough nutrients, you could risk root burn or an apple tree that focuses more on producing leaves than fruits.

If your apple tree is exceeding 8 inches of growth per year, you typically will not need to fertilize it unless it is showing specific deficiency symptoms.

When your apple tree is growing less than 8 inches per year, it’s a safe bet that a dual application of fertilizer will do it some good!

Look For Signs Of Deficiencies

Trees are pretty good at letting us know when they’re not getting enough nutrients or water from the environment.

Apple trees have a few telltale signs that they are lacking in certain nutrients:

  • Yellowing leaves: leaves that have a yellow or bronze outer edge are likely lacking in potassium or magnesium.
  • Pale leaves: pale leaves are an indication of nitrogen deficiency.
  • Stunted growth: If your apple tree is slow-growing, it may be due to a nitrogen deficiency.
  • Low fruit yield: this could be due to a lack of several different nutrients.
  • Weird-shaped fruit: This is most likely caused by a boron deficiency.

If you notice anything off about your apple tree, it may need a fertilizer application. If the symptoms come on suddenly, a liquid fertilizer might be your best choice as this will be absorbed quickly by your apple tree.

Other slower-developing symptoms may be treated with an all-purpose fertilizer or a slow-release fertilizer such as spikes or potassium sulfate.

It’s not recommended to apply fertilizer too early or too late in the season. This can prevent apple trees from hardening off for the winter and will do more harm than good.

That’s A Wrap!

Apple trees make a great addition to the yard and can provide you and your family with more fruit than you could possibly eat each year!

Fruit production depends a lot on how many nutrients are available to your apple tree. Applying fertilizer regularly can help ensure your apple tree thrives each and every year!

While it may seem like you have endless options when it comes to fertilizers, which one you choose is largely based on the needs of your apple tree.

A soil test can help reveal what kind of nutrients are present in your yard and what kind of fertilizer might be best for your apple tree.

You can always talk with your local arborist who may have an idea of what the soil in your local area is like and they can recommend a good fertilizer to use for your apple tree!

If you have an old tree, take a look at the reasons why you may need to cut down your apple tree, along with the best time to do it!

References

Aguirre, P. B., Al-Hinai, Y. K., Roper, T. R., & Krueger, A. R. (2001). Apple Tree Rootstock and Fertilizer Application Timing Affect Nitrogen Uptake, HortScience HortSci, 36(7), 1202-1205.

Kopytko, P., Karpenko, V., Yakovenko, R., & Mostoviak, I. (2017). Soil fertility and productivity of apple orchard under a long-term use of different fertilizer systems. Agronomy Research, 15(2), 444-455.

Li, J., Liu, Y., Tang, Y. et al. Optimizing Fertilizer Management Based on Controlled-Release Fertilizer to Improve Yield, Quality, and Reduce Fertilizer Application on Apples. J Soil Sci Plant Nutr 22, 393–405 (2022).

Murtić, S., Oljača, R., Koleška, I., Čivić, H. (2017). Apple Quality and Calcium Content as Affected by Fertilizer Treatment. Polish Journal of Environmental Studies, 26(5), 2107-2111.

Do apple trees need full sun? Yes, indeed they do; to grow big, juicy, tasty apples, the tree needs plenty of sunlight. Not any sunlight will do though, if your climate is exceptionally hot, you may need to plant them where they receive cooler morning light.

Without enough sunlight, apples can turn out bland, woody, and just unpleasant. Not enough sunlight can even prevent the tree from fruiting at all. Apple trees need sunlight to encourage growth, keep the tree strong, energy production, and for better tasting fruit.

These trees love the sun, but when the sun is too hot it can damage the fruits or the tree. Let’s go ahead and delve into the great wide world of apple trees and why they grow best in full sun.

1. Sunlight Encourages Growth Of Flowers And Apples

Ripe apple in orchard, ready for picking. The orchard has anti-hail nets

For an apple tree to produce those big, fat, fleshy fruits, it needs the sun to tell it to grow.

When the apple tree doesn’t get enough sunlight, it won’t produce flowers. When there are no flowers, then there won’t be any apples.

As fall begins to set in and the days shorten, the plant goes into flowering mode. As the earth tilts away from the sun, the light loses some intensity and the plant knows it’s time to flower. Apples are the opposite, but the same principle applies.

When the day’s sunlight increases, the apple tree notices and starts to flower. Without the increased sunlight, the tree won’t produce flowers. No flowers equal no apples.

2. Apple Production Requires Energy

We eat for energy—and because food tastes so darn good. Apples are a good source of energy as they contain a lot of natural sugars, plenty of fiber, and many other essential nutrients.

To produce a canopy full of these energy pods, the tree needs a lot of energy. Trees get their energy from photosynthesis which requires plenty of sunlight.

The tree’s leaves turn sunlight into sugars and energy, and when apple trees produce an excess of energy, they can store it in the apples.

Without plenty of sunlight, the tree won’t have those extra stores of sugar. This results in apples that end up either small and bland, or they won’t produce at all.

3. Apples Need Sunlight To Taste Good

When apple trees are shaded, or they don’t get at least 6 to 8 hours of sunlight per day, the fruit ends up suffering. The tree may look beautiful and have a very healthy canopy of leaves, but the apples look small and weak.

When apples are grown in the shade their texture isn’t ideal. Shady apples can become hard, tasteless or bitter, and “woody.” Have you ever picked a small apple off the tree when you were younger, and bit into it only to feel like you were chewing a stick or rock?

If you’ve experienced this before, it’s most likely because the tree was growing in a shady area. Limited sunlight can also cause the apples to taste bland or too tart.

The sunlight is what creates the sweet sugars, and when they’re absent, you have an unappealing apple.

4. Sunlight Keeps Apple Trees Strong

When trees get everything they need to keep them healthy such as good soil, fertilizer, adequate water, and plenty of sunshine, they’re better equipped to handle problems. Wherever plants grow, bugs and pests will show up.

When an apple tree gets plenty of sunlight it tends to be stronger, which deters most insect pests, and helps the tree deal with fungus and infection, thus, strong, healthy trees are better able to deal with pests and sickness without much problem.

Apple trees that get plenty of sunlight are also better able to deal with pruning and can bounce back from damage. Heavy storms or high winds can cause branches to break, but stronger trees can bounce back and resist secondary problems resulting from damage.

5. Apple Trees Grow Faster In Full Sunlight

Apple trees planted in shady areas will still grow, but they won’t grow as fast. If you’re planting a sapling in hopes of getting apples from it soon, you need to make sure it gets plenty of sunlight, or you’ll be waiting much longer.

According to the University of Minnesota Extension, when apple trees get enough sunlight and nutrients, they can grow 12 to 18 inches per year.

If the apple tree is planted somewhere in the shade, then its growth will be stunted and it will grow much slower.

Can Apple Trees Get Too Much Sunlight?

Organic fruit orchard with ripe red and yellow apples on branches and on the ground in an English countryside .

Apple trees need at least 6 to 8 hours of full, unfiltered sunlight, but they do best when they get 10 to 12 hours per day.

But depending on the climate, too much sunlight can be harmful. These trees do love the sun, but they don’t handle extreme heat very well.

Head on over to our article about apple trees and their sun requirements, to learn more in-depth information! The reality is, yes they do need full sun – but there are limitations and things you need to address to ensure the health of your apple tree.

Too Much Sun Can Cause Sunburn On Trees!

If you live in a climate that sees extreme heat during much of the summer, then you’ll want to plant your tree somewhere it gets mild morning sun, and not the blistering hot afternoon sun.

According to the University of California Agriculture and Natural Resources, sunburn can damage the bark, foliage, and fruit, especially when the soil is dry, and temperatures are high. Newer plants with thin bark and new root systems are most susceptible.

Apple trees are susceptible to sunburn in excessive heat, especially young, newer plantings.

How To Combat Sunburn On Your Apple Trees

If you live in an area that experiences dry, very hot summers, here are a few tips to help prevent sunburn on your apple trees.

  1. Plant your apple trees where they get morning sunlight, and are protected from the hot afternoon sun.
  2. Look for eastern or northern-facing areas as the morning sun still delivers enough sunlight, but isn’t as intense as the afternoon sun.
  3. Find a spot with some filtered afternoon sunlight so the tree isn’t getting cooked later in the day.

Another way to help prevent sunburn is to wrap your tree in a reflective or white wrap. Dewitt 3-Inch by 50-Foot Tree Wrap White is a great way to protect the tender new bark of an apple sapling. The white tape helps to keep the trunk cool and protects against sunburn.

Of course if your apple tree is too damages or isn’t producing enough fruit, this could be a reason to cut your apple tree down.

Apple Sunscald Can Happen In The Winter

What the heck is sunscalding you ask? The short answer is; it’s basically a sunburn in the winter.

What happens is moisture or sap underneath the tree’s bark freezes during a cold spell, then the sun comes out and thaws the moisture. While this doesn’t harm the tree, if the sap then refreezes, the expansion can cause cell and tissue damage to the tree.

Symptoms of sunscald include loose, flaking bark, or dried, cracked, exposed wood underneath, or on the west side of the tree. It can be on the trunk or branches.

Wrapping your tree can work to help prevent this as well!

Can Apple Trees Get Too Much (Or Too Little) Sun On Cloudy Days?

A few cloudy days won’t harm your apple tree. They are still getting some sunlight, even if the clouds cover every inch of the sky for as far as you can see. The sun isn’t as intense with the cloud cover but it’s better than nothing.

A handful of cloudy days won’t cause any harm to your trees. They may slow down growth for a little bit, but it will be so incremental that you’ll not notice it.

Now, if you live in an area that routinely has more cloudy days than sunny ones, your apple trees will be affected. In this case, you’ll need to figure out what part of your property gets the most sun and make the most of it when you do get sunny days.

However, there are some really easy-growing apple tree variations that we recommend trying, and hey, some may even be better for cloudy days! Head on over to our article about the easiest growing apple trees for more information!

Try Out Reflective Mulch On Cloudy Days!

Before you ask what that is, let me go ahead and explain. Reflective mulch may be self-explanatory, but it’s actually not silver-painted wood chips or anything of that nature (it’s what my mind thought of when I first heard of it).

Reflective mulch is basically a polyethylene plastic sheeting that reflects the sunlight back up to the bottom of the plants. It has been proven to help vegetable crops and smaller garden crops grow better and fight off certain pests.

The applications have recently been applied to orchards with positive results. Apple trees that get a treatment of reflective mulch end up getting more viable apples. So, if you live in an area that has a lot of overcast days, you might try this out.

Silver Metallic Plastic Mulch 4 Ft X 50 Ft is one option to really reflect the light back up into the tree. This way when the clouds are out, your tree is getting double the sunlight. Apples may grow bigger and tastier with this reflective mulch.

You Can Also DIY It!

For those of you who like to stay on a budget or are avid DIY’ers, you can make your own reflective mulch.

Just get a few old cardboard boxes and wrap them in aluminum foil. Then take your foil-lined cardboard and stake them down underneath your tree.

These methods may help you to grow apples in cloudy environments, just keep an eye on your trees if the sun returns and tries to make up for all the cloudy days.

Can You Grow Apple Trees Indoors?

Ziziphus mauritiana, also known as Chinese date,Chinee apple, Indian plum, Indian jujube, ber fruit and dunks is a tropical fruit tree species belonging to the family Rhamnaceae.

This is sort of a trick question because you certainly can grow apple trees indoors. Yes, there’s a “but” coming, apple trees can be grown indoors, but you may not get any apples.

First, most apples need a pollinator that gathers pollen from a separate apple tree to get fruit. That’s why when you plant apple trees, you typically need at least two different varieties. Crabapple trees will even work as a cross-pollinator.

There are apple trees that don’t need another tree, but the flowers still need to be pollinated. That’s usually pretty difficult to attain while the trees are indoors. You can be the pollinator, but that’s difficult.

Steps To Growing Apple Trees Indoors

When attempting to grow apple trees indoors and you want to have them produce fruit, there are a few things to consider.

The first is height. Apple trees can grow over 20 feet, so you’ll want to find a dwarf variety.

If you’d like to grow apple trees in your yard, I encourage you to read our apple tree growing guide here!

1. You Need The Right Tree

Secondly, you’ll need to address pollination.

You can do this by purchasing a different variety of dwarf apple trees, or by getting a self-pollinating, dwarf, apple tree. That may prove to be a little difficult.

2. Address The Lighting

As we have discussed, sunlight is essential, not only for the plant but for apple production as well.

If you have a sunroom or a large window that gets plenty of light you might be able to get your indoor apple tree to fruit, the northern-facing window may be the best option!

The sunlight won’t get so hot from these directions, but you’ll need to make sure your apple tree is getting at least 8 hours of sunlight. If you don’t see fruit on your tree for over three years, and it’s mature enough to start fruiting, you’ll have to put it outside.

3. Put Your Apple Tree On The Patio

Even though it’s in a pot and getting plenty of sunlight inside, putting your apple tree outdoors during the late spring, and summer will help it get enough sunlight.

When the tree is flowering it will help attract butterflies, honeybees, and other pollinators, which are essential to getting big apples.

Just watch the tree’s water needs as the soil will dry out faster outside. As the tree starts producing fruit, water needs increase as well.

There We Have It!

That’s why apple trees grow best in full sun!

Apple trees need full sunlight to:

  • Produce flowers and fruit
  • To create enough energy to grow apples
  • To make sure the apples still taste delicious
  • To keep the trees strong and healthy
  • To increase the growth rate

A few cloudy days won’t hurt your apple trees or their production, but extended sunless days will. Too much or too intense sun can also negatively affect your apple trees.

You can also grow apple trees indoors, though producing apples may take some extra steps. Make sure you address pollination (have more than one tree), get a tree that won’t grow through your ceiling (dwarf variety), and give it enough sunlight.

Now that you know what your apple trees need, get out there, channel your inner Johnny Appleseed, and plant some apple trees.

References:

Rom, Curt R. “Light thresholds for apple tree canopy growth and development.” HortScience 26.8 (1991): 989-992.

Rom, Curt R. “Light distribution in and photosynthesis of apple tree canopies.” III International Workshop on Temperate Zone Fruits in the Tropics and Subtropics 279. 1988.

Mika, Augustyn, et al. “Effects of orchard mulching with reflective mulch on apple tree canopy irradiation and fruit quality.” Journal of Fruit and Ornamental Plant Research 15 (2007): 41.

Volz, Richard K., D. Stuart Tustin, and Ian B. Ferguson. “Pollination effects on fruit mineral composition, seeds and cropping characteristics of ‘Braeburn’apple trees.” Scientia horticulturae 66.3-4 (1996): 169-180.

Sugar maple trees are a staple in many yards, and with their seasonal color show and classic form, it’s no wonder. However, because of their popularity, they also tend to end up planted in less than ideal areas.

Sugar maple trees grow their best when planted in well-drained, loamy, and sandy soil. Plant your sugar maple in full, unfiltered sun inside USDA Zones 3-8 with nutrient-dense soil. For best results, consider germinating your own seeds and planting them during the Fall.

Once you know their basic requirements, it isn’t so difficult to grow a sugar maple tree in your own yard. We’ll cover the best places to plant sugar maple trees, and just how to go about planting them!

1. Sugar Maples LOVE Well-Drained Soil

Sugar maple trees like plenty of water, but they don’t want to soak in it. It’s best to keep the soil moderately damp, but not exactly wet.

It’s also important to remember that sugar maples are pretty drought-tolerant. So it’s better to make sure that the water you give them isn’t just sitting in the soil.

It’s fair to say, sugar maples don’t like wet feet. Meaning, that while they need their share of water, they also need soil that drains well enough to keep their roots from being constantly submerged in soaking-wet soil.

If you’d like to learn more, check out our piece on why maple trees need so much water!

2. Sugar Maples Also Grow Well In Loamy And Sandy Soil

These trees are a hardy sort, but it’s still always best practice to grow them in environments where they can really thrive. If there’s an ideal way to describe the way that these trees like their soil, it’s loamy and slightly sandy.

What does that mean? Well, loamy soil typically has plenty of humus (deteriorating plant matter), and as a result, the soil is fertile. Loamy soil often also has some amount of clay and sand, and while it can drain, it often stays damp.

Bet you thought that meant ground chickpeas at first – huh?

If you need to add some humus to your soil, a product like The Anderson’s HumiChar, an organic soil amendment, can do the trick. The other good news about products like these is that you really don’t need to use them much in order to see results.

If there’s an area in your yard with this kind of soil, and you’re looking to plant something there (not all plants do very well with loamy soil), a sugar maple just might do the trick.

Of course, you’ll still need to make sure that it’s an area that receives adequate sunlight.

If you have clay soil, take a peak at our guide on planting maple trees in clay so you can make it work! 

3. Make Sure To Plant Sugar Maple Trees Where There Is Full Sun

Sugar maple trees grow especially well in bright, sunny spots.

Full sun means a minimum of 6 hours in direct sunlight. However, many plants (including sugar maple trees) can really thrive with more than that. If you can, it’s best to plant these trees in an area where they can get from 8 to 10 hours of sun each day.

Can you plant sugar maples in partial sun? Yes, technicwaterally you can. With that being said, though, there’s definitely a reason it isn’t recommended. Without enough light, they won’t grow as well, or may not reach their full potential height.

These trees grow at a moderate to slow rate. If your sugar maple tree is receiving everything it needs, it should grow between 1 and 2 feet per year.

Colorful autumn leaves of the sugar maple, acer saccharum close up - major source of sap for making syrup.

4. Sugar Maple Trees Need The Correct Growing Zones

USDA growing zones are specific climatic areas, as specified by the United States Department of Agriculture. Here’s a quick guide from the United States Department of Agriculture on Growing Zones if you want some deeper info. Basically, growing zones are used to specify where you live, and can be used as a guide on when to plant certain crops.

It’s best to grow sugar maples in zones 3 through 8. 

That’s a wide range, and it covers a lot of the continental United States. However, there are certain areas that aren’t as well suited to growing these trees, so make sure you check your zone before you plant. Here’s a growing zone map that can help you identify which growing zone you’re located in

The map linked above is much more detailed than many other guides you may see. However, if you’re not quite sure that you’re in the correct hardiness zone (also known as a growing zone) to grow sugar maple trees, this map will leave you without a doubt.

5. Make Sure To Plant Sugar Maple Trees In Nutrient Dense Soil

One thing you should know about sugar maples is that aside from well-draining soil, they also need soil that’s packed with nutrients. Ideally, you can plant your tree in an area that is already stocked with humus and plenty of nutrients.

Of course, you might not always have this nutrient-dense soil available in your yard, or you might not know whether or not the soil there is rich enough in essential nutrients for your tree.

Be prepared to do some testing and add extra nutrients on a regular schedule if your soil doesn’t contain the right amounts of certain nutrients. 

How To Plant Sugar Maple Trees 

Now that you’ve scoped out your planting area, checked out the soil, and made sure you’re in the right climate to grow a sugar maple, how do you plant sugar maple trees?

We’re not just here to tell you about where to plant sugar maples. We’re about to tell you everything you need to know about how to plant them and why they’re one of the best maples to plant!

There are a few things you need to consider: will you be planting an older tree or growing from seed (or seedlings)? Are you willing to plant your tree in a different season from the rest of your plants? And, are you willing to put the work into the soil to help your new sugar maple tree thrive? 

1. Consider Planting Sugar Maples From Seed (Or Seedlings) 

Sugar maple trees often have years where they produce heavier numbers of seed than others. If you already have sugar maples, you have probably noticed that every 4 to 7 years the trees produce significantly more seeds than in other years.

If you’re gathering seeds from trees you already have, these are the best years to gather seeds from (and the seeds tend to be of better quality). 

If you’re unable to gather seeds on your own, it’s much better to buy seeds from a local grower. Not only will that grower be able to give you more information in person, but they may also have seeds from trees that are better adapted to your local conditions. 

2. Try Planting in Early Fall 

Alright! So now you have your perfect seedlings (or seeds) and you’re ready to get growing. But, there’s a slight caveat, which we hinted at in the section above.

Sugar maple trees aren’t like the geraniums or zinnias you start growing after the last frost. In fact, you’re going to wait until much later.

In fact, you won’t plant your sugar maples until months later (if you’re being wise about it). 

Why Plant Sugar Maples In Autumn?

Sugar maples are native to colder climates, which means their growing seasons are slightly different from those of other plants from warmer climates.

When you plant them in the fall, the seeds, or seedlings, have more time to prepare to grow as soon as spring arrives. They will slowly grow and germinate while the weather is cooler. Then, when spring arrives they can pop up from the ground and really start to thrive. 

Not only does this help them get in sync with a proper growing cycle, but it also allows young trees to grow and gain enough strength before the coming freeze in winter. 

Fall Color Sugar Maple Leaves

3. Use Soil Amendments For Young Trees 

Young trees have much higher nutrient requirements than older, and mature trees. This is where soil amendments come in. 

Soil amendments are the things that you put into soil to enrich it. 

So, what does that actually mean for you, when you’re planting a young sugar maple tree? It may mean that you need to add fertilizers. (That’s one of the most common soil amendments, no matter what plant you’re growing.)

Or it could mean adding compost to the soil as a nutrient-rich additive that continues adding nutrients as it decomposes. 

Fun fact! Here’s another reason you should be extra motivated to make sure your sugar maple trees have soil with the right mix of nutrients (especially nitrogen). According to a study in the journal Tree Physiology, the amount of nitrogen contained in the leaves can affect when leaves turn red, and how bright that color is. 

How Much Do Sugar Maple Trees Grow?

Speaking of growing sugar maple trees, it’s a good idea to make sure you can also handle the fully grown mature tree and not just the sapling. 

A fully grown, mature sugar maple tree can grow to be between 60 and 75 feet tall. Their spread can reach between 40 and 50 feet. 

As you can see, sugar maple trees can grow to be quite tall. Make sure that you plant them in an area where they can reach their full height and spread unimpeded (and without encroaching on other trees or structures).

If you want some specifics on maples in general, take a look at our full maple tree growth timeline here!

How Fast Do Sugar Maple Trees Grow?

Sugar maples can add about 24 inches to their height every year. They don’t grow very quickly, but they do tend to maintain a steady growth rate until they reach full maturity (which can take between 30 and 40 years for most trees.)

That still means that after just 10 years, you’ll still have a nice-sized tree, probably around 24 feet tall or even more. Even a tree half that age can still make a nice fixture in your lawn; sugar maple trees are known for their beauty no matter what age they are. 

Considering that sugar maple trees are known for their incredibly long life spans, they actually reach maturity (and their full height) relatively early in their lives. These trees are known to live for hundreds of years. It’s not at all uncommon to hear of sugar maple trees living to 300 or 400 years, and many at least reach 200.

Sugar Maple Tree Growth Requirements

Now that we’ve covered where to plant these amazing trees, it’s time to look at the strictest of requirements they need to live. 

Some trees are pretty happy in just about any kind of soil, and with nearly any amount of light their planting area affords them. A sugar maple tree is hardy, but that doesn’t mean you can simply neglect their needs. 

Sugar Maples Love Sun

Sugar maple trees really thrive with plenty of sun. Even though they can live in partial sun, it’s best to maximize the amount of time they get in pure, unfiltered sunlight. 

Sun requirements for sugar maples: 

  • Full sun – At least 6 hours of unfiltered sunlight every day, even up to 8 or 10 hours.
  • Partial sun – A minimum of 4 hours of sunlight every day, but more is better. 

They Prefer Slightly Acidic Soil 

While you already know that sugar maple trees need well-fertilized soil, they also have other requirements when it comes to soil.

These trees like slightly acidic soil: not quite neutral or alkaline, but not too acidic either.

A study from Environmental Science and Technology has confirmed that improper acidity and a lack of available calcium not only contribute to less seed production, but also to less, and thinner lower canopy growth.

If you’re not sure about this part of your soil’s composition, you’re not alone. Plenty of people never consider the pH levels in their soil, and simply plant their garden where it fits best.

However, if you’re planting a large specimen, like a maple tree, it’s worth making sure that the soil is suitable for them.

Trees are an investment, so a small tool like the Apine Soil Meter is worth picking up before you plant. It quickly reads the pH of your soil, and it also has a sensor to determine the moisture in your soil, as well as the light intensity.

Well-Drained Soil Is A Must

Sugar maple trees certainly do like a good watering. However, it’s best not to leave them in a situation where their roots are basically sitting in the water.

Well-drained soil can help ensure that your tree gets enough water, without letting the roots soak. This is especially helpful when you live in an area that gets heavy rainfall because you don’t have to worry about the extra watering causing more harm than good.

Now, sugar maples do like soil that’s slightly damp, but it shouldn’t be squelching wet. This is yet another situation in which a good little soil meter can make a huge difference. Use a soil meter that can detect moisture, and check the soil in your planting area multiple times before you put your new tree in.

How Can I Check How Well My Soil Drains?

For example, check the moisture after a good, heavy rain. Then, check it a day or two after the rain stops. And lastly, check the soil again after several days without rain.

This will help you determine how quickly excess water drains from the soils, and how long the soil can hold onto moisture. As a bonus, it will also help you determine how frequently you will need to water your tree, as it relates to the changes in the weather. 

Help Your Sugar Maple Thrive With Annual Pruning!

It’s only fitting, then, that we also discuss one of the important measures you can take to keep your tree stay healthy as it grows.

The fact is, doing some light pruning on your sugar maple tree every year can actually help it grow better. 

When your tree is younger, pruning can help determine the shape that your tree will grow into as it matures. This part is mainly for superficial purposes, but it can also help your tree grow into a more manageable tree than if you don’t start it early.

Why Would I Want To Prune My Maple Tree?

Pruning mature sugar maple trees serves more than one purpose. The first purpose of annual pruning is to get rid of ‘problematic’ branches.

If you notice branches that are dead or broken, make sure to remove those as you go through your annual pruning. Likewise, if you notice branches that may be ill, it’s important to remove them before issues spread to other branches. 

The next reason to prune your tree annually is to prevent damage. Maple trees can become overcrowded with branches if you’re not properly managing them.  

Thinning out branches keeps your tree happy, and ensures that the leaves from the branches that are left are able to get their fill of sunlight.

Here’s A Quick Recap! 

If you want to grow a sugar maple tree, the good news is you can! While they do have some specific needs, if you carefully select where you plant them, these classic trees can grow for hundreds of years. 

Remember this when planting sugar maple trees:

  • Plant them in full sunlight 
  • Use slightly acidic soil 
  • The soil should drain well, and be somewhat loamy 
  • Make sure the soil has plenty of nutrients 

There are five ways to find the right place to plant a sugar maple tree. As long as you follow our guide, you can look forward to a tree that only gets better with time (and, for several hundred years, in fact!)

References

Cate, T. M., & Perkins, T. D. (2003). Chlorophyll content monitoring in sugar maple (Acer saccharum). Tree Physiology, 23(15), 1077-1079. 

Schaberg, P. G., Van den Berg, A. K., Murakami, P. F., Shane, J. B., & Donnelly, J. R. (2003). Factors influencing red expression in autumn foliage of sugar maple trees. Tree Physiology, 23(5), 325-333. Sullivan, T. J., Lawrence, G. B., Bailey, S. W., McDonnell, T. C., Beier, C. M., Weathers, K. C., … & Bishop, D. A. (2013). Effects of acidic deposition and soil acidification on sugar maple trees in the Adirondack Mountains, New York. Environmental science & technology, 47(22), 12687-12694.

Hot summer days are always better under a shade tree. While most people think of massive oaks and maples for shade, the linden tree is a lesser-known gem that is a wonderful choice for a shade tree!

Linden trees make excellent shade trees. They have an attractive pyramidal shape while attracting pollinators like bees, butterflies, and hummingbirds. Linden trees turn a golden yellow in the fall and are adaptable to different of soil and PH conditions.

If you’re wondering whether linden trees are good shade trees, wonder no more! They definitely are! Below, we’ll go over all the reasons why and give you some tips on where to plant these wonderful shade trees.

Are Linden Trees Good Shade Trees?

A lot of times we take shade trees for granted. We flock to them on hot sunny days seeking cooler temperatures and a respite from the sun.

What exactly makes a good shade tree? Good shade trees will have a few common characteristics:

  • Large canopy
  • Few pest insects
  • Good location
  • Easy to maintain
  • Adaptable
  • Stable

First and foremost, a good shade tree has to provide adequate shade! According to North Carolina State University, American linden trees grow to around 80 feet tall and have a spread of 30 to 60 feet.

Shade? Check!

What Makes Linden Trees Better Than Other Shade Trees?

Among other important shade tree qualities, the tree has to be able to thrive in a bunch of different conditions.

Luckily, linden trees are adaptable to a variety of environments. Lindens can tolerate clay soils, a pH ranging from acidic to alkaline, and even partial shade conditions.

More importantly, linden trees can survive in a wide range of hardiness zones. Most linden trees can live in hardiness zones 3 through 7. The American linden can stretch up to zone 8.

Lindens are more cold-tolerant than heat-tolerant, but zones 3 through 7 cover most of the United States except for the very hottest areas such as the extreme southeast and southwest.

By the way, if you’ve ever heard a linden tree referred to as a basswood tree, you can read all about the differences between the two here.

If you’re on the fence about planting a linden tree in your yard, read on to discover all the reasons why linden trees are one of the BEST shade trees.

Linden Trees Have A Great Shape For Shade

When it comes to shade, a tree’s shape is important! Trees that have branches growing at odd angles or that have a slender shape won’t cast shade as nicely as uniform-shaped trees.

Take a palm tree, for example. Even though it’s pleasing to look at and gives off a tropical feel, the shade beneath a palm tree is limited. 

The shape of the linden tree combined with its impressive height and width make it a wonderful choice for a shade tree.

According to the University of Kentucky, linden trees will grow in a pyramid shape when they are young. As they age, the canopy will become more rounded and full.

single linden tree in meadow at spring

How Can I Promote My Linden To Grow In This Shape?

Linden trees are known for sprouting more than one trunk when they are first growing. It is best to trim these extra trunks and branches off to give your linden tree the best possible shape. 

Trimming the extra trunks will promote a healthier tree that can focus on growing up and out instead of spending energy on a whole new trunk.

The height and spread of your linden tree will affect the amount of shade it gives off. Most species of linden tree will reach around 60 to 80 feet. The width (spread) of the tree is usually ½ to ⅔ the height of the linden tree, so around 30 to 50 feet wide.

Linden Trees Are A Haven For Wildlife

If you have the space in your yard to plant a linden tree, it is incredibly beneficial to wildlife. You’ll be able to witness squirrels and birds taking advantage of the amazing things a linden tree has to offer.

Linden trees attract a handful of beneficial animals and insects:

  • Squirrels
  • Birds
  • Hummingbirds
  • Bees
  • Butterflies
  • Lightning Bugs

Linden trees tend to have softer wood, which is helpful to cavity-nesting birds. This is especially true of the little-leaf linden. Squirrels will eat the seeds of linden trees.

What Makes Linden Trees So Attractive To Wildlife?

One of the big attractions for wildlife is the nectar-rich flowers of the linden tree. Butterflies, bees, and hummingbirds LOVE linden trees.

Recently, linden trees have come under fire due to the possibility of the nectar being toxic to bees. However, this claim has been disproved by studies such as the one reported in the Journal of Apidologie

They found that there was no increase in the mortality of bees that visited linden trees for nectar.

With that out of the way, you can plant your linden tree with peace of mind that you’re helping bees! If you love watching wildlife and feeding pollinators, a linden tree is a good choice for a shade tree.

Linden Trees Put On A Show In The Fall

As summer comes to a close and cold weather sets in, trees start to prepare for winter. One way that trees prepare is by shedding their leaves.

Before the leaves fall off, they turn into the well-known fall colors of orange, red, purple, and yellow. Linden trees are no different and will give you a show before going dormant for the winter season.

The fall color of a linden tree will depend on the species of tree and the conditions where it is growing. Most often, linden trees will turn a brilliant golden yellow in the fall.

That being said, you may also see a lighter shade of green, purple, or even red leaves in the fall.

Linden Trees Look Stunning In The Summer

Fall is an exciting time to go around and stare at all the beautiful colors on the trees. While linden trees put on a good show in the fall, summer is actually when they show off the most!

In the summer, linden trees bloom clusters of creamy white to golden yellow flowers that droop off the stem. These showy flowers are what attract bees and other pollinators.

The flowers bloom anywhere from May through July and are a sight to see —and smell! Not only are these flowers quite showy, but they also give off a pleasant fragrance.

If you’re a tea drinker, you can also use the flowers to make herbal tea!

Linden trees make great shade trees, and while you’re enjoying the shade, you can also enjoy the fragrant scent of their flowers and hear the gentle buzzing of bees as they visit the flowers.

After the Thunderstorm, Trees and Summer Fields in the Warm Light of the Setting Sun

Linden Trees Are Adaptable

A tree may be the best shade tree in the world, but if it can only grow in swamps or on the tops of mountains, it doesn’t really help the average homeowner!

A good shade tree needs to be adaptable to a variety of climates. Luckily, the linden tree is known for being flexible and resilient.

Let’s check out some of the specifics:

  • Hardiness zone: Linden trees will thrive in hardiness zones 3 through 7, which cover most of the US. The only exceptions are the extreme southeast and southwest where the temperatures get a little too warm.
  • Soil: According to the University of Florida, linden trees can be planted in clay, loam, silt, and sandy soils. In other words, they can be planted in almost any soil type!
  • pH: Like most trees, lindens have a preferential pH level. However, they can and will adapt to both alkaline and acidic soils. If you want the fastest growth, plant them in soils with a PH between 6 and 8.
  • Sun: Linden trees can grow in full sun or partial shade, making them one of the few trees that will still grow in shade conditions.
  • Tolerances: Linden trees are somewhat drought-tolerant and wind resistant. Some species are tolerant of urban pollution while others are not. The little-leaf linden in particular cannot tolerate pollution.
  • Moisture: Linden trees can tolerate a little bit of moisture in the soil. However, they cannot sit in water for very long without unwanted consequences.

Some species, like the bigleaf lindens, are more adaptable to lower elevations. Others, such as the little-leaf lindens, prefer higher elevations. That being said, each can still grow in less-than-ideal conditions.

Linden trees are also cold-tolerant. They can survive in sub-zero temperatures, with some species surviving in temperatures as low as -30℉!

Why You Should Plant A Linden Tree

We’ve gone over a few important details about why linden trees make excellent shade trees, but what makes them better than an oak tree or maple tree?

When it comes down to it, it’s all about your preferences. What are you looking for in a shade tree? 

Appearance

Linden trees are an excellent choice if you are looking for a tree with a uniform appearance. With lindens, you know exactly what the tree will look like when it’s fully grown.

Other shade trees like white pine and live oak are a mystery in terms of mature shape. They may have branches poking out at odd angles or a lop-sided spread.

Fall Clean Up

There are a few pros and cons to having a big shade tree in your yard. One major con of deciduous trees is the mess they make in the fall.

Linden trees are moderately impressive in the fall with golden yellow leaves. As temperatures continue to decline, the pretty leaves will go from the tree branches to the ground, also known as your yard.

With that being said, linden trees are far less messy than many other trees out there. Oak trees drop a ton of acorns in the fall and sweetgums drop spiky balls. If you’ve ever been around maple trees in the fall, then you know the helicopters/whirligigs that litter the yard.

Check out why linden trees are so messy (and what to plant instead) if this sounds like more work than it’s worth.

Roots

An understandable concern of many homeowners is whether or not a tree’s roots will become a problem later down the road.

Roots can creep under foundations or crack through sewer systems, making a mess of the yard and causing costly repairs.

Linden tree roots do not tend to cause a lot of problems. As the tree matures, the root system will continue to expand, but the roots normally do not crack the surface.

Honeylocust, silver maple, oak, ash, and aspen trees pose a greater risk in terms of root damage. These trees have roots that will break the surface, potentially causing damage to sidewalks and foundations.

Aspen trees may not break the surface, but the roots are far-reaching and are known to seek out sewer lines in search of a water source.

Where To Plant A Linden Tree

If you’re sold on planting a linden tree in your yard, the next logical step is deciding where to plant it.

The placement of your linden tree will depend on how you want to shape your yard and what kind of shade you want. Do you want shade to sit under? Or would you rather use a shade tree to keep your home cool?

Linden flowers, Heart linden is a national tree from the Czech Republic and Slovakia, and two national trees in Latvia. Tilia cordata leaf is also considered a symbol of Slovenia

Plant In The Southwest Corner To Cool Your Home

According to the University of Missouri, shade trees do well near the southwest corner of a house. This will help keep your home cool on sunny summer days and warm on cold winter days.

The reason has to do with the angle of the sun throughout the year. In the summer, your linden tree will cast shade on the house to cool it down. In the winter when all the leaves are shed, sun will be able to reach the home and warm it up.

A tree that also helps you save on your energy bill? Bonus!

Make sure you plant your linden tree an appropriate distance from your home, at least 20 feet. Any closer and the branches may begin rubbing against the house or the roots may reach out beneath the foundation.

Another benefit of planting your linden tree in a southern corner of the yard is that it will act as a windbreak from storms.

Plant Near A Favorite Spot

Shade trees are more than just tools to be used in the yard. They can also be a place to relax, take in a deep breath, and enjoy the scenery.

If you have a favorite spot in the yard or a scenic view, consider planting your linden tree in this area. Try to envision what it will be like when it’s tall enough to provide shade.

One thing to think of before planting a linden tree in your favorite spot is the surrounding area. Make sure there are no flowerbeds or gardens that might be cast in shade once your linden tree grows.

If you already have a linden tree in your yard, consider making the area around it your new favorite spot! You can plant some shade-tolerant flowers nearby like begonias, alyssum, lily-of-the-valley, or astilbe.

While you can purchase these plants online in seed form, it’s better to get them from your local nursery or garden center.

You could also hang a rope swing or a glider from your linden tree to give the kiddos something to do or give yourself a place to sit. Playvibe’s 40 inch Tree Swing Saucer Swing can hang from the branch of your linden tree for tons of summer fun!

Problems With Linden Trees

While there are a lot of benefits to planting a linden tree, it wouldn’t be right to only point out the good. Here are a few cons to planting linden trees:

  • Leaf scorch: linden trees are not very tolerant of dry, hot conditions. If it’s super hot and sunny, the leaves may get scorched. Leaf scorch can be fixed by giving your linden tree a deep watering.
  • Pests: Linden trees will occasionally play host to a few insect pests such as spider mites, Japanese beetles, borers, and caterpillars.

The best way to prevent pests and other sources from harming your linden tree is to keep it healthy. Give your linden tree enough nutrients and water to thrive.

While mature linden trees do not typically require fertilizer, if you are noticing signs of stress, consider a fertilizer such as The Andersons Professional PGF Complete 16-4-8 Fertilizer. It comes in an 18lb bag and has a solid NPK ratio that will help your linden tree bounce back to life.

Another important step in keeping your linden tree healthy is to keep it watered, especially during dry, hot weather.

That’s A Wrap!

Shade trees are a cool oasis on hot summer days. Picking the right shade tree to plant can be a challenge. One tree that often gets overlooked is the linden tree.

To recap, the things that make linden trees good shade trees include:

  • Uniform shape
  • Attracts wildlife
  • Impressive fall colors
  • Beautiful and fragrant summer flowers
  • Adaptable

Linden trees make good shade trees. When compared to other deciduous shade trees, they are typically less messy, have stronger branches, and have a more uniform shape.

Remember, you can always ask a professional arborist to help you pick out which linden tree to plant and where to plant it in your yard.

References

Akbari, H. (2002, March). Shade trees reduce building energy use and CO2 emissions from power plants. Environmental Pollution, 116(1), 119-126. https://www.sciencedirect.com/science/article/abs/pii/S0269749101002640

Iles, J. K., & Vold, A. M. (2003, November). Landscape tree cultivar preferences in Iowa, U.S. Journal of Arboriculture, 29(6), 331-336.

Santic, Z., Pravdic, N., Bevanda, M., & Galic, K. (2017). The Historical Use of Medicinal Plants in Traditional and Scientific Medicine. Psychiatria Danubina, 29(4), 787-792. https://hrcak.srce.hr/file/383463

Scattolin, L., Alzetta, C., Bolzon, P., Sambo, P., & Accordi, S. M. (2012, November 30). Linden tree stress detection: Chlorophyll-nitrogen contents and ectomycorrhizal community. Plant Biosystems, 147(2), 364-375. https://www.tandfonline.com/doi/abs/10.1080/11263504.2012.747570Vines, R. (2021). Linden Family (Tiliaceae). In Trees of North Texas (pp. 342-346). New York, USA: University of Texas Press. https://doi.org/10.7560/780187-037

Why You Should Always Plant Weeping Willows Near Water

Weeping willows are trees that we can count among some of the most recognizable of all. Their cascading branches fill with delicate-looking leaves to provide an inviting shelter underneath. They’re a popular feature in many landscapes, especially those near water.

Weeping willows do best planted near water. It’s not for aesthetic appeal, rather, it’s because willows thrive with an abundant water source. They can tolerate standing water for a period of time, and even help prevent soil erosion. Plant weeping willows at least 50ft away from any structures.

There’s plenty more you should know about how and where to plant weeping willows- and of course, why you should be doing it.

Keep reading through this guide to learn why weeping willows are so adapted to planting near water, and why you should choose to plant them rather than another species!

Weeping Willows Provide Benefits To Many Landscapes

Yellow and orange weeping willow tree (Salix babylonica) in winter

Before we get into reasons why it’s good for weeping willows to be planted near water, there are plenty of reasons it’s beneficial to the ecosystem to plant weeping willows near water.

Willows are inherently beneficial to the wildlife that surrounds them. They provide crucial shelter for birds and small animals and even provide food and water. Many of these are native species that dearly need shelter when other woodlands are being destroyed.

Weeping willows also produce lovely yellow flowers in spring, which further supports the local pollinators. But get this – there are a bunch of different varieties of willow trees, that all provide some amazing things for our landscapes! Check our article comparing and contrasting willow trees to see what’s right for you!

Weeping Willows Help Maintain Erosion

There’s much we can say about how weeping willows support creatures that are naturally drawn to the water.

However, willows are also a key factor in maintaining the balance of land and water.

This is because weeping willows are masters of preventing and halting erosion. Their extensive root systems thrive on the readily available hydration that seeps into the ground from the nearby water.

A Weeping Willow’s Roots Hold Soil Together

As the willow’s roots dig further into the soil to get access to the moisture, they provide an important natural framework that holds the soil together deep below the surface.

Because of this, many people plant weeping willows near the shore to keep them from slipping into the water.

Whether or not you’re a big fan of the tree’s appearance, it certainly might be worth planting one if you want to keep the land and water lines where they are.

Why Is It Good For Weeping Willows To Grow Near Water?

Weeping willows are one species of tree that really doesn’t mind having wet feet.

Where other trees need soil that drains quickly and remains damp at most, weeping willows can tolerate excessive moisture. And that’s not all.

Weeping willows can even tolerate standing water for a number of weeks!

Weeping Willows Can Store Excess Water

Naturally, standing water isn’t a condition they can tolerate continuously. However, they will be able to make use of the extra water to a certain point and store it to use to further their growth.

However, because of its storing nature, a benefit that homeowners will love is that the weeping willow tree can actually help soak up spots that tend to hold too much water like for instance, a low point in your yard.

Keep in mind that weeping willows take up more water than other species because they also release more through transpiration.

Their Aggressive Root Systems Help Reach Water

Weeping willows are known to have extensive, and aggressive root systems. Because of this, they are rarely planted right next to sidewalks and roadways.

Any plant that has particularly intrusive root systems has them because they need to expand and reach moisture wherever it’s available. Hence, the reason why willows have a reputation (even if ill-founded) of seeking out septic systems and water lines to get their hydration.

Whether or not this is the case, providing weeping willows with an accessible water source can prevent problems with their extensive root systems.

Just to add, since they DO have an aggressive root system, it’s not a great idea to grow certain plants under willow trees.

Can You Give A Weeping Willow Too Much Water?

Willow green branches bend low over the smooth surface of the water.

Of all trees, weeping willows are some of the most flood tolerant and easily accepting of extra moisture. And of course, people are actively encouraged to plant them near rivers, lakes, ponds, and other bodies of water.

But the question is, can you give a weeping willow too much water? In fact, you can.

Too Much Water Can Reduce The Amount Of Oxygen

Just because they can survive extremely wet conditions doesn’t mean they can thrive in them.

Over a period of time, flooded soil actually reduces the amount of available oxygen to the roots.

Excess Water Can Make The Surrounding Soil Compact

Not only that but once floods or standing water recedes, the soil naturally compacts to make up for the absence of the water that expanded it.

Just as the water takes up room that would otherwise be available for oxygen, the compacting of the soil also allows less room for oxygen.

Whether it’s because the soil becomes too compact, or because the continuously submerged roots can’t get new oxygen from the water, the roots can suffocate or drown.

Excess Water Can Cause Fungus

Another issue with too much water in the soil is the pathogens and microbes that take up in the environment.

The best example of this is the fungus that causes root rot, known as Phytophthora. This fungus isn’t exclusive to willows. Root rot can happen to any plant when the roots are in wet, stagnant conditions for too long.

When this fungus takes hold, it decomposes the roots and ultimately harms the tree as a whole. As we’ll cover in more depth later in this article, fungi are one of the vulnerabilities of weeping willows. As such, it’s important to prevent standing water whenever possible.

How And When To Water Weeping Willow Trees

So, whether or not or not you plant your weeping willow directly near the water, or whether you decide to plant it elsewhere, you need to monitor the water going to your weeping willow.

Even when weeping willows are planted near the water, that may not guarantee that their roots are getting enough water.

One thing you should know is that soil can hold water deep below the surface. However, because weeping willows have root systems that can go deep enough to reach water pipes, but can also grow quite shallow, and therefore close to the surface.

As a result, the water that they’re planted near may not always be available to them. Not only that but bodies of water do rise and fall naturally depending on the climate and rainfall.

When Should You Water Weeping Willows?

One thing you should know is that younger weeping willows need more water and more attention than established trees.

After you plant your tree, the soil should remain moist. That means in most cases you’ll need to water weekly, for up to an entire year after initial planting.

At the same time, you don’t want to overwhelm the young tree with water. Make sure there isn’t standing water, and keep a couple of uppermost inches damp.

Once your tree is established, you simply need to ensure the soil doesn’t become dry. Again, the soil should be damp to the touch on the upper layers.

You can use a soil meter like the XLUX Soil Moisture Meter to help you keep a closer eye on the soil.

Weeping Willows Tolerate A Variety Of Soils

How do you find the right balance, and the right soil, for your weeping willow? The good news is that weeping willows are trees that can tolerate an impressive range of different soil types. Like anything else, however, this is within reason.

Weeping willows can tolerate both acidic and alkaline soil to a certain degree. But, if the pH veers too far on either end of the scale, the tree won’t be able to grow as well.

One reason weeping willows are great to grow is that they can still thrive in difficult soil that many other trees cannot.

These trees can grow in sandy, loamy, acidic, alkaline, or even rocky and clay-filled soils.

One thing to note is that if you’re planting your willow near water, chances are that the soil is already somewhat fertile.

But, Not All Soils Provide The Best Nutrients For Weeping Willows!

Although it can grow in different soils, if the soil has a lot of clay, and sand, or is somewhat rocky, it won’t naturally have as many nutrients as the weeping willow tree needs.

However, that’s not a huge problem though, because you can take measures to enhance the soil – like with fertilizer!

Next, we’ll talk some more about making sure your tree has the nutrients it needs in the soil.

How To Fertilize Weeping Willow Trees

Even if you have excellent soil, with plenty of nutrients, your tree will inevitably use up the nutrients unless more is put into the ground.

If you notice lighter ends of leaves, it’s a sure sign that your tree is experiencing a mild nutrient deficiency at the least.

Before Planting

Before you plant your weeping willow, mix some compost or natural fertilizer with the soil.

You don’t need to go too deep when adding the fertilizer. Adding it to the upper layers of the soil is just fine.

After Planting

There are a couple of ways to approach fertilizing your tree after planting it.

And, as luck would have it, we recommend using more than one of them alone. One of the first measures you can take is mulching.

Mulch not only helps to insulate the soil, which is great for trees in less temperate climates, but helps to retain moisture, which is ideal if you’re struggling to get your willow enough water.

Mulching also allows organic material to slowly break down and release nutrients into the soil over time.

How Much Fertilizer Do You Need?

When you add fertilizer to your soil, you should typically add at least one cup of fertilizer (mixed appropriately) for every inch your tree’s trunk measures around.

Of course, this is just a general rule of thumb, and you should always make sure to distribute nutrients evenly over your tree’s root zones.

If you’re not sure where to start with fertilizer, check out this TreeHelp Premium Fertilizer for Willow. This is specifically designed for weeping willow trees, to give you all the best nutrients your tree will need to thrive!

What Else Do Weeping Willow Trees Need?

Weeping willow tree or Babylon willow (Salix Babylonica) on a shore of lake

We’ve talked a lot about water and soil, and how that affects weeping willows.

However, any plant needs more than the right amount of water to achieve its best growth.

Next up, we’ll look at the requirements for weeping willows to grow.

Weeping Willows Need Plenty Of Sun

Weeping willows do best with full sun, but can also tolerate partial sun.

To put it simply, they need a minimum of 4 hours of sun, although at least 6 to 8 hours is ideal.

The good news is that these trees often take care of the problem of getting enough sunlight themselves.

Sun Helps Them Grow Tall!

Weeping willows can easily reach 50 feet tall, allowing them to reach above the shade of other trees.

Younger trees, and therefore smaller trees, don’t yet have this advantage, although, with the other right conditions, they soon will.

These trees are exceptionally fast growers, and can easily add 5 to 8 feet to their height in a single year. Of course, you should still take note of the sunlight an area receives before you plant there.

Willows Need Routine Prunings

We all love the sweeping branches of weeping willows, and because of that, many people are reluctant to prune those branches away.

Younger weeping willows will need more extensive, regular pruning. This is because it actually helps the young tree to grow back more vigorously. You can choose to either prune at the beginning of spring, or as winter begins.

Older weeping willows require much less maintenance. You won’t need to prune as thoroughly, but you do need to keep an eye out for damaged or broken limbs.

One other thing to keep in mind when you prune weeping willows is that some branches will rub against, and possibly damage others. If you notice that certain branches are interfering with others, you need to prune to allow the other branches to grow properly.

Always Remove Broken Or Damaged Branches

Remove damaged branches to help maintain the health of the rest of the tree.

Another key thing you should keep an eye out for is branches that hold enough weight to stress other branches on the tree.

Branches that are too heavy are more likely to break, which opens the possibility of other health issues such as infection and disease.

There may also come a time when your weeping willow tree should be cut down. As much as we’d hate to admit it, it can be dangerous to keep a weeping willow tree standing when it is having issues! Check our article for signs that your weeping willow tree needs to be cut down.

Weeping Willows Need To Be Inspected For Pests

Pests are something no gardener wants to deal with. For all its other strengths, the weeping willow is susceptible to some types of pests or infections.

One way to help your tree is by inspecting it and looking for signs weak branches and oddly colored foliage. Because weeping willows should be water adjacent, the fungus is a common problem (and this is one of the reasons why snakes love willows!)

Other problems can come in the form of insects that like to prey on weeping willows. The good news is that if you catch an infestation quickly enough, you can usually prevent major damage and get rid of the pests in question.

Use Preventative Measures To Keep Pests Away

One way to keep pests at bay is by using regular preventative measures.

Certain insecticides are made to target many of the insects that regularly target willows.

The best thing to do is to spray before you have to deal with an existing infestation. Depending on which product you choose, you’ll either spray once or twice yearly.

Because weeping willows should be planted near water, it’s especially important to select a treatment that won’t hurt other plants and wildlife. So using a natural pesticide like this Bonide Captain Jack’s Neem Oil 3-in-1 Treatment is a great option.

Can You Plant Weeping Willows Near Your House?

When you’re looking at places to plant a weeping willow, you may wonder if you can plant one near your home, and yes you can, but you need a large area to do so.

Otherwise, these trees are great for shade, preventing erosion, and adding some privacy to your property.

There’s nothing wrong with planting one on your property, but you do need to be wary of planting them a good distance from your home and other significant structures, because they grow large, and their expansive root systems can destroy foundations and structures.

Because they constantly seek water, their roots are adapted to spread out and go through soil both deep and shallow.

How Far Away From Your House Should You Plant A Weeping Willow?

The general guideline is to plant weeping willows a minimum of 50 feet away from your home, any structures, and septic tanks.

This allows the roots plenty of room to expand, without risking them interfering with any other structure that would otherwise be in their way.

Can You Plant A Weeping Willow In Dry Areas?

Weeping willow tree also known as Babylon willow or salix babylonica

While nobody likes to come down to semantics, technically, yes, you can plant a weeping willow in a dry area.

However, if you plant this tree in a dry area, it’s going to take a lot of work on your part to keep it healthy and growing normally, including an extensive irrigation setup.

When the trees are fully mature, they can tolerate some amount of drought. Unfortunately, being able to tolerate a condition does not mean they can thrive in it.

For more information on the best places to plant a weeping willow tree – we’ve got you covered with a really in-depth article about the best places where they will thrive!

Wrapping It Up!

The fact is, weeping willows are ideal trees to plant near water. They thrive on extra moisture, enough so that they can even help tidy up extra wet spots.

And planting weeping willows near water isn’t just good for them. It’s good for the ecosystem around them. From housing wildlife, to purifying water, to helping to prevent erosion, this is a tree you’ll want growing near water.

Resources

Kefeli, V., Lininger, C., & Shultz, R. (2007). To chemotaxonomy of willow species.

Latch, B. J. (1980). Weeping willow rust in New Zealand. New Zealand journal of agricultural research, 23(4), 535-538.

Pauliukonis, N., & Schneider, R. (2001). Temporal patterns in evapotranspiration from lysimeters with three common wetland plant species in the eastern United States. Aquatic Botany, 71(1), 35-46.

Olive trees are an absolute staple of Mediterranean cuisine. And, as more people take time to garden and grow their own food, olive trees are rising in popularity. Based on the climates they’re native to, you might be wondering if you can grow your own.

If you’re going to grow an olive tree, you must plant it in full sun. Olive trees are originally from warm, sunny parts of the world. They need the sun to grow olives, a lack of sun leads to a lack of blossoms, sunlight keeps olive trees healthy, and olives won’t ripen without proper sun.

Let’s take a more in-depth look at all the reasons why you should grow olive trees in full sun. Not only that, but we’ll also look at the different requirements for properly growing olive trees, and give you some tips on how to best plant them!

1. Olive Trees Need Enough Sun To Grow Fruit

There are plenty of types of trees that can still grow fruit without intense, full sunlight. With that said, olive trees are not one of them.

While they will also need the proper water and nutrients, the most important component for a bountiful olive harvest is intense, unfiltered sunlight.

All plants use some amount of light for photosynthesis. This is the process in which plants use sunlight and convert it into sugars that they need to grow and process crucial nutrients from the soil.

What Happens When An Olive Tree Doesn’t Have Direct Sun?

Without enough sunlight, olive trees simply do not have the extra energy to put into growing olives. Because olives are where the tree’s seeds are contained, they are actually entering the reproductive stage of their growth when they produce olives. 

If plants don’t have extra resources to put into their reproductive stage, they’ll devote the available energy to the preceding stage. That is the vegetative stage.

The vegetative stage is when a plant spends all its resources on its foliage. By growing more leaves, and expanding their leaves, the plants also hope to increase their ability to gather more sunlight. 

In short, full sunlight allows your olive tree to dedicate the resources it needs to the reproductive stage- when it grows the olives.

All in all, a lack of sunlight will severely impact your olive tree’s growth. If you’re interested in how long olive tree’s normally take to grow, take a look at our full olive tree timeline laid out!

2. Olive Trees Can’t Form Blossoms Without Sunlight

Before an olive tree even begins to produce olives, it has to go through the proper steps first. As we mentioned, growing olives are part of the reproductive stage of an olive tree’s life.

But there’s another critical part of the olive tree’s reproductive stage: growing flowers and blossoming. Then the flowers need to be pollinated before the next stage (growing olives) begins.

However, blossoms may not even begin to grow if your olive tree isn’t getting enough sun. Or, perhaps equally as disappointing, your olive tree might begin to form flower buds, only to have them drop.

Why Would An Olive Tree Drop Its Blossoms?

This is commonly referred to as blossom drop. It can happen for a variety of reasons, and often it’s as a result of an imbalance (or deficiency) of certain micronutrients. 

When it comes to blossom drop though, it isn’t always because of a nutrient deficiency. That’s especially true when it comes to subtropical plants that need a lot of sunlight, and that includes olives trees. 

3. Sunlight Keeps Olive Trees Healthy 

Olives trees need more sunlight than your typical house plant to stay healthy. Even if olive trees appear to be healthy, that doesn’t necessarily mean that they are.

In fact, no matter how the tree looks, if the olive tree isn’t getting enough sunlight it’s almost impossible to keep it happy and healthy.

This applies to olive trees grown both indoors and outdoors. If you plan on growing your olive tree indoors, it’s especially important to make sure you can give it enough light year-round.

There are a lot of different ailments that can arise as a consequence of olive trees not getting the proper amount of sunlight.

Even before olive trees reach the stages where they produce blossoms and subsequently, olives, they have to “bulk up,” so to speak.

What Happens If An Olive Tree Does Not Receive Enough Sunlight?

In the earlier stages of their lives, these trees are focused on growing vegetation to allow them to collect more sunlight, which then means that they can create more plentiful energy stores. 

Remember, sunlight is a crucial ingredient in the process plants use to feed themselves.

If a plant isn’t getting enough sunlight, chances are it also just plain isn’t able to feed itself. And any organism without some kind of food supply simply cannot sustain itself. 

Olive trees and snow mountain peaks

4. Olives Won’t Ripen Without Proper Sun 

Even if your olives do begin to grow, that doesn’t guarantee you a successful harvest. The tree’s work isn’t done until the olives are ready to be harvested. 

Even after producing the initial fruit onset, there’s still plenty that the tree needs to do before the olives reach their full size and flavor.

If you are seeing olives on your tree, but they don’t seem to be making much progress, you may need to assess whether or not your olive tree is actually getting enough sunlight.

Here is a timeline of olive tree growth. It can help you know if your olive tree is developing at a normal rate!

What If The Olives Are Not Ripening?

If you’re growing your olive tree in a container, this is a much simpler issue to solve, especially if you’re growing it outdoors.

Take a look at the space you have for growing. If the area you have your olive tree in seems to have some shady spots during the day, you may need to move it. 

Try to find an area that gets the most sunlight during the day. This may mean you need to observe the area several times throughout the day. Make sure that the spot you’re scoping out is also free of obstructions that could block sunlight from getting to your tree. 

Of course, there’s nothing you can do about a cloudy day, but those will happen anywhere.

Possible obstructions can include: 

  • Other plants and trees 
  • Large vehicles 
  • Garden and patio furniture 
  • Fences and retainer walls 
  • Homes, decks, and sheds 

This is just a partial list, but the principle is clear. Make sure there’s nothing getting in the way of your olive tree’s shade. 

What If You Can’t Move Your Olive Tree?

That can be a slightly more difficult problem. If your tree is already established, move anything that blocks the sun, and consider trimming other trees if they’re getting in the way of your tree’s light. 

Another important note: If you’re worried about your olives reaching their full potential, you also need to make sure they get enough water. In a study from The Journal of Horticultural Science and Biotechnology, even with the same amount of sunlight, olive trees that have full irrigation (versus drip irrigation) produce a higher weight of fruit produced. 

How Much Sun Does My Olive Tree Need? 

Saying that olive trees need a lot of sun is one thing. However, to some people, 6 hours seems like a lot of sunlight, whereas other people might think full sun means a full 12 hours of unfiltered light.

How much sun does an olive tree need? Olive trees thrive on sunlight, and that means that six hours of sunlight is an absolute minimum. When you want a good harvest, you don’t want to do the minimum requirements for any of your tree’s care. Aim for a minimum of 8 hours of intense, unfiltered sunlight for your olive tree.

If you can, it’s even better to make sure your olive tree gets up to 10 or 12 hours of sun.

Granted, this may not be possible in all regions. And if it’s not, remember, the more sun you can give an olive tree, the better.

How To Make Sure Your Olive Tree Gets Enough Sun

As we reviewed above (in reasons to plant your olive tree in full sun), you should be carefully selecting the area in which you’ll place your olive tree. Along with that, you can also do your best to remove any obstacles preventing the sunlight from reaching your tree.

However, if you haven’t planted your olive tree yet, there’s a more precise way to check out the quality of sunlight in a given area.

A light meter is incredibly helpful when you need to check out an area for growing a plant with very high light requirements.

For plants like olive trees, we recommend using a light meter like the Dr.meter LX1330B Digital Illuminance Light Meter. Now, if you’re wondering why we chose this meter in particular, it’s because not only is it easy to use, but it also does the work for you.

Yes, it includes the ability to record and store data, meaning that you don’t need to babysit it and take recordings all day. Just set it in the spot and let it record, and check it at the end of the day.

Olive trees in Malaga province in the springtime

Can I Grow An Olive Tree Indoors? 

Yes! However, your two main concerns with growing an olive tree inside are: making sure that you have a large enough planter for your olive tree and making sure your olive tree gets enough light.

If you want to grow an olive tree in the house, you need to make sure that there’s a large window nearby that gets plenty of sun. Even then, you may struggle to ensure that your olive tree is getting its daily dose of full sun.

It’s perfectly fine to supplement the light your olive tree gets, even if it’s not from natural sunlight.

Of course, natural sunlight is the preferred option, and it’s totally free. However, you can make sure your tree is happy and healthy by using lights to supplement natural light. Before you ask, no, a desk lamp or ceiling lights will not help.

What Type Of Supplemental Light Is Best?

Not only is the amount of light produced by incandescent light bulbs insufficient, but it also doesn’t contain the light spectrum needed. A lot of growers use HID (high-intensity discharge) lights. However, they put off a lot of heat, and you’ll also need to switch bulbs to get a full spectrum.

Instead, we recommend a full spectrum LED lighting setup. The advantages of these are endless. You can choose the kind of light to give your tree, and they use very little energy while also producing very little heat.

In all fairness, if it’s your first time using a grow light (the easiest term to find the proper lights for growing plants indoors), it’s not always easy to find the right one. To make it a little easier, we suggest this LBW Grow Light With Stand.

One of the first reasons is that it’s easy to set up, just like a normal lamp. Next, it has a few different light modes, and can even mimic the natural sunlight at its peak, around noon and the middle of the day. Plus, it comes with a timer, which is a serious benefit if you work away from home.

What Other Requirements Do Olive Trees Have?

It’s no mystery that olive trees can’t survive on ample amounts of sunlight alone. Of course, getting a good olive harvest also isn’t as easy as just watering your olive tree and making sure it gets plenty of light. 

So, what do you need to grow an olive tree? 

Here’s a quick overview of what olive trees need to grow: 

  • Plenty of water 
  • Full sun (6-12 hours a day) 
  • A regular fertilizer regimen 
  • The right soil 
  • Pest protection 
  • Maintenance pruning 
  • Only appropriate mulching materials 

Next, let’s look at these factors a little more in-depth. 

How To Water Your Olive Tree 

Just because olive trees thrive in heat and plenty of direct sun, that doesn’t mean they’re also drought-hardy. In fact, it’s even more important to be vigilant about watering your olive tree than with other hot-weather trees. 

Now, olive trees also need soil that drains well. If your soil tends to hold an excess amount of moisture, there’s a centuries-old trick you can use to your advantage.

Planting your olive tree on a sunny slope can help your tree get all the sun it needs, while the slope also helps extra water drain away. This takes care of part of the soil requirements. 

For an in-depth guide for watering your olive tree, check out this guide!

Olive Trees Need Soil With Enough Nutrients 

Some people get lucky, and they already have nutrient-rich soil. However, not everyone is so lucky. If you’re part of the latter, you’re not alone.

Many people need to add nutrients to their soil to accommodate their plants. Another good piece of news is that while many plants need a special blend of fertilizer to cater them, olive trees do not.

Most typical, all-purpose garden fertilizers are perfectly fine for olive trees. However, it’s best to use a slow-release fertilizer to even distribute nutrients throughout the season.

Proper Olive Tree Care And Maintenance

If you have your tree set up and ready to go, that’s great! But what do you do after your olive tree is getting plenty of water, sunshine, and all the right nutrients?

You now have to do everything you can to help your olive tree keep thriving!

In this case, we’re not considering providing nutrients, sunlight, and regular watering as part of the ‘maintenance,’ although they are things you absolutely must do.

Right now, we’re going to talk about other ways to maintain your olive tree and keep it healthy to produce for another season.

If Growing Olives Outdoors: A Note On Mulch 

If you live in a climate where the weather can get chilly, and you grow your olive trees outdoors, you may need to provide some kind of insulation to the soil near the roots. This is important: don’t use the typical wood mulch. 

There are a couple reasons for this: first, the mulch can hold too much moisture. Second, the mulch is so highly carbon-based that it can create a nutrient imbalance. This is particularly true when it comes to nitrogen, although other nutrients are still affected. 

What’s the alternative? Pine-based mulching materials are the best option. Pine straw is certainly the top choice, but other pine mulches work as well. USA Pine Straw is a great option, with many devoted customers lauding the quality.

Here’s our guide for making your own pine mulch if you’d like to learn more!

Long-Term Care For Your Olive Tree 

Aside from regularly fertilizing and watering, there are other things you can do to keep your olive tree in tip-top shape.

Pruning olive trees is different from pruning other types of trees.

Pruning for olive trees is, unlike so many other fruiting trees, not necessary to get an optimal harvest. However, it can be necessary if you want to improve your tree’s shape, or even encourage it to grow in a way that makes it easier to pick off the wolves by hand.

Not only that, but it can make it easier to avoid damage from branches rubbing against one another, and it can help keep pests from lurking in the branches.

And on that note, another thing you need to keep an eye out for is pests. The good news is unless you live in a subtropical climate, where olive trees naturally grow, you don’t need to worry too much about pests: except for one type. Those are scale insects.

What do scale insects look like? They look like small, dark, circular bumps on your olive tree and typically hide in those ‘V-shaped spots where branches meet and underneath leaves.

If you see these, treat the affected areas immediately, and prune off branches as necessary.

If you’d like more info – take a look at our guide on pruning potted olive trees here!

Italian olives trees branch close up,extra virgin olive oil production,genuine bio green olives.

Most Important Tip For Growing Olive Trees

One of the best tips for growing olive trees is: make sure they get enough water. That’s especially true if you live in an area prone to drought. 

The best way to tell if this is an issue for your olive tree is wilting, or curling leaves. While these can be symptoms of other issues, make sure it’s not a drought/excessive heat problem first. 

If you want more detail on how this works, the Journal of Experimental Botany published a wonderful study on how extra sunlight during a time of drought can actually have a negative effect on olive trees’ ability to photosynthesize. 

That’s A Wrap! 

We’ve gone over all the facts, and here’s our conclusion: olive trees need full sun to be healthy. 

Here’s why olive trees need full sun:

  • Allowing the olive tree to be healthy overall, and be able to feed itself
  • Helping the olive tree transition to the reproductive stage (where it produces blossoms and fruit) 
  • Enabling olives to develop and ripen 
  • Fueling their growth for harvest (and years of healthy life) 

Even if you grow an olive tree indoors, it’s still possible to make sure it gets a healthy level of sunlight. Remember, for olive trees, full sun is more or less equivalent to full health, and if you’re really determined to get many years of good harvests, you need to give your tree the necessities to make it happen.

If you were ever wondering, take a look at what happens after olives are finally grown on a tree!

Resources 

Agam, N., Cohen, Y., Berni, J. A. J., Alchanatis, V., Kool, D., Dag, A., … & Ben-Gal, A. (2013). An insight to the performance of crop water stress index for olive trees. Agricultural Water Management, 118, 79-86. 

Angelopoulos, K., Dichio, B., & Xiloyannis, C. (1996). Inhibition of photosynthesis in olive trees (Olea europaea L.) during water stress and rewatering. Journal of experimental botany, 47(8), 1093-1100. 

Gucci, R., Lodolini, E. M., & Rapoport, H. F. (2007). Productivity of olive trees with different water status and crop load. The Journal of Horticultural Science and Biotechnology, 82(4), 648-656. Iniesta, F., Testi, L., Orgaz, F., & Villalobos, F. J. (2009). The effects of regulated and continuous deficit irrigation on the water use, growth and yield of olive trees. European Journal of Agronomy, 30(4), 258-265.

Mulch doesn’t only make your landscape look uniform and neat, but it also comes with some added benefits. It keeps moisture in the soil, adds nutrients, prevents weeds, and helps with temperature control.

You can easily create an attractive organic mulch using pine needles! This amazing natural mulch can withstand severe weather while keeping your garden moist and limiting weeds. Rake up fallen pine needles, go over them with your lawnmower, and spread the mulch 3-4 inches thick around your plants.

If you’re wondering what to do with all those pine needles falling off the trees in your yard or looking for an organic and affordable mulch option for your plants and trees, you’ve come to the right place. Read on to learn more about this magical mulch!

Why Pine Needles Make Great Mulch Infographic
Check out this graphic in a new tab to save and share it if you’d like! You can hold down the image on mobile to save it.

The Many Benefits Of Using Pine Needles As Mulch

We know the importance of picking only the best material for your garden.

So besides giving you something to do with all those pine needles hanging out under your pine trees, here are just a few of the many benefits that come with turning your pine needles into mulch.

1. Pine Needles Recycle Local Nutrients When Used As Mulch

There are two types of mulches you can use in your garden; organic or inorganic mulch.

Mulch that is made from plant material is considered organic. Organic mulches eventually break down and add nutrients to your soil, allowing the nutrients to be absorbed by your plant roots again. 

This recycling of nutrients is essential when growing plants, and this is especially beneficial for veggies and fruits you plan to harvest. 

Pine needle mulch will help you create a balanced home for your trees and plants, ensuring a stable growing environment, a bountiful harvest, and healthy plants for a long time. 

2. It’s Very Cost Effective

We all want what’s best for our plants and our wallets! The good news is that pine needle mulch is relatively cost-effective to purchase and maintain.

If you have pine trees on your property, then your pine needle mulch will be completely free, but if not, it can be pretty cheap to obtain, depending on where you live.

Pine needle mulch will also help you save money on watering as it absorbs less water than other mulches.

It also takes much longer to decompose than different mulches, meaning you will have to replenish it far less than others. This will help you save money if you buy your mulch and time if you make your mulch.

Is Pine Needle Mulch The Best?

Researchers from the Indian Department of Soil Science compared a series of different organic and non-organic mulches and their effects on strawberry growth.

They compared pine needle mulch to a series of mulches, including grass, transparent and black polyethylene (plastic) and Eupatoriom. For the case of pine needles, they found quite a few interesting things.

First up, the researchers found that ALL mulched treatments increased minimum soil temperature. The polyethylene mulches performed better in that regarded while pine needle and grass mulch ended up lowering the maximum soil temp (which is good or bad depending on the scenario.)

Furthermore, all mulches were effective at retaining moisture with the polyethylene mulches retaining the most water and nutrients (of course they would, plastic doesn’t absorb water and traps airflow.)

Now for the good stuff, behind black polyethylene mulch, pine needles produced the second most root growth out of the rest of the mulch types, over transparent polyethylene and grass.

Another study from the Journal of Environmental Horticulture found that organic mulches (various barks, chips and needles) vs. polyethylene mulches led to a 50% decrease it total weed control, where plastic mulches led to total weed control.

I encourage you to do some more research on the fact, but the main takeaway here is that plastic is the best mulch, and pine needles / bark are probably more than good enough for your home use and will help decrease weed growth while increasing water retention, root growth, and yield.

Personally, I try to limit a lot of the plastic I use. So I would much rather use an organic mulch vs. inorganic unless I was running a farm where my yield = my income.

Here’s a quick chart summing up the difference between pine mulch and other mulches.

Most Common Mulches Compared

MULCH TYPEHOW ITS PRODUCEDORGANIC/INORGANICCOMPLICATIONBENEFIT

Incase you’re wondering, you can learn more about the difference between pine straw and pine needles here.

3. Pine Needle Mulch Will Keep Weeds Away

Since they are always competing with our plants for nutrients, water, and light, weed management is a top priority for most gardeners. That said, mulch is a great option to help combat this issue. 

Pine needle mulch makes it more challenging for weeds to germinate than other natural mulches because the seeds will often drop below the mulch.

The mulch also keeps the weeds from sun access, preventing them from growing successfully. When controlling weeds with pine mulch, a three to four-inch layer will do the trick! 

Because it is much more lightweight than other mulches, it is essential to manage the layer of pine needle mulch to keep weeds out. 

A few key points:

  • Always ensure you have about a three-inch layer of pine needle mulch at all times.
  • Pull weeds right away.
  • Use a weed spray to help manage your beds. 

4. It’s Tidier Than Other Mulches 

You may notice that pine needle mulch is commonly used on hillsides and other kinds of slopes. It does an excellent job of staying in place, and there’s a reason for this!

Unlike other types of mulch, pine needles interlace each other making it less likely to move and shift around. Mulches like shredded wood, tree bark, grass clippings, etc., will float around, especially in areas with temperamental weather. 

close up on colorful mulch in piles
Traditional mulch types (NOT pine needle mulch.)

If you’re tired of picking up debris and raking your mulch back into place, pine needle mulch might be just what you need.

How To Make Pine Needle Mulch 

Now that we’ve run through the benefits of pine needle mulch, I’m sure you’re curious about just how easy it is to make your own mulch. Spoiler alert, it’s very easy! Let’s take a look.

How To Source Your Pine Needles

Having an abundance of pine trees on your property can sometimes come with some frustration. Yet beautiful, these trees can get pretty messy. 

According to Utah State University Forestry Extension, new needles are produced every spring and summer and can last between two to four years. As your pine tree grows, you’ll see the newer needles in the front of the branches while the older needles sit further back. 

As time goes on, these needles become more shaded and less beneficial to the tree. So, then they fall off. The tree is constantly producing new needles and losing old needles. And as you know, all those old needles end up scattered all over your yard. 

Dry fallen needles and pine cones. Autumn background. Natural brown forest soil in a pine forest.
Pine needles and cones!

As you’re sprucing up your yard, use those old pine needles as new mulch! Then, sit back and relax in your tidy yard, knowing you are reusing material and your plants are in good hands. 

As you prune your pine trees, collect the pine needles from the limbs you cut off. You can also harvest pine needles from dead or dying branches before they even hit the ground. 

Bonus tip: If you don’t have pine trees in your yard, try taking a walk around the neighborhood and ask your neighbors if they would like you to take some pine needles off their hands. They will probably be happy you’ve offered. You get free mulch and make new friendships; it’s a win-win for everyone!

Be resourceful! Don’t be afraid to use needles from the branches you prune through regular pine maintenance.

Making Your Pine Needle Mulch

If you’re collecting pine needles in your backyard, you will want to thoroughly rake the pine needles into a pile. It’s important to note that your average leaf rake may not do the trick with pine needles. As I’m sure you know, having the right tools for the job will make you more productive.

When picking the right rake for pine needle collecting, you must keep two things in mind. First, choose a rake with tines with a smaller spread so the needles don’t easily fall through. Second, a rake with a broader rake head will allow you to collect more needles per rake pass.

Either the Amazing Rake Back Saving Garden Rake or VIVOSUN 2-Pack Adjustable Garden Camping Rake would be our top recommendations! 

After successfully raking up all of your pine needles, you will want to break them down a bit. You can do this by going over your pile with a mower or running them through a shredder.

If you don’t have access to either of these tools, you can leave your pile to let it naturally break down before spreading your layer of mulch around your plants and trees.  

Applying Your Mulch To Plants And Trees 

Now that you’ve gone through the hard work of preparing your pine needles for mulch, you must apply your mulch in a way that will help your plants thrive. 

Here are a few guidelines for laying mulch, according to the University of New Hampshire

  1. Lay mulch whenever you establish new plants. The mulch will allow the roots to develop by blocking competition with weeds.
  2. Keep the mulch two to three inches from the base of the plant. Not doing this can create an environment for disease and pests. 
  3. Mulch trees and shrubs up to or just past the drip line of the plant canopy.

If you grow plants under your pine tree, you can simply let them fall right underneath if you’d like!

Yes – You Can Buy Pine Needle Mulch!  

If you’re lucky enough to have a pine tree in your yard, you don’t have to worry about purchasing pine needle mulch. If not, don’t worry because pine needle mulch is relatively easy to come by. You can buy it locally at most plant nurseries, home improvement stores, or garden centers.

And if you love convenience, you can have pine tree mulch delivered right to your front door! This USA Pine Straw- Premium Pine Needle Mulch is highly rated and easy to use. This is an excellent option if you’re in an area where pine needle mulch is not locally sourced.

Pine Needle Mulch Best Practices 

Your work is never really done when it comes to gardening and tree care. Maintenance is half the battle! 

Once you’ve created or purchased and laid out your mulch, it’s time to make sure you’re taking care of it and replenishing it as needed. 

Let’s review the best practices to keep your pine needle mulch lasting long.

Fallen pine needles on the ground.

Test Your Soil’s pH

Some gardeners like to avoid pine needle mulch because they fear that it makes your soil acidic or that it is only suitable for acidic plants. However, this isn’t necessarily the case.

Yes, with a pH level of 3.2 to 3.8, pine needles are acidic, but they don’t necessarily make your soil acidic, 

According to Oregon State University, when pine needles are left to break down naturally, the decomposers in the soil will neutralize them.

It is only when you turn the freshly fallen pine needles into mulch right away that it could potentially change the pH of your soil, but even then, it won’t make that big of a difference. 

If you ever feel worried about the pH of your soil, you can always keep some soil testing pH strips on hand to ease your mind of any worry. 

These Plants Love Pine Needle Mulch 

Pine needle mulch is excellent for all your acidic and nonacidic plants. You can use it in your flower beds, vegetable beds, or around your trees and shrubs. Here are a few plants that love pine needle mulch: 

  • Tomatoes
  • Potatoes 
  • Onions
  • Berries like strawberries and blueberries
  • Roses
  • Daisies 
  • Marigolds
  • Azaleas
  • Hydrangeas 

When To Add More Mulch 

One of the many benefits of pine needle mulch is that it is light, easy to move around, and easy to add. Also, it can last for quite a while! 

If you’ve ever taken a hike or stroll through any piney forest, then you’ve probably felt the bouncy-like mat created by the pine needles. It’s nice and sturdy, and it’s not easily blown away.

 It is a slow-to-decompose material, so you won’t need to refresh it as much as other mulches. 

A good rule of thumb is to ensure that the mulch stays at a level of about three to four inches. Once it starts dropping below that, it may need a refresh. 

To keep it healthy, give it a good raking to loosen up the mulch a bit in the springtime. Other than that, it doesn’t need much care! 

That’s A Wrap!

As you can see, mulch is a terrific addition to any garden bed or tree, especially if it’s pine needle mulch. Now for quick recap.

Pine needles make excellent mulch because:

  • It does a great job of recycling local nutrients. 
  • It’s cost-effective, especially if you have pine trees! 
  • It will keep those pesky weeds away. 
  • It’s nice and tidy due to its ability to stay in place more than other mulches. 
  • It lasts a long time. 
  • It won’t change your soil’s pH. 
  • It’s easily sourced.

We hope we’ve given you all the resources (as well as some relief because those pine trees love to drop a lot of needles!) to help you get started on your mulching journey. Enjoy! 

Resources

Bhatt, L., Rana, R., Uniyal, S. P., & Singh, V. P. (2011). Effect of mulch materials on vegetative characters, yield and economics of summer squash (Cucurbita pepo) under rainfed mid-hill condition of Uttarakhand. Veg. Sci, 38(2), 165-168.

Chandra, S., Singh, R. D., Bhatnagar, V. K., & Bisht, J. K. (2002). Effect of mulch and irrigation on tuber size, canopy temperature, water use and yield of potato (Solonum tuberosum). Indian Journal of Agronomy47(3), 443-448.

Nwosisi, S., Nandwani, D., & Pokharel, B. (2017). Yield performance of organic sweetpotato varieties in various mulches. Horticulturae, 3(3), 48.

Skroch, W. A., Powell, M. A., Bilderback, T. E., & Henry, P. H. (1992). Mulches: durability, aesthetic value, weed control, and temperature. Journal of environmental horticulture10(1), 43-45.

Your Competitors Are Already Running Ads. Are You?

This is for service business owners who are ready to SCALE.