Grow Your Business with Tree Journey

Our TradeWorks Revenue System™ builds a detailed advertising funnel that attracts, nurtures, and converts the right clients – so you can finally stop chasing leads and start scaling your business.

Birch trees are typically prized for their lovely, papery, peeling, oftentimes white bark, and lush green foliage. But the ornamental yard trees are starting to gain popularity with syrup makers and hobbyists alike because they are relatively easy to tap.

If you are tapping birch trees for sap, you need to start before the buds on the trees begin to sprout. For most areas, that time is around mid-March to late April. Unlike maple sap which is quite sweet, birch sap has a more watery consistency with a woody, slightly sweet flavor when reduced.

You know now that birch trees, just like maple trees can be tapped to obtain delicious sap, and eventually boiled down into tasty syrup, but there are many things you should know before delving into this project. Keep reading to find out more about birch sap, how to cook it down into syrup, and how to tap the trees correctly.

Can You Even Tap A Birch Tree?

birch trees in field

I’d tap that tree! Yes you can, and not only birch trees—any variety of birch trees can be tapped.

In fact—you can also tap walnut, beech, and alder trees as well as many more. Tree tapping supplies are readily available online, and with a small initial cost, you can begin tapping trees for sap consumption, syrup, and other products!

When Is The Best Time To Tap A Birch Tree?

If you have tapped or still do tap maple trees, then you can jump right into birch tree sap collecting directly after maple sap season is over.

Once winter’s tight grip has loosened and the nights and days are no longer dipping into freezing temps, the sap inside birch trees starts to thaw and it’s time to tap. Depending on what area you live in, that time could be between mid-March to the latter weeks of April. 

A better indication is when the tree still has tiny buds on the branches but has not sprouted leaves yet. When you tap a birch tree you will soon know if the sap is starting to run or not.

A healthy birch tree during the tapping season will net you about a gallon of sap per day. If your tree is not producing any sap yet, and the leaves haven’t sprouted, give it a little time, the sap may still be thawing out. 

For a cheap tapping option, consider the TAP MY TREES Spile And Hook as it’s a great budget start to birch tapping!

Find Healthy Birch Trees For The Best Sap

You want to look for birch trees that have a large canopy, get plenty of full sunlight and are at the very least 8” in diameter. They should be healthy trees without a lot of broken, dead branches, and do not have any mushrooms growing on the branches or trunk.

Those trees are dying and have a lot of deadwood on them. Birch trees don’t typically live very long compared to oak trees, or elms which both can live for hundreds of years. 

If you are a beginner at foraging and using wild trees, consider getting a book such as the National Geographic: Field Guide To Trees Of North America.

Other trees to be avoided are ones located where pesticides, herbicides, and other chemicals are used or sprayed. Keep away from trees lining roadways because they will have absorbed a lot of chemicals from sprays and chemical-laden water runoff along the roadways themselves.

For more information on what a proper birch tree looks like, take a look at our piece on how far birch tree roots spread!

How To Tap A Birch Tree

Now that you have picked out your healthy, mature tree that’s free of pesticides, petroleum chemicals, and other hazardous gunk, let’s get to the good part. You will need a drill and bit the size of your tap or spile. You’ll also need a hammer or rubber mallet to tap the spile in, as well as collection buckets, preferably with lids to keep out debris and bugs. 

If you have tapped other trees like maple trees, then the same equipment you used for them will work for tapping birch trees. If you don’t have the equipment, Amazon.com has plenty of tree sap collecting kits or individual pieces you may need to get started. 

You just want to make sure your equipment is thoroughly cleaned to prevent any cross-contamination. Make sure anything that is cutting, drilling, or being inserted into the trees, or touches the resulting sap is cleaned and disinfected. 

Collecting sap from birch trees is similar to collecting sap from maple trees. Birch sap is quite different from maple sap because it contains simple sugars, fructose, and glucose, as opposed to the complex sucrose found in maple sap. Birch sap also differs in chemical composition.

Pick A Spot And Drill A Hole

drop birch juice

Pick a spot on the tree about 3 to 4 feet above the ground, and preferably on the northern or eastern side of the tree to prevent too much sun from hitting the fresh sap. Make sure your spiles and drill bits are sterilized using rubbing alcohol or by boiling them first and drilling one hole per tree. 

For regular drilling, most people recommend something like this Greenworks Hammer Drill Kit, along with something like this Liberty Supply Professional Maple Tree Tapping Bit.

The hole needs to be at a slight, upward angle. No more than 20-30 degrees. If it’s too steep, the full bucket could pull the tap right out of the tree. Only drill about an inch to an inch and a half deep into the tree—where you’re reaching the sapwood. Any deeper and you can injure the tree and you won’t collect much sap. 

Look Out For Dark Wood

If you get dark brown shavings while drilling, go pick another tree because this one is diseased or dying. The shavings should be very light-colored or white. 

Now, clean out the hole with clean water if there are any shavings left, and gently tap in the spile. Attach the bucket and you’re good to go.

If the sap doesn’t immediately start to flow, be patient. You can go tap another tree then come back to check or check again tomorrow. Once the sap is flowing, just make sure to collect it each day because it will net a lot in a short time.

A Few Side Notes About Birch Sap

You can drink the sap right away. Birch sap is considered a health drink in many countries and does contain many vitamins and minerals. Be sure to filter the sap first to remove any debris or impurities that could have fallen into the collection bucket.

Although most sap collecting equipment is now made of stainless steel or plastic, some older equipment may be composed of copper. You shouldn’t use anything copper when collecting birch tree sap. Birch sap is acidic enough to corrode copper.

Make Harvesting Birch Sap A Family Affair

Spring landscape. A birchwood on a background of the sky with clouds. Beautiful harmonous snow-white trees.

Tapping a birch tree, or any tree for that matter could be a fun activity for everyone in the family. It’s a great lesson for younger kids to teach them about how nature can provide for us, and respect trees and nature even more. Even though it’s still probably a bit chilly out, tapping birch trees is a great outdoor fun project.

Who knows, this undertaking could help them with a school project or essay if they happen to be studying trees or forests.

How Often Can You Tap A Birch Tree?

Maple trees are hardy plants that can endure being tapped nearly every year. Unfortunately, birch trees are a bit more fragile and probably won’t do well if they are tapped year after year.

After A Few Seasons, Give Your Birch Tree A Rest

You only want to drill one hole per year in a birch tree. Don’t worry though because if the tree is large and healthy, you will end up with gallons of sap per tree. You should only tap a birch tree about 3 years in a row, then give the tree a rest.

When drilling a hole for sap the following year, you’ll need to pick another spot. From the original hole, move to the right or left between 4 to 6 inches, and a few inches above. Refrain from drilling completely around the tree, as this is called girdling the tree, and it will not be able to heal itself.

Since birch trees are not as strong as maples, this is just another reason to stay vigilant about equipment cleaning and disinfecting. The trees do heal themselves from the drilled holes, but extra cleanliness won’t hurt at all.

Does Tapping Hurt Birch Trees?

Tapping does not hurt the tree if it is done in moderation, with clean equipment, and handled the right way. Even though birch trees are not as hardy as some other trees, that does not mean they can’t deal with getting tapped. Once you are finished collecting sap from the tree, remove the spile and the tree will soon close the hole itself.

The tree is going through a growth phase after winter, and will often heal a tap hole very quickly. As long as you only drill one hole per sap season, and then give the tree rest for a season or two after up to three taps, the tree will continue to grow and be healthy.

What To Do With Birch Tree Sap

production of birch sap in spring

You’ve collected gallons of sap per birch tree, now what can you do with it all? First off you need to figure out what to do with it quickly because birch sap is quite perishable. It will remain fresh for up to 7 days if refrigerated, longer if you freeze it.

According to the USDA Forest Service: Birch sap is becoming commercialized in Alaska where people are using sap and syrup to make candies, salad dressing, marinades, and even ice cream.

Ferment The Birch Sap

If you have the know-how and equipment, birch sap can be fermented into birch wine, birch beer, or even into birch mead.

Birch beer—the non-alcoholic kind that’s similar to root beer—is probably the most prevalent of beverages. Here the sap is processed, essential oils are added as well as carbonation and sugar to make a fizzy, spicy drink that carries flavors of spices, and wintergreen.

Boil Birch Sap Into Syrup

The most popular use for birch sap, after drinking it straight, is cooking it down into syrup. Birch syrup is very different in flavor from maple syrup because of the significantly smaller amount of sugar found in birch sap. Birch syrup is said to have an earthy, almost savory-sweet flavor that goes well on meats, in glazes, and marinades.

It takes remarkably more birch sap to craft syrup compared to maple sap. Where it takes approximately 30-40 gallons of maple sap to make 1 gallon of syrup, it can take 100 to 200 gallons to make a single gallon of birch syrup. With such high water content, and alternately low—and easily burned—sugar content, it can be difficult to make good-tasting birch syrup.

Birch Sap Is Perishable

birch forest in sunlight in the morning

When the sap does start pouring out of your tap, you’ll need to collect it daily, as the temperatures during this time will be warmer than maple sap season, and because birch sap is more perishable than maple sap. Birch sap will last about 7 days under refrigeration before it starts to ferment. If you are going to use birch sap, do so quickly.

If you don’t have the time to cook the sap promptly or you want to store it longer, you can freeze it, this way it will last a much longer time.

Be careful though, because if you plan on freezing the sap, make sure you have plenty of space. If you tap 5 or 6 trees, you could potentially harvest a gallon of sap per tree, per day, for 3 to 4 weeks. That’s a lot of sap!

Tips For Making Birch Syrup

Collection of birch sap from the bark of a tree.

Birch sap contains glucose and fructose sugars in small amounts. Those types of sugars will burn quickly if heated too high or for too long, leaving you with a caramelized tar-like substance that does not taste good. You’ll have to adopt a low and slow process to make delicious birch syrup.

Birch sap needs to be evaporated slowly to produce the best flavors. Most commercial birch syrup manufacturers use reverse osmosis to create the best syrup. Small birch syrup outfits don’t have access to that kind of equipment because of the hefty price tag, so they have to do it the old-fashioned way.

Boiling birch sap will create a lot of moisture because there is a lot of liquid that needs to be cooked off. Be prepared for this. If you plan on cooking a lot of birch sap, you might want to set up some kind of outside rig, say like a turkey fryer.

Get Out There And Start Tapping

You don’t have to have a lot of expensive equipment or be a big tree tapping operation to start collecting your own healthy birch tree sap. You don’t have to be a survivalist or homesteader either. Anyone can tap birch trees for sap if you know what you’re doing, and when to get started.

If you are interested in creating a home grown birch grove for tapping, check out this troubleshooting article on 4 Reasons Why Birch Trees Can’t Grow In The Shade!

You know, the air is crisp, the trees haven’t started budding quite yet, what are you waiting for? You now know when the best time to tap birch trees is, you know how to collect the sap, and you have several different ways to use the sap. Get out there and tap those birch trees.

References:

Jeong, S.-J., Lee, C.-H., Kim, H.-Y., Lee, S.-H., Hwang, I.-G., Shin, C.-S., … Jeong, H.-S. (2012, January 31). Quality Characteristics of the White Birch Sap with Varying Collection Periods. Journal of the Korean Society of Food Science and Nutrition. The Korean Society of Food Science and Nutrition. https://doi.org/10.3746/jkfn.2012.41.1.143

Trummer, Lori; Malone, Tom. United States Department of Agriculture, US Forest Service Alaska Region, State and Private Forestry Forest Health Protection, Anchorage Office. Some impacts to paper birch trees tapped for sap harvesting in Alaska. 10/02/2022 16:09:22. http://hdl.handle.net/11122/3198

Abby K. Van Den Berg, Mark L. Isselhardt, Timothy D. Perkins. March 2018. Identifying Sustainable Practices for Tapping and Sap Collection from Birch Trees: Optimum Timing of Tapping Initiation and the Volume of Nonconductive Wood Associated with Taphole Wounds

If you are growing your own papaya trees or merely considering growing them, you probably want to know how long papaya trees last and where papaya trees grow. After putting in the time and effort to grow these plants will you be rewarded with beautiful, broad-leaved foliage year after year, as well as tasty fruits.

Papaya trees are tropical tree-like plants that are generally short-lived. With the right conditions, papaya plants can live close to 20 years. Papaya trees grow best in USDA Hardiness Zones 9-12 because they need a tropical climate to successfully grow and produce fruit.

Papaya trees can last for several years if they receive the right conditions. These finicky plants live life in the fast lane, require moderate care, but are relatively easy to grow. Keep reading! In this article, we’ll be going over how long papaya trees live, how fast papaya trees grow, and how to care for them.

Why Papaya Trees Last So Long

fresh papaya tree with bunch of fruits

Papaya trees live fast, grow up quickly, and burn out just as fast. They may live for a few decades if the conditions are perfect, and there are reports of a very limited selection of trees that reach the ripe old age of 40. The lifespan of a papaya tree is also related to the weather, the climate, and what you are growing the papaya trees for.

Papaya trees will start producing fruit theIr first year. Compare that to apples, citrus trees, or other fruit trees, which take years for the first fruits to show up, papayas are a great choice.

The downside to that is, that papaya trees don’t produce fruit for nearly as long as actual woody trees.

Papaya trees may last for a decade or three if they are cared for very well, but they typically only produce fruit for a small amount of that time. Either that or the quality of the fruit starts to decline after 3 to 4 years.

If you are growing papaya trees for the fruit, you can expect them to last for a handful of years; even commercial papaya producers replace their trees every 3 to 4 years because of this.

The good thing is they are easy to grow!

You can renew your crop from seeds every 2 to 3 years. When you get great fruit, keep those seeds and grow some more papaya trees. That way, when the older trees start to fizzle out, you’ll have replacement trees either growing or ready to grow.

Papaya trees grow tall with a single trunk that often has a top-heavy crown. This makes wind a major factor in the lifespan of papayas. If a papaya tree reaches 20 to 30 feet tall and is laden down with fruit, a good gust of wind could knock the tree to the ground, thus, ending its lifespan early.

Too much rain or a sudden cold snap could end a papaya tree’s growth as well. These plants are quite susceptible to root rot as well as cold temperatures.

There are a few areas in the United States where you can grow papaya trees outside year after year. These places include most of Florida, south Texas, Arizona, southern California, and Hawaii. If you’re like me and the vast majority of the population, you probably won’t be able to grow papaya trees outdoors, unless you replant them every year like annual flowers.

Freezing temperatures will surely destroy papaya trees, as these tropical plants have not become accustomed to the cold. With proper care, you can protect them from a short cold snap, but prolonged freezes will finish them off.

So, if you live in an area that gets a typical winter, your papaya trees will be ornamental tropical trees that grow beautifully for a few months and then shrivel up during the first frost.

As Papaya Trees Get Older, They Get Weaker

Young, vibrant papaya trees are healthy, strong trees that are very resistant to most tree diseases and pests, but as the trees age, they get more susceptible to mold, rot, and pests. This is another reason papaya plants don’t typically live very long.

When growing papayas at home, they will probably only live for 5 to 7 years before either getting root rot, being blown over or some other disease that ends the tree’s life cycle.

Papaya trees do well for a short time, but then they begin to fizzle out in a few years.

Since they are very easy to grow from seed, it’s usually not prudent to try and fight a pest invasion or treat diseases in papaya trees; just get rid of the problem trees and grow new ones.

How Long Do Papaya Trees Bear Fruit?

Papaya trees will start fruiting in the first year, often 6 to 12 months after seeds have germinated. If they stay warm and well-tended, they should continually grow taller as they produce more fruit. They will stop producing fruit when the weather starts to cool down.

If you live in areas where you can grow papaya trees outdoors you will likely have better, longer yields of fruit. They thrive in hot humid temperatures and a lot of sunlight, which is a little harder to mimic indoors.

With optimal conditions, papaya trees will produce fruit for 7 to 8 years, but as the trees mature, the quality of fruit tends to decline. As the trees age, they are more likely to either get blown over by wind because they are always growing taller, or some other malady will strike them down. It’s recommended to replace your fruiting papaya trees every 3 to 4 years.

If you grow your papaya trees indoors, even if you can replicate outdoor, natural conditions it is still recommended they be replaced about every 5 years. This helps with fruit production, the height of the plants, and reducing the likelihood of disease in the trees.

What Is The Life Cycle Of A Papaya Tree?

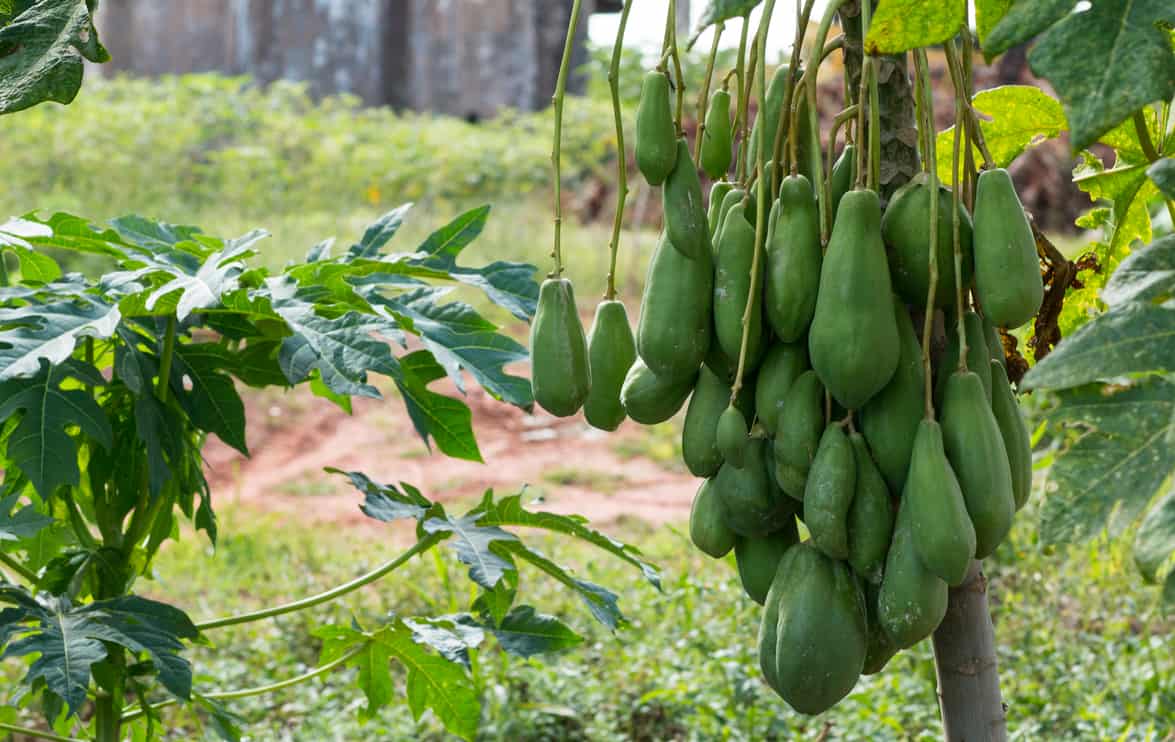
Tree very full of green papaya

Papaya trees grow fast, are easy to start from seed, produce fruit within the first year, continue to produce quality fruit for a few years then they quickly hit their twilight years.

Let’s put that into a timeframe so you know what to expect.

According to the University of Florida IFAS Extension, papaya fruit production depends on factors like climate and plant care. A healthy papaya tree will start producing flowers about four months in, and then 3 to 7 months after that it will likely start producing fruit.

Seedling: Starting a papaya tree from seed only takes about 2 to 4 weeks if you rinse them and break the outer coating off the seed. Cover the seeds with about a quarter-inch of soil and keep it moist, soon you’ll have seedlings pushing up from the soil.

Sapling: After a month or two, if you started your seeds indoors, it is time to transplant the papaya plants to their permanent areas. It could be outdoors or in a large planter if you’re keeping them indoors. They should be about a foot or two tall before transplanting.

Young Tree: Around the four-month mark you should start seeing flowers on the plants. Papaya trees can be either male, female, or both. The seeds you get from fruits at the grocery store are likely to be both male and female.

Male flowers grow in thin clusters, with thin shoots that extend off the tree a few inches. Female flowers are fuller and grow right above leaf stems. The female flowers need to be pollinated to produce fruits. If you are growing papaya plants inside strictly, you can pollinate these flowers yourself by using a cotton swab or a small paintbrush.

Fruiting Stage: After the flowering stage, if the flowers have been pollinated you should begin seeing fruits growing from the flowers after a few more months. About 3 to 7 months after the flowers you could be harvesting fresh papaya fruit for yourself. Depending on conditions and the vitality of the plant, you could get high-quality fruit from your trees for the next 4 to 5 years.

Mature Tree: During this time the tree starts to get very high. You may not be able to safely reach the fruits of the tree, it could break and fall with a high wind gust, or it could get something like root rot. As the trees mature they get weaker and more susceptible to disease. Around this age, it’s time to start thinking about replacing existing trees.

Papaya Trees Are Easy To Grow

Papaya flower on the papaya tree

You can go to the grocery store, buy a papaya fruit, and grow your own plant from the seeds. All you have to do is wash the seeds, break the outer sac that contains the seed—this outer shell inhibits germination—dry the seeds for a day or two, then plant them.

That’s basically it, no stratification is required. The seeds will start sprouting in a few weeks. You’ll just need to have well-drained soil, keep the soil moist, and make sure they are kept very warm. Papaya trees thrive in higher temperatures.

According to the University of Florida, to start growing papaya trees, remove the seeds from ripe fruit and rinse through a colander. Break the seed’s surrounding sac by pressing the seeds against the side of the colander. Rinse them thoroughly then lay them out on a paper towel to dry. Once they are dry, the seeds can be stored in a plastic bag and in the refrigerator for a few years for later use.

Papaya Trees Need Moist Soil

One of the biggest problems with papaya trees is that the roots don’t handle standing water at all. They love water but are finicky about it. The soil has to stay moist, and the plant can’t dry out, but standing water will cause root rot to set in quickly.

If you plan to grow papaya or other fruit trees, the FoxFarm FX14100 Coco Loco Potting Mix is the perfect soil to do so! The coconut coir in this potting mix can hold more water than its weight, while still being a well-draining soil.

Papaya Trees Love The Heat

Since they come from a tropical climate, papaya trees need it hot to grow and produce fruit.

If you live in USDA Hardiness Zones 9-12 you should be able to plant papayas outside as long as you protect them from freezing temperatures. If you live in cooler climates the trees will most likely be ornamental trees for one year, unless you can bring them inside during the cooler months.

Starting your own papaya seeds is easy with this 2 Sets Seed Starter Tray with Heat Mats. This will help to keep the seeds moist, and it offers the correct soil temperatures as papaya seeds need the soil temperature to stay in the range of 60-70°F for proper growth.

Papaya Trees Need Fertilizer

Papaya fruit are growing on trees in the garden on a blurry natural background.

Papaya trees grow quite fast, so they require a lot of organic material such as compost, and/or fertilizer. Typical trees native to your growing zone only require fertilizer about every one or two years, whereas papayas will need nutrients about every month during the warm, growing months.

So while they are easy to grow, they do require a decent amount of your attention.

The Nelson Citrus Fruit and Avocado Tree Plant Food is a great fertilizer choice for your papaya tree. It has a balanced nutrient ratio specifically for fruit trees to properly grow fruit. Additionally, this fertilizer has added calcium to help improve the growth of the papaya tree trunk and limbs and added potassium to assist the tree during colder temperatures.

Papaya Trees Need Full Sun

Sunlight is crucial for the growth and development of your papaya tree. Papayas need a lot of sun. If you plant papaya trees outside, they need all the sunlight, so don’t plant them around other trees or buildings that might shade them. If you grow them inside you’ll need either a sunroom that gets 6 to 8 hours a day of full sun or a greenhouse.

Papaya Trees As Ornamentals

Some people like to grow papaya trees as annual, fast-growing, ornamental trees outdoors.

There’s certainly nothing wrong with this, and they can be beautiful specimens prized for their large, broad leaves and tropical look. Once cold weather sets in and they get a hard frost, it will finish them off for the season.

Once winter has played out, you can start seeds inside again, and once the threat of frost is gone, plant the papaya trees outdoors for a new round of ornamental trees. Papaya trees need consistent temperatures in the 80s and 90s to grow fruits, so areas farther north may not get the hot weather that will grow papaya fruit.

If you do end up getting green fruits but they don’t ripen, you can still use them. Green, unripe papaya is used in cooking or as a substitute for winter squash. There are a lot of recipes out there that utilize green papaya, so if that’s all you can grow in your area, don’t throw them away, cook them!

That’s A Wrap!

fresh papaya tree with bunch of fruits

Now that you know how long papaya trees will last and how fast they grow, we hope you go out there and grow your own. These trees are easy to grow, but they are a bit finicky. Once you have everything figured out, it’s not hard to keep papaya trees growing.

In perfect tropical conditions, papaya trees will last for decades. If you are growing them for fruit production, then you’ll only want to keep them growing for 4 to 7 years, after that it’s best to replace them with new, vigorous growing papaya trees. You can keep your trees alive for years with proper care, but as they age it gets less prudent to keep them alive because they are so easy to replace.

We hope this has been of some help to you on your papaya tree journey!

References

Wang, Ren-Huang, et al. “Leaf age and light intensity affect gas exchange parameters and photosynthesis within the developing canopy of field net-house-grown papaya trees.” Scientia Horticulturae 165 (2014): 365-373.

Wadekar, Ashish B., et al. “Morphology, phytochemistry and pharmacological aspects of Carica papaya, an review.” GSC Biological and Pharmaceutical Sciences 14.3 (2021): 234-248.

Liao, Zhenyang, Qingyi Yu, and Ray Ming. “Development of male-specific markers and identification of sex reversal mutants in papaya.” Euphytica 213.2 (2017): 1-12.

Niklas, Karl J., and Thomas E. Marler. “Carica papaya (Caricaceae): a case study into the effects of domestication on plant vegetative growth and reproduction.” American Journal of Botany 94.6 (2007): 999-1002.

Have you always wanted to have a banana tree in your yard? Maybe you are looking to start a produce business and banana trees would fit right in. After making sure you have the right climate for one, you need to find out about the best soil for banana trees.

If you live in a tropical climate, you won’t have any trouble finding the right type of soil to grow your banana tree in, which consists of lava rock and sand. Without this climate, banana trees can thrive in cactus-specific soil coupled with a sunny location.

Once you learn how to get the soil prepared for your banana tree you will be reaping the fruits of your labor in less than a year (I know, I couldn’t resist!) With a few added details and just the right soil, your banana tree will grow at its optimum level for many years to come.

What Are Banana Trees?

Banana plantations in Dong Nai province, southern Vietnam.

Banana trees are the plants that produce the sweet yellow fruit that you find in the grocery store and on produce stands. They love the tropics but the truth is you can actually grow them just about anywhere if you pay attention to their needs.

There are around 1,000 different kinds of bananas that can be found growing in over 150 countries. Some are pretty familiar, but a few will surprise you. 

The most common is the Cavendish, which are the ones that we buy at the grocery store. An interesting variety is the Blue Java, also known as the ‘Ice Cream’ banana because it tastes similar to vanilla ice cream. Musa Velutina bananas bear pretty pink fruit but have a lot of seeds and are difficult to eat.

According to Perdue University’s Center for Crops, the banana tree is a large herb (for the sake of this article we are going to continue calling it a tree.)

Because their makeup doesn’t include a woody stem, banana trees are considered to be an herb. As an herb, they can grow as tall as 40 feet high making them one of the tallest in this class in the world. 

Even though it is technically called an herb, it really looks more like a tree. The structure of this plant lies in the way the leaves grow. At the base of the banana tree, the leaves intertwine with each other creating what is known as a pseudo-stem, which can carry the weight of the tree. 

6 Conditions Banana Trees Need To Thrive And Bear Fruit

 Banana tree with bunch of green growing raw bananas

You may be wanting to grow banana trees just as an addition to your yard or you may be wanting to start a small banana plantation professionally. Either way, certain conditions that must be met for them to thrive and produce beautiful sweet bananas by the bunch.

1. Banana Trees Need A Humid Climate

Ideally, banana trees would like to have a flowered lei around their neck and call Hawaii home, but any place that is warm and humid will do. This does not mean you can’t grow a banana tree in an area that gets a little chilly here and there. More on how to deal with that in a minute.

2. Banana Trees Need Warm Temperatures

For a banana tree, a good day is when the temperature is around 80 degrees and it is humid outside. You will want to make sure you live in an area where the temperature doesn’t get below 55 degrees. 

You can up the humidity of your banana tree by misting it daily, or if it is in a container you can put it on a tray of pebbles or small rocks. Inside, you can place it near a humidifier.

3. Banana Trees Need Full Sun

Landscape of central Thailand, a banana tree, rocks in the background

They really like to bask in full sun, but you may need to keep an eye on the and give them a little bit of shade now and then. Six hours of sun is what they want, but you have to make sure they don’t get burned. (Think of it like telling your kids to make sure to wear sunscreen.)

4. Banana Trees Need Well Drained Soil

Ah, the all-important part that is truly the base that will help the banana tree thrive and bear fruit. Make sure not to get just any potting from a home and garden department. Banana trees need soil that can drain easily or the tree will die if it is left in any kind of water build-up.

Banana Plant Potting Soil Mix is a hand-made mixture that has been created specifically for banana trees! It comes in an 8-quart bag that will be the perfect soil for your banana plant.

5. Banana Trees Need Frequent Watering

During the summer months, a banana tree should be watered about every couple of days. When watering, take your time and make sure it is reaching down deep and getting to the roots. Do not overwater or the roots will rot. Feel the soil and if the top inch feels dry, it is time to water it again.

6. Banana Trees Need Fertilization

While your banana tree is growing, you should fertilize your banana tree every month. An all-purpose 10-10-10 fertilizer will work well for your banana tree. Southern Ag All Purpose Granular Fertilizer 10-10-10, has equal parts nitrogen, potassium, and phosphorous, to help your banana tree flourish.

How Do You Prepare The Soil For Your Banana Tree?

Banana trees in Thailand

There are a few things you can do before you plant your banana tree that will give it the best chance not only of survival but the most productive life it can have. You don’t have to wait until it’s warmer if you plan on planting your tree in the cooler months, just make sure it is not cold.

Because the roots of the banana tree do best when they have enough room to spread out, make sure the hole you dig is not only deep but wide. Put some of the special soil you have for your tree at the bottom of the hole so it can get directly to the roots right away.

To prepare the soil, make sure it is loosened up so it is porous enough for the water to drain properly. You can mix in some compost If you have some peat moss or manure will help with the mixture as well.

The soil should be one that is specifically for growing banana trees. These blends ensure that the roots get enough hydration but the soil can drain and not clump up leaving your banana tree sitting in water. 

Can You Grow Banana Trees In Pots? 

fresh green banana tree with flora

Not only can you grow banana trees in pots you can actually grow them inside your home. If you don’t have enough land to grow a banana tree with its expansive root system, you can easily grow a banana tree in a plastic, ceramic, or wooden pot. Just make sure you start with at least a 15-gallon pot.

Once it begins to grow and needs to be moved to a larger pot, you can either move it and plant it outside or find an even larger pot to plant it in. Growing your tree indoors you will need to make sure that the soil can always stay well-drained. Look for soil that has a good combination of vermiculite and perlite.

When you grow a banana tree indoors it is important to get just the right soil for it to grow. The soil has to be able to drain while still keeping the banana tree hydrated. Once you water your tree, make sure it is well-drained and dry before you water it again.

Until you decide if you want your banana tree to continue to grow indoors or if you want to move it outside, you may want to start with Soft POTS.

The 15-gallon pots are made of a thick fabric that is made from recycled water bottles. They are breathable providing good aeration for your trees and it has handles on each side so you can move them around when they need more or less sun.

What Is A Dwarf Banana Tree? 

dwarf banana

A dwarf banana tree is actually just a smaller version of the Cavendish banana tree. This is the type of banana tree that produces the bananas that we currently get at our local produce stands and grocery stores.

While the conditions it requires are similar to the regular-sized banana tree there are a few things it requires that are different. It does like full sunlight but it can exist in some shade.

As for the soil for the dwarf Cavendish banana tree, it likes it to be loamy and able to drain well. The makeup should be a combination of silt and sand with some clay added. They also like their soil to be more acidic with a pH level that ranges from 5.5 to 6.5

The Best Soil For Indoor And Outdoor Banana Trees

banana trees

While the soil needs for banana trees for indoor, outdoor, and dwarf banana trees are similar, here is an easy breakdown for each and how to prepare it.

Outdoor Banana Trees

The main type of soil that an outdoor banana tree must-have keeps the tree wet but not sitting in water. That will end up causing issues for your banana tree. It prefers some sandy soil but still needs to be well-draining.

If you are adding a banana tree to your existing outside garden, you can add some perlite to keep it well-drained. In the summer months when the weather is warmer, you should water your banana tree once or twice a day. 

Keep the pH level of your banana trees at 5.5 to 7. Make sure it does not go above 7.5. Keep an eye on the pH levels and invest in a home test so you can check it at least once a year.

Bananas have a lot of potassium in them and it is because they require a high level of potassium while they are growing. Use a fertilizer that is high in potassium and it will help the growth of your banana tree, and even add some compost to the soil. Mist them daily to bring up the humidity level.

Indoor Or Potted Banana Trees

When you are dealing with an indoor banana tree that you are growing in a pot, you may want to select a soil mixture that uses organic materials or one that will continuously provide nutrition. This will give your indoor tree nutrition regularly as it releases it in a time-release manner.

Make sure you keep the acidity level under the pH level of 7. Banana trees need to be in pots that are large enough to accommodate their spreading root system. And while they are growing, fertilize them regularly with a 10-10-10 combination of nitrogen, potassium, and phosphorous. 

Banana trees love to be treated with a lot of potassium. But they are not stingy with it, they use it to pass it on to their fruit.

Dwarf Cavendish Banana Trees

These mini versions of the common Cavendish banana trees are easy to grow and will make a great ornamental addition as a potted plant, or a fruit-bearing tree in your outside garden. 

Just like the other types of banana trees, they like soil that will drain well but still keep them hydrated. The soil should have a pH level of 5.5 to 6.5 and your banana tree should be fertilized every couple of months. You can plant it outside if you have room or inside in a roomy pot that has a good drainage base.

That’s A Wrap!

Banana plants on a farm beside the mountain

No matter where you live, the good news is that you will be able to grow a banana tree. If you have plenty of room you can grow several. 

If you don’t have much room you can grow just one.  And if you don’t have enough room for any trees you can grow one right in a pot in your home. 

Knowing the best soil for banana trees in each type of environment will give them the best chance not only for survival but for producing fruit on an ongoing basis. And if it looks like they are done producing bananas, don’t count them out.

Once they finish growing a bunch of bananas, another rhizome will pop up on the other side and will soon enough produce another bunch.

Thanks for sticking around and learning all about the best soil for banana trees! We wish you the best of luck on your banana tree journey!

References 

Collins, J. H. (1924). Growing Our Own Bananas. Scientific American131(2), 86-139.

Lahav, E. (1995). Banana nutrition. In Bananas and plantains(pp. 258-316). Springer, Dordrecht.

Have you ever wondered about the brown inner parts of your cedar tree and what would happen if you trim them? We’ve got that and a lot more covered in this article! In reality, there’s a few simple reasons as to why cedar trees won’t grow back.

Cedar trees grow new growth from their old growth or dead zone. This means if you prune your cedar and cut into the dead zone, your tree may not come back. If you only prune the new growth, about a third of the way back, your cedar tree will keep growing.

Evergreens are prone to natural browning and seasonal needle drop, but sometimes this can be a hint at a bigger issue. Keep reading to learn more about what this means and why your cedar tree won’t grow back!

Will Your Damaged Cedar Tree Grow Back?

The first question to ask yourself is, what damaged your cedar tree? Is it because of the seasons, drought or water stress, pathogens, infestations, or something else?

If your cedar tree is damaged and turning brown in certain spots, it could be because of a variety of things. If it’s seasonal, it is natural for your cedar tree to be dropping needles.

When this happens, around summer to fall, your cedar tree will drop yellow and brown needles to make way for new ones. However, it may be difficult to tell the difference between this or other damage to your cedar tree.

Next up is drought or water stress. If you notice brown needles around the base of the tree, this can easily be attributed to dry conditions. It doesn’t always mean this is the issue, but if you don’t notice any bug damage or other signs of stress, try soaking it at least once a week and see if it helps.

On the other hand, if your tree is too water-logged, or in an area that stays too wet, it can be susceptible to root rot. This is often devastating to any tree.

If your tree turns brown on one side of the tree, this could be root rot. Armillaria root rot is a root disease specific to evergreens, including cedars. Unfortunately, there is no cure for this and your tree will not come back.

If you have a pest infestation, you might notice your cedar tree turning a dreaded brown. Pests like spider mites are common amongst cedar trees. Fortunately, you can use insecticidal soaps to rid your tree of infestations.

Most of the time, if your cedar is turning brown and has some slight damage, your tree will grow back. However, if it seems to affect your entire tree, there’s a good chance it could be on its way out.

The best thing to do in this situation if you are unsure is to contact tree professionals who can assess the situation properly!

Did you know many cedar trees have blue needles? They’re absolutely beautiful and super interesting to learn about.

Will My Cedar Tree Grow Back After Trimming?

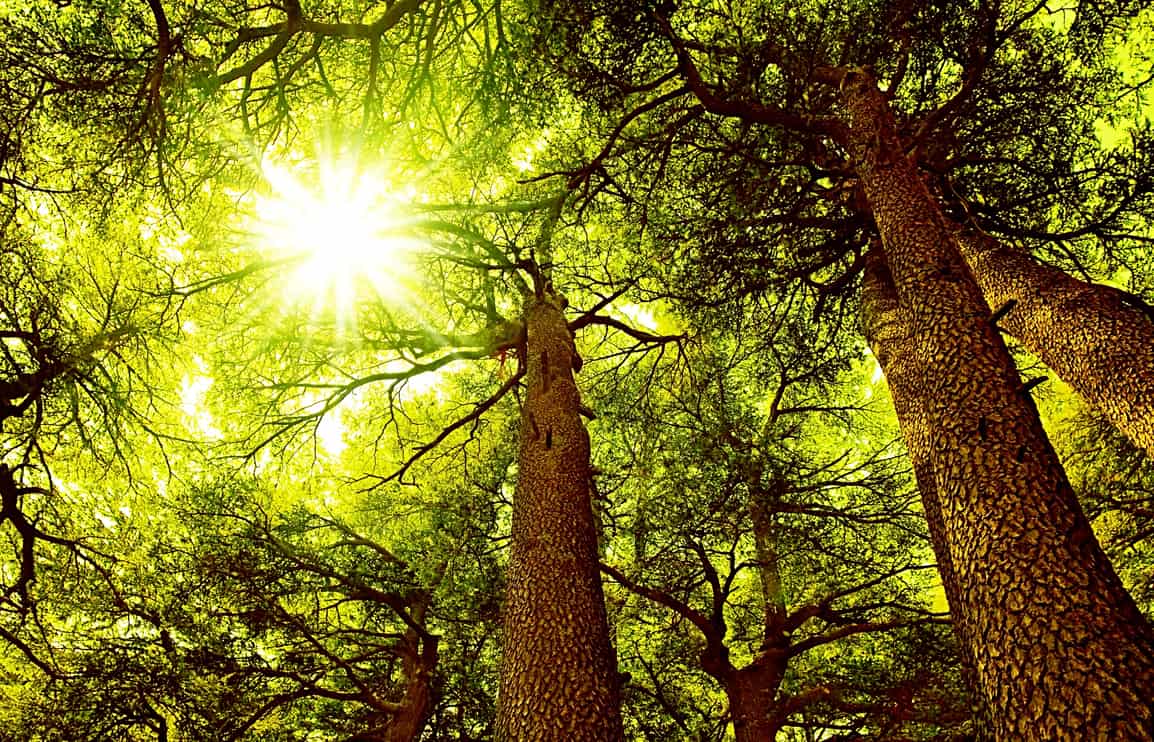
Sunny Cedar forest background, old rare trees, sunrise with rays of sun light coming through the branches

Since cedar trees grow from new growth, you have to be especially careful when trimming or pruning them. 

Cedar trees have an inner area of the tree made up of deadwood called the dead zone. Fresh growth grows from the ends of the branches in the dead zone. This means new buds formed the previous year on the ends of branches. 

When trimming and pruning cedar trees, stay within the green portion of the branches. Do not stray into the old/brown/dead area you’re trimming, otherwise, your branches will not come back.

Will Deer Eaten Cedars Come Back?

Fallow deer fawn eating a leaf

So, there is a conflicting argument about whether deer will eat cedar trees, and if cedar trees are so-called “deer-resistant”. But like everything else, if the deer are hungry enough, they will eat whatever they can.

So while deer may not always choose to eat cedar, if it’s there in the winter, when everything else is gone, there’s a good chance they’ll eat it.

If you notice chomping on your cedar trees, the short answer is yes, your cedar tree will come back. However, this depends on the age and health of your cedar tree. If it’s a newly planted sapling or small cedar, or if it’s more mature, taller, and the majority of it is out of the deer’s reach.

If it’s a relatively young plant, there’s a good chance your tree might not come back because of the additional stress put on a young tree that’s already trying to adjust.

If it’s an older plant and the deer chow down on the dead zone area, those branches will not come back, but your tree will most likely survive. Established and healthy plants have a leg up in this situation.

You can combat this by using a deer spray, and one that works! Liquid Fence HG-70109 Animal Repellent works to repel deer. It can be used year round, even! The caveat to this though, is you will most likely have to alternate between it and the Repels-All Animal Repellent Concentrate.

Alternating between the two is one of the best ways to keep the deer at bay using products. Both deer repellents have quite the rough smell, which is why it works!

Should I Prune My Cedar?

Close up of man hand with hedge trimmer cutting bushes of white cedar to ideal fence. Male gardener, wearing in overalls with protective glove working with professional garden equipment in backyard.

This is probably the most important question to ask. Should you prune your cedar tree? The short answer is yes!

Pruning is a great way to give your tree the boost it needs by removing the unnecessary branches, meaning anything that is dying, dead, and turning bad on the tree. This will not only prolong the life of your tree, but it will also increase airflow, stimulate growth, and help protect it from pests and internal issues.

If you decide to do any trimming other the above, it will probably be to enhance the cedar’s shape. While this is okay to do, follow the above and do not trim into the dead zone or the brown interior area of the tree.

If you get close to that point, stop! If you’re trimming your cedar so it doesn’t look wild, only trim back about a third of the green growth. This will ensure your cedar grows back.

The next most important thing is when to prune your tree. Like most trees, you want to prune your cedar tree during the late winter and early spring to help prevent any infestations or diseases. Pruning during cooling temperatures ensures the tree will heal before insects emerge.

If you decide to prune your cedar tree, you’re going to need the right tools.

This list includes hand pruners, loppers, and a handsaw or pole saw. Don’t worry though, we’ve got some recommendations for you that are sure to have you pruning with ease.

Hand pruners are something you’ll want to keep in your landscaping tool chest. They are excellent for cutting branches less than ½ inch in diameter. The FELCO F-2 068780 Classic Manual Hand Pruner is a great option for hand pruning your cedar tree, especially if you want to shape it.

Felcos are known for their durability and performance! They have steel blades and can cut branches like a champ. Although the price point is a bit steeper than some other hand pruners you may find, they are worth it!

Loppers are another great thing to have on hand. They help you reach those branches just a little higher up and the ones too thick for your hand pruners.

Loppers cut branches that are between ½ to 2 inches in diameter. The Fiskars 394801-1003 PowerGear2 Bypass Lopper is a wonderful set!

These cut branches like you’re cutting through butter! No, seriously! Loppers are the preferred method of pruning and trimming trees since they can help you get the job done quicker and more efficiently than regular hand pruners.

Pruning saws can be used for any larger diameter branches. The Fiskars 15 Inch Pruning Saw with Handle is another tool to have for any outdoor work. This pruning saw also cuts things with ease and makes outdoor work way easier.

Another tool we recommend having in your outdoor tool chest is a pole saw. You can’t beat the Fiskars Chain Drive 7–16 Foot Extendable Pole Saw & Pruner, which extends up to 16 feet high! Because of its steel pruner blade, it can cut branches up to 1 ¼ inch thick in diameter.

Because it’s extendable, you won’t have to always be dragging out the ladder when you want to reach those high-up branches. Because it is Fiskars, it also has a full lifetime warranty.

That’s A Wrap!

There you have it! Let’s recap why cedar trees won’t grow back and what you can expect!

Pruning is a great way to prolong the health and wellness of your cedar tree and give it the boost it needs. By removing the unnecessary branches, or anything that is dying, dead, and in poor shape.

This will not only prolong the life of your tree, but it will also increase airflow, stimulate growth, and help protect it from pests and pathogens.

Similar to most evergreens, when you prune a cedar tree, you have to be careful about how far back you’re pruning. Cedar trees grow new growth from their old growth, or what is referred to as the dead zone.

If you prune back into the dead zone, you’re cutting off the area where the new growth stemmed from, meaning your tree probably won’t come back. If you only prune the new growth, or the green part, before you get back into the brown, dead zone, roughly about a third of the way back, your tree will keep growing.

There are a variety of reasons your cedar tree could turn brown. Some of which are natural, from which your tree will come back. However, a handful of those reasons, like a pest infestation or Armillaria root rot, might mean your cedar tree is on its way out.

Additionally, if deer are chowing down on your cedar trees and start eating into that dead zone, anywhere they didn’t reach will continue to grow, but the parts in the dead zone are probably history.

That’s a wrap! Thanks for sticking around and learning why your cedar trees won’t grow back, and what to expect.

References

Alban, David H. “The influence of western hemlock and western redcedar on soil properties.” Soil Science Society of America Journal 33, no. 3 (1969): 453-457.

Engle, D. M., & Kulbeth, J. D. (1992). Growth dynamics of crowns of eastern red-cedar at 3 locations in Oklahoma. Rangeland Ecology & Management/Journal of Range Management Archives, 45(3), 301-305.

Prescott, C. E., & Preston, C. M. (1994). Nitrogen mineralization and decomposition in forest floors in adjacent plantations of western red cedar, western hemlock, and Douglas-fir. Canadian Journal of Forest Research, 24(12), 2424-2431.

Ribbons, Relena R., David J. Levy-Booth, Jacynthe Masse, Sue J. Grayston, Morag A. McDonald, Lars Vesterdal, and Cindy E. Prescott. “Linking microbial communities, functional genes and nitrogen-cycling processes in forest floors under four tree species.” Soil Biology and Biochemistry 103 (2016): 181-191.

Zou, Chris B., Dirac Twidwell, Christine H. Bielski, Dillon T. Fogarty, Aaron R. Mittelstet, Patrick J. Starks, Rodney E. Will, Yu Zhong, and Bharat Sharma Acharya. “Impact of eastern redcedar proliferation on water resources in the Great Plains USA—current state of knowledge.” Water 10, no. 12 (2018): 1768.

A strong, healthy tree is a beautiful sight to behold, especially when the leaves are swaying in a gentle breeze. We know the leaves typically fall off every autumn and regrow in the spring, but does tree bark grow back? Is there anything that can be done if your trees lose large patches of bark?

While trees can repair minor instances of bark damage, major bark loss won’t grow back and instead, the tree will develop thick encrusted ridges around the missing bark. When this happens, smooth out the missing bark edges as best as possible to allow for clean regrowth.

Many reasons cause trees to lose their bark. Let’s dive in and find out what these reasons are, what can be done about it, and how—if possible—tree bark can be repaired.

Why Tree Bark Is So Important

The tough outer layer of the tree, or tree bark, is the first line of defense. Much like our skin. The bark protects the tree from temperature extremes, keeps moisture from rain out, while keeping internal moisture in, and helps to guard against insects and animals.

Just like our skin, tree bark grows from the inside out and will shed from time to time as the new cells underneath are constantly replaced. When the growing layer of bark is damaged either by pests, environmental issues, disease, or other problems, it is unable to grow back.

The bark protects the growing layers of the tree that supply the limbs and leaves with water and nutrition. If these layers get damaged enough, it can spell certain doom for the tree. When large sections of bark get damaged or destroyed, especially if the damage goes completely around the tree, fatality increases.

According to The Department of Environmental ConservationWhen tree bark is missing or damaged it can weaken the entire tree. Think of damaged bark like a wound in your skin. It can allow bacteria and viruses to enter which can be a cause for concern.

If a tree is missing a lot of bark, or there are signs of decay, you should contact a professional to inspect your tree.

Why Tree Bark Doesn’t Grow Back

Trees can grow their leaves back, so why shouldn’t they be able to grow their bark back? Let’s look at the tree leaves like the hair on our heads. We can cut our hair down to the scalp, and it will grow back; a tree’s leaves are similar to human hair because they are constantly replaced.

The tree bark is made of different cells and so tree bark will act differently when damaged. If the outer layer of the bark is damaged, it can regrow from underneath. Trees even shed bark occasionally, especially trees like the river birch.

When the growing layer underneath the outer hard, rough, bark layer is removed or severely damaged, it can’t regenerate.

Of course, trees like the paper birch have bark that naturally falls off and grows back naturally.

What Causes Trees To Lose Their Bark? 

Trees don’t typically drop all their bark-like some people who shed their clothing as soon as they get home after a long day at work. There has to be an underlying condition or problem that makes trees lose their bark. It’s essential to their wellbeing.

Many causes such as insect infestations, animal damage, environmental factors, or human causes can damage tree bark. Let’s delve into these reasons and more to find out if there is anything that can be done to help the tree.

1. Insect Infestation

Close up termites or white ants

Many insects want to get the nutrients that trees create for themselves. Boring insects—the ones that drill holes into the trees, not the ones that drone on about uninteresting subjects—especially can cause a lot of damage to trees.

For instance, the emerald ash borer has been wreaking havoc among American ash trees; killing them by the millions. If you see peeling bark or large patches of bark that have fallen off, along with small holes in them, you might have a problem with borers. The biggest telltale sign will be D-shaped holes from where the larvae have burrowed out of the tree.

The larvae of boring insects cut tunnels through the growing layers of the tree and if the infestation is big enough, it can kill the tree by cutting off the nutrition to the leaves and rest of the tree.

Ants can also damage trees and tree bark, though they are usually attracted to trees because of other insects that produce a byproduct called honeydew. If you find ants in or around your trees, you probably have another issue with your trees such as rot or an aphid infestation.

To get rid of borers or ants in your trees, your options are pretty limited. You can either cut down and destroy the infested trees or use some kind of pesticide to get rid of the insects. We don’t recommend doing the latter yourself; it would be better to contact a professional arborist or pest control expert.

You can learn more about the trees that insects love In order to understand what trees are most at risk for insect damage.

2. Animal Damage

Many animals out there will damage the bark of trees in the food search. When food is scarce these animals will strip away the bark to reach the inner, tender areas of the tree for sustenance. Newer trees and saplings are particularly susceptible to this kind of damage.

Deer, squirrels, porcupines, voles, and rabbits can all make a meal of the tender cambium layer underneath the dry bark. This layer is the growth layer. It carries water and nutrition to the other parts of the tree and can be nutritious to animals when other sources of food are harder to find.

Bark Damage From Deer

They can strip off large sections of bark either by rubbing with their antlers or by stripping away the bark to get to the inner cambium layer. This damage looks like ragged strips and/or large chunks of bark missing from the tree a few feet off the ground.

To repair this damage, you need to trim off the ragged areas of the bark with a sharp knife. Try not to cut more healthy bark off. Then simply let the area heal on its own.

Don’t use any kind of paint or sealant as this can hinder the healing process. To help the tree heal itself better, make sure it gets plenty of water, and add some fertilizer if you haven’t done that lately.

If the tree doesn’t appear to be responding well 2 to 3 weeks, you should seek out a local arborist.

Bark Damage From Rabbits

In winter you might see evidence of rabbits chewing on your trees at the ground level. Rabbits can be especially damaging because they cannot get very high, instead, they can end up girdling the tree. Girdling happens when the bark is damaged completely around the tree and is often leads to the end of the tree.

If you see rabbit damage to your tree, the same steps as for the deer apply here. Be sure to pay special attention to the tree if it has been girdled as the tree will likely need to be removed.

Bark Damage From Squirrels

These fluffy “tree-rats” can cause damage to the tops of the trees and along branches. This usually happens in late winter when food storage becomes scarce. You shouldn’t have to worry about this damage too much because of what damage the squirrels do, the tree can usually deal with.

Bark Damage From Voles, Gophers And Mice

Except gophers, these rodents don’t usually pose too much risk to trees when they dig through the bark. Mice and voles will also nibble on the small roots of trees.

If you notice small holes and areas of freshly dug soil mounds near your trees you might have mice or voles living in the ground. Gophers dig the same types of holes, only larger. Gophers can cause serious problems to trees, especially if they are saplings.

You can use strong-smelling repellents to run these rodents off your property. Castor oil and cayenne pepper are two scents that help to run these guys off. Either pour them around their holes or mix with water and spray wherever you see the evidence.

If these methods don’t work, contact a professional pest control service to help you handle these animals. Often human methods are preferred. Most professional pest services have several ways to deal with repeat offenders.

Bark Damage From Porcupines

These walking pincushions can seriously damage trees. They can also climb very well and will often stay in a tree until it has had its fill. Porcupines will easily girdle a tree as it makes a meal of the inner layer behind the bark.

Damage by porcupines will look like shallow gnaw marks, usually around a tree and often several feet high. This kind of damage is almost always fatal for the tree. The best way to deal with porcupine damage to trees is prevention, but we will get to that just a little bit later.

3. Woodpeckers Cause The Most Bark Damage

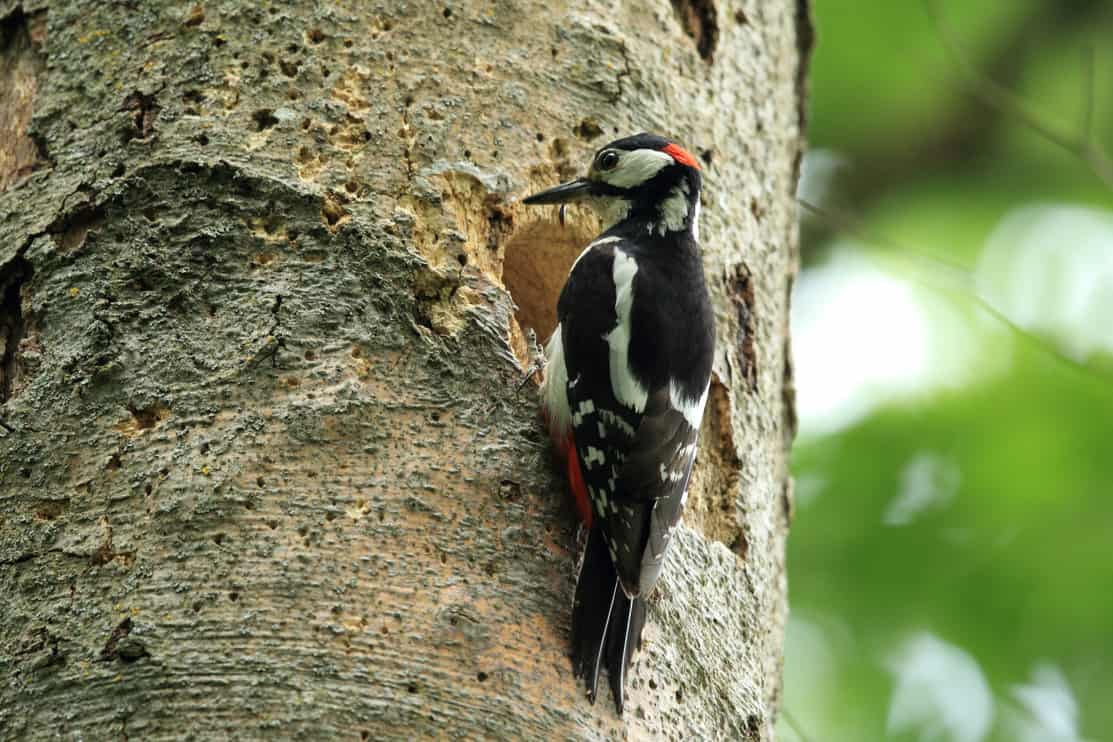
Great Spotted Woodpecker (Dendrocopos major)

Woodpeckers and sapsuckers can also damage the bark of a tree. While woodpeckers don’t normally damage healthy trees, the sapsuckers often do because they are looking for the sweet-tasting sap running just beneath the surface of the tree.

Woodpeckers tap at trees looking for grubs, beetles, and other insects under the bark. Unless there’s an infestation, woodpeckers will only chip away at small sections of the tree looking for food. The exception is the pileated woodpecker.

These large woodpeckers can strip away wide sections of bark looking for insects to eat. Fortunately, these birds often seek out dead or decaying trees as these attract the bugs they like to dine upon. They can occasionally attack healthy trees, but they are only looking for insects.

If you have a lot of woodpeckers on your property, you might want to have an arborist check your trees for insect infestation or you may have a lot of dead and decaying trees that need to be taken down before they cause damage.

Sapsuckers on the other hand will drill shallow holes into trees in search of the sap they feed on. They often tap holes in horizontal or vertical lines, then return a little while later to slurp up the tasty sap dripping out of the holes.

These birds don’t typically stick around for long as they are migratory and the damage they do is usually minimal. A healthy tree can quickly heal after a sapsucker comes in for a meal.

4. The Tree Has Reached The End Of Its Lifecycle

When large sections of bark fall off trees, it’s never a good sign. It could signal rot or a disease that is killing the tree. If you notice bark falling off in large sections you may be able to save it with the help of a professional if you act quickly.

Rot can set in quickly when a tree is not healthy. This often attracts insects and fungus that will help speed up the process. Depending on the type of tree it may be worth trying to keep it alive, but odds are you’ll be better off having someone cut it down for you and replace it with a new tree.

As I mentioned before, contacting a professional tree service will help you determine if saving your tree is a feasible option.

5. Sunscorch Or Sunburn

That’s right, even trees can get sunburn. This especially can happen during very hot, dry summers. Sunscorch is something that can peel the bark off a tree in the winter. Either of these events can severely damage a tree’s bark and shorten the life of the tree.

Sunscorch happens in winter, typically on the south to the southwest side of the tree trunk. When the bark is frozen because of extreme temperatures, then warmed because the sun thaws it out, sun scorch can happen.

The Utah State University Forestry Extensions explains that sunscald/sun scorch is caused by winter freezing temperatures that affect sun-warmed tissues of the tree called the cambium. The bark will start discoloring and if the injury is severe enough the bark will slough off.

Younger trees with thinner bark are more susceptible to this type of damage. The bark will peel off leaving the growing inner layers of the tree exposed to the elements. If this happens, it will shorten the life of the tree.

To prevent this on your trees, you can leave the lower branches on the trees so they help to provide shade, plant the trees somewhere they will get shade on the southern side, like near a building, or you can wrap your tree to protect from temperature extremes. This Walter E. Clark Tree Wrap is a highly recommended product to protect from sunscalds!

Sunburn on a tree is the same thing we get when we go on vacation and spend too much time in the sun. The extreme heat and constant glare of the sun on a tree’s trunk can make the bark peel just like your back after a long day at the beach. Sunburn is very similar to sun scorch except it happens in the summer months.

Drought Conditions Will Hasten Sunburn In Trees

For trees with sun scorch, keeping the trunk shaded or protected during hot, dry summer months will help to prevent sunburn. Keeping the tree watered and healthy will also help to prevent this from ruining the bark.

When planting new trees, the best time to plant them is spring and fall. Avoid planting during the summer if at all possible as the tree will not be established enough to withstand a hot, dry summer. Using a white or reflective wrap can help prevent sunburn as well.

The best way to heal your trees after either sunburn or sun scorch is to keep the tree watered and healthy as possible. Remove any dead, peeled bark so insects and fungus don’t have a place to hide and let the tree heal itself. Don’t put any sealants or covers on the injured areas as that has been proven to be detrimental.

Did You Hurt Your Tree Bark?

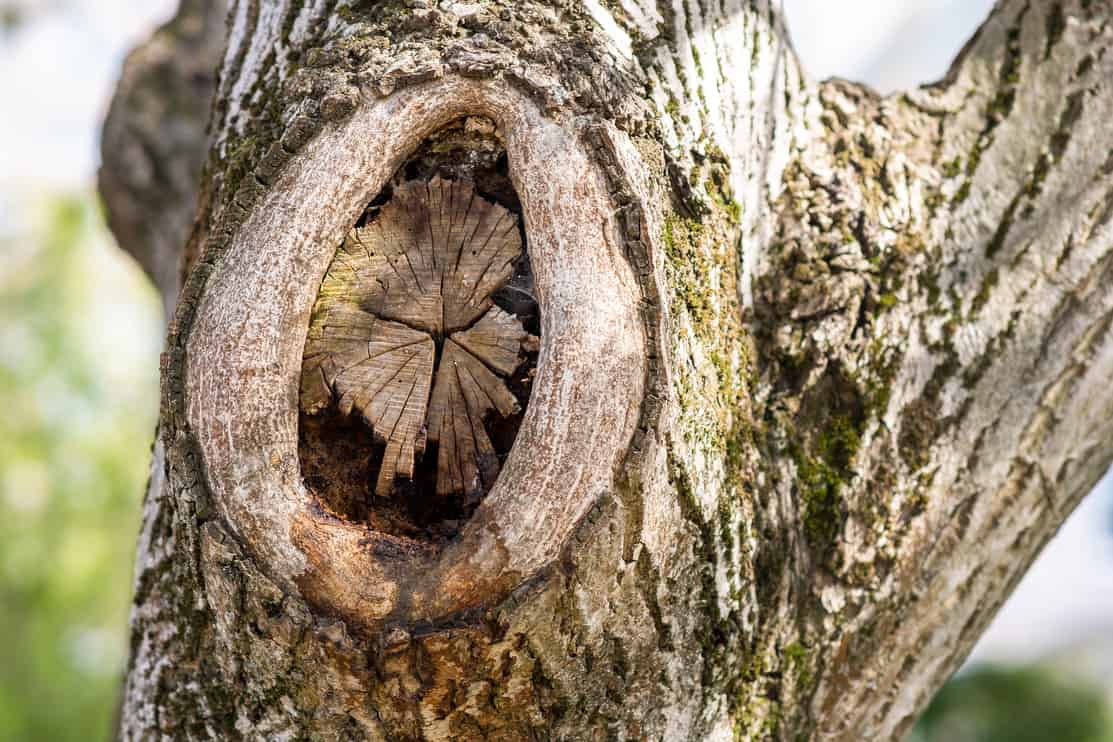
Close up view of old chopped off tree branch.

A tree’s bark can be damaged by trimmers and mowers as well, especially newer trees. Trees can be girdled this way. A powerful trimmer, even in professional, steady hands, can accidentally strip away bark and damage a tree in an instant.

To prevent this type of damage you can plant ground cover around the trunk of the tree or add a bed of mulch. Just leave an indention a few inches to a foot out from the base of the tree. You want your mulch to resemble a donut around the tree.

If you accidentally damaged your tree’s bark, take a look at our guide on how to save a tree with stripped bark here!

Fungi And Tree Bark

Bad jokes aside, hypoxylon canker is a fungus that can cause tree bark to fall away in large sections. If you see a fungus growing underneath the peeling bark, along with dying branches and yellowing leaves it’s probably hypoxylon canker.

If you are having trouble with disease and fungi targeting your trees, consider using something such as this BioAdvanced Concentrate product!

Unfortunately, there isn’t much that can be done if this fungus sets in your trees. The best thing to do is to remove the tree and destroy the wood to prevent it from spreading to nearby trees and shrubs.

Preventing Tree Bark Loss

A strong, healthy tree is the best prevention from factors that can damage or drop bark. Proper watering, fertilizing, and trimming of your trees will be able to handle most problems. When trees are healthy, they are much more capable of healing wounds, fighting off insects, and preventing issues.

Munching critters on the other hand might be a bit tougher to prevent. If you have problems with rodents like gophers, rabbits, and ravenous porcupines, the best way to keep these pests off your trees is to wrap the trunks with a wire mesh. Something like these Andwarmth Tree Protectors will help protect against most animals.

If you have issues with porcupines, you might have to go a little more extreme as these prickly characters are great climbers. You might have to employ some catch and release traps or attach some electric fence wire around your trees to keep porcupines away.

How To Save A Tree With Damaged Bark

As we’ve mentioned before, tree bark can’t grow back. The tree can heal itself if the damage isn’t too extensive though.

What you can do to help the tree after the bark has been damaged is to remove the jagged edges of the bark but be careful not to expose any more living tissue underneath. Use a sharp knife or chisel to round off the edges. Then just keep the tree healthy and let it heal on its own.

For one of the most common type of yard trees in the United States, check out our guide on the reasons why bark is falling off your oak tree and how it fix it!

Don’t Use Sealants

Just because they are out there doesn’t mean you should use them. Arborists and plenty of scientific studies say that sealants don’t help trees to heal. They can do the opposite and depend on what kind, they can offer hiding places for insects and fungus.

Girdled Trees

If the bark damage goes completely around the tree, all you can do is keep an eye on it and see if the tree can bounce back. A girdled tree has very little chance of healing itself as the layer of tissue that provides the rest of the tree nutrients and water is damaged.

If the tree seems stunted, leaves start dropping before autumn, or it doesn’t grow at all, you will have to remove the tree. There’s nothing else to be done.

That’s A Wrap!

Trees can regrow leaves and new branches every year, but when a tree loses its bark, it is incapable of growing back. There are a lot of things that can damage a tree’s bark such as animals, fungus, or environmental factors, and healthy trees typically can heal themselves if the bark damage isn’t too severe.

When tree bark is damaged, with a little knowledge and professional help, you can decide if the tree needs to be removed or if it will heal and continue to provide shade and beauty. 

References:

Baxter, R., and L. Hansson. “Bark consumption by small rodents in the northern and southern hemispheres.” Mammal Review 31.1 (2001): 47-59. https://doi.org/10.1046/j.1365-2907.2001.00078.x  

Villari, Caterina, et al. “Progress and gaps in understanding mechanisms of ash tree resistance to emerald ash borer, a model for wood‐boring insects that kill angiosperms.” New Phytologist 209.1 (2016): 63-79.  https://doi.org/10.1111/nph.13604 

Verheyden, Helene, et al. “Variations in bark‐stripping by red deer Cervus elaphus across Europe.” Mammal Review 36.3 (2006): 217-234.  https://doi.org/10.1111/j.1365-2907.2006.00085.x 

Walnut trees are well-known for their tasty fruit – the walnut! These trees are excellent ornamental trees that provide plenty of shade and will attract wildlife. If you’re thinking about planting one, you may be wondering where the best place to plant a walnut trees is?

The most common walnut trees include the black walnut and the English walnut. Black walnuts can grow in hardiness zones 4 through 9, while English walnuts prefer zones 3 through 7. The most popular states to grow walnut trees includes California, Illinois, Iowa, Indiana, Minnesota, and Missouri.

California is the United State’s largest producer of walnuts, but that doesn’t mean walnut trees can’t grow in other places, too! Below, we’ll check out the best places to plant a walnut tree and how to plant them.

Where Should I Plant A Walnut Tree?

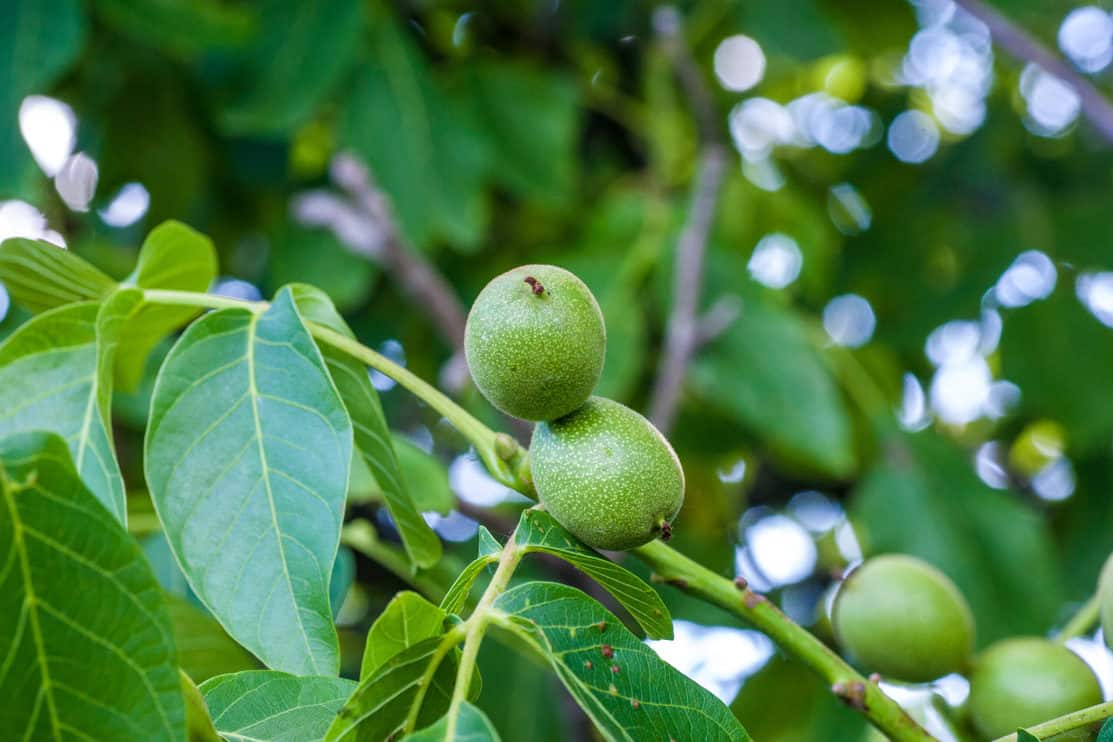
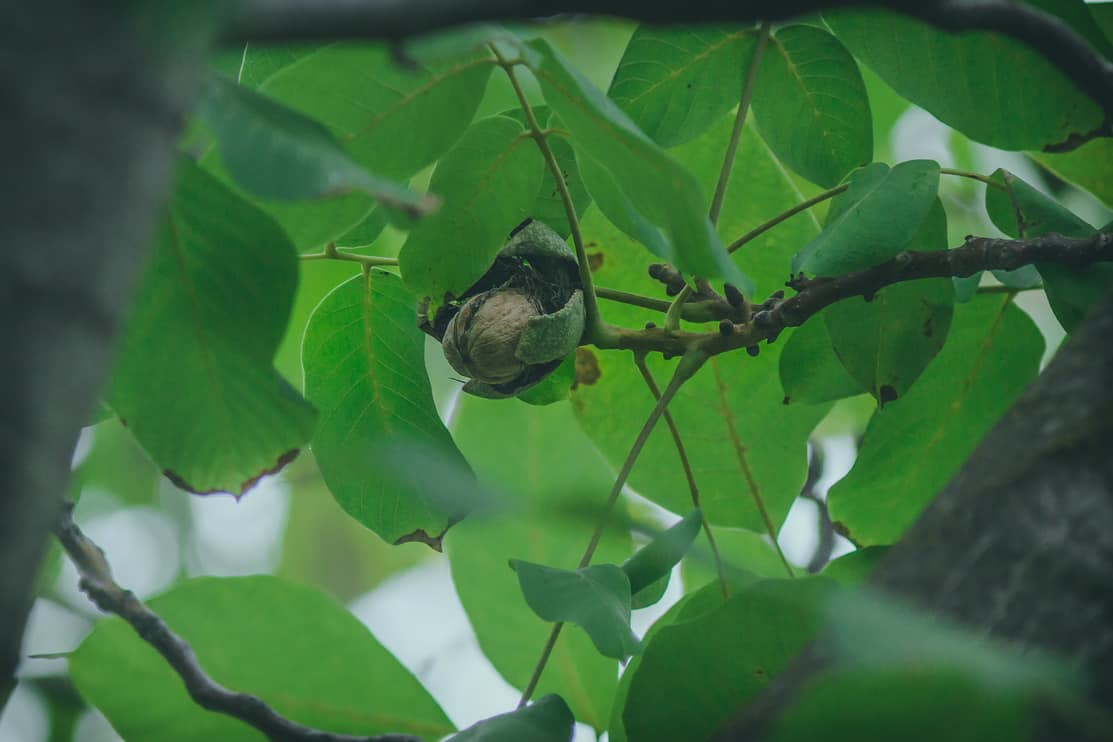
Walnut splitting open on tree

English walnuts are the more popular walnut tree if you are looking to harvest the nuts. The shells are far easier to open than black walnut. But if you’re not concerned with the walnut fruit and just want a nice-looking shade tree, either walnut will do just fine!

Both walnuts prefer full sun and moist, well-drained soils where they can establish a deep taproot. Black and English walnuts prefer clay, sand, or loam soils with a neutral PH. 

Walnut trees are renowned for their production of a natural herbicide called juglone. When planting a walnut, don’t expect much else to grow around it. You can view a list of plants that you should specifically not plant around a walnut tree here.

English walnuts are a little more tolerant of the cold than black walnuts, but not by much. Both trees are susceptible to late spring frosts, which can put a serious damper on fruit production and growth.

When deciding where to plant a walnut tree in your yard, make sure you have plenty of room. According to North Carolina State University, English walnuts can grow up to 60 feet and black walnuts can reach heights of 75-100 feet. 

You’ll also want to be careful about juglone exposure – Don’t plant a walnut tree near your garden!

Can I Plant A Walnut Tree Anywhere?

Walnut trees can be planted almost anywhere in the United States. The few exceptions would be areas that are either too cold or too hot for walnuts to survive.

Walnuts don’t survive well in the cold areas of Alaska that dip below -40℉ in the winter. On the other end of that extreme would be areas like southern Florida, Texas, Arizona, and southwest California that are just too hot to grow walnut trees. Most of the Hawaiian Islands are also too hot to grow walnut trees.

Walnut trees cannot be planted in shade and they will not do well in wet soil. Otherwise, walnuts are pretty content to be planted anywhere. You can always check the USDA Hardiness Zone Map to make sure your area will support walnut trees.

5 Best Places To Plant An English Walnut Tree

English walnut trees, also called Persian walnuts, are more popular for planting than black walnuts. As mentioned before, English walnuts thrive in hardiness zones 3 through 7.

For optimal growth, you’ll want an area that has a combination of the right temperature, plenty of sunlight, and the right soil type.

So, let’s take a closer look at the states within these zones and discuss the best places to plant an English walnut tree.

If you’re still confused between the two primary walnut tree species, you can learn more about black and english walnut tree differences here.

Where To Plant English Walnuts In The West

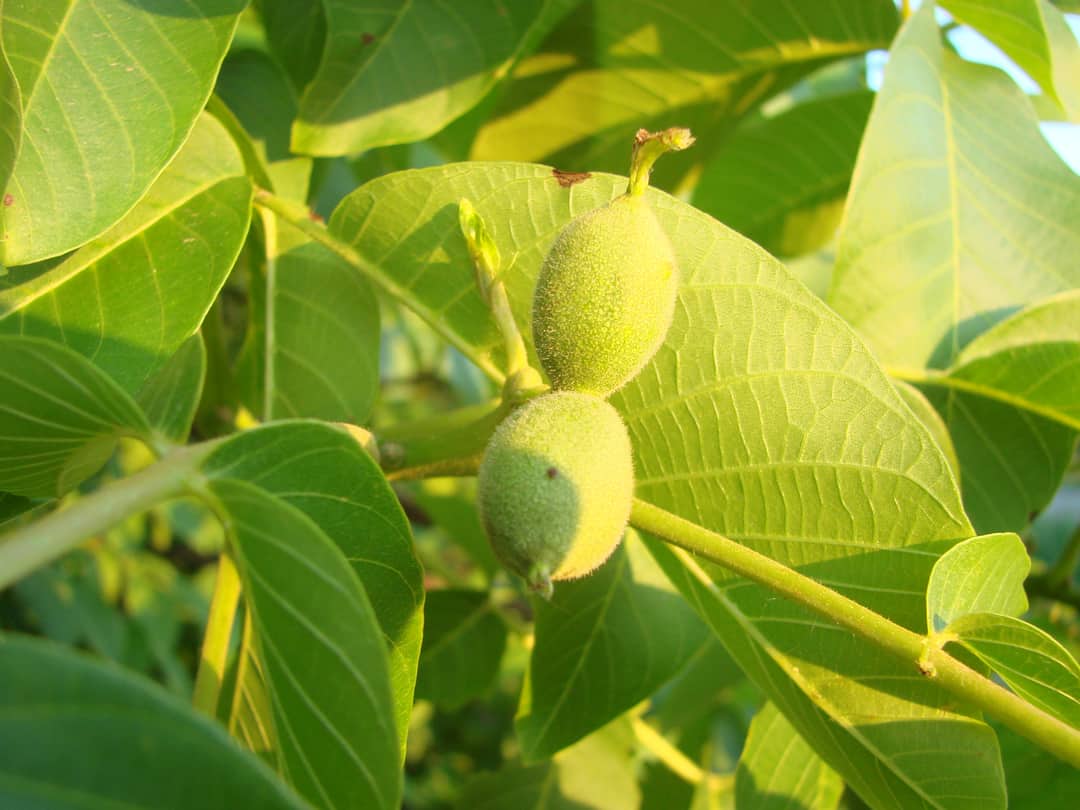
green walnuts from the side on a branch of a walnut tree. Copy space

The West is known for being drier and hotter than other regions in the U.S. There are some pockets of decent growing conditions for English Walnuts, but much of the west coast is too warm or sandy for English walnut trees.

Walnut trees can grow in any state in the west:

  • Washington
  • Oregon
  • California
  • Nevada
  • Idaho
  • Montana
  • Wyoming
  • Colorado
  • Utah

However, some areas are better than others for growing English walnut trees, and a few regions of these states cannot grow walnuts because it is simply too hot or the soil conditions are not favorable.

The West includes a range of hardiness zones from 3 to 11. Hardiness zones define what the minimum temperature in that region can reach and are helpful when determining if your chosen tree can survive the winter or not.

In the West, optimal growing areas will be along with eastern Washington and Oregon, central and eastern California, northwestern Utah, western Colorado, and north- and southwest Idaho.

Even within these regions, there will still be some areas that aren’t optimal for English Walnuts due to soil conditions or drought. 

Where To Plant English Walnuts In The Southwest

The southwest is a large area of the United States but it only encompasses four states:

  • Arizona
  • New Mexico
  • Texas
  • Oklahoma

Many areas of this region include hot climates with dry, desert conditions. These are not optimal growing conditions for an English Walnut tree. 

In the Southwest, English walnut trees can grow well in central Texas and the Texas panhandle, and all of Oklahoma except the extreme southeast corner.

Where To Plant English Walnuts In The Midwest

The midwest is known for the corn belt and is America’s heartland. The weather and soil profiles vary greatly in the midwest region, and not all areas are good for growing English Walnuts.

The midwest includes:

  • North & South Dakota
  • Nebraska
  • Kansas
  • Minnesota
  • Indiana
  • Missouri
  • Wisconsin
  • Illinois
  • Iowa
  • Ohio
  • Michigan

Although English Walnuts can grow in all of these states, optimal growing areas are going to be from southern South Dakota across to southern Wisconsin and northern Illinois. 

Kansas, Missouri, and Indiana have decent growing conditions across the state as long as the soil conditions are right. Much of Ohio and Michigan are suitable for English Walnuts as well. 

The northern regions of Minnesota and North Dakota can support English Walnuts, but the cold winters and late frosts can stunt growth and cause trees to produce less fruit.

Where To Plant English Walnuts In The Southeast

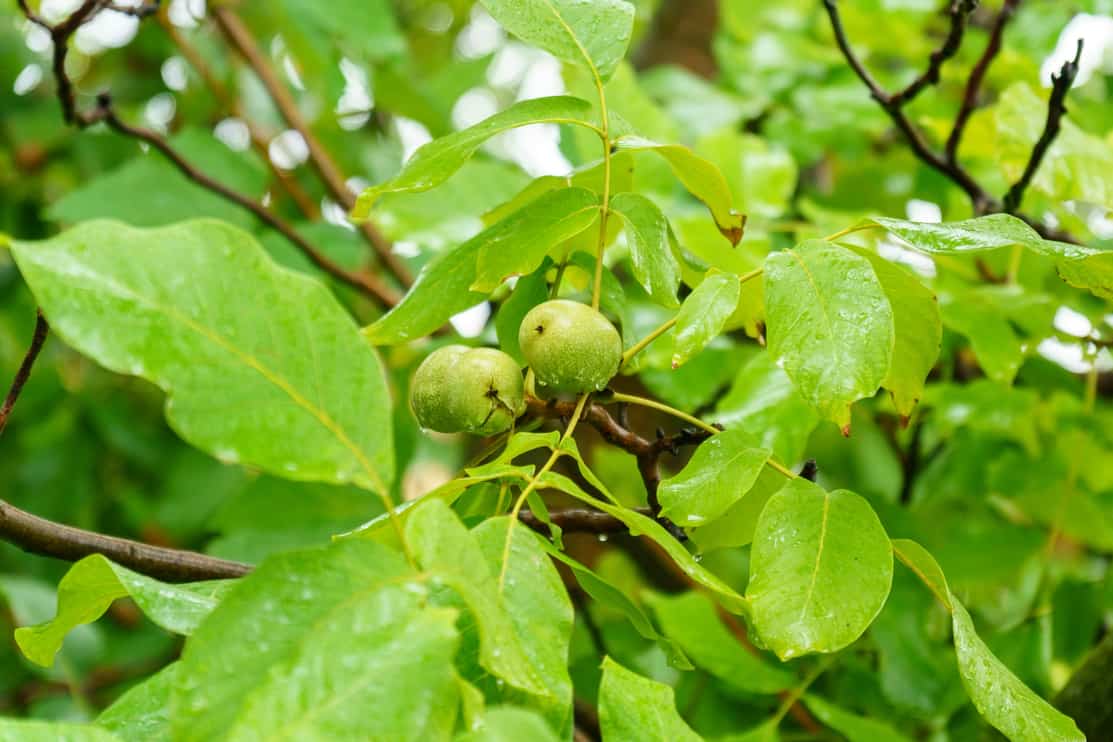
Green unripe walnuts hang on a branch. Green leaves and unripe walnut. After the rain

The southeastern United States is typically humid and can range from lowland swamps to the Appalachian Mountains.

The southeast includes:

  • Arkansas
  • Louisiana
  • Mississippi
  • Alabama
  • Georgia
  • Florida
  • North & South Carolina
  • Tennesse
  • Kentucky
  • Virginia
  • West Virginia
  • Maryland
  • Deleware
  • Washington D.C.

Many of these states are too warm to support healthy English Walnut growth. For example, Louisiana, most of Mississippi, and all of Florida are out of the English Walnut’s preferred hardiness zone.

Only the extreme northern regions of Mississippi, Alabama, Georgia, and South Carolina can support English walnuts.

Optimal growth is more likely to occur in Tennessee, Kentucky, West Virginia, and Virginia. Central and northern Maryland can also support good English Walnut tree growth.

Where To Plant English Walnuts In The Northeast

The northeast is known for displaying some of the most stunning fall foliage in the country. Both English walnut and Black walnut are deciduous trees that change color in the fall and drop their leaves in preparation for winter.

The English walnut boasts golden yellow leaves in the fall and feels right at home in many of the northeastern states.

Because of their proximity to the great lakes, some parts of the northeast tend to be gray most of the year, which can limit fruit production and growth for English walnuts who prefer lots of sun.

The northeast includes:

  • Pennsylvania
  • New York
  • New Jersey
  • Connecticut
  • Rhode Island
  • Massachusetts
  • New Hampshire
  • Vermont
  • Maine

In the northeast, optimal growing areas for English walnuts includes all of Pennsylvania and Massachusetts, southern, central, and western New York, central New Jersey, northern Connecticut and Rhode Island, and central and southern Vermont, New Hampshire, and Maine.

Like the midwest, the northeast is susceptible to late frost in the Spring and early frost in the Fall which can stunt growth and lower nut production.

Vermont, New York, and Connecticut are the cloudiest states in the northeast and may not be the most optimal place to grow an English walnut. Nonetheless, these stately trees will still grow there and provide shade for those rare sunny days.

In most environments, walnut trees can produce up to 80 pounds of unshelled walnuts each year!

5 Best Places To Plant Black Walnut Trees

Juglans Nigra (Eastern Black Walnut) at park in Istanbul

Black walnut trees are a little less popular than English walnut trees, but they are still beautiful trees that provide plenty of shade on those warm summer days.

Compared to English walnuts, black walnut trees typically thrive in warmer conditions. Their hardiness zone boundaries are between zones 4 and 9. 

Let’s check out the regions mentioned above and find out the best places to plant black walnut trees.

Where To Plant Black Walnut Trees In The West

Because black walnut trees overlap with much of the English walnut tree’s habitat, we’ll discuss the major differences between the two in this section.

Black walnut trees can thrive in almost all areas along the west coast except for a few hot spots near San Francisco and Los Angeles. All of Washington and Oregon are suitable for black walnuts as long as the soil conditions are favorable. 

Western Idaho, northern Nevada, and most of Utah will support black walnut trees, as will eastern and western Colorado. 

Much of Montana and Wyoming are too cold to support black walnut trees.

Where To Plant Black Walnut Trees In The Southwest

Walnut Juglans Blooming on Spring

The southwest is a difficult place for many plants to grow due to the hot, dry conditions as well as the high elevation areas.

Black walnut trees can survive further south into Texas but do not reach the actual southern tip of Texas. Northeastern Arizona and nearly all of New Mexico and Oklahoma will support black walnut growth.

Northern New Mexico, Oklahoma, and the Texas Panhandle are probably the most optimal areas to grow black walnut trees in the southwest.

Where To Plant Black Walnut Trees In The Midwest

Much of the northern midwest gets too cold in the winter for black walnuts to grow to their full potential. For example, Northern North Dakota, Minnesota, and Wisconsin are simply too cold.

Southern Nebraska, Iowa, and Michigan have optimal temperature needs for black walnut trees. Kansas, Missouri, Illinois, Indiana, and Ohio also have good growing conditions as long as the soils are deep and well-drained.

Where To Plant Black Walnut Trees In The Southeast

For English walnut trees, much of the southeast was simply too warm for the tree to thrive. Because black walnut can withstand warmer temperatures, they can dip a little further into the southeast than the English walnut.

But just because it can survive doesn’t mean it will thrive in these conditions. 

In the southeast, black walnuts grow optimally in Arkansas, Tennessee, Kentucky, West Virginia, Virginia, Maryland, and Deleware. They’ll also grow in northern Louisiana, central and northern Mississippi, Alabama, and Georgia.

In Florida, black walnuts can grow as far south as the Placid Lakes, but this is not their optimal growing zone as the temperatures are on the brink of being too warm for black walnuts.

Where To Plant Black Walnut Trees In The Northeast

The northeastern United States gets some of the strangest weather due to the Great Lakes. With so much varying weather conditions and patches of extremely cold temperatures, much of the northern northeast is off-limits to black walnuts.

Optimal growing areas in the northeast include all of Pennsylvania, New Jersey, Connecticut, and Rhode Island. Southern New York and Maine, and southeastern New Hampshire can also support optimal black walnut growing conditions.

How Do I Plant A Walnut Tree?

European walnut (Juglans regia)

If you have the time and patience, planting a walnut tree from seed is better than transplanting it from a nursery. 

The reason is that walnut trees have deep taproots that grow straight down into the soil. This makes them more difficult to successfully transplant than a tree with more horizontally-growing roots.

Using local seeds dropped by local walnuts is the BEST way to plant a walnut tree. These seeds will already be accustomed to the area’s soil conditions and climate, meaning they will have the best chance of surviving.

Purchasing online seeds or plants is not recommended as these can be from vastly different regions. The tree will grow, sure, but it won’t grow as fast or produce as much fruit as a local seed will.

Even if you find and use seeds from local walnut trees, using fertilizers can be helpful as nut trees need as much nitrogen as they can get. Using something like J R Peters Jacks Classic All Purpose Fertilizer can help your walnut tree thrive as it grows.

Make sure your seeds are viable by dropping them in water. The ones that float can be discarded. The best time to plant your seeds is in the fall. Push them 1-2 inches into the soil. By Summer you should notice some growth out of the soil.

It’s recommended to protect your vulnerable saplings from wildlife by using a tree protector. Andwarmth’s Tree Protectors come with six tree protectors that can be added together to create wider or taller protection so you can continue to guard your walnut tree as it grows.

This is helpful especially once your tree begins producing fruit. The nuts will attract wildlife and can encourage deer to rub against the trunk or nibble on twigs in the winter.

That’s All For Now!

Walnut trees are more than just nice ornamental landscaping trees. They provide tons of shade on hot summer days and encourage wildlife like deer and squirrels to stop by.

Walnut trees require plenty of sun, deep, well-drained soil, and plenty of space to grow. Black walnuts and English walnuts are the two most popular walnut trees. They can survive in a variety of conditions, but each has its preferences.

This article was mainly focused on temperature requirements, but the soil is also an important factor in choosing the right location to plant a walnut tree. Walnuts prefer deep, well-drained soil that can range from loamy, sandy or even silty clay.

Black walnut and English walnut can technically grow in every state of the United States, but within each state are certain areas where walnut trees will grow optimally.

Overall, the five regions of the U.S. where black walnut and English walnut can grow include:

  • West
  • Southeast
  • Midwest
  • Southwest
  • Northeast

In general, English walnuts can survive in colder conditions than black walnuts, while black walnuts can survive in warmer climates than English walnuts. Happy walnut planting!

References

Cambria, D., & Pierangeli, D. (2012, March). Application of a life cycle assessment to walnut tree (Juglans regia L.) high-quality wood production: a case study in southern Italy. Journal of Cleaner Production23(1), 37-46.

Fulton, A., & Buchner, R. (2006, February 23). The Effect of Water Stress on Walnut Tree Growth, Productivity, And Economics. UC Farm Advisors, 1-15.

Tang, H., Ren, Z., & Krczal, G. (2000). Improvement of English walnut somatic embryo germination and conversion by desiccation treatments and plantlet development by lower medium salts. In Vitro Cellular & Developmental Biology – Plant36, 47-50.

Von Kiparski, G. R., Lee, L. S., & Gillespie, A. R. (2007, May 01). Occurrence and Fate of the Phytotoxin Juglone in Alley Soils under Black Walnut Trees. Journal of Environmental Quality36(3), 709-717.

Cutting down trees for firewood can be both rewarding and challenging. But what about that dead tree in your path? Can you process it into firewood? It’s dead, most likely not viable for any other use, so why not cut it up and burn it?

You can use dead trees for firewood, but you should take into consideration the type of tree as some make better firewood than others. Specifically, hardwood trees are often better than softwood species as firewood. Also consider the condition of the wood, the size of the tree, and whether it houses animals or insects.

You can certainly use dead trees for firewood, but there are a few things you should be on the lookout for. We’ve compiled a handy list of 9 things to check before using dead trees as firewood. Let’s get to it!

What You Should Consider Before Using A Dead Tree For Firewood

Processing already fallen trees for firewood is a great practice. In-fact, i’m doing the same thing right now with three dead pine trees that were in my yard! Of course, we’re using them strictly for outdoor firewood, but it’s really a great practice of reducing the need for cutting down alive trees.

If you are cutting and processing your own firewood, you have probably come across dead trees before and wondered if they would make a viable firewood option. Some already dead trees certainly will make for good firewood, but there are things to consider.

The tree may be a pine or other softwood, which does not make great firewood (hence why I’m using ours just for campfire wood.) It could be infested with insects or rotted inside. Maybe the tree has been felled for so long it is already rotting, in which case it’s best to let it be.

If you are looking for long-lasting firewood, check out our top 10 article on the slowest burning firewoods and how long they last!

Now, onto the good stuff. The following list details 9 things to check before using dead trees as firewood.

1. Check The Wood’s Moisture Content

A man measures the humidity of firewood with a moisture meter, monitoring fuel quality.

Once a tree has died, it has already started drying out, so you may not have to season it as long. A dead tree will take about 2 to 3 years to dry out completely, but once it is dry, it starts to rot, which we will touch on momentarily. When a tree is cut and split, the wood dries out quicker because of the exposed surface area, compared to a whole uncut tree. 

Cutting a dead tree for firewood may save you time on seasoning, depending on how long the tree has been dead. The best way to check for the moisture content on potential firewood is with this Moisture Meter For Wood – Pin Type Digital Dampness Moisture Sensor. It has built-in calibration and can be used for more than just wood.

You want the moisture in your firewood to drop to around 20% at least before burning it. The lower it is, the better, and hotter your firewood will burn, but 20% moisture is a good all-around average to strive for. 

For trees that cure faster and have low moisture, take a look at our guide on the best firewoods to burn here.

2. Is The Tree A Hardwood Or Softwood?

Hardwood trees make for better firewood than softwood, with a few exceptions. Hardwood trees are trees that drop their leaves in the winter, also known as deciduous trees. They don’t have thick resinous pitch running through them and are denser, which makes for hotter, slower-burning, cleaner firewood. 

Softwood trees have channels that carry thick, sticky sap through the trees. When you cut pine trees and other softwoods, the thick sap can get on your chain saw or your hands, and have everything as sticky as gum at the bottom of your shoe.

Softwood trees are conifers, or evergreen trees. They include pine trees, spruce, and fir trees, among others. They have leaves similar to needles instead of broad, flat leaves, and though softwood trees will drop some of their needles, they don’t lose them all during the winter like hardwood trees. 

If the dead tree is an oak, hickory, maple, locust, or fruit tree like apple or cherry, then you potentially have a very good firewood laid out in front of you. Of the multitude of hardwoods, some to avoid because they do not burn well, or smoke and pop a lot are poplars, aspens, basswood, and willow trees. 

There’s a lot to consider, especially if you do not know all the different varieties of trees there are, but generally, hardwood trees are much better than softwoods.

You can view our full guide on the firewoods that produce the least amount of smoke here.

3. Is The Tree Still Standing Or Fallen?

Whether the tree is standing dead wood, or it has fallen over, there are a lot of things to think about here. A standing dead tree, depending on how long it’s been dead, may drop large branches when you cut it.

If the canopy shows signs of broken branches or there are a bunch of broken branches around the tree, for safety reasons, it’s best to leave the tree alone. Falling tree branches are nothing to play around with. 

Sometimes trees will uproot and fall. This happens when the canopy gets too heavy for the roots to support it, the ground gets exceptionally wet, or the tree gets blown over from terribly high winds. These trees are best left alone unless you are a professional at cutting trees. 

If you cut on an uprooted tree, it could suddenly shift and cause injury or the entire root ball could fall back into the hole. Either way, cutting on an uprooted tree is a practice best left to professional tree experts. 

Sometimes a tree will break and fall at the trunk. If the tree has fallen in this manner and has broken completely away, then this is a tree you could cut up for firewood. 

4. Is The Tree Rotten Or Moldy?

a pile of fallen old rotten logs

As we stated earlier, if the tree has been dead for some time, it will rot or become moldy. Either of these states of decay makes for poor firewood, and you should never burn moldy firewood.

Rotten wood loses its density and becomes soft and brittle. Soft, rotten wood will burn fast, but not produce much heat because most of the fuel is already gone. Rotten wood is also often pretty moist, which again makes for poor firewood.

If you try to burn wet firewood, the fire will often sputter and hiss as the flames work to remove the excess moisture. 

Wood covered with mold or mushrooms (fungus) should not be burned either. If moldy, fungus-covered wood is burned, you potentially release a lot of spores into the air, which is no good. Definitely don’t burn this wood indoors.

So, if you see a dead tree that appears to be rotten, moldy, or covered with fungus, leave it alone and let it rot as nature intends.

5. Is The Tree Hollow?

This may be difficult to detect if the tree is still standing, but if the tree is laying on the ground, you may be able to see if the tree has been hollowed out. A hollow tree could be caused by a insect infestation, some sort of trouble, or it may have happened because the tree was very old. 

A hollow tree means less wood you can bring home. Depending on how hollow the tree is, it may not even be worth cutting and splitting. Although, you may not even find out it is hollow if the tree is standing until after you cut it down. 

If the tree is hollow, you might try cutting some of the larger branches to find out if only the trunk was hollowed out. If this is the case, you may get a decent amount of firewood just from the branches. 

6. Is It Infested With Insects?

One of the worst scenarios, in this case, is being attacked by a swarm of bees when you cut on a tree. While this is highly unlikely to happen, some bees and insects will colonize dead trees, especially in hollowed-out cavities.

To find out for sure if the dead tree you want to use as firewood is hosting a hidden hive of stinging insects, pay attention to the tree. Look and listen for telltale signs. Can you hear the droning buzzing of thousands of little stingers?

Use your eyes as well. If you see insects flying in and out of a hole, quietly step away and find yourself another tree to use for firewood. 

7. Is The Dead Tree An Animal Habitat? 

In the woods, a hollowed-out tree cavity could be prime real estate for animals such as bats, certain birds, squirrels, raccoons, and porcupines to name just a few. Do not stick your hand, head, or any other body part into the hollow of a tree to find out. You might get a nasty surprise. 

You may not be able to see if an animal is living in a hollow cavity of a tree, but if you suspect something is making this tree home, do the right thing and let it continue to live there.

Birds and other animals use dead trees for nests, shelter, or perches. Many bird and animal species use the cavities in dead trees to roost, and shelter from the elements. 

8. Is The Size Of The Tree Worth Turning Into Firewood?

This one is pretty obvious, but it bears mentioning. A small dead tree may not be worth the time cutting it up for a small amount of firewood. If you are just looking for a lot of kindling, or you want some small logs for burning outside, then it might be worth your time. 

Only you can decide if the tree is big enough to spend the time cutting it up for firewood. A fully mature tree could net you a full cord of wood. A cord is considered 128 square feet of split firewood, or a section 4 feet wide, by 4 feet tall, by 8 feet long. 

9. Where Is The Dead Tree Located? 

Tree fallen on house

This is a minor consideration, but we always try to be thorough. If the dead tree is in the woods where you have permission to cut them down for firewood, then cut away. However, if the tree is on your property, you should inspect the area for any obstacles. 

Maybe the tree is way in the back of your property and you have several acres of wooded property. Then, you do not have to worry as much about where the tree lands when you cut it down. 

Is the dead tree sitting right in the front yard? It may look like a simple thing to cut down a dead tree, but even with professionals, cutting a tree can sometimes be tricky. If any objects nearby could be damaged by a falling tree, then leave it to a professional. 

There are many reasons you may want to chop down a tree in your front yard. If you are contemplating it, give our article on the reasons why you should cut down the tree in front of your house a gander.

Do a quick search on online and you will find plenty of videos of amateurs cutting trees in their yards with disastrous results. If there is anything around the tree that could be damaged, like yours or a neighbor’s house, a fence, vehicles, or power lines, then get a professional to cut the tree down for you.

If you want to cut the rest of the tree for firewood after it is safely dropped, they should let you do so. Always err on the side of safety when cutting trees down. 

That’s A Wrap!

Cutting and splitting your own firewood can be a rewarding activity, especially if you are trying to save money on your heating bill. It may take a lot of work, but it can save you money in the long run, especially if you find a few good, dead trees to use as firewood. 

Dead trees can be significant sources of firewood if you check out a few things first. Look for animals that might nest inside them, if there are swarms of insects, and if the tree is in a safe place to be cut down. Plan your actions out before you cut on that dead tree. It may or may not be worth it. 

References:

The Effect of Firewood Removal on … Populations In a Northern Oak … (n.d.). Studylib.net. Retrieved March 29, 2022.

Harmon, M. E., Woodall, C. W., Fasth, B., Sexton, J., & Yatkov, M. (2011). Differences between standing and downed dead tree wood density reduction factors: A comparison across decay classes and tree species. Res. Pap. NRS-15. Newtown Square, PA: U.S. Department of Agriculture, Forest Service, Northern Research Station. 40 P.15, 1–40.

Kahl, T., & Bauhus, J. (2014). An index of forest management intensity based on assessment of harvested tree volume, tree species composition and dead wood origin. Nature Conservation7, 15–27.

Hagerdon, Charles W., and Corey P. Wong. “Thinning in exchange for firewood.” Journal of Forestry 84.7 (1986): 44-46.

As you probably are aware, trees can provide food, nice views, and shelter. If you’re wondering how the shelter comes into play, you may want to know about the kinds of critters living your trees. 

Some of the most common animals and insects you will find living in trees are squirrels, geckos, raccoons, skunks, birds, ants, beetles, cicadas, caterpillars, and butterflies. These animals and insects typically use trees as a source of shelter to protect themselves from the elements.

Before we dive into learning about the animals and insects living in trees, it is important to first know why these creatures might opt to live in a tree in the first place. So, let’s get into it!

Why Do Animals And Insects Live In Trees?

Animals and insects often live in trees because they are multi-use beings, providing not only a home but also food, interaction with others of their species, opportunities for reproduction, and water. However, to be clear, each species will have its reasons for choosing a certain species of tree in any location. 

While it all comes down to access to the basics, animals and insects alike are complex organisms with reasoning to back their choices. Even if those reasons are more biological than they are intentional. 

Trees are great homes for a wide variety of life; between those who fly, climb, or stay closer to the ground, there is always something a tree can offer. 

Between safety, food security, and shelter from inopportune weather, animals, and insects, look for a reliable area to settle down and use what they have available to them.

Here are some of the common reasons animals and insects may opt to live in, or at least around, trees:

Protection From The Elements And Weather

When temperatures rise, or when rain becomes heavy, trees are a solid constant able to help animals stay safe from the elements.

Whether the leaves of branches help slow the impact of rainfall, or crevasses in the trunk allow little critters to escape the cold of winter, there are many ways trees can protect animals and insects alike.

Another benefit of the shelter of a tree is it allows critters to stay put while remaining near their food source, which brings us to our next reason.

Proximity To A Food Source

Animals and insects living in trees are constantly staying near their food sources. Whether it is squirrels eating acorns from their oak tree home, or birds flying down to the ground to find some worms, trees provide access to the food sources of their residents. 

The University of Vermont Extension uses the example of butterflies who feed on nectar as adults. They source the nectar from flowers on trees the butterfly is calling home. 

Now, not all animals or insects live in one tree for their whole lives. In fact, most do not. However, these plants can help to sustain and further other living beings’ lifespan. 

Speaking of a prolonged lifespan, predators cause quite a threat to the longevity of their prey. Trees can help with this as well. 

Hideout From Predators

Living tree branches and hollow trunks of dead trees both help their tenants in one very important area- protection from predators. 

The height of a tree’s canopy can often help small animals like squirrels and birds, and insects such as butterflies, to stay above their predators’ line of sight. Some predators may not be adept at climbing trees, which would make this an even more secure home base for all kinds of living critters. 

Fallen tree trunks, natural crevasses, and other tree-based homes closer to the ground still offer great predator protection. Animals like foxes, wolves, and coyotes are large enough they may not be able to stick their heads into some areas where smaller creatures like raccoons may live, let alone enter the space and attack their prey.

You Can Find These 9 Animals And Insects Living in Trees

Alright, let’s get to the good stuff now, shall we?

Here are a few, and just a few, of the animals and insects that call trees home. Of course, there are many more species you could include here. These are, however, 9 of the most common species recognized for living in trees.

Squirrels

Red squirrel sitting on the tree

To begin our list, we have squirrels- a rodent in the same family as marmots, chipmunks, prairie dogs, and more.

Squirrels are known best for munching on acorns while they are not terrorizing guests at college campuses throughout the United States. They love to build nests in the branches, in the space where single branches split into two or more, smaller branches.

Since these animals live among the branches, you can expect them to stay up there when a storm occurs.

Tufts University helps provide some reassurance that animals are safe in trees during a storm, as it notes that birds are much safer when utilizing their trees’ often thick connection of branches, twigs, and leaves. 

Hiding within the foliage of a tree is quite safe for the animals that live there!

Geckos

Talking about animals who live among the branches of a tree, geckos are fond of calling this type of environment home.

Geckos eat some insects, spiders, and other small rodents, but are not the common predator you might think of. Certainly not in the same way owls or foxes aggressively advance on their prey.

Among the branches, geckos may find another food source in small fruit. The size only matters because geckos choose meals they can fit into their mouths easily. Some larger fruit with certain exteriors is not going to be a simple meal for them.

Since this species also lives in the branches, they can stay safer from their predators, which include snakes and spiders. 

However, geckos living in the trees may have more to do with their particular species rather than the family of lizards they belong to. We have a feeling some lizards may not be so keen on living right next door to the birds, who may try to eat them instead.

Raccoons

Funny raccoon on a branch. Outdoor

Raccoons are excellent climbers, which leads to them finding housing in some pretty interesting locations. 

When it comes down to it, natural cavities in living trees or the open space under fallen trees are commonly the accommodation of choice for these critters. 

Between the safety from predators and the elements alike, raccoons and trees are like peanut butter and jelly, though the relationship here might just be a little more complex.

Raccoons are not picky eaters, clearly seen in how they dig through garbage, so the tree environment provides better resources than what they may seek on their own. 

These resourceful critters may have a reputation for getting in the way of people, but in nature and when left to their instincts, trees are pretty great real estate.

Skunks

Surprisingly, there is even a place for these smelly little critters among the trees. 

Much like raccoons, skunks favor the natural cavities that a tree might provide them. Any hollow tree trunks, space under fallen trees, or other natural nooks and crannies are very attractive places for skunks to settle into.

Skunks like to eat nuts, seeds, eggs, small insects, and birds, along with some other foods. While birds can stay safe up in branches above, skunks can find plenty of food in the tree they choose to live in. Whether they choose to munch on berries or worms, they will surely find something to snack on.

Birds

This one might be pretty darn obvious. Of course, birds live in trees!

The branches provide a great place for parents to nest and raise their young. The adult birds can leave for small periods to gather food for their young, while not being required to stray too far from the baby birds up above.

Since these creatures fly, the obvious choice for them is to live among the branches, giving birds a place to land easily while remaining suspended in the air they soar through all day.

Staying away from predators remains a concern, and the tall branches of trees help to keep these flying friends out of reach of the animals that may hurt or kill them.

You can make your tree more bird friendly by adding something like the Squirrel Buster Standard Squirrel-proof Bird Feeder. If you want the beautiful birds to stay around without being bullied by squirrels, this is perfect for you!

Ants

Out of all the insects out there, surely you have noticed ants crawling on the trunk of a tree. Perhaps you saw them as a child playing among the branches as you climbed toward the top of a tree.

Maybe you see them now as you climb trees, reconnecting with your inner child. We don’t know!

Ants are a common species, therefore it is not surprising these critters live in trees along with anthills. 

You could think of their setup as a ‘summer home’ sort of deal. Of course, ants love their hills, the structure of the community, and the challenge of producing food. However, that food has to be sourced from somewhere, and in nature, food may be sourced from trees. 

Ants rarely damage a tree. Instead, they make use of cavities and any rotten wood that may provide a suitable home. The only ant that may damage a tree are carpenter ants, but they can only dig tunnels in soft wood, meaning the tree may have already had wood rot.

They seek the sweet dew left behind by other insects but also can be protected from other predators by holing up above the ground.

Caterpillars And Butterflies

You know how butterflies have to go through a period of metamorphosis to become that final, beautiful form? Well, the caterpillars who turn into these flying works of art must build a chrysalis somewhere.

What place is better than a tree, which they can hang their chrysalis from while going through the most significant change of their life?

You see with these creatures how the distance from other bugs and animals can be helpful while a huge transformation occurs. 

This follows the same vein of not only safety but comfort and ease. Nature might center on things essential to life, but individual animals and insects can also certainly follow their desires for a more comfortable existence.

There are many types of caterpillars and not all are as likable as others, but if you are seeing your leaves are being eaten, or a tree seems to be taken advantage of, you can work with a trained professional in your area.

One type of nasty caterpillars are tent caterpillars, or silkworms. To learn more about what harm they can bring, and how to get rid of them, check out 7 Ways To Get Rid of Silkworms (Tent Caterpillars) For Good.

Beetles

Spruce bark beetle posing for the camera

Beetles are just another bug that lives in a tree, but why?

For these insects, it is all about the bark. Called bark beetles, quite creatively we might add, these insects are found in trees already declining or dead. Fallen trees or pieces of firewood may serve as a temporary home for these critters as well.

Iowa State University Extension tells us there are hundreds of species of bark beetles. 

If you are seeing these beetles in a mostly healthy tree, we recommend trimming or pruning any infested limbs. 

Otherwise, these beetles do not cause huge issues, since they seek trees that are already a viable host (meaning dead or declining). They may cause some annoyance, but are not a threat to humans.

Your house structure and furniture (processed wood) will also remain safe from bark beetles who opt to take advantage of resources already past their better phase of life. 

In a way, bark beetles are wonderful at repurposing space, and trees other species can no longer live in.

Cicadas

Have you ever heard the noise of cicadas in the summer? Just going on and on, for weeks at a time, if not longer. 

Not every place has cicadas, and they certainly do not always come with quite the same level of intensity every year. 

After living in the ground, which is a whole different story, cicadas will find a tree to attach to and lay eggs on.

This is a prime example of trees not only being used as a home but also as a site for reproduction and continuing the species.

Trees provide everything necessary for cicadas to continue out of the elements, away from predators, and near food sources, so that young can survive and thrive upon hatching. 

Eventually, it’s back to the ground, anyway. 

How Can Insects Or Animals Benefit Your Tree?

Green Day Gecko on Leaf Cute

Animals and insects can most definitely cause harm to plants, and sometimes they end up being quite the pests. However, this is not always the case.

Quite often, funny enough, these creatures and plants get along very well in a symbiotic relationship.

Removing Harmful Insects

One benefit of the regular critters who call trees home is they often work to remove insects causing a negative disruption to the balance of the tree’s ecosystem. Treecosystem, if you will.

They often want to protect their home, which means protecting the tree. Invasive pests and harmful critters will not stand a chance when faced with the typical tenants of a tree.

This may mean animals eat insects who could harm the tree, or they may simply scare other creatures off. Regardless of the situation, the tree gets some helpful protection and animals get to stake their claim.

Natural Fertilizer

Having animals can be especially helpful when you need a little extra natural fertilizer. 

Picking up what we are putting down?

If not, the animals will *cough, cough* use the restroom near the base of the tree. This will continue to break down and add some extra nutrients to your soil. 

So, let animals and insects make a home on a tree, and the tree will reap so many of the benefits. It’s all just one big natural cycle of repurposing and giving a little to get a little. 

Repurposing Trees That Are Otherwise Not Viable

Like we talked about with bark beetles, there is an entire sector of tree-wildlife relationships centering on fauna making use of rapidly declining or already dead flora.

For example, you may see an injured or dead tree from being in the path of a forest fire. You may also just assume this tree is pretty much out of commission, right? 

Not exactly. 

Trees that have fallen or been partially destroyed can offer great places for nests, dens, and other homes for animals and insects alike. They are usually searching for a space both protected from the elements and capable of housing multiple members of a group

That’s It For Now!

Well, that’s all we have for now. 

Stay tuned though, because there are always more trees, and insects and animals, to talk about. Nature is an especially incredible thing and we hope that you’ve enjoyed learning a little more about it in this piece. 

If you forget some critters we named in this article, never fear!

Here’s a final list of animals & insects who especially use trees as their home.

  • Squirrels
  • Geckos
  • Raccoons
  • Skunks
  • Birds
  • Ants
  • Caterpillars and Butterflies
  • Beetles
  • Cicadas

Just remember, these creatures make their home outdoors, using the materials and locations they have at their disposal. Please be mindful of this when looking to call an exterminator or pest control when a creature is not truly causing you any harm or extra stress.

If you have concerns about the safety or health of your tree, do some research and see what steps you can take to restore your peace of mind and maintain your tree’s health.

Thank you for reading!

I hope this article helps you along your ever-evolving tree journey.

References

Casipe, M. How These Animals Live in Trees Is Changing How People Live in Houses.

Ryan, K. C. (1994). Interactions Between Fire-injured Trees and Insects. In Plants and their environments: proceedings of the first biennial scientific conference on the Greater Yellowstone ecosystem (Vol. 93, p. 259). US National Park Service, Natural Resources Publication Office.

Floren, A., Biun, A., & Linsenmair, E. K. (2002). Arboreal ants as key predators in tropical lowland rainforest trees. Oecologia131(1), 137-144.

Wherever there are trees, there are bound to be insects. When you’re out in the summertime or walking through the woods, it is evident that bugs are present, but there are some trees that insects love even more than they like bothering you!

While trees in general attract variety of bugs and insects, these are the 6 most common types of trees insects adore:

  • Cottonwood Trees
  • Pine Trees (Conifers)
  • Mulberry Trees
  • Pear Trees
  • Apple Trees
  • Rotting Trees

Insects are attracted to these trees because they either have sweet sap, fruit, or shelter.

If you have any of these trees in your yard, there is a good chance you’ve seen quite a few insects roaming around as well. Let’s dive into more on why insects love being around these trees so much!

Most Common Insects To Find In Trees

There are quite a few insects that love to hang around trees because of the natural structure, safety and sheltering aspects they provide. Not to mention, they are also great sources of food or water and moisture for a lot of insects.

Specifically, moths, beetles, caterpillars, borers, and aphids are usually the most common types of bugs you will see in trees because they are burrowing insects at some point in their life cycle. The most common types of insects on trees specifically are the clearing and flathead boring beetles.

You can also take a look at our list on the most common animals and insects that live in trees if you’d like to learn more about the actual creatures, rather than the specific trees themselves!

Issues That Insects Cause To Trees

Wood-boring insects are usually pretty destructive and can cause quite a bit of harm if you aren’t aware of their presence, and sometimes it is hard to notice because these insects like to live under the bark. Usually, they weasel their way under the bark when a limb falls or the tree takes some sort of injury, this creates an open door under the bark’s surface.

When insects get underneath the tree’s bark like this, they can cause damage in a couple of different ways. First off, they will burrow even deeper into the conductive tissue under the bark which is responsible for transferring both water and sap throughout the tree.

After this, the tree’s tissue will essentially turn into decomposing matter. Because the tissue is underneath the bark, it creates a wound inside the tree that is now in the tree’s main nervous system. It is very hard to spot and it cannot be healed, once a tree starts to decompose you cannot reverse what has been done, you can only stop it from spreading further.

Because of this, insects can cause things like girdling, structural weakness and branch dieback in trees. This can also cause deformities in trees as they grow around wounds and try to repair themselves, almost like scars.

Insects Love Cottonwood Trees

Close up shot of eastern cottonwood at Las Vegas, Nevada

Cottonwood trees are one of the most common types of trees that insects are attracted to. Cottonwood trees are very old trees and they’ve been around for a long, long time. According to Lake Forest College, they are actually the oldest hardwood trees. 

Cottonwood trees produce a sweet-smelling resin-like sap, which makes bugs flock to them just because of the sweet scent they produce. Cottonwoods also have trembling leaves. Trembling leaves are ideal for bugs because they can easily stay on the leaves to munch, but it makes it difficult for predators to see and catch them when they’re moving around.

The bark on a cottonwood tree is incredibly thick, so it provides great shelter to bugs that want to burrow their way under and make a home. These cottonwood trees are also very susceptible to limbs falling, so it’s very easy for bugs to find access to the sweet-smelling home that lays under the bark’s hard exterior.

We will discuss later how insects love trees that are rotting, but cottonwoods are susceptible to rotting so they have another vote from insects on the best place to live. Cottonwoods are susceptible to rot because they need so much water, and if they don’t get enough the portion of the tree that doesn’t get enough water will start to rot away.

The most common insects to find on cottonwood trees are:

  • Wood leopard moths
  • Leaf feeders
  • Cottonwood borers
  • Poplar tentmakers
  • Carpenter worms
  • Mealybug
  • Clearwing borer
  • Redhumped caterpillars
  • Twig borers
  • Fall webworms
  • Leaf Curl Mites
  • Aphids
  • Oakworm

If you need to defend against these insects, Monterey LG 6299 Horticultural Oil Concentrate is great to help keep them away because it can be used when the tree or plant is in the dormant season or when it’s growing. It’s easy to use, just mix with water and apply to trees!

Pine Trees (Conifers) Attract Bugs And Insects

Beautiful pine trees on background high mountains.

Pine trees (or conifers) are another great place for bugs to invade. They have a sticky sweet sap that bugs are attracted to, and they have thick bunches of pine needles that make protecting themselves from predators a breeze.

Pine trees are usually a pretty wet wood, so it’s a great source of moisture and water for insects. Mosquitoes actually love them in the summer because of the moisture they provide under their thick foliage.

They are softwood, making burrowing a dream. They are also trees that are incredibly hardy and grow in the winter months, so they are a great choice when insects are looking for a place to get out of the elements.

According to the Oregon Department of Forestry, pine trees go through abiotic damage, this is damage caused by the environment. Any limb damage from the elements or things of that nature is considered abiotic damage. Because they are softwood trees that leaves them open to having not only exposed opening in their bark but they are also susceptible to rot.

When this happens, you can start to see markings on the trees from the damage the bugs have made from making their homes after they found a susceptible pine tree. You might see things like brown frass, pitch pearls, and streaming pitch on the bark of the tree if this has happened.

A lot of bugs are attracted to pine trees, like pine beetles, wood borers, defoliators, and sapsuckers. The most prominent type of bug that likes to be around pine trees according to the United States Department of Agriculture is the pine beetle. A fitting name, right?

These beetles like to make their way under the bark of a pine tree and then lay their eggs, feed off of the softwood of the tree, and essentially make themselves right at home. They can destroy a tree in a matter of a few short weeks and then they will turn around and move to a different tree and start all over again.

You can notice if a pine beetle is invading your pine tree if you see it start to turn red and then turn brown, if this happens you will want to look at ways to reduce your pine beetle numbers because they will continue to decimate pine tree populations.

You can remove trees that have been affected and trees that are injured or rotting. Pine beetles can be dangerous, and they are a big cause for concern. They wreak havoc on multiple pine trees, which then will become dry and can result in forest fires.

Pine beetles can damage tens of thousands of trees if not taken care of and they have caused mass destruction in pine tree numbers since the beginning of the 2000s.

You can check out more about pine trees in our article 5 Reasons Why Your Pine Tree Isn’t Growing (& How To Fix)!

Insects Thrive Off Pear And Apple Trees

Low hanging and easy to pick Conference pears at a low tree.

If I were a bug, I think these are the trees I would probably pick to make into my home. Pear trees and apple trees are a hot spot for bugs to live because, well you probably guessed it, the fruit they provide.

All fruit trees are attractive to bugs, but because pear and apple trees usually have fruit that stays on the tree a little longer to mature, they continue to attract insects.

It is said that a lot of people who plant fruit trees regret it once they find out how many bugs (and even animals) might come into their yard looking for a snack. 

Insects burrow into the bark and the fruit rather than just eat it and walk off. Insects are a bit harder to detect than deer or other animals when it comes to fruit trees, but they do leave some tell-tale signs that they’ve been around.

Insects can leave scabs on the tree or the fruit once they’ve infested it. They can also cause rot or mildew, which you can see on the bark and from the outside of the tree.

Most tree affilictions like fire blight are more common if insects are involved. This also includes cankers, flyspecks, blotch, freckles, and wilt. All of these things are common signs of insects hanging around your fruit trees.

Common types of insects you might see around pear and apple trees are weevils, mites, fruit flies, moths, aphids, slugs, and beetles. 

Mighty Mint 32oz Plant Protection Peppermint Spray is a natural alternative to insecticides that many people use on fruit trees to help keep away insects! It does a great job of handling the pests without being a chemical insecticide.

Insects Love Mulberry Trees & Their Fruit

berries of mulberry in foliage ripe on the branches of a tree, closeup

There are red and white mulberry trees with fruits that are pink, white, and purple. They are really attractive trees and their fruit is very fragrant, so you know what that means-insects are close by.

These trees are pretty susceptible to root rot because they are so used to dry soil and dry conditions if they get too much water they cannot handle it. Their roots then begin to grow mildew and rot and again-you know what that means (cue the insects).

When these trees get too wet, they also can get bacterial infections causing more rot throughout the tree. If they get too wet they are ideal living situations for insects and they meet all of the requirements to be move-in ready.

Whiteflies and mulberry flies are big pests to the mulberry tree and they can cause quite a bit of damage. They can eat the fruit as well as the inner workings of the tree, just like all of the trees we have talked about so far, the mulberry tree is no exception.

Neem oil is a commonly used oil for fruit trees, a lot of people like to take a more natural route for insecticides on fruit trees especially if they intend to eat the fruit. Bonide BND022- Ready to Use Neem Oil has a great ready-to-use formula that you can spray right on the tree to help protect it and keep it good for the long run. 

Rotting Trees Provide Shelter For Insects

Old rotten tree trunks with moss

Finally, we come to rotting trees. It doesn’t matter what type of tree it is, if it is rotting it is susceptible to bugs. Insects will find their way into rotting trees and feed off of them, but once they have done all the damage they can do they will move on.

Sooner or later, when they have gotten to all of the rotting trees they will move on to flourishing trees. When this happens, we see mass amounts of devastation in our forests and large numbers of issues within our trees.

If you have a rotting tree, we suggest that you call a professional arborist to assist you in cutting it down and to get rid of the tree to help avoid insects from inhabiting it. Not only will it save you time, but it will also save you in the long run money because you won’t have to cut down mass amounts of trees since you got rid of the one that was creating problems.

Also, if bugs are attracted to already rotting trees, they tend to wear them down even more, which then starts to weaken the structure, making those trees dangerous to be near due to a fall hazard.

We wouldn’t say if a tree has some rot that you definitely need to get rid of it. Like we said earlier, a tree might have rot that forms a callus around it and can still be in good shape. However, if you a mostly rotten tree, then it is an issue.

If you have a tree with some rot that you are not wanting to get rid of, you can try bug repellents on it to help keep the bugs away. Organic Laboratories 100-021 Lab QT Organocide is a great option to get rid of the insects you want, and not the ones you don’t. 

That’s A Wrap!

mountain river on a misty sunrise. amazing nature scenery with fog rolling above the trees in fresh green foliage on the shore in the distance. wonderful countryside landscape in morning light

Trees everywhere have been bothered by bugs since the beginning of time, and while there isn’t a whole lot we can do about it there are steps we can take to help keep our trees happy and lively while they provide a home for bugs and insects alike.

If you have any of these trees in your yard, try out one of the insecticides listed and see how it goes for you, just make sure to carefully read the label before trying it out and if you want to don’t hesitate to call a licensed professional for help! 

References

Durben, Rachel M., et al. “Beavers, bugs and chemistry: A mammalian herbivore changes chemistry composition and arthropod communities in foundation tree species.” Forests 12.7 (2021): 877.

Kiritani, K. “The impact of global warming and land‐use change on the pest status of rice and fruit bugs (Heteroptera) in Japan.” Global Change Biology 13.8 (2007): 1586-1595.

Ohira, Y. “Outbreak of the stink bugs attacking fruit trees in 2001.” Plant Prot. 57 (2003): 164-168.

Wermelinger, B. E. A. T., Denise Wyniger, and B. E. A. T. Forster. “First records of an invasive bug in Europe: Halyomorpha halys Stal (Heteroptera: Pentatomidae), a new pest on woody ornamentals and fruit trees?.” Mitteilungen-Schweizerische Entomologische Gesellschaft 81.1/2 (2008): 1.

You won’t be the only one weeping if you prune your large trees at the wrong time of year. Large trees are known to ‘weep’ sap out of large cuts if their branches are cut during their active growing season. When actually is the best time to prune large trees?

Always prune large branches from trees during their dormant season from mid-winter to early spring. This discourages resin, or sap from flowing from the tree cuts. Large coniferous trees may be pruned any time of the year, but it’s best to prune during their dormant season as well.

A well-pruned tree has a big impact on its longevity, appearance, and structure. Read on to learn how to tell if your trees are dormant and for more pruning tips!

How To Know When To Prune Your Large Tree

In North America, the late fall and winter months are considered the dormancy period for most trees. The temperatures are cooler, there is less sunshine, and trees are not actively growing new leaves and needles.

It is preferred to make all large cuts to big trees during this dormancy period, no matter what species.

You’re in luck if the trees around you are deciduous, meaning their leaves fall off seasonally because that’s the most obvious clue your tree is dormant! Your trees are in dormancy during this period when the leaves have dropped off for the season.

During the dormant season, the transportation of groundwater from the roots to the canopy has mostly ceased, and the leaves are no longer converting sunlight to energy to grow. It’s like the factory has shut down for the season, giving us time to prune!

Coniferous trees, or trees with needles and cones, are also likely dormant at the same time as their deciduous counterparts.

According to the United States Forest Service, you can prune conifers at any time of year. However, it’s important to note that pruning during the spring and summer growing seasons will likely cause the dripping of sap from branches.

Dripping sap from your trees is not desirable for a few reasons.

First, it’s messy; sticky sap is difficult to remove from cars, sidewalks, tools, etc. Secondly, the open wound is more likely to attract insects and pathogens to your tree.

There are times when pruning during the growing season can’t be avoided. In these instances, there are things to do to help protect your tree from making a sappy mess. Try using Bonide Bonide (BND225) – Tree Pruning Sealer for a fast, easy, and effective dressing designed to aid in the healing of any kind of tree wound.

You Can Trim Old Tree Branches Any Time Of Year

Trees in winter landscape

Pruning old and deadwood is a must-do, especially when removing it from large trees. The large dead branches often will split and hang vicariously above one’s head. These are often called “widow-makers”, for good reason.

Dead branches are easy to notice during the active growing season because there are no leaves growing on them or they have turned brown. This wood is no longer actively using the tree’s resources, therefore will not release flowing sap when cut.

During the dormant season, deciduous trees’ branches and stems are all visible, so it is easy to see the shape of the tree. It is also easy to see where there may be branches rubbing on one another and needing pruning. However, it can be more difficult to tell right away if the branch is dead. A couple of quick observations will give you the answer.

First, if it is dead, the wood will often crack and break off from the tree easily. Second, the bark will look discolored or dried out. Thirdly, there will be no buds or active growing tips on the stems from where the leaves will grow from.

Another common way to tell if the wood is alive or dead is to do the “scratch test”. Simply use your fingernail or blade and scrape away the outer bark from a small branch. If it’s green underneath, it’s alive. If it’s brown and dry, the wood is dead.

Prune Certain Early Flowering Trees In The Early Spring

Single blossoming tree in spring on rural meadow

Common spring-blooming understory tree species, such as Redbud and Dogwood trees, should be pruned just after flowering to preserve spring blossoms. By pruning immediately after their bloom period, new growth will be encouraged that will form new flower buds for the next year.

If there are large branches that need to be pruned off, however, it is a good rule of thumb to still prune those branches off in the tree’s dormant period.

Redbud and Dogwood species are commonly planted too close to homes and often need heavy pruning when they start getting too large. By following these tips, your trees will remain beautiful and full of blossoms each year.

If you’d like to learn more, take a look at our guide for pruning flowering cherry trees, which are ornamental trees!

Late Blooming Trees Should Be Pruned In The Dormant Season

Trees without leaves on a background of blue sky and clouds. Late autumn, Sunny day.

Have you noticed trees blooming in the summer or fall? Examples of this could be Golden Raintree, Tulip tree, Sourwood, Crepe myrtle, and Fig trees. It is very common for later blooming species to grow their blossoms on new spring growth.

Pruning your later flowering trees in the dormant season will encourage more light penetration throughout the canopy. This could result in more light reaching fruit-bearing parts of the tree, and more blossoms.

If pruning involves too many cuts on shoots and small branches, it could instead cause excessive sprouting of new shoots, also called ‘suckers’ or ‘water sprouts’. These suckers will instead hinder light penetration and use up valuable nutrients that could have been powering flowers and fruits.

Prune Large Fruit Trees In The Late Winter

winter evening in the forest - fairytale landscape

Pruning fruit trees is an activity many growers anticipate with joy or dread. Caring for fruit trees can be a lot of work since they need annual pruning to keep them vigorous, healthy, and productive.

While care should be given to pruning fruit trees during their dormant season, additional care should be given if you live in a very cold region. Freeze damage can occur to freshly pruned fruit trees if pruned too early in the winter.

Studies have shown that late-autumn and early winter pruning decreases fruit trees’ cold-hardiness. Since some trees are more fragile than others to cold temperatures, this is an important detail to keep in mind!

Additionally, frost injury on pruned trees appears mainly in bark and wood around the pruning wounds. This suggests that the frost damage was a result of reduced cold hardiness due to wounding.

Many plants can resist freezing due to a plant phenomenon called supercooling, but when the tissues are wounded, ice formation can penetrate the exposed plant cells causing damage and death. 

Pruning your fruit trees in the late winter will protect them from getting damaged from heavy winter freezes. A late winter pruning is best because they will soon be out of the dormant season and will be able to quickly recover from the open cuts during the upcoming growing season.

Orchard workers have reported that dormant-pruned fruit trees increase the percentage of blossoms that set fruit. That is another great reason to prune during the dormant season!

Some orchards do light pruning during the summer, but spray pesticides on the fruit trees that protect it.

It should be added however that cutting back the “water shoots” or “suckers” can be done during the growing season without negative effects. In fact, by removing these shoots, even in the summer, plant energy and nutrients will be redirected to active growth and fruit production of the rest of the tree.

Can I Prune Large Trees During The Growing Months?

Yes, but it is better to remove a small amount of live foliage often, rather than a lot all at once. Read that twice.

Consider the scenario of a large tree with a lot of new growth weighing down a branch that you keep walking into, for example. Simply snip off the ends of the branches. This will remove some weight from the branch and hopefully lift it so it’s not hanging in a walking path.

Light pruning during the summer months shouldn’t cause much harm to your tree if done with a clean blade and so long as you’re not taking off large branches.

Hedging is another example of pruning that can be done in the growing months. However, this is not often a practice done on large trees.

To learn more about tree branches and how they actually grow, take a look at our info guide on why branches don’t grow on the bottom of trees here!

4 Tips For Pruning Large Trees

Large fruit tree pruning

Getting started with pruning projects can feel overwhelming, especially if the trees haven’t been maintained for several years. Understanding when the best time is to approach the job at hand will help you plan for your success! Read on to learn tips as you begin to plan.

1. Call A Professional To Prune Your Trees

For large, dangerous cuts or trees, call a professional. In these cases, special equipment may be needed, like climbing gear, heavy chainsaws, ropes, and pullies to keep people and structures safe.

2. Understand Pruning Techniques And Methods

There are a variety of pruning cuts, each that will produce different growth responses in plants.

If you’re a visual learner and have a global appreciation for trees, the book Tree Pruning: A Worldwide Photo Guide is filled with instructional photos of trees around the world. The book covers branch anatomy, wildlife, safety, trees, and people, and displays over 150 photographs, with a variety of diagrams.

3. Use The Right Tools

For trees that can be pruned safely by the home gardener, the importance of having the right tools cannot be emphasized enough. The most common tools used are hand shears, lopping shears, pole pruners, and saws.

Hand Shears Or Hand Pruners

There are a few different types of pruners to choose from, bypass, anvil, or ratchet pruners. Bypass pruners are generally preferred, but all types can cut branches up to around ½ inch in diameter.

For the serious gardener needing a pair of quality bypass pruners, we’d recommend the Felco 2 Bypass Pruner and Leather Holster. When taken care of, this quality pruner will serve all your hand pruning needs.

A more economical “look-alike” is the Gonicc 8” Professional Sharp Bypass Pruning Shears. This item can cut up to ¾ inch in diameter tree branches and has a sap groove design to keep the shears from sticking.

While bypass pruners are a great choice for hand pruning, they are more difficult to use on dead wood. For this job, the Felco Felco Pruning Shears are a better choice. This high-performance anvil pruner has a narrow-pointed anvil blade that allows for closer cuts to the trunk than other anvil pruner models.

Ratcheting anvil pruners are a good choice for a gardener who doesn’t have a strong grip strength. Instead of cutting all at once, you will ‘pump’ the handle to ratchet down the blade and eventually make the cut.

Lopping Shears

There are so many choices when it comes to lopping shears. You will want to consider the length of the handle you need, along with how much weight you can handle in a tool and how often you’ll use them, so you know how much to put into it.

Loppers are used for medium-large branches 2 ½ inches or less. We’ll point you to the two types of lopping shears so you can be confident you’re getting a quality product that will support the health of your trees with clean cuts that will heal quickly.

The Felco Pruning Loppers would be considered the “Cadillac” of lopper shears. Notice there are a few different sizes of handles to choose from, all ergonomically designed.

Pole Pruners

Pole pruners are fun to use because with the long pole you’re able to cut 1 ¼ inch branches high above you in the canopy standing from ground level.

It makes a big difference having a quality tool with a sharp blade to do the job well because even though you’re on the ground, it still feels like a balancing act! In those moments, every movement and decision point to cut matters and you will want to get it right!

The Jameson PH-34-PKG Tree Pruner Kit is made in the USA and has the largest cutting capacity on the market with a true 1 ¾ inch hook opening.

Saws

For larger tree branches, you might be considering a power tool. For jobs too big for a pole pruner, but not quite worthy of a powerful chainsaw, consider getting a power pole electric chainsaw.

Scotts Outdoor Power Tools Electric Pole Saw is a good choice for beginners who may be shy around gas-powered tools. This corded, electric pole chainsaw features an automatic oiling system with an oil level window and a tool-free tensioner chain adjustment.

To choose the best gas-powered chainsaw for you to make those bigger cuts with, be sure to measure how big the diameter of the largest branches is. This will help you determine what size bar you will need on your saw.

It is recommended to shop for chainsaws in person because you will want to find a well-balanced machine that is comfortable for you. It needs to be powerful enough to do the job, but light enough for you to handle it safely.

4. Clean Your Blades

Blossoming trees in spring

Your pruning tools could be carrying something nasty on the blade, even though you can’t see it! It is recommended to always clean your blades between trees to prevent the spread of anything harmful to your other trees.

It is a simple, but effective practice that you should get into the habit of doing. An easy DIY method is to put some ethanol or 70% isopropyl alcohol in a spray bottle and squirt some on the blade before moving on to the next tree.

The Integrated Pest Management Department of the University of Missouri states that bleach could also work but will need to be diluted to a 10% solution before applying it to blades. It can be corrosive to blades, so be sure to give a good rinse with water after application.

That’s A Wrap!

Trees add so much health to our lives, we need to be stewards of their health as well. I hope you found some helpful information that will help you determine when you should be pruning your trees and other useful tips.

References

Bedker, Peter J. How to prune trees. Vol. 95, no. 1. Government Printing Office, 2016.

Li, K. T., Lakso, A. N., Piccioni, R., & Robinson, T. (2003). Summer pruning effects on fruit size, fruit quality, return bloom and fine root survival in apple trees. The Journal of Horticultural Science and Biotechnology78(6), 755-761.

Norainiratna Badrulhisham, Noriah Othman, Knowledge in Tree Pruning for Sustainable Practices in Urban Setting: Improving Our Quality of Life, Procedia – Social and Behavioral Sciences, Volume 234, 2016, Pages 210-217

Have you ever wondered whether a tree could still thrive without all of the branches that make it appear the way it does? Branches are a significant portion of any tree, and they may just be more crucial than you think. Perhaps the real question is, is there a scenario where a tree could even survive without branches?

The importance of tree branches is widely underestimated. Trees can’t survive without branches as they are essential for a tree to grow and thrive. No branches mean no leaves, which limits the movement of nutrients and the amount of structural support that a tree needs to be healthy.

The reason branches are so foundational in the life and growth of a tree is actually pretty simple so we won’t keep you waiting any longer. Let’s get into it!

Why Can’t Trees Survive Without Branches?

In short, branches hold the key to tree growth. 

The ends of branches have something called a meristem, which we’ll dive into a bit later, and this meristem allows cells to divide and grow to be particularly intense in these regions. 

Without branches, trees could rely on the meristems located toward the lower portion of the tree, near the roots, but this would not provide nearly enough growth for a tree to continue.

Wait a minute, so can trees grow without branches then?

Can Trees Grow Without Branches?

branchless tree in a forest

When the majority of a tree’s major limbs, their branches, die or are removed there is quite a small chance the tree will successfully continue growing. 

Texas A&M reminds us that the larger a broken limb is, the less likely a tree is to be able to survive. Additionally, the more branches that are broken or lost, the more unstable the situation for a tree to grow.

At this point, the tree is no longer able to thrive and surviving is barely on the table. 

Why is this? Well, branches are a crucial part of the tree. 

But what if the tree itself grows without branches? 

This would be quite an abnormal situation, but the branches of a tree are so central to a positive development that a tree would not likely live for long without branches to support its internal systems.

A tree without branches is probably a tree that didn’t survive the previous winter.

How Trees Actually Grow Branches

Trees, as individual organisms, can grow in height because of their branches, but how does that really work out?

Branches hold the meristems of a tree, which are essentially the very endpoints of said branches. What are meristems, though? How on earth do they work? A meristem, simply put, is the center of intense activity which catalyzes growth.

How does it do that, you ask?

At the end of the branches is where all new cells of the tree are generated and able to expand. This means that trees essentially grow inward as they grow upward.

It’s important to note that most trees do not grow in the way that humans and animals do, where growth can occur in most parts of ourselves. When it comes to trees, the cells are produced in a limited number of locations.

Cue the meristems, and why branches matter so much!

Why Branches Are Important To Trees

Sprout growing from tree branch

If it wasn’t clear when we talked about branches being a vital component of a tree’s growing process, we’ll say it again:

Branches are a driving factor in whether or not a tree can grow taller and, therefore, at all. Branches are not only structural support for a tree. They don’t only hold leaves or act as a filter for wind and other elements. 

When it comes to the life cycle of a tree, it wouldn’t be possible without the way branches hold the meristems which create all-new cells of the tree. 

Branches are the catalyst for life, quite literally, in the case of a tree.

It’s important to note that some trees actually don’t grow branches near the base of the tree – it just isn’t efficient for them. You can learn more about why branches aren’t growing at the bottom of your tree here.

How To Care For Your Trees To Promote Branch Growth

Gardener watering a young tree in spring

Now that you know a little more about the extreme importance of branches, let’s talk about how you (note: not a meristem) can still help your tree to grow and stay healthy!

Maintain General Observance Of Your Trees

Keeping an eye on your tree is a very easy habit to get into, and can make such a huge difference. 

By taking the time to check in with your tree (this goes for any plant) you’ll be able to catch anything that may be wrong early on. This can lead to earlier prevention of disease, decay, infestation, and so many other things that could inhibit the health of your tree.

Keep Your Trees Hydrated

Speaking of the things you can do to keep your tree healthy in a preventative way, ensuring there is adequate water is a huge factor that many people seem to overlook. Water is key!

If your tree is not properly hydrated, it will need to focus more of its energy on maintaining its stability and less energy on flourishing and doing the best it can!

If you are someone who is gone a lot, are forgetful, or are just busy, using an irrigation system like this Blumat Drip System could be a lifesaver (and a timesaver, too!).

Fertilize Your Trees

If you are a regular reader or know some things about trees already you’ll know that fertilizer is a key component that is quite often overlooked.

Since we are talking about alllll the trees today, and not just one specific species, we can’t tell you exactly which kind of fertilizer you should be using. We can arm you with the tools to figure it out, though!

By the end of this article, you won’t only understand why branches are so important but you’ll also be able to navigate the world of fertilizer as a confident customer.

Let’s start by explaining the numbers you’ll be looking for on a fertilizer bag:

You’ll see 3 numbers, 10-10-10 for example, which are referred to as an NPK value. This value stands for nitrogen, phosphorus, and potassium, and indicates how different elements are balanced within the fertilizer. 

So, if you see 8-8-8 or 10-10-10 or 20-20-20, you’ll know that this is a fertilizer that is well-balanced and can work on most, if not all, trees.

For your specific species of tree, we suggest looking up the NPK value that is recommended by experts and going from there. 

A great, balanced fertilizer, if you’re looking for something that is a safe bet, for now, is the Miracle-Gro Tree & Shrub Plant Food Spikes that come in a 12-pack and give you a great bang for your buck!

Prune Your Trees

We’ve been talking about how trees can’t do well once they lose their branches, so why on earth is there a section in this article about cutting off those very same branches?

It’s simple, really. General maintenance-based pruning is a whole different story from the loss of branches that takes place and causes a tree to lose its energy, lifeforce, and appearance. 

Pruning in a consistent, but educated manner can actually promote the regrowth of branches when there are too many crowded in one spot, when branches are beginning to decay and/or die, and when the tree itself just needs a little TLC.

If your tree is in trouble, check out our article on saving a tree with stripped bark here!

That’s A Wrap!

Get it? Soon, you’ll be able to take the next step in caring for your tree- whatever that means for you!

Thanks for sticking around to learn about the reasons branches are so important to the success of a tree, how to keep your tree healthy and maintained, and more!

We wish you the best of luck as you continue along your tree journey. May you (and your trees) be successful and see constant growth along the way. 

References

Bertram, J. E. (1989). Size-dependent differential scaling in branches: the mechanical design of trees revisited. Trees, 3(4), 241-253.

Henriksson, J. (2001). Differential shading of branches or whole trees: survival, growth, and reproduction. Oecologia, 126(4), 482-486.

Air plants are definitely gaining popularity, especially among those born without a green thumb! These interesting plants do not need a pot or soil to grow, getting all their nutrients from the air. So, where exactly do you plant an air plant that doesn’t need soil?

Indoors, air plants love to be planted near a south, west, or east facing window in terrariums, or simply set it on a surface. Outdoors, air plants love to be planted in bright areas that don’t get direct sun, such as on a covered patio, in the crooks of tree branches, or beneath a tree.

You can really get creative when it comes to planting air plants. Below, we’ll go over all the details about where to plant them and how to take care of them!

What Are Air Plants?

Hanging tiny Tillandsia in garden

Before we get into where to plant air plants, you may be wondering what these alien plants are? After all, what kind of plant doesn’t need soil!

Air plants are grouped under the genus Tillandsia and are found naturally in North and South America. These plants have become very popular in the home due to their exotic appearance and their minimal care needs.

According to the University of New Hampshire, air plants fall into two broad categories:

  • Desert region air plants
  • Rainforest region air plants

Air plants that are from desert regions will typically have light- to silver-green fuzzy leaves that can sometimes be scaly. Those from rainforest regions will be darker green and have curved leaves instead of the flat, fuzzy leaves of desert air plants.

When it comes to choosing an air plant for your home, most people will go for the air plants from desert regions. These will be far more forgiving if you forget to water them for a few days.

In the wild, air plants will use their roots to latch onto surfaces such as rocks, telephone poles, other plants, and trees. Unlike parasitic plants, air plants will not harm their host. They just use them as an anchor to stay in place.

Plants that use hosts in this manner are known as epiphytes. One of the most well-known epiphytes out there is Spanish moss, which often dangles from live oaks and bald cypress trees.

Although epiphytes like air plants do not normally harm their host, a few studies took a closer look and found that epiphytes can harm hosts in terms of leaf production and premature branch decay.

Overall, air plants do minimal, if any, damage to their host trees.

Why Don’t Air Plants Need Soil?

Soil is the typical medium that plants use to absorb nutrients and water, but air plants operate a little differently. Air plants use things called epidermal trichomes to absorb water and nutrients from the atmosphere. 

Trichomes are located on the plant’s leaves and can absorb water in the form of rain, fog, and dew droplets. They absorb nutrients through decaying leaves and other organic matter in the air.

An article in the Journal of Nature Communications looked into the microscopic world of these trichomes and found that they are not only highly efficient at absorbing water, but they’re also great at keeping that water from evaporating too quickly.

This is especially important for air plants that live in desert regions. The air is readily absorbed into the plant, but the process of evaporation is slowed by a thick shield located in the trichome.

6 Places Air Plants Love To Be Planted Indoors

Tillandsia air plants on a wooden background

Having plants in your home or apartment is an excellent way to bring some life to the indoors. Air plants are particularly useful in small apartments or spaces where large houseplants just won’t cut it.

Having air plants inside is a necessity in some regions that are just too cold to have them outside. In general, anything below freezing is too cold for an outdoor air plant.

Even though air plants need minimal effort to keep alive compared to other plants, they still require three necessities:

  • Sunlight
  • Water
  • Air circulation

When choosing a place to plant your new air plant, be sure to keep these three things in mind. Sunlight, in particular, will be a deciding factor when choosing a place for your new air plant.

Air plants love sunlight, but they should never be placed in direct sunlight. According to the University of Florida, you should place your air plants near south, west, or east facing windows. Air plants will not do well in rooms without windows.

With all that in mind, let’s check out all the places air plants love to be planted indoors!

Terrariums, Seashells & Driftwood

Hanging glass sphere terrarium with plants growing inside

Terrariums come in many shapes and sizes and are a great way to display your unique air plant. Terrariums are typically glass or plastic and have an opening somewhere to allow air to circulate inside.

The nice thing about terrariums is that they can be displayed in so many different places depending on your decorative preferences. Some can be the centerpiece of your coffee table while others can hang from the ceiling.

Mkono’s Plant Terrarium Display Glass Tabletop Succulent Air Plant Planter Globe is a popular terrarium that is meant to sit as a centerpiece on a table or displayed on a shelf. All you need to do is fill it with some kind of material inside (small pebbles work great!) and set your air plant inside.

If you’re looking for a more unique design that can be hung up, Mkono also sells a 2 Pack Glass Hanging Planter. It comes in two shapes – a globe and a teardrop.

For any crafty folks out there, you can make a terrarium yourself from old glass containers. All you need is something to put inside such as pebbles, a small log, some cool rocks…get as creative as you like! Place your air plant inside and you’re done!

Air plants need air circulation to thrive, so just be sure to leave an opening somewhere.

Small Containers And Bowls

Nice composition of Tillandsia, species of evergreen, perennial flowering plants in the family Bromeliaceae, native to the forests, mountains and deserts of Central and South America, the southern United States and the West Indies.

Not only do air plants require minimal care, but you can also put them in just about anything and they’ll do just fine. Bowls, baskets, dishes, and even seashells can all be excellent containers for an air plant.

If you have an ocean vibe going on in your home, using a conch shell as a container for your air plant is a great choice.

Nautical Beach Decor sells a Large Bahama Queen Conch Seashell that is sold in the USA with a ‘harvest hole,’ meaning the conch was removed legally only after the shell was inspected to make sure it was mature enough to harvest.

Driftwood is another great ocean-themed decoration you can use as an air plant container. If you’re not into an ocean-themed container, there are plenty of other small bowls, cute decorations, and themed containers that you can use to match your unique theme!

If you don’t really have any particular theme in your home or apartment, you can always opt for something neutral like Naturally Med’s Olive Wood Rustic Bowl. This will go well in most settings and can be placed just about anywhere.

As always, be sure to place your container in a brightly-lit room out of direct sunlight. Other than that, the placement of your container is entirely up to you and your creative imagination!

Walls

Tillandsia in the market flower

We weren’t kidding when we said air plants can thrive just about anywhere! If you’re not thrilled about terrariums, containers, or bowls, you can plant your air plants on the wall instead.

Use something like AOAOPQ’s Air Plant Holder Wood Frame to mount a lattice-like frame on the wall. Use wire to attach the air plant to the frame. This is certainly one of the more unique and interesting ways to display these amazing plants!

You can also use hot glue to attach air plants to any surface you like such as a windowsill, wall, shelf, or counter. However, this isn’t recommended as many air plants require thorough misting or even occasional submergences in water that will require you to remove them from their position.

And re-gluing your air plant each time you water it can get old fast…

3 Places Air Plants Love To Be Planted Outdoors

Tillandsia

Air plants can thrive indoors and outdoors if the conditions are right. To display your air plants outside, you’ll want to make sure you live in an area suitable for air plants to survive.

Because air plants are typically from tropical and subtropical areas, asking an air plant to survive outside in, say, Alaska might be a little too much…

But if you live in a warmer climate like the southern United States you are probably safe placing an air plant outdoors. Even if you live in an area that has cold winters, you can always transition your air plant indoors once the temperatures begin approaching freezing level.

You can also check the hardiness zone of your air plant if you know the species. This can help you determine if it will survive outdoors.

Similar to indoor air plants, outdoor air plants should be placed somewhere that gets sun but is protected from too much direct sunlight. 

Patios And Decks

Tillandsia air plant in the nature.

There’s nothing better than settling down on your patio after a long day of work, enjoying the sunshine and breeze as it plays across your face.

Air plants love it too! 

Covered patios and porches are the perfect places to display your air plants. Because it is protected from direct sunlight, air plants will thrive being out in the open air on your covered porch, but won’t shrivel up from too much sun.

You can use terrariums to hang your air plants up, or use containers and bowls to display them on a covered table on your porch as well. You can also use a mounted lattice board to display your air plants on the wall of your covered porch. 

On Trees

Tillandsia varieties growing wild in tropical Argentina

In the wild, air plants often grow on trees using their little roots to grab hold of branches and trunks where they can.

Air plants don’t do any damage to the tree they are growing on, they just use it as an anchor to stay in place. They also benefit from being shaded by the tree so as not to receive too much direct sunlight.

You can use these same tactics to find a home for your air plant on your outdoor trees. Landscape trees are a great place to display your air plant. It can spruce up your landscape tree and bring some new color into your yard.

Air plants love being attached to tree branches or placed in the crooks of trees where the branches meet the trunk. You can help your air plant stay in place by using wire to keep the air plant attached.

Another option is to hang your air plants from a low tree branch. You can use terrariums or something like Shappy’s 4-piece Hanging Air Plant Holder Tassel. This comes with 4 plant hangers complete with a loop and S-hook for easy hanging.

If you decide to go this route, just remember that you still may need to water your air plant from time to time, especially if it is a rainforest air plant that is used to humid, wet conditions.

Terrariums can also be used to hang your air plant from a low-hanging tree branch. Just make sure the terrarium is out of the direct sun as much as possible.

Covered Landscaping Like Flowerbeds With Shade

Beautiful Green Tillandsia Usneoides Plants or Spanish Moss Plants Hanging On The Air.

You may have noticed a theme going on here…air plants do not do well in direct sunlight. For this reason, planting them out in an open landscape or flowerbed is not a good idea.

However, if you have a flowerbed or landscape with taller plants and shrubs, air plants can thrive under light shade conditions. 

You can get creative with where you place your air plants within a flowerbed or landscape. Use interesting containers, terrariums, or even driftwood to give your flowerbed an exotic and unique look.

Caring For Your Air Plant

Tillandsia in a glass florarium. Decor in the office, hotel or home. Beautiful tropical plants in the florarium. Cut down a tree and dry textured twig. Vertical image.

With any house plant, certain requirements must be met for the plant to survive and thrive. Air plants are no different. 

To keep your air plant happy, you’ll want to pay close attention to:

  • Sunlight: As we mentioned before, air plants do not like direct sunlight. But depending where the air plant is native to will affect how much sunlight it needs. Desert air plants typically prefer more sun than air plants from rainforest regions.
  • Temperature: Air plants are used to tropical and subtropical climates. According to the University of New Hampshire, they prefer temperatures between 65℉ and 85℉.
  • Water: Just like sunlight requirements, water requirements will differ between desert air plants and rainforest air plants. Overwatering can be just as damaging as underwatering since air plants are susceptible to rot if they are overwatered. 

For desert air plants, misting them every other day with a spray bottle may be sufficient to keep the plant happy and healthy. If you start to notice brown leaf tips or curling leaves, it means your air plant is not getting enough water.

For rainforest air plants, you can soak them in room-temperature water for fifteen minutes twice a week to get them the proper amount of water that they need. Allow the plants to dry before placing them back in their container.

  • Fertilizer: Because domesticated air plants do not have access to rotting leaves or other organic material, you should provide fertilizer to ensure they are getting the necessary nutrients. 

Cute Farm’s Tillandsia Air Plant Fertilizer is an excellent product that can be sprayed directly on your air plant once per week. This product has the bonus of coming with an air plant care guide too!

That’s A Wrap!

Tillandsia with Spanish moss or Tillandsia usneoides in the ornamental farm.

Air plants are fun to have around the house or apartment. They’re exotic, strange-looking, and fairly easy to take care of.

Air plants can be planted indoors or outdoors depending on if the conditions are favorable. In both indoor and outdoor settings you’ll want to find a place that has plenty of light, but not too much direct sunlight.

To recap, here are the 9 places that air plants love to be planted:

  • Indoors:
    • Terrarium
    • Seashell
    • Driftwood
    • Small bowl or container
    • Hung on the wall
  • Outdoors:
    • Covered patio or deck
    • Attached to tree
    • Hanging from a tree branch
    • In protected landscape

That’s all we’ve got for you today! Happy air planting!

References

Flores-Palacios, A. (2015, October 12). Does structural parasitism by epiphytes exist? A case study between Tillandsia recurvata and Parkinsonia praecox. Plant Biology, 18(3), 463-470.

Papini, A., Tani, G., Di Falcon, P., & Brighigna, L. (2010). The ultrastructure of the development of Tillandsia (Bromeliaceae) trichome. Flora – Morphology, Distribution, Functional Ecology of Plants, 205(2), 94-100.

Raux, P. S., Gravelle, S., & Dumais, J. (2020, January 20). Design of a unidirectional water valve in Tillandsia. Nature Communications, 11(396).

Soria, N. F., Torres, C., & Galetto, L. (2014, October). Experimental evidence of an increased leaf production in Prosopis after removal of epiphytes (Tillandsia). Flora – Morphology, Distribution, Functional Ecology of Plants, 209(10), 580-586.

Valencia-Diaz, S., Flores-Palacios, A., Rodriguez-Lopez, V., Ventura-Zapata, E., & Jimenez-Aparicio, A. R. (2010). Effect of host-bark extracts on seed germination in Tillandsia recurvata, an epiphytic bromeliad. Journal of Tropical Ecology, 26(6), 571-581. 

Your Competitors Are Already Running Ads. Are You?

This is for service business owners who are ready to SCALE.