Grow Your Business with Tree Journey

Our TradeWorks Revenue System™ builds a detailed advertising funnel that attracts, nurtures, and converts the right clients – so you can finally stop chasing leads and start scaling your business.

Pine trees are one of the faster-growing categories of trees and can gain over two feet each year! To achieve this rapid growth, you’ll need to do some things to keep the tree healthy and happy. A tree in optimal conditions will grow significantly faster than one in so-so conditions. 

In order to grow your pine tree as fast as it can, you’ll need to pick the correct species, plant it in the right spot, and give it the right amount of sunlight, water, nutrients, mulch, and pruning

If you follow these simple steps, you’ll have a towering pine tree in no time!

Continue reading, and we’ll cover each of these steps in greater detail plus give you a couple more tips to get the most from your pine tree. With a bit of extra work and attention to detail, you’ll be rewarded with a large pine in no time!

Pine trees are a relatively fast-growing species of tree that have many benefits, including shade, windbreaks, and prevention of erosion with pine needles and deep roots. To get those benefits from your trees, however, you’ll need them to grow to a good size first.

Pine trees, like any other tree, and will grow best when you plan out the right species, location, and follow a schedule to give them the care they need. If you follow the steps below and do a bit of research on what conditions your specific species of pine prefer, you’ll be enjoying large majestic trees in no time.

How to grow your pine tree faster infographic

1. Select The Right Species Of Pine For Your Climate

There are over 120 species of pine that grow worldwide, so the first step is to choose the right species for your particular environment.

Some pines do better in cold or warm climates, some need more or less water, and they all have different soil preferences. Selecting the right species will go a long way in affecting the growth rate of these trees.

Your best bet for choosing a species of pine tree will be to select one that is native to your area. Those trees have undergone thousands of years of evolution to be perfect for the environment they are in.

Native trees will also have the lowest environmental impact, which may be important in some areas, but inversely native trees will have the most pests and diseases that could affect them.

While I recommend doing some additional research to ensure you’re choosing the right pine tree for your specific area, here are five fast-growing species to get you started.

1. Eastern White Pine

The Eastern white pine is a hardy tree native to the New England area and does well in well-drained, acidic soils. They do best with full sun and grow up to 80 feet tall, and grow 2 feet per year!

These trees do best in USDA zones 3-8 and are an excellent option.

2. Green Giant Arborvitae

Or more commonly, the “Green Giant” is a sturdy tree that grows in a visually appealing conical form, topping out about 60’ tall and a 20’ spread

These trees need some full sun and some shade doing best in zones 5-7.

3. Loblolly Pine

The loblolly pine is a pine tree that grows remarkably fast, gaining over 24” per year and maturing to a size of up to 100’ tall and a 35’ spread in ideal conditions.

This tree adapts to most soil types and does well with full sun in zones 6-9, making it an excellent southern tree.

4. Jack Pines

These are hands down some of the toughest pines and will grow in poor soil without complaint, making it a nearly maintenance-free option for those looking for an easy option.

Jack pines grow in asymmetrical patterns up to 70’ tall, needing partial sun and doing best in USDA zones 2-6.

5. Ponderosa Pine

The ponderosa pine is a tree with a medium growth rate between 13-24” per year but can grow 100’ under cultivation and over 200’ in the wild.

A hardy tree that will resist fires and drought once mature, and can be planted in zones 3-7 with full sun and in most soils.

2. Plant Your Pine In The Right Soil

After selecting a tree from your local nursery, make sure to plant it in the right soil and choose a species best for the soil you have.

Most pine trees prefer soil with good drainage and plenty of room for their roots. Sandy and sandy loam soil textures are best for pines since they drain well, and a little acidity goes a long way.

Pines do best in soil with plenty of organic matter, although this is not a necessity and can be supplemented with some other techniques we’ll touch on later.

A large pine tree will have a taproot extending over 75 feet in the ground, and the rest of the roots can spread 30 feet out, although most trees will take up much less space.

Make sure to plant a pine tree far enough from any buildings so that the roots will have space to grow without compromising the foundation or causing other problems.

When planting your seedlings, plant them with their root collars 2-3” below the surface of the soil, or only 1” below the surface if you are dealing with poorly draining soil.

Pack the dirt well around the seedling for good root-to-soil contact and to keep the seedling securely in the ground while a root system develops.

If you are planting your pine tree in a container, the soil matters even more! Check out our in-depth list of what soil your pine tree prefers.

3. Make Sure Your Pine Tree Is Getting The Right Lighting

Pine trees add beauty to a stone path with box hedges behind and to the left of the path.

Since photosynthesis is how plants get all their energy, having the right amount of sunlight is important for their growth. Keep this in mind when selecting where to plant your pine trees.

Most species of pine trees need full sunlight as much as possible, so plant them in areas accordingly. Open spaces not being shaded by other trees or buildings are best, but work with what you’ve got since they are such hardy trees.

If you don’t have many spots that get full sunlight, then make sure you pick a pine tree that does well in partial light, such as Jack pines, which are not the fastest-growing option but will grow in the toughest conditions.

That being said, most species need full sunlight for optimal growth, so if you’re looking to grow your pine trees as fast as possible, then planting them in the right spots should be a priority.

While your seedling is growing, it is important to check that nothing is shading it and trim any branches blocking light or if there are any weeds to be weeded taking care of that.

4. Make Sure Your Pine Is Getting Water Regularly

Drought can be one of the most difficult environmental factors for a pine tree, and one season of drought can slow down growth significantly for several years following.

Frequent watering is especially important for the first two years of a pine tree’s life, and after being transplanted water is important to build a healthy root structure. 1 inch of water per week is all pines need to grow, and both rainfall and irrigation are good ways to achieve this. 

If you choose a native species or one that is well adapted to your particular environment, then you probably won’t need to water it much as the rainfall will be enough.

However, if you are experiencing a dry spell or plant a species that prefers more water than your environment provides, then you’ll need to irrigate for the best growth.

While getting water to your trees is important, make sure you aren’t giving them too much water either.

Pine trees are susceptible to drowning, so it is important to plant them in soil with good drainage. Make sure the ground around your tree isn’t constantly wet and muddy, and allow the soil to dry out before watering again. 

Watering your pine tree in the winter may also be necessary, which you can learn more about in our article on the subject!

5. Apply The Right Fertilizer At The Right Time

Fertilizing pine trees is thankfully pretty easy because you only need to do it every few years and for pine trees, over-fertilizing will cause more problems than under-fertilizing.

If you recently planted a pine seedling, they are very vulnerable, and fertilizing right away can cause nutrient burning and other problems. Water is very important for the first year, but hold off on fertilizing until the next spring.

The general rule of thumb for fertilizing pines is to apply 1 pound of fertilizer for every inch of trunk diameter, or 1.5 pounds per inch for mature trees over a 6” diameter. Miracle-Gro Shake ‘N Feed Flowering Trees and Shrubs Plant Food is a preformulated and easy-to-use option to provide nutrients to your pine tree.

Until the tree is 5 or 6 years old fertilize every spring with a balanced, slow-releasing fertilizer. Spring is the best time to fertilize your pine trees since they will go through the most growth at this time, and optimal conditions will increase growth.

After the tree has matured and established its root system, you can fertilize much less often. Pine trees are not super nutrient hungry, so you can get away with only mulching most years, and small amounts of supplemental nutrients otherwise.

Pine trees in nature get all their nutrients from decomposing plant matter on the forest floor, and the best way to emulate this environment is by leaving the pine needles the tree drops and using quality mulch. 

6. Mulching Will Help Keep Pine Trees Healthy And Happy

Mulching is one of the easiest and most effective ways to grow your pine trees faster. Mulching mirrors the natural environments pine trees have adapted to help them keep the right microclimate for their root systems.

The single best thing you can do for your pine tree aside from properly irrigating is to mulch your trees.

One of the first steps to take is probably the easiest: when the tree drops its needles, leave them. This layer of pine needles is not a replacement for using high-quality mulch but will provide additional nutrients and cover.

One of the biggest benefits of mulching is mulch adds organic matter to the topsoil, improving water retention and preventing erosion. Mulching will keep the soil around your tree there, and you won’t have to water as often, protecting the tree from drought.

Did you know that pine needles actually make amazing mulch? To learn more, check out our article on how to make mulch from pine needles.

The other benefit of mulch is when the organic matter breaks down, nutrients are released back into the soil, feeding the pine tree. For a nice aesthetic mulch, I recommend using wood chips piled on top of the pine needles.

This combination of wood chips and pine needles will provide a range of nutrients that the tree needs, add an aesthetic value, and suppress weeds that could rob the nutrients from the soil around the tree.

When applying mulch, cover the entire area around the tree but leave 8-12 inches around the base of the trunk open. Piling the mulch too close to the tree trunk will trap too much water in the tree and will cause rot.

Other options to use for mulch include shredded bark and shredded hardwood, or you can mulch with organic material you have available, including leaves from other trees and grass clippings.

Apply mulch in the spring every year and depending on how the mulch looks, you can reapply it in the fall. Keep a good layer of 4” or so, there’s no need to pile on a ton of mulch since a thick layer won’t do any good.

7. Pruning Is Important For Pine Tree Growth

A close up of two hands holding a pair of gardening shears, pruning a pine shrub.

Alright, you can probably get away with not pruning your pine tree, and it will still grow well since they are very low-maintenance trees. However, if you want it to grow as fast as possible, you’ll need to give it the occasional trim.

When you go to give your pine tree a haircut, the best time to do so is in spring. Since most of the growth is done in spring and early summer, this will give as much time as possible for the cuts to heal.

Pruning any broken and diseased branches should be the number one priority, so any bare branches or those with only brown needles should be taken care of.

The other branches to target are if two branches are rubbing against one another since this can rub the bark off and open up the tree to pests and diseases.

After these branches are taken care of, you can prune any branches that you need for maintenance reasons, or change the tree’s look. Never cut off the top section of the tree.

The best way to trim branches is not to remove the entire limb if possible and just cut it back as far as you need. However, if the branch is overhanging a driveway, dead, or you need to remove it completely, then you can still do so.

Whether you are using pruners or an electric saw, make sure that you clean and disinfect the equipment between uses. This will prevent any transfer of disease from one tree to another or one branch to another.

You also do not need to prune your pine tree every year if all the branches are healthy, and every other year or three years will still result in a large and healthy pine.

If you need a lopper to prune your pine tree, these Fiskars 9138 Power-Lever Bypass Loppers will easily tear through small branches. For larger branches, you can use a reciprocating saw or a handheld one depending on what you have available.

For an in depth guide on pruning, read our article on all of the reasons to prune your pine tree.

8. Monitor Your Pine Tree For Pests

To truly maximize growth, you’ll need to ensure that the tree is as healthy as it can be. This involves frequently checking for any damage that pests could cause.

Pests are going to vary by region, so the pests that will target your trees will vary. However, here are a few common pests that like to target pine trees:

  • Aphids
  • Caterpillars
  • Weevils
  • Mealybugs
  • Borers
  • Southern pine beetles
  • Pine sawfly

These pests will target your pine along with many more. Pine trees are especially vulnerable tree to pests so closely paying attention to any discoloration in needles or back, or noticeable damage and acting accordingly will keep the tree healthy and maximize growth.

Pine beetles are the most serious pest to watch out for and are most likely to affect trees stressed by drought and weakened trees.

Following the other tips on this list will help prevent pests since a healthy tree is more resistant than an unhealthy one. A healthy tree will also recover much quicker than an unhealthy one, so treat issues as soon as they arise!

If you do have another pine tree in a place where you want to plant a new one, take a peak at our guide on the reasons to cut down your pine tree here.

The End!

If you made it this far, thank you! I hope you enjoyed these tips and learned something from them that will help your trees grow as fast as possible. Waiting for a tree to mature and reach its full height takes a lot of patience, but it is rewarding in the end.

To recap, here are the 8 steps to maximize the growth of your pine tree:

  • Pick the correct species
  • Plant it in the right spot 
  • Give it the right amount of sunlight
  • Water regularly, but not too much
  • Provide the right nutrients
  • Apply mulch yearly
  • Pruning any branches that will detract from growth

If you do these things, then your pine tree will grow as fast as it can! Some pine trees will fully mature in only a decade, and anything you can do to help it early on will exponentially help it in the long run.

References

Daniels, R. F., & Burkhart, H. E. (1975). SIMULATION OF INDIVIDUAL TREE GROWTH AND ST AND DEVELOPMENT IN MANAGED LOBLOLLY PINE PLANTATION. DIVISION OF FORESTRY & WILDLIFE RESOURCES. Retrieved August 23, 2022.

Kluepfel, M., Polomski, R. F., & Coyle, D. D. (2020, June 19). Pine. Home & Garden Information Center | Clemson University, South Carolina. Retrieved August 23, 2022.

Sun, F., Kuang, Y., Wen, D., Xu, Z., Li, J., Zuo, W., & Hou, E. (2010). Long-term tree growth rate, water use efficiency, and tree ring nitrogen isotope composition of pinus massoniana L. in response to global climate change and local nitrogen deposition in southern China. Journal of Soils and Sediments, 10(8), 1453–1465.

Thompson, M. Y. (2018, March 10). Fertilizer for thought: Caring for your pines. College of Agricultural, Consumer, and Environmental Sciences (ACES). Retrieved August 23, 2022.

Tong, Q. J., & Zhang, S. Y. (2005). Impact of initial spacing and precommercial thinning on jack pine tree growth and Stem quality. The Forestry Chronicle, 81(3), 418–428. https://doi.org/10.5558/tfc81418-3 

Choosing a tree for your yard or garden can be difficult given the seemingly infinite number of choices you could make. Trees add dimension to any landscape through height, color, and texture. They also stabilize the soil and provide shade as well as a habitat for local wildlife. 

Some of the fastest-growing trees are Weeping Willows, Hybrid Poplars, Red Alders, and American Elms, although there are many other fast-growing trees that you could plant.

These trees will all grow quickly and mature in a relatively short amount of time.

There are many characteristics of each of these deciduous trees other than the growth rate, and we want to help you make the best decision for your own yard!

Read on to discover the 12 fastest-growing deciduous trees, their lifespan, height at maturity, ideal hardiness zone, and the best way to plant and care for them. If you are not sure which tree will work best for you and your landscape, make sure to contact a professional!

What Makes A Deciduous Tree Deciduous?

Sunny autumn landscape with pond in park and trees with yellow autumnal foliage. Deciduous trees.

The simplest way to define deciduous trees is that they have leaves that change color and they lose their leaves in the fall.

Most deciduous trees are broadleaf trees, but there actually are a couple of species of deciduous trees with needles, including Larches and Dawn Redwoods. 

While the rule is that deciduous trees lose their leaves, we all know every rule has an exception. Check out our article to learn about the six deciduous trees that keep their leaves year round.

Deciduous Trees Are Known For Their Beautiful Fall Colors

Deciduous trees are known for their beautiful fall foliage, including red, orange, and yellow leaves that appear each fall.

The reason this change of color occurs is that each winter as the days get shorter and darker, the chlorophyll breaks down. Chlorophyll is used by trees to convert sunlight into energy, and without the light, the trees go into a sort of hibernation. 

As you may guess by their seasonality, many of these trees will grow best in regions with plenty of rainfall and distinct seasons, but many of them are actually quite tolerant of drier, more arid climates. 

The major types of deciduous trees include poplars, maples, and oaks. You are probably familiar with many of these trees, even if you don’t know them by name.  

Which Deciduous Trees Will Grow The Fastest In My Yard?

View of bare deciduous tree tops and the sky looking up from the forest floor.

Deciduous trees can provide beauty, shade, and interest to your landscape. The fall foliage is attractive for many people who are drawn to the beautiful colors of the foliage as the weather changes. 

Keep in mind that some of the fastest-growing trees are relatively short-lived because the wood of fast-growing trees is often weaker. 

Depending on your needs, you may be looking for the fastest-growing tree or just a balance between growth rate and lifespan.

Read on to discover the 12 fastest-growing deciduous trees and their characteristics to help you make the right decision for your landscape.

Fastest Growing Deciduous Trees Ranked: Complete Growth Chart

Here’s a quick summary table on the fastest growing deciduous trees to help streamline your view – you can then keep on reading for a detailed breakdown on each tree!

Fastest Growing Deciduous Trees

TREEANNUAL GROWTHLIFESPANFULL HEIGHTBEST HARDINESS ZONE

1. Hybrid Poplar

  • Height: 40-50’ 
  • Spread: 30’
  • Growth Rate: Between 5’-10’ per year 
  • Hardiness Zone: 3-9
  • Lifespan: 60 years
  • Cold And Drought Tolerance: Not very cold or drought-hardy and prefer temperate, moist climates.
  • Soil: Fertile and moist alluvial soils (loose clay or silt deposited by a river)

Hybrid Poplar trees are fast-growing specimens that are quick to mature and provide shade but are relatively short-lived.

This type of poplar has green, silvery leaves that have a lighter underside. These trees grow quickly in full sun and are usually harvested for firewood within the first ten years of life. 

They are not the most tolerant of species, preferring rich, fertile soil and a temperate climate with plenty of precipitation. Hybrid poplars are also prone to limb breakage and are not a good choice to plant in an area where children or animals will frequently occupy, or too close to buildings and sidewalks. 

2. American Elm

  • Height: 80’-130’
  • Spread: 60’-120’
  • Growth Rate: 3’-6’ per year
  • Hardiness Zone: 4-9
  • Lifespan: 175-300 years
  • Cold And Drought Tolerance: Moderately tolerant of most conditions, though they will thrive in moist soil in full sun.
  • Soil: Well-draining, fertile soil but tolerant of most soil conditions. 

American Elms are among the taller of the elm species. They are well known as common street trees and landscape trees due to their towering form and long lifespan when planted in full sun to partial shade. 

Elms produce small flowers and fruit in the spring and summer and have showy fall foliage that ranges from yellow to deep purple.

American Elms have shallow root systems and so while they are great street trees, they are known to cause some sidewalk lifting and so should have a vault if planted near infrastructure. 

A drawback of the American Elm and any other elm species for that matter is the Dutch Elm Beetle. This pest has devastated a huge percentage of elms in the U.S. and around the world and many trees need to be inoculated.

3. Black Cottonwood

Black cottonwood (Populus trichocarpa) trunks and leaves seen looking up from below
  • Height: 125’-150’
  • Spread: 100’
  • Growth Rate: 5’ per year
  • Hardiness Zone: 5-9
  • Lifespan: 200 years
  • Cold And Drought Tolerance: Moderately tolerant of climates that range from arid to humid, and can tolerate wet winter conditions. 
  • Soil: Cottonwoods prefer moist, deep alluvial soils and are limited by soil acidity and poor drainage and nutrients.  

Black Cottonwood is actually a type of poplar tree and is one of the largest species within this type of tree. Native to the Northwestern U.S., this tree requires full sun and is intolerant of shaded growing conditions. 

Cottonwoods usually grow near streams or rivers, and when grown on their own, take a towering form with a single trunk and significant canopy spread.

Cottonwoods can tolerate a wide array of growing conditions but will not thrive in poor soils, needing nutrient-rich, well-draining soil to thrive. 

Cottonwoods are also prone to limb breakage and as their name suggests, their seeds take the form of fluffy white puff balls. While some find this charming, the trees can be quite messy when they go to seed, so they may not be ideal for the low-maintenance gardener. 

4. Weeping Willow

  • Height: 50’
  • Spread: 35’
  • Growth Rate: 10’ per year
  • Hardiness Zone: 6-8
  • Lifespan: 30-40 years
  • Cold And Drought Tolerance: Weeping willows are not cold-hardy and are moderately drought tolerant.
  • Soil: These trees prefer moist, acidic soils. 

Weeping Willows are known for their long branches that hang low toward the ground almost like a swinging vine.

They are one of the fastest growing deciduous trees, but their rapid growth rate has a trade-off of their short lifespan, only living about 30-40 years.

These trees prefer full sun to partial shade and acidic soils. They are not tolerant of cold weather and have weak wood, meaning they may not be ideal for gardens where children or pets will frequently play. 

Despite their short lives, these trees mature to provide shade quickly and have an iconic silhouette that has inspired poets and visual artists for centuries. The weeping willow is also one of the best fast growing large trees to plant in your yard!

5. Quaking Aspen

  • Height: 40’-50’
  • Spread: 30’-40’
  • Growth Rate: 2’ per year
  • Hardiness Zone: 1-7
  • Lifespan: 150-200 years
  • Cold And Drought Tolerance: Quaking Aspens are typically high-elevation trees that can tolerate cold but are not tolerant of hot, dry conditions. 
  • Soil: Prefers moist but well-draining, nutrient-dense, loamy soils.  

Quaking Aspens are tall but compact trees with leaves that appear darker on top with lighter green undersides. 

The defining characteristic of these trees that give them their name is the long petiole that holds the leaf to the branch. These petioles cause the leaves to rustle in the breeze, giving the trees the appearance of “quaking,” with a lot of movement and a pleasant sound as the leaves move. 

These trees prefer full sun and very moist, acidic soils. Quaking Aspens are long-lived, making them good landscape trees if your yard meets the conditions in which they thrive.

Because they are so long and slender, they might not be the best option if shade is your goal. However, if you are looking for the fastest-growing shade trees, head over to our article to find a list of 19 shade trees to plant ASAP!

6. Big Leaf Maple

  • Height: 50’-100’
  • Spread: 50’
  • Growth Rate: 3’ per year
  • Hardiness Zone: 5-9
  • Lifespan: 300 years
  • Cold And Drought Tolerance: Can be extremely drought tolerant when mature, tolerating climates ranging from temperate and moist to hot and dry. 
  • Soil: Prefers deep, moist soils but will tolerate poor soil conditions, although this may limit its height and spread at maturity. 

Big Leaf Maples provide some of the best fall foliage with leaves that average about 12 inches across and turn colors ranging from bright yellow and orange to deep red.

These trees are tolerant of many different conditions from heavy precipitation to more arid climates but aren’t particularly cold hardy.

Big leaf maples are probably the most shade-tolerant species on this list and can easily be planted in shaded yards.

They are also incredibly long-lived, reaching upwards of 300 years of age. These trees will be the focal point of any yard and are beautiful deciduous trees that will grow in many conditions. 

For more details on maples, check out our article on why maples are some of the best shade trees out there!

7. Paper Birch

  • Height: 50’-70’
  • Spread: 35’
  • Growth Rate: 2’ per year
  • Hardiness Zone: 2-7
  • Lifespan: 140-200 years
  • Cold And Drought Tolerance: Paper Birch grows best with regular moisture but can be drought tolerant. 
  • Soil: Prefer acidic, sandy, clay soils. 

The most defining characteristic of the Paper Birch is its smooth, white bark that peels off in paper-thin strips as it ages. This long-lived species can be drought tolerant and requires full sun to thrive. 

This tree is also commonly planted in landscapes and as street trees because of its distinctive bark and the golden yellow color of its fall foliage.

The Paper Birch tree is very popular with wildlife, attracting birds who feast on its long seed pods in the summer. You may not know it, but there are actually other types of birch trees that don’t have white bark!

8. Dawn Redwood

  • Height: 70’-100’
  • Spread: 25’
  • Growth Rate: 2’ per year
  • Hardiness Zone: 5-8
  • Lifespan: 100-400 years
  • Cold And Drought Tolerance: This is a very tolerant species that can withstand many conditions from drought to high moisture.
  • Soil: Prefer acidic soils of all types from sandy and loamy to wet clay soils.

The Dawn Redwood is the only tree on this list that does not have broad leaves and is actually only one of two needle-bearing tree species that lose their foliage in the fall.

This tree will grow tall and can live upwards of 400 years but does require space to thrive. This means you shouldn’t plant it within a dense stand of trees or other shade plants. 

Dawn Redwoods are an extremely tolerant species that can withstand many harsh conditions from dry, hot summers to cold, wet winters. They require little maintenance, making them a great landscape trees if you have enough space. 

9. Pin Oak

Red oak leaves close up on a branch.
  • Height: 70’
  • Spread: 40’
  • Growth Rate: 2’ per year
  • Hardiness Zone: 4-8
  • Lifespan: 120 years
  • Cold And Drought Tolerance: Tolerant of drought, cold, and pollution. 
  • Soil: Prefers well-draining soil but can tolerate dry, compacted conditions as well. 

Pin Oaks is another showy fall tree that has lobed leaves that turn bright yellow and orange in the autumn months. This tree requires full sun and is actually incredibly drought tolerant, growing in dry, arid climates. 

In addition to climate, this species can also tolerate high levels of pollution, making it a good choice for city landscapes.

It can grow in soils ranging from acidic and loamy to very compacted. Another benefit of Pin Oak is that it provides dense shade and can cool down a very sunny yard. 

There are quite a few other oak trees that grow fast as well! For more information on that, head on over to our other article about the fastest-growing oak trees for an in-depth look!

10. Red Alder

  • Height: 70’-120’
  • Spread: 30’
  • Growth Rate: 6’ per year
  • Hardiness Zone: 5-8
  • Lifespan: 100 years
  • Cold And Drought Tolerance: This species is not drought tolerant and will only grow in temperate, wet climates. 
  • Soil: Can tolerate a wide range of soils but prefers a well-draining sandy, loamy soil. 

Red Alders grow tall and slender with a conical-shaped canopy and leaves with deep ridges and veins.

Alders are actually the only broadleaf trees that produce cones, making them unique on this list and among deciduous trees. 

These trees prefer to grow near water and can tolerate poor-draining soil, but are not drought-hardy and won’t grow well in dry, arid climates.

Because of their fast growth rate and shorter lifespan, they will mature and provide shade quickly and are also great trees to help control soil erosion because of their shallow root systems.

11. Ginkgo

  • Height: 50’-80’
  • Spread: 30’-40’
  • Growth Rate: 1’-2’ per year
  • Hardiness Zone: 3-9
  • Lifespan: Up to 3,000 years
  • Cold And Drought Tolerance: These trees are drought, heat, pollution, and salt tolerant.
  • Soil: Ginkgos can tolerate most soil types that are well-draining, and cannot tolerate oversaturated soils. 

Ginkgos have been around since the dinosaurs, and this prehistoric tree has fascinating fan-shaped leaves that drop quickly in the fall.

They have a high tolerance for many adverse conditions, even withstanding high salinity in the soil which is a unique attribute. 

These low-maintenance trees would be a great choice for landscape or street trees that receive full sun.

The only thing to keep in mind is that the female trees produce fruit that is unpleasant smelling at best, so make sure to get a male specimen to avoid cleaning up stinking fruit each summer.

12. White Ash

  • Height: 50’-80’
  • Spread: 40’-50’
  • Growth Rate: 1’-2’ per year
  • Hardiness Zone: 4-9
  • Lifespan: 300 years
  • Cold And Drought Tolerance: This species is moderately drought tolerant but prefers moist soils.
  • Soil: Can tolerate many soil types from acidic to alkaline, wet, to dry, loamy, and sandy soils. 

The White Ash is unique looking, with long, thin leaves that grow in clusters that turn yellow to deep maroon in the fall. This tree requires full sun but is not the most tolerant and does not thrive in harsh conditions, only moderately drought tolerant. 

A popular landscape tree, the White Ash has recently fallen victim to an invasive pest insect called the emerald ash borer beetle, which targets all species of ash and is widespread across North America and beyond. 

Take care to grow a strong and healthy tree that will be more resistant to pests and other diseases. 

Which Deciduous Tree Is Right For My Yard?

Choosing which tree to plant in your yard is really going to depend heavily on the conditions of your yard. Luckily, we have summarized the ideal growing conditions of 12 types of deciduous trees in this article for you!

Read through each type carefully and then assess the characteristics of your yard!

  1. How much sun does it get?
  2. What type of soil do you have?
  3. Is the climate arid or do you receive a lot of rain?
  4. Are you looking for the tallest tree or the one with the most shade?

If you can answer these questions, you can make an informed decision and choose the tree that best fits your space as well as your needs and wants. 

Use tools to help you assess your yard, such as this SONKIR Soil pH Meter which measures soil moisture, soil acidity, and the amount of sunlight easily.

And hey, if you have a smaller sized yard, you still deserve some nice shade! Check out our article about the fastest-growing shade trees for small yards – so that you can find the perfect tree to fit in your yard!

How To Care For Your New Deciduous Tree

Beautiful multicolored alder leaves with shallow depth of field in the autumn forest

Now that you have chosen a tree, make sure to take special care of it while it is a young sapling.

Young trees are especially vulnerable to extreme temperatures, drought or overwatering, and nutrient levels in the soil. 

Planting A Young Tree

When you plant your tree, dig a hole large enough to have a few extra inches on all sides of the root ball, and plant the tree so that the start of its trunk is flush with the ground, avoiding burying the trunk or leaving roots exposed. 

After planting, make sure to water really well. Right after planting is when your sapling will be most vulnerable, and you want to ensure you avoid stressing it more during this stage of life. 

You can give your tree a solid foundation first and foremost by being diligent in your watering routine.

Especially in the dry summer months, you can use a Treegator Original Slow Release Watering Bag for Trees to ensure the slow, consistent release of water, eliminating the risk of over or under-watering your young tree. 

Protecting Your Tree During Harsh Weather Is Important

During storms, high winds, or even just for extra security, consider staking your tree with KOGEN Tree Stakes Kit. This will also help your tree to grow straight, strong, and tall. 

During the harsh winter months, cover your young tree with old bed sheets or plastic sheeting to avoid frost damage. After a few years, your young tree should be strong enough to handle harsh conditions on its own. 

Check Your Tree For Pests!

Finally, check your tree regularly for pests such as borer beetles, aphids, scales, or other insects that could cause damage to your tree.

If you notice yellowing or browning of the leaves, wilting foliage, branches, or other signs of distress, ensure that you treat your tree for pests using neem oil or other methods of remediation. 

That’s A Wrap!

The deciduous tree is a category that encompasses a wide variety of trees that are all unique in their characteristics and environmental needs.

Making an informed choice about which tree to plant in your own yard should include not only its growth rate but its needs including light, water, soil, and local climate. 

Hopefully, this list has helped you gain a better sense of what deciduous trees there are and what they can offer your landscape. 

Whatever tree you choose will surely add interest, color, and depth to your landscape in addition to trees adding wildlife habitat, erosion control, and carbon sequestration among their many benefits. Thanks for following along!

References: 

  1. Dakis-Yaoba Ouédraogo et. al. (2013) Slow-growing species cope best with drought: evidence from long-term measurements in a tropical semi-deciduous moist forest of Central Africa. Journal of Ecology. 101(6): 1459-1470.
  2. Davey, P.A. et. al., (2006) Can fast-growing plantation trees escape biochemical down-regulation of photosynthesis when grown throughout their complete production cycle in the open air under elevated carbon dioxide? Plant, Cell & Environment. 29(7): 1235-1244.
  3. Fadón, E., Fernandez, E., Behn, H., & Luedeling, E. (2020). A Conceptual Framework for Winter Dormancy in Deciduous Trees. Agronomy. 10(2): 241.
  4. Madejona, P., et. al. (2016) Three-year study of fast-growing trees in degraded soils amended with composts: Effects on soil fertility and productivity.  Journal of Environmental Management. 169: 18-26

There are many amazing plants that grow in hot desert climates, but trees may not be the first to come to mind. Trees, however, provide shade, habitat, and beauty to the landscape, and there are actually more options than you may think when it comes to selecting a tree for your desert landscape. 

When selecting trees for a desert landscape, consider the limitations of the land itself.

Drought and heat are the most limiting factors, but trees that are adapted to this sort of environment, such as varieties of mesquite, Palo Verde, eucalyptus, ash, and ironwood trees can thrive in hot, dry climates. 

When selecting a new tree in the harsh desert climate, a fast growth rate will deliver shade and interest the quickest, however, we always recommend checking in with a local arborist to find the perfect tree for your environment!

What Types Of Trees Grow Well In Hot Deserts?

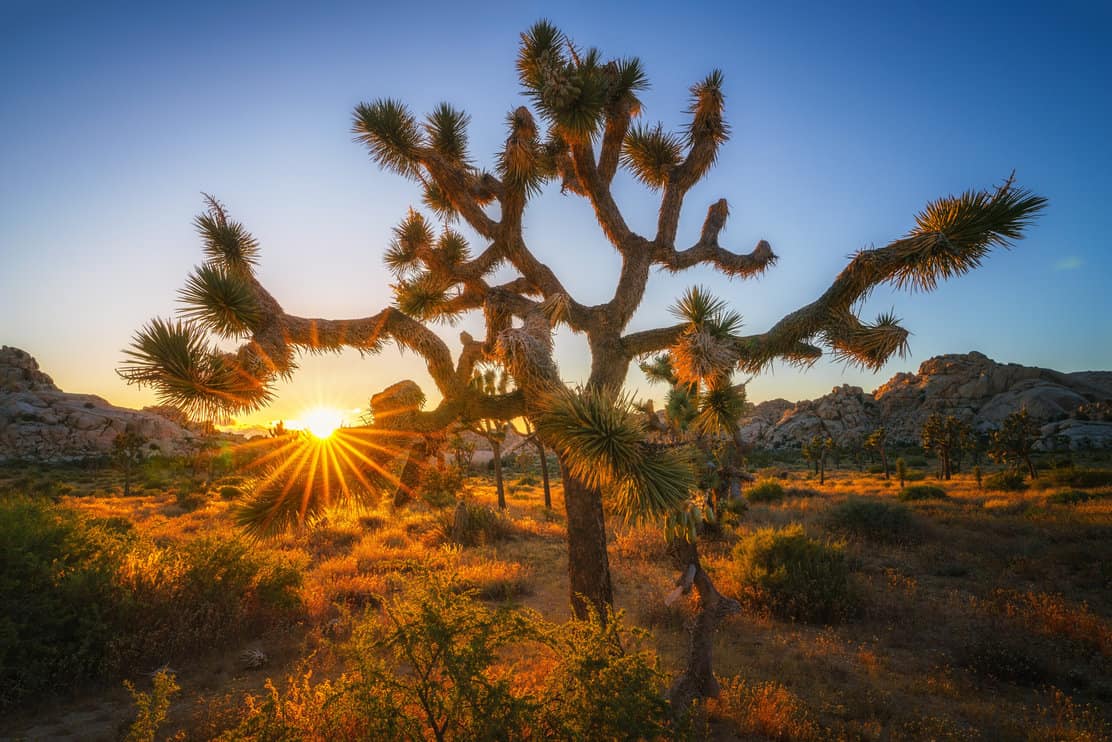
a joshua tree in front of a desert landscape at sunset

While heat is a major factor in desert-growing tree varieties, the most limiting factor in this environment is actually water.

While the weather is hot, trees cool themselves through a process called transpiration. In this process, much like the way humans sweat, trees lose water through small pores in their leaves. 

Trees can release hundreds of gallons of water this way, and in the desert, the tree can struggle to replace this water due to a lack of precipitation or groundwater. 

Some Adaptations For Desert-Hardy Trees

You may notice that desert-hardy trees often have much smaller, thinner leaves, or thick, leathery leaves.

Both of these adaptations work against drought-like conditions, with smaller leaves losing less water and thicker leaves storing more (kind of like a cactus).

The major types of trees that are adapted to these conditions are members of the pea family, such as palo verde trees and locusts, mesquite trees, and ironwood trees.

There are, however, many other species of tree that will do well in the desert. 

Which Drought-Tolerant Trees Will Grow Fastest In Hot Weather?

Now let’s get specific! While there are many other trees that will grow well in hot weather, an important aspect of planting trees for many gardeners is achieving a mature tree and the shade it brings quickly.

With this in mind, here is a list of the 12 fastest-growing hot-weather trees, and if you’re looking for a full list of trees that grow in the desert, make sure to head on over to our article for a list!

Fastest Growing Trees For Hot & Dry Climates: Complete Growth Chart

Here’s a quick summary chart of the top fast growing hot climate trees! Don’t worry, we’ll give a detailed breakdown below if you want more information on any specific variety.

Fastest Growing Trees For Hot Desert Climates

TREEANNUAL GROWTHLIFESPANFULL HEIGHTBEST HARDINESS ZONE

1. Desert Ironwood Tree

  • Growth Rate: 12” per year
  • Full Height: 30’
  • Canopy Spread: 15’-30’ 
  • Drought Hardy: Yes
  • Cold Hardy: Up to 25°F
  • Planting Conditions: Plant in full sun in well draining soil. 
  • Lifespan: 50-150 years
  • Hardiness Zone: 9-11

Desert ironwoods are members of the pea family and although they are not the fastest-growing tree on this list, they are quite hardy in both hot and cold weather.

They produce delicate clusters of pinkish-white flowers, creating a beautiful early to late spring display of color. 

In addition to flowers, they produce blue-gray, thick leaves, and edible seed pods which attract all kinds of desert wildlife.

These trees are great shade trees and can be evergreen when watered, but they will shed leaves in periods of extreme drought to conserve water. 

Desert Ironwood is native to the Sonoran Desert in the Southwestern United States, where it was traditionally harvested for firewood and woodworking. 

2. Desert Willow Tree

  • Growth Rate: 24”-36” per year
  • Full Height: 30’
  • Canopy Spread: 30’ 
  • Drought Hardy: Yes
  • Cold Hardy: Yes
  • Planting Conditions: Full sun to partial shade in well-draining soils 
  • Lifespan: 40-150 years
  • Hardiness Zone: 5-9

The desert willow, despite what its name suggests is not a true willow but is named for its resemblance to the original weeping willow with slender leaves and long, low weeping branches. 

The desert willow usually grows with multiple trunks and can be trained as either a tree or shrub depending on how you prune it.

Notably, the desert willow is a great urban tree because its roots will not cause damage when planted close to buildings or near sidewalks.

Probably the best feature of the desert willow is the fragrant pinkish-purple orchid-like flowers that attract wildlife such as hummingbirds, butterflies, and other pollinator species.

These blooms last throughout much of the summer months, bringing long-lasting color to the landscape. 

This tree is tolerant of many conditions and is especially drought-hardy, surviving off of rainwater in even the driest of desert climates, although regular watering will enhance its overall appearance. 

For more information on willows of all kinds, check out our article about willows, weeping willows and more!

3. Silk Tree

  • Growth Rate: 24” per year
  • Full Height: 35’-50’
  • Canopy Spread: 40’-55’ 
  • Drought Hardy: Yes
  • Cold Hardy: No
  • Planting Conditions: Full sun in well-draining soil 
  • Lifespan: 30 years
  • Hardiness Zone: 9B-11

The silk tree is named for the thin, silk-like floss that is produced by the large seed pods which can be up to eight inches in length.

This silk was historically used for textiles, and even to stuff pillows. The silk is not the only useful part of the tree though, with bark that comes off in thin strips that were once used to make rope. 

The silk tree is a great shade tree, with a wide-spreading canopy that is sometimes wider even than the tree is tall. Be careful around this tree, as the young branches have sharp spines. 

The trunk of the young tree is green and can often stay that way through maturity or otherwise will turn gray.

The silk tree is also endowed with pink and white clusters of small flowers that bloom late in the season, toward fall and even winter. 

When considering the silk tree, keep in mind that its roots can be shallow, and are prone to lifting sidewalks or becoming tripping hazards or interfering with the mower when planted in the yard. 

4. Arizona Ash Tree

  • Growth Rate: 13”-24” per year
  • Full Height: 40’
  • Canopy Spread: 40’
  • Drought Hardy: Moderate to yes, with a full canopy
  • Cold Hardy: Yes
  • Planting Conditions: Full sun in well-draining soil
  • Lifespan: 50-150 years
  • Hardiness Zone: 6-11

The Arizona ash, otherwise known as the Modesto ash tree, is a deciduous tree that is native to the Southwestern United States woodland areas but can be adaptable to a desert climate if properly cared for. 

This is a less drought-tolerant species and is prone to burning or trunkscald if the canopy is not robust. Because of this, it is recommended that gardeners keep up with regular watering to avoid damage. 

Despite this sensitivity to heat and light, the Arizona ash does require full sun to reach its potential.

Although it is stated to grow up to 40’ in urban conditions, the Arizona ash has actually been found to reach 70’ tall in California’s coastal range.

Being a deciduous tree, the Arizona ash will lose its leaves each fall and winter, but it is not particularly known for fall color – if you’re thinking about growing an ash tree, make sure to check out our article about how long ash trees take to grow!

5. Chitalpa Tree

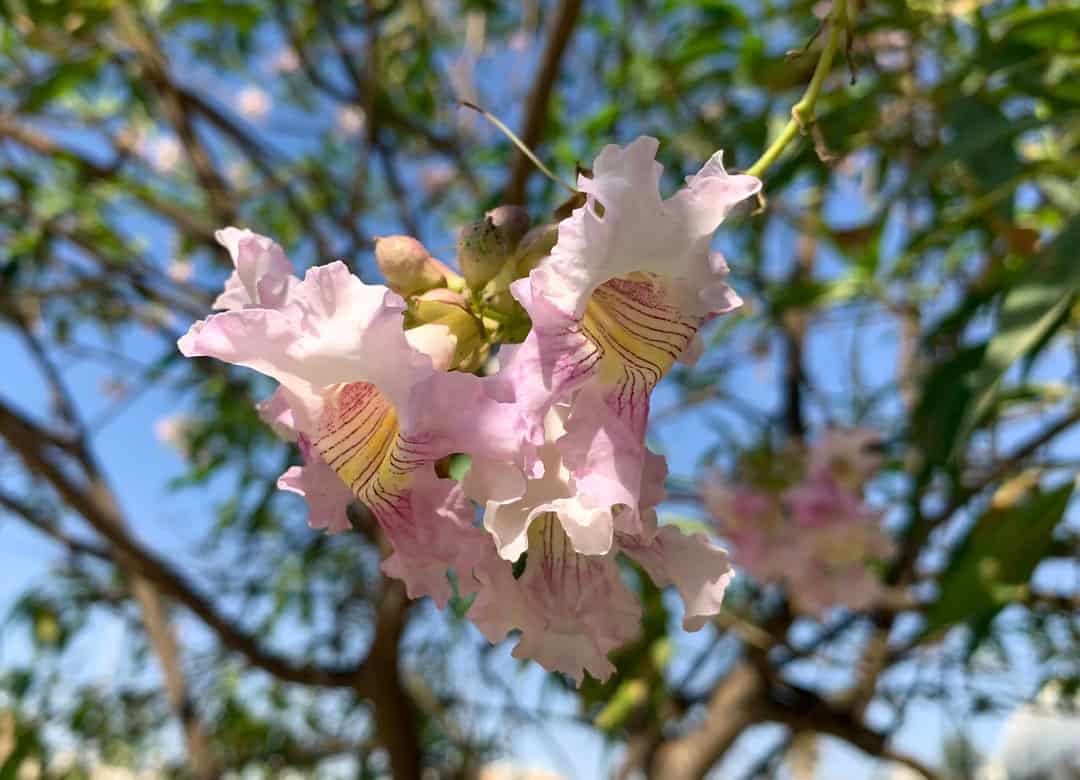
whitish-pink blooms of a chitalpa tree
  • Growth Rate: 36” per year
  • Full Height: 30’-50’
  • Canopy Spread: 30’-50’ 
  • Drought Hardy:  No
  • Cold Hardy: Yes
  • Planting Conditions: Full sun to partial shade in well-draining soil, avoid western facing exposure due to danger of trunk scald 
  • Lifespan: 35 years 
  • Hardiness Zone: 6-11

The chitalpa tree is a hybrid of the desert willow, and like its predecessor, features beautiful large, trumpet-shaped flowers. The flowers bloom in late spring and can persist even through early fall. 

This North American native tree is fast-growing but is not the hardiest of species on this list.

The chitalpa tree has a sparse canopy which can leave it prone to trunk scald and issues related to heat when exposed to too much sun. 

It is best planted in full sun to partial shade away from direct western sun exposure. Additionally, this tree may require supplemental watering throughout the dry summer months.

Well-draining soil is a must because of the chitalpa tree’s propensity for developing root rot and powdery mildew.  

6. Desert Gum Eucalyptus

  • Growth Rate: Up to 6’ per year
  • Full Height: 50’
  • Canopy Spread: 50’ 
  • Drought Hardy: Yes
  • Cold Hardy: Moderate
  • Planting Conditions: Full sun in well-draining soil
  • Lifespan: 150 years
  • Hardiness Zone: 9-11

The desert gum eucalyptus is without a doubt the fastest-growing tree on this list, growing as much as six feet per year in the right conditions.

It also features a strong upright shape and wide, full canopy, making the eucalyptus a great shade tree and windbreak in exposed landscapes. 

Native to Australia, this tree has rough, blue-gray bark and small ovate leaves and blooms in small clusters of whitish flowers, but is not particularly showy. 

Once a very popular landscape tree, the desert gum eucalyptus has fallen somewhat out of fashion, largely due to the fact that it is a messy tree, creating significant leaf, flower, and seed litter. 

7. Honey Locust

  • Growth Rate: 24” per year
  • Full Height: 70’-80’
  • Canopy Spread: 20’-40’
  • Drought Hardy: Moderate
  • Cold Hardy: Yes
  • Planting Conditions: Full sun, adaptable to most soils except particularly heavy soils 
  • Lifespan: 120 years
  • Hardiness Zone: 4-9

The honey locust tree is sometimes described as having a delicate shape, with thin, spreading branches and delicate compound leaves.

In keeping with its shape, the honey locust is a bit more particular about its environment, prone to suffering from issues of heat, humidity, and poor soil. 

This tree does have thorns, so be careful when performing routine maintenance.

The honey locust puts out long seed pods that attract birds and other wildlife but can be messy as they fall to the ground. 

The honey locust is actually part of the legume family and is a nitrogen-fixer, so is a good choice in poor soils, where it will actually replenish much-needed nutrients as it grows. 

8. Fig Tree

  • Growth Rate: 12” per year
  • Full Height: 30’
  • Canopy Spread: 30’ 
  • Drought Hardy: Moderate
  • Cold Hardy: Yes
  • Planting Conditions: Full sun, tolerant of most soil conditions  
  • Lifespan: 200 years 
  • Hardiness Zone: 6-11

The fig tree is adaptable to many different environments and can do well in a hot desert climate as well as wetter, colder environments. It is a hardy tree, capable of growing in even poor soils. 

Possibly the most appealing feature of this tree is the fruit it puts out in late summer.

Figs are actually not technically a true fruit, but swollen stems containing seeds and flowers called inflorescence.

These trees do prefer regular watering but are tolerant of most other external conditions. Because the fig tree’s reproduction depends on new growth, all pruning and maintenance should be done during its winter dormancy. 

For a deeper look at why fig trees love the sun so much, check out our article on the five reasons to grow fig trees in full sun!

9. California Pepper Tree

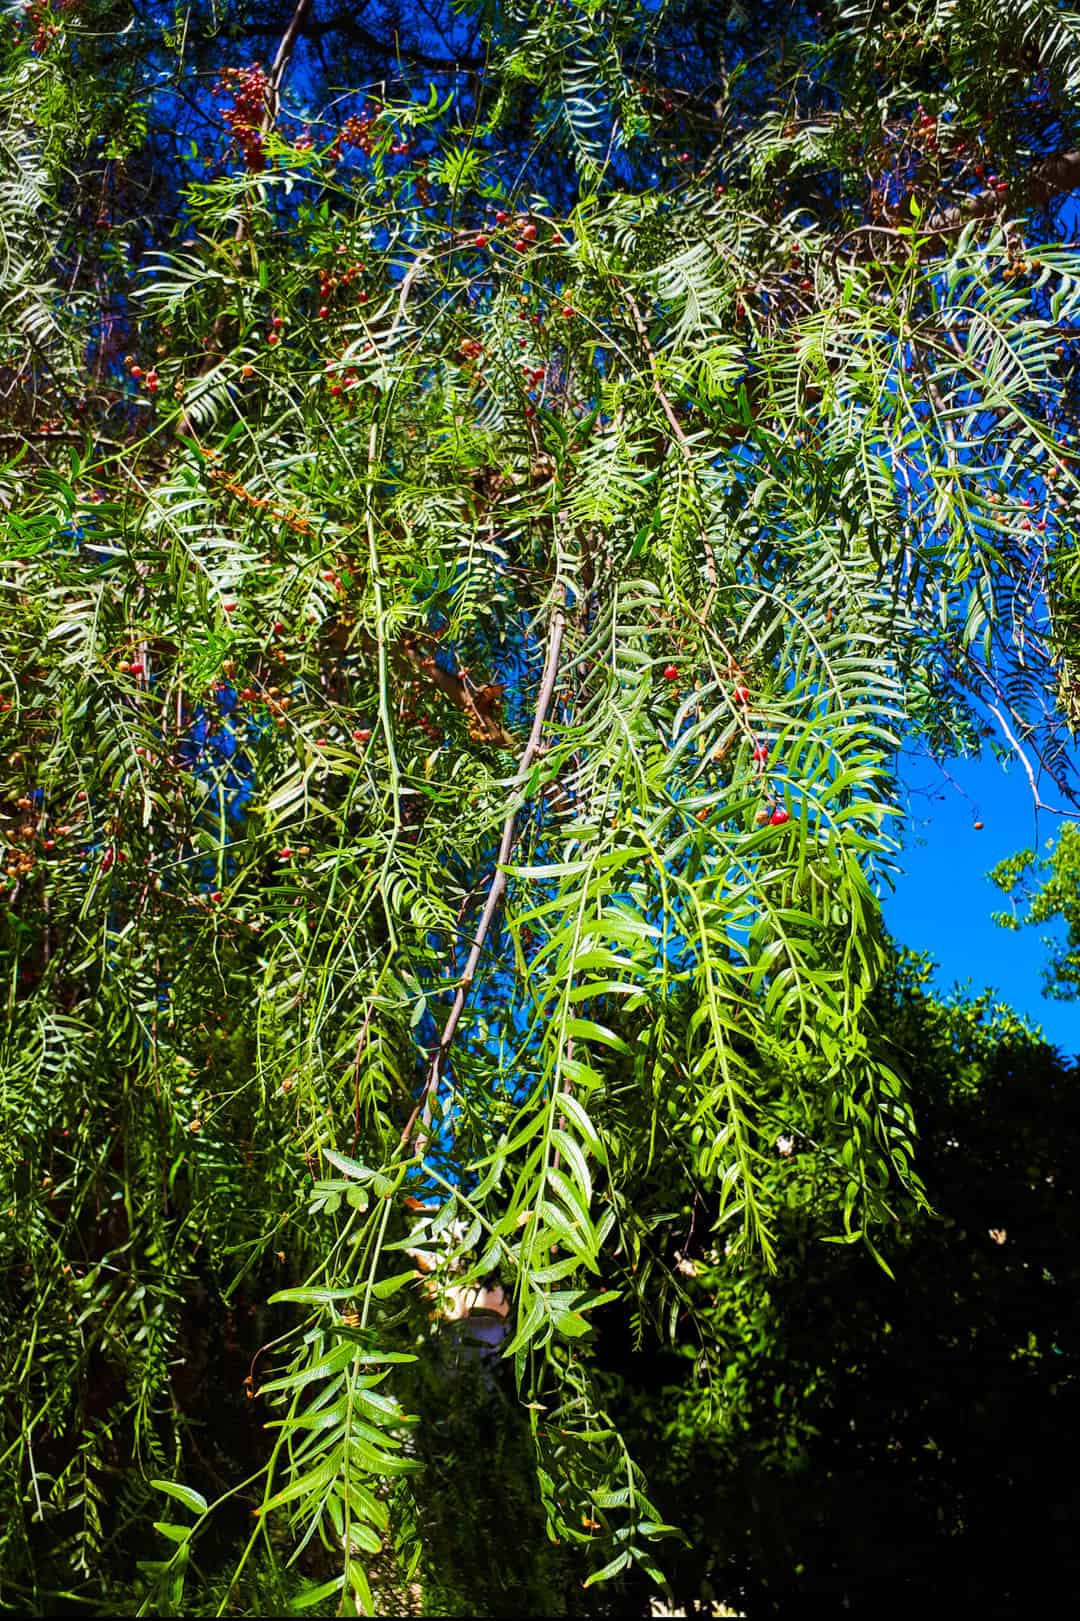
pepper tree fruits on the branch of a pepper tree with long, thin leaves
  • Growth Rate: 36” per year
  • Full Height: 40’
  • Canopy Spread: 40’ 
  • Drought Hardy: Moderate
  • Cold Hardy: Moderate
  • Planting Conditions: Full sun in well-draining soil
  • Lifespan: 50-150 years
  • Hardiness Zone: 9-11

The California pepper tree is another fast-growing tree that provides plenty of shade with its widespread canopy and sweeping, low-hanging branches (think weeping willow!) 

The California pepper tree is a fragrant tree, from its compound leaves to the yellow-green flowers and fall and winter fruit.

Each part of the tree is aromatic, making this a pleasant feature in the landscape or garden. 

These trees can be more high-maintenance, requiring regular pruning and staking when the tree is young to train the tree into an appealing shape.

You may want to invest in some tools, such as these THANOS A1101 Extendable Anvil Loppers Tree Trimmer to keep up with removing the suckers that tend to grow around the base of the trunk.

Avoid planting this tree in grass lawns or turf, because it is prone to yellowing foliage and other issues if inundated with water, prefer well-draining soils. 

10. Chilean Mesquite Tree

  • Growth Rate: 36” per year
  • Full Height: 50’
  • Canopy Spread: 100’ 
  • Drought Hardy: Yes
  • Cold Hardy: Moderate
  • Planting Conditions: Full sun in native desert soils
  • Lifespan: 200 years
  • Hardiness Zone: 9-11

The Chilean mesquite tree is an ideal shade tree for dry climates, growing tall and with an especially wide-spreading canopy. Its growth rate is water-dependent, so a well-watered sapling will readily exceed 3 feet of growth per year to reach its full height. 

It is actually not recommended that you continue to irrigate mature trees, and they will actually grow best relying on infrequent desert rains alone. 

Native to the desert, the Chilean mesquite actually grows best in unamended desert soil, and will not do as well in lawns or turf, where the abundance of water will lead to weaker wood.

Because of the tolerant and low-maintenance nature of this tree, the Chilean mesquite is a popular desert landscape tree, often used in parks as well as parking lots and landscapes. 

11. Palo Verde

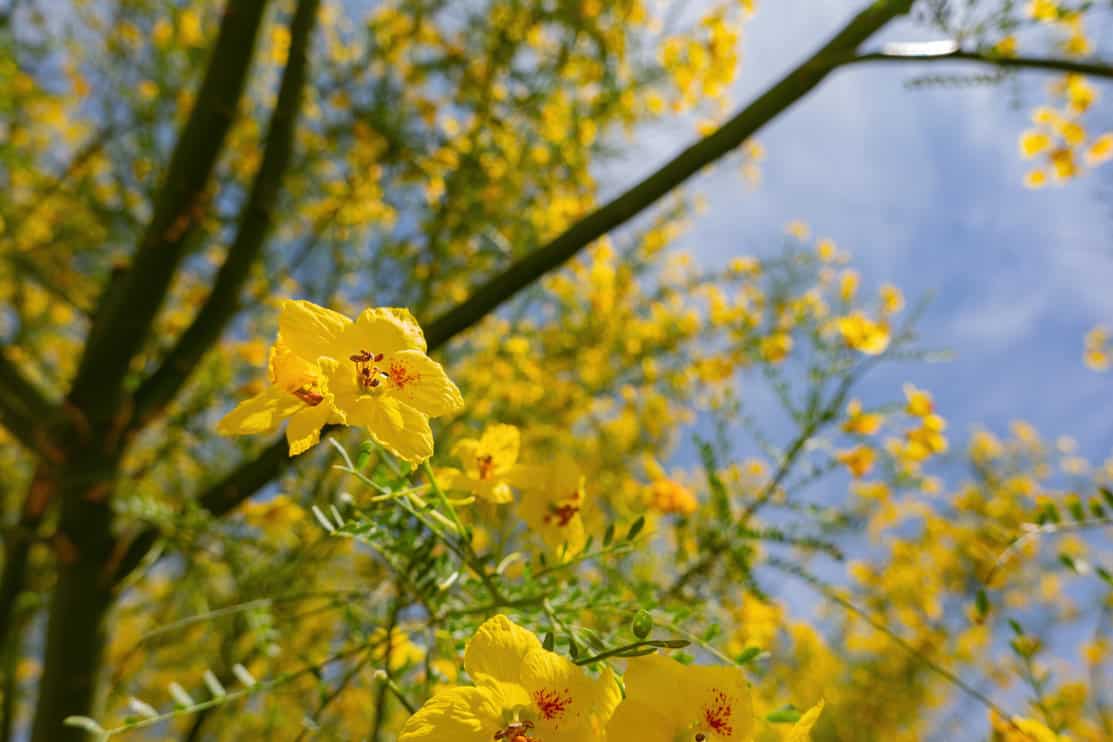
Yellow flowers with red stamen cover the branches of a tree with small oval leaves
  • Growth Rate: 24”-36” per year
  • Full Height: 25’
  • Canopy Spread: 30’ 
  • Drought Hardy: Yes
  • Cold Hardy: Yes
  • Planting Conditions: Full sun, adapted to desert soils but tolerant of most soil types
  • Lifespan: 150 years
  • Hardiness Zone: 7-10

The blue palo verde is an iconic feature in the deserts of the Southwestern United States, with its trademark smooth, green bark and fine, spreading branches. This tree puts out a showy spring display of bright yellow flowers. 

While native to the desert and the poor soils that are native to the area, this tree can actually do well in lawns and turf, tolerant of wetter soils. 

Although the blue palo verde tree is deciduous, losing its leaves during the colder winter months, the green trunk and branches give this tree the appearance of being evergreen and they provide color all throughout the year. 

12. Shoestring Acacia

  • Growth Rate: 36” per year
  • Full Height: 30’
  • Canopy Spread: 10’-20’ 
  • Drought Hardy: Moderate
  • Cold Hardy: Moderate
  • Planting Conditions: Full sun in well-draining soil
  • Lifespan: 50 years
  • Hardiness Zone: 8-11

The shoestring acacia is named for its long, stringy leaves and stems that give the appearance of shoestrings hanging from the branches. The maroon bark and yellow flowers add a pop of color throughout the year.

These trees are favored by low-maintenance gardeners because they do not create much litter and are moderately drought and weather-hardy, requiring only supplemental watering to keep them happy and healthy. 

This is not a climbing tree, because although it lacks thorns, the branches can be weaker and prone to snapping. The shoestring acacia attracts birds and other wildlife.

How To Choose The Best Drought-Tolerant Tree For Your Yard

Although the trees in this list are adapted to desert conditions, you should still take care to provide them with basic care to ensure the healthiest and therefore most resilient tree possible.

First, assess your landscape and determine what kind of soil, light, and other factors that will be important for your tree’s growth.

Aside from those otherwise specified in this list, many trees require supplemental water as they become established, at about one inch of water per week during the spring and summer. 

Make Sure To Water The Roots Slowly And Deeply

Also important is watering the root area thoroughly, including the entirety of the canopy spread.

Tree roots usually grow about as far as the canopy is wide, providing a helpful guideline for how far out to water. 

Another helpful way to ensure your tree is retaining water is by adding a couple of inches of mulch such as this MIGHTY109 Espresso Brown Wood Chip Mulch around the root zone of your tree.

Mulch is a useful tool to help prevent excess water evaporation in the hot desert climate as well as helping to suppress weeds or encroaching turf grass. 

Do Not Over-fertilize

You should never over-fertilize desert trees! The danger of over-fertilizing in the desert is that excessive nutrients can cause overgrowth which will increase the need for water in an already drought-prone environment. 

Finally, it is important to consider when you are actually planting your tree.

Fall is the best time to plant a new tree. The reason for this is that the soil is still warm from the summer months and can retain moisture before winter freezing. 

When the weather is too hot, the tree can become stressed and prone to dehydration, and in the winter, the frozen soils and temperatures can put the tree into shock.

Fall is the sweet spot when the tree can focus its energy on establishing its roots and growing stronger before any extreme weather. 

That’s A Wrap!

Planting in the desert creates a particular set of limitations including the extreme heat, poor soils, and the availability of water.

It is important, then, to select trees that are adapted to growing under these conditions. 

There are many different choices of trees that will thrive in even the harshest of desert climates, and many steps you can take to give them a good chance at success. 

Make sure to select a tree that is right for the unique conditions of your yard and gardening style, and you are sure to have a beautiful tree that will add depth, color, shade, and interest to your landscape for generations to come. 

References:

  1. Rahman, M.A., Armson, D. & Ennos, A.R. (2015) A comparison of the growth and cooling effectiveness of five commonly planted urban tree species. Urban Ecosystem. 18, 371–389.
  2. Wang, Z.H., Zhao, X., Yang J., Song, J. (2016) Cooling and energy saving potentials of shade trees and urban lawns in a desert city. Applied Energy. 161, 437-444.
  3. Venhari A.A., Tenpierik M., Taleghani, M. (2019) The role of sky view factor and urban street greenery in human thermal comfort and heat stress in a desert climate. Journal of Arid Environments. 166, 68-76.
  4. González-Rebeles G., Méndez-Alonzo, R., Paz, H., Terrazas, T., Tinoco-Ojanguren, C. (2022) Leaf habit determines the hydraulic and resource-use strategies in tree saplings from the Sonoran Desert. Tree Physiology.

Let’s be honest, the artificial Christmas tree just doesn’t cut it anymore and that’s why you’re here. Although I couldn’t be more proud that you’ve decided to bring nature indoors this holiday, growing a Christmas tree takes time and an abundance of care.

Evergreens used for Christmas trees can take anywhere from 5 to 12 years to reach the average indoor height of six to eight feet.

The Norway Spruce, Leyland Cypress, Virginia Pine, and White Pine are the fastest-growing Christmas trees reaching the perfect height in less than five years.

There are a handful more varieties that still grow quicker than the average listed below. Even though you won’t be able to harvest your tree this holiday, you’ll be able to watch the Christmas spirit grow outdoors until it’s ready to come inside!

Oh Christmas Tree: Finding The Perfect One

Oh Christmas tree, Oh Christmas tree, which one of you should I take home with me?

If you’ve ever tried searching for a live Christmas tree, then you already know just how hard it is to pick the perfect one. Almost all species of evergreen trees can be grown and used as Christmas trees. 

However, you’ll typically find five species of evergreens at your next Christmas tree farm or lot. More often than not, the real Christmas tree in your home will be a variety of fir, spruce, pine, cypress, or cedar. 

Firs Have That Classic Christmas Tree Smell

A close up of a branch of a fir tree with small, dense needles and two young fir cones at the end.

The most popular species of fresh Christmas trees is the fir. Firs are known for their excellent needle retention and strong, festive fragrance. If you’re looking for a Christmas tree that can hold those delicate ornaments and smell like Christmas, a variety of fir is the best option for you.

Firs have flat, friendly, flexible needles that add a soft touch to your home for Christmas, but are often slower growing than the other evergreen species.

The Balsam firm is the original Christmas season staple, but it isn’t among the fastest growing. There are a few fir varieties listed below that are fast-growing and resemble the old-fashioned Christmas tree.

Spruces Grow Quickly And Look Elegant

Close up of a spruce tree with vibrant green new growth at the ends of the branches.

Spruce trees are another popular option for the holiday season. However, their poor needle retention usually ranks them lower than other evergreen species.

Spruce trees are often chosen as Christmas trees for their elegant branches, fresh scent, and vibrant display of colors. Their needles are individually strong, but often fall before the season is up.

One variety of the spruce tree, the Norway Spruce, is the fastest-growing Christmas tree for you to plant in your backyard and harvest in a few short years!

For a more in-depth look at spruce trees, read our article on the best spruce trees for your yard.

Pines Have It All

A close up of a pine tree branch with spring blooms in clusters of small orange flowers.

Pine trees make the perfect indoor Christmas tree. Often, this species is faster growing than the other evergreens. 

Pine trees do well in colder climates, so if you’re looking to plant a Christmas tree outdoors and you reside up North, the pine is the perfect option.

Every fast-growing pine variety is known for offering the best of both worlds: a fresh fragrance and natural needle retention.

Our article on the complete pine tree growth timeline will give you better insight into how to grow one in your own yard.

Cypresses And Cedars Are Pretty Fast Growing

Green hedge of cypress trees along a dirt path.

The cypress and cedar varieties are often slow growers. However, there are a few outliers that grow faster than others.

If you’re weary about bringing the outdoors in, cypress or cedar is the safest choice for learning how to navigate fresh Christmas trees as they’re often better suited as more of a “neutral” tree for scent and feel.

Plant These 11 Fastest Growing Christmas Trees In Your Yard

Christmas trees, like any other tree, take time to grow. There are, of course, a few varieties that grow faster than the rest. 

It is important to note that if you plan to grow a Christmas tree from seed, you’ll have to add several years onto the timeline. From seed to sapling, growth is slow, but that shouldn’t be discouraging! Nurturing your own Christmas tree from the seed to the holiday season is admirable. 

However, the timelines listed below are meant for growing your Christmas tree from a sapling. Growing a Christmas tree can take as little as three years and sometimes as much as fifteen years, but according to the National Christmas Trees Association, they usually take an average of seven years to grow to the perfect height.

I get it, that still feels like a long time… like the time it takes for Christmas to come back around… several times.

Lucky for you, there are actually a few evergreens that can grow into the perfect Christmas tree in under five years!

Fastest Growing Christmas Trees Ranked: Complete Growth Chart

Here’s a quick table to summarize all of our info below – you can then keep reading for a detailed breakdown on each tree!

Fastest Growing Christmas Trees

TREEANNUAL GROWTHYEARS TO AVERAGE CHRISTMAS TREE HEIGHT (6’ TO 8’)BEST HARDINESS ZONEFRAGRANCENEEDLE RETENTION

1. Norway Spruce

The Norway Spruce is the fastest-growing Christmas tree. When young, the Norway Spruce grows rapidly. This evergreen can reach a marketable Christmas tree height in just three years!

At its best, a Norway Spruce can grow up to 60 inches a year but averages a steady two to three feet per year of growth when planted in your yard.

The Norway Spruce grows into the perfect pyramidal shape with strong needles and branches that point upward. 

This Christmas tree offers a fresh, fragrant scent, but ranks poor in overall needle retention. To combat shedding spruce needles, harvest your Christmas tree closer to the holidays.

If you plan to plant a Norway Spruce for your next Christmas tree, the best time to plant is in the spring or early fall. Be sure to plant your tree in shallow, acidic soil.

The Norway spruce then requires at least six hours of sunlight and daily deep watering to properly grow. After the first year, your spruce should be established enough to slow down watering.

If you’re looking for a quick, easy tree to grow in your backyard to harvest for the holidays and decorate as you count the days down to Christmas, the Norway Spruce is the one.

2. Leyland Cypress

The Leyland Cypress is another one of the evergreen varieties that grow to average Christmas tree height in under five years!

This fast grower inches upward at two to three feet per year when grown in fertile soil with access to full sun. The best time to plant the Leyland Cypress is sometime mid-fall.

The Leyland Cypress has soft, feather-like needles that will last all season long. The evergreen aroma is faint and produces no pollen which is perfect for those with allergies!

The Leyland Cypress is commonly used as an ornamental tree. It’s perfect for landscapes and yes, it’s also perfect for ornaments!

3. Virginia Pine

The Virginia Pine is a popular choice for a Christmas tree. If properly planted, the Virginia Pine can become your next Christmas tree in as little as three years!

To properly plant your Virginia Pine, transplant in the spring in well-drained, acidic soil with access to full sun.

The Virginia Pine is the pioneer of plants because it is extremely hardy and easy to grow. In fact, the Virginia Pine will begin to amend the soil around it to improve growing conditions! 

This pine does require pruning to maintain the perfect holiday shape. You can even use your pine prunings for wreaths and holiday greenery!

The needles of the Virginia Pine are short, soft, and produce a pleasant, piney scent.

4. White Pine

Next on the nice list for fast-growing Christmas trees is the White Pine. This evergreen has become a traditional tree for the holidays.

The White Pine can reach a height of six feet in only three years! This pine grows at a steady rate of two to three feet per year.

The long, soft needles are beared in bundles of five, one of the only pines that do this! They’re perfect for ornaments and other holiday greenery uses.

To plant your own White Pine, wait until springtime and place in well-drained, slightly acidic soil with access to full sun. However, if you live in a warmer climate, offer your pine some shade to ensure proper growth.

The White Pine is the best tree to plant to become your next Christmas tree if you’re looking for a pine that offers it all. This evergreen offers a fresh scent, great needle retention, and grows quickly!

5. Douglas Fir

If you’re looking for your very own picture-perfect, hallmark Christmas tree to harvest from your own backyard, the Douglas Fir is a great start.

The Douglas Fir, surprisingly not a true fir, is one of the most popular Christmas trees to date. This dense, dark, earthy evergreen hardly makes its debut on the nice list as a fast-growing Christmas tree.

Although it does not grow as fast as the ones listed above, you’ll still have a fragrant, fresh Christmas tree seven feet tall in only five years, slightly below the average growth timeline for Christmas trees.

The Douglas Fir tends to be adaptable but prefers full sun access and acidic, well-drained soils. Plant your Douglas Fir in late winter or early spring.

Their needles are soft and shiny giving this fresh Christmas tree an artificial feel, but it’s real! The needles tend to be weaker than the average but will hold up throughout the season. 

No need to worry about weak branches, just search for some lightweight ornaments instead!

Glass ornaments may be too heavy and crush the needles of some real trees, so opt for lighter ones instead. RESSYYT 24pcs Christmas Ball Ornaments contains lightweight, shatterproof, and high-quality ornaments guaranteed to not crush your Christmas tree.

6. White Spruce

Spruce trees are often known to be slow to moderate-growing, but the White Spruce is a fast-growing evergreen that can be grown into your next Christmas tree! Spruce trees make beautiful Christmas trees because of their natural shape, rich color, and stiff needles. The White Spruce is known to add elegance to any space.

The White Spruce easily grows over a foot per year and will grow into the perfect Christmas tree height in six to eight years.

This evergreen closely resembles the Colorado Blue Spruce and is one of the strongest to hold ornaments and maintain needles while still releasing a slight evergreen scent.

The White Spruce is widely used as a Christmas tree and grows best in acidic, well-drained soils with access to full sun. The best time to plant your white spruce is in the late summer or early fall.

The branches of the white spruce are strong and perfect for hanging any heavy ornaments.

7. Scotch Pine

The Scotch Pine is an evergreen that is commonly grown as a Christmas Tree in the Midwest. This pine can grow up to two feet per year and can be harvested in six to eight years as a Christmas tree.

The Scotch Pine is easy to plant and maintain, and is highly survivable. If you’re new to the idea of growing your own Christmas tree, the Scotch Pine is the perfect start! Simply said, the Scotch Pine is the Christmas tree for beginners.

This evergreen will remain fresh all season long and has short, stiff branches perfect for hanging your delicate ornaments!

To begin planting your own Scotch Pine, wait until spring or fall and then transplant it into moist, well-drained, alkaline soil with full sun. Wait six years and you’ll have a seven-foot Scotch Pine Christmas tree!

9. Canaan Fir

The Canaan Fir is a variation of the Fraser Fir and Balsam Fir that is fast-growing, flawless, and fresh. The balsam fir is a timeless, traditional tree for the holiday season, but is often slow-growing. The Canaan fir is the fast-growing partner of the Balsam Fir!

This evergreen grows an average of one to two feet per year, and can be harvested at six feet in only seven years!

The Canaan fir is a combination of the two most widely known Christmas tree varieties and inherits the best feature of both. For example, the Canaan Fir combines the beauty of the Balsam Fir and the compact, needle retention of the Fraser Fir… but better.

The dark green, sturdy needles of the Canaan Fir make them perfect for hanging ornaments and the fresh fir scent creates a festive holiday scene in your home! 

The Canaan Fir does best when planted in full sun, and moist, well-drained soils. It thrives in cooler climates and must be planted in the spring or fall.

Turn your home and backyard into a hallmark holiday movie with the Canaan Fir!

10. Eastern Red Cedar

Typically, cedars are very slow-growing, yet they make wonderful Christmas trees! The Eastern Red Cedar actually falls under the nice list of fast-growing Christmas trees. You’ll find that cedars are best grown in the South and are grown as the traditional southern Christmas tree.

The Eastern Red Cedar grows an average of one to two feet per year and can reach the perfect holiday height in seven to nine years!

The scent of this cedar is usually light and has small spreads of foliage with small needles that retain throughout the season. Usually, the Eastern Red Cedar branches do best with lightweight ornaments.

The Eastern Red Cedar should be planted in the fall to root and recover by the spring. Plant your next Christmas tree in acidic, moist, well-drained soils to grow at its fastest rate.

11. Colorado Blue Spruce

And at the end of the nice list is the Colorado Blue Spruce. The Colorado Blue Spruce is a wonderful Christmas tree candidate for your homegrown journey.

The Colorado Blue Spruce is often a versatile landscape tree, but also doubles as the perfect Christmas tree! You could even leave your Spruce uncut to debut as an outdoor holiday staple in the neighborhood… no need for a sparse charlie brown Christmas tree, get yourself a  compact Colorado Blue Spruce Christmas tree!

The Colorado Blue Spruce has short, spiny needles that are a vibrant bluish-green color to add some holiday hues to your home! They are great for hanging ornaments but don’t often hang around until the holidays when harvested too early.

The Colorado Blue Spruce is native to the Rockies of Colorado obviously – but will do well planted in any yard with moist, well-drained, acidic soils to grow one to two feet per year. This Spruce requires full sun and plenty of space to bush out.

Plant your Colorado Blue Spruce in the late winter or early spring and harvest your new Christmas tree in seven to ten years!

The blue spruces color is what makes it so iconic, and luckily we have a guide on how to make your spruce even bluer to really pop in your holiday display.

How To Grow Your Own Christmas Tree

The National Christmas Tree Association estimates that there are 350 million real Christmas trees growing throughout farms in the United States at any given time, so why not make it one more?

The first step to growing your own Christmas tree is to select one of the fast-growing varieties from above. Once you’ve decided on the perfect tree for your family, you’ll want to head out to your local Christmas tree farm or nursery and grab a sapling of your favorite fresh tree!

After returning home with your sapling (in the desired season for planting), having decided on the perfect spot in your yard, transplant your new sapling into acidic, moist, well-drained soil. Be sure to plant your new sapling away from structures and other trees to eliminate competition and slow growth.

The First Year of Growth

For the first year of growth, be sure to deeply water your new tree to help facilitate root growth and recovery. 

You’ll want to check on your mini Christmas tree farm often to eliminate the growth of weeds, pests, and competitors.

Keep in mind that growing a fast-growing variety of evergreens is different from the average growing Christmas tree. Because of their rapid growth, your branches won’t grow symmetrically or in the perfect shape. To keep the shape, it is recommended that you shear your tree often after it has grown past the seedling stage.

Maintenance for Your Growing Tree

Fast-growing varieties require pruning twice yearly, while average-growing varieties require a prune maybe once a year.

Remember, your clippings can be used to make wreaths and other holiday greenery!

Once your tree has reached the desired height for your home, it is time to harvest. It is best to harvest your Christmas tree no more than a month before the holidays to ensure needle retention and a fresh aroma.

There are 8 ways to make your pine Christmas tree last longer, which we’ve put into a quick guide for you.

Water, Water, Water!

If you’re worried about keeping your Christmas tree fresh after cutting it, Miracle-Gro for Christmas Tree Plant Food will add the perfect touch to the water for your tree trunk. Remember that your fresh tree will soak up water quickly in the first few days of being cut, so check it often! One capful will keep your fresh tree hydrated and reduce the number of needles that drop!

You should add a bit of water to your tree intermittently, too. We have a whole article on why you should spray your Christmas tree with water, in case you want to learn more.

Enjoy your years of hard work for the festive holiday and start the journey on your next tree!

Fa La La Logging Off

Real trees are a renewable, recyclable resource, so it’s no wonder you’re looking to reach out into nature this holiday for your Christmas spirit!

To review, there are hundreds of varieties of evergreens that can be grown as a Christmas tree. This post has narrowed it down to the ten fastest-growing Christmas trees for you to grow on your own time!

The 10 fastest-growing Christmas trees are:

  • Norway Spruce
  • Leyland Cypress
  • Virginia Pine
  • White Pine
  • Douglas Fir
  • White Spruce
  • Scotch Pine
  • Canaan Fir
  • Eastern Red Cedar
  • Colorado Blue Spruce

These ten varieties will grow into your next Christmas tree in under ten years.

Don’t be the grinch that stole Christmas, grow a tree of your own this season! Santa’s presents will look perfect under your new fresh and festive Christmas tree!

References:

Anderson, S., & Marcouiller, D. (2007). Introduction to growing Christmas trees. Oklahoma Cooperative Extension Service.

Johnson, J. E. (2020). Species for Christmas tree planting in Virginia.

Moorhead, D. J. (2009). Selection and care of Christmas trees for the home.

Sowder, A. M. (1949). Christmas trees—the industry. Trees. Yearb. Agric. US Dep. Agric.

Wray, R. D. (2008). Christmas trees for pleasure and profit. Rutgers University Press.

Are you looking for a fast-growing tree to add to your backyard? We all know that trees take forever to grow! That said, some species grow faster than others, and if you choose the right one, you’ll have a tall tree in no time.

Are you ready to learn more about these large, fast-growing trees so that you can choose the right one for your yard? Let’s go!

What Are The Most Common Large Tree Varieties?

The most common large tree varieties for backyards include:

  • Hybrid poplar
  • Weeping willow
  • Green giant arborvitae
  • Dawn redwood
  • Pin oak
  • River birch
  • American sycamore
  • Northern red oak
  • Silver maple

There are many great reasons to plant a tree in your backyard. Hedge trees provide incredible privacy, large trees will shade you on a hot summer day, and besides looking nice on your property, planting trees is an excellent way to help the environment. 

But although you might dream of having a beautiful, towering tree in your backyard, it’s more complex than just plopping a tree into the ground.

Consider Everything Before Planting A Tree

When planting a tree, there are many factors to consider, such as soil type, potential pests, amount of sun, water lines, sidewalks, and more.

Additionally, most baby trees don’t do well with lazy gardeners—you can’t just plant a tree and forget about it! Most trees will need a lot of tender love and care, especially during their first years, and you’ll probably have to invest in an irrigation system.

Although they sound complicated, you’ll be up and running in no time if you use an irrigation kit like this Rain Bird Drip Irrigation Landscape & Garden Watering Kit.

Sometimes you find yourself looking out of a window and thinking—man, I wish there was a tree there! But since you really can’t plant a fully grown tree, it could take years for that daydream to become a reality.

But we’re here to help! 

Below we talk about the fastest-growing backyard trees, how big they get, planting recommendations for each one, and much more! So, what are you waiting for—let’s learn about some trees!

Fastest Growing Large Trees Ranked: Complete Growth Chart

We’re going to throw a lot at you below, so here’s a quick chart to help you summarize the differences! Keep reading on to view the full tree by tree detailed breakdown.

Fastest Growing Large Trees Ranked

TREEANNUAL GROWTHLIFESPANFULL HEIGHTBEST HARDINESS ZONE

1. Hybrid Poplars Are Popular Fast Growing Trees

Mature hybrid poplar in a field with a blue sky.

Poplar is the colloquial term for trees in the Populus genus, including cottonwoods and aspens. They’re native to cold and temperate regions of the northern hemisphere.

A hybrid poplar can quickly produce shade on your property while creating a privacy screen or windbreak. Plus, civic and environmental engineers commonly plant hybrid poplars along rivers and streams to create buffers, shade, and support.

The Natural Resources Research Institute of the University of Minnesota-Duluth is on the cutting edge of developing swiftly-growing poplars that are disease-resistant and easily root from cuttings.

They’re crossing the European black poplar and Minnesota cottonwood trees to develop these hybrids. And while these specific hybrids aren’t available to the general public yet, there are plenty that are!

Growing Information For Hybrid Poplars

Depending on the species, hybrid poplars grow quickly. In fact, according to the University of Idaho, Idaho hybrid poplars can grow as much as 10 feet a year in well-irrigated conditions!

Additionally, the trees can reach anywhere from 50 to 150 feet high with trunks up to 8 feet in diameter—so make sure you have the room!

Hybrid Poplar trees like warm weather and moist soil; they require full sunlight and grow best in areas with a high water line. Their roots can cause trouble to structures such as your home, driveway, and road, so make sure you consider that when choosing a spot to plant your new tree.

To learn more about poplars, check out our article explaining why poplar trees are invasive and what you can do about it!

2. Weeping Willows Are Beautiful And Grow Quickly

Sun shining through weeping willow tree branches.

Weeping willows are depicted in many paintings across multiple artistic eras for a reason—they’re beautiful and provide fantastic shade! To add even more beauty to your yard, read our article on plants you can plant under a weeping willow!

Interestingly, Native Americans used to chew on the willows young twigs to relieve headaches, which makes sense because they contain salicylic acid, the main ingredient in Aspirin.

Although native to China, they’re prevalent in North America. Today, you can find them anywhere, from Ontario to central Florida and as far west as Missouri.

Growing Information For Weeping Willows

Willows do best in large backyards that are next to the water. They like moist—even wet—conditions and tend to grow best in cooler environments. If you want to grow them somewhere drier, be ready to invest in some irrigation!

The trees grow up to 60 feet tall with a broad, cascading canopy (hence the name weeping) and lose their leaves in the wintertime. They prefer cooler areas but can grow as far south as Zone 9B.

Willows will quickly grow to be 30 to 40 feet, with a width of up to 40 feet. Some species even grow as tall as 75 feet! They typically grow between 6-10 feet each year.

Things You Should Know Before Planting Willow Trees

Due to how quickly willows grow, the wood is not particularly strong and can crack easily. Likewise, heavy winter snow can cause damage. Willows also litter leaves, branches, and twigs, quite a bit, so be ready to do some backyard work!

A good rake, like this Ansgery Aluminum Landscape Rake, can help you clean up leaves in a jiffy.

Additionally, willows are susceptible to plenty of diseases, including:

  • Cankers
  • Leaf spots
  • Powdery mildew
  • Blight

All in all, the beauty of this magnificent tree is well worth the trouble. Just be sure to plant your willow at least 20 feet from your home and 12 feet from walkways and driveways. And make sure the roots won’t hit any water lines.

3. Green Giant Arborvitae Are Popular Fast Growing Landscaping Trees

A row of young green giant arborvitae grow in a grass yard along a wooden paneled fence.

Green giant arborvitae is a large evergreen conifer, a hybrid between the Japanese arborvitae and Western red cedar. They were initially developed in Denmark in the 1930s, arriving in the US in the late 1960s when the US National Arboretum was given a specimen.

As it became available in nurseries across the country, it started to gain a reputation as a landscaping tree. This tree is popular because its needles keep their deep green, glossy sheen throughout the year, even in the winter.

The green giant arborvitae is easy to maintain because it’s hardy and grows uniformly, meaning it doesn’t require much—if any—pruning.

Growing Information For Green Giant Arborvitae

The green giant arborvitae is hardy in zones 5-8 and most popular in the Southeastern states. It’s mostly resistant to diseases, occasional drought, insects, and deer but doesn’t tolerate salty soils or sprays well. 

Overall, these trees get lofty, growing up to 60 feet tall with a width of 18 feet. They thrive in moist locations with full sun and some afternoon shade and can grow in many different soil types. When placed smartly, it can grow around 4 feet each year!

4. If You Want A Fast Growing Deciduous Tree, Check Out The Dawn Redwood

Group of tall dawn redwood trees along a road in autumn with orange leaves in front of a tree lined hill

The dawn redwood is famous for its perfect pyramid shape and towering heights up to 200 feet tall! While it looks like an evergreen, its needles are actually deciduous, meaning they shed in the winter. 

One of the things that stands out most about this tree is its deep red trunk. Also, the top parts of its roots are visible, a trait mostly reserved for tropical trees.

Pro tip: Dawn redwoods make great climbing trees!

Growing Information For Dawn Redwoods

Although these trees don’t grow as fast as some of the other trees on the list, they grow quickly and increase in height by two to three feet each year. In fact, they can reach 25 feet in ten years or less. 

When planting a redwood, be sure to choose a site that gets full sun. You don’t have to worry as much about soil with these tree as they can tolerate a range of soil types—so long as it’s not alkaline. 

Its drought tolerance is moderate, with an aerosol salt tolerance of low.

5. The Pin Oak Is An Excellent Large, Fast Growing Tree

A pin oak in a grass field with yellow flowering blooms.

The pin oak is a quick-growing deciduous red oak known for being more graceful and slender than some other oak varieties. They’re native to Southeastern Canada and the Northeastern and North-central US. They’re usually found in zones 4-8.

Pin oaks are commonly used as shade or street trees in private yards and parks. Want to know exactly how long a pin oak will take to grow? Check out our article detailing the full pin oak tree lifespan!

Growing Information For Pin Oaks

Like most oak trees, pin oaks are large trees with broad diameters. This species of oak can grow up to 90 feet tall, with some trees having been observed reaching heights of 125 feet. On average, you can expect a pin oak to grow about two feet each year.

They thrive in full sun and like moist, loamy, and acidic soils. They do well in soils that don’t drain quickly and can tolerate moderate flooding. That said, they can also adapt to dry urban conditions. 

Due to its shallow roots, waterlines cause less concern than other backyard trees. However, pin oaks must be planted at least 20 feet away from buildings, driveways, and roads.

6. River Birch Grow Quite Tall When Grown Near Water

A close up of the peeling bark of a paper birch tree.

The river birch is the most popular of all birches and grows in zones 4-9. 

One of the reasons it’s so widely grown is because of its beautiful, peeling, multicolored bark. Young trees have pinkish bark, while older trees develop red-grey bark.

The river birch grows (you guessed it) near water in the wild. However, you can plant them almost anywhere in the United States for landscaping purposes.

Growing Information For River Birch Trees

One of the unique things about river birch trees is that they grow nearly as wide as they are tall. For example, a mature river birch can grow 60 feet tall and up to 50 feet wide! Plus, there are tons of great places to plant river birch trees. To learn more, check our our birch tree planting guide with nine great suggestions.

Although their growth depends on the nearby conditions, they have been known to grow two feet per year.

That said, they do best with the following:

  • Moist soil
  • Fertile soil
  • Well-draining soil
  • Full sun or moderate shade

The river birch has no particularly harmful pests. They can sometimes acquire aphids, but natural predators tend to take care of that!

7. American Sycamore Are One Of The Largest Fast Growing Trees

the green leaves and branches of a sycamore tree growing in a grass lawn.

The American sycamore can grow up to 100 feet tall—125 feet under ideal conditions—and its impressive trunk can reach diameters larger than 10 feet. While young, it has a pyramidal shape but grows up to be more rounded with an irregular crown.

The American sycamore is native to Central and Eastern US and Southeastern Canada. It grows to be its largest in flood plains or along rivers or streams.

Growing Information For American Sycamores

This tree likes full sun and soil that is fertile and moist. It can tolerate loam, clay, sand, and alkaline soil. It can also tolerate drought to a degree.

The American sycamore has a quick growth rate—otherwise, it wouldn’t have made it onto this list— and adds around two feet to its height each year. Because they’re so big these trees need a lot of backyard space, so make sure to consider its full size when choosing a location.

If you’re looking for a more detailed guide, take a peak at our full sycamore tree growth rate timeline!

8. Northern Red Oak Is A Hardy Quick Growing Tree

Northern red oak with orange fall leaves

The Northern red oak is one of the fastest-growing oak trees. Their trunks tend to be very straight, with thick bark ridges that almost appear cracked and leaves as large as 9 inches long! They’re similar to white oak trees, but many people often prefer the look of red oaks (you can view the major differences between red and white oak trees here.)

Northern red oak acorns were traditionally a vital food source for Native Americans. The acorns were leached with ashes to get rid of bitter tannins and then prepared in various recipes.

Although similar to scarlet oak, Northern red oak prefers damper soil. Additionally, it can thrive in shaded areas where the scarlet oak would struggle.

Growing Information For Northern Red Oak

Red oaks like to grow in acidic, moist, well-draining sandy or loam soil. However, they’ll still do okay in alkaline, dry, clay soil. In ideal conditions, Northern red oak trees can grow to 75 feet tall and 45 feet wide. Like many of the trees on this list, they add about two feet per year to their height.

The northern red oak is a great shade tree used in lawns and parks. Their acorns provide vital winter food for wildlife such as squirrels, wild turkeys, deer, and songbirds.

Pro tip: if oak wilt is prevalent in your area, it’s best to choose a different tree to plant, just in case.

9. Silver Maple Are A Beautiful Quick Growing Tree For Every Yard

Jagged green leaves of a maple tree

The silver maple tree is the fastest-growing American maple species. Because of how quickly it grows, the wood is pretty weak and susceptible to storm damage. It’s also a big target for wooly alder aphids.

Even though its extensive root system is prone to damaging sidewalks and water pipes, it’s still an incredibly popular, often-planted tree because of how quickly and easily it grows. 

The silver maple gets its name from the silver tones on the underbellies of its leaves, which look particularly beautiful in the wind.

Growing Information For Silver Maple Trees

The silver maple tree is one of the taller trees on the list and can reach up to 100 feet into the sky. Additionally, it can grow to be up to 50 feet wide. But it’s not the only maple tree species to grow big! For a better guide on maple trees and their pros and cons, check out our article on the 9 best varieties to plant.

These trees like to grow in moist soils and are often found deep in the woods or next to streams. They don’t do well in dry soil, so they often aren’t a good choice for dryer climates.

In the right conditions, though, you can expect your silver maple to grow about two feet each year!

Which Fast Growing Large Tree Should I Plant In My Yard?

Before we can answer which large tree you should plant in your yard, we need to consider why you want to grow a tree in the first place.

Best Large Tree To Grow As A Sound Barrier

The hybrid poplar is your best option as a sound barrier. Environmental engineers often use them along highways and roads as a barrier during civic planning!

Hybrid poplars do well in rows to create a wall of protection against you and the road. They grow massive, so make sure you have room for them!

Best Fast Growing Tree To Plant For Beauty

If you’re looking for a quick-growing tree that’s also absolutely gorgeous, you’ll want to go with a weeping willow. 

Weeping willows are famous worldwide for their cascading branches along picturesque watersides. There’s almost nothing more magical than sitting underneath a weeping willow to read your favorite book.

Of course, you’ll need a good hammock to relax in while you enjoy your book, and this Vivere Double Cotton Hammock is perfect for a summer nap in the shade! 

Best Large Backyard Tree To Plant For Your Family

If you’re planting a tree for your kids, the dawn redwood is your best choice! These beautiful trees have much stronger wood than most of the other quick-growing trees on our list.

The roots of the dawn redwood will be a lot of fun for your kids to run around on. Likewise, its low branches make it the perfect climbing tree. Who doesn’t like climbing trees?

Best Large Tree To Plant For Shade

Because it grows tall and has outward stretching branches, the hybrid poplar is the best quick-growing large tree to plant for shade. 

These massive trees can shade your home and garden in the summer, helping you reduce the amount of electricity you use by running an air conditioner and saving a sun-scorched garden.

Although the dawn redwood can grow to be around 50 feet taller than the hybrid poplar, it has a pyramid shape rather than outward branches, allowing it to provide lovely targeted shade but making it less likely to provide sweeping shade. 

Best Fast-Growing Tree To Plant Along A Pond Or Stream

Weeping willows are the most apparent tree of choice if you’re planting along a pond or stream. That said, the river birch is a strong competitor!

Weeping willows naturally grow in wet conditions in the wild, which is why you’ll frequently find them growing wildly near rivers and streams. Additionally, environmental engineers will sometimes use them as support for riverbeds and runoffs. 

River birch also grows well in wet conditions and will impress anyone with its beautiful bark. Young trees especially turn heads with their pink tones. One truly unique thing about the river birch is that it often grows more than one trunk, giving them a clustered appearance. So you get two trees for the price of one!

Tips For Planting And Growing Large Trees

Believe it or not, planting a tree takes a lot of planning and effort. But don’t worry; we’ve got you covered!

Let’s plant some trees!

When Should You Plant A Large Tree?

Although you could plant a tree any time during the year, some species do best when transplanted during certain seasons. For example, most balled or burlapped trees grow best when planted in the fall after their leaves have dropped.

Why plant in the fall? Good question! The answer is simple—with no leaves to focus on, your new tree will put all of its energy into developing a solid root system, allowing it to survive better in the heat and drought that summer brings.

However, some species of tree do good (even better) when planted in the spring or summer, so be sure to consider the best time to plant a tree species when shopping for your new backyard addition!

You will most definitely need to prune whatever tree you end up planting, so make sure to bookmark our guide on how to prune large trees for once your tree is full grown!

Test Your Soil A Week Or Two Before Planting

If you want your new tree to flourish, it must have the correct pH, nutrients, and soil drainage. And the last thing you want to do is find out you put the tree in the wrong spot after you planted it! 

To avoid transplanting, choose a couple of suitable locations in your yard and test the soil a few weeks before planting. Testing in advance allows you time to adjust the earth or choose a new spot. 

That said, if you’re going to disrupt the ground during final grading or plan to use new soil during planting, test after those changes occur.

Ornamental trees typically prefer soil that’s pH ranges from 5.8 to 6.5. Soil that is more acidic or alkaline than this can result in nutrient deficiencies. 

To raise the pH, you can add dolomitic lime. Conversely, you can use sulfur or aluminum sulfate to lower the pH. Only attempt to raise or lower your pH once you have a soil test and are sure of what you need to do!

Adding Organic Matter

Organic amendments like compost are added to soil to improve soil tilth—soil nutrient and water-holding capacity.

It’s best to incorporate organic matter throughout the rooting zone rather than just in the planting hole. Otherwise, the roots may stay where the nutrients are instead of spreading out.

Organic matter should make up about 10-20% of the soil. Before adding it to clay soils, consider improving the drainage via deep tilling.

Oh, and did you know you could save money by creating your own mulch? It’s true, and we can tell you how. Just check out our article explaining why pine needles make great mulch and how to make your own!

How Deep Should You Plant Your Tree?

Depth is another essential factor to consider when planting a tree. If you plant too deeply (or not deep enough), your tree may be damaged and its growth stunted. 

Your planting hole shouldn’t be deeper than your root ball’s height in well-draining soil. Don’t disturb the earth at the bottom of the pit; otherwise, the tree might sink deeper.

In addition, make sure there isn’t an extra layer of soil covering the root ball. The only thing that should be put over the root ball is mulch. Even just half an inch of excess soil over the root ball can stop water from reaching it!

How To Prepare And Set The Root Ball

Trees grown in containers can be removed and put straight into the hole. Cut off any circling roots, so they don’t strangle your tree! 

If it’s rootbound, use a pair of pruning shears to make slices in the root ball from top to bottom in three or four spots. Then, pull the outside roots away from the root ball.

When preparing a hole for a bare-root tree, make sure you dig it wide enough to spread out the roots. You don’t want to have to bend roots for them to fit!

Also, ensure you’re using natural burlap rather than synthetic when covering up the soil around your baby tree.

How To Fill The Planting Hole

The soil you use to fill in around the root ball is known as backfill. Use the original soil along with 10-20% compost. Place your tree into the hole at the right depth, then backfill half of the space surrounding the root ball.

Tamp the soil gently—don’t fully compact the ground, though. Finish up with loose and unamended soil, with another tamping.

Because the roots haven’t had time to spread, you’ll need to water the root ball directly. To do this, create a 3-inch-tall water ring around the edge of the ball.

Mulching Can Help Or Hinder A Trees Growth

Believe it or not, proper mulching is one of the keys to ensuring your tree grows as quickly as possible. Not only does it help keeps weeds to a minimum, but it helps retain soil moisture, regulate soil temperature, and eliminate damage from landscaping tools.

But, when done improperly, mulch can become a new tree’s worst enemy! 

You should add a layer of mulch around your tree that measures 2-4 inches deep and up to 6 feet wide. Leave a 3-6 inch gap between the mulch and the tree’s trunk.

Don’t heap piles of mulch up against the tree, as the wet mulch can rot the bark, damaging the tree’s growth. Also, don’t use the volcano method, as water will collect in the hole and rot the trunk. Finally, don’t make the mulch any deeper than 4 inches, as this can rob the soil of oxygen. 

Watering Is Vital During The First Few Months

As mentioned before, you’ll need to water the root ball directly at first—the raised ring you’ve built with soil will help keep the water around the root ball. 

Water the tree deeply after mulching. Be sure to adjust how much you water based on whether your soil is draining or poorly draining.

Keep constant moisture, but not saturation, for the first few months after you transplant. Pay attention to how quickly your soil dries out so you can water sufficiently!

That’s A Wrap!

Whether you’re aiming for a little extra shade or want a shining beauty to take center stage, one of the trees on this list is sure to tickle your fancy.

To quickly recap, some of the most popular fast-growing large tree varieties include:

  • Hybrid poplars
  • Weeping willows
  • Green giant arborvitae
  • Dawn redwood
  • Pin oak
  • River birch
  • American sycamore
  • Northern red oak
  • Silver maple

Before planting, consider what kind of soil you have, your goal, and how large of a tree your backyard can handle. Additionally, following the planting techniques we shared will help your tree thrive. 

Hopefully, this article helped you find the perfect quick-growing tree for your space! To learn more, check out our list of the 19 fastest-growing shade trees for your yard.

Happy planting!

Resources

Calvo-Alvarado, J. C., Arias, D., & Richter, D. D. (2007). Early growth performance of native and introduced fast-growing tree species in wet to sub-humid climates of the Southern region of Costa Rica. Forest Ecology and Management242(2-3), 227-235.

Duryea, M. L., & Malavasi, M. M. (1993). How trees grow in the urban environment. Florida Cooperative Extension Service, Institute of Food and Agricultural Sciences, University of Florida.

Fitzpatrick, D. (1994). Money trees on your property: profit gained through trees and how to grow them. Inkata Press Pty, Butterworth-Heinemann.

Thomas, A., Priault, P., Piutti, S., Dallé, E., & Marron, N. (2021). Growth dynamics of fast-growing tree species in mixed forestry and agroforestry plantations. Forest Ecology and Management480, 118672.

Who doesn’t delight in a nice, sunny day, right? On the flip side, sometimes it is just nice to soak up the shade and bask in the cool breeze that only occurs right underneath a tree. Maple trees might be the tree to give you this moment of respite during hot summer days!

These trees have large canopies, grow tall (and fast), provide syrup, and are great, sturdy additions to areas all over North America.

Maples are not only beautiful and useful, but are also resilient and reliable. 

As you consider what might be the best shade tree to invest your time and money into, maple should be at the top of your list. This tree could be your best option, depending on factors like where you live, and what you are looking for. Stick with us for a while so that we can go over all the basics. You’ll leave feeling informed and prepared!

Maple Trees Are Great For More Than Just Shade

Let’s start off with the main question on everyone’s mind. Are maple trees good shade trees? Yes, maples are wonderful shade trees, for many reasons. 

You can rely on these trees to grow quickly. Maple trees are tall, have a wide canopies, live a long time, provide added benefits like sap that can turn to syrup, and provide shelter from not only the sun but also from other elements. 

They Have Large Canopies

The distinction between a regular old tree and a shade tree has to do with the canopy- how dense it is, how wide it spreads, how tall the tree is, and how the height reflects the canopy’s ability to throw its shadow so that it can provide shade. 

A maple tree, however, has a canopy that will reach 30 to 50 feet wide in most cases – which provides a very large shadow! 

Maple Trees Are Diverse

Maple trees have their preferences about the environments in which they can grow and thrive, but this is no different from any tree. 

Generally, with well over 100 species of maple trees, you will find a species that fits any given environment that trees can grow. It’s safe to say that maples can be found virtually everywhere in the United States.

They Grow Tall!

Maples trees grow up to about 2 feet, or 24 inches, per year. This makes them medium-fast growing trees and, at maturity, they might stand anywhere from 30 to 150 feet tall. What a range!

Between the height of the tree and the spread of its canopy, you are sure to find some great shade underneath.

Since these maple trees are able to grow quickly and adapt well, they might just be the right option for your next shade tree.

Maple Trees Thrive In A Lot Of USDA Zones

Maple trees do best in USDA hardiness zones 3-9 overall, but most prefer the slightly more temperate climate in zones 5-9. Their ability to thrive in a wide range of zones makes it possible to find maples all over the United States, and greater North America, even.

Maple trees are seen as one of the best shade trees due to their wide canopy, multifaceted uses, and growth rate.

Now, let’s get to the heart of it all. Here are 6 reasons maple trees are so great.

1. Maple Trees Can Grow All Across North America

A row of maple trees with bright orange and yellow fall foliage line a lane.

There are approximately 132 species of maple trees, which means that each individual species is going to have slightly different requirements and respond best to different things. 

According to the USDA, hardiness zones 3-9 encompass the regions of the United States where these trees are able to grow the best. 

Since the hardiness zones go from 1-13, this means that maple trees are able to thrive in most areas of the United States, especially because the more moderate middle zones make up the majority of environments in the United States.

So, What Exactly Is A Hardiness Zone?

You may be wondering what is a hardiness zone and why do we care about it? Let us to tell you! 

When we talk about the hardiness of a plant, we are referring to how ‘cold hardy’ it is. This is really just another way of saying, “Alright, how cold can it get in a region before the tree starts really struggling?”

So, the USDA hardiness zones give us a helpful set of parameters to determine the coldest it might possibly get in a given zone and, as it follows, what zones are best for what types of plants.

Maple Tree’s Required Hardiness Zone, Explained

The hardiness differs based off the type of maple tree we’re talking about! 

Sugar maple, autumn blaze maple, red maple, and silver maple are some of the most common maple trees to choose from, and each will have a slightly different set of needs to consider as you determine what the best conditions to grow your tree are.

4 Kinds Of Maple Tree Hardiness Zones

  • Sugar Maple: This species of maple grows best in USDA hardiness zones 3-8.  That means that the range of average extreme low temperatures for sugar maple is -40 to 15 degrees Fahrenheit. Here are the best places to plant sugar maple trees if you go this route!
  • Autumn Blaze Maple: This type of maple tree prefers USDA hardiness zones 4-8, just a bit less hardy than the sugar maple listed above.The range of average extreme low temperatures for the autumn blaze maple species is anywhere from -30 to 15 degrees Fahrenheit.
  • Red Maple: Our third species as an example this time prefers to reside in USDA hardiness zones 3-9. So far, this type of maple is the coldest hardy of our listed examples. The range of average extreme low temperatures for the red maple tree has a wide range of -40 to 25 degrees Fahrenheit.
  • Silver Maple: Finally, we have the silver maple species, which can be found in USDA hardiness zones 3-9. Just like the red maple, that means that this species prefers an average extreme low-temperature range of -40 to 25 degrees Fahrenheit.

The good thing about the zones that maple trees grow in is that, since they are in the middle portion of the zone designations, you’ll find that at least one maple-friendly growing zone exists in each of the 50 states.

2. Maple Trees Have Large Canopies That Provide Excellent Shade

Maple trees, similar to their birch, oak, and other tree counterparts, happen to have canopies that are quite large. This makes them perfect for casting shade on even the brightest, sunniest day of the season.

While the maple tree, on average, has a canopy that spans from 30 to 50 feet wide, you might get a better idea of what to expect by looking at a few different examples, like we did above.

  • Sugar Maple: This maple grows to be 60 to 75 feet tall, and its canopy spreads anywhere from 40 to 50 feet wide (they are also amazing maple syrup trees!)
  • Autumn Blaze Maple: An autumn blaze maple is a bit shorter, growing anywhere from 40 to 50 feet tall, with a canopy spread of 20 to 40 feet wide. 
  • Red Maple: This one meets the top two somewhere in the middle in terms of height. Red maples get from 40 to 60 feet tall, and tend to have a canopy that is 40 feet wide. 
  • Silver Maple: This type of maple tree gets between 50 and 80 feet tall, with a canopy that ranges from 35 to 50 feet wide at full maturity. 

It could be best to first search your growing zone, then get an idea of how much space you have that your tree of choice can fill out. This will help you begin to choose the right tree for your exact location.

Now overall, maple trees LOVE sun, which is why they are great to plant in areas where they get plenty of sun.

3. Maple Trees Make Sap (AKA Maple Syrup)

Shade isn’t the only thing you’ll be getting out of this deal! Let’s not forget that maple trees produce sap, which can easily be turned into the maple syrup that we all adore. 

If you don’t love maple syrup, odds are you know someone that does. So, you can keep it to yourself or become the favorite neighbor that stops by with some syrup once in a while. Either way, you’re winning.

And get this – you don’t have to be a pro to get your own syrup, though. Simply grab a tap, watch a few online video tutorials, and you’ll be on your way!

You can learn more about maple sap by reading our article on the different maple trees that produce maple syrup incase that influences your planting choice!

4. Maple Trees Grow Quite Quickly

Maple trees are known for growing at a medium to fast rate, typically. While some trees may take a little longer than others, most are going to shoot up at least a foot per year, often much more. This means that you will have a shade tree relatively quickly even if you are planting your maple as a new tree. 

Of course, it will take some time to get your maple to a size where it covers your desired area of shade, and it will not be able to produce sap until it reaches a certain age. If you start now, though, odds are that you’ll be reaping the benefits of a young-to-mature tree sooner than you might expect. 

Maple Tree Growth Rates

  • Sugar Maple: These trees are said to have a medium growth rate because sugar maples grow anywhere from 12-24 inches per year, which translates to 1-2 feet of vertical growth. On an annual scale, this isn’t bad!
  • Autumn Blaze Maple: The autumn blaze maple has a fast growth rate, growing more than 24 inches, or two feet, in any given year.
  • Red Maple: Much like its relative, the sugar maple, this tree grows at a medium rate. The red maple also shoots up about 12-24 inches, 2-3 feet, per year.
  • Silver Maple: Similar to the autumn blaze maple, the silver maple is also a fast grower with vertical increases in size of over 24 inches, or 2 feet, per year.

You might notice that, unlike the hardiness zones in which maple species might thrive differently, the growth rate of maple trees tends to be comparable.

Read more about maple tree growth rates in our piece on the average maple tree timeline and how long it takes for full growth.

5. Maple Trees Do Well In Many Soil Types

Two types of maple trees, one with bright red leaves in front of one with yellow leaves in the fall.

Not only are maple trees flexible when it comes to the cold. They are also rather adaptable to different soil types, including clay. Maples do best in well-drained soil that is slightly acidic.

For context, many trees are well-suited for many soil types but will draw the line at clay and drier desert-like soils.

If you have a maple that is growing in a climate that is a bit drier, you may be concerned about the amount of water it has access to. 

Perhaps you aren’t around to regularly water your plants, or maybe you’d just like to take one thing off your to-do list. If that sounds like you, we recommend using an irrigation system to help your maple tree get water in dry climates.

This CARPATHEN Drip Irrigation Kit comes with drip emitters, ¼ tubing, and drip connectors, and is a great choice for your yard, garden, and even patio plants.

Use Fertilizer To Sustain The Tree In Different Climates

Beyond that, if you are looking for a way to help sustain your maple tree a little beyond what the soil itself can provide, you may consider using a fertilizer. 

We’ve found that, for maples, that a fertilizer with an NPK of 10-4-6 or 16-4-8 has the best balance of elements that your tree needs. 

NPK stands for nitrogen, phosphorus, and potassium. This acronym helps us easily list the ratio of each of these important elements to one another. 

So, since maple trees need more of the first number, we know that they require more nitrogen, and then slightly less potassium, and, finally, even less phosphorus. 

The Andersons Professional PGF Complete 16-4-8 Fertilizer with 7% Humic DG is a granular fertilizer, which is one of the preferred methods of receiving nutrients for maple trees.

For a more detailed guide, check out our article on the best maple tree fertilizers.

6. Maple Trees are Resistant to the Elements

On top of all of their other benefits, maple trees have been known to protect people and homes against more weather than just the sunThe maple tree itself may just help protect your home and yard from wind damage, harsh storms, and any other severe weather. 

Live maples are wind resistant thanks to their sturdiness, and are often planted in places where they can best offer this protection from the weather.

While we hope you don’t need to utilize your maple for any sort of shelter or protection, it’s good to know that you have a sturdy structure growing right behind you.

Should I Plant A Maple Tree?

Bright orange and yellow fall foliage on large big leaf maples in the forest.

Even as you read through the reasons that a maple tree can be a good shade tree, you might wonder if it’s the tree for you. 

So, is there any reason to avoid planting a maple tree? Well, like every other tree, there are some things to consider as you think about how much time and effort you will put into a maple tree’s growth.

For the sake of giving you as much information as we can, we want you to know what might be a bit more time-consuming when it comes to having a maple tree. 

Reasons Why You Shouldn’t Plant A Maple Tree

  • Maple trees have a very shallow root system, which can end up causing cracks in sidewalks, uneven soil around the base of the tree, and tripping hazards for people and pets alike.
  • Some maple species are invasive, so you want to make sure that you are picking a species that will not overtake other nearby plants.
  • Maple trees are messy, thanks to the helicopter seeds that fall from their branches, and the sap that may drip from any wounds on the tree. 

None of these reasons are particularly, well…bad. They’re just things to keep in mind as you make your decision.

Learn more about the best maple trees by reading our article on the best maple trees to plant – it’ll give you a detailed walkthough on the best ones to plants and where they should go!

That’s All!

Okay, that’s it for now. Rest assured that we have lots more in the way of shade tree writing. So, if you still aren’t convinced that maple trees are the right shade trees for you, you can search our site for more articles on trees that make wonderful shade trees.

So, in closing, maple trees are great shade trees. Also, who doesn’t love maple syrup? It’s a win-win situation!

Let’s recap:

Why are maple trees such wonderful shade trees?

  • Maple trees can grow across the United States (& North America)
  • Maple trees have large canopies that provide excellent shade
  • Maple trees make sap (AKA maple syrup)
  • Maple trees grow quite quickly
  • Maple trees do well in many soil types
  • Maple trees are resistant to the elements

We want to congratulate you for taking the time to do your research before choosing your next shade tree. It’s always better to know before you grow!

It may take some time to get familiar with your tree of choice, but we are confident that you will choose the best species to offer you shade, among all the other great things that a tree has to offer you.

Until next time, good luck as you continue along your tree journey. Remember, we are right here with you.

References:

Bauce, E., & Allen, D. C. (1991). Etiology of a sugar maple decline. Canadian Journal of Forest Research, 21(5), 686–693.

Godman, Richard M., Harry W. Yawney, and Carl H. Tubbs. “Acer saccharum Marsh. sugar maple.” Silvics of North America 2.654 (1990): 78.

Tremblay, M-F., Yves Mauffette, and Yves Bergeron. “Germination responses of northern red maple (Acer rubrum) populations.” Forest Science 42.2 (1996): 154-159.

You planted a maple tree in your landscape because of the shade it provides, and the beautiful fall colors. Possibly it was there when you bought the house, but now your maple’s leaves are turning brown. Assuming it’s not the autumn season, you want to know why the leaves have started turning that nasty shade of mud and what to do about it. 

When maple tree leaves turn brown, it could be because of scorch, too much watering, or not enough watering.

More specifically, there could be root damage, fungus, or problems with the soil that’s causing your maple tree’s leaves to turn brown. Assessing the issue and fixing it soon could save the tree before permanent damage occurs. 

There are several reasons your maple tree leaves could turn brown. A thorough inspection of the tree itself and the surrounding ground can help you understand what is causing the problem. If you can’t figure out what the problem is, you may need to consult with an arborist who can help save your trees. 

There are many varieties of maple trees found around the globe. Most of these varieties are hardy plants that rarely have problems with fungus or pests. When they get planted in non-native areas, though, the conditions can become difficult to deal with.

Most maple trees native to North America are cooler weather trees that don’t like too much heat. The red maple is one species that can handle harsher weather, and they are found as far south as Florida. 

No matter what kind of maple tree you have, when the leaves are turning brown before they should naturally, there’s a problem that needs to be addressed. These are the reasons your maple’s leaves are turning brown. 

1. The Leaves Are Scorched

While this can happen nearly any time during the growing season, it typically happens during the heat of summer. Scorch happens when the moisture in the leaves is removed faster than it can be replaced. 

Extreme heat can cause the leaves to dry out before the tree can pump more water into them, which will cause dried and brown outer edges, while the rest of the leaf turns yellow. As the problem continues to get worse, eventually the entire leaf can turn brown, and then it will fall off. 

High winds can cause the same damage, though it’s not typically as devastating as extreme heat combined with drought. Wind scorch happens when dry air hits the leaves with damaging gusts, causing the moisture in the leaves to evaporate out. 

Scorch can also happen if there is enough damage to tree roots or the tree trunk. When the tree cannot send water from the roots up to the leaves, the environment can dry out the leaves, leaving them susceptible to damage, which will cause them to turn brown. 

Once leaves have been damaged by scorch, they won’t repair themselves. Dried out, brown leaves will never turn green again, so don’t worry about making them look healthy again. 

What you can do is water your tree with a deep drenching. You want the water to penetrate up to two feet into the ground so the roots can get plenty of hydration. Be sure not to over-water the tree, because this can be as bad as the tree getting no water. 

Watering a tree about once a month to once every three weeks is sufficient during dry months as long as the water truly goes deep into the ground. Keep in mind tree roots surpass the canopy. Sometimes they grow several times as large as the top of the tree, so water these areas as well. 

2. Fungus Can Cause Brown Leaves

Brown and spotted maple leaves with holes and damage.

There are a few fungal infections that can cause a tree’s leaves to turn brown and unsightly. Some of these are not life-threatening to the tree and will clean up on their own, while others may need expert help. 

Anthracnose Fungus

Anthracnose is one fungus that causes maple tree leaves to brown prematurely. It can also make the leaves curl up, become distorted, have brown patches across the leaves, and make them drop early. 

This fungus typically shows itself in the lower and inner areas of the tree, but it can work its way farther into the higher branches. Wind or splashing water containing anthracnose spores can spread the fungus. 

If your maple tree is showing symptoms of this fungus, there’s not much you need to do unless it has infected your tree for a few years in a row, and shows significant leaf damage. When your tree has a prolonged experience with severe anthracnose and shows no signs of getting better, call a tree expert to treat it.

Follow these steps when treating this tree malady; water your trees sufficiently during the growing season, but keep water from splashing onto the leaves. Prune affected branches and leaves, and trim to allow more light to penetrate from the canopy. Then destroy any infected fallen leaves, as well as the trimmed leaves, to prevent the issue from reappearing.

Keep your tree as healthy as possible through this time and it should get better on its own. Just be sure to limit fertilization unless soil tests find the ground lacking in key minerals. 

Tar Spot

Tar spot is another fungus that can cause leaves to turn brown, in small circular spots, and then fall off early. This is another non-lethal leaf affliction, especially in larger, established trees. 

The spots may start about ⅛ of an inch in diameter, and look yellow or brown, but they can grow a little bitter as it spreads. Aside from giving the leaves an ugly appearance and causing them to fall early, this fungus doesn’t do lasting harm to the tree. 

To prevent the spread in the next growing season, rake the leaves up and dispose of them. They can be burned—assuming where you live allows for the burning of leaves—buried, or composted. The compost needs to be warm enough to eradicate the spores if you choose this method. 

Make sure your compost pile gets at least 140℉ and you turn the pile frequently to make sure all the leaves get “cooked.”

Fungicides don’t need to be used to treat most cases of tar spot. 

Verticillium Wilt

Verticillium wilt is something that can permanently damage a tree as there is very little that can be done about it. This is a soil fungus that enters through the tree’s roots, then prevents water and nutrients from flowing up through the tree to the leaves. 

Another problem with this affliction is that it can mimic other less destructive symptoms like scorch. Verticillium wilt can occur at any time during the growing season. It also can show up one year, then lay dormant the next year, but it won’t go away on its own.

Unfortunately, no current fungicides work against verticillium either.

Other symptoms of this fungus include loss of foliage on a single branch, which then stops living. It may infect a whole side of the tree. It can also cause stunted growth, and leaf wilting. 

Once it enters the plant, there is no real cure. If the tree is small and new, it is best to remove it and not plant anything in that area until the soil is treated. If the tree is sturdy and established, you can give the tree the best care you can to help it be able to fend the fungus off. 

Keep the tree watered well, but not over-watered, fertilize it with a high-phosphorus content fertilizer and remove any branches that are no longer showing signs of life. 

You may be able to treat the soil by a process that is called soil solarization. Soil solarization heats the soil using the sun’s heat to burn off bacteria, fungi, insects, nematodes, and other soil pests.

First, remove any grass or plants from the area. Then water the ground well. You want the water to create steam from the hot sun. The heat from the steam is what will rid the soil of the fungus.

Next, cover the area with a thick, preferably clear, plastic. Then bury the perimeter to keep it from blowing off and to keep the humidity and heat inside. Leave the plastic to “bake” for at least four weeks during the hottest days, then remove the plastic.

3. Drought Leads To Thirsty Leaves

Trees going through an extended drought can cause leaves to brown and eventually fall off. While trees are more tolerant than grasses and flowers, they can still succumb to the drying effects of a long dry summer. 

Usually, the leaves will wilt when water becomes scarce, followed by a yellowing. If the lack of water continues, then the leaves will brown and eventually fall off. 

Some species of maples are more tolerant of drought than others. The sugar maple is one tree that doesn’t do well in either dry or hot environments and will require more watering. 

If your area is experiencing less than normal rainfall and the soil is becoming hard and dry, you probably need to water your trees to keep them from dropping their leaves. Watering your trees when the leaves have started wilting can bring them back, but once they turn brown, the leaves won’t get green again. 

For more details on the subject, check out our article about why maple trees need so much water.

4. Too Much Water Can Cause Browning

Just as too little water can flip your green leaves to crusty brown, so can too much water. It can be difficult to overwater your trees, especially if you are watering your grass, but in times of extreme rains or floods, this can happen. 

If the environment is to blame for dumping too much water onto your trees, there’s not much you can do. You might be able to go out and implore the clouds to move on to other, drier areas, but I doubt they’ll listen. 

Too much water from rain most likely won’t permanently ruin your trees. Unless root rot sets in which a strong, established tree can usually overcome in the next season. All you can do is wait for the next growing season to see if the tree comes back or if it needs to be removed. 

5. Your Maple Tree Could Be Iron Deficient

Yes, iron is needed for healthy trees too. In fact, iron is an essential block in the formation of chlorophyll. Since chlorophyll gives plants their green color, when there is a distinct deficiency of iron, the leaves can become discolored. 

A mild lack of iron could cause the leaves to turn yellow or white, but if the nutrient is absent for an extended period, then the leaves will transition to bland brown. Since other issues can cause the leaves to change color, the only surefire way to tell if your soil is lacking iron is to do a soil test

To get extensive soil results such as pH levels, and several nutrients including iron, try out this MySoil – Soil Test Kit

A severe iron deficiency in your tree could become expensive to treat. If it’s caught in time, you can probably treat it with an iron supplement such as Southern Ag Chelated Liquid Iron. When a tree, especially a large tree, is severely lacking in iron, you may have to get a professional arborist out to treat it. 

They may do a deep iron soak by tapping into the soil about two feet and pumping in a liquid supplement, or they might add the mineral directly into the tree. After you rule out insects, water problems, leaf scorch, or fungus, then you might have to resort to iron supplements. 

If you’re looking for a maple tree fertilizer, take a look at our guide on when to fertilize your maple tree for some more helpful tips!

6. Overfeeding Can Lead To Brown Leaves

Spots on the leaves of a diseased maple tree

This happens to me at the dinner table and buffets, but you can also overfeed your trees, which can lead to several problems, including discolored and brown leaves. We want our trees to do well, that’s why we water them, prune branches, and add fertilizers. 

Adding too much fertilizer can stress the tree and cause more damage than good. In fact, most trees don’t need extra feeding because they get enough nutrients from their vast network of roots. Unless your soil is in terrible condition, tree fertilizers aren’t necessary. 

Mulching your grass and leaves into the ground and adding mulch to the base of your trees gives them plenty of nutrients to stay strong and healthy. Testing your soil will let you know if you truly need to add any extra nutrients to your yard.

If you need to add plant food for your trees, be sure to follow the recommended doses so you don’t accidentally feed it too much and cause problems like root rot, slowed growth, and brown leaves.

7. Root Damage Harms Maple Leaves

As well as the rest of the tree. When the roots get damaged, it prevents nutrients from reaching the leaves, which can cause brown leaves. 

Most trees, especially big, established specimens, can easily withstand a bit of root damage. When large sections get damaged either by digging, insects, or fungus, the tree can become stressed. If too much of the root system is torn up, then the entire tree might cease to live. 

While you will be able to tell while digging if you damaged the roots of a tree, insect damage might be harder to spot. Some insects can bore into a tree and down to its roots, causing damage. This can prevent nutrients and water from reaching the foliage. 

To spot insect damage, especially from boring pests, look for small round or D-shaped holes along the base of the tree or around the trunk. You might even see small piles of sawdust on the ground as well. 

Insects can damage smaller saplings much faster than mature trees, but a large enough infestation can create serious damage to the mightiest of trees. If you notice boring insects and they seem to cause a lot of harm to your tree, seek the advice of a professional tree service. 

You might be able to treat them yourself, but if you don’t get them all, another generation of insects could come back and infect the tree again.

If you do have root damage on your tree, then it may be a good reason to cut down your maple when you have the chance.

8. Girdling A Tree Is Bad Business

Girdling trees in the forest

When a tree’s bark is removed all the way around, the tree is cut along the entire circumference, or something is wrapped around it and left there, that action is called girdling. This is bad for the tree and can cause fatal, irreversible damage. 

Sometimes this happens when using high-powered trimmers around trees, especially young trees. The strings can hit the tree with such force that it rips away the bark and growth areas of the tree, which prevents it from sending nutrients to the top. If this happens, most times it is fatal to the tree. 

Insects, beavers, deer, mice, or other animals can girdle a tree as they search for food. Alternately, if someone were to tie a tight rope or wire around a tree and leave it for several years, this could cause the same damage. The tree is strangled and starved of nutrition. 

There’s not much you can do to save a tree that has been girdled. Some trees, if the damage isn’t too extensive, might survive it, though most times you’ll have to replace them. 

For many damaged trees, there is still hope! Read our article on what to do to save a tree with stripped bark before you give up!

9. It Could Be Growing In A Non-Hardy Zone

Your maple tree might have been planted in a zone that isn’t conducive to hardy growth. Most maple trees like cooler climes. For instance, sugar maple trees love northern habitats and wouldn’t do well in Texas. 

When purchasing trees at local nurseries, they typically have plant varieties tolerant of local weather. However, with the ability to order nearly anything online, sometimes people get plants that aren’t made for their areas. 

While the trees might do alright during mild seasons, when the extremes hit, the trees will end up suffering. Unless the tree is potted and you’re able to move it inside when the weather outside is frightful, it might not survive more than a few seasons. 

When you are planting trees in your landscape, look for plants tolerant of your zone’s climate. Talk to the people working there as they will be able to tell you which plants and trees will work for your area. Doing so will cut down on the care you will have to provide these trees to keep them strong and healthy. 

When you’re ready to plant, check out our article on where to plant a maple tree to learn where and how to grow a healthy maple!

There You Have It!

When your maple trees start browning before fall, it could be several issues. Some are easy to fix, some need little to no attention, while other problems might require the help of professionals.

Your tree could simply need a good, occasional soaking, some soil supplements, or you might have to call a professional tree expert. Most times the problem can be fixed, and hopefully, by the next season at the latest, your maple trees will be full, lush, and gorgeous once again.

References:

Linzon, S. N., W. D. McIlveen, and R. G. Pearson. “Late-spring leaf scorch of maple and beech trees.” Plant Dis.;(United States) 56.6 (1972).  

Douglas, Sharon M. “Common diseases of maple.” The Connecticut Agricultural Experiment Station (2009).

Horsley, Stephen B., et al. “Factors associated with the decline disease of sugar maple on the Allegheny Plateau.” Canadian Journal of Forest Research 30.9 (2000): 1365-1378.

Lucena, Juan J. “Synthetic iron chelates to correct iron deficiency in plants.” Iron nutrition in plants and rhizospheric microorganisms (2006): 103-128.

Spruce trees are known for their year-round color, as they are part of the evergreen family of trees. Although these hardy trees typically keep a varying shade of green every season, you may notice some needles beginning to turn red.

Why do spruce trees turn red? The important thing to note is that it is not normal for spruce to turn red. Underlying issues such as needle rust, pests, or blight are often behind unexpected color changes.

If you notice this color change, even if it’s only on a few needles, it’s important to investigate and solve the problem as soon as possible. The faster you start fixing it, the easier it is to prevent the issue from affecting the rest of your tree.

Determining The Cause Of Red Needles On Spruce Trees

Before you can truly know how to fix the discoloration on your spruce tree, you need to figure out why your tree is beginning to turn red. A good place to start looking is in the area where you notice discoloration, and ask yourself three questions:

  1. Is it exclusively on the tips of the needles?
  2. Does it spread throughout an entire branch?
  3. Is the red color primarily on areas that get the most sun, or does it show equally in the shaded areas?

If it’s turning red, your spruce tree may be ill, have damage that you haven’t yet noticed, suffer from a pest infestation, or it could even be lacking essential nutrients that it uses to keep its needles healthy and green.

Additionally, reddening can also just be a product of improper care, such as underwatering or overfertilizing. For more information on what your spruce needs in terms of fertilization, check out our article on the 5 best spruce tree fertilizers.

Where Is The Redness On Your Spruce?

Depending on whether it covers a small, select area, or seems to spread throughout the tree can tell you a lot about the cause of the red needles.

For instance, if the discoloration is limited to areas that get the majority of the sun, you can easily assume that a likely cause is excessive heat and too little water.

If this is the case, you can also check the soil around your tree. If it’s also very dry or even cracking, you need to improve your irrigation.

For more information check out our article on how to water your spruce tree.

1. Needle Cast Can Make Your Spruce Turn Red

Needle Cast isn’t necessarily a disease in the way that we would think of human ailments. However, it is a serious condition that needs to be treated as soon as it’s detected.

Signs Of Needle Cast

  • Discolored needles (specifically, brown to red hues, purplish-red or brown, or some yellowing)
  • Needles that drop after changing color
  • Appearance in especially humid, moderately warm weather

Note: Not all afflictions that cause discoloration cause needles to fall from the tree. However, it is a key symptom of needle cast disease. 

What Causes Needle Cast On Spruce Trees?

First and foremost, you need to understand that a needle cast is actually a fungus The fungus in question is often Rhizosphaera Kalkhoffii.

Don’t worry. There’s not a whole lot you can do to prevent it if you’re experiencing very humid weather and temperatures between 65 to 75 degrees Fahrenheit.

With that said, those are the perfect conditions for these fungal spores to really set in, so keep an eye on your trees if that weather lasts for a while.

2. Spruce Needle Rust Can Make Your Spruce Tree Red

A glowing sunrise outlines a pair of Sitka Spruces.

Spruce needle rust is another fairly common cause of spruce trees turning a reddish tone (although many times it looks like a light red, or even almost pink, or a tan-brown color). Now, this is another fungus, not the typical disease we talk about.

The other thing to know about spruce needle rust is that the colors progress over the space of a couple of months. In the beginning, some of the needles have bits that look orangish-white on them (or pieces that seem to come from off the leaves). This is typical of the first month or so when the fungus begins taking hold.

Signs Of Spruce Needle Rust

  • Needles with bits of light orangish-white on them
  • Changing colors as the fungus progresses
  • Needles that eventually turn hues of tan, red, brown or pink
  • Needles begin to fall off the tree after the last color change
  • Typically begins developing in spring when the weather is humid and wet, and not yet too hot

3. Spider Mites Can Make Your Spruce Tree Red

Spider mites are fairly well known to gardeners to attack other, smaller species of plants. However, that doesn’t mean larger species, such as spruce trees, are invulnerable.

In fact, spider mites can be a reason that your spruce tree is turning red or brown.

Spider Mites Are Really Small

Unfortunately, as you may be able to determine from their name, spider mites are exceptionally small.

It’s extremely common for spider mites to go entirely unnoticed until an infestation is well underway, and nearly out of control.

Spider Mites Make Ultra-Fine Webs

A tell-tale sign of spider mites is their ultra-fine webs. These have a somewhat similar appearance to regular spiderwebs, although they’re even finer and smaller. These are even harder to spot when you’re dealing with a large, bushy tree.

However, you can tell when your tree is beginning to suffer from these pests if you spot the damage. You can often spot the beginning signs of damage around the trunk of the spruce, or among the lower branches. You’ll also notice some needles taking on a yellow-brown color.

If you’re familiar with regular spider mites, there’s a difference between those and the ones that are attracted to spruce trees. Spruce spider mites tend to take hold during spring, whereas those that plague the rest of your garden will come when the weather really heats up.

4. Certain Pine Beetles May Cause Redness On Your Spruce

Now, there are plenty of different kinds of pine beetles, and they’re often just as eager to infest a spruce tree as they are any other needle-bearing evergreen tree.

White pine beetles are fairly well known for damaging spruce trees and turning their needles a rusty, reddish-brown color. However, early signs of pine beetles can be seen through the gradual yellowing of needles, and evidence of beetles boring into the tree bark itself.

You may see physical holes in the bark, sap bubbling from holes in the tree, or even granules and dust from beetles digging into the wood.

5. Tussock Moths May Be Why Your Spruce Tree Is Red

Pine beetles may be a burden to deal with, and spider mites certainly are no walk in the park. However, those aren’t the only pests you need to keep an eye out for on your spruce trees.

So, if your spruce trees are turning red or brown, and it doesn’t seem to be because of the aforementioned pests, it just might be tussock moths.

The good news is that if you’re in a more rural area, tussock moths are significantly less likely to damage your spruce trees. However, in areas with a higher population, like cities, tussock moths seem to have the advantage.

Tussock Moths Are Attracted To Blue Spruces

Not only that, but they’re especially attracted to certain species of spruce trees: namely, blue spruces (although Douglas firs are another favorite of these pests).

Blue spruces are already difficult enough to keep blue on their own. Unfortunately, there are some moths and other pests that can prevent your blue spruces from being blue, or even cause them to turn red.

As a caterpillar, they have brown and tan-to-white coloring- often appearing as stripes throughout the body. Another identifying characteristic of the caterpillars is the fuzzy black antennae at the forefront of their heads.

As they grow to moths, they have distinctly dark, charcoal-gray wings with black borders and details.

6. Pine Wilt Can Cause A Red Spruce

Despite its name, pine wilt disease does not affect only pine trees. In fact, it often also affects spruce trees. Nematodes, a type of parasitic worm, are the culprits behind this pesky affliction. And the way trees begin to show damage is somewhat counterintuitive as well.

When we think of worms, we often think of dirt. However, nematodes are a different type of worm. As a result, the damage they inflict on spruce and pine trees actually begins showing at the top of the tree, with browning needles, rather than near the base of the tree.

7. Winter Burn Can Make Your Spruce Tree Red

Spruce trees are well-known as evergreens. Of course, that means that they’re green all year long (more or less). However, one reason your spruce trees might not be green all year is winter burn.

It’s not a literal burn, but rather a condition that can occur as a result of damage to the needles. In particular, it’s damage that occurs during very cold winter months. Note: Winter burn often begins showing at the tops of trees, where the more serious damage starts.

Spruce Trees Need To Be Watered In The Winter Too

Although spruce trees are known to be tolerant of cold weather, that doesn’t mean it’s always an easy season for them. That’s especially true when temperatures are exceptionally low- and even more true when the winds are harsh.

You’re probably used to watering your trees regularly during the summer. What you might not realize is that spruce trees also need to be watered during the winter.

Dehydration, coupled with cold weather and high winds can easily lead to winter burn, which will cause spruce needles to turn brown.

8. White Pine Weevils May Make Your Spruce Red

Despite their name, white pine weevils can actually damage spruce trees, although Norway spruces are one of their favorites.

The good news is these pests usually attach to trees in higher elevations.

These pests feed on the bark and move to mate, after which, they dig holes into the bark to lay their eggs. If you see spots of sap or resin along your tree’s bark, there’s a chance that’s a result of white pine weevils feeding on your tree.

Another tell-tale sign of a white pine weevil infestation is affected branches that begin to droop, and turn light brown giving them a hook-like appearance. You’ll typically see this curve beginning later in springtime, and they will soon fall off the tree.

How To Treat Spruce Trees Turning Red Or Brown

Spruce with slightly red needles against a bright blue sky

Before we take a deeper dive into how to treat your spruce tree, it’s important to keep in mind that one cure won’t fix every affliction.

Because the cure is often specific to the cause, it’s important to know why your spruce tree is turning red or brown. Hence, why we’ve included the detailed descriptions above about identifying the cause of your tree’s discoloration.

However, some of the treatments do have different steps, so it’s important to first diagnose the problem, and then take the proper steps to treat it.

With that in mind, we’ll go over treatment options for each reason your spruce tree is turning red. Not only that, we’ll also review ways you can prevent these problems from happening in the future.

If your spruce seems to not jump back – you may need to cut it down, check out our article on why you may need to cut down your spruce tree.

Treating And Preventing Winter Burn

Even though you can’t control the weather, you can still help your spruce tree avoid the damage of winter burn.

It’s important to remember- one of the main causes of winter burn is dehydration.

You can check the soil to assess how dry or moist it is. If the soil is obviously dry, it’s definitely time to water the tree. But don’t worry, preparing the soil before winter can also help retain moisture. The best way to preserve moisture in the soil over winter is by adding mulch.

If you’re looking for a good mulch, we recommend Mighty Pine Mulch.

Treating Needle Cast And Spruce Needle Rust

Because needle cast and spruce needle rust are both afflictions that arise because of a fungus, most of the treatments are the same. For that reason, we’re grouping their treatments together.

The first thing to do is reduce excess moisture on your trees. Basically, if you have irrigation or sprinklers that also spray water onto your tree’s needles, direct them to another part of your yard.

Pruning Your Spruce Can Help

You can also prune your spruce tree to eliminate some branches within the bulk of it.

The goal here is to enable more ventilation (airflow) to the inner branches of your tree. In turn, this extra air will help wick away some moisture, making that part of your tree less susceptible to fungus.

Did you know that pruning can also keep the size of your tree manageable in the long run? Read more about it in our article on 6 simple steps to keeping a blue spruce tree small.

You May Need A Fungicide

While the measures above can help prevent it, if the fungus takes hold, you’ll need to use a fungicide. There are different fungicides you can use.

In the case of spruce needle rust, you can often forego fungicide treatments, unless the needle rust becomes severe.

If either needle cast or spruce needle rust is a recurring problem, you may need to use a preventative fungicide.

Copper-based fungicides are popular for preventing these issues, just like this Southern Ag Liquid Copper Fungicide.

Getting Rid Of Spider Mites

Spider mites are pesky pests, and they’re not easy to get rid of. Unfortunately, there aren’t many options to get rid of them without using a pesticide.

Of course, not all pesticides are created equally. There are certain types you can use, which are more eco-friendly and won’t harm other trees and plants around your spruce.

If an infestation is bad enough that it’s damaging your spruce tree, it needs treatment. Before you spray any pesticides on your tree, always check to make sure they’re not going to harm your tree as they get rid of the pests.

Simply giving your tree a good spray with water beforehand will help the efficacy. This helps dislodge some of the pests, which gives the treatment a head start.

Treating Tussock Moths

Tussock moths, much like spider mites, are best done away with by using a pesticide. However, they are easier to spot, which means prevention can be a key factor in keeping your spruce trees healthy.

You probably won’t know you have a tussock moth problem until your spruce tree suffers damage. And even after you treat your trees, you’ll want to keep an eye out for cocoons and tussock moth caterpillars the next time spring comes around.

If you do notice some cocoons, carefully remove them, and treat your tree again, if it’s within the acceptable time frame (some treatments should only be used every few months, so check the instructions).

In some cases, there are sprays that actually deter these pests for up to 12 months. If you’re looking for a low-maintenance solution that lasts, try BioAdvanced Tree and Shrub Protector.

Dealing With Pine Wilt On Your Spruce

Pine wilt disease is perhaps the most serious of all the afflictions we’ve covered. Unfortunately, because the nematodes spread very quickly, there’s not much you can do. Not only do they spread throughout the tree, but they also spread to surrounding trees.

Before you take drastic steps, you need to verify that your spruce tree does, in fact, have pine wilt disease. Why do you need to be absolutely sure? Because it’s commonly known that the only kind of solution is getting rid of the infested tree.

Unfortunately, if you leave the tree as it is, it will only allow the disease to spread to other plants and trees.

Treating White Pine Beetles And Weevils

While these are different pests, they have a lot of the same habits. As a result, you’ll need to treat them in similar ways. When you treat for white pine beetles and white pine weevils, prevention is key.

Adults typically nest over the winter and then mate and brood around the tree, allowing their offspring to take over the trees in the next spring.  Because of that, you need to spray trees in the spring, or you can choose a more holistic pesticide and apply it during the fall.

You typically only need to spray the main branches, or ‘leaders,’ which will help get rid of the larvae that like to hide in there. However, you don’t have to rely on only chemical methods. You can also carefully prune away branches where the pests have burrowed within.

The Takeaway

As soon as you see your spruce tree turning red or brown, you need to diagnose the issue. Finding the cause behind the discoloration is crucial.

Whether it’s winter burn, a fungus, or a pest infestation, you need to know what it is in order to properly treat it. Once you’ve treated the issue, do everything you can to prevent it from coming back.

References:

Burke, M. J., Gusta, L. V., Quamme, H. A., Weiser, C. J., & Li, P. H. (1976). Freezing and injury in plants. Annual Review of plant physiology, 27(1), 507-528.

Fischl, G., Csöndes, I., Kadlicsko, S., & Józsa, A. (2008). Study on the factors provoking the reddening and decline of blue spruce (Picea pungens Engelm.). Növényvédelem44(8), 401-402.

Heiniger, U., & Schmid, M. (1989). Association of Tiarosporella parca with needle reddening and needle cast in Norway spruce. European journal of forest pathology19(3), 144-150.

Lewis, K. J., & Lindgren, B. S. (2002). Relationship between spruce beetle and tomentosus root disease: two natural disturbance agents of spruce. Canadian Journal of Forest Research, 32(1), 31-37.

Whitney, R. D. (1962). Studies in forest pathology: XXIV. Polyporus tomentosus Fr. as a major factor in stand-opening disease of white spruce. Canadian Journal of Botany, 40(12), 1631-1658.

Chestnut trees have incredibly long lifespans in comparison to many other trees. They can also grow quite tall, and provide nuts that are used for so much more than roasting on an open fire. If you’ve been thinking about growing this new tree, how do you do it?

It takes chestnut trees 3-7 years to bear nuts. If you plant this tree from a seed, it may take a little longer to see nuts produced. A healthy chestnut tree should grow about 12-84 inches per year, depending on the species. They will reach from 80 to 100 feet tall in most cases, sometimes more.

Let’s dive into the timeline of a chestnut tree, what it takes to sustain it, and what you should expect along the way. We’ll even talk about some tips for growth, maintenance, and choosing the perfect location. So, stick with us, and let’s get into it!

What is a Chestnut?

According to the USDA Forest Service, nuts are actually a type of dry fruit. They are specifically defined as dry, single-seeded fruits with a high oil content that are enclosed in a protective husk that is usually a leathery outside layer. Chestnuts fit right into this category.

In taste, these nuts are crunchy and bitter when left raw. When you cook them, though, or roast them, they become softer, sweeter, and even buttery. 

Where Do Chestnuts Grow?

Chestnut trees grow in a wide range of climates, making them as versatile as they are long-lasting. The main needs of this tree are lots of sunlight and loamy soil that drains well. 

You’ll find chestnut trees growing in USDA Hardiness Zones 4-9. This represents the average minimum temperature that a tree can survive, in extreme winter situations. So, zones 4-9 mean that a chestnut tree can handle extreme lows of -30 degrees Fahrenheit to 25 degrees Fahrenheit.

Chestnut trees often grow in the eastern United States from Florida up through New England. They can also be found from the Ohio valley all the way East through the Carolinas. This chunk of the midwestern and eastern U.S. is the most common place to find chestnut trees, though they are located throughout the states.

How Quickly Does A Chestnut Tree Grow?

It is going to take some time for your chestnut tree to fully mature. You can expect it to come to maturity at 15-20 years of age, quite sometime after it has already begun producing fruit, but long before the end of its life cycle. Part of this growth rate will depend on how the tree first got established, your location, and other environmental factors.

A chestnut tree will take 3-7 years to begin producing chestnuts, and, of course, a sapling will provide you fruit much more quickly than a tree that you’ve grown from seed. 

When planting a sapling, whether store-bought or propagated from an existing tree, there is less work required to establish the tree into its environment. A tree planted from seed will always take more time to fully get going. Most chestnut trees are planted from seeds, as this is an easier process than propagating. 

How Long Does It Take To Grow A Chestnut Tree? Full Timeline

At this point, you might have made your decision about whether a chestnut tree seems like the right fit for you. Say you want to grow a chestnut tree, but now what to know what you should be expecting next. How should you navigate the process as it unfolds over the years?

As long as your area falls into USDA growing zones 4-9, gets even and direct sunlight, and has the right soil, it should be quite easy to grow your own tree. Most of these factors can also be mimicked if you choose to grow a tree in a container and/or indoors. You want to keep these factors in mind, along with proper maintenance, to ensure your chestnut tree’s success.

These incredible trees will do just fine when provided with the right keys to their success. So, let us walk you through the most important steps along the way to growing a healthy, productive chestnut tree.

Day 1: Finding The Right Chestnut Seed (or Sapling)

To begin, you’ll want to decide whether you want to start off with a seed or a sapling. Your experience level, what you want from your tree, and your location will play into this decision.

If you start from a seed, the process is simple. In fact, we recommend this route because of its ease when compared to propagating a sapling. So, let’s go through the steps:

Steps for Planting a Chestnut Seed:

  1. Gather your chestnuts from the ground, or harvest them off the tree in early October. 
  2. Store the chestnut in a cool, dark place until you see the husk split open
  3. Allow the chestnuts to germinate. You should place them in a bag or bucket with holes.
  4. Fill the aerated container with peat moss, surrounding each individual chestnut (free from the husk at this point.)
  5. Store the chestnuts in a refrigerator at 32-34 degrees Fahrenheit for at least 2 months, but up to 3 years in order to properly germinate.
  6. Plant your germinated chestnut seed indoors during early spring, but ensure that the temperature is at least 70-80 degrees Fahrenheit

Keep in mind that this is just the initial step because you’ll end up transplanting your chestnut tree into the ground outside, or into a bigger pot indoors.

Day 1 – Day 90: Planting a Chestnut Seed Indoors in February-March, or Outdoors from May-June

As your germinated chestnut gets established in the soil and begins to form into a seedling of its own, you’ll want to plant it in a different container or perhaps even outdoors. The controlled environment of the container will help it to get established, but then it is up to you to move the seedling where you see fit. 

This brings us to our next steps:

  1. Plant the chestnut indoors around February or March. Seeds will need to be located on a warm, sunny window sill, or in a greenhouse if you have one. So long as the temperature is 70-80 degrees Fahrenheit, you’ll be in a good position.
  2. Your container should be able to hold potting soil without making a mess while maintaining a high level of aeration.

If you do choose to put your young tree outdoors early on, you’ll want to wait until May or June for this step, after allowing it to get established in a warm, controlled, indoor environment. This will then let your chestnut seedling establish itself outdoors before the next cold season comes around.

Where to Plant your Chestnut Seed

According to the State University of New York, chestnut trees prefer soil that is sandy to loamy in texture, well-drained, and acidic in order to thrive. Soil that is wet, basic, or clay on a permanent basis is an immediate red flag when it comes to growing a healthy chestnut tree.

If you find yourself in the U.S. and want to find the best region to plant or confirm whether your region is suitable, you can refer to the USDA Plant Hardiness Zone map.

Chestnut trees prefer to grow in the USDA hardiness zones 4-9, in the temperate regions of the United States.

What is a USDA Plant Hardiness Zone?

The USDA has a map of the country’s different growing zones, so that people can see which plants best grow in which zones within the United States.

These maps define hardiness, or growing, zones across the United States which refer to the average extreme minimum temperature an area can have while sustaining a thriving tree. Since chestnut trees fall into the middle zones, they are medium-hardy and require temperate regions to thrive.

These USDA hardiness zones are divided into zones defined by intervals of 10 degrees Fahrenheit. Those zones are then further split into the letters A and B, as a way to define the higher and lower halves of the 10-degree temperature range. “A” signifies the lower 5 degrees of the range while “B” marks the higher 5 degrees.

Even if a tree can physically survive in certain extremely low temperatures, these are still extremes. You should never refer to the hardiness zones as a marker for average temperatures in an area you look to plant in. These are meant to tell you the coldest temperature range your tree can handle for short periods of time and should be adhered to as such. 

The Early Months – Year 1: Watching your Chestnut Tree Get Established

The early stage, the first year or so, is a pretty vulnerable time for your tree. Pay attention to any potential dips or lulls in progress, especially when you have begun with a seed itself.

(If you decided to purchase a sapling, you may be able to avoid this part of the process as a whole.)

No matter how your tree’s life began, there is always a risk in the early stages. The tree is still finding its way, looking to establish itself, and working to adjust to things like weather, wildlife, and even human interference.

We recommend that you begin your planting process indoors, in a well-aerated container, to give your chestnut tree the best chance of success.

This will help you to establish your plant before bringing it out into nature itself. If your sapling is old enough, or large enough, though, it could go directly outdoors. That part depends on the sapling!

Year 1 – Year 2: Sustaining a Healthy Tree

At this point, you can begin to focus on your tree as a sapling, as opposed to an extremely young seedling. Regardless of your starting point, your tree is on its way to being a slightly-more-mature sapling by now.

You should expect to see some changes in growth as you prepare to transplant your tree, especially if it goes from a container to the ground outside. This is normal, as the environment will be quite change for your young tree.

Differences Between Indoor and Outdoor Growth

Inside, you will be able to control the moisture, to a degree, the temperature, and any other external factors that your chestnut tree may experience. Indoor growth, especially for a seedling and a sapling, can provide the structure a tree needs to later thrive outdoors. Or, you can keep growing your tree inside for good, if you prefer.

Outside, more elements will be just out of your control. You can pick an area with a certain temperature, humidity, and environmental factors, but that’s about it. You can’t always control what comes next for your tree and its progress. 

It will likely take your tree time to acclimate if you move it outdoors after its early months or years were spent inside. Give it some time, space, and extra TLC. Your chestnut tree should adapt after a while, and will be all the better for it!

How to Transplant your Chestnut Tree Sapling in May or June

Finally, we come to our next steps in the process. So, let’s continue our list from earlier on, and see what comes after germinating and initially planting your chestnut seed:

  1. Chestnuts need loose, well-drained, acidic soil. They might start out best with a soil-less potting mix made of decomposed bark, but once you get to the outdoors you’ll have to work with your environment. Add some decomposed material to help maintain aeration, preserve the root ball, and keep the seed from rotting in soil that is too compact for it. 
  2. Plant the nut ½ to 1 inch deep, flat side facing down. Soil should be kept moist and occasionally receive some fertilizer.
  3. Mid-May to late June is the best time to transplant, just like if you had planted the seedlings earlier on. You’ll want to introduce the seedling or sapling to the outdoors by allowing them to be placed outside in the sun and wind at increasing intervals, before fully transplanting them.
  4. When planting the seedling or sapling, your hole in the ground should be twice the size of the root ball. Remove the rest of the nutshell that is attached to the root, so that animals cannot pull them back up to eat the chestnuts.

Year 3 – Year 7: Chestnut Production Begins

Once your chestnut tree gets to the stage of maturity where it can begin producing fruit, chestnuts, things become pretty simple and straightforward. Now, your main concern is maintaining the tree and harvesting the nuts. This begins during years 3-7 of your tree’s life. 

A tree that began as a seed may take longer than one that you bought as a sapling, or propagated from an existing tree, complex as that process may be. 

Chestnuts will likely get better, and your tree will continue to be more prosperous over time. So, don’t sweat it if the first few years don’t bring you the best chestnuts you’ve ever seen.

Year 8 – Year 800 (and Beyond): A Mature Chestnut Tree Produces Nuts

No, our heading is not a typo…yes, you are reading it right.

Some chestnut trees can live up to 800 years, and certain species may have an even longer lifespan than that. As you can tell chestnut trees are incredibly long-lived and stable. The exact lifespan depends on environmental factors, nutrition, and maintenance.

One great way to give your chestnut tree a boost that will keep it going for as long as it can? Fertilizing! We’ll dive into this more below as we talk about best maintenance practices, but it is a tried and true way to support your tree throughout its life.

As your chestnut tree begins to get older, you will be getting older, too. So, do what you can to sustain your tree for future generations to come!

Does it Matter if You Grow a Chestnut Tree From a Seedling or From a Sapling?

The way that you choose to plant your chestnut tree mostly boils down to personal preference.

If you want to start from the very beginning, you’ll get the satisfaction of knowing that your tree’s progress was truly organic. If you start from a sapling, you’ll have the peace of mind that your tree is already partially established, and should thrive throughout its maturing years.

Propagating chestnut trees from cuttings, which would start you out with a sapling, is actually much more difficult than just planting some chestnuts and seeing where that takes you.

If you still can’t quite decide whether you want to start from seeds or an established sapling, you should consult someone at your local nursery. Professionals in your area may have some context that you don’t and could help guide you through this initial part of your chestnut tree journey.

Can Chestnut Trees Be Grown Solely in Pots?

Yes, you can easily grow chestnuts in a container like a tree tube or another pot.

Of course, a potted chestnut tree can be great when you have a sapling but have not yet decided on a permanent location for it. The pot can end up being this tree’s lifelong home, though, too, if you prefer. 

All that you need to successfully produce a container-grown chestnut tree is the right soil, an appropriate-sized pot, and the will to take care of an especially domesticated sort of tree.

Sustaining your Chestnut Tree

Chestnut trees do their very best in sunny locations, with loamy soil that drains well and has a pH between 5 and 6.5. These trees grow in a wide range of climates but do appear to thrive most in places that experience hot, humid summers. 

USDA hardiness zones 4-9 are best suited to sustain chestnut trees, and this is where you should look to be if you plan to plant (or transplant) one of your own. Even, direct sunlight is key and means that the location in a yard matters just as much as the geographical location you choose to plant in.

You can begin growing your chestnut tree in a container and then, as it matures, choose to keep it in a pot or transplant it into an appropriate area. If you are unsure of what might be best for you and your tree, talk to a professional. That’s what they are there for, after all!

Water When It’s Hotter

So, watering your tree makes that big of a difference, huh? It does! Chestnut seedlings will need the most water when compared to other stages of this tree’s life because they are working the hardest to establish themselves. 

As your tree gets older, it will need less water. In fact, after a couple of years, as your tree begins to mature more, you can typically let nature run its course and only water once in a while. When it’s hotter or drier out, you may need to pick up the hose a little extra. 

For more detailed instructions on when and how to water, check out our watering schedule detailing how much water chestnut trees need.

If you’re worried about underwatering or, in this case, overwatering your tree, you should opt for an irrigation system. These don’t have to be industrial, like the ones you see watering fields, but instead can be perfect for your yard. We recommend the CARPATHEN Drip Irrigation System.

Prune to Evade Doom

If you want to sustain a fuller appearance and keep dead leaves from acting as an energy suck for your tree, you should prune it every once in a while. You can use shears like the gonicc 8” Professional Premium Titanium Bypass Pruning Shears

Pruning not only helps aesthetically, but can support the key functions of your tree, its growth, and its production of chestnuts. 

It’s overall quite beneficial. If you don’t feel like doing this yourself, there are plenty of professionals that would be happy to support you in this task.

Fertilize to Sustain Healthy Life

It is actually recommended that you do not fertilize a newly-planted tree right away. You should try to instead wait until its second or third season to introduce any fertilizer.

While this is something that is often referred to as a life-sustaining addition to your tree, its first year should be about focusing on establishing a root system.

Why would fertilizer hinder this? Well, fertilizers encourage trees to focus on the production of leaves and, eventually, fruit. So, wait to fertilize until roots are established.

You can use a product with an NPK ratio of 5-10-5 or 10-10-10 for best success. NPK stands for nitrogen, phosphorus, and potassium, and refers to the ratio of these important elements in a product.

We recommend starting with Southern Ag’s All Purpose Granular Fertilizer for your maturing chestnut tree. It’s great because it comes in a 5-pound bag that you can easily spread around the base of the tree. Afterward, just add some extra water to help it mix into the existing soil!

That’s A Wrap!

It’s time to wrap up for now! We hope that this timeline helps you feel prepared in growing your very own chestnut trees. You’ve got this!

As a quick refresher, the timeline should look a little something like this:

  • Day 1
    • Pick your chestnut seed or sapling
  • Year 1
    • Plant your chestnut tree and watch it begin to grow
  • Years 1-2
    • Sustain the early growth of your chestnut tree
  • Years 3-7
    • Chestnut production begins and increases
  • Years 8-800 (and Beyond)
    • You have a mature, nut-bearing chestnut tree that is ready to be maintained

This process should be a pretty fun and exciting one, no matter how you chose to initially begin growing this tree. Frankly, you can grow the tree indoors or outdoors, in a pot or in the ground, and still get delicious chestnuts. In the end, you’ll have a result that is quite the same. 

Congratulations on embarking on this latest tree journey, and thank you for allowing us to be a part of it. We’re happy to provide any guidance that we can to make things easier for you. 

References

Heavren, S. (2020, Fall). The Perfect Tree: The American Chestnut Tree in American Culture, Economics, and Science in the Nineteenth and Twentieth Centuries.

Paillet, F. L. (2002). Chestnut: history and ecology of a transformed species. Journal of Biogeography29(10‐11), 1517-1530.

Wang, G. G., Bauerle, W. L., & Mudder, B. T. (2006, May 01). Effects of light acclimation on the photosynthesis, growth, and biomass allocation in American chestnut (Castanea dentata) seedlings. Forest Ecology and Management226(1-3), 173-180.

All maple trees produce sap, but usually when we’re talking about the maple that produces sap that eventually turns into syrup, we’re talking about the sugar maple (Acer Saccharum). Earning its name from the sweet sap it produces, the Sugar Maple is an American northeastern and Canadian native, and it’s so popular and pleasing to look at, that two states have made it their state tree – Vermont and Wisconsin. 

Maple trees produce sap during a very small window of time. Temperatures dictate when the sap season begins and how long it lasts. The sap season starts in January when temperatures are beginning to rise above freezing and ends in April when the temperatures hit a consistent temperature above freezing.

Read on to find out which maple trees produce the best sap and what time of year they do. We’ll also dive into the equipment and some tips to harvest that sap to turn into syrup, in case you feel like topping your pancakes with your own homemade maple syrup (yum!)

The Maple Tree is one of America’s biggest timbers, with sugar maples reaching anywhere from 50 to 130 feet. The fewer neighboring trees a Maple has, the larger it gets.

The top of the Sugar Maple is round with compact leaves and branches. A tree whose inner workings rely on the cold as much as it relies on the summer heat, it’s a fairly hardy tree.

A beautiful and imposing presence, the Maple Tree is a North American classic.

If you’re looking to grow a maple tree check out our maple tree growth timeline!

There Are A Few Maple Trees With Usable Sap

Another source of sap would be the Black Maple (Acer Nigrum) or Red Maple (Acer Rubrum), although, they may not be considered the most favorable choices.

The Black Maple which also produces sap will do a similar job as the Red Maple, and although it may be quicker, it doesn’t produce sap that is the same quality as sap from the Sugar Maple. For this reason, the Black Maple is not typically sought out. And although you can get sap from a Red Maple (Acer Rubrum) as well, this sap is, unfortunately, less sweet and the window to get the syrup is much smaller. 

Red Maples buds break earlier in the year. Bud breaking is when, as the name suggests, the buds of the tree begin to break through the surface. It’s when the next stage of a tree’s cycle begins (and the start of spring at that) and at which point, the sap’s taste begins to change and it’s no longer a viable syrup source. Well, at least not like a tasty syrup!

If you want to learn about more trees that produce syrup-worthy sap, check out our article on the five trees that produce maple syrup!

How To Tell Sugar, Red, And Black Maples Apart

Red Maple and Sugar Maple are very similar looking and often confused. Both produce sap but the Sugar Maple is favored for that resource.

To tell the two apart you usually look to the leaves. A Maple Tree’s leaf looks like a hand with its fingers extended out. A Red Maple will have more indentations and grooves along the edges of the leaf while Sugar Maples are smooth.

To tell a Black Maple from a Sugar Maple, again, we turn to the leaves! As stated above, Sugar Maple leaves have more round, less jagged edges. Black Maple leaves have more of a drooping look and their leaves have almost a hairy texture to them. 

When fall rolls around, you might even get a stronger clue. Sugar Maple leaves turn a very vibrant orange during the Fall season while Black Maple leaves tend to be more yellow. This may seem like a tiny detail, but when two trees are hard to tell apart, you gotta take what you can get!

Check out our article about different types of maple trees to learn more!

So, What Is Maple Tree Sap Anyway?

Sap is made up of water and the starch found in the roots of a tree that gets transformed into sucrose, i.e. sugar. The reason why Sugar Maples are so favored for their sap is they tend to have a higher concentration of sugar, meaning, it can be used to make more syrup because there’s more sugar to go around.

And isn’t that the end goal of it all? 

Now, how does that sap get from inside the tree to outside the tree and onto our pile of French toast? During the season when the sap is thriving, temperature plays a key role in getting the sap from inside the tree to inside our local waffle House – so, let’s talk about its movement below!

How Does Maple Tree Sap Move?

During the day, when temperatures are above freezing, the heat pushes the sap up through the tree and if there is an opening somewhere on that tree, the sap will pour out of it. That’s why we tap trees!

At night, when the temperature drops below freezing, the drop creates suctioning; pulling the water up through the leaves, mixing that water with the sugar and creating MORE sap. 

So, which maple trees have sap, and how can I tell? Keep reading to find out!

What Environmental Factors Will Increase A Maple’s Sap Output?

Large maple tree in a grass field with a clear blue sky.

There are a few things that will increase a Maple’s Sap supply like location and nitrogen availability – let’s talk more about that below!

Location! Location! Location!

As discussed earlier, a great way to tell how good a Maple Tree’s sap supply will be is where it is in relation to other trees.

A tree that’s going to give you more sap is a tree that isn’t competing with a lot of others. Specifically, you want a tree whose crown is not competing with other trees – I guess you can say the tree will be very full of itself. A Maple Tree that has a large and healthy crown will actually provide more syrup than a tree that has grown in a tight and enclosed space.

According to Pennsylvania State University, trees grown without competing forestation can produce from 15 to 20 gallons of sap in a season. A Sugar Maple Tree grown in a forest, with competing growth, will give offer about 10 gallons of sap in one season. Tapping a tree squished between other Maples is gonna halve the amount of sap you are able to retrieve. 

The expensive supermarket prices for Maple syrup are starting to make a lot more sense now…

Check out our article on how and where to plant your maple tree for the best results in your own yard.

Nitrogen Availability Affects The Sap Supply

This isn’t a tip you always want to put into practice but can be beneficial for maple trees. Maple Trees LOVE nitrogen and a study published by the University of New York shows that an increase in nitrogen will also increase the sugar levels in the sap. Which, then, of course, increases the syrup output.

The reason why you may want to hold off on increasing the nitrogen in the soil (which would be a quick way to get it into the root system and into the body of the tree) is that just like how nitrogen can flow from the soil into the roots, it can also flow from the soil into any neighboring water sources, which can pollute nearby water.

Those water sources could be used for plants that aren’t happy with lots of nitrogen in their system and no one wants to negatively impact one plant at the expense of another! 

All that being said, if you live in an area where there are natural stretches of land with higher nitrogen in the soil, you’re gonna have a great and healthy spot to plant your maple.

For a more detailed guide, check out our article on how to fertilize your maple tree.

When Is Maple Sap Season?

This is the question that requires a little work on your part, but don’t worry, it’s not a difficult task. Sap season happens at the end of winter/beginning of spring but it’s less about the exact dates and more about the conditions

Before we dive into the little bit of work, you should actually learn some info about what conditions are necessary for sap to be available to tap. But DON’T WORRY, it’ll be quick, easy, and painless!

Seasonal Conditions Required To Produce Sap

There are a couple of things you’re gonna need from Mother Nature for sap to occur in healthy supply. 

Rain:

Water is one of the main properties of sap so to get a lot of sap, you’re gonna need a lot of water. To get a healthy size of sap from a maple tree, the previous summer there needed to be a good amount of rain. 

Snow:

Temperature is also a key part of sap abundance. When it’s time to tap a tree for sap, you’re going to need certain temperature qualities at play for the sap to move up through the tree.

A Look At A Sap Season Timetable

I know what you’re thinking – can you just answer the question…? Absolutely. Well, sorta. Just a little more background information is involved than just a straight answer! Basically, the sap season depends on what the temperatures are like in your specific area. Get a calendar that tells you the temperatures in your area from January to April/May. 

To find the start of sap season, look at January and figure out when the temperatures are no longer just steadily below freezing but actually fluctuating from below to above freezing- that is your start time. To find the end of the season, look to March/April/May (if you’re lucky enough to live in an area with extra long springs), when you see steady above-freezing temperatures – this is your end date.

So, for all the time between those fluctuating temperatures to when the temperatures hold firm above freezing, that whole stretch, is sap season.

Now The Fun Part: How To Collect Sap

Collecting Maple Sap In Winter

What if you live in an area where Sugar Maples flourish in abundance and you want to tap your own sap to make Maple Syrup? You can!

Sap tapping (this is not the technical name…) is an activity lots of people love and have even built small syrup businesses out of!

It is an endeavor and you will have to get special equipment, so only embark on this journey if it really excites you and you plan to do it safely (remember you’re dealing with a pretty cold time of year!). 

There are many delicious syrup brands you can get without ever having to step ONE FOOT in the woods. Like this delicious Coombs Family Farms Organic Maple Syrup!

The Need To Knows When Collecting Maple Tree Sap

However, if you really want to tap a tree on your own – there are a few things to remember! The size of the tree, the equipment you use, and certain things to avoid.

How Big Should The Maple Tree Be To Collect Sap?

The size of the maple tree really matters when you’re collecting sap! Here’s a quick rule of thumb when deciding which tree to tap.

  • 12” or less in diameter: don’t tap
  • 12” to 18”: tap one hole
  • 18” and up: tap two holes

You never want to tap more than two holes per tree. It messes with the pressure building inside the tree which is necessary to move the sap throughout it.

How To Use A Sap Spout

Just like when you hang a picture, you want the drill bit you use to create the hole to match the size of the spout the sap is gonna pour out of. A great set that you can try out is this Dewalt Drill Bit Set!

For the spout, you’re going to want to use something that is durable & easy to clean. Liberty has a highly rated Stainless Steel Tap that has a little hook on it, making it easy and convenient for hanging a bucket under. It’s made of steel, so it’ll be easy to clean and won’t crack.

You’re also gonna want to be VERY CAREFUL when you’re putting the spout in – splintering the wood around it will just create more cracks in the tree, the sap will pour out from all the cracks, which will miss your bucket – and in turn, your plate.

What To Avoid When Tapping A Tree

  • Don’t tap old wood. Make sure to tap only clean, white wood. Discolored wood could mean decay, and you’re not going to want to chance getting decay mixed up in the sap you could eventually be consuming.
  • Don’t tap old holes because it could lead to cracking and as we’ve already discussed, you DEFINITELY don’t want that.
  • Don’t use any sort of sanitizing agent.
  • Don’t leave spouts in the tree! Make sure to remove the spouts at the end of the season. Firstly, you paid money for that thing, you don’t want to lose it. Secondly, a lot can happen in a year- that spout could be knocked about, and it can create cracks that you’ll regret when you go back the next year!

How To Turn Maple Sap Into Syrup

There are a few things to remember when collecting the sap, and then turning it into syrup. Let’s talk about these below.

Collecting The Sap

You’re going to want to get sanitized buckets and jugs for collecting the sap. For some great options, check out these cute Tiawudi 2 Pack of Collapsable Plastic Buckets, that are perfect for collecting sap!

Each day of collecting, you’re going to be able to collect about one gallon of sap. Until you have the chance to boil your sap, you’re going to want to keep it below 40 degrees Fahrenheit. Maple Sap is a natural resource – and can spool. And it will spoil much quicker if it gets above 40 degrees Fahrenheit.

Before boiling the sap to turn it into syrup, you must filter the sap to clear out any debris that might be floating around – check out how to filter and boil the sap below!

To Make Syrup, Simply Boil The Sap

PLEASE NOTE: only boil clear sap, make sure to discard any yellow or cloudy sap. We don’t always know what’s going on with a tree and want to only use the cleanest and healthiest parts.

When boiling the sap, you don’t want the temperature to rise above 219 degrees Fahrenheit (a candy thermometer is gonna come in handy here), and the way you handle it is gonna be very similar to how you would caramel. DO NOT STIR THE SAP, let it do its thing!

After you’ve boiled and filtered it again for debris or crystallized sugar, put it in a cool place to dry (not a cold place) and now, you’ve got yourself some homemade syrup. Yum!

If you’re unsure how to boil sap correctly, please check in with a professional to ensure your sap turns into a syrup that you can eat.

Wrap Up!

There’s a lot to learn, and love, about maple trees and their sap! Let’s go over what we learned!

  • They all produce sap but only some of them are more favorable.
  • There are fun ways to collect sap, that you can do on your own!
  • There are certain times like from January – April that are best for collecting sap.
  • Collecting sap can be an enjoyable activity!

As fall is in the air, Maple leaves will change color and Maple syrup will be filling up shops and homes alike. Hopefully, this gave you some fun ideas about sap tapping (again, not the official title!) or at the very least, helped you understand Mother Nature a little more!

References:

Farrell, M. (2013) Estimating the maple syrup production potential of American forests: an enhanced estimate that accounts for density and accessibility of tappable maple trees. Agroforestry Systems.

Ball, D. W. (2007) The chemical composition of maple syrup. Agroforestry Systems.

Lovett, G. M. & Mitchell, M.J. (2004) Sugar maple and nitrogen cycling in the forests of Eastern North America. Agroforestry Systems.

Wild, A.D. & Yanai, R. D. (2015) Soil nutrients affect sweetness of sugar maple sap. Forest Ecology and Management.

Why do avocado trees grow best in full sun? The simple answer is that these fruit trees are accustomed to warm and sunny climates, but there are also several reasons why you should make sure your avocado trees get enough sun. 

Avocado trees grown in full sun are often healthier, experience better growth, produce better quality fruit, and produce fruit more frequently. Because of this, it’s best to grow avocado trees somewhere (indoors or outdoors) that will allow them to obtain at least six hours of direct sunlight a day.

In this article, we will discuss not only why avocado trees grow best in full sunlight and the benefits of doing so, but also offer you some useful tips for making sure that your own avocado trees get enough sunlight while also not falling victim to unexpected weather conditions!

There are quite a few reasons why it is best to grow avocado trees in full sunlight. We narrowed it down to the top four reasons.

1. Full Sun Promotes Better Avocado Tree Growth

Avocado trees grown in full sun (with a minimum of six hours of direct light each day) exhibit more robust growth.

These trees often grow more quickly than trees that don’t get sufficient sunlight! Trees that receive enough sunlight will grow taller and often have better foliage.

2. Sunlight Creates Healthier Avocado Trees

Avocado trees grown in full sun are almost always healthier than avocado trees grown in shaded or partially shaded conditions.

This is because sunlight is necessary for all plants, but especially for avocado trees. The photosynthetic process for these trees requires a great deal of sunlight.

In order for avocado trees to obtain sufficient energy and nutrients to remain healthy, it’s crucial that they get plenty of sunlight.

Two ripe avocados hand from the branch of a tree.

3. Sunlight Helps Avocado Trees Produce Better Fruit

It’s fairly well-established that the avocado trees which get plenty of sunlight produce better fruit.

Avocados from trees grown in full sun often have a fuller, richer taste when compared to avocados produced by trees grown in partial shade. 

In fact, most fruits benefit from more sunlight. To learn more, check out our articles about figs, apples, lemons, olives, and even cherries!

4. Sunlight Brings Increased Avocado Fruit Production

Avocado trees that receive plenty of direct sunlight produce fruit more frequently and in greater quantities.

Indeed, experts such as the University of California Master Gardeners agree that trees in orchards that have become crowded or overgrown (resulting in too much shade and not enough direct sunlight) produce less fruit.

Additionally, that fruit is usually of substandard quality in comparison to trees that are sufficiently spaced out and receive full sun.

Indoors vs Outdoors: Making Sure Your Avocado Trees Get Enough Sunlight

Clearly, it’s important to make sure your avocado trees get enough sunlight if you want them to produce high-quality avocados (and plenty of them)!

While sunlight is incredibly important for avocado trees regardless of whether you grow them indoors or outdoors, there are notable differences in how you should go about making sure your trees receive that light depending on if your tree is inside of your home or out in your yard. 

Sunlight Requirements For Avocado Trees Outdoors

There’s no disputing the fact that avocado trees typically grow best outdoors; after all, it’s much easier to ensure that your trees are getting enough sunlight when they are outside. 

That being said, there are still certain steps you can take to help make sure that your avocado trees get enough sun to remain healthy and produce delicious fruit. With that in mind, we’re going to share with you some useful tips for growing your avocado trees outdoors.

Selecting The Best Variety For Your Climate/Region

There are a few different available varieties when it comes to avocado trees which can be grouped into three categories: Mexican, Guatemalan, or West Indian.

The trees within these three groups have different heat and cold tolerances (as well as notable differences in the flavor and texture of the fruit they produce) so it’s important to do your research to determine which variety of avocado tree will work best in your area. 

In most cases, avocado trees do best in USDA Hardiness Zones 10 to 12.

When in doubt, you might also consider consulting with a local arborist or landscaping/agricultural expert about the best avocado variety for you and how to best take care of it.

Planting Your Tree In A Good Location

Where you plant your avocado tree is of critical importance when it comes to making sure your tree gets enough direct sunlight to remain healthy.

When planting an avocado sapling or tree, make sure that it is spaced a good distance away from any other trees. This will help prevent your avocado tree from growing in the shade of other trees while also reducing the likelihood of competition for nutrients (which can sometimes occur when trees are planted closely together.)

Generally speaking, it is recommended that you keep at least twenty-five to thirty feet of space between individual avocado trees. This should give them plenty of space to grow while also allowing them to get enough direct sunlight.

Furthermore, it’s generally recommended that you plant avocado trees in a south-facing location since this can help them to get plenty of light and warmth.

Sunlight Requirements For Avocado Trees Indoors

Generally speaking, it’s not recommended to grow an avocado tree indoors long-term.

Because these fruit trees do require a minimum of six hours of direct sunlight every day to achieve optimum growth, successfully growing an avocado tree indoors usually requires a fair amount of effort, particularly if you are growing it inside of your house rather than a greenhouse. 

When growing a potted avocado tree indoors, you will need to place it by a window that lets in a considerable amount of bright sunlight; southern-facing windows are usually best for this. 

Remember, avocado trees need a lot of sunlight even when grown indoors, so it’s best to avoid interior corners, dim rooms, or any location that doesn’t receive several hours of bright light a day.

Another tip for making sure your avocado tree is getting enough light indoors is to rotate it periodically; this ensures that all the leaves on the tree are getting enough sunlight.

Generally speaking, it’s recommended that you rotate your potted avocado tree every two to three weeks. 

For more tips and ideas about growing avocado trees indoors, read our article on the best indoor fruit trees.

Sunlight Requirements For Avocado Trees In A Greenhouse

While growing an avocado outdoors may not be an option for anyone living in a colder climate, there is an alternative if you’ve got the resources necessary: growing your tree in a greenhouse.

A greenhouse can be an excellent choice for growing temperature-sensitive trees and plants like avocado trees, because it is a controlled environment where you can make sure that the conditions are as close to ideal as possible.

For avocado trees, in most cases all you need to do is make sure they get enough sunlight and water, and that the temperatures stay warm enough to keep the plant healthy. 

Also, most avocado tree varieties prefer a certain level of ambient humidity (usually 50% or higher), so try to keep the interior of the greenhouse suitably conditioned. 

In most greenhouses, this should not require an overabundance of effort (since most greenhouses are fairly humid by default due to the way they retain water vapor) but if your own greenhouse tends to be more on the dry side, you can install a humidifier to help increase the ambient moisture levels.

Products such as this LACIDOLL Large Humidifiers Whole-House Style Commercial & Industrial Humidifier are often the best choice because their industrial/commercial design allows them to cover large areas such as greenhouses and conservatories.

The Effects of Inclement Weather

While we’ve established that avocado trees need to be grown in full sun in order to reach their full potential and produce lots of delicious fruit, there’s also no escaping the fact that no matter where you live, not every single day will be sunny enough to provide those requisite six hours of direct natural light. 

Alternatively, sometimes you may need to contend with unseasonable heat waves that expose your avocado tree to higher levels of heat and greater amounts of scorching sunlight than even the hardiest of avocado trees can handle on their own. 

With this in mind, we’ve put together some information for you in order to help you be better prepared for these different weather conditions.

Cloudy and Poor Weather Days: How Much Sun Is Enough?

Even if you live in an incredibly temperate region, it is very unlikely that your local weather conditions will involve bright sun every single day of the year. There will always be cloudy and rainy days where the sun is more of an idea than a reality. 

Because of this, many people growing avocado trees often wonder: how much sun is enough? After all, we have no control over the weather, so how can we be sure that our trees are getting enough sunlight during the seasons when overcast is the norm?

Thankfully, while there is not much we can do about the weather, there is also not much cause for concern when it comes to the occasional rainy day (or even a rainy season). 

These trees are native to the tropical and subtropical cloud forest regions of Mexico, Central America, and South America. Most varieties of avocado trees are accustomed to a certain amount of moisture and can adapt fairly well to a location that experiences periodic overcast or stormy days as long as they are cared for properly.

If anything, someone growing one or more avocado trees should be much more worried about heat waves and droughts than rain!

Heat Waves: How Much Sunlight is Too Much For Avocado Trees?

While the general rule of thumb when growing avocados could best be stated as “the more sun, the better”, there is still such a thing as too much sun even for these heat-hardy trees.

Young avocado trees (particularly any sapling younger than a year old) can fall victim to scorched leaves and other forms of sun damage when exposed to extreme levels of light and heat. 

In most cases, the ideal amount of direct sun for avocado trees is a minimum of six hours with anything up to eight hours being perfectly fine as well, and in some cases, even beneficial as long as the tree is also getting enough water and nutrients.

However, more than ten or twelve hours of direct sunlight runs the risk of damaging the tree’s leaves, which in turn could have a seriously negative impact on the tree’s overall health and ability to grow.

This means that if your region is experiencing unseasonably hot weather or going through a heat wave with incredibly high temperatures and scorching sunlight, you may need to take extra steps to ensure that your avocado doesn’t become damaged or overly stressed from these intense conditions. 

Additionally, dwarf avocado trees can be incredibly sensitive to harsh sunlight when they’re young.

How Can I Protect My Avocado Tree From The Sun?

Trees less than a year old should be sheltered from direct sunlight during the hotter summer months in order to avoid sun damage to the bark and leaves.

Products such as RUIAN-JIAXIN Shade Fabric Sun Shade Cloth can be helpful for lessening the impact of strong sunlight and help to reduce the risk of your avocado trees experiencing sun damage.

Additionally, if you live in an area that experiences intense levels of heat and sun year-round (such as certain regions of Arizona or Nevada) it’s recommended that you use shade cloth that will provide higher levels of protection against scorching rays while also allowing enough sunlight through to allow the trees to grow.

Temperature Extremes: What To Watch Out For

Before we go, however, we also want to briefly touch on the recommended temperature range for growing avocados, so that you can be better informed about the potential impact of temperature changes on your own trees.

After all, sunlight and temperature changes often go hand in hand (with droughts being a prime example), so it’s important to understand the limitations of what your avocado trees can handle

While the levels of hardiness vary depending upon the specific variety of avocado in question, most avocado trees prefer temperatures in the range of 60°F to 85°F.

Where Do Avocado Trees Grow Best?

Their preference for moderate temperatures is what makes avocado trees a popular landscaping choice (as well as a prolific crop) in places like southern California and Florida, both of which have plenty of sunlight and a fairly moderate climate. 

Try to avoid growing avocados outdoors in any location that drops below freezing at any time of the year. These frigid temperatures can be incredibly harmful to your tree.

Growing avocados in desert climates is also not generally recommended, since the scorching hot temperatures have the potential to burn your tree’s leaves and bark, particularly if your tree is a young sapling that has not yet become well-established. 

To learn more about how long it takes to grow an avocado tree as well as other tips and tricks for saplings take a look at our article on the timeline for avocado tree growth.

That’s A Wrap!

As you can see, there are many reasons for growing avocado trees in full sun. Who wouldn’t want healthier trees, better and more robust growth, increased fruit production, as well as richer and more flavorful fruit?

Because these are such great benefits, it’s important to know what steps to take to ensure that your avocado trees are getting adequate sunlight. 

To summarize, here are some key points to keep in mind when growing avocado trees:

  • Know which varieties of avocado are best suited for your region.
  • Plant your avocado tree in a location that will allow it to get at least six hours of direct sunlight a day.
  • When growing an avocado tree indoors, make sure it is kept in a location that gets plenty of bright light (southern-facing windows are often best).

References

AB Woolf, IB Ferguson, LC Requejo-Tapia, L Boyd, WA Laing, & A White. (n.d.). Impact of sun exposure on harvest quality of ‘Hass’ avocado fruit.

B Snijder & PJC Stassen. (1999). Pruning mature and encroached avocado trees to … – avocadosource.com.

F ARNOLD WHITE. (1949). The care and protection of young avocado trees – avocadosource.com.

Lime trees may seem like exotic fruit trees that only grow in sunny, tropical climates, but did you know that many people in cold, cloudy parts of the world grow limes right in their own homes?

The best places to grow lime trees are in your yard, in your home, or in a container that can be moved between the two locations. Lime trees grow best in warm, humid environments with full sunlight and plenty of water. These conditions can even be replicated indoors to grow a tree in a container.

If you have ever dreamed of growing this vibrant citrus tree, but thought you had to move to Florida, you may be surprised to learn that, with a little preparation, and the right knowledge and materials, you can grow a lime tree yourself, no matter where you live. 

Why Should I Plant A Lime Tree?

According to the University of Minnesota Extension Office, limes are among the types of fruit trees such as lemons and some oranges, that can be grown indoors for their entire lives. 

One strange fact to know about lime trees is that, like many other types of citrus trees, the fruit is harvested in the winter instead of the fall like other fruits such as apples. Also, citrus fruits are like strawberries and unlike bananas, in that they do not ripen any more once they have been picked. 

So make sure to give your limes adequate time to ripen on the tree before you pick any of them. Otherwise, you will have limes that are not ready to eat and will stay that way. 

Choosing A Type Of Lime Tree 

Deciding what type of lime tree to plant can be overwhelming when there are so many options. Here is a quick chart you can use to compare a few different types of lime trees as you decide which type suits your needs best. 

Type of Lime TreeWhere It GrowsCharacteristicsSize of TreeType of Lime
Mexican limeMexico; anywhere very warm year roundVery sensitive to cold weatherUp to 15 feet tallCommon limes found in grocery stores
Persian limeAll over except cold climatesEasy to grow outdoors if the weather is right; provides shadeUp to 20 feet tallOf limes sold in the United States, this is the most common. 
Bearss limeCaliforniaProduces limes in the winter; limes are fresh for a long time after ripeningAs tall as 20 feetSeedless cross between lemons and limes
Blood limeAustraliaGrows limes that are red instead of greenBetween 5 and 8 feet tallRed limes! Small, sweet limes
Calamansi limeThe PhilippinesGrows orange limes that are a hybrid Up to 20 feet tallLimes looks like tangerines; sour fruit with a sweet rind

Growing A Lime Tree In Your Yard

Growing a lime tree in your yard can only be achieved if you are confident that the weather where you live will be warm enough for a citrus tree. 

While you do not necessarily have to live in a tropical climate, you do need to live somewhere where the winters are not extremely cold or very long. 

Don’t try to grow a lime tree outside if you do not meet these criteria. It might seem like a good idea to give it a try just in case your lime tree survives, but you will most likely be left with either a dead lime tree or one that you have to quickly transplant to a new, warmer location. 

Places You Can Grow An Outdoor Lime Tree

Here are some places where you can grow a lime tree outside. If you live in one of these places, you might be able to enjoy a citrus tree in your yard or garden. 

Many states in the southern part of the United States meet these criteria, especially states like Florida and the southern parts of Georgia, Alabama, Louisiana, and even South Carolina. If you live in one of these areas, you might be able to plant a lime tree outside as long as you are willing to take some extra precautions in the case of very cold weather. 

According to Texas A&M Agrilife Extension, a lime tree cannot survive if the temperatures drop to the high 20s F or below, so lime trees cannot be planted outdoors in most parts of the country. But that does not mean that you cannot have a lime tree; just keep reading later in this article for information about how to grow a lime tree indoors. 

Choosing An Outdoor Location For Your Lime Tree 

If you can plant your lime tree outside, you will need to choose the right spot for it. You can’t move your tree around if it needs different light or temperature or anything like that, so this permanent spot for the lime tree has to be right from the beginning. 

Lime trees need a great deal of sunlight, so it is of the utmost importance that you find a spot for planting that gets full sun, which means at least six hours of sun every day. The best time to get this much light is during the morning hours. 

To choose the right spot, do some scouting ahead of time. Go outside on a clear, sunny day and monitor a spot all day until you find one that gets enough light. 

Making Sure Your Lime Tree Gets Enough Sun Outdoors

For more information about why sunlight is so important for outdoor lime trees, check out reasons why lime trees grow best in full sun. Then you will know not only how to give your lime tree a lot of sunlight but also why it is so important that you do so. 

Even outside, there can be obstacles that stop your lime tree from getting enough sun, like the shadows cast by houses and buildings, or the shade provided by other trees. 

You can eliminate this problem, at least in your yard’s current state, by scouting the location ahead of time, as we described above, to make sure the spot you choose is sunny enough for your outdoor lime tree. 

There is always the possibility that something could be added to your yard or your neighbor’s yard that causes shade or shadows on your lime tree. In this case, you might be able to dig it up and transplant it, or you might be able to do something to mitigate the shade. Just keep an eye out so you can solve problems like this as soon as they arise. 

Growing A Lime Tree In Your House

According to the University of Wisconsin-Madison, the best type of citrus tree to plant indoors is a dwarf variety, as the full-sized types of lime trees are too big to be kept in containers. But there are many options to choose from, so you can find the right lime for inside your house. 

Growing a lime tree indoors is in many ways easier than growing one outside because you have so much control over the environment and conditions, but there are a few things you need to keep in mind. Indoor growing presents its own challenges, so let’s take a look at a few of those now. 

Achieving The Ideal Indoor Temperature For Growing A Lime Tree

According to the University of Minnesota Extension Office, the best indoor temperature for a citrus tree is about 65 degrees Fahrenheit during the day with a slightly cooler temperature, about five or ten degrees cooler, at night.

Many homes are kept a little warmer than this, especially during the winter months with artificial heat or during the summer months if the household does not use air conditioning, but there are some ways to reach the ideal temperature indoors or to at least get closer to it. 

If your home is often warmer than 65 degrees during the day or warmer than 55 to 60 degrees at night, as most homes are, you can first consider if other areas of your house might have cooler temperatures, such as an enclosed porch or a lesser used room.

If you have, for example, a guest bedroom that does not get regular use, you might be able to simply close the heating vents in that room, resulting in a cooler temperature than the temperatures in other rooms in the rest of your home. 

It might seem that another way to keep your lime tree in a cooler place is to choose a cool area of your home like the basement or a shady corner of a room with lots of windows. The problem then, though, is that you have removed your lime tree from its much-needed sunlight. So don’t sacrifice sunshine for cooler temperatures. 

Making Sure Your Lime Tree Gets Enough Sunlight, Even Indoors

According to the University of Minnesota Extension Office, lime trees need a lot of sunlight during the day, even if they are kept indoors. This can be somewhat difficult to achieve, depending on the types of windows you have, how shady your surrounding front yard and back yard are, and what kind of space you have in the various rooms of your home. 

If possible, put your lime tree in a room that has a southern-facing window. This will help it get a lot of sunlight. If you do not have a room with a southern-facing window, just try to find the sunniest room possible for your lime tree. 

Another way to make sure that your indoor lime tree gets adequate sunlight is to take it outside when the temperatures are warm enough. 

Many people find that they can keep their lime trees indoors for the cooler weather of fall and spring and the cold weather of winter, but that the warm temperatures of summertime are warm enough that the lime tree can be moved outdoors for at least a couple of months, probably in June, July, and August. 

Providing Humidity For Your Indoor Lime Tree

Another problem you might encounter when planting a lime tree indoors is that indoor humidity levels drop dramatically in the winter months due to the artificial heating of homes. That dry air is not good for your lime tree, so it’s a good idea to try to provide some extra water not just to the roots of your tree but also to its branches and leaves. 

One way to achieve this is to use a plant mister, which is like a spray bottle that sprays water mist. You can use one of these to mist the entire lime tree, providing moisture to the leaves, twigs, and branches. 

Another way to help your lime tree with humidity is to place a shallow dish of water under the tree or right next to it. Then the water will turn into mist as it evaporates, and the mist will humidify your lime tree. 

Making Sure Your Lime Tree Gets Enough Water

It might seem like an indoor plant would be easier to water than an outdoor one, but in fact, watering an indoor tree can sometimes get messy, leading people to perhaps not water it as often or not give it an adequate amount of liquid with each watering. You can take some steps to make sure you give your lime tree plenty of water but that the water does not leak onto the floor or end up on the walls. 

One tool that you really need for an indoor tree is a dish that is placed under the pot in which your lime tree is planted. Then, if you overwater the tree, the excess water will drain into that dish, not onto your floor. 

Another way to help with watering is to get the right vessel. Instead of using cups or pitchers from your home, which can easily splash on walls or make holes in the soil with the pressure of the water when it is poured out, use a dedicated watering can that fits the size of your lime tree and provides water without making a mess. 

How To Plant A Lime Tree In A Container

Now let’s take a look at one of the more popular options for most people in the country: planting a lime tree indoors and keeping it in your house. This is container planting, and it is a little different from planting a lime tree outside. 

Planting a lime tree in a container provides you with a lot of options for placement, water, humidity, temperature, and decoration. Here are some tips for how to plant your lime tree in a container once you have decided to do so. 

Choose The Right Container

A pot for a lime tree should be quite large, as it is best to plant your tree in the same container it will grow in for most of or even all of its life. This prevents the tree from having to be transplanted later, which can put the tree into shock and puts it at risk for breakage of twigs, leaves, branches, and even roots. 

Make sure your container is also the right size for the space in which you plan to primarily keep it. If your pot is too big for the spot, you might end up moving it somewhere else with less-than-ideal conditions, which would not be good for your lime tree. 

Lastly, make sure your container has adequate drainage at the bottom. This can be as simple as holes that have been drilled into the bottom of the pot, but it is super important that water can drain out of the soil of your lime tree. 

Removing The Lime Tree From Its Shipping Or Storage Container

A lot of plants and trees arrive at your home or are purchased at the gardening center in plastic temporary pots. These are great for their purpose, but they can be difficult to use when planting your tree because the trees are sometimes hard to remove.

Be very careful when taking the tree out of the plastic container. If you pull too hard, you can break the tree’s branches or roots, damaging the tree before you have even planted it. 

Before you try to remove the tree, gently squeeze all around the sides of the plastic pot to loosen the soil, then gently try to pull the tree free of the container. If that does not work, use gardening shears to cut the sides of the plastic pot and remove the tree that way. 

Planting The Tree In The Container

The next important tool you will need is a bag (or two) of potting soil, which is what you will use to plant your lime tree in a container. Start with a potting soil designed specifically for indoor citrus trees such as your lime tree; for example, you might choose Soil Sunrise Citrus Tree Potting Soil Mix

Fill the container with potting soil until the level looks like it would provide space for the entire lime tree sapling. Then gently place the lime tree in the center of the pot and start loosely putting soil around the root ball in a circle. 

Pat the soil gently and keep filling the container until the root ball is completely covered and you have left a couple of inches of space between the top of the soil and the top rim of the container. Then pat gently again and get ready to water the plant. 

Watering Your Planted Container Lime Tree

The last step in this process is to water the tree. The easiest place to do this is outdoors, so if you have planted your lime tree in a container that is on a caddy with wheels, take the tree outside for watering (unless it is freezing cold), then wheel it back inside after the water has drained.

If you are indoors and cannot take the tree outside for its first watering, another good option is to place the pot in a shower and water it there so any soil that drains with the water can wash down the drain and does not end up on your floors. 

You can also just water the tree slowly over the course of the day, emptying its drainage saucer each time. No matter which method you choose, just make sure that you thoroughly water the tree on its first day right after you plant it. 

A Few Closing Reminders

Here are just a few more tips to help you successfully grow your new lime tree, whether you planted it in a container or outdoors in your yard. 

Witches’ Broom Disease Of Lime (WBDL)

While lime trees are not particularly susceptible to many diseases or pests, there is one to be aware of as a new lime tree owner. Watch out for witches’ broom disease.

 According to the USDA, Witches’ Broom Disease of Lime, or WBDL, has caused a lot of problems for lime trees in a number of areas of the world. Witches’ Broom Disease of Lime is caused by insects or fungi, and it can kill new growth in lime trees. 

Using Fertilizer For Your Lime Tree

It is best to let your lime tree grow for a full fruit-bearing cycle before you start using an external fertilizer, but once you have done so you can give your lime tree a boost with fertilizers, indoors or outdoors. 

Give your lime tree some extra nutrients if you planted it outdoors by leaving it without fertilizer for its first full fruit-bearing cycle, but in the years after, give it some fertilizer like Fox Farm Happy Frog Organic Indoor Outdoor Citrus and Avocado Fertilizer. You might find that it helps your tree grow better and produce more and higher quality limes. 

That’s A Wrap!

Now you are ready to choose a type of lime tree and decide whether you want to grow it indoors or outdoors. Whichever you choose, a lime tree can be a great addition to your yard or to your indoor plants. 

Enjoy growing those limes!

References

Garnier, M., Zreik, L., & Bové, J. M. (1991). Witches’ broom, a lethal mycoplasmal disease of lime trees in the sultanate of Oman and the United Arab Emirates. Plant Disease75(6), 546-551.

Mardi, M., Khayam Nekouei, S., Farsad, L. K., Ehya, F., Shabani, M., Shafiee, M., … & Hosseini Salekdeh, G. (2011). Witches’ broom disease of Mexican lime trees: disaster to be addressed before it will be too late. Bulletin of Insectology64(2011), S205-S206.

Your Competitors Are Already Running Ads. Are You?

This is for service business owners who are ready to SCALE.