Grow Your Business with Tree Journey

Our TradeWorks Revenue System™ builds a detailed advertising funnel that attracts, nurtures, and converts the right clients – so you can finally stop chasing leads and start scaling your business.

Palm trees will give your yard a tropical feel and provide plenty of exciting foliage as the palm-like fronds spread out and sway in the wind. But just because the space under your palm tree is shady doesn’t mean you can’t spruce it up with some tropical shade-tolerant companion plants!

Some of the best plants that will thrive under your palm tree include tropical hibiscus, asparagus fern, Asiatic jasmine, bromeliads, golden shrimp, birds of paradise, crotons, blue ginger, and moth orchids. All of these plants thrive in tropical climates and aren’t opposed to the cool shade thrown by your palm tree.

Below, we’ll go over the BEST plants to plant under your palm tree. We’ll also discuss some of the care requirements so you can make sure your tropical plants thrive.

Can You Grow Plants Under Your Palm Tree?

Depending on the species of palm tree you are dealing with, the space beneath it may seem too inhospitable to grow plants. Don’t fret, there are plenty of shade-loving tropical plants out there!

So, the answer is yes! You can grow plants under your palm tree.

Even so, the plants under your palm tree will face a few challenges that will need to be addressed:

  • Shade: First and foremost, your plant will need to tolerate some shade to survive under your palm tree. Some palms cast more shade than others, so be sure to choose a plant that is at least somewhat shade tolerant.
  • Nutrients: Palm trees require nitrogen, potassium, and magnesium more than any other nutrients, and they will steal these from their leaves if the quantity is scarce in the soil. Planting something beneath your palm tree means there will be even fewer nutrients available.

To combat this problem, you’ll want to use a palm fertilizer to ensure your palms are getting enough nutrients despite sharing the soil with another plant. BGI’s Palmgain 10lb Bag Palm Tree Fertilizer was designed by the University of Florida to specifically address palm tree nutrient needs.

  • Water: According to the University Of California, palms should be watered when the soil two inches below the surface is dry. When you add a plant under your palm tree, that water is going to disappear faster than normal, meaning you’ll have to water the area more frequently.
  • Climate: Before choosing a plant to place beneath your palm tree, take into consideration the hardiness zone in which the plant can survive. It needs to be adapted to tropical conditions just like your palm tree.

Despite these challenges, you have a wide variety of choices to plant under your palm tree. There’s no reason the space beneath your palm needs to be bare or plain jane. Spice it up with some creeping vines or brilliant bromeliads!

How To Grow Plants Under Your Palm Tree

Beautiful palm trees and shrubs in the park under the sunlight

All of the plants on our list are going to combat the challenges we discussed above. They’ll be shade tolerant, require little nutrients and water, and thrive in tropical climates.

But to make your plants happy and to see the full blooms of flowers while keeping your palm trees a lush green, you’ll want to take care when planting under your palm tree by following some of the guidelines below.

Choose The Right Location For Your Plants

This may seem like a silly section – aren’t we planting our plants under our palm trees? Well, yes, but there are a few areas to avoid under your palm tree.

When digging into the soil for a spot to place your plant, make sure you’re not digging near or on top of the palm tree roots.

Palm trees do not have very deep roots. Instead, they spread out in a fibrous manner horizontally as opposed to vertically. 

If you’re digging and hit into something hard, chances are you’re on top of the palm tree’s roots. Try to dig a little to the left or right to make sure your landscape plants do not choke out the palm tree roots.

Another consideration when choosing a location for your plants is what areas receive sunlight. There should be some places beneath your palm tree that receive a little sun during the morning or evening.

Depending on your chosen plant, you may need to plant them where they get the most sun or perhaps even the least sun. In general, the north side of your palm tree will get the least sun while the south will get the most.

A third and final stipulation is the plants that don’t require digging at all.

Uh, what?

Yep, some of the plants on our list are going to attach to the trunk of the palm tree instead of being planted in the soil! 

With these plants, you’ll want to make sure to attach them with something that will hold them up properly and provide them with the necessary sunlight requirements.

If your palm tree isn’t in an ideal location for growing with other plants, you may have to find a way to safely transport it to a different area in your yard! You can read our guide on how to transplant a palm tree here!

Know Your Palm Tree

According to the University of Florida, there are over 2,600 species of palm trees and shrubs. That’s a lot of variety!

Before you decide to plant something under your palm tree, make sure you understand what kind of palm tree you have and what its specific requirements are. 

You don’t want to plant something under your palm tree that won’t make a good companion. For example, planting something that requires constant moisture with a palm tree that requires good drainage and cannot remain wet.

We’ll go over some of these specifics below so you can be sure you’re planting something under your palm tree that will thrive, adding color and variety to your tropical garden!

Another thing to take into consideration is the size of your palm. Some of the plants on our list grow quite large, over five feet, so you’ll want to make sure you match the size of the flower with the size of the palm.

Some of the best palm trees for larger flowers include:

  • Areca Palm
  • Kentia Palm
  • Windmill Palm
  • Fan Palm (and its varieties)
  • Canary Island Date Palm
  • Queen Palm
  • Foxtail Palm
  • Sylvester Palm

If you decide to go with one of the shorter flowers on our list, you can fit them under some of the smaller palm varieties such as:

  • Pando Palm
  • Pygmy Date Palm
  • Cat Palm
  • Fishtail Palm
  • Lady Palm

All palm trees may have that beachy feel, but not all palm trees have the same layout. Take a careful look at how the leaves of your palm tree cast shade on the ground. For some of the flowers on our list, you’ll want to find the sunniest spot, for others, the shadiest.

9 Most Beautiful Plants For Underneath Your Palm Tree

Palm trees are a staple in yards and gardens for those who live in tropical climates. They bring out a beachy feel and look super nice on those blue-sky days.

But there’s nothing wrong with adding a bit of color and interest under your palm tree. Check out the plants below and choose the one that fits your landscape the most!

Tropical Hibiscus

Tropical Hibiscus Flower

Tropical hibiscus can be grown as a tree or as a shrub. These tropical plants boast amazingly showy flowers that come in a wide range of colors.

Growing to around 5 feet tall, tropical hibiscus will do best beneath a large palm tree as opposed to a low-growing palm tree.

According to the Smithsonian Institute, tropical hibiscus thrives in hardiness zones 9 through 12. They’re low-maintenance plants that prefer well-drained soil, just like many palm tree species.

Tropical hibiscus is known for its beautiful flowers, but when planted in the shade of a palm tree, don’t be surprised if you see fewer flowers than those planted in the full sun. 

Water: Tropical hibiscus is semi-drought-tolerant, but it prefers evenly moist soils. Try to keep the leaves as dry as possible to avoid mildew.

Sun: The more sun the more flowers, but tropical hibiscus will thrive just fine in partial shade. Try to place this plant in the spot that gets the most sun under your palm tree.

Bloom Time: You can expect your tropical hibiscus plant to bloom year-round, but each blossom only lasts a few days.

Pair With: Medium to large palm varieties.

Asparagus Fern

Asparagus ferns are evergreen perennials that have an interesting shape and lush green leaves that will show off nicely beneath your palm tree.

These evergreens thrive in hardiness zones 9 through 11 and prefer sandy, shady conditions. They’re not as showy when compared to other tropical plants. Their flowers are small but fragrant.

The nice thing about asparagus fern is that it’s tolerant of various conditions, including drought and shade. This makes it a good companion plant to your palm tree.

You can plant asparagus fern with tropical hibiscus as these two plants have very similar requirements and clash nicely in terms of texture and color.

Water: Asparagus ferns prefer moist soils but their roots store enough water to withstand some drought. If the leaves begin turning yellow, your fern needs more water.

Sun: direct to indirect light. This is best placed in the sunniest spot beneath your palm tree.

Bloom Time: Asparagus fern blooms from spring through fall.

Pair With: Small to large palms

Asiatic Jasmine

Although the name is misleading, Asiatic Jasmine is not related to the jasmine plant. It is a tropical evergreen creeping vine that will look great beneath your palm tree.

This resilient vine can withstand salt, drought, shade, and poor soil conditions. The less care you give it, the better off it is. If you give too much water to this plant it can expand too quickly, covering ground that you don’t want to be covered.

Asiatic jasmine does well in hardiness zones 7 through 10 and, seriously, once you plant this baby you don’t have to do anything. Natural rainfall will suffice this hardy plant for water and it isn’t necessary to fertilize unless the plant doesn’t appear to be growing.

According to the University of Florida, you can expect your jasmine vine to expand 3 feet wide and anywhere from 6 to 18 inches tall. Just be aware that this is a groundcover plant, meaning nothing will be able to grow beneath it, especially grass and weeds. 

Water: Watering is not necessary except when the plant is first transplanted into the soil.

Sun: Thrives in deep shade to full sun

Bloom Time: While the plant itself will remain green year-round, the inconspicuous flowers only bloom from July to August.

Pair With: Small to large palms

Golden Shrimp Plant

With an interesting name, stunning gold and white blooms, and lush green foliage, what’s not to like about these plants?

Golden shrimps thrive in hardiness zones 9 through 11. They typically reach a height of around 3 feet, so are best planted beneath a palm tree that can accommodate this height.

One downside to this beautiful plant is that, once it grows, it can look sparse underneath. Planting a groundcover plant along with your golden shrimp plant can help fix this issue.

Water: Golden shrimp plants prefer evenly moist soil. It’s not recommended to let them dry out between waterings.

Sun: Full sun to partial shade. Find a spot under your palm tree that receives a few hours of sun per day.

Bloom Time: When grown in tropical regions, golden shrimp plants bloom year-round. In subtropical regions, they may only bloom in summer.

Pair With: Medium to large palms

Bromeliads

Beautiful red bromediad flowers

Bromeliads don’t refer to a specific type of plant. Rather, it refers to an entire family comprised of over 2,500 different species of plants.

Bromeliads may grow from the ground, but some are known as epiphytes and grow on tree trunks or rocks. These tropical plants cannot withstand freezing, so if they are grown outdoors they will only thrive in zones 9 or higher.

Because there are so many different species of bromeliad, you can imagine their shade tolerance will vary. When searching for a bromeliad to plant under your palm tree, look for these varieties:

  • Aechmea
  • Neoregalia
  • Nidularium
  • Canistropsis
  • Vriesea
  • Pitcairnea

In the wild, many of these shade-tolerant bromeliads have incredibly bright flowers to attract pollinators to shady locations. So, you can expect your shade-tolerant bromeliads to add some very attractive color under your palm tree!

Notes on mounting bromeliads to your palm tree trunk: if you decide to go for an epiphyte bromeliad, make sure to mount it using something natural like Kinglake’s 328 Feet Natural Jute Twine

This type of twine will eventually degrade in the environment. Using fishing line, copper wire, or other non-degradable material is not recommended. Once your bromeliad is secure, it will begin to take hold of the trunk with its roots while the original mounting material degrades.

Water: Bromeliads that attach to tree trunks or rocks absorb water through their leaves and from the cups that their foliage forms. They are used to environments with high humidity, so be sure they get enough water. However, do not overwater, as bromeliads do not like to sit in wet soil.

Sun: Varies with species. If you choose from the varieties we listed, they thrive in partial to full shade.

Bloom Time: Varies depending on the species. Some will bloom for months while others only a few weeks.

Pair With: Palms with relatively thinner trunks so the roots can take hold easier. The height of the palm isn’t as important.

Birds Of Paradise

We’re talking about the birds of paradise plant, not the actual bird. Though, those colorful birds would look nice in your tropical garden!

But really, you can get the beautiful color of a bird of paradise from the plant, too. These tropical flowers produce brilliant colors that resemble their namesake.

Birds of paradise do best in hardiness zones 10 through 12, but can be kept in colder climates if brought indoors during the cold season.

Some species of birds of paradise can grow to 30 feet tall, so be sure to pick a smaller variety such as Dwarf Orange so it will fit beneath your palm tree.

One of the downsides to birds of paradise is that they take a few years to bloom. If you buy the plant in a container, it may already be blooming. But, if you try to plant it from seed, you may have to wait a few years before you see those brilliant flowers.

Water: Birds of paradise prefer moist soil, but make sure to let the soil dry between waterings.

Sun: Birds of paradise can tolerate partial shade, but they do best in the sun. Try to find a place under your palm tree where the canopy breaks open, giving your birds of paradise as much sun as possible.

Bloom Time: Birds of paradise are more likely to bloom when the hot tropical temperatures cool down a little, typically from Fall through Spring.

Pair With: Large palm varieties

Crotons

Green Leaves Of Crotons - Codiaeum Variegatum Pictum - Bushes Growing Along Walkway, Way Park Garden

If you want a variety of colors, look no further than crotons! These perennial evergreen shrubs come in all kinds of colors, shapes, and sizes. You’re bound to find a variety that fits your palm tree, no matter its size.

Some varieties of crotons need full sun, so be sure to grab a shade-tolerant variety such as Geisha Girl, Van Buren, Mosaic, Claude Lorraine, or Nestor. 

You can use crotons to cover the entire area beneath your palm tree, or just a few spaces. The beauty of this plant doesn’t come from its flowers but rather from its leaves which range in color from light whites, yellows, and pinks to dark reds, purples, and oranges.

Crotons can be purchased at a local garden center and typically come in pots. They are hardy from zones 9 through 11 but can grow in colder climates if brought inside when temperatures cool down.

Water: Crotons prefer to be watered frequently. If you notice the leaves begin to wilt, your plant is probably thirsty.

Sun: depends on the variety. Many shade-tolerant varieties do great in dappled shade.

Bloom Time: According to the University of Wisconsin, crotons bloom in the spring, but the flowers are not very showy compared to the stunning leaves.

Pair With: Varies with the species. Check the height of your croton to see which palm it pairs best with!

Blue Ginger

Similar to our Asiatic jasmine plant, blue ginger has a misleading name and is not related to ginger at all! Instead, this tropical plant belongs to the same family as spiderwort.

Blue ginger boasts brilliant blue flowers and has lush green foliage to add to the tropical feel of your palm tree. 

These plants are evergreen when grown in tropical and subtropical areas, but when exposed to cooler climates they will lose their color and die back in the winter.

Blue ginger grows up to 8 feet tall, so will not do well beneath smaller palm varieties. It thrives in hardiness zones 9 through 11, a perfect partner for your palm tree.

Water: Keep the soil evenly moist. Like many plants on our list, blue ginger is used to high humidity and will appreciate a misting here and there.

Sun: Prefers dappled shade.

Bloom Time: If given the right conditions, blue ginger will produce flowers year-round. Otherwise, they may only bloom spring through fall and die back in the winter.

Pair With: Medium to large palm trees.

Moth Orchid

Moth Orchid In Understory Of Forest

If you’re looking for a unique flower to pair with your palm tree, the moth orchid is the way to go. This orchid does best when attached to your palm tree’s trunk and is given part shade, part sun.

Similar to our epiphyte bromeliads, use twine or burlap to help secure your orchid to the trunk of your palm tree. The rougher the bark, the better. You can use sphagnum moss to cover the burlap or twine and provide your orchid with soil medium.

Moth orchids are low-maintenance plants that do not require many nutrients or care. They thrive in zones 10 through 12. In colder climates, they must be grown in pots rather than on your palm tree.

These interesting plants can grow up to 3 feet tall but are generally around 12-15 inches.

Water: Orchids prefer humid environments and will benefit from a weekly misting. According to the Smithsonian Institute, you should only water your orchid when the growth medium (your sphagnum moss) is dry.

Sun: Moth orchids prefer partial sun.

Bloom Time: Moth orchids will bloom in winter or spring, depending on the climate. The blooms will most likely fall off when temperatures get too hot in the summer.

Pair With: A palm tree that will provide part sun, part shade. The rougher the bark of the palm tree the better. The size of the palm tree doesn’t matter, but these orchids typically look better on thin-trunked, medium to tall palms.

That’s All For Now!

Having a landscape under your palm tree will only add to the uniqueness and beauty of your tropical yard.

But for a plant to thrive under your palm tree, it will need to overcome shade, water, and nutrient deficiencies. Luckily, you still have quite a list to choose from.

To recap, the 9 best plants to plant under your palm tree include:

  • Tropical Hibiscus
  • Asparagus fern
  • Asiatic Jasmine
  • Bromeliads
  • Golden shrimp plant
  • Birds of Paradise plant
  • Crotons
  • Blue Ginger
  • Moth Orchid

This list includes a variety of flowers that should be able to fit under any palm tree you may have planted in your yard. 

You can check out Tree Journey if you have more questions about your landscape trees, flowers, plants, or shrubs!

References

Granados, J., & Korner, C. (2002, September 30). In deep shade, elevated CO2 increases the vigor of tropical climbing plants. Global Change Biology8(11), 1109-1117. https://onlinelibrary.wiley.com/doi/abs/10.1046/j.1365-2486.2002.00533.x

IEEE Staff. (2011). Overview of image processing approach for nutrient deficiencies detection in Elaeis Guineensis. IEEE. https://ieeexplore.ieee.org/abstract/document/5993432/citations#citations

Praptosuwiryo, T. N., & Cahyaningsih, R. (2019). Diversity and host preferences of ferns and lycopods epiphytes on palm trees. Biodiversitas Journal of Biological Diversity20(12).

Thomas, K. R., Kolle, M., Whitney, H. M., Glover, B. J., & Steiner, U. (2010, December 06). Function of blue iridescence in tropical understory plants. Journal of the Royal Society Interface7(53).

Though you may not know the names of many trees, most people can instantly recognize birch trees because of their distinctive beauty. But as an ornamental tree found in nurseries everywhere, can birch trees grow well in locations other than riverbanks? 

The river birch grows along riverbanks naturally, but they actually can be planted nearly anywhere in the United States. Birch trees are rapid-growing, hardwood trees that are naturally tolerant and grow best in wet areas. Once established, birch trees do best as landscape trees in acidic soil.

If you would like to own some of that beauty for your property, we will show you the best places to plant birch trees and where they grow the best!

What Is A Birch Tree?

Birch trees are short-lived, fast-growing trees known for their distinctive bark patterns that originate from cooler regions of the northern hemisphere. They are used as ornamental trees as well as for lumber, and the papery bark has many uses, including pharmaceuticals. 

Birch trees are prized for their stunning visual appeal throughout all seasons compared to most ornamental trees who only show off their innate beauty during Fall. The unique, white, curling bark of the birch tree looks amazing in any season, especially in Winter.

They have picturesque white bark that often is seen peeling off in large sheets contrasting with bold green saw-toothed leaves and are usually seen growing along riverbanks or streams.

Younger trees show off the characteristic peeling bark, but as they mature the lower regions of the trunk bark grow thicker into deeply furrowed, brown plates. All birch trees exhibit “toothy” outer edges on their leaves. 

There are about 40 different varieties of birch trees from the iconic river birch that you’ve probably seen along rivers or creeks, to paper birch, and silver birch to name a few. For this article we will be focusing on the most popular birch varieties that are native to the United States, and where they grow the best.

If yuo were wondering more about paper birch, that’s the type with all the flakey bark! And no, you shouldn’t peel birch tree bark off if you see it flaking.

Do Birch Trees Only Grow on Riverbanks?

Birch grove near a river

Birch trees can grow in a variety of places, not just along riverbanks. While the aptly named river birch does grow naturally along riverbanks and they easily establish themselves on their own, they can grow in many other areas. 

Most birch trees need plenty of water when they are first planted, but once it is established, it will grow well in most areas and soils.

They do need plenty of sunlight in the canopy but also require a bit of cool shade and moist soil for the roots. This can be accomplished by planting ground covers, low-growing flowers, or a thick mulch bed to protect the shallow roots from getting too much sun. 

What Climate Does A Birch Tree Grow Well In?

Birch trees are native to cooler regions of the Northern Hemisphere like Europe, Canada, the USA, and the Himalayas. They can handle colder temperatures, but unless they are native to warmer climates they may not do as well in the farther southern regions. In the US birch trees tolerate winters as far north as zone 2 and can withstand summers as far south as zone 7. 

Birch trees can tolerate extreme cold climates and are able to survive temperatures colder than -40F. They are supremely adapted to tolerate and exploit the harsh conditions of northern ecosystems that make most other trees (and people for that matter!) tap out.

Birch Trees Don’t Do Well In Drought

Birch trees have shallow roots that require a lot of water, especially when they are starting. They do well in areas that get a lot of rain or low-lying areas where water accumulates, but they can’t handle being wet all the time.

Once a birch tree has had a chance to be well established, it is relatively drought-resistant, but it can’t handle the dry, hot climes of the deep south. 

Here Are The Best Places To Plant Birch Trees

Birch trees can grow in many places, with varying types of soil and water conditions; they don’t have to be along the banks of lakes and rivers to thrive. Here are 9 of the best places to plant birch trees!

Birch Trees Thrive In Areas With Full Sun

Spring blossom of a birch tree

Birch trees need a lot of sun! At least 6 hours of full sun is needed to keep birch trees happy, but at the same time, you have to protect the roots and keep them shaded. There are several reasons why birch trees can’t grow in shade, so if you have areas in your yard or along with your property that get a lot of sun, that’s a good place to plant a birch tree (and have a picnic with your family of course!).

In the article, “How to Grow and Maintain a Healthy Birch Tree”, the USDA suggests that homeowners should place birch trees where the soil will be shaded, cool, and moist. It’s important to remember, however, that birch trees require full to partial sunshine on their leaves to grow well.

Birch trees send out sprawling lines of shallow roots that need to be protected from the strong sun. The ideal place to plant a birch tree if you have the structure is the north or east side of the building. This way your birch will get at least 6 hours of sunlight, and the roots stay cool and protected.

If you don’t have a building to prevent the sun from pounding the root system, you can simply mulch around the tree, or plant something along the base of the tree that will protect the roots. 

Bulbs work well to protect the shallow roots of birches as well as low-lying ground covers like vinca, ornamental grasses, or other plants that don’t require deep soil to thrive in.

Fun Fact: did you know that black birch is one of the hottest burning firewoods?

Birch Trees Do Well Along Creeks Or Riverbanks

Birch trees grow well along riverbanks or other areas of running water. If you have a creek or river running through your property, you could plant a line of birch trees along the water’s edge. You will have a picturesque scene of unmatched natural beauty on your property!

When planting them, make sure the tree is back enough away from the bank that it won’t end up falling in. They love water, but aren’t the best swimmers! You may have to water them a bit for the first year, but once they have established themselves, they will find plenty of moisture from the river. 

Birch Trees Like To Be Near Ponds

Birch tree on a lake side

Do you have a natural pond on your property? Why not plant a few birch trees near the pond to offer some shade to the area and add an extra dose of beauty to the area. Only plant birch trees near natural water features, and not on ponds or fountains that you have spent a lot of money and time on as they can damage them. 

If you have landscaped a pond or water feature on your property, planting a birch tree nearby is not recommended. Birch trees are known for seeking out water, and they could puncture the liner in that quest to find water.

Also, when Autumn hits, many of the falling leaves will get into the pond and possibly clog up the pumps or even harm fish or other animals if you have them!

Plant Birch Trees In A Landscape

Do you have a landscaped area of flowers and decorative shrubs, but you just need something more to top it off and make the area pop? Maybe you should think about planting a birch tree there! If the canopy can get plenty of sun, this could be a perfect place to plant a birch tree because you already have plenty of vegetation that will serve to protect the roots. 

If you have plants that work well with shade or semi-shade, a birch tree could go well there because, after a short time, the canopy will spread out and provide a nice area of shade for your shade-loving plants. 

Birch Trees Make A Beautiful Centerpiece

The beauty of birch trees with their striking white bark and light, airy canopy is the perfect specimen for centerpieces in your garden or landscaping. Birch trees grow fast, so in a few years, you will have a mature tree centerpiece. Add in some low-growing shrubs or flowers to contrast or accentuate the whitebark and you will have a stunning centerpiece in your garden!

Just be careful not to plant birch trees too close to sidewalks as the shallow roots could eventually crack or lift the concrete. Also, before planting, check to make sure there are no water pipes or drainpipes anywhere near the root system. Birch tree roots will seek out the tiniest cracks and get inside where they will eventually crack or clog the pipes. 

Birch Trees Prefer Areas With Acidic Soil

Birch trees prefer acidic soil of 6.5 to 5.0 on the pH scale while most lawns prefer a neutral 7.0 pH.

So, if you have an area of your yard or garden that is more on the acidic side, and you just can’t get grass to grow well there, don’t alter the acidity, simply plant a birch tree there instead!

Plant Birch Trees In The Wet Areas Of Your Garden

Tree and green grass lawn covered with water

Other places that are great to plant birch trees are wet garden areas. Do you have an area in your garden that just seems to stay too wet for much of anything else to grow?

If you have an area that is simply too damp and other plants you put there drown or get root rot, try setting a birch tree there. 

Maybe the area is a little lower than the rest of the garden. Possibly there is a lot of clay in the ground that holds water longer than other areas.

Whatever the reason for the extra wet area, it would be a great place to plant some birch trees. Birch trees can tolerate wet areas well and will help with the soggy problem. 

Birch Trees Do Well In Low-Lying Wet Areas That Gather Water

Birch trees can also do well in that low-lying area in the back of your yard (or front, or side) that always seems to be soggy and swampy whenever it rains.

Your grass out there is always struggling because of the water that pools up out there, and as soon as someone walks across it, you have a muddy mess. You could clear that area up with a few birch trees!

You don’t have to hire an expensive excavator to regrade the area or have truckloads of fill dirt piled in the low-lying area to prevent the water from pooling up and messing up your yard. Instead, think about planting birch trees to take care of that area naturally.

It never hurts to plant trees. Not only are they pleasing to the eye, and provide shade and shelter for birds and other small animals but they also help to remove carbon dioxide from the air!

Birch Trees Can Be Planted In Sandy Soil

If you have very sandy soil, you know there aren’t many plants or trees that will grow in the loose soil, unless of course, you love to have spiky cactus all over. But then again, if your area is too wet, even the cactus will have a hard time surviving. 

Birch trees with their shallow, sprawling roots love loose, quick-draining, sandy soil. If you mulch up the leaves that drop each year and leave them to degrade into the soil you will also help to condition the soil for further plantings as time passes.

The leaves will break down and provide missing nutrients than sandy soil usually doesn’t have. 

If there is an area that is too sandy for anything else to grow well, then it’s probably a perfect place to set a few birch trees there. 

Are Birch Trees Actually Good for Yards?

Well, that depends on what type of yard you have. Birch trees are fast-growing trees but are also one of the shortest-lived of the hardwoods.

In the early years, birch trees will shoot up fast, often 20 to 40 feet high. If you plan on planting them in your yard, make sure they are not too close to your house, or near power lines as they will have to get cut back.

Some people think that planting birch trees in clumps of three tends to prevent the trees from reaching their maximum height. The thinking is because the roots are shallow and widespread, with three birch trees in a small area, the roots have to compete amongst themselves and stunt their growth.

If your yard has an irrigation system or you have a lot of water pipes running through your yard, you’d be better off not planting birch trees in your yard. Birch trees, like willows, have strong and aggressive roots that will seek out water wherever. Metal or plastic pipes are no match for the roots of the birch, as they will infiltrate any tiny joint or crack. 

If you have a small yard with lots of pipes running through the ground or a lot of overhead hazards then birch trees are not a great fit for you. 

Alternatively, if you have a wide-open space free from overhead lines and in-ground plumbing, then the space would be great for a birch tree or more. Birch trees don’t grow huge, but they can get 30 to 40 feet tall, and need to be a minimum of 20 feet away from your house.

Birch Trees: Are They Able To Grow Just Anywhere?

Birch trees in early spring

While birch trees come from cooler climates and love wet, well-drained soil, with the proper care they can grow just about anywhere. The main hindrances to growing birch trees are heat and drought. 

The USDA write up on the Paper Birch sums up where birch trees can grow best by stating that due to the trees overall genetic makeup, the paper birch grows can grow on almost any soil. Specifically, they state it can grow from “steep rocky outcrops of the mountains to flat muskegs of the boreal forest (Histosols)”.

Pretty wild stuff!

Birch trees can grow in wet areas, sandy or clay soils, areas of higher acidity, and love full sunlight as long as the temperature doesn’t get hot enough to bake the roots. Once the trees are established, they become more drought tolerant because of the shallow root system.

Precautions To Take Before Planting Birch Trees

Birch trees are beautiful in their own right and can make stunning additions to your property, but with planting any tree, some careful considerations need to be made before you plant. 

Water Lines and Irrigation 

As we stated earlier, birch roots will seek out water. Front yards usually have water supply lines and sewage lines underground. Irrigation lines for watering lawns and landscapes have become increasingly popular as well. If your yard has any of these pipes in your yard, it’s not advised to plant birch trees in this area. 

The roots of birch trees can spread far and are determined to get into the never-ending supply of water. Make sure you check for water lines before planting birch trees. 

Overhead Power Lines

You also shouldn’t plant birch trees near overhead power lines, streetlights, or other overhead hazards. Birch trees grow fast and tall; if they get into the lines above, the city or county will have to cut them back. 

Sidewalks, Patios, or Other Paths

Because of the shallow, sprawling root systems of birch trees, unless you want your sidewalks, patios, or walkways to become an off-road hiking trail, don’t plant birch trees around these structures. The roots could crack the concrete, raise pavers, or otherwise disturb the smooth surface creating trip hazards, and unsightly cracks. 

Wrapping It Up!

You may have noticed the peeling bark, and rough-edged oval leaves of birch trees along rivers and parks and wondered if you too could have something like that in your garden. Well now you know you can, and you know where you can plant these cold-loving deciduous trees where they will grow the best. 

Some of the best areas to plant birch trees are:

  1. Areas with full sun
  2. Near creeks or riverbanks
  3. Near ponds
  4. In a landscape
  5. As a centerpiece to a garden
  6. Areas you have acidic soil 
  7. Wet spots in the garden
  8. Low lying areas that gather water
  9. In sandy soil

Birch trees are prized for their distinctive looks, and captivating beauty through all the seasons, and are a very fast-growing tree. They grow great in nearly all types of soil conditions with the proper care, meaning you can enjoy that papery magnificence all year round in your yard and property.

If you have sandy soil, wet soil, normal soil, or acidic soil, a birch tree will love it as long as the leaves get plenty of sun, and the roots stay cool and moist, you too can grace your yard with the beauty of the birch tree. 

Best of luck on your tree journey! 

References:

Lachowicz, H., Sajdak, M., Paschalis-Jakubowicz, P., Cichy, W., Wojtan, R., & Witczak, M. (2018). The influence of location, tree age and forest habitat type on basic fuel properties of the wood of the silver birch (Betula pendula Roth.) in Poland. BioEnergy Research11(3), 638-651.

Beck, P., Caudullo, G., de Rigo, D., & Tinner, W. (2016). Betula pendula, Betula pubescens and other birches in Europe: distribution, habitat, usage and threats.

Perala DA, Alm AA. (1990). Reproductive ecology of birch: a review. Forest Ecology and Management 32: 1-38.

Grafting a tree sounds like a difficult, labor-intensive, highly skilled endeavor, but it doesn’t have to be. It does require a little bit of knowledge along with a few specific tools, but it can be done if you follow a few simple steps. Grafting a tree also needs to be done in late winter, before the trees transition out of their dormant state.

When attempting to graft a tree, it’s best to wait until late winter or early spring while the scions and rootstock are still in their dormant phase. While budding is usually performed during the growing season, most grafting is done in winter and results in the best success.

The preferred time to graft most trees is in the late winter, before the temperature starts to warm up, and before the trees start to bud. The reason being, because as the tree enters the growth stage, it can heal faster, and has more time to grow before going dormant again. Keep reading to learn the steps to graft your tree!

Check Your Equipment Before Getting Started

Fresh cleft graft on a young figs tree

The proper tools are essential for doing any job well. Though you won’t need a lot of equipment to graft trees, the proper maintenance of your equipment will make all the difference. Before you get started make sure you have these items available:

Tree Grafting Requires A Grafting Knife

A grafting knife or a razor-sharp knife works very well here.

A sharp knife is paramount for grafting because you need good, clean cuts on both your scion (the part of the tree you are going to graft, usually a short, pencil-thin branch) and rootstock (the tree that is getting the graft attached to it).

A clean wound on a tree heals better and faster compared to a jagged, rough cut, a tear, or crushed part of the tree. PUELDU Double Blades Grafting/Gardening Knife with 2 Grafting Tapes is a great option because it has one curved blade, which helps to get a clean cut, and a flat blade with a bark lifter for cleft and splice grafts.

It also comes with two rolls of tree wrap!

If you need to sharpen your knife instead of buying a new one, this Work Sharp Precision Adjust Knife Sharpener will help you put a razor’s edge on your blades. 

Sharp Bypass Garden Snips

Your scions should be about the width of a standard, wooden pencil. A sharp pair of bypass garden snips such as these Gonicc 8″ Professional Premium Titanium Bypass Pruning Shears will probably become your gardening best friend. 

These bypass shears create clean cuts on smaller branches making your grafting job that much easier.  

Tree Wrap

When you start grafting trees, you are essentially performing surgery on a tree. Once the graft is complete the wound needs to be wrapped with a high-quality tree wrap. 

This helps to keep bugs and debris out of the wound so it can heal faster and cleaner. The second reason to wrap a new graft is to add structural integrity. After all your hard work, you don’t want a mild gust of wind to break off the newly grafted branches. 

You can use something flexible such as electrical tape in a pinch, but we recommend tree wrap made specifically for trees. Dumta Nursery Grafting Tape is a great grafting tape that allows the wound to breathe while keeping water out. It’s also biodegradable, so you won’t have to remove the tape once the graft heals. 

Cut-Resistant Gloves

While working with very sharp knives, it’s always advisable to have something to protect the little “piggies”. Cut-resistant gloves such as these Cut Resistant Gloves, 3 Pairs Upgrade Safety Cutting Gloves are an essential safety precaution when working with very sharp knives. 

Fine Toothed Saw 

This tool is optional depending on the type of graft you are doing and the size of the graft. If you are grafting a larger branch that snips or loppers can’t easily cut through, you will need a fine-toothed saw for a nice, clean-cut.

Corona Tools 10-Inch RazorTOOTH Folding Saw is a great pick for branches or trunks six inches or less that need to be cut for grafting. The sharp teeth leave smooth cuts that will heal easier compared to other saws. 

A Disinfecting Solution To Clean Your Tools

To prevent cross-contamination between trees, it is advised to disinfect your cutting tools before and after you cut into the trees. Isopropyl alcohol works immediately to disinfect your tools, and it evaporates quickly which helps to prevent rust.

You don’t have to mix isopropyl alcohol or dilute it with anything!

Another solution to disinfect your tools is to use a mixture of water and bleach (according to product specifications.) Place the solution on your blades and let them dry completely before using!

The downside to bleach is it can eventually damage plastics and rubber parts on your tools. It can cause the metal to rust if it’s not cleaned and dried completely, and if you get it on our clothes, it will strip the color out. 

9 Steps To Easy Grafting! Let’s Get Started

apple tree renovation by the grafting

Several different types of grafting that can be done to a tree, but we will be focusing on the whip and tongue graft, which is one of the easiest grafts, especially compared to a whole tree graft. 

Yes, you can graft an entire tree. As long as you have a strong rootstock and fresh scions available, you can graft an entirely different tree to a small stump. But that’s an advanced class, let’s start with something simple; a single branch.

Whip And Tongue Graft

This type of graft is the most popular method and is used mostly on fruit trees. Say you have an apple tree that grows beautiful red delicious apples, but you want a variety.

So you decide to graft on some gala apples, for example, now you have one apple tree that produces two types of apples every year. But, can you graft in winter? Let’s dive into grafting to learn more!

Step 1: Choose Your Grafting Site

We’re assuming you already have your rootstock and scion picked out, so we’re going to get straight into grafting. You want to make sure for a whip and tongue graft, both rootstock and scion are about the same size.

Step 2: Cut Your Scion On A Diagonal

With your sharp knife or razor knife, cut your scion on a diagonal. This cut only needs to be about one inch long.

Step 3: Make A Second Diagonal Cut

Next, you need to do another opposite, diagonal from the first cut you made. Your scion should now have a V at the bottom of it and now be about one-half inch long.

Step 4: Cut An Area Below The Buds

On your rootstock, take the bypass shears and cut an area below any buds. You want the tree to focus on the graft and grow that section.

Otherwise, the graft may not take because all the growing energy is being focused on the bud underneath the graft.

Step 5: Cut A “V” Into Your Rootstock

Now, use your sharp knife again and cut a ‘V’ into your rootstock where the scion will rest.Where your scion has a point, the rootstock needs to have an open ‘V’ base for the scion to fit into. 

What you want to see is the cambium layer lining up. The cambium layer is the layer of green growth directly underneath the bark. This is where all the growth happens on trees, so these need to line up as closely as possible.

According to NC Historic Sites, for a successful graft, each growth needs to have clean, even cuts that match up to the cambium layers. The wound is then bound with tape so it can heal. Then new cadmium cells grow together to create a layer of cells called a callus.

Step 6: Insert The Scion Into The Rootstock

Make sure you DON’T shove it in there because that could cause your rootstock to split. You want a good, snug fit, but don’t shove it in there. If there is a big gap, whittle down one end so it fits better, but really be careful not to split the branch of your rootstock.

Step 7: Wrap Both Ends Using Grafting Tape

Now that the scion and rootstock are together—you may need an extra pair of hands for this step—wrap the two ends with grafting tape. You want to make sure the tape has a snug fit, but don’t squeeze the life out of the tree.

If you have ever wrapped your wrist, knee, or other joints with a sports brace, this would be similar, only a little bit tighter. The main goals here are to keep insects and rain out while adding structure and stability to the graft with the grafting tape.

You could also take this time to label your graft. You don’t want to accidentally cut the graft off when you go to prune your trees. Plus, if you do several grafts at the same time, this helps keep everything organized.

Step 8: Maintain Your Tree!

Now, you should water your tree, and if it hasn’t been fertilized in a year or two, now would be a great time to add some extra nutrition so the tree can grow even better!

Keep checking on your tree to make sure it’s doing well. Not all grafts will take so you will have to keep an eye on the scion to see if it is starting to grow when spring rolls around.

Step 9: Check To See If The Graft Has Taken

Once you see that the graft has taken and the scion has leafed out, you might be able to take the tape off if it’s not biodegradable tape. Around mid to late summer, if the tape is not starting to come off on its own, you should go ahead and remove it.

If the tape stays on too long it can actually constrict growth and choke off the new graft. Take a look at the grafting point, it should be almost undetectable, or you might see a small scar where the cuts were made.

As long as it’s all fused, the graft is a success and you don’t have to worry about wrapping it anymore. Give yourself a nice pat on the back or congratulate yourself by cracking open a cold one!

Benefits Of Grafting

Macro photo of a successful graft in the branch of a cherry tree in bloom.

Grafting has been around for thousands of years, and if it wasn’t for this type of tree surgery, we might not be enjoying the plump, delicious, sweet, fruit we enjoy today.

If you have ever planted seeds from an apple, one, you know it takes a long time to get fruit, and two, you wouldn’t even end up with the same fruit. 

If you planted a Honeycrisp apple seed, you’d be very disappointed when the fruit that finally came about was hard, bitter, and tasted nothing like the apple the seed came from. That’s because apple seeds don’t grow the same trees or fruit. Apple trees are grafted to get a certain type of fruit.  

Grafting can be done to make a hardier tree. Say a certain type of tree is prone to root problems, you can bypass that by grafting a tree to a different, more resistant rootstock. 

According to the USDA, grafting can create a desirable market for growers and consumers by increasing resistance to diseases, nematodes, and stress. Grafting can also increase harvest yields and fruit quality. 

Grafting also adds variety. I once had a citrus tree that had five different fruits growing on it. Lemons, limes, tangerines, navel oranges, and mandarin oranges. You could do the same thing with other fruit trees, or similar flowering trees for a unique species. 

You can experiment with small branches, that way, if the graft doesn’t take, you won’t lose the entire tree, just a branch or two. 

Why Graft In Winter?

Grafting in late winter is the best time for several reasons. The trees won’t get shocked when you do a transplant on their limbs, when the growing season starts, the tree has a longer time to heal, and spring is when all the tree’s growth happens. 

If you were to start grafting in the summer or fall then the tree would not have time to completely heal before the harsh winter sets in. When the temperatures dip below freezing, a frost could set in and ruin the new grafts, making them completely unviable. Grafting in late winter or early spring counters the hard freezes that could ruin a new graft. 

During spring, trees take in a lot of water which flows through the cambium layer. The water is used to kickstart new growth and make the leaves bud out. This is what really makes a graft heal and start growing. 

Grafting in late winter gives the tree plenty of time to completely heal and get prepared for another winter chill. 

Can You Graft Trees In Summer?

There’s no law that says you can’t graft trees in the summer, but we certainly wouldn’t recommend it. The reason is that the growing season is over, and the tree won’t have enough time to heal before winter. 

Basically, doing anything to your trees such as transplanting, pruning, or grafting during the summer is just a recipe for disaster. During the summer, you should only really be watering your trees. 

What Types Of Trees Can Be Grafted Together?

Common wisdom for tree grafting is that the trees have to be similar to each other for a graft to take. Unfortunately, we won’t be seeing any Christmas trees that also grow apples—heavy sigh. Sadly, you also won’t have any success putting the lime in the coconut tree (to drink it on up). 

Apple trees can be grafted to each other, and some people have reported success in grafting pears to apple trees. Stone fruit trees can be grafted to each other. I’ve heard of peach, nectarine, plum, and cherry trees before.

Citrus trees can also be grafted together. Roses can be grafted to have different color flowers on the same tree, but in the end, the trees have to be similar to each other.

The reason is, that the cambium layers have to be similar, or they won’t line up and grow together. Completely different tree species have different growth layer structures, so that’s why they don’t work. 

Where To Get Scions

There are several places you can get viable scions:

  • Friends and neighbors
  • Farmer’s markets
  • Local plant sales
  • Online retailers
  • Some nurseries—call and see. They may have a supplier they could hook you up with
  • In the wild—be sure to check local laws and ordinances, sometimes it’s illegal to take from state and national forests.
  • Grow them yourself

Storing Your Scions

Scions need to be cut when they are dormant and can be stored for up to three months. You want to make sure you have the previous year’s growth on the straightest branch possible. To locate the new growth, take a look at the potential scion, where the bark changes texture or color and cut just below this area. 

If you are going to store them, you’ll need a little more space to cut them off before you graft them. 

Scion wood can be stored in an unheated basement, garage, or refrigerator. The temperature needs to be between 34 ℉ and 54 ℉. Never store them in a freezer, this will ruin them. 

You’ll need a sealable bag that is big enough to hold them comfortably. Next wrap the scions in damp paper towels. They don’t need to be dripping wet, and, you should squeeze as much water out of them as possible, then put them in the refrigerator.

You’ll have to take them out, and open up the bag to exchange the air inside about once a week. These are still living plant parts and need fresh air. If you need to add some water to the paper towels, now would be the time to do that, just remember to squeeze out the excess. 

That’s All On Grafting, Folks!

grafting trees in spring. Gardening and vegetable garden. Selective focus. nature.

Now you know all about the whip and tongue graft and how to go about it yourself. It’s best to do this type of grafting in late winter when the tree is dormant so that when spring rolls around, the tree has plenty of time to heal. 

Just remember to keep the scions and rootstock fresh, and you’ll need similar varieties of trees. I know I’d love to have a fruit salad tree, complete with apples, cherries, oranges, peaches, etc, but because the trees are so different, it’s not possible right now. 

Thanks for sticking around with us on your tree-grafting journey!

References

Goldschmidt, Eliezer E. “Plant grafting: new mechanisms, evolutionary implications.” Frontiers in plant Science 5 (2014): 727.

Errea, P. “Implications of phenolic compounds in graft incompatibility in fruit tree species.” Scientia Horticulturae 74.3 (1998): 195-205.

Ashrafzadeh, Seyedardalan. “In vitro grafting–twenty-first century’s technique for fruit tree propagation.” Acta Agriculturae Scandinavica, Section B—Soil & Plant Science 70.5 (2020): 404-405.

Melnyk, Charles W., and Elliot M. Meyerowitz. “Plant grafting.” Current Biology 25.5 (2015): R183-R188.

I don’t know about you, but I’ve been seeing lots of videos showing the harvesting of juicy, colorful fruit — all with bags over them! The first thought that comes to my mind is to prevent bugs, but why else? If you haven’t seen this with banana trees before, I’m sure you’re intrigued!

Bags on banana trees help prevent infestations from insects, damage from the environment, birds, or other animals. A lot of the bags used on commercial fruit farms are laden with insecticides to protect bananas from insect damage. It also helps improve the outer aesthetic of the fruit.

Keep reading to learn more about why they put bags on banana trees, and how it works!

Why Do They Put Bags On Banana Trees?

Banana bagging, or bunch covering, has been used for centuries. Originally, banana leaves were wrapped around banana bunches to protect them from winter temperatures.

However, bagging is now common practice throughout the world on fruit farms and is proven to increase the yield and quality of fruit.

Bagging, to be more specific, is the physical practice of placing a bag over banana bunches at different stages of growth!

Bagging not only protects the banana fruit against insect damage and animals, but it also creates a microclimate! This microclimate protects bananas from frost damage and helps maintain a more consistent temperature.

This process also enhances external and internal fruit aesthetics by reducing blemishes and improving color. Banana covering is labor-intensive and pretty costly, but for many farmers, the benefits outweigh the costs. 

There are a few methodologies and practices to follow for bagging banana trees. Let’s dig deeper into the world of bananas!

How Do Banana Bags Work?

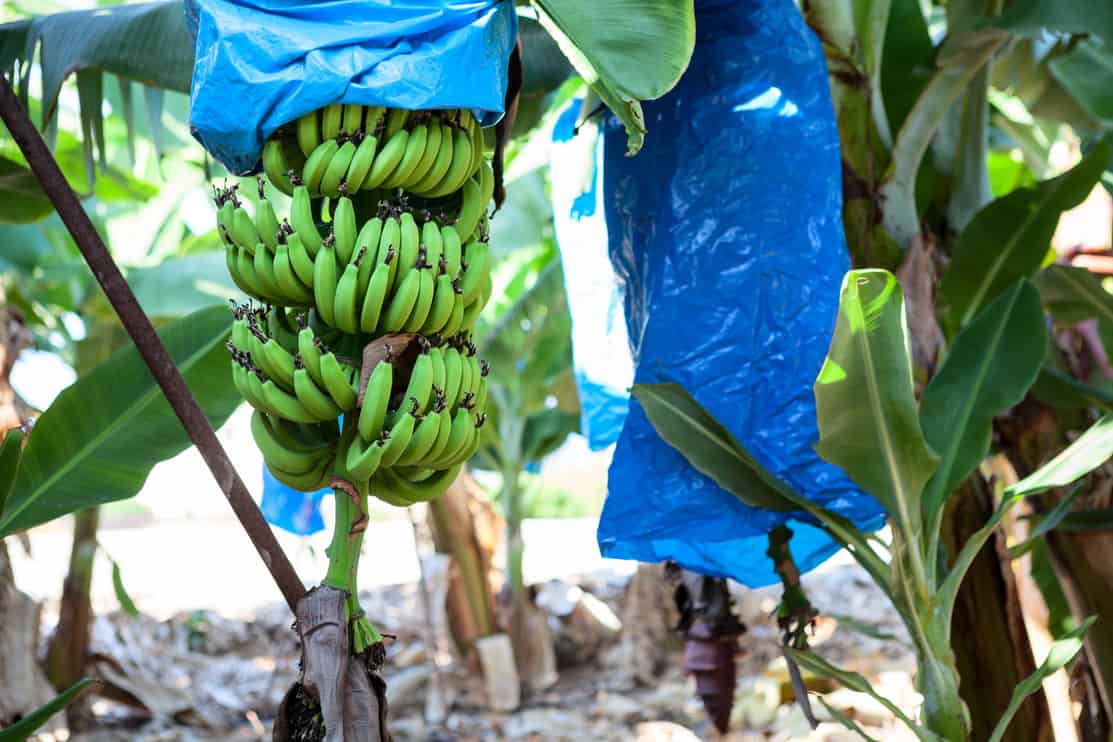
Cavendish bananas plantation, bunches are encased in plastic bags for protection

Bananas have a thick peel, often a bright yellow when ripe, and have little to no blemishes on them, at least in the grocery store. This is where banana bags come in! There are a few different banana bags or also known as bunch covers.

These covers have unique characteristics and different uses. Let’s find out more.

Protect Against Damage

This includes transparent, blue polyethylene, half blue and half silver plastic, all-season bunch covers, and PP non-woven skirting bags. Some bags, mainly used by commercial growers, are saturated with insecticides to protect banana crops.

These bunch covers or banana bags protect bananas and other fruits against pathogens, damage from wind, birds, and sun, scarring, and damage during harvesting. 

Additionally, banana bags can protect fruits from freezing temperatures and reduce stress. So, as you can see, there are a multitude of reasons banana growers choose to use banana bags on their fruit.

Block UV Rays From The Sun

Transparent bag covers are mainly used to block UV rays from the sun. These bags allow for better light and temperature to penetrate the bananas and increase their growth. In certain conditions, where sunscald is an issue (basically sunburn on bananas), transparent bags are not used.

Blue polyethylene bags are commonly used in large-scale, or commercial banana farms. Sunscald, as we mentioned above, can be prevented using these bags.

The blue polyethylene blocks UV rays but still allows heat to penetrate, promoting optimal growth. These bags also prevent infestations from insects, and protection from birds, and other environmental factors. 

Maintains Proper Temperature Of The Bananas

Half blue and half silver plastic bags have a dual feature, and are pretty cool! 

The silver part of the bag faces toward the sun, with the blue side facing the trunk. Facing the blue side towards the north increases the temperature within the bag during the winter months.

The opposite is true during the summer and warmer months. Facing the silver side towards the north during the summer months decreases the temperature within the bag. This dual feature helps keep a constant temperature in the bag to improve fruit growth. 

An all-season bunch cover is a bag used to protect against harsh growing conditions. It was developed in Australia and ensures even heating, lighting, and development of bananas. They also have more UV protection than other banana bags.

Controls Ripening Of Bananas

Next is the PP (polypropylene) non-woven skirting bag. These bags are made up of a fabric that protects without sacrificing water permeability.

This type is supposed to help control the ripening of bananas and allow airflow and moisture circulation. It is also said to block insect and pathogen infestations completely!

When you’re picking out bananas in the store, you probably go towards the ones with the least amount of blemishes, bruises, or cuts on the outside of the peel.

Well, your bananas have probably been covered with banana bags! Banana covering yields better fruit quality and increases its market value, specifically because of a blemish-free appearance.

Effectiveness Of Banana Covers

Bananas wrapped in Blue plastic bags on a Tractor trailer, Aerial view.

It has become the most common practice in commercial banana production to cover bananas. They vary based on thickness, color, and type, as we mentioned above. 

The thickness of banana bags doesn’t affect the efficiency but affects the overall cost. What the thickness of the banana cover does is control and influence the overall temperature within the bag and can actually increase issues with bananas themselves if the climate isn’t just right.

The color of banana bags is another factor that influences banana growth and fruit quality. 

Banana covers come in white, blue, and silver, as we mentioned above. Using different colors of banana bags depends on the season, climate, and region. Each has a different impact on growth depending on what they’re used for. 

White-colored bags let in the most light, and blue covers let in the second most light. This leads us to what is better, white or blue? 

Blue banana bag covers result in bigger and heavier bunches of bananas. 

Why do you think this is? If you said UV rays, you’d be correct! 

The blue bag covers let in the most amount of heat without letting in UV rays, meaning no sunburn!

Another study from the Agricultural and Food Engineering Department of the Indian Institute of Technology looked at why colored bags are superior to non-colored bags. Colored bags not only reduced the time between flower emergence and harvesting, but they improved the quality and yield of bananas and offered protection against UV rays and pests. 

As we mentioned above, the different bags are used for different reasons and in different seasons, climates, and regions. Banana bagging can also quicken the maturity of banana bunches, ensuring on-time harvests for banana farmers. 

The effectiveness of bunch covers is substantial. Bananas covered with bags don’t show signs of scratches, blemishes, or physical injury, compared to uncovered bananas. 

In case we didn’t make the point earlier, banana bunch covers increase yield, quality, and size. Bananas also mature much quicker when covered with polyethylene covers. Using these bags can also limit the use of insecticides used on banana crops.

However, it depends on the insects growers are targeting, and the efficiency of the bag by itself.

Can I Grow My Own Banana Tree?

Raw bananas hanging on banana tree.

If this article is getting you excited about growing plants, well you’re in luck. You can grow a banana tree from the comfort of your own home!

There are ornamental banana trees (which produce fruit but you can’t eat it), and those that produce edible fruit. 

Whatever variety you decide on, bananas trees need full sunlight and at least 12 hours of sunlight. Depending on the type of banana tree, like the dwarf cavendish banana tree, they are self-pollinating, meaning you don’t need another tree near it to produce fruit. 

Additionally, banana trees need specific soils and consistently warm temperatures to produce fruit (you can view the best banana tree soils here.)

They will not survive if temperatures reach below 50 degrees Fahrenheit. So if you live in a USDA Hardiness Zone under 8, your banana tree will be a seasonal plant to have around the pool or patio, or grown as an indoor plant. 

If you want to grow it inside, it will not produce fruit, however, if you live in a tropical climate there’s a chance your banana plant can fruit! 

The Brighter Blooms – Ice Cream Banana (tree) is a great way to get started. It comes in three different sizes, so you can choose which size works best for you. This tree company even has a warranty, in case your banana tree doesn’t arrive as expected. 

Now that you know a little more about growing your own banana tree, you can boost your banana tree’s health by using fertilizer. 

The Dr. Earth INC 756P Exotic Blend Palm, Tropical & Hibiscus Fertilizer is a perfect option. It is non-GMO and organic! It’s made in the USA and has amazing reviews of reviving plants that were on their last leg. 

That’s A Wrap!

By now, we hope you feel you know why banana bagging is important to quality fruit harvests. The next time someone brings up fruits, you’ll have lots of exceptional facts to share about why their fruit looks so good!

That was a lot of information at once, so let’s recap why they put bags on banana trees and how it works. 

Bags on banana trees help prevent infestations from insects, environmental damage, and damage from birds and other animals. 

Bagging is a physical practice that involves placing a bag over banana bunches at different stages of growth. 

Most banana bags used on commercial fruit farms are saturated with insecticides to protect bananas. When the insecticide-laden bags rub against the fruit, it helps prevent insect infestations from forming.

Banana bagging has been used for centuries. Banana leaves were wrapped around banana bunches to protect them from winter temperatures before the use of bags. 

There are a few different banana bags, which include transparent, blue polyethylene, half blue and half silver plastic, all-season bunch covers, and PP non-woven skirting bags.

These bags all have different purposes and are used depending on the use, location, and climate. 

If you live in a tropical climate or want to grow an indoor plant, well, you can grow your own banana tree! While it may not produce fruit, it’s still an amazing plant to have in your landscape or houseplant collection. 

Thanks for sticking around and reading with us and learning why they put bags on banana trees, and how they work!

References 

Amani, M., and G. Avagyan. “Effect of polyethylene bunch cover on fungal diseases control of banana (Musa acuminata L.) in Iran.” International Journal of Farming and Allied Sciences 3, no. 10 (2014): 1054-1057.

Damour, G., Garnier, E., Navas, M. L., Dorel, M., & Risede, J. M. (2015). Using functional traits to assess the services provided by cover plants: a review of potentialities in banana cropping systems. Advances in agronomy, 134, 81-133.

Pathak, Purnima, Kartik Baruah, and Bhupen Kumar Baishya. “Influence of bunch covers on appearance and maturity of banana cv. Jahaji under high density planting system.” Research on Crops 17, no. 3 (2016): 512-516.

RODRIGUES, M. G. V., SOUTO, R. F., & MENEGUCCI, J. L. (2001). Influence of polyethylene banana bunch cover for irrigated banana tree in the North of Minas Gerais state. Revista Brasileira de Fruticultura, 23, 559-562.

Santosh, D. T., Tiwari, K. N., & Reddy, R. G. (2017). Banana bunch covers for quality banana production-a review. Int J Curr Microbiol Appl Sci, 6(7), 1275-1291.

If you’re going to start growing your garden, herb, landscape, or vegetable, you’ll probably have lavender somewhere in the mix. Whether you’re a new or experienced gardener, you’ll want to make sure you plant lavender in the right spot!

Lavender needs to be planted in an area with full sun, with at least 6 hours of sunlight a day. Lavender will suffer in the shade and won’t grow. Planting lavender in full sun will promote a healthier and stronger plant, and increase the production of blooms.

We’ll go over why lavender needs full sun and not shade, and the best things to do when planting lavender. Keep reading to keep your lavender bright and blooming!

If You’re Harvesting Lavender You’ll Want Full Sun

Fields of Lavender Against Blue Sky

Lavender needs full sun to grow properly and thrive. Imagine you planted some vegetables in the shade that needed full sun, chances are the growth will be stunted, and you might not even get any fruits. Your vegetable plant might even start to rot or get mildew! Yuck!

Lavender is an indigenous perennial to the Mediterranean, the Middle East, and India, and is found along the coasts and mountains regions of Europe. So, if you imagine the types of climates in these regions and what can grow there, like desert landscapes, coastal areas, and rocky soils, this will give you an idea of the conditions lavender does best in. 

The same thing applies to lavender, if you want to get that big bushy purple wave of blooms, well you’re going to want to plant it in full sun!

On the other hand, there are a few shade-tolerant varieties of lavender, but we’ll get into that later.

So, you’re growing your lavender. Regardless of what you are growing it for, landscape, herb, or whatever it may be, you’re going to need full sun if you want to harvest it! And chances are, if you’ve ever had it in your yard, grown it, or seen it, you’ll want to try harvesting it at some point.

Lavender Needs Full Sun For Fragrant Blooms

If you’re growing lavender, chances are aside from the look you’ll want to smell that sweet fragrance from time to time. And where does that fragrance come from? The blooms!

But guess what your lavender needs to give you those fragrant blooms? The sun! This means it needs to have at least 6-8 hours of full sunlight a day to even grow the blooms at all. 

Lavender oil production within the flowers is directly dependent on the amount of sun it receives. Another factor at play is soil fertility. If your lavender is in full sun but still not producing fragrant blooms, it may be in overly fertile soil, which sounds counterintuitive. 

Overly fertile soil typically has excess nutrients like nitrogen. Excess nitrogen causes lavender to turn yellow because it’s receiving too many nutrients, and it will begin to look leggy. Not only that, but its flower production will start to decrease as well.

But that’s not all, there are also certain varieties of lavender that have stronger fragrances compared to other varieties, and ones with scents similar to rosemary or pine. Lavandula x intermedia ‘Grosso’ is known to be the strongest smelling lavender variety. 

There are four types of lavender, all of which have different growth habits, sun requirements, looks, and uses. ‘Grosso’ lavender is part of French lavender, but there are four other types of lavender, including English, Portuguese, Spanish, and Lavandin (which are the hybrid forms). 

So, if we didn’t make it clear, the main idea is the sun! If you’re tending to your lavender during the day, you’ll probably want to protect yourself from the sun. 

If you need a hat, this Quiksilver Men’s Pierside Lifeguard Beach Sun Straw Hat is wonderful option to keep cool while gardening! It comes in multiple sizes and colors and is large enough in diameter to keep the sun off you from all angles!

Lavender Needs Full Sun To Control Soil Moisture Content

Purple lavender flowers on a blue clear sky background. Blooming lavender in the sunlight. Beautiful summer day. Close-up, selective focus.

Lavender does not tolerate sitting in wet soils for an extended time. Without full sun and well-draining soil, this will tend to be an issue. This leads to a variety of diseases, especially if the water has nowhere to go. 

And just like most plants, over-watering is a huge problem and is super common. 

If you’ve ever tended to ornamentals or flowers in your yard or vegetables in your garden, you have probably heard of things like powdery mildew and root rot. Well, they aren’t unique! Lavender is just as susceptible especially without the sun to dry up excess water that sits in the soil. 

So, if you have poorly draining soil and shade, this will present itself in the form of your lavender plant suffering. This can look like yellowing, wilting, fewer blooms, leggy-ness, and browning of the whole plant.

As we mentioned, most lavender varieties cannot tolerate sitting in heavily saturated soil, like, at all. This means if you have clayey soil, which is slow draining, or areas that are commonly flooded, it’s not to say your lavender won’t survive, but you may have to do some extra work to keep it growing.

If you do live in an area with clay soil, there are a few tips to help you grow lavender successfully:

The first tip of growing lavender in clay soils is to plant lavender in an area of full sun, with 6-8 hours of sunlight every day. What a surprise! 

The next tip is to plant lavender above the water table so that it’s elevated. You can do this in the form of a mound or a raised soil bed that looks like a semi-circle. 

Lastly, when planting lavender in clay soils, you can dig the hole twice as deep and wide as your plant and backfill the hole with limestone, sand, compost, and grit!

If you decide to try this method, the VPG Fertilome PEL318 6Lb Agricul Limestone is an excellent choice to help correct soil acidity (if needed), and increase drainage.

All of the tips mentioned above can drastically help with drainage and can help ensure your lavender grows successfully in poorly draining, sometimes flooded soil. 

Shade Increases The Chance Of Pathogens In Lavender

Purple lanes of lavender in the provence in France, Europe

You may have guessed what comes next on our list: lavender ailments.

  • Powdery mildew is a fungal disease that will display symptoms on the leaves of lavender plants. This fungus looks exactly as the name says and proliferates in humid environments with warm temperatures.
  • Root rot is a result of overwatering, poor drainage, and waterlogged soil underneath lavender. Although this is especially common in indoor plants, it can be a common issue with lavender, since they are quite finicky about sitting in water. This will quickly cause your lavender to expire.
  • ‘Shab’-Phomopsis is a fungal affliction that targets the stems of lavender. If you notice every shoot beginning to wilt, without the threat of drought, this could be the culprit.
  • Verticillium is a soil-borne fungal ailment that thrives in warm and wet conditions near lavender. This affects over 400 different plant species and NOT just lavender. Because it is a soil-borne disease it is difficult to manage. This pathogen affects the xylem vessels, which transport water from the roots to the leaves.
  • Alfalfa Mosaic Virus is a phytopathogen that causes lavender leaves to turn yellow, wilt, and curl up. This is not specific to lavender and affects over 600 plant species. This pathogen is spread through insects, mainly aphids, but is also transmitted through seeds and pollen.

Growth Of Lavender Is Dependent On Full Sun

Lavender growth is directly dependent on the amount of sun it receives. Without 6-8 hours of full and direct sun every day, your lavender will most likely become leggy and weak, and you won’t get that full, dense look you may have expected. 

Growing lavender in the proper location can also ensure that your plant is lush and has lots of buds and blooms. 

If you’ve never seen a leggy plant, we’ll give you an idea of what it looks like. It is sparse, doesn’t have dense, full growth, and kind of looks lanky and misshapen. Usually, it’s a lot of tall stems with not much else going on. Your plant might also lack those gorgeous, fragrant flowers you were hoping for!

As we mentioned above, root rot, along with other pathogens, is a concern when growing lavender in an improper location. So, to grow a strong plant that will continue to come back year after year is dependent on having the proper amount of sun.

Does Lavender Grow In The Shade?

Lavender does not grow well in shade. Although some varieties may be more shade tolerant than others, like Spanish lavender, French lace lavender, and French lavender, it doesn’t necessarily mean that they will grow to their full potential given too much shade.

So, wherever you are planting in your yard, garden, or landscape, make sure your lavender is placed in a location that receives full sun.

Most Common Types Of Lavender

Spectacular lavender rows at sunset. Picturesque purple lavender fields and agricultural areas in Provence region, France, Europe

Lavender has been tested time and time again to determine the best growing conditions. Including things like drought tolerance, moisture tolerance, and soil composition tolerance. 

Lavandula angustifolia is one of the most common types of lavender that you’ll find and it comes in multiple varieties.

Each variety can tolerate different conditions, so it’s important to read the tag or research it before planting! What we mean by this is some Lavandula angustifolia responds well to drought conditions without showing signs of stress, while other lavenders prefer moist conditions, and don’t tolerate drought as well. 

Some of the most common types of lavender you’ll see are: 

  • English lavender
  • ‘Hidcote’ English lavender
  • ‘Munstead’ English lavender
  • Lavandin
  • ‘Hidcote Giant’ lavandin
  • Spanish lavender
  • French lavender

English Lavender

English Lavender is drought tolerant and needs well-draining sandy soil. It grows best in USDA Hardiness Zones 5-8 and can grow up to three feet tall!

This lavender is most widely used in cooking and baking, and essential oils.

‘Hidcote’ English Lavender

Next up is the ‘Hidcote’, which boasts silver foliage with fragrant flowers. It is a compact variety that does best in well-draining soil.

This variety grows in USDA Hardiness Zones 5-8 and grows up to 20 inches tall, significantly smaller than the English lavender we just mentioned.

‘Munstead’ English Lavender

The ‘Munstead’ lavender is another compact growth lavender. This variety also has silver-gray foliage like the ‘Hidcote’. It does best in well-draining soil and grows to 18 inches tall.

Like the previous lavenders, this one grows best in USDA Hardiness Zones 5-8.

Lavandin

Lavandin lavenders are a hybrid version of lavender. They are English lavender crossed with spike lavenders and are typically used in perfumes and oils. This type is tolerant of dry conditions, and warm temperatures, and needs well-draining soil.

This variety grows to two feet tall and does best in USDA Hardiness Zones 5-8.

‘Hidcote Giant’ Lavandin

The ‘Hidcote Giant’ lives up to its name, growing up to three feet in height. It is known for its incredibly tall and abundant flowers. It does best in well-draining soil and USDA Hardiness Zones 5-8.

Spanish Lavender

Purple Spanish Lavender Flower

Changing gears to the Spanish lavender. Not only does Spanish lavender look wildly different than English lavender, but it can also tolerate hot temperatures.

If you want spring and summer blooms, you can intersperse your English lavender with Spanish lavender that begins blooming in the middle of spring.

This lavender grows to two feet tall and does best in USDA Hardiness Zones 8-11. 

French Lavender

French lavender has a few cool-looking varieties. Especially the Lavandula dentata, which resembles ferns or yarrow.

French lavender has a different scent to it, which is said to be more like camphor. This variety also begins blooming in spring and will continue blooming into summer and fall.

It grows up to three feet tall and does best in USDA Hardiness Zones 8-11. 

Now that you’re well versed in a few different popular lavender types, hopefully, you have an idea of what is best for your location.

That’s All For Now!

Thanks for sticking around with us to learn more about if lavender grows in the shade. 

We hope that you were able to pick up some helpful tips on why lavender needs full sun and not shade to grow and produce beautiful, fragrant blooms that we know and love. 

References

Adgaba, Nuru, Ahmed Al-Ghamdi, Yilma Tadesse, Awraris Getachew, Awad M. Awad, Mohammad J. Ansari, Ayman A. Owayss, Seif Eldin A. Mohammed, and Abdulaziz S. Alqarni. “Nectar secretion dynamics and honey production potentials of some major honey plants in Saudi Arabia.” Saudi Journal of Biological Sciences 24, no. 1 (2017): 180-191.

Cook, Samantha M., Martin Jönsson, Matthew P. Skellern, Darren A. Murray, Peter Anderson, and Wilf Powell. “Responses of Phradis parasitoids to volatiles of lavender, Lavendula angustifolia—a possible repellent for their host, Meligethes aeneus.” BioControl 52, no. 5 (2007): 591-598.

Jianu, Calin, Georgeta Pop, Alexandra TGruia, and Florin George Horhat. “Chemical composition and antimicrobial activity of essential oils of lavender (Lavandula angustifolia) and lavandin (Lavandula x intermedia) grown in Western Romania.” International journal of agriculture and biology 15, no. 4 (2013).
Kayedi, Mohammad Hassan, Ali Akbar Haghdoost, Ali Salehnia, and Kiumars Khamisabadi. “Evaluation of repellency effect of essential oils of Satureja khuzestanica (Carvacrol), Myrtus communis (Myrtle), Lavendula Officinalis and Salvia sclarea using standard WHO repellency tests.” Journal of Arthropod-Borne Diseases 8, no. 1 (2014): 60.

Koulivand, Peir Hossein, Maryam Khaleghi Ghadiri, and Ali Gorji. “Lavender and the nervous system.” Evidence-based complementary and alternative medicine 2013 (2013).

As fall comes around and the leaves continue to change, it is a good time to remember that there are more causes than the seasons that could result in your oak tree losing its leaves. Some animals and insects that eat oak tree leaves, so watch out!
Mammals, birds, and insects alike are all to blame for an oak tree’s leaves mysteriously disappearing. Five of the most detrimental animals and insects for oak trees include birds, oak leafrollers, oakworm caterpillars, tent caterpillars, and oak shothole leafminers.

Below, we are going to give you all the information you need to know about what is a healthy part of nature, and when an animal or insect is going too far in harming your tree’s leaves. So, keep on reading, and let’s get to learning!

What Animals Are Attracted to Oak Trees? 

Oak leaves are not the only attractive part of the tree when it comes to food sources. Over 100 species eat acorns, from squirrels and deer to wood ducks and wild turkeys. 

Many mammals are also drawn to an oak tree primarily because of its sheltering properties. On hot days, animals and people alike can find respite from the sun as they enjoy the shade from the oak’s massive canopy. 

On rainy days, though it is not recommended to sit near a tree in a thunderstorm, the many oak leaves help to block the wind and rain. Small animals especially, like raccoons, chipmunks, squirrels, and birds, take advantage of this helpful characteristic. 

Not only are creatures attracted to oaks for the acorns and the wonderful shelter, but they may also come specifically for something else: the leaves.

What Kind of Insects Are Attracted to Oak Leaves?

Leaves of oak tree with hoarfrost in forest in the winter

When it comes to insects and oak leaves, there should be quick action. Many species of moths use these leaves as their primary source of food, but some species of caterpillars and other similar bugs have an even more extreme negative impact on this important part of the oak tree.

Realistically, many more insects than animals eat oak tree leaves, and they are what you will need to watch out for the most.

What Kind of Animals & Insects Eat Oak Leaves?

There are not too many creatures that specifically opt to make a meal of oak tree leaves. Most prefer the fruit or an acorn as their oak tree source of food.

There are a few pests that you should be aware of, some of which are very harmful and some that are not too bad.

It is important to know what to watch for, so let’s talk the animals and insects that eat oak leaves:

●  Birds. Many species of birds feed on both oak leaves and the insects that cause them harm, resulting in a semi-beneficial relationship to the tree overall. Most of the time, birds should not be much cause for concern, even if they do eat a few leaves here and there. 

●  Oak Leafrollers. A very pesky caterpillar, this one has the potential to cause some serious and detrimental issues if not controlled. Luckily, North Americans do not have as much cause for concern at the moment, but being prepared is key.

●  Oakworm Caterpillars. They may be relatively easy to deter but, left untreated, these little critters can cause some serious havoc on oak leaves and, eventually, the trees themselves. 

●  Tent Caterpillars. These creatures chew leaves and spin silk. Sound like an annoying problem? That’s because it is- you don’t want these caterpillars around your oak trees. 

Oak Shothole Leafminers. These tiny bugs create big problems, and holes in leaves, that only get worse with time.

Clemson University’s Home and Garden Center shows that most threats to oak trees will be seen in the form of disease or insects that attack sap or bark, but the pests that attack oak leaves should not be overlooked.

Birds Eat Oak Leaves

Mighty Oak Tree in Green Field under blue skies with clouds, Spring Landscape under Blue Sky

Many of the same birds that eat acorns also eat oak leaves. This includes but is not limited to blue jays, wild turkeys, crows, mallards, woodpeckers, ducks, and more. 

Even more so than opting for a meal of leaves alone, the University of Florida Extension explains that oak leaves are often a casualty of birds trying to get to the insects in the tree, which do happen to feed on the leaves. 

So, if you see any type of bird perched on a limb of live oak, near a cluster of leaves or a pile of Spanish moss, just know that they are there to get a little more than just a tasty salad.

In fact, this is kind of an interesting situation because the birds feeding on so many types of insects that cause significant harm to a tree helps the tree to increase its growth. By consuming so many leaf-chewing insects, birds can eat some leaves and stilldo more good than bad to the tree itself. 

This is a sort of mutualistic relationship in a way. Birds get food, shelter, and some extra snacks while the tree does not have so many insects vying for its precious foliage. 

If you see many birds in your oak tree, remember that they are helping more than they are hurting. There is no real need to worry about these flying friends. 

When it comes to insects, however, that is another story…

Oak Leafroller Eats Oak Leaves

Oak leafrollers, otherwise known as green oak tortrix, are small caterpillars with a green or brown body. Typically, their heads are a bit darker. 

A particularly harmful critter, much more so than any of the birds mentioned above, this is one to watch for. 

Though not a threat yet in North America, this species is widespread in Europe and parts of Africa and Asia. There are a wide variety of suitable hosts all across the North American continent, so this is a creature to keep tabs on. 

Leafrollers spin webs across leaves to turn them into a feeding area that is more condensed and therefore safer. Over time, this can cause an entire tree to lose all of its leaves. 

So, how do you solve this infestation?

If the problem has not developed into a full-blown infestation, you could just take some trimmers like these ClassicPRO Titanium Bypass Pruning Shears to remove the clusters of leaves that have been affected. 

If this does not work, you may need to rely on some sort of bio-pesticide to get the job done for you. Protect U.S. mentions using BT, Bacillus thuringiensis, to treat true infestations as they occur.

As this is not an issue in North America quite yet, we’ll leave this one at that for now and hope that you won’t need to reference this section unless you are based in a location that is home to these pests.

Oakworm Caterpillars Love Oak

Spring Sun Shining Through Canopy Of Tall Oak Trees. Upper Branches Of Tree. Sunlight Through Green Tree Crown - Low Angle View.

Similar to the oak leafroller, this caterpillar has a body that begins as a greenish-yellow color but this creeping creature gets darker with age.

Between spring and summertime, these critters could completely defoliate a tree. Instead of spinning silk to cluster the leaves, they tend to munch directly on them until they are down to the veins. 

You’ll want to deter these pests quite early on to ensure that they do not overrun your tree entirely. This can be done by using the BT that we talked about in the last section. Read more about this here.

Something like this Garden Safe BT Worm and Caterpillar Killer can help. This product is intended for organic gardening and boasts that it will not harm beneficial insects or animals if used as directed.

You simply mix the product with water, as directed, and spray it on. You’ll need a ladder most likely, but that is a small step to curb a big problem!

If your tree is young and it is a manageable task, you can easily pick individual caterpillars directly off of the leaves. This is recommended only if the process of buying BT and using it would take longer than hand-picking caterpillars.

You can learn more about keeping oakworms off your oak tree here.

Oak Trees Are Feasted On By Tent Caterpillars

Thanks to the University of Kentucky College of Agriculture, we know that tent caterpillar eggs are laid in clusters of 100 to 300. Now that is a LOT of potential pests coming to destroy your beautiful oak leaves. 

With a reddish-brown color and hairy body, this little pest can cause more damage than one might expect. While the first sign of infestation may be thinning crowns, another indicator is the constant dropping of caterpillar waste. 

Not only is this a messy, annoying dilemma, but these particular caterpillars have multiple methods of destroying your oak leaves. Along with weaving strands of silk that add a rather unseemly appearance to the overall look of the tree, these critters will chew right through your oak leaves. 

As the young caterpillars start working their chaos as buds begin to break in the spring, you can try to take a preventive step by either cutting branches in later winter or tree banding in early spring before the infestation can take hold. 

What is tree banding, you may ask?

Basically, you can wrap your tree in a sort of adhesive that is both environmentally friendly and incredibly effective at catching bugs of all kinds. 

This Catchmaster Tree Banding Insect Adhesive Barrier is both easy to use and yields great results. The downside to this product is that it can harm non-target insects and may affect birds, squirrels, and other tree-dwelling critters. You can minimize the risk by putting chickenwire fence over the substance.

Oak Shothole Leafminers Eat Oak

These pests are particularly bothersome because they do not just eat the leaves. Instead, the adult females begin by puncturing into them to consume their sap. This leads to holes forming and expanding as the insects continue to feed and the leaves grow with the season. 

As blotches expand, the leaves weaken and offer up an even more vulnerable area for consumption both by these oak shothole leafminers and other insects that are looking for an easy meal.

Instead of birds or caterpillars, this creature is a small fly that you’ll want to be on the lookout for. 

Unfortunately, there is not much of a solution for these pests, so we want to remind you of ways you can at least maintain control when it comes to their pesky peers.

Keeping Your Oak Leaves Safe From Animals & Insects

Acorns on a bed of autumn leaves

There are plenty of methods to help keep critters from eating your oak leaves.

Oklahoma State University tells us that livestock of any kind are much more likely to eat live, green leaves than they are to opt for a snack of dried and/or fallen ones. 

Here are a few methods to keep animals from feasting too frequently on your tree:

Trim Your Leaves If Needed

Remember that by catching the infestation early, you can save a lot of time, stress, and money. This is only going to be successful if there are not already too many insects causing the same sort of problem.

If you see certain insects on your tree and are not sure how bad things are, reach out to a local professional for help.

Use BT to Control Larger Infestations

Has your tree become overrun with pests that are eating, or otherwise destroying, your oak tree leaves? 

Using BT to spray should not cause harm to any beneficial insects, but will help take care of those that are attacking your oak’s foliage. 

Call a Professional

We mentioned it above and we’ll say it again here. If you are not sure how to handle a problem, cannot quite tell how bad it is, or just feel generally overwhelmed, leave it to the professionals!

This is a good way to ensure that the problem will not accidentally go unresolved, and will give you peace of mind from the security of knowing that someone is helping you get this issue under control.

Okay, It’s Time For Us To Leave!

Bad pun? Maybe. Good information? We certainly hope so!

Oak trees are wonderful organisms that do so much for the environment and the critters around them, but it’s good to be aware of those that might do your tree harm.

While oaks are extremely resilient, even they have their limits.

It’s okay to let birds eat leaves once in a while as they work to help you control the tree’s insect population, but this is not always something that you can rely on. While there is a semi-mutualistic relationship there, not every tree is going to draw in birds. 

Often, insects will try to overrun your tree so being a step (or two) ahead is important.

Remember, this article is not a completely comprehensive list of all the pests that may attack and consume your oak leaves, but it does include the most harmful ones. There are other species of caterpillars and flies that will have similar impacts. 

While we know it is not feasible to observe all of the leaves on your tree, especially when it is mature and towering over you and your home, ideally, this will help you feel prepared if you do stumble upon the realization that you have a problem.

We hope that this article helped you to feel more informed about the animals and insects that may feed off of your tree, as well as how to keep them at bay. 

Until next time, thanks for reading.

References

Marquis, R. J., & Whelan, C. J. (1994). Insectivorous birds increase growth of white oak through consumption of leaf‐chewing insects. Ecology, 75(7), 2007-2014.

McManus, Michael L.; Liebhold, Andrew M., eds. Proceedings: Ecology, Survey and Management of Forest Insects; 2002 September 1-5

Rubtsov, V. V. (1983). Mathematical model for development of leaf-eating insects (Oakleaf roller taken as an example). Ecological Modelling, 18(3-4), 269-289.

If you have one of those gorgeous, large, otherworldly black walnut trees in your yard, chances are at one point or another you’ve thought about cutting it down. Believe me, you aren’t the only one! We understand, and there are a few good reasons as to why you’re thinking that way.

Here are the best reasons to cut down your black walnut tree: Other plants can’t grow around it, it has surface roots, it requires too much upkeep, branches are too close to your property, to minimize storm damage, or the tree is dying and browning.

Although walnut trees are beautiful, we’ll dig deeper into the reasons you might want to cut down your walnut tree, and just when you should do it. Keep reading to learn more!

Your Walnut Tree Is Excreting Chemicals

Ripe Walnuts Growing On A Walnut Tree

There are many reasons in which you may want to cut down your walnut tree. Although some of them may not apply to you, it is good to know some common ones to understand the effects this tree can have.

If you want to keep a walnut tree maintained, consider using something like this Sun Joe Pull Chain Saw. It’s electric and can give you a bit more of a boost to get those high up branches with ease!

If you still think you may want to cut the tree down, keep on reading!

Also, please keep in mind that we are referencing black walnut trees below, as english walnut trees do not primarily grow in the United States while black walnut trees do!

Juglone In Black Walnut Trees

There’s a scientific reason other plants can’t grow around your black walnut tree. Black walnut trees contain a chemical toxin called juglone.

This chemical is exuded from all parts of the tree. This chemical is not unique to the black walnut tree, and other species that contain juglone are other walnuts, butternut, pecan, and hickories.

However, what is unique to black walnuts is that they contain the highest amount of this chemical compared to other trees.

Juglone is spread throughout the entire tree and deposited into the soil making it inhabitable for certain plants to survive.

You can view our full list of plants not to plant under a black walnut tree here.

There are certain shrubs and herbaceous flowers that can grow under black walnut trees. These includes daffodils, daylilies, ferns, irises, forsythias, yarrow, astilbe, phlox, tulips, hostas, bee balm, rose of Sharon, St. John’s Wort, and barberry.

Certain trees are also tolerant to juglone including maples, eastern red cedar, serviceberry, sweetgum, oaks, and dogwood to name a few. But for trees, the list is quite long.

Moreover, some vegetables and fruits are tolerant to juglone, too! This includes onions, beets, squashes, carrots, beans, corn, cherries, plums, and peaches.

If none of these plants suit your needs and you’re struggling to grow anything in your yard, then you might consider removing your black walnut tree.

If you want to learn more about your black walnut, you can check out our article on the main difference between walnut trees and black walnuts trees here!

Your Black Walnut Tree Has Surface Roots

Surface roots are a real pain in the butt, especially if you have lots of them. If you’ve noticed surface roots for a while stemming from your tree, it could be that your tree has struggled to find the nutrients it needs. 

Surface roots are dangerous to have on your lawn. Your tree is also more susceptible to animals, weather, and damage with showing roots. 

Surface roots aren’t always something that can be removed. And removing them could do more harm than good to the tree. In this case, it might be recommended that the entire tree comes down rather than trying to remove pesky roots. 

If this is the case, we suggest calling tree professionals to check it out and determine the best thing to do.

Your Black Walnut Requires Too Much Upkeep

Eastern Black Walnut

If you’ve ever been around a black walnut, you know how much of a tripping hazard it can be. The black walnut husks are about the size and color of a tennis ball and fall with force to the ground. Seriously, it sounds like someone is throwing baseballs onto the ground from up in a tree!

Despite their bright green color, these husks are incredibly easy to trip on and can be more of a nuisance than anything. 

When black walnut husks begin to fall, it seems like they never stop! The upkeep of black walnut trees might be more than you bargained for. 

As we mentioned above, because certain plants can’t grow around black walnuts, this could create a barren lawn that you didn’t necessarily want. So between the upkeep and barren ground, you might be considering taking down your tree. 

Your Black Walnut Is Producing Too Much Juglone

Black walnuts produce the chemical juglone, which we briefly touched upon above. Juglone becomes a toxin when pre-juglone from within the tree is oxidized. So when any sort of cut or damage happens to the tree and pre-juglone is exposed, that’s when it becomes oxidized and turns into juglone.

Because it is found in all parts of the tree, consuming too many black walnut leaves or using walnut shavings as bedding can cause issues with animals. 

Now, we don’t think you’re going to be eating black walnut trees or using the pine shavings as bedding! But if you have dogs, horses, goats, etc., you’re probably considering them in this too. Because if you’ve had any animals, you know that they like to get into trouble.

Juglone isn’t just an issue for humans, it’s also an issue for animals and livestock. According to the Ontario Ministry of Agriculture, Food and Rural Affairs, juglone sensitivity in equines is extremely high and can cause laminitis within a few days of exposure when present in bedding.

Some people are more sensitive to juglone than others, which can result in a reaction when near it. If you are concerned about this we recommend contacting tree professionals to give you the rundown about your black walnut tree, juglone, and what to do!

To Minimize Potential Storm Damage From Branches

Storm in the forest at summer day

Is your tree growing too close to your house? Is it in a questionable area? This could be leading you in your decision to cut down your black walnut

If you live in an area where hurricanes are an issue, you may be wanting to cut down your walnut tree too

If you want to cut down your tree because of hurricane winds, don’t! According to North Carolina State University, in category three hurricane winds, most trees are not going to fall. Some trees can prevent more damage by blocking winds.

However, if you see that your tree has some rough spots that look like they could be laden with pests or infections, then cutting down your tree to minimize potential storm damage could be the right move for you.

Additionally, some storms have more significant winds than hurricanes, and if you have a tree that stretches to your home, or is even close to it, well then your best bet might be to cut it down, especially if it’s considered an overly mature tree.

Want to learn more about cutting down your tree? You can check out our general guide on the main reasons to cut down a tree in the front of your house!

Your Black Walnut Tree Is Susceptible To Pathogens

Black walnut trees are susceptible to a complex invasive pest problem called thousand canker disease. This disease needs the walnut twig beetle and a pathogen to take down these massive trees.

The craziest thing is that the walnut twig beetle carries the spores of the tree fungal pathogen Geosmithia morbida, which is responsible for thousand canker disease in black walnut trees according to Clemson University.

So when the walnut twig beetle bores beneath the surface of the bark, they can spread this fungal pathogen!

As a result, cankers form from the surface where the beetle bored into. The combination of the boring beetles and cankers, over time, will end the tree.

Your Black Walnut Tree Is Showing Signs Of Stress

This goes hand in hand with the things we mentioned above. Is your tree looking stressed out? Rough-looking branches, losing leaves, noticeable damage signs? If so, your tree might be stressed out and it might be on its way out anyway.

There are certain things to look for to tell if your tree is stressed out including, canopy dieback, cracking and splitting in the trunk, leaf drop, wilting and brown leaves, and even mushrooms near the base of the tree.

  • Canopy dieback is exactly what it sounds like. This is usually when parts of the tree’s canopy begin dying, losing leaves, and branches die.
  • Cracking and splitting in the trunk is typically an issue. This can be caused by poor wound healing and when weak branches split. If the tree doesn’t heal itself it can indicate a distressed and unstable tree.
  • Leaf drop does not always mean your tree is on its last leg. If your tree is dropping leaves, it could be a result of drought stress or overwatering, however, it can also be due to disease or an infestation.

So if you notice leaf drops accompanied by other things, it’s probably best to contact professional arborists to help determine the root cause.

Additionally, if you notice wilting and brown leaves on your tree it could be a response to heat stress and the sun, but if this is a newly planted tree, it could be in shock.

Either way, your tree is stressed out! You can try watering your tree at least once a week and apply mulch to its base. If these don’t work, then you might have a bigger issue on your hands.

When you see mushrooms growing near the base of your tree, it’s never a good sign. This typically indicates issues with the roots or the trunk. 

It could be anything from root rot, which is exactly what it sounds like, to heart rot, which is where the interior wood of the tree decays, and even the overall rot of the entire tree. 

So, if you see many mushrooms at the base of your tree, we suggest calling tree professionals ASAP!

When To Cut Down Your Walnut Tree

man cutting tree in forest

Whether you’ve had it up to here with your black walnut tree, or you notice signs of stress, then it might be time to cut your walnut tree down. 

Depending on what’s going on with your tree, that can determine when you’re going to cut it down. If removing your tree is dire (branches too close, tree looks like it will fall, etc) then most likely a tree company will remove it ASAP.

If it’s something that can wait, then the best time to cut down your walnut tree is in the dormant season, which is between late winter and early spring!

That’s A Wrap!

While you may or may not love your black walnut tree, it may be time to cut it down. Let’s recap!

These are the most common reasons people cut down their black walnut tree: 

  • Other plants can’t grow around it
  • Your tree has surface roots
  • It requires too much upkeep
  • It’s a hazard to you
  • To minimize storm damage
  • It’s susceptible to pathogens
  • It’s showing signs of stress.

If you decide to cut down your black walnut tree, depending on the reasoning will vary throughout the year, however, the most typical time to cut it down is during the dormant season.

During the dormant season, your tree has no leaves making it easier to cut and handle.

If your tree needs to come down ASAP, a professional arborist will make the call on when it’s best to cut your tree down.

Thanks for sticking around and learning about why to cut down your walnut tree, and when to do it! Until next time!

References

Cline, Steven, and Dan Neely. “Relationship between juvenile-leaf resistance to anthracnose and the presence of juglone and hydroquinone glucoside in black walnut.” Phytopathology 74, no. 2 (1984): 185-188.

Coder, Kim D. “Seasonal changes of juglone potential in leaves of black walnut (Juglans nigra L.).” Journal of Chemical Ecology 9, no. 8 (1983): 1203-1212.

Ponder, Felix, and Shawky H. Tadros. “Juglone concentration in soil beneath black walnut interplanted with nitrogen-fixing species.” Journal of Chemical Ecology 11, no. 7 (1985): 937-942.

Schmidt, S. K. (1988). Degradation of juglone by soil bacteria. Journal of chemical ecology, 14(7), 1561-1571.

Von Kiparski, G. R., Lee, L. S., & Gillespie, A. R. (2007). Occurrence and fate of the phytotoxin juglone in alley soils under black walnut trees. Journal of Environmental Quality, 36(3), 709-717.

Living in a van is an adventure all on its own. Whether you do it full-time or are a weekend warrior, van life is exciting! While you’re adventuring, you may wonder how to grow fruits in your van so you have access to fresh produce wherever you are.

To grow fruits in a van, they need to be small and easy to take care of. It also requires a dash of creativity and some patience. The best and easiest fruits that meet these requirements include strawberries, blackberries, currants, gooseberries, grapes, and raspberries.

Growing fruit in your van takes a bit of work, but the payoff is worth it. Read on to discover the easiest fruits to grow in your van and how to grow them!

Can You Grow Fruits In A Van?

Living in a van comes with plenty of its own challenges. Besides figuring out your setup and finding a place to park your home each night, you also have to get creative with your meals.

The limited space inside of a van means most van lifers do not have amenities like a microwave, toaster, or a large fridge/freezer. For this reason, they make a lot of meals with fresh ingredients.

Growing fruit in your van is not only fresh, but it can also cut down on your grocery bill and eliminate the clutter that comes from store packaging. With limited space comes the need for limited garbage.

You live in a moving vehicle. Is it even possible to grow fruits in a van?

Absolutely! With a little care and a lot of creativity, you can grow fruits right inside your van, giving you access to fresh fruit no matter where you are in the world. 

But don’t expect a few seeds thrown in a pot by the window will produce any fruits. There are certain steps you have to take to ensure your fruits will grow indoors.

With a little creativity, a little trial and error, and a little patience, you’ll be enjoying fresh fruit in no time!

How To Grow Fruits In A Van

Pot with bush of with green leaves and berries for landscape design. Strawberry bush with red berries in metal flowerpot.

Most fruit trees are just too big to grow in a van. Even the dwarf varieties of citrus or apple trees grow to around 10 feet. 

This is not ideal for a van.

Instead, we’re going to be looking at perennial plants and brambles in dwarf varieties. These plants still produce the same fruits as their full-sized cousins, but the plants themselves are smaller and fruit yields are smaller.

But before we go over the actual fruits and how to take care of them, let’s discuss where to put them and what to grow them in.

Choose A Good Location For Your Van life Fruits

Growing a plant inside a stationary home is easy peasy. You just set the plant near the window and boom, you’re done. Van life isn’t so simple.

You’ll need to consider the motion of the van at some point. Your fruit plant needs to be secure, so it doesn’t topple over while you’re driving.

Space is another concern. Vans will give you somewhere around 60-70 square feet of space. Add in your bed, cabinets, and kitchenette and that number drops significantly. 

While dwarf varieties don’t need much space, they still need some space.

Your fruits will need plenty of sun to grow to their full potential, so you’ll want to choose a location that gets at least a little sun while you’re driving. When stationary, you can always place your fruit plant outside to soak up the sun and maybe even a little fresh rain.

Most fruits prefer full sun, meaning at least six hours of direct sunlight per day. However, with fruits, the more sun, the better. Even up to 10 hours per day for some plants.

What about inside your van? Where can you hope to put your fruit plants where they’ll get enough sun AND not fall over while in motion?

Some potential locations for your fruit plant inside your van include:

  • Hang Your Fruit Plants: Fruit plants aren’t typically meant to hang, but humans aren’t typically meant to live in a van, either. Let’s break some rules! Consider hanging your fruit plant from the bottom of your cabinet storage space near a window.
  • Use Suction Cups: Suction cups with hooks like HangerSpace Suction Cup Hooks are a creative and clever way to hang your fruit plants on your window.
  • Use magnets: Magnets are a van lifer’s friend. We use them to keep our cabinets and drawers shut while driving, our kitchen utensils in place, and our keys from being lost. You can also use them to keep your plants in place! Lovimag’s Neodymium Disc Countersunk Hole Magnets are perfect to keep your plant stuck to a specific location. 

Simply affix the magnet somewhere in your van (preferably within reach of sunlight) and stick the other magnet onto your potted fruit plant.

  • In A Cabinet: Placing your plants in a cabinet isn’t ideal if you’ll be traveling for longer than an hour or two. However, if it’s a quick trip, you can place your fruit plant in your cabinet and use blankets, clothing, or other material to pack around it, so it stays put while you’re driving.

When choosing a location, make it so that you can move, adjust, and remove the plant from that location. 

You’ll need to place your fruit plant outside to water it since you don’t want to fill up your gray tank unnecessarily. You’ll also want to be able to move the fruit plant outside to give it the necessary sun when you have your van parked.

Choose A Non-Rigid Pot For Your Fruit Plants

Anyone interested in traveling in a van knows you can’t have breakable things in your van. Forget about ceramic dishes and cups and replace them with rubber or durable plastic.

The same can be said for your fruit plant pots. You don’t want something breakable that will shatter into a million pieces if it accidentally falls over.

Hard plastic is certainly an option for your fruit planters, but the thing about hard plastic is that, well, it’s hard! Immovable! In a van, you’re better off going with a planter that can mold to different shapes and sizes.

Gardzen’s Aeration Fabric Pots with Handles are an excellent choice! This product comes in plenty of different sizes to fit your specific fruit plant’s needs, ranging from 1 gallon all the way to 25-gallon bags.

For most fruits, a 5-gallon container is a good size.

Having a moldable, foldable, non-breaking pot gives you options you won’t have with a rigid planter. Fabric containers are also reusable, so you can once again cut down on trash and clutter.

Give Your Fruit Plants Enough Sunlight

While it is possible to keep your fruit plants alive by setting them near a window, your plants will not be very happy and they will most likely not produce fruit. For fruit, you need real, unfiltered sunlight.

The good thing about van life is you can stop whenever you want, wherever you want. While you stop, you can set your fruit plant outside to give it much-needed sunlight.

Consider setting your fruit plant container on the roof of your van or on a foldable table in the sun. Some fruit plants, especially brambles, can even withstand partial shade.

However, there are always going to be times when you have to travel for hours at a time, maybe even days at a time, to get to your destination.

During these times, make sure your plant is close to the window so it can absorb as much sunlight as possible. You can also invest in light fixtures to supplement the sunlight and keep your plants happy and healthy.

GHodec’s Grow Light for Indoor Plants provides the three essential colors plants need to photosynthesize – red, blue, and white. It also comes with a clamp instead of a stand, so the lights stay in place, even when you’re in motion.

Studies such as the one from the Journal of Horticultural Science have shown using LED lights with at least red and blue light increases fruit yields.

As a bonus for van lifers, these grow lights have an input of just 5 volts (2.4 amps) which is equivalent to a phone charger! 

Keep The Temperature Above Freezing

Van lifers are rarely traveling to the coldest, most retched environments out there. Most are living life in warm, balmy climates where, at most, you need a flannel tied around the waist for the evening chill.

However, it’s important to note that most fruit plants require temperatures well above freezing to survive.

The good thing is that most van lifers have insulated their vehicles to keep the temperature relatively stable. But it’s something to keep in mind if you want to have fruit plants that produce fruit!

Use The Right Potting Soil For Your Fruit Plants

As you’ll find out below, none of the fruits we listed have crazy soil requirements. You will not need a PH meter to plant any of these fruits.

Still, you can’t just dig some dirt out of the campground, throw it in a pot, and expect your fruits to bloom.

Use quality, organic potting soil for your fruit plants. Organic soil is better if you plan to eat your fruits (which we assume you do!).

However, this doesn’t mean you have to spend a bunch of money on fruit-specific potting soil. Most fruits will do just fine in your run-of-the-mill organic potting soil.

6 Easy Fruits To Grow Inside Your Van

Raspberries, gooseberries, honeysuckle and currants trees in a pot on a garden table. Gardening abstract background. Agriculture.

When growing fruits in your van, berries are the way to go! Strawberries, gooseberries, raspberries… these are suitable to grow in a van.

The fruits we have on our list are there for a few reasons:

  • Self-fertile: this means you only need one plant to produce fruits. 
  • Space: You need fruits that are small, compact, and can withstand pruning
  • Easy: Van life isn’t about stressing over your plants. You need a fruit plant that’s easy to take care of and requires low maintenance.

As much as we’d love to give you tips on growing apples, citrus, and avocados, these fruit trees are just too big and too complicated for a van. Instead, we went with small, simple, tasty berries.

Grow Strawberries In Your Van

Strawberries are one of the simpler fruits to grow in a pot and are very versatile in terms of food. Throw them in a smoothie, smother them in whipped cream, or just eat them plain!

There are three main varieties of strawberry:

  • June-bearing
  • Ever-bearing
  • Day-neutral

Each has different fruit-bearing times and quantities, but for van life, either everbearing or day-neutral strawberries are preferred. They produce smaller fruits and take up less space.

An important thing to note about strawberries (and many fruits in general) is they cannot be planted from seed. You must acquire either a transplant or a bare-root crown which can find at local nurseries.

Keep a close watch on your plant for pests such as aphids and whiteflies. These can be hard to spot because of their small size.

Light: Strawberries require at least 6 hours of sun per day.

Water: According to the University of Minnesota, strawberry plants should get the equivalent of 1 inch of rainwater per week. They recommend a good soaking once per week.

Soil: Use an indoor/outdoor potting soil mix. Strawberries aren’t picky about the soil but require enough nitrogen to flourish.

Harvesting: Once your strawberry plant flowers, it takes up to four weeks for the fruit to ripen enough to pick. Pick strawberries when they are a deep red, even if they are small.

Grow Blackberries In Your Van

Blackberries are part of the caneberry family and are closely related to raspberries. They can be used in a variety of dishes such as glazings, jams, desserts, breakfast toppings, and eaten plain.

According to Oregon State University, the best type of blackberry to grow in a container is everbearing blackberries. Semi-erect blackberries are a little too rambunctious to be planted in a container.

One thing to note about blackberry plants is the branches on which the fruit grows will die back each year. Don’t worry, this does not mean the plant is dead! The roots and crown will remain alive and produce new fruit-bearing branches.

You can purchase potted blackberry plants and transfer them to your fabric containers. Blackberry plants cannot be grown from seed.

For full-grown blackberry plants, it’s recommended to use a 20-gallon container. However, for van life, you’ll want to grab a dwarf variety of blackberry such as baby cakes

The dwarf variety of blackberries typically grows 2-3 feet tall and produces the same delicious-tasting blackberries as their full-grown counterparts.

Light: Like most fruits, blackberries LOVE the sun. Give your blackberry plant at least 6 hours of sun. The more, the better.

Water: When just starting, keep your blackberry plant’s container wet but without standing water. Once the plant establishes itself, it will need about 1 inch of water per week.

Soil: Blackberry plants prefer well-drained soils, but they are tolerant of wet conditions as well. It’s recommended to use a mixture of perlite such as The Valley Garden’s Organic Perlite for All Plants, and potting soil.

Harvesting: Pick your blackberries when they have transformed from a shiny black to a dull black. Shiny blackberries will be tart and acidic, so don’t pick too early!

Grow Currants & Gooseberries In Your Van

Gooseberries are similar in size and shape to grapes but have a sour kick to them you won’t find in grapes. Currants are similar in size but are made of clusters of pea-sized fruits.

Gooseberries and currants are on the bigger side for a van (they can grow up to 6 feet) but we put them on our list because they can withstand heavy pruning.

Like blackberries and strawberries, currants and gooseberries are self-fertile, which is another plus for van life because you will only need one plant to produce fruits.

You can get potted plants from your local nursery or order them online as a bare root. It’s recommended to use a pot that’s about a foot deep and a foot wide.

There are three main types of currants: 

  • Red – more acidic/sour
  • Pink – sweeter
  • White – sweeter

There are also black currants, but some varieties are not self-fertile and would require two plants, which isn’t ideal in a van.

Gooseberries are translucent and can appear green, pink, or red.

Unfortunately, it can take currants and gooseberries up to 3 years to produce fruit. However, some will produce fruit in their first year in optimal conditions. Keep your plants pruned to a reasonable size for van life, as these babies will take off if left unchecked!

Light: According to the University of Minnesota, currants and gooseberries can grow in full sun or partial shade. The more sun, the more fruits! 

Water: Keep the soil moist to the touch.

Soil: Currants and gooseberries will grow in normal potting soil, but will produce more fruit if they have the help of fertilizer. Fertilizer spikes like Jobe’s Organics Tree Spikes for Fruit and Nuts work well to keep your currant and gooseberry plants happy.

Harvesting: Depending on the variety of currant plant, harvest berries when their color is full. You can also taste-test currants and gooseberries to see if they are ripe as you can eat directly them from the plant. If they are very sour, they are not ripe yet.

Grow Grapes In Your Van

close up view of planting of grapes using polybags in the garden

This one may come as a surprise. After all, aren’t grapes vine-growers that spread all over the place? 

Well, yeah, but it doesn’t mean you can’t grow a small vine in a container! You can get grapes as a bare root in the winter or grab them in pots in the spring and summer from your local nursery.

Just be aware that grapes will not produce in their first year. They may produce their second year but could take 3 or 4 years to produce. If you’re into van life for the long haul, this shouldn’t be a problem, but if you need fruit fast, grapes are not the best choice.

It’s recommended to use a 15-gallon container for grapes, but you can start smaller and move your way up as your vine grows. For grapes, you will need a trellis to train the vines.

A small trellis, like UWIOFF’s Indoor Small Trellis will work great in your van as it’s only 10.2 inches high and 6.1 inches wide.

Light: As with all the fruits on our list so far, grapes prefer full sun conditions, at least 6 hours per day.

Water: According to the University of Arizona, grapes should be watered deeply but infrequently. Water the top 3-4 inches of soil but allow it to dry completely before watering again. 

Soil: Choose a soil mixture that drains well. Grapes dislike being saturated in water.

Harvesting: Pick your grapes when they are plump and easy to pull from the cluster. You can feel the grape with your hands – if it is very hard, it is under-ripe. If it is soft and shriveled, it is overripe.

Raspberries Grow Great Vans

Raspberries are closely related to blackberries. But unlike blackberries, raspberries are hollow in the middle and have a sweet, tart taste.

Like most fruits on our list so far, raspberries are sold as either a bare root plant or in a pot that you can pick up from a local nursery. Or maybe not so local if you’re traveling in a van!

As for the container, full-sized raspberries need a little bigger size than strawberries or blackberries. It’s recommended to use a container 2 feet deep and 2 feet wide. But again, for van life, try to find a dwarf variety such as BrazelBerries or Raspberry Shortcake.

Some dwarf varieties come with the bonus of being thornless! According to Oregon State University, black and purple variety raspberries do the best as a single plant in a container.

If you decide to go with a full-grown variety, you will need to trellis the plant to keep the canes from drooping. Dwarf varieties do not need trellises. 

Start your raspberries out in a 5-gallon container and transplant them if needed, or prune them to remain small. It’s recommended to use a fertilizer when starting out raspberry plants. Any all-purpose organic fertilizer will do, but slow-releasing fertilizers are best. 

Note: Always read the directions on fertilizers. You will only have a single plant, maybe two, so you will need to reduce the amount of fertilizers or water it down appropriately.

Light: The more sun, the better, but at least 6 hours per day.

Water: Raspberries should not be over-watered, as they are susceptible to root rot. However, since raspberries are mostly made of water, the plant still needs an adequate amount. It’s recommended to water the soil until it is thoroughly wet without standing water.

Soil: Use a potting mix that drains well. An organic potting mix like Perfect Plant’s Organic Potting Mix for All Plant Types is a good choice. This particular potting mix blends perlite as well, which is good for drainage.

Harvesting: Pick your raspberries when their color is full and they can be removed easily from the plant. If the berry is still hanging on for dear life, it’s not quite ripe.

That’s All For Now!

Growing fruits in your van may sound like a tedious and difficult journey, but it’s easier than you think and can provide you with fresh fruits no matter where you are!

Overall, the 6 easiest fruits to grow in a van include:

  • Strawberries
  • Blackberries
  • Currants
  • Gooseberries
  • Grapes
  • Raspberries

As long as you provide adequate conditions, your fruits are bound to produce. If you’re looking for fast-producing fruits, go with blackberries or raspberries. If you’re willing to wait, try to grow grapes, currants, gooseberries, or strawberries.

You can read more about the best plants you can grow in a van here!

References

Dara, S. K. (2016, July 20). Managing Strawberry Pests with Chemical Pesticides and Non-Chemical Alternatives. International Journal of Fruit Science, 16(1), 129-141.

Donadio, L. C., Lederman, I. E., Roberto, S. R., & Stucchi, E. S. (2019). Dwarfing-canopy and rootstock cultivars for fruit trees. Propagation, 41(3).

Piovene, C., Orsini, F., Bosi, S., Sanoubar, R., Bregola, V., Dinelli, G., & Gianquinto, G. (2015, September 22). Optimal red:blue ratio in led lighting for nutraceutical indoor horticulture. Horticultural Science, 193, 202-208.

Worthington, M. L., & Clark, J. R. (2020). Development of blackberry cultivars with novel plant architecture. Acta Hortic., 1277, 159-164.

Whether it’s in a wood-burning stove, a fireplace, or outdoors around the campsite, you want a hot fire that warms up fast. After all, that’s the main reason to have a fire, isn’t it? When buying or preparing firewood for the burning season, you probably want to know – what is the hottest burning wood?

Hardwood species such as oak, maple, ash, and most fruit trees will provide you with the hottest burning, and longest-lasting coals for your money. Hardwoods are denser than softwoods such as pine, so they have more fuel to burn hotter and last longer.

For intense heat that makes you take a step back from the fire before you start sizzling like bacon in a frying pan, you need a dry, dense wood that puts off a flame as hot as the surface of Mercury. Keep on reading as we go over 10 of the hottest burning firewoods, and how long they will last in the fire!

Determining ‘Hotness’ In Firewood

Open fire in fireplace. Closeup of burning stack of firewood with orange flames.

We were all taught at an early age that “fire is hot”, whether that was because your parents drilled it into your head, or they let you learn by making your own mistakes. Determining how hot firewood is, takes a bit more of a scientific approach.

We use BTUs, or British Thermal Units to measure the heat from firewood, heaters, or other sources of heat. One BTU is the amount of heat energy it takes to raise the temperature of one pound of water by one degree.

For firewood, the heat output is measured by how many BTUs are put out per cord of wood. A cord is the standard measure of a load of firewood and is usually sold by the cord. In terms of measurement, a cord of wood equals 128 cubic feet of split, stacked firewood (a 4’ x 4’ x 8’ stack of wood).

10 Hottest Burning Firewoods

Closeup of metallic pot on bonfire at campsite

We are assuming all of these firewood varieties have been properly seasoned before they are burned. Properly seasoned typically means the moisture content in the wood is around 20% moisture or less.

The only way to properly tell if firewood is properly seasoned is to use a moisture meter. This Moisture Meter For Wood is an inexpensive way to test for that magical number of 20%.

All you have to do is poke the pins into the wood and it will give you a digital readout of the moisture content in firewood, and even a few other materials.

Remember, you always want to check the moisture content of firewood before using it.

Without further ado, let’s get into the million-dollar question of what is the hottest burning firewood? Not all of these firewoods will be available for you to purchase, but if you happen to come across them, or you can cut them down yourself, then count yourself lucky.

10. Sugar Maple

There are a lot of maple tree varieties, from silver maple, and red maple, to sugar maple and bigleaf maple, there are around 125 different varieties. For this list, we are focusing on the sugar maple, as it is one of the hottest burning maple varieties.

Sugar maple is the same maple tree that makes the amazing morning syrup you slather all over pancakes, french toast, and waffles. Once the tree no longer is viable for syrup production, it makes great firewood, especially since you can probably get an entire cord of wood from just one tree.

Maple wood as firewood is a great all-around type of firewood. It may not be as dense or as hot as others like oak and hickory, but it makes up for that by being readily available in most areas, and for seasoning relatively quickly.

You don’t want maple to sit around too long because if it gets too old it can start to put off a funny smell when it’s burned.

Season your sugar maple wood for about six months and you will get a great, hot burning, long-lasting wood that will also give you a great aroma.

Some people report smelling maple syrup when it burns. The only bad thing about making your house smell like maple syrup is that you’ll then want pancakes for dinner.

Properly seasoned sugar maple firewood puts off around 24 million BTUs per cord of wood. To put that into context, let’s set it next to a ton of coal, which is burned in many areas to create electricity for communities.

One ton of coal puts off 26 million BTUs; considering a cord of wood can weigh approximately one ton, sugar maple firewood is an excellent heating source. 

9. Mulberry

If you have ever seen these trees or had them growing on your property, you probably groaned a little bit. These trees are notorious for dropping tons of nearly tasteless berries that resemble elongated blackberries.

You don’t want to walk through them because the purple juice will stain your shoes and everything you walk in. You also don’t ever want to park near a mulberry tree, because not only will you have tons of berries splattering all over your car, but birds flock to these trees to eat the ripe berries, leaving purple and white droppings everywhere.

The berries can be eaten, but they don’t have much taste. You can also make jams, wines, and desserts out of them which are better since you usually add some flavor to them.

Mulberry trees also grow like weeds everywhere because of their massive seed dispersal, and they are fast-growing trees.

The birds help with this by depositing seeds everywhere they leave their poop. But if you cut this tree down and split it, you’ll have great firewood!

The only downside to mulberry firewood is the long seasoning time. After it is cut and split, it will need to season for at least a year. Mulberry trees contain a lot of moisture in the wood, so it takes longer to season.

Mulberry wood, once it’s properly seasoned, burns hot and it will burn for a long time without much smoke. It will keep a hotbed of coals that will last several hours as it’s one of the slowest burning woods. Mulberry wood, like most fruitwoods, puts off a pleasing scent when it’s burned, so it works great in fireplaces and campfires.

The second contender in our hottest burning firewood list, Mulberry wood, comes in at 25.8 million BTUs per cord of wood.

8. Black Birch

There are a lot of species of birch wood that are great for firewood, but the black birch shoves all others out of the way to come out on top. Black birch can be identified by dark brown bark and shiny, dark green serrated leaves that turn bright yellow in the fall.

Black birch trees are a very dense variety of birch trees. It contains long, thick fibers inside the wood that makes for a hot burning and very long-lasting firewood.

The black birch tree doesn’t take long to season, less than a year, so you could theoretically cut it, dry it, and burn it all the same year. This firewood does not put off a lot of smoke, it doesn’t throw many sparks, and it produces a sweet-smelling aroma when it burns.

As far as heat, the black birch packs about 26.8 million BTUs inside a cord of wood.

7. Applewood

Another wonderfully smelling wood that also produces scorching heat is applewood. Yes, the same tree that produces the fruit touted to keep the doctor away is a great heating source.

Applewood is a little difficult to find though because it’s more lucrative as a fruit producer. If you do happen to come across some though you should certainly snatch it up.

Maybe a neighbor needs their apple tree taken down, or an orchard is replacing some of their trees, if so, it never hurts to ask if you could take the trees yourself to process for firewood.

Not only is it great for heating your house, but the flavorful smoke it produces gives meats a delightful smoky flavor. Applewood smoked bacon, barbecue, or chicken anyone? Yes please! Fill my plate up.

But as firewood to heat your house it is great. It takes about a year to season, but you won’t regret waiting that long because of the great aroma, and hot flames it produces, and applewood will burn for a long time.

In a fire, from start to finish, it will probably last between 5 to 6 hours!

Jumping up a notch, apple firewood comes in at a sweltering 27 million BTUs per cord of firewood.

I’m a HUGE fan of applewood trees overall, as they are one of the trees that produce the least amount of smoke overall!

6. Hornbeam

Hornbeam wood is one of those that are usually hard to come by because they are great firewood that is usually felled before they get too tall or old.

They are especially hard to identify as they look incredibly similar to other trees. One of the tell-tale features of hornbeam trees though is the undulating appearance of the limbs.

The limbs look like they have cords running underneath smooth bark. The leaves look very similar to birch tree leaves, except the serrations are slightly wider.

For some, these trees can be difficult to split as well. To keep from getting aggravated, you may have to split the hornbeam with a hydraulic splitter if you have one.

Hornbeam firewood also needs a long time to season. This is very fickle firewood. If you have experience with avocados and wait for them to become ripe, you’ll see certain similar characteristics to hornbeam wood.

The wood takes a year with premium conditions to dry out, but you’d be best to wait two seasons to dry the wood, but once it’s dry enough to burn, the wood then tends to get moldy and go bad relatively quickly.

Like a green avocado, you wait forever for it to ripen, but when it does, you have a tiny window of use before it turns into brown, unappetizing mush.

For all its fickle attributes, the hornbeam makes for a wonderfully hot, long-lasting firewood.

A hornbeam bed of coals will glow bright orange and keep the heat for many hours. The wood produces a scorching 27.1 million BTUs per cord, so it will help to keep your house nice and toasty!

5. Beech

Halfway through the list, we find the majestic beech tree. These trees can grow to over 100 feet tall, so if you come across these giants, you could end up with a lot of firewood from just one single tree.

Beech firewood has a faint, nutty aroma when it’s burned, but it truly shines because of the intense heat it creates.

This is due to the low moisture content of the wood once it finally completes seasoning. Most woods will naturally dry to around 20% moisture; whereas beech trees can fall between 12%-17% moisture content. 

It’s this low moisture that makes this firewood such a ‘hothead’. The only problem with beech as firewood is if you’re cutting it yourself, you will have to let it season for two years to get that extra low moisture content.

If you season it for one year and then burn beech firewood, you will probably get a lot more smoke coming off the firewood than you would if you let it season an extra year.

Beechwood is also a tough wood to split, so this is one you’d be better off with a hydraulic splitter than going about it with a maul or splitting ax.

You will be rewarded for your patience with a wood that burns 27.5 million BTUs per cord of wood. Burning this wood in your fireplace or woodstove means you can build up the fire at night, then when you wake up in the morning, you will still have a warm bed of coals to get a new fire started!

4. Hickory

Hickory is firewood that is often readily available in many areas because it grows along the east coast of the United States, Canada, and into the midwest regions. Hickory wood is also popular for furniture, tool handles, and flooring because of its incredible strength.

Hickory trees also produce nuts that deer, squirrels, and even humans enjoy.

As firewood though, hickory is extremely hard to beat. It’s one of the best firewoods you can find because of the heat, longevity, and availability. Hickory firewood also produces a pleasing aroma that is utilized in many charcoals or chips for barbecue smokers.

Splitting this super-dense wood will be a chore because it is very hard. I have seen people bounce a sharp ax right off of logs before. After it is all split, it will take about a year to season, but then you have one of the longest-lasting, hottest burning firewoods you can find.

Hickory firewood does not spit off many sparks, and it produces very little smoke. A cord of hickory firewood will produce about 28.5 million BTUs of heat.

If you have some of these trees on your property or can find some that you can cut, they will provide plenty of warmth for those bone-chilling winters.

You can take a look at our full list of the slowest burning firewoods if you want something that burns longer and not just hotter!

3. Black Locust

Next up on our list, we have the black locust tree. This tree is one of the fastest-growing trees around, which is rather unusual because it’s still a very dense tree. Most fast-growing trees tend to be softwoods like pine or other evergreen species.

The black locust tree grows so fast in fact, that in many areas it’s considered an invasive species. Just cutting them down usually isn’t enough to keep them under control. Some people have resorted to using herbicides to get rid of their black locusts.

The National Resources Conservation Service has this to say about the invasiveness of black locust; when black locust is introduced into an area, they cast a wide net of shadow that starves out other sun-loving plants. These trees can get so dense that very little ground vegetation grows underneath them.

This may help you if you are looking for good firewood because neighbors or people dealing with these trees will probably let you come in and cut them down for them.

Black locust, even being this dense, is easy to split wood. You won’t be fighting with one block all day. It only needs to be seasoned for one year before burning, and once it’s ready you have top-notch firewood. I hear you saying, “I sense a ‘but’ coming,” and you’re correct…

Black locust trees have a lot of long, sharp thorns on their leaf-bearing branches. If you are dealing with this wood, you will have to wear some protective gloves such as these Wells Lamont Men’s Heavy Duty Leather Ranching & Fencer Gloves. These thick, leather gloves will help protect you from the thorns of black locust trees.

After you have dealt with the insidious thorns, you will end up with firewood that puts off a whopping 29.3 million BTUs per cord of wood.

With the right gear, and taking an extra step or two of caution, black locust firewood is truly hard-to-beat firewood.

2. White Oak

Whatever type of oak you burn as firewood, you can’t go wrong. Oak firewood, in my humble opinion, is the king of firewood. It may not be as hot as the top firewood, or it may not put off a sweet smell like applewood or cherry, but because of everything else, oak is all around the best.

Now, we say white oak simply because it’s proven that white oak makes better firewood than red oak.

Overall, it’s better than most other firewoods due to it’s natural abundance as well!

Other woods burn hotter, others burn longer, but not by much. What puts oak over the top of all the others is because of the availability, ease of splitting, low smoke, heat, and longevity of an oak fire. 

Oak firewood is one firewood that will last all night long. Once you have a good bed of coals, you can put a few new logs on, go to bed, then wake up to still warm embers that are easily stoked back up.

White oak needs a year to season. It does hold a lot of moisture and needs a full season to lose enough of that moisture to make a good fire. Wet, or green wood usually smokes a lot, doesn’t put off as much heat, and is harder to burn than properly seasoned firewood.

White oak is at the top of the list of oak trees for heat output. Most oak trees put off a ton of heat when they burn, but the white oak is at the top of the list with an astounding 30.7 million BTUs of heat per cord of wood.

You can view our full list of the best oak trees for firewood here to learn more in-depth information!

1. Osage Orange 

As we reach the top of the list for hottest firewoods we get to a contender that isn’t available everywhere, it’s a pain to split and doesn’t grow very tall, but if you want a heat as hot as Hades’ toejam, you can’t go wrong with osage orange.

Another name for this tree is the horse apple, but it’s neither orange nor apple tree. It produces green, grapefruit-sized, wrinkly, fibrous fruits that produce a sticky, latex-like sap when cut or crushed.

Many people consider this tree a nuisance because of the large fruits that animals don’t want to eat, and end up everywhere. It has thorns, and if it’s cut down, the tree will quickly sprout off many, thorny off-shoots, and keep growing.

Osage orange wood is so dense, that if you’re cutting down a single tree, you will need to bring along a few extra, sharpened chains because you will need them.

You should split it as soon as you can as well, as the wood dries, it gets harder to split.

If you’ve been able to cut and split a few cords of osage orange for firewood, leave it seasoning for about a year. Some say you can burn it after six months, but I’d leave it a few more months just to make sure.

When burning this wood, it will get insanely hot. Some people have reported damage to their wood-burning stoves when they burn this firewood.

If you are using osage orange as firewood, it would be best to supplement it with something that doesn’t burn quite as hot like cherry. Other than that, burn it outside in a campfire setting to help keep away the cool night.

This firewood is definitely not fireplace wood though. Osage orange puts off a showering spark show akin to a 4th of July celebration. All the previous firewoods in this list, only spark or crackle very infrequently, but the horse apple tree throws sparks constantly.

According to Nebraska Game and Parks, dried, seasoned, osage orange wood produced the highest amount of BTUs from native trees. However, when the wood burns it produces a considerable amount of sparks.

Even when you properly season osage orange, a thick, sticky sap remains behind. That’s the reason for the sparks. As the wood burns, the sap burns and crackles as well, throwing off a constant show of sparks.

While osage orange wood puts off a staggering 32.9 million BTUs of heat per cord, it also throws off a fireworks stand worth of sparks.

Osage orange is the unstoppable beast of heat when it comes to firewood, but with all the sparks, you’d be better off going with white oak firewood. See why I said oak is the king of firewood? Wink, wink.

That’s A Wrap!

Wood burning in a cozy fireplace at home, keep warm. texture

Whether you’re using the firewood in a wood-burning stove, in your fireplace for supplemental heat, or outside in a campfire setting, these firewoods will certainly keep you warm for hours.

Even with average firewood, you are getting about 20 million BTUs per cord, which will certainly keep your home warm. But if you are looking for firewood that will fight off the chill of winter like a champion prize-fighter, you can’t go wrong with white oak, hickory, black locust, beech, or any other firewood on this list.

Good luck on your firewood journey!

References

Abbot, P., Lowore, J., Khofi, C., & Werren, M. (1997). Defining firewood quality: A comparison of quantitative and rapid appraisal techniques to evaluate firewood species from a southern African savanna. Biomass and Bioenergy12(6), 429-437.

Basham, Elizabeth. The West Virginia Friends of Firewood Network: Engaging with and exploring the practices of firewood producers. West Virginia University, 2013.

Zou, L. Y., Zhang, W., & Atkiston, S. (2003). The characterisation of polycyclic aromatic hydrocarbons emissions from burning of different firewood species in Australia. Environmental Pollution124(2), 283-289.

Did you know certain plants love acidic soil, while others despise it? Acidic soil can be great for your treess, especially if you live in areas that have loamy soil. On the other hand, it could be an issue for plants that don’t tolerate acidic soils well.

Acidic soil can be great for acid-loving plants. Soil pH determines the nutrient uptake and growth of your tree or plant. Acidic soil gives them access to a range of nutrients that aren’t necessarily available in lower soil pHs. Rainwater plays a heavy role in how acidic soil becomes.

Soil pH can be tested to determine if your soil is acidic, alkaline, or neutral. So, if you want to find out if acidic soil is good for your tree, keep on reading!

Is Acidic Soil Really Good For Trees?

So, when you hear acidic, you’re probably thinking, “Well, isn’t acidic soil bad for trees?” And, while that’s the case for some trees, it’s not the case for all, which is kind of counterintuitive. 

Some plants, those that are considered ‘acid-loving’ need more of the nutrients that are readily available in acidic soils. This includes evergreens, hydrangeas, rhododendrons, and even blueberries. 

According to SUNY Environmental College of Science and Forestry, a lot of nutrients are more readily dissolved in acidic soils rather than in neutral and alkaline soils, which is why certain trees and plants do better in it. 

Some trees prefer a soil pH of 6.6-7.3, which is considered a neutral pH. Acidic soils are defined as soils that have a pH of less than 6.6, neutral soils have a pH range of 6.6-7.3, and anything above that is considered alkaline. 

Let’s dive into the reasons why acidic soil is great for your trees!

1. Acidity Helps Your Tree Absorb Nutrients

Woman hand plants a tree on soil

Trees need specific nutrients and minerals to complete photosynthesis, grow, and carry out their natural processes. These nutrients are separated into three different categories: Primary, secondary, and micro-nutrients.

Primary nutrients, called macronutrients are nutrients that plants require the most and in the largest quantities. Primary nutrients include carbon, hydrogen, oxygen, phosphorus, and potassium. These nutrients are responsible for the major plant functions of plant structure, respiration, water retention, cell formation, and energy production. 

Secondary nutrients include calcium, magnesium, and sulfur, which are needed in moderate amounts. Certain plan functions of secondary nutrients are enzyme activities, metabolism, protein, and amino acid formation. 

Micro-nutrients for trees are boron, chlorine, copper, iron, manganese, molybdenum, and zinc. These nutrients are needed in very small amounts in comparison to primary and secondary nutrients. These nutrients are mainly responsible for enzyme activity.

If you have an oak tree, check out our guide on the best oak tree fertilizers so they get the right nutrients!

For plants to effectively take up nutrients, they have to be in specific forms, and water-soluble otherwise they cannot be used by the tree or plant.  

Did you know that soils with lower pH levels have certain nutrients that are more readily available? 

Well, it’s true. Plants can easily uptake nutrients such as iron, aluminum, and manganese. The same is true for more alkaline soils, the only difference being different nutrients that are available.

At certain pH levels, some nutrients are not in available forms for plants to uptake. This is determined by the microorganisms and microbes present in the soil, which ranges from different soil types.

If you have a spruce tree, I highly recommend checking out our guide on the best spruce tree fertilizers here to get the pH right!

2. Your Tree Has Access To Nutrients Only Found In Acidic Soils

big tree root

Soil pH refers to the concentration of hydrogen ions within the soil. So in soils with a low pH, there is a greater amount of hydrogen ions than in soils with a high pH. 

Because of the high concentration of hydrogen ions in acidic soils, this gives trees access to the nutrients they need. 

Like the primary, secondary, and micro-nutrients we mentioned above, such as zinc, iron, manganese, aluminum, copper, and boron, which are all found in greater amounts in acidic soil than in neutral or alkaline soils. 

Even certain nutrients such as calcium, magnesium, sulfur, and nitrogen are moderately present throughout acidic and alkaline soils. 

Species like green ash, bald cypress, river birch, cottonwood, dogwood, magnolia, longleaf pine, slash pine, and sweetgum are just a few tree species that tolerate acidic to neutral or alkaline soils. 

3. Soil pH Influences Plant Growth And Beneficial Bacteria

close up of Earth worms on the ground

Soil pH can affect the beneficial bacteria that live in the soil. These microorganisms help decompose organic matter and influence the growth of plants, including your tree.

However, certain soils that are highly acidic limit the amount of decomposition from bacteria, resulting in less organic matter broken down.

This can become an issue. It can limit the number of nutrients that can be taken up by the tree, such as nitrogen. 

Depending on the type of soil, certain nutrients are not in available forms for plants to uptake and readily use. Microorganisms and microbes present in the soil are responsible for breaking them down to enable plants to take them up effectively. But, this ranges from different soil types.

According to Washington State University Extension, most of the nutrient cycles within the soil are directly controlled by the microbes within the soil.

This helps trees and plants absorb nutrients through organic matter decomposition, and nitrogen-fixing. Plants would not be able to as effectively acquire nutrients from the soil without the help of microorganisms.

If you have maple trees, take a look at our piece on the best maple tree fertilizers here!

How Soil Becomes Acidic (And What Nutrients Are In It)

Background with a path of olive trees on a cultivated field

As we touched on above, acidic soil has a soil pH of less than 6.6, which contains those certain nutrients that are lacking in abundance in neutral and alkaline soils. This includes primary, secondary, and micro-nutrients like Zinc, Iron, Manganese, Aluminum, Copper, and Boron. 

Other nutrients, such as Calcium, Magnesium, Sulfur, and Nitrogen are moderately present across the board in acidic to alkaline soils. 

According to SUNY Environmental College of Science and Forestry, the soil becomes acidic as a result of things that happen in the environment. 

Leaching of nutrients from soil can be caused by: rainwater, the formation of weak organic acids, and the formation of strong organic and inorganic acids. 

Rainwater can leach or drain away minerals like calcium, magnesium, potassium, and sodium. 

The formation of weak organic acids can also be a result of the combination of carbon dioxide from decomposition and root respiration dissolving in water. 

Lastly, the formation of strong organic and inorganic acids is a result of decaying organic matter and oxidation.

Any areas that have higher rainfall are going to tend to have more acidic soils. This happens due to the ionization that happens when water combines with carbon dioxide, thus releasing hydrogen and bicarbonate.

These hydrogen ions (hydrogen and bicarbonate) then replace the calcium ions (that were already in the soil), resulting in the acidity of the soil.

From there, a water-soluble ion of calcium and bicarbonate bonds together and is formed and drained from the soil. This process is much more complicated, but this is just a quick synopsis of what happens. 

Soil pH is affected by things such as the parent soil material, rainfall, organic matter, or fertilizers. Nitrogen fertilizers can also increase soil acidity. So this means that if nitrogen fertilizer is applied at a greater rate, the soil is going to become more and more acidic.

Changing The Soil pH

You can change the soil pH by adding materials or additives to the soil. This includes things like limestone, and wood ashes.

Because of the nutrients present within limestone and wood ashes, you can raise soil pH in the case that you want your soil to be less acidic!

Before you guess whether your soil is acidic or alkaline, the best thing to do is test it! The Luxekem Soil pH Meter is a great choice. It has four functions including soil moisture, pH, temperature, and sunlight intensity, so you’ll be able to test just about everything at once.

Above, we mentioned the different primary, secondary, and micro-nutrients that are present in acidic soil. Adding a wood ash amendment to your soil can increase the pH but in slow increments.

Wood ash is high in potassium and calcium and can be spread into a thin layer during the winter and turned in in the springtime. 

Using a limestone application can also increase the pH of the soil. Limestone is primarily composed of calcium carbonate and adds calcium into the soil, neutralizing acidic soil.

You can use things like calcification limestone, dolomitic limestone, hydrated lime, ground oyster shells, pelletized lime, and fluid lime. 

After you test the pH of your soil, if you decide you want to change it, you can add an amendment like Garden Lime 6.75 lbs. The Epsoma brand makes amazing products, plus it’s organic. It also comes in pellets so it’s easier to apply and adjust the pH of your acidic soil.

You can learn more about the specific pH’s that trees like here!

Acidic Soil Can Contribute To More Storm Damage And Soil Toxicity

Forest in early autumn before storm with a dramatic cloudy sky

Believe me, when I learned of this, I wondered how it could be true for quite a bit.

A study done by the Swiss Federal Institute for Forest, Snow, and Landscape Research, assessed the effects of soil properties, specifically, the acidity of the soil. 

What they found was that soil pH had the most significant impact on storm-damaged plots and that it should be considered a risk factor in the susceptibility of forests to damage from storms. 

They suggest that an increase in deciduous trees would reduce the amount of damage and susceptibility that forests have to storms. 

So, while acidic soil may be good for some trees, and some landscapes, in others, it drives damage from natural disturbances. 

Soil pH can also limit the growth of certain trees and plants and make it impossible for them to live in a certain location.

Too low of a pH can also cause toxicity to plants. This means that certain nutrients are only available at toxic levels, like aluminum and manganese, or nutrients won’t be able to be absorbed, at all.  

This results in yellowing leaves, stunted plant growth, and development, and can even cause the plant to end all together.

If you weren’t sold on the pH meter above, or you just want something easier to read, you can try the Garden Tutor Soil pH Test Kit (3.5-9 Range). These soil pH test strips give you results in just 60 seconds so you can optimize your soil pH. 

That’s A Wrap!

While acidic soil can be great for acid-loving plants, for other plants it can be detrimental. 

Soil pH determines the nutrient uptake and growth of your tree or plant. Acidic soil gives trees and plants access to a range of nutrients that they may not get from other soil types. 

If your soil is too acidic for your plant or tree you can use different soil amendments like limestone to increase the pH of your soil.

On the other hand, a soil pH that is too low can cause toxicity or plant poisoning, where certain nutrients are only available at toxic levels. 

Lastly, soil pH has a significant effect on storm damage to forest plots and makes forests more susceptible to storm damage.

Thanks for learning with us about why acidic soil is good for your tree!

References

Bagayoko, M., S. Alvey, G. Neumann, and Andreas Bürkert. “Root-induced increases in soil pH and nutrient availability to field-grown cereals and legumes on acid sandy soils of Sudano-Sahelian West Africa.” Plant and Soil 225, no. 1 (2000): 117-127.

Mayer, P., Brang, P., Dobbertin, M., Hallenbarter, D., Renaud, J. P., Walthert, L., & Zimmermann, S. (2005). Forest storm damage is more frequent on acidic soils. Annals of Forest Science, 62(4), 303-311.

McCauley, A., Jones, C., & Jacobsen, J. (2009). Soil pH and organic matter. Nutrient management module, 8(2), 1-12.

Ohno, Tsutomu, and M. Susan Erich. “Effect of wood ash application on soil pH and soil test nutrient levels.” Agriculture, Ecosystems & Environment 32, no. 3-4 (1990): 223-239.

Stark, Sari, Minna K. Männistö, and Anu Eskelinen. “Nutrient availability and pH jointly constrain microbial extracellular enzyme activities in nutrient-poor tundra soils.” Plant and Soil 383, no. 1 (2014): 373-385.

Zhalnina, Kateryna, Raquel Dias, Patricia Dörr de Quadros, Austin Davis-Richardson, Flavio AO Camargo, Ian M. Clark, Steve P. McGrath, Penny R. Hirsch, and Eric W. Triplett. “Soil pH determines microbial diversity and composition in the park grass experiment.” Microbial ecology 69, no. 2 (2015): 395-406.

Olives are most comfortable growing in Mediterranean climates. But did you know you can grow olives in North America? Not only can you grow them in specific areas in the United States, but you can also grow them indoors.

It takes around 3 to 6 years for olives to grow on outdoor trees and around 1 year indoors. The negative aspect of indoor trees is they don’t get to experience the natural season cycles that outdoor trees receive. Olive trees can be transplanted outside in warm climates once mature.

Growing olive trees is not difficult but they do require certain provisions to provide you with the best harvest. Let’s dive in to learn more about how long it takes olives to grow and how best to facilitate that growth!

Where Do Most Olive Trees Grow In The World?

Olives like to be warm and cozy so they like growing up in Mediterranean countries. You can’t blame them! You will notice when buying olive oil most of the best brands come from that area. The top places for growing the best olives are Spain, Italy, Portugal, Greece, Turkey, Chile, and Argentina.

Olive trees thrive in places that enjoy warm spring and summer months and cool winters but nothing below 15 degrees. While they like it warm they don’t like it too hot and they still need some cool air for the olives to reach their optimum size and taste. Olive trees do not do well in tropical temperatures.

What Areas Of The US Are The Best Places To Grow Olive Trees?

California leads the way in the United States with the highest number of olive trees making it the top producer of olive oil. The other areas that are the best places that successfully grow olive trees are Georgia, Texas, Arizona, Florida, Alabama, Oregon, and Hawaii.

Texas is next in line with more than 250 olive oil growers across the state!

If you want to know where the olive oil you are interested in purchasing is from making sure you check the label on the bottle. It should tell you everything from where the oil was produced to the date of the press and when it expires.

What Zones Are Best For Growing Olive Trees Outdoors In The US?

Orchard with olive trees

If you are an experienced gardener you are already familiar with this, but if you are just starting, the United States Department of Agriculture (USDA) has a map of where you can find out what you can and cannot plant in your area. The USDA Planting Map posts a complete map of the United States with the zone numbers listed for every area.

The best places to grow olives outdoors in the US are in zones 7 to 10. You can find the map on the USDA’s site and just locate your state and area where you live to see if you are living within this range. The following list tells you what each zone encompasses and which olive trees will grow well in these areas.

The zones listed may show a state but you will have to look up your specific area to see if it is part of this zone hardiness area.

  • Zone 7 includes areas in the Pacific Northwest, Utah, Nevada, California, Arkansas, Texas, Arizona, Virginia, Tennessee, New Mexico, New Jersey. and Pennsylvania.

The best olive trees for Zone 7 are Mission, Picual, Arbequina, and Manzanilla.

  • Zone 8 includes South Carolina, North Carolina, Mississippi, Alabama, Louisiana, Arizona, Washington, Oregon, Florida, Georgia, Arkansas, California, and Arizona.

The best olive trees to grow in Zone 8 are Arbosana, Arbequina, and Koroneika.

  • Zone 9 includes areas in California, Louisiana, Texas, Florida, and Arizona.

The best olive trees you can grow in Zone 9 are Frantoio, Mission, Ascolano, and Manzanillo.

  • Zone 10 includes much of South Florida, coastal California, and a bit of south-central Arizona.

The best olive trees you can grow in Zone 10 include the Mediterranean tree, the Arbequina olive tree, the Pendolino olive tree, the Koroneiki Greek Olive tree, and the Mission olive tree.

Do Olive Trees Need To Be Pollinated?

Pollination of olive trees happens when the trees have flowers. The pollen from the male portion of the plant, the anthers, joins the female portion of the plant, the stigma. These spring flowers will later become ripened olives.

Not all olive trees need to pollinate because many are considered self-pollinating. This process means that instead of having to be planted next to another similar tree to produce olives, pollination can occur via the wind or even by bees. 

Make sure you purchase your olive trees from a reputable nursery. Most of the olive trees sold are self-pollinating but the professionals will be able to confirm that for you.

How Do You Plant An Olive Tree?

If you have found that you live in a zone that is conducive to growing olive trees, the next step is to find just the right area to plant them. Find an area in your yard or garden that gets at least 6 to 8 hours of full sun each day.

Make sure that the soil you are using for your olive trees is light enough to remain drained at all times. Olive trees will not thrive in heavy soil that is thick and clay-like. Most importantly, give your tree plenty of room to expand so the roots have a good amount of space to spread out through the years.

Can You Plant an Olive Tree from Seeds?

The quick answer is yes, you can plant an olive tree from seeds. The long answer is you have to get a fresh olive and not one that you purchased from a grocery store and just finished eating. If you know someone who already has an olive tree you may be able to get fresh seeds from this person’s tree.

Popular Florida horticulturist, Stan DeFreitas, will guide you in planting olive trees with seeds in this informational YouTube video Gardening from Seeds: How to Plant an  Olive Seed. If you have the patience, you can do it, but it’s not cheating if you buy the tree already growing!

How Do You Plant Indoor Olive Trees In Pots?

The first thing you need to do to grow an olive tree indoors is to find a type of tree that will grow well indoors. When purchasing a new tree at your local nursery, make sure that someone who specializes in indoor plants and trees helps you make your selection.

Next, look for a window that gets at least 6 to 8 hours of sunlight every day. Transfer the tree into a pot that is large enough for the roots to fit but also provides them with room to grow. Before you leave the nursery pick up a bag of potting soil that drains freely.

Water your olive tree thoroughly every week. Put another container under the pot so you can let the water drain out of the bottom. When the tree starts to grow more slowly, during the fall and winter seasons, you can cut back on watering it to one time a month.

During these slow-growing months, you can give it a dose of a houseplant fertilizer that includes nitrogen once a month a well. In the spring you can increase the type of fertilizer to one that provides a slow-release twice a month.

8 Olive Trees That Are Perfect For Growing In Pots Indoors

Pot with olive tree indoors

Koroneiki Olive Trees

Koroneiki olive trees are perfect for growing in pots in your home as they are easy to grow and virtually maintenance-free. Their leaves are larger than most olive trees but you will be able to see olives by the first year. Talk about immediate gratification!

This tree should be placed in an area that gets full sun but it can also thrive in partial sun as long as it is at least for 6 hours a day. You can fertilize it between 4 to 6 weeks later when the tree becomes dry but you can cut that down during the winter season.

Perfect for making olive oil.

Arbequina Olive Trees

This tree is the most popular olive tree for growing indoors. They are self-pollinating and the colors they offer make them an asset to your interior décor. Look for the beautiful flowers that begin to bloom in spring and change colors until they become yummy ripe olives.

Place the pot in front of a window that faces the south and gets sunlight for a minimum of 4 to 8 hours every day. Water when dry and you can enjoy your first olives in the first year.

Perfect for curing and making olive oil.

Mission Olive Trees

Mission olive trees started as popular trees in Spain but they have become equally as popular in California. They are already self-pollinated so they are ready to grow and produce great-tasting olives.

Mission olive trees can take cooler temperatures so if you don’t live in an area that is warm most of the time this will is the perfect olive tree for you to grow indoors.

Mission olive trees make great indoor plants, they have pretty leaves that are both green and gray, and they remain free of diseases as they grow indoors.

Perfect for making your olive oil or brining the olives for a snack.

French Picholine Olive Trees

This tree bears the most popular olives in France. When the fruit of this tree grow and ripen they have a flavor that is nutty with a spicy kick. The olives are picked when they are still green to use as a snack or stay on the tree until they turn black to make a nice olive oil out of them.

The Picholine is well suited to be an indoor plant as it is easy to grow and will thrive if you keep it pruned.

Perfect for snacking as well as making olive oil.

Manzanilla Olive Trees

These olives may hail from Spain but they have achieved the status as the number one olive in the United States. They are almost always brined and topped with a red pimiento.

They can be eaten in foods, like potato or tossed salads, in martinis, or even snacked on alone.

Their requirements are few – they don’t need to be pruned much but they do like warm air rather than cool air.

Perfect for snacking, charcuterie boards, salads, and martinis.

Amfissa Olive Trees

This olive tree comes from Greece and is one of the most popular olives in that area. It makes a great indoor plant because it is self-pollinated and compact so you can slip it into a corner as long as it gets enough sunlight. 

While you may not see olives for a couple of years when they do ripen they will have a purplish-brown color with a buttery, salty flavor.

Perfect for making olive oil or brining the olives.

Nicoise Olive Trees

If you have ever had a niçoise salad you will know why the name of this olive sounds familiar. They come from France but they are Ligurian olives from Italy. Once these olives reach maturity they are dark brown and are brined with a variety of herbs enhancing their smoky flavor.

They love the warm weather and thrive in dry heat. You can expect to see olives on your inside pot in about two years.

Perfect for niçoise salad, tapenade, and on a variety of salads.

Kalamata Olive Trees

Another favorite among olive enthusiasts in the US, Kalamata olives grow primarily in Greece. They have dark skin that is shiny and purple in color.

They like warm conditions but not too hot and keep their soil wet but do not overwater (they are like the Goldilocks of olives, everything needs to be just right!)

These olives are rich in vitamins making them a healthy and nutritious snack. The trees do not grow very fast and it could take about three years to see your first edible olives.

Perfect for snacking, Greek salads, topping pizza, and adding to pasta dishes.

What You Can Do With Your Ripe Olives

Olives prepped for eating
  • Eat them raw – many olive purists don’t need anything done to their favorite varieties. Most olives have enough of a unique flavor to make them enjoyable to munch on just as they are. However, we don’t recommend eating olives straight from the tree.
  • Marinate them – in a mason jar, combine about ¼ cup of olive oil with a couple of tablespoons of red wine vinegar. Add in garlic, bay leaves, fresh rosemary, and some lemon rinds along with about 2-3 cups of olives. Refrigerate from two hours to two weeks. Enjoy!
  • Make your own olive oil – this is completely doable but it is time-consuming for a fairly small yield. The easiest instructions that I found online were this video: How to Make Olive Oil at Home. It is just over three minutes and is easy to follow with no special equipment needed.
  • Make a tapenade – slathering homemade tapenade on crusty Italian bread will give you the ultimate olive-tasting experience!

Supplies You Need To Grow Your Own Olive Tree

You can find everything right here on the Internet to get started – from the pots to grow them in, to the olive trees themselves!

  • Arbequina Olive Tree– this live plant comes with a special blend of food, especially for this type of tree, as well as a planting guide. You can expect a tree that is around 2 – 3 feet tall.
  • TreeHelp Annual Care Kit for Olive Trees – for a nominal amount this care kit will make sure your trees are healthy and give you the tastiest olives. It includes a bag of premium fertilizer and can take care of one large tree or a couple of smaller ones.
  • Large Outdoor Tall Planter – this 20-inch planter is just the thing for indoor trees that may need to go outside every once in a while. It includes a drainage tray so your tree does not sit in water.

To learn more about how long it takes other trees to produce, check out our article Here’s How Long It Takes To Grow An Avocado Tree (Timeline).

That’s A Wrap!

We hope this guide helps broaden your knowledge about olives! Feel free to refer back to it as needed to know how long it takes olives to grow and which ones grow best indoors.

I don’t know about you, but now I’m in the mood for some tapenade! Until next time!

References

Chiraz, M. C. (2013). Growth of young olive trees: water requirements in relation to canopy and root development.

Eleftheriou, E. P. (1987). A comparative study of the leaf anatomy of olive trees growing in the city and the country. Environmental and Experimental Botany27(1), 105-117.

Sofo, A., Dichio, B., Xiloyannis, C., & Masia, A. (2005). Antioxidant defences in olive trees during drought stress: changes in activity of some antioxidant enzymes. Functional Plant Biology32(1), 45-53.

Perpetuini, G., Prete, R., Garcia-Gonzalez, N., Khairul Alam, M., & Corsetti, A. (2020). Table olives more than a fermented food. Foods9(2), 178.

There’s nothing stranger than walking outside at night and hearing the eerie creaks and groans of nearby trees. At some point in your life, you’ve probably ran into a tree making some weird and wacky sounds. Well, there’s a few different reasons trees make noises especially during the night.

Trees make different noises at night which is generally a result of wind. These noises include creaking, groaning, squeaking, scratching, and cracking. Trees make more noise at night because everything else around them is still, so we’re able to identify their sounds better.

Below, we’ll go over all the different noises that trees make at night and what causes the noise. We’ll also provide some ways to remedy those noises if they’re coming from your landscape trees outside your home!

Trees Make A Creaking Noise At Night

Tree bent but not broken by the wind

One of the noises that trees make at night is creaking. Trees can creak during the day, too, but it sounds a heck of a lot more ominous at night.

Healthy trees will make a few creaks here and there, especially in areas prone to windy conditions. However, when trees make excessive creaking noises, they may be calling for help.

Creaking is caused by branches moving in the wind. There could be an old wound in the branch or a hole dug by a pest that is rubbing together, creating the creaking noise. Creaking can also be a sign of a dead branch.

When a dead branch starts creaking, it could mean it’s getting ready to drop. It’s best to trim these types of branches before they fall unexpectedly to the ground.

Creaking is most prevalent on windy nights which are most frequent in spring. Be on the lookout for branches that aren’t flowering in the spring, as these are probably your source of creaking at night.

Trees Groan At Night

Trees can do a lot of talking at night and combined with the dark, it can make them seem alive! Well, the truth is, trees are alive and they have ways of complaining just like we do.

Groaning is a noise made by a tree’s trunk when it has an old wound that is being moved by the wind. Tree wounds could be from a pest, affliction, lightning, or anything that damages the trunk without actually severely limiting the tree.

When the trunk of the tree sways, the layers of bark that have grown around the wound will move, stretch, and shrink, which causes the groaning noise. 

If your landscape trees are groaning, it’s usually not a cause for concern. It just means your tree is trying to recover after its trunk has been damaged.

However, if you’re worried about the longevity of your tree, check out our article: 5 Simple Steps To Save A Tree With Stripped Bark! This guide will give you some tips on how to treat a tree wound and what you can do to improve the tree’s chance of survival if this is the case.

Trees Squeak At Night

Winter landscape with snowy forest and many stars in night sky

Squeaking is certainly one of the most unsettling noises to hear from a tree at night. Like a door to a spooky house slowly opening to reveal a monster. Boo!

Despite the noise, squeaking trees have a far less sinister cause. Squeaking happens when two branches of a tree cross over each other and rub together in the wind. It can also happen when neighboring trees have branches that cross over each other.

If you’re hearing eerie squeaking noises at night from your landscape trees, it’s time to bust out the pruning shears and trim your trees.

Preferably, you’ll want to prune tree branches before they grow too large. If you notice branches are starting to cross over, or even appear to be growing in that direction, prune one of them as soon as possible.

According to New Mexico State University, the best time to prune is January through March, but you can prune as early as October if necessary.

For small branches, consider using pruning sheers such as Professional Premium Titanium Bypass Pruning Shears. They can cut up to ¾-inch branches and are good for when you see branches beginning to grow together.

For larger branches, Tabor Tools Anvil Lopper Tree Trimmer works well. It can cut branches up to 2 inches thick and has a long handle to give you maximum leverage when cutting through a larger branch.

Once you’ve eliminated crossing branches, you should not hear any more squeaking noises coming from your landscape trees!

Trimming these types of branches also promotes healthy growth for your trees. Branches will no longer need to compete with one another for space or resources.

For tips on how to prune large trees, check out our article on the best time to prune large trees – you’ll need them!

Trees Whisper, Shush, And Cackle At Night

The leaves of trees look different with each change of the season. In spring, leaves are a luscious green, freshly grown. During the summer, leaves begin to lighten from sun exposure. In fall we see the brilliant oranges, yellows, and reds as leaves prepare to drop.

The way leaves sound in the wind will depend on what season it is. During spring, the rustling of leaves can be characterized as more of a whisper at night. The leaves are smooth and therefore make a light noise as they sway in the wind. 

During the fall, the leaves of most trees are drying out and getting ready to drop. When these leaves rustle in the wind it’s more of a cackle as the dry leaves swing in the wind.

Yet another varying noise is what evergreen leaves sound like. After all, these trees stay green all year and do not lose their leaves en masse like deciduous trees. Trees like pines, spruce, redwood, fir, and cypress all keep their leaves year-round.

These trees, especially those with needles, make shushing noises when the wind blows at night. This is due to the needles rubbing against one another.

So, how much wind does there need to be to cause trees to whisper, cackle, and shush? According to the National Oceanic and Atmospheric Administration (NOAA), winds around 4 miles per hour are enough to rustle leaves.

When winter comes around and most trees are bare, another noise happens from the lack of leaves. But we’ll get to that a little later!

Trees Crack At Night

Beautiful sunset on river with trees in water

Winter is tough on a lot of people. It’s cold, it’s dreary, and you have to put on six layers of clothing to walk outside. Trees have it rough in the winter, too.

During the cold days of winter, trees are susceptible to something called frost crack. According to Michigan State University, the most susceptible trees include:

  • Sycamore (most common)
  • Maple Tree
  • Apple Tree
  • Cherry Tree
  • Horse Chestnut Tree
  • Linden Tree
  • Walnut Tree
  • Willow Tree

For frost crack to happen, it needs to be a particularly sunny winter day followed by a very cold night. During the day, the sun warms the bark, especially on the south or west side of the tree. The bark will swell a little bit in the heat.

As the sun sets and temperatures drop rapidly, the inner wood and outer bark shrink, but at different rates. The outer bark shrinks right away, but the inner wood takes a bit longer. The result? Craaaaack. 

The different sizes of the bark create a loud cracking noise and a tear is formed in the bark. Luckily, most of the time these cracks can be healed over the years by the tree.

If your landscape tree suffers from frost crack, don’t be surprised if the wound closes in the summer and re-opens in the winter. 

This is due to fluctuating temperatures. In the summer, warm temperatures swell the bark, closing the wound. In the winter, the bark shrinks, pulling back and revealing the wound. This is normal. Over the years the tree will eventually seal the wound so that even in the winter it does not show.

Trees Make Scratching Noises At Night

Tree noises can be just as ominous as a coyote’s howl at night. One of the other noises that trees can make at night is scratching.

Trees make scratching noises when their branches rub up against a hard surface such as the side of a building, a fence, or a telephone pole.

If you happen to hear this type of noise coming from your landscape trees, it’s probably time to trim your trees back. Scratching branches can sometimes damage siding or chip paint if it happens for an extended period.

Trees that are scratching against a utility pole will typically be taken care of by the utility company. Otherwise, you can find out where the scratching noise is coming from and trim those branches yourself if they are within reasonable reach.

You’re more likely to hear this noise at the top of a tree, as some trees don’t grow many branches at the bottom of the tree.

Animals Make Noises In Trees At Night

Owl In Tree At Night

There are hundreds of bugs, birds, and mammals that frequently use trees as either a home or just a place to hang out. At night, there are still plenty of critters living in or climbing on the trees.

Some animals are looking for food, others a place to sleep for the night. No matter why they’re in the tree, they tend to be noisy about it.

A few of the most common nighttime animals that make noises from trees include:

  • Katydids
  • Tree Crickets
  • Tree Frogs
  • Owls
  • Raccoons

According to the University of Illinois, Katydid ‘songs’ are most prevalent in late summer. This is true for tree crickets as well.

Some frog species will climb into trees at night and produce a chirping/whirring sound. Spring peepers, for example, prefer to be on the ground but are excellent climbers and sometimes find their way into trees at night.

Owls are frequent visitors to trees, often resting on large branches near the trunk. If they are incubating or raising chicks they may sit in a nest built by other animals or birds. Owls do more than just hoot, they also whistle, coo, sing, and bark.

Raccoons are another frequent nighttime visitor to trees. Raccoons climb trees to look for food, reach rooftops, or escape predators. Raccoons make quite a ruckus and can squeal, bark, yip, growl, and hiss.

Certain insects can also make noises in trees at night. To learn more, take a peak at our article on the most common insects that live in trees!

Trees Howl and Whistle In The Wind At Night

We can’t discuss all the odd noises trees make at night without mentioning the eerie howl of the wind as it whips through the trees.

Again, this noise isn’t technically made by trees. But howling wind is almost always associated with trees (and spookiness!)

The howling and whistling noises of the wind are created by friction. In this situation, the friction is between the wind and the tree branches.

As the air moves over and around the branch, it creates a howling or whistling noise, depending on the size of the twigs/branches.

Howling wind is especially prevalent when trees lose their leaves in the Fall and Winter months. Leaves can dampen some of the sounds created by the wind, but when there are no leaves, the wind is free to howl and whistle as loud as it wants!

Remember, trees will be trees and this is just a normal part of nature!

That’s A Wrap!

Trees are living organisms that have a lot to say to the world around them. Just because they’re stationary doesn’t mean they don’t have a lot of talking to do.

To recap, the 11 different noises that trees make at night include:

  • Whispering – wind rustling through spring leaves
  • Shushing – wind rustling through spring/summer leaves
  • Cackling – wind rustling through dry leaves
  • Creaking – when a dead branch is getting ready to fall
  • Groaning – when a trunk has an old wound
  • Squeaking – branches rubbing together
  • Cracking – from frost crack
  • Scratching – against buildings, fences, and materials
  • Bugs & animals in the trees
  • Howling – wind
  • Whistling – wind

Some of the common solutions to making these noises go away include proper pruning and trimming of your landscape trees. Make sure your trees aren’t growing too close to your house or your fence, as this can be a source of noisiness at night.

Good luck on your tree journey!

References

Burton, J. I., Zenner, E. K., & Frelich, L. E. (2008, September 01). Frost Crack Incidence in Northern Hardwood Forests of the Southern Boreal – North Temperate Transition Zone. Northern Journal of Applied Forestry25(3), 133-138. https://academic.oup.com/njaf/article/25/3/133/4780135?login=true

Holloway, B. (2011). The Tree and Its Voices: What the Casuarina Says. Swamphen: A Journal of Cultural Ecology1. https://openjournals.library.sydney.edu.au/index.php/Swamphen/article/view/10586

Mhatre, N., Bhattacharya, M., Robert, D., & Balakrishnan, R. (2011, August 01). Matching sender and receiver: poikilothermy and frequency tuning in a tree cricket. Journal of Experimental Biology214(15). https://journals.biologists.com/jeb/article/214/15/2569/10430/Matching-sender-and-receiver-poikilothermy-and

Okkonen, J., Neupauer, R. M., Kozlovskaya, E., Afonin, N., Moisio, K., Taewook, K., & Muurinen, E. (2020, Setember 11). Frost Quakes: Crack Formation by Thermal Stress. Journal of Geophysical Research: Earth Surface125(9). https://agupubs.onlinelibrary.wiley.com/doi/abs/10.1029/2020JF005616

Your Competitors Are Already Running Ads. Are You?

This is for service business owners who are ready to SCALE.