Grow Your Business with Tree Journey

Our TradeWorks Revenue System™ builds a detailed advertising funnel that attracts, nurtures, and converts the right clients – so you can finally stop chasing leads and start scaling your business.

Air plants are becoming more and more popular in the household. They require no soil and little care, making them a hassle-free plant. However, if you’re going on vacation and need to leave your air plants behind, you may be wondering how long they can go without water?

Most air plants will survive up to 2 weeks without water. Some drought-tolerant species such as T. flexuosa are adapted to drier conditions and can last up to 3 weeks. Species that are naturally from humid environments such as T. elongata will struggle after just one week without water.

Air plants are unique in that they get everything they need from the air rather than soil. Let’s take a closer look at how long air plants can go without water.

How Much Water Do Air Plants need?

Instead of using soil and roots to absorb nutrients and water, air plants make use of their leaves to gather all the water and nutrients they need from the air. 

This is because they are epiphytes, meaning they attach themselves to a plant via their roots and just ‘hang’ out..okay terrible joke but you get the point. They aren’t parasites, they just use plants and sometimes rocks for support while getting nutrients and water from the air.

In their native habitats, air plants may be subjected to dry, arid conditions, or they may be at home in a humid rainforest. This is an important distinction because some air plants require less water than others.

Your average air plant cannot survive on misting alone, even if you mist your air plant every day. It requires a good soaking in room temperature water to absorb the necessary water to thrive.

When misting, you should use enough water so that it is dripping from the leaves of your air plant. For soaking, make sure your air plant can be completely submerged.

According to Iowa State University, air plants use specialized cells called trichomes. These cells, located on the air plant’s leaves, absorb water from the air in the form of dew, humidity, or rain.

Air plants are almost always purchased as live plants from a nursery or garden center, so you don’t need to worry about the different life stages of the plant in terms of watering.

How Do You Water An Air Plant With No Soil?

Beautiful of Tillandsia ionantha Planch in garden. Air plant.

Now we know that air plants need to be both misted AND soaked to absorb the necessary water. So, um, how exactly do you water a plant that has no soil?

Air plants should be heavily misted once per week and soaked in room temperature water 2 to 3 times per month. Misting should be done so that water is dripping off the air plant.

To mist your plant, you can use a plastic spray bottle or an actual plant mister like Ebristar’s Glass Plant Mister Spray Bottle. This product works great at creating a fine mist instead of a heavier spray like other plastic spray bottles might.

Concentrate the misting on the plant’s leaves. This is the part of the plant that will absorb and use the water. After misting, be sure to gently shake your air plant so that water is not sitting in the leaves near the base of the plant.

Now, what exactly do we mean by soaking air plants in water? 

Surprisingly, it’s exactly what it sounds like! You can follow these steps to properly soak your air plant:

  • Step 1: Find a bowl that will fit your entire air plant inside.
  • Step 2: Fill the bowl with water, preferably purified water with little to no chlorine or other harsh chemicals.
  • Step 3: Allow the water to sit for 24 hours to reach room temperature. Do not use cold water as this can shock the air plant.
  • Step 4: Take the air plant and submerge it entirely into the room temperature water.
  • Step 5: Leave your air plant submerged for 30 minutes to 1 hour.
  • Step 6: Hang your air plant so that it dries completely before placing it back in its container. If you don’t let the air plant dry completely, it can develop root rot or similar afflictions.

Soaking is extremely beneficial for air plants. An article in the Journal Planta found that when T. ionantha, a very drought-tolerant air plant, was soaked in water for 3 hours, it absorbed as much as 40% of its weight in water. 

Once absorbed, the water is slowly distributed throughout the plant to wherever it is needed. Meanwhile, excess water is stored in the trichomes for later use.

After both misting and soaking, shake your air plant to remove excess moisture. Many air plants have a shape that will allow water to sit in the crook of the leaves. This can promote rot and can stress the air plant more than if it were underwatered.

Air Plant Watering Schedule

There are many different kinds of air plants and when you first get into growing these bizarre plants, it can be intimidating to decide which species to get.

We totally get it! 

But rest assured, the vast majority of air plants can be cared for in the same way. Even if you go with a more drought-tolerant air plant, you can still mist it once per week and soak it 2-3 times per month.

Conversely, if you get a drought-sensitive air plant, it will still thrive with the normal watering schedule.

Some of the most popular indoor air plants include:

  • Xerographica
  • Ionantha (sky plant)
  • Brachycaulos
  • Aeranthos (Mad pupper)
  • Capitata (peach air plant)
  • Bulbosa
  • Pink Quill
  • Cacticola
  • Cotton Candy
  • Recurvata (small ball moss)

These can all be watered in the same general manner. However, if you notice something doesn’t look right, your plant may be telling you it is water-stressed.

Adding fertilizer to your watering schedule can encourage your air plants to bloom, which is rare if they are grown indoors. It will also encourage new growth and nutrition in your plant.

Cute Farm’s Tillandsia Air Plant Fertilizer comes in a mister bottle for easy application. Their 8 oz. bottle will provide an air plant with enough fertilizer for six months. 

Depending on where you buy your air plant, you may be provided with a fertilizer similar to this product. A mist fertilizer is the best choice for air plants as it will deliver the nutrients to the leaves where they are absorbed the easiest.

To use fertilizer, simply mist it onto your air plants once a week. It’s best to fertilize and water on different days so that the water does not rinse off the fertilizer.

You can read more about the best places to plant your air plant indoors here!

How To Tell If Your Air Plants Are Getting Enough Water

Close up flower of tillandsia air plant with blur background.

Plants are a little more difficult to communicate with than people or animals. Nonetheless, plants will let you know when they are stressed by exhibiting certain symptoms.

According to Clemson University, signs that your air plant is not getting enough water include:

  • Curling leaves
  • Rolling leaves
  • Dull-colored leaves
  • Brown leaf tips
  • Stunted growth

If your air plant is exhibiting any of these symptoms, it’s best to give it a good soaking so that it can recover from being drought-stressed.

On the opposite end of the spectrum, you can overwater your air plant. Overwatering is the number one reason that air plants wither and die off, not underwatering.

Signs that your air plant is overwatered include:

  • Yellowing leaves
  • Dark-colored trunk (base) 
  • Leaf drop 
  • Leaves that are easily pulled from the middle of the plant
  • Squishy base

If you’re debating whether or not to water your air plant, it’s best to give it a few more days before watering. Air plants can tolerate dry conditions far better than wet conditions.

(By the way, I encourage you to check out our article on why you shouldn’t water your plants everyday.)

How Long Can Air Plants Go Without Water?

Your air plant will let you know when it is drought-stressed by showing some of the characteristics discussed above. 

How long can air plants REALLY go without water? If you’re planning a month-long trip, can you expect your air plants to be alive when you get back?

The majority of air plants can safely withstand two weeks without water. After two weeks, your air plants may start to exhibit drought stress. 

Some air plant species will not survive after two weeks, others can squeak by and be revived after 3 weeks, even 4 weeks, without water.

An article in the American Journal of Botany found that after 30 days of drought, the air plant T. brachycaulos was still maintaining normal metabolic processes. T. elongata, on the other hand, stopped after just 7 days of drought.

This just goes to show that there’s no one-size-fits-all answer when it comes to how long air plants can go without water. However, 2 weeks is a good all-around baseline for most air plants.

How To Revive A Dried Out Air Plant

Reviving a dry air plant with water

If you forgot to hire a plant sitter for your long getaway and come home to discover your air plants have shriveled up, there might be a way to bring them back.

Air plants that seem dead might be brought back to life with a thorough soaking in room temperature water. According to the University of Illinois, you can soak your air plant for several hours or even leave it soaking overnight.

Once the air plant is done soaking, shake the excess water off or hang the air plant upside down to allow it to dry. Don’t worry, the leaves will retain the water to keep the plant hydrated for a few days.

Repeat this soaking once per week and mist every day until you see improvement. As soon as your air plant shows signs of life, cut back on the soaking to every other week and misting every day. As the plant improves, cut the misting back to once a week. 

Eventually, you can get back to your normal watering schedule. 

This will not work for every shriveled air plant. Some will be too far gone to be brought back. But air plants are incredibly resilient and many species are used to going without rain for months at a time (though they still acquire water from dew or humidity).

How To Prepare Your Air Plants When You Leave For A Trip

Wondering what to do to prepare your air plants for a few days (or a few weeks) without water? We got you covered!

When you can’t find a plant sitter for your trip, you can take a few steps before you leave and a few steps when you get back to make sure your air plants survive without water.

  • Give it a good soak before you leave: The day before you leave, soak your air plant in room temperature water for 1-3 hours in the morning. This will help the air plant absorb as much water as it can into the trichomes and store them for the coming drought.
  • Lower the temperature of your home: According to New Mexico State University, air plants will use less water when temperatures are lower. This will help extend their drought tolerance while you are gone.
  • Move your air plant to a shady location: The less light the air plant is exposed to, the fewer metabolic processes it will perform and the fewer nutrients and water it will need. This doesn’t mean full shade, but moving it further away from the window than normal works just fine
  • Use plastic bags: place your air plant in a plastic bag with holes punched in it while you are gone. This serves as a mini greenhouse and will help seal in moisture for your air plant.
  • Give it a good soak when you get back: When you get back, soak your air plant again in room temperature water for 1-3 hours. This will help revive the plant and give it plenty of water after a period of drought.

How Long Can Air Plants Survive Without Light?

Tillandsia or Air plant which is grows without soil attached with the wood with its colorful flowers.

We mentioned that placing your air plants away from sunlight can prolong their drought tolerance. Just how long can they go without light?

When you want to prolong your air plant’s drought tolerance while you leave on a trip, you can move your air plant to low-light conditions.

Like their water requirements, most air plants can withstand 2 weeks without light. After two weeks, your air plant will likely become stressed and may even perish.

Air plants are tough and can withstand unfavorable conditions for quite some time before they start to complain or show signs of damage. That being said, if you want your air plant to thrive, it’s best to keep it in bright, indirect light.

East- and west-facing windows are a great location for your air plant. According to Cornell University, south-facing windows may get too hot in the summer but can be used in the spring, winter, and fall.

Can Air Plants Survive In A Box?

Maybe you aren’t worried about watering your air plants because you’re leaving on a trip. Maybe you’re moving far away and need to transport your air plants with you.

If this is the case, the easiest way to transport plants is in a box. This keeps them secure so they are not falling over in your vehicle and provides support to keep the plant upright.

2 weeks is the standard for water, light, and survival in a box for air plants. Even if your air plant shows signs of stress from being in a box for a week, it will most likely bounce back after being given adequate light and water once you reach your destination.

Before you move, be sure to check with your destination’s State Plant Regulatory Official to make sure it is okay to move your air plant with you. 

This is just to ensure your plant is not invasive to the area. In most cases, air plants are actually on the decline from overharvesting, but it’s always best to check!

You can use some of the measures listed above before you move to give your air plant the best chance of survival. Soak it before you leave and once you reach your destination and keep the temperature in your vehicle cool.

That’s All For Now!

Air plants are bizarre and interesting plants to have in the home. Their minimal care requirements make them attractive to many busy homeowners.

While air plants require less care than most houseplants, you’ll still want to provide them with adequate light, water, and air circulation.

If you’re leaving for a trip or moving your air plants in your vehicle, it will be difficult to meet the requirements of your air plant in terms of watering.

Air plants can go for 2 weeks without water in most cases. Some air plants are more sensitive to drought while others are more tolerant.

It’s a good idea to give your air plant a good soaking before you leave and after you return. This will help restore the air plant’s water stores so they can continue to grow.

When you’re not on vacation or traveling, be sure to give your air plants a weekly misting, a few monthly soakings, and weekly fertilizing to keep them happy and healthy! 

References

Bader, M. Y., Menke, G., & Zotz, G. (2009, May 21). Pronounced drought tolerance characterizes the early life stages of the epiphytic bromeliad Tillandsia flexuosa. Functional Ecology23(3), 472-479. https://besjournals.onlinelibrary.wiley.com/doi/full/10.1111/j.1365-2435.2009.01547.x

Graham, E. A., & Andrade, J. L. (2004, May 01). Drought tolerance associated with vertical stratification of two co-occurring epiphytic bromeliads in a tropical dry forest. American Journal of Botany91(5), 699-706.

Montes-Recinas, S., Márquez-Guzmán, J. & Orozco-Segovia, A. Temperature and water requirements for germination and effects of discontinuous hydration on germinated seed survival in Tillandsia recurvata L.. Plant Ecol 213, 1069–1079 (2012). https://doi.org/10.1007/s11258-012-0066-9

Ohrui, T., Nobira, H., Sakata, Y. et al. Foliar trichome- and aquaporin-aided water uptake in a drought-resistant epiphyte Tillandsia ionantha Planchon. Planta 227, 47–56 (2007).

Have you ever seen those tiny little blueberry-looking things on evergreens? If so, you’ve seen junipers! I’m sure you have wondered at some point how much water they need, especially since they’re usually found in areas that lack rainfall. Whether you’re a new or experienced outdoor lover, you’ve probably seen junipers somewhere!

Established junipers require little water at all, and they don’t like soggy or wet soil. Even if you just planted some junipers, your watering habits will be infrequent. Junipers are extremely drought tolerant and only need watering if you notice the foliage is fading.

Junipers don’t need a lot of water, and even less so during the dormant season. Keep reading to learn just how much water they need!

Do Junipers Need A Lot Of Water?

You will typically find junipers along rocky slopes and mountainous, semi-arid areas. These locations are actually what junipers prefer. Places with lots of sun, little water, and fairly warm conditions.

Junipers are drought tolerant and have adapted to harsh conditions. They do not do well in soggy or wet soils but will adapt to most soil types. Being native to semi-arid areas, these trees do best in well-draining soils.

They develop a substantial root system with a taproot that penetrates down deep into the soil and a vast lateral root system.

Junipers are grown as shrubs, ground cover, and trees and actually can live for hundreds of years. However, as landscape plants, most live for 30-70 years.

These trees require little care at all, especially water. Although they are drought-tolerant, there are a few things to follow when planting to ensure you give your juniper what it needs.

Juniper with large buds in the garden, close-up. Caring for ornamental garden plants.

Watering A Newly Planted Juniper

Juniper trees need water when they are first planted to establish roots.

Considering junipers are extremely drought tolerant, they need to establish their root system. The only way they can do this is with proper care after they are first planted!

Since it’s a newly planted tree, you’ll want to water it frequently, but you probably won’t need to water it every day. Newly planted junipers can be watered roughly twice a week. After the first few months, you can lessen your watering.

You’ll want to be careful with over-watering your juniper. Over-watering is easy to do, especially if you mulched the area around your juniper. Over-watering will breed root rot, pathogens, and pests, and your juniper will not be happy.

If you’re unsure about how much water your juniper needs, you can always feel the surrounding soil. You can do this by using a yardstick and sticking it down a few inches to a foot.

Now, this will not be a telltale sign every time, but if you watered it yesterday, and the soil is still moist or damp, then you won’t need to water it for at least another day.

As with a lot of drought-tolerant plants, it’s best to let the soil dry out between watering instead of watering it just a little each day.

Watering Juniper Trees During The First Year

The first year is considered the establishment period. During this time, your juniper is establishing roots and adapting to the new environment.

You can water your juniper roughly once a week during the first year. When you water, you’ll want to deep soak the area. 

If you want to fill in your landscape, this columnar version is a great way to add interest and privacy to your yard. This Blue Arrow Juniper – 10 Live Tree grows easily in a wide range of soils and grows upright into tall, narrow trees.

Junipers offer year-round interest to give you some color in the dreary winter months! During the first year, you’ll want to water it regularly so it can establish a root system, and after that, you’ll barely have to worry about it. 

The blue arrow juniper is perfect for lots of different spaces reaching a height of only 12-15 feet tall. Each tree will only be 2 feet wide, which is what makes them great for a privacy screen. 

Watering Juniper Trees After The First Year

Once your juniper has been in the ground for 12 months, you’ll have your established juniper. At this point, you won’t need to water your juniper unless you notice any drought stress, like browning or yellowing of leaves or wilting.

Over-watering is a sure way to destroy your juniper. So unless you notice signs of the tree browning, you won’t need to water your plant, and regional rainfall should be sufficient. 

If you notice signs of stress, you can water your juniper every day until you notice its color coming back to a deep green.

Sometimes it’s hard to tell if junipers need water, especially since they aren’t houseplants. You can use this SONKIR Soil pH Meter to test the soil moisture, soil pH, and sunlight.

It’s easy to use and takes the guesswork out of trying to figure out how moist your soil is!

Do Junipers Need Water In The Winter?

Beautiful branches of a juniper with frost.

During the winter months, junipers go into a dormant state. This dormancy state lasts for roughly three months.

During this time, they aren’t actively growing and don’t need to be watered as much, if at all. During this dormancy, junipers rest and slow down, or stop their growth to get ready for the cold temperatures of winter. You can think of it as hibernation.

Dormant trees will still be alive, and their branches won’t easily snap. Because the tree is still alive and just resting, so to speak, the branches will still be flexible and not gray or brown underneath the bark. 

Since junipers are evergreens, they won’t drop their leaves like deciduous trees like oaks or maples.

This dormancy period is necessary for trees to preserve energy to put into new growth for the springtime.

Preparing Your Juniper For The Winter Months

Although junipers are dormant during the winter months, you can help prepare your juniper for the cold, short winter days. To prepare your juniper for wintertime, you can water it frequently in the fall to give them the extra hydrating boost for winter.

You can keep watering during fall until the ground freezes. 

If you are lucky enough to have snow in the winter, it will provide protection from the wind, water, and insulation to the juniper. If you don’t get any snowfall or precipitation, it might be a problem for your juniper. 

No one wants to water their trees during the winter. But watering your juniper and other evergreens during dry spells throughout winter will help keep your tree healthy and alive (especially if you just spent lots of money on them). 

If you don’t feel like getting out a big, bulky hose, you can opt for the Flexi Hose. Honestly, after using one of these hoses, you’ll probably never want to go back to a normal hose.

It comes in multiple lengths and even has a nozzle attachment. It’s lightweight, easy to use, and easy to store, making watering in the winter way easier than you could imagine!

Why Don’t Junipers Need A Lot Of Water?

juniper shrub up close

As we mentioned, junipers are extremely drought resistant. Even as landscape plants, they need little water. The million-dollar question here is, why?

According to Duke’s Nicholas School of the Environment and Earth Sciences, junipers are the most drought-resistant group of plants that have been studied

A study from researchers at Duke University found junipers have a genetic and evolutionary reason to explain their extreme drought tolerance. Drought significantly affects pinyon pine populations, completely destroying them. 

They also found that at the same time, the serious drought conditions did not affect junipers. As you might know about extreme drought conditions in the southwestern states, it makes you wonder if junipers will be the ones to survive. 

The scientists of this study found junipers have resistance to cavitation. Cavitation is mainly used in physics to describe centrifuges, water turbines, and propellers. 

However, in the sense of junipers, it means they can maintain transpiration during dry periods and prevent bubbles that form in the xylem. Which explains why they are incredibly drought tolerant. 

Junipers Control How Much Water Evaporates Through Their Leaves

Transpiration is when water evaporates through openings in the leaves of plants and trees. So, junipers can control the amount of water that gets released through their leaves during these extreme drought conditions. 

Junipers also have extra woody material in their xylem, which prevents bubbles from forming. The xylem transports water from the roots to the rest of the plant.

And, if bubbles get into the xylem, it interrupts the water that flows to the top of the plant. So, the extra woody tissue prevents disruption of water transportation within the xylem. 

So, you may wonder why this is an issue. If air bubbles get into the xylem vessels, they can stop them from functioning, resulting in little to no water getting to the top of the tree. This causes wear and tear in the tree, and can even cause death to the tree. 

Junipers Are Cavatation-Resistant

Junipers are considered cavitation-resistant. Cavitation typically occurs during extreme drought conditions, which explains one reason junipers can survive, and increase in numbers, even during periods of limited to no water.

Juniper species that are more resistant to drought also have leaves that are thick but narrow to limit the amount of water that is released.

Junipers are evergreens with needles and scalelike leaves. Junipers are also conifers, meaning they have cones. Their cones, however, resemble blue-colored berries. 

Characteristics Of Juniper Trees

Although we mentioned why junipers don’t need a lot of water to survive — let’s dive into the characteristics that make up juniper trees! We’ll explain the physiological traits that allow them to grow in some of the harshest conditions.

Junipers Can Survive In Many Soil Conditions

Junipers have substantial adaptations to allow them to survive in locations with harsh conditions, poor soil, and little rainfall. Their most notable being their large, wide root system. 

They Have A Long Taproot

Some junipers develop both a taproot that goes straight down and a lateral root system, while others mainly have a root system that spreads out laterally.

The taproot allows them to search for water deep beneath the surface, and can even reach 40 feet downward in search of water. Talk about adapting.

The environment where junipers grow has extreme wind from time to time, with fast gusts that can easily knock trees down. This root system helps the juniper to withstand gusts of wind and grip the sides of mountains. 

According to the National Park Service, their root systems make up two-thirds of the tree’s overall mass. This widely spread root system helps them survive the extreme drought conditions they tolerate.

Junipers Are Self-Pruning

Another adaptation is self-pruning. Junipers will phase out branches that are dead and will cut off all nutrients to those branches, directing nutrients and water to the rest of the tree. 

Enough about junipers in the wild. You can grow your own juniper as a ground cover, a bush, or a tree. This Andorra Compacta Juniper is a great option to fill in areas of your yard. 

These compact juniper plants are low-growing, providing just enough ground cover. This juniper species boasts of being evergreen, tolerates urban environments, is deer resistant, and even salt tolerant. 

That’s A Wrap!

There you have it! We hope you learned how much water junipers need. Let’s recap!

Junipers are extremely drought-tolerant plants that require little water at all. Newly planted junipers will need to be watered every few days for the first year to become established. 

If your junipers have been planted for over a year, your watering habits will be infrequent, if at all. Because junipers are extremely drought tolerant, they only need watering if you notice that the foliage is fading. 

Junipers are found along rocky slopes, mountains, and semi-arid areas. This is their native habitat, and these locations are what they prefer. They need lots of sun, little water, and fairly warm conditions. 

Junipers do not do well in soggy or wet soils but will adapt to most soil types. Because of their native habitats, they do best in well-draining soils. 

Junipers develop a unique root system. They have a taproot that penetrates down deep into the soil, and a lateral root system that spreads wide, allowing them to soak up as much water and nutrients as possible. 

It’s better to underwater than to over-water your juniper. Although over-watering is easy to do, especially if you mulched the area around your juniper, it will wreak havoc on your plant.

Junipers go dormant during the winter months, but they still need moisture. Before winter sets in, you can water them frequently in the fall to give them the boost they need for winter. 

Juniper trees have developed genetic adaptations that allow them to thrive in dry conditions without a problem. This is probably one reason they live so long!

Well, now that you know how much water junipers need (or don’t), you can plant some junipers of your own! 

Thanks for sticking around and reading with us!

Until next time!

References 

Baker, William L., and Douglas J. Shinneman. “Fire and restoration of pinon–juniper woodlands in the western United States: a review.” Forest Ecology and Management 189, no. 1-3 (2004): 1-21.

Burkhardt, J. Wayne, and E. W. Tisdale. “Causes of juniper invasion in southwestern Idaho.” Ecology 57, no. 3 (1976): 472-484.

Miller, Richard F. “Biology, ecology, and management of western juniper (Juniperus occidentalis).” (2005).

Miller, Richard F., and Jeffrey A. Rose. “Fire history and western juniper encroachment in sagebrush steppe.” Rangeland Ecology & Management/Journal of Range Management Archives 52, no. 6 (1999): 550-559.

Miller, R. F., Svejcar, T. J., & Rose, J. A. (2000). Impacts of western juniper on plant community composition and structure. Rangeland Ecology & Management/Journal of Range Management Archives, 53(6), 574-585.

During winter, many trees that are not cold hardy will have trouble in colder environments. However, mild winters may provide some room for tropical trees like citrus to survive. In that case, how exactly do lemon, and other citrus, trees survive these mild winters?

Citrus trees are durable, and this includes lemon trees. A frost is not often enough to end a lemon tree that is both mature and healthy. Lemon trees are able to survive mild winters due to their special adaptations, availability of light, and their durable nature.

If you have a lemon tree growing in conditions that fall outside of the subtropical and tropical categories, there may be hope for them. Stick with us for a bit to find out how lemon trees can make it through mild winters outside of their hardiness zones!

How Do Lemon Trees Survive And Grow During Winter?

Lemon trees are subtropical citrus plants, which means that they are going to do better in warmer environments.

It also means that they will thrive most in soil that is moist but drains well, which is common in their native environments.

Finally, it means that they do best with lots of sunlight, as in 8-12 hours a day.

When you think of a citrus tree in general, you likely think of warm weather and lots of sunlight.

Can these trees even survive during the winter, then? How might they manage to get by during those months with less sunlight and cooler weather?

There are a few ways that lemon trees survive during the winter months.

Lemon trees are durable, but they can also be helped by the human hand to have greater success in the cold.

Regardless of where you are growing them, lemon trees usually follow a basic timeline that dictates when, and how fast they will grow .

So, how do they do it?

Lemon Trees Are Durable 

Like all citrus trees, lemon trees are particularly durable. The average lifespan is over 50 years, though healthy and well-kept lemon trees can easily hit the triple digits.

Lemon trees also tend to be quite easy to care for. So, even in the winter when you have to do more to maintain your tree’s wellbeing, the process is not an overly difficult one.

Lots Of Light Helps Lemon Trees To Thrive

Lemon tree grove on a stormy winter day

Lemon trees do well when there are about 8-12 hours of sunlight a day. When there is less sunlight in the winter, no matter what location you are in, you may be concerned about your tree’s needs being met. 

You may want to use some artificial sunlight to supplement the lessened sunlight that is outdoors. However, real sunlight is always best and will do the most for your tree, citrus and otherwise. 

Getting sunlight is a key factor for the growth of almost any tree, aside from those that are particularly adaptable to dark forests, for example. 

To make sure that your lemon tree will get as much sunlight as possible, it is important to plant it somewhere out in the open. You should find a space that is not too close to other trees that may overshade your young citrus. 

It would also be best to avoid planting too close to any buildings. These could also shade your young tree but, later on, the foundation and roots may compete for space, or the branches of the mature tree may be too close to the structure.

Sunlight is key to making sure that your lemon tree can survive mild winters. So, make sure to love your lemon tree and give it lots of light!

Lemon Trees Adapt For The Winter

During the winter, citrus trees tend to store more nitrogen than during warmer-weather months. Later, once temperatures and sunlight hours are on the rise, nitrogen absorbed is not stored as much.

This is just one example of the general adaptation of plants to their environment. Nature is pretty darn good at keeping itself in check, and lemon trees are not an exception to this rule. They can use internal processes and evolutionary adjustments to stay healthy and strong during mild winters. 

In fact, lemon trees are actually considered to be evergreens, meaning that they keep their foliage (and possibly grow) all year long!

While there are things that trees can do, and other things that humans can do to help the trees, is there a limit?

Are There Limits To Winter Conditions For Lemon Trees?

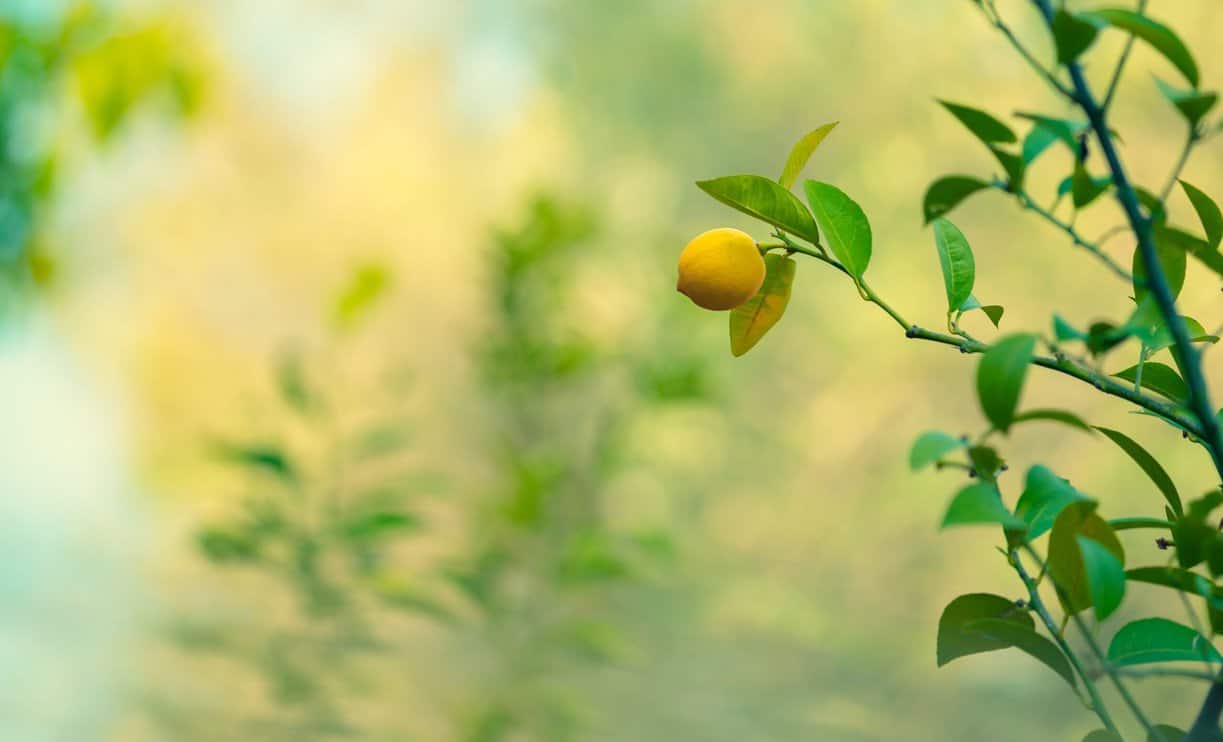
Lemon dripping with rain water

Though lemon trees are durable and tend to have a long lifespan, there are also limits to the resilience you’ll see displayed in these trees.

At a certain point, whether that is too little sun or too low of temperatures, your lemon tree will begin to decline.

This decline can be avoided in many cases, especially if you are aware of some of the causes.

What Might Cause Lemon Trees To Decline Or End In Winter?

So, you are wanting a lemon tree of your own but need to know more. Good for you, many of the causes of lemon trees declining in the winter can be proactively avoided.

Lemon trees may decline or end in the winter for the following reasons:

  • Temperatures got too low
  • Temperatures were moderately low, but for too long
  • Available sunlight declined too much
  • There is too much wind
  • Soil becomes depleted of nutrients
  • Soil becomes too dry
  • Soil is wet but unable to drain well

Okay, there are a lot of factors that might damage or even lead to the demise of your lemon tree. What can you do about that?

The main culprit is going to be the temperature of the area your lemon tree is planted in.

To understand the needs of the lemon tree, we should discuss cold hardiness and the USDA hardiness zones.

How Cold Hardy Are Lemon Trees?

If you read our pieces or know much about plants, you may be familiar with a little thing called USDA Hardiness Zones.

The USDA hardiness zones help us to understand and differentiate between the different regions of the United States based on their average extreme low temperatures.

The temperature ranges are extremes and may not be typical for winter in a given area. However, the important thing to note is that those extremely low temperatures are possible

Lemon trees are best when placed in an area that has an extremely low temperature of 20 degrees Fahrenheit. That is to say that lemon trees will not do well if temperatures get below 20 degrees

You shouldn’t try to plant a lemon tree in an area with this winter weather, because it is the absolute extreme minimum that a lemon tree may be able to endure. As an extreme, in USDA hardiness zone 9, that temperature is going to be handled as a one-off event. 

Confused about hardiness zones? 

Let’s go over them in a bit more depth. 

Each zone covers a range of 10 degrees Fahrenheit, designated by numbers like 9, 10, and 11, for example. Zones go from 1 to 13, as seen on the USDA’s plant hardiness zone map.

Zones are each broken up into 5-degree sections, labeled A and B. So, 9a would cover 20-25 degrees Fahrenheit while zone 9 (a+b) would cover 20-30 degrees Fahrenheit. 

Areas in the United States that are considered proper growing locations for a lemon tree are as follows:

  • The Western parts of Washington, Oregon, and California
  • Southern Arizona, New Mexico, Texas, Arkansas, Lousiana, Alabama
  • All of Georgia, Florida, South Carolina
  • The Eastern parts of North Carolina and Virginia

What Are The Signs Of Winter Damage To My Lemon Tree?

Without discrimination, winter is the hardest season for any plant to bear. Cold hardy trees still have the potential to not survive a particularly harsh winter. So, trees that may be able to survive a mild winter could quite quickly be damaged by a more intense winter. 

Keep an eye out for some signs of winter damage to your lemon tree so that you can confidently gauge the health and success of your tree. 

Lemon Fruit Damage

One of the easiest ways to spot winter damage to a lemon tree is by checking the fruit of your tree. 

The rind of a cold-damaged lemon will become loose and even potentially fall off. This is because the inside of the lemon will become waterlogged, essentially, and will not be able to hold the entire fruit together any longer.

Stunted Growth

Any cold that is fighting to survive cold temperatures or other difficulties will put its energy toward staying alive. This means that there will be less energy available to put toward normal growth processes. 

The growth of a cold-damaged lemon tree will be stunted, and if this becomes a pattern it will be easy to see the lack of growth in your tree.

This could lead to the inability to grow fruit, so lemon production will go down and the tree may fall into a cycle of survival mode.

Dead Or Dying Lemon Tree Branches 

Branches of a old lemon tree in the garden, looks very attractive.

If you see branches that are dying or have already died on your lemon tree, this is another good indicator that your tree is no longer thriving.

This is common to see as a result of cold damage because these smaller parts of the tree can’t handle the extreme temperatures as well as the base of the tree can. 

Dead branches can cause much larger issues like fungus growth or even the rot of other parts of the tree that they are attached to or resting on. 

If you see dead or dying branches on your tree, you should prune them as soon as the weather warms up a bit in the spring. Pruning right before the blossoming period is best.

Dying Leaves On The Lemon Tree

Similar to dying branches as a result of the cold, you’ll see there may be sections of leaves that begin to have dieback. 

Dieback is when leaves brown, wilt, or even rot, but stay on the tree. This can cause issues quite like those that dying branches can cause. 

Anytime a dead or decaying portion of a tree is left on the tree, it can impact the rest of the healthy tree. So, it is important to remove dieback as soon as you can. This will allow you to maintain the health of the rest of your tree.

Dying leaves can also be a sign that the tree isn’t getting enough nutrients or energy. Lemon trees have shallow roots, so it is easy for them to get damaged or run out of available nutrients!

How To Keep Your Lemon Tree Growing In The Winter

You want to keep your lemon tree happy, healthy, and most of all allow it to continue growing, right? 

I have good news. There are some things you can do to maintain your tree’s health in the winter.

Keep up with a few standard practices to give your lemon tree the very best chance of getting through any winter, mild or otherwise.

Choosing The Right Location For Your Lemon Tree

Location is one of the most important things when it comes to the success of your tree. 

Your primary focus should be:

  • Planting your lemon tree in the proper USDA hardiness zone of 9-11
  • Planting your lemon tree in an open area, away from buildings and other trees so that it can get the best light
  • Planting your lemon tree in moist, but well-drained soil
  • Planting your lemon tree in an area where you can monitor it and take care of it

Use Mulch To Protect The Tree’s Roots

Mulch can help you protect your lemon tree by covering the roots and keeping a healthy amount of moisture in the soil. 

I recommend a mulch like these Natural Cedar Shaving that come in bags of 4, 8, and 16 quarts. They can last a long time depending on your needs and are inexpensive.

Give Lots Of Water To Your Lemon Tree 

Water is key, anywhere and anytime. The amount, however, varies. So does the frequency of watering.

In the winter, for a citrus tree, you only need to water it every 3-4 weeks.

Afraid you’ll underwater or overwater? To avoid messing up, or forgetting to water, you can use something like this Automatic Drip Irrigation Kit with a Water Timer.

Fertilize Your Lemon Tree

Sometimes your tree just needs to be fertilized. 

For lemon trees, and any citrus, you’ll want a balanced fertilizer such as this ENVY All-Purpose Plant Food. The elements in the product should all have equal representation. 

Seeing an NPK (nitrogen, phosphorus, potassium) number of 6-6-6 or 10-10-10, for example, is ideal. 

This number is meant to help you see how much of which element is in the fertilizer and can be even easier to spot when it’s the same number all in a row of 3. 

Keep Your Lemon Tree Pruned

Gardener pruning a young lemon tree in spring using pruning shears or secateurs with ripening fruit in a close up view of the hands and garden tool

Especially if you are seeing that your tree’s branches have begun to die as a result of the cold, you’ll need to prune your lemon tree. 

Removing dead branches could mean the difference between a healthy tree and your tree developing fungus and rotting in damp conditions. 

You should prune your lemon tree on a semi-regular basis and as-needed, anyway, so this one is good to keep in mind at all times.

Wrapping Up!

When life gives you lemons…plant a new lemon tree. That’s the saying, right?

Anyway, lemon trees are durable and adapt well, but to a certain point. 

Planting these trees in hardiness zones 9-11, along with making sure they have proper water, sunlight, and a good soil type, will ensure that your tree lives a long, healthy life.

For now, keep up the good work. Good luck as you continue along your personal tree journey, this time with lemons!

References

Castle, W. S. (1983). Growth, yield, and cold hardiness of seven-year-old’Bearss’ lemon trees on twenty-seven rootstocks. In Proceedings of the Florida State Horticultural Society (Vol. 96, pp. 23-24).

Kato, T., Kubota, S., & Bambang, S. (1982). Uptake of 15N-nitrate by citrus trees in winter and repartitioning in spring. Journal of the Japanese Society for Horticultural Science50(4), 421-426.

Dacko, I. G. (1950). Lemons overwintered successfully. Sad i Ogorod, (7).
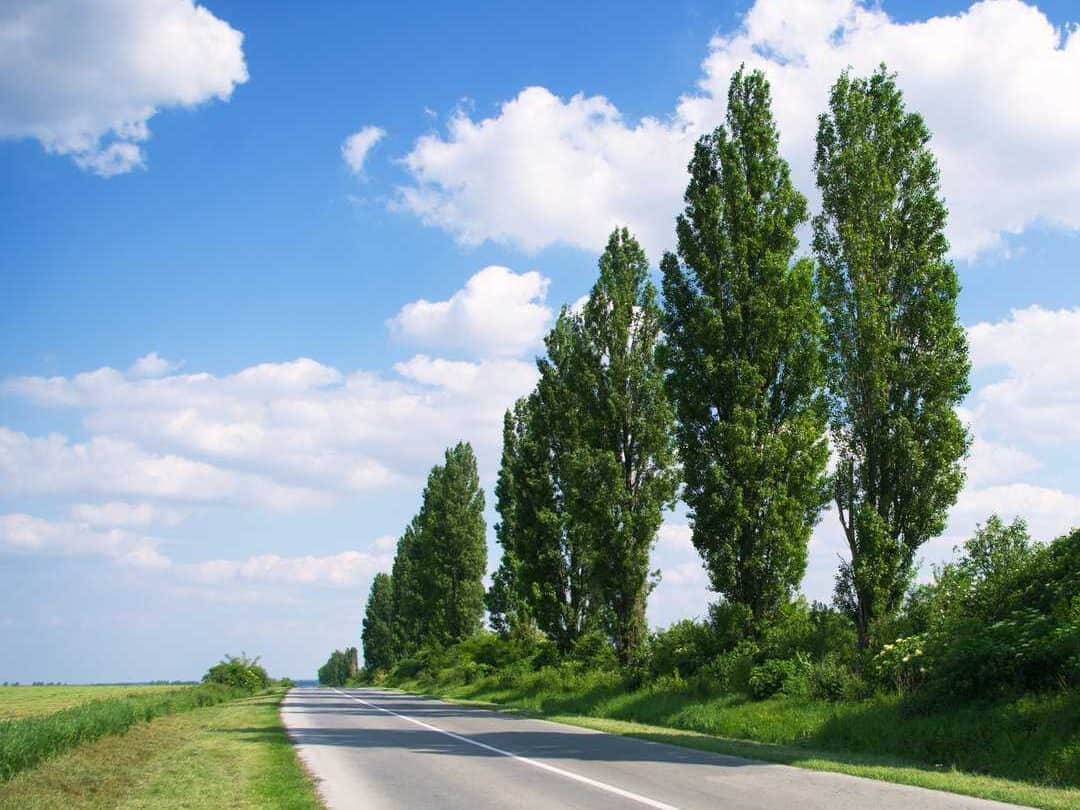
Maple trees come in several varieties and multiple sizes. They can grow quickly, or take a while to mature, but once they are grown, they can provide shade, shelter from the wind, and attract wildlife. Let’s explore how long it will take for a maple tree to grow.

Some maple trees can take between 20 to 30 years to mature, while other species will reach maturity in half that time. Japanese maples are the turtles of this tree genus, growing only a few inches in a year, while silver maples can add over 7ft of growth in a single year.

We’ll go over the steps on how to grow your own maple trees from seeds and saplings, and how long it takes for these trees to reach maturity. Hopefully, this will help you decide what kind of maple tree you want on your property, and what to expect during each stage of its life.

What Type Of Maple Tree Is Right For You?

Picking the right maple tree largely depends on what attributes you are looking for, as well as what size yard you have.

Some maple trees stay small and shrub-like, others stop growing when they reach 20 to 30 feet tall, while others can be towering giants that require a lot of space. 

Best Maple Trees For Small Yards

If you have a smaller yard, then a huge sugar maple, black maple, or sycamore would not be a brilliant choice. They all can grow to over 100 feet tall and grow nearly as wide. For smaller, more compact yards you’d be better off with Japanese, Korean, Norway, or paperbark maple trees.

Japanese and Korean maple trees can grow up to 35 feet tall, or be dwarf varieties, which grow slowly and only achieve a height of 5 to 7 feet. Paperbark and Norway maple trees will grow to heights of 25 to 60 feet, respectively.

Keep in mind when you decide to plant a tree that it needs to have space to expand. Trees that will grow higher than a one-story house need to be at least 20 feet away. Even small trees that topple can cause a lot of damage if they fall onto your house.

Tree roots have to be considered as well. Some trees can grow under, and into foundations causing major problems, so give them space to grow freely without becoming a problem.

Maple Trees For Big Yards

For those of you who have large expanses of turf, you have more options when it comes to maple trees. Silver maples, sugar, sycamore, and red maples, as well as the previously mentioned trees, can be incorporated into your landscaping. 

Some maple varieties can grow to 70 to over 100 feet tall. These include the big-leaf maple, sugar, black, red maple, and sycamore.

These trees will need to be planted quite a distance away from any structures or power lines. Thirty feet would be the bare minimum, but I’d personally put a few more feet of distance between them and my house. 

While maple trees are considered hardwood trees, some fast growers like the silver maple have softer limbs and trunks that can break or fall in high winds and during heavy storms.

You definitely don’t want any of these limbs falling on your roof, so keep them a fair distance away. 

How Long Does It Take For A Maple Tree To Grow?

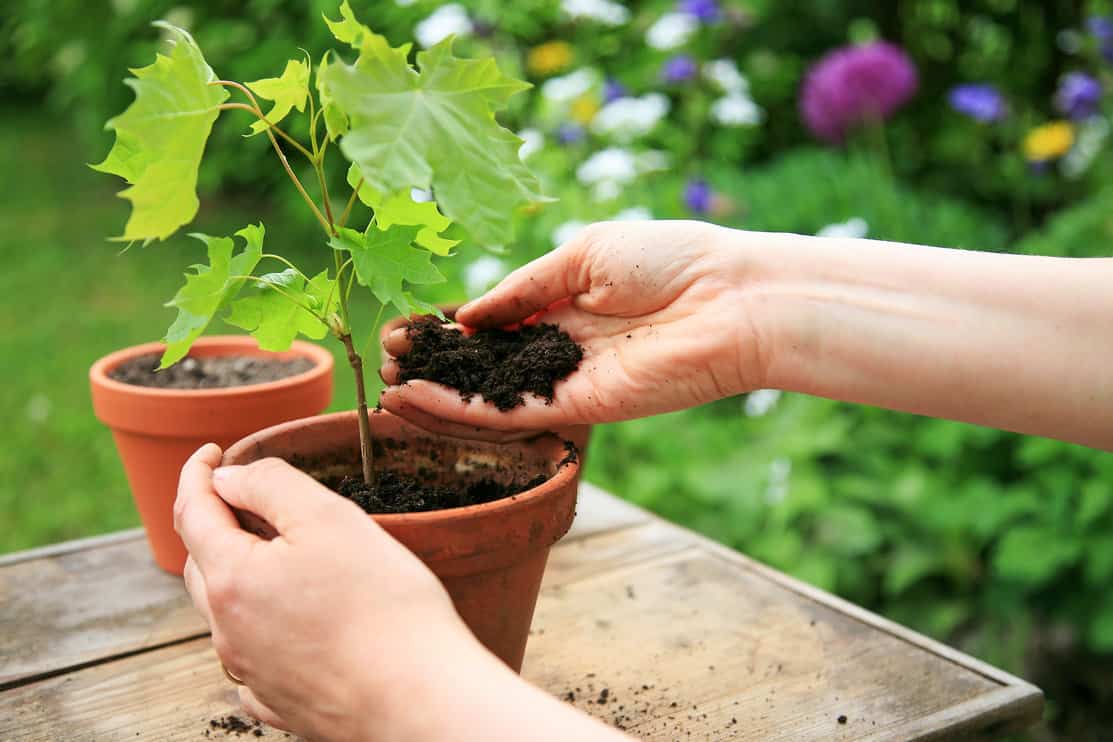
Hands planting a maple tree seedling in a flower pot

Maple trees can take a few decades to reach maturity. This depends on if you are starting your maple tree from seed, seedling or you have a sapling you purchased from a local nursery. 

Growing A Maple Tree From Seed

Did you find some maple seeds on the ground while you were walking in your neighborhood, the park, or out hiking? You should be able to get these seeds to sprout into seedlings with the proper steps.

If you found seeds that started falling in the fall, then these will most likely need a period of stratification before they will germinate. Stratification is a period of cooler weather required for some seeds to grow.

Seeds that have fallen in spring do not require this chilling period and will probably not stay viable in storage for long. Red and silver maple seeds fall into this category and can be started without stratification.

According to the USDAsilver maple seeds start growing in April, take about three weeks to mature, and then will disperse from the tree. They require no stratification, and germination is usually successful in moist, organic soil.

When searching for seeds, only take the ones that have fallen to the ground. If you pluck them straight from the tree, they may not be mature enough to grow into a tree. Look for seeds that are firm, dense, and don’t have any holes in them.

How To Mimic Stratification For Your Maple Tree

Put your maple seeds in a sealable plastic bag with a moist soil medium. You want something like peat or a seed starting soil you then dampen. You don’t want it dripping wet or swimming in water. 

Put the bag with the seeds in the refrigerator. Make sure they don’t freeze, as this could ruin the seeds. Anywhere between 34℉ to 41℉ is a good range to strive for.

It’s important to keep the bag partially opened. Even through this cold process, the seeds need to “breathe.”

Now leave them for about 40 to 120 days, but check them every two weeks. Add a few drops of moisture to the soil if it’s drying out. Tap off any moisture droplets that have condensed inside and flip the bag over.

If you see any moldy or mushy seeds, remove them. Once they sprout during this time, remove them and put them in a seed starting tray or small pot. 

If the seeds haven’t started sprouting after 120 days, take them out and begin planting them. Keep in mind that most times, not all the seeds will sprout, so you will want to stratify at least 10 to 15 to make sure you get a few viable seedlings.

As the seedlings grow, you can cull the ones that aren’t growing so well. 

You can plant seeds outside and let nature take care of the stratification for you, but this process could take up to two years. That’s if squirrels, deer, or other animals haven’t eaten the seeds or seedlings. 

Now Plant The Maple Seeds

Whether they have been stratified, or they’re from a species that doesn’t require a cold snap to get them to grow, it’s time to plant them. Cover the seeds with a thin layer of soil—less than an inch is plenty—then place them in a warm area of the house, preferably near or on a windowsill.

Keep the soil moist while you are working on germinating the seeds, but don’t drown them. Now is not the time to get impatient, because some seeds can still take 40 to 90 days for the seeds to sprout.

Once you have a few maple tree seedlings growing, reduce the frequency of water just a bit. You don’t want to keep the soil moist all the time, as root rot can set in. Instead, let the soil get dry to the touch before misting it again.

You’ll also want to start setting them outside in a partially shaded area, so the new seedlings can harden. As they reach around six inches tall, you can plant them in their new home, or transplant the maple trees to another, larger pot until they get larger and stronger. 

It’s around this time that you will want to give your maple tree seedlings more sunlight. Most maple trees are sun-loving trees. While they can survive in shady environments, maple treesl do much better when they get between 4 and 8 hours of sunlight. 

Deer, rabbits, and sometimes squirrels often eat maple seedlings. You may want to take steps to protect them by either wrapping them in chicken wire or leaving them in pots until they are a few feet tall. 

This may take a year or up to five years, depending on variety, for the seedlings to grow into sapling size. This means the main trunk is about two inches in diameter. 

When And How To Plant Maple Saplings

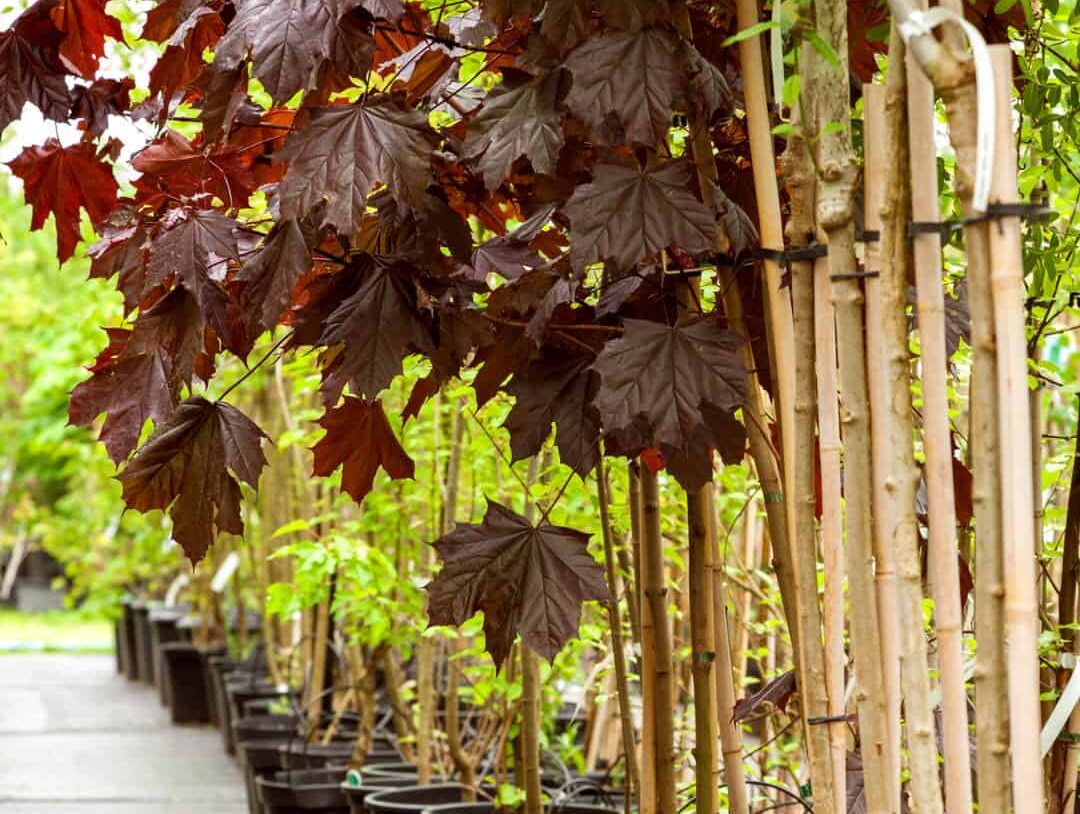
Row of young maple trees in plastic pots. Alley of seedling tree

Fall is the best season for planting, and maple trees are no exception to the rule. While you can plant them at any time, fall is the best season because it gives the trees a chance to establish their roots in new soil. 

It’s important for the roots to get acclimated so that when spring comes around, the tree can send moisture and nutrients up to grow new branches, leaves, and flowers.

Choose Your Planting Spot

Choose a site that gets plenty of sun and is far enough away from structures, sidewalks, pathways, or any kind of water pipes. Remember, maple trees LOVE sun!

Maple roots are often shallow and can raise or crack cement and asphalt. Some maple roots also will disrupt drain pipes in their search for water, so be mindful of supply lines and septic fields.

Dig The Hole!

Next, dig your hole. Dig as deep as the container and about two to three times as wide. Loosen up the root ball so the roots can spread out and mix the existing soil with a good garden or potting soil so there are plenty of nutrients for the new tree. 

Set The Maple Sapling Inside

Set the sapling in the hole, but don’t bury the trunk deeper than the original soil level in the container. Before you fill in the remainder of the soil, water the hole and root ball very well. This makes sure the water reaches the roots.

Fill The Hole And Wait

Now fill in the hole, compact the dirt, and add a layer of mulch. Spread the mulch in the shape of a donut while keeping it away from the trunk a few inches. 

Once your maple sapling is in the ground, it can take 10 to 30 years for the tree to mature. During this time, you may need to prune the tree occasionally for health, but the main thing you can do to make sure it remains healthy is to make sure it gets enough water.

Fertilizer isn’t really necessary for maple trees unless you can tell it’s NOT growing well. Their roots spread out far enough to find the nutrients they need. With regular leaf mulching, mowing, and keeping a layer of mulch around the tree, it finds enough nutrients to stay full!

Keeping Your Maple Strong From Sapling To Young Tree

Maple saplings are still susceptible to damage from foraging animals that like to snack on tender tree bark and the soft tissue underneath. Deer, mice, squirrels, porcupines, and beavers all will seek new saplings, especially when other food sources are scarce. 

According to the USDA, when deer feed on saplings, they increase potential frost damage, weaken the tree and insect infestation. These can increase the mortality of the saplings.

Place A Wire Mesh Around The Maple Tree

To keep them protected, you should erect a wire mesh frame around them. You can use metal fence posts, wood stakes like these Bond Manufacturing Hardwood Stakes, or anything else rigid enough to hold hardware cloth. 

Pound them into the ground around the tree, then take some hardware cloth and attach it to the posts to enclose the tree in a tight cage. Nueve Deer Hardware Cloth has ½” holes that will keep animals out and away from the tree.

Use Chicken Wire

Chicken wire will help against deer and some larger animals, but mice and squirrels can get through the openings. 

Next, drape some netting or mesh over the top of the tree and secure it with bread ties or zip ties to keep small climbing critters like squirrels out. Feitore Deer Fence Netting will help to deter them.

Keep Your Maple Tree Watered

Saplings need to be watered more often than big, established, mature trees. You’ll probably have to water them on a regular schedule, especially during periods of sparse rain for the first two years of growth. 

Maple trees need a good, drenching watering every couple of days to keep them healthy.

The biggest concerns here are to make sure the water soaks in and reaches the roots, but also to keep from watering them too much. Root rot is hard to fix and can be fatal, especially in newer trees. 

Let the top of the soil dry out before watering again so the tree’s roots can “breathe,” instead of drowning the roots in water. When watering your maple sapling, give it a few gallons at a time. Proper watering is the best way to prevent sunscald and leaf scorch.

Properly Mulch Your Maple Tree

A good three to four-inch layer of mulch around the tree helps to keep moisture in, and as the mulch decomposes, adds organic nutrients to the soil. 

Once the tree is about five years old, you can remove the protective mesh and start letting nature water your tree. In times of drought, you can water your tree to keep it healthy, but during normal conditions, the tree should be able to fend for itself. 

Congratulations, you have a strong growing maple tree! It should give you and your family a lifetime of beauty, shade, and enjoyment. Aside from the occasional pruning and watering during droughts, you shouldn’t have to do much else to keep your maple tree healthy. 

How Fast Do Maple Trees Grow?

Maple tree turning yellow in autumn in a public park.

Again, this is species specific. Some maple trees grow very slow while some will reach maturity quickly, for a tree that is. 

Some of the slower-growing maple trees include most species of Japanese maples, sugar maples, field, and Shantung maple.

Many of these trees will grow no more than a foot per year. For trees that can reach over 100 feet tall, this means it could take a lifetime for them to attain their full height.

Common Maple Tree Growth Rates 

Sugar maples will take about 30 to 40 years to reach a tall, mature age. Dwarf Japanese maples are some of the slowest growing maple trees. They only reach five to seven feet tall, and it may take them ten years to attain that height. 

Maple trees with a slightly faster growth rate will grow up to two feet per year. Medium growth maple trees include trident maples, Norway, red, and some bigger varieties of Japanese maples, such as Acer palmatum, or Bloodgood. 

Red maples may reach a mature height of 40 to 60 feet tall in 20 to 30 years, while a Bloodgood Japanese maple will reach a max height of 35 feet tall in 15 to 20 years. 

Fastest Growing Maple Trees

The fastest-growing maple trophy goes to the silver maple. This tree can shoot up almost as fast as bamboo (but they aren’t nearly as invasive).

The speedy silver maple can grow up to five or six feet in a single year. These trees can reach maturity in less than 10 years.

If you are looking for a super fast-growing tree, look no farther than the silver maple. But with that quick growth brings a soft, easily broken wood, so keep that in mind. 

Other fast-growing maple trees include the autumn blaze and freeman maple. These are hybrids of the red or, in the case of freeman maple, a red and silver maple mix.

While they don’t grow as fast as the silver maple, they are still considered fast-growing maple trees. 

Can You Grow A Maple Tree In Your Zone?

Some maple trees can grow from Maine to Florida, while others can’t deal with extreme heat. Most maple trees are fairly hardy from U.S. grow zones 4 down to 8, but again it depends on the species. 

Maple trees can be found all across the United States and Canada. While sugar maples favor the eastern side, they can grow in the west.

The bigleaf maple is native to the western states and can be found in Washington, Oregon, California, and even up in Alaska.

You should be able to find maple trees that are native to or will grow well in your zone, no matter where you are.

Establish a relationship with your local nurseries and ask them what maple trees will work for you. They’ll be able to provide you with all the information you need to grow your own maple trees. 

That’s A Wrap!

Trees can provide benefits for people, wildlife, and the environment, so go ahead and take up this hobby. The trees you plant can provide several generations with beauty, shade, and happiness. 

Whether you’re planting sugar maples, sycamores, or Japanese maple trees, these iconic trees are fun and exciting to care for and watch grow up into strong healthy trees. Get out there and start planting.

References:

Ostfeld, Richard S., Robert H. Manson, and Charles D. Canham. “Effects of rodents on survival of tree seeds and seedlings invading old fields.” Ecology 78.5 (1997): 1531-1542.

Carl, Clayton M., and Albert Granville Snow. Maturation of sugar maple seed. Vol. 217. Northeastern Forest Experiment Station, Forest Service, US Department of Agriculture, 1971. https://books.google.com/books?hl=en&lr=&id=jK2cxrI_AycC&oi=fnd&pg=PA1&dq=maple+tree+seeds&ots=Nvh34JltBC&sig=IWTAlHe0addJNsuJd-uCWIYR-P8#v=onepage&q=maple%20tree%20seeds&f=false 

Farmer, Robert E., and Maureen Cunningham. “Seed dormancy of red maple in east Tennessee.” Forest Science 27.3 (1981): 446-448.

Tremblay, M-F., Yves Mauffette, and Yves Bergeron. “Germination responses of northern red maple (Acer rubrum) populations.” Forest Science 42.2 (1996): 154-159.

We all know what a tree is, but do we, really? As you will see, nailing down a single definition for such an extraordinarily broad and diverse collection of species within the entire Plant Kingdom is impractical if not impossible. Still, why are trees called trees?

Trees are called trees because they are tall, perennial, woody plants with a single unbranched self-supporting stem holding an elevated and distinct crown of branches. The word “tree” derives from the Old English word “treow” which primarily defined large woody plants.

However, there’s still MUCH more to it! This article will review 8 features of common trees that distinguish them from all other species of plants and get into the nitty gritty of just why trees are called trees. Let’s get to it!

All Trees Have A Trunk

Tree trunks in a forest

The trunk is likely the most prominent visual feature most people associate with a tree. No other plant species on earth stands upon such a single, unbranched woody stem. While several species grow from a clump-like base, it is the uniqueness of the trunk that defines a tree’s visual identity.

While shared as a common feature, the trunks of various tree species show remarkable diversity. Consider shape and form. At one end of the spectrum, most pines, birches, and redwoods feature trunks that are nearly perfectly vertical. At the other end are species such as junipers, contorted beeches, and Japanese maples which feature twisted irregular trunks.

The girth of the world’s largest trees, as measured by circumference and diameter, is simply incredible. El Arbol del Tule in Oaxaca state, Mexico, stands alone atop the list. While only a modest 116 feet in height, the tree has a circumference of 137.8 feet and a diameter of just over 46.1 feet. It would take over 60 adults with outstretched hands to make it around its massive trunk. Wow!

The volume and weight of El Arbol del Tule are equally bewildering. Checking in at just under 25,000 cubic feet, it would fill every square inch of a 3,000 square-foot home with 8 feet high ceilings! If you put its 1.1 million pounds on one side of a balance scale, it would take 111 African Bush Elephants, the largest land mammal on earth, on the other side to match! 

Not even the colossal blue whale comes close to rivaling the staggering scale of some trees, earth’s true largest living organisms. 

All Trees Have Indeterminate Growth

Indeterminate growth refers to a tree’s ability to grow outward in all directions. Tree growth occurs in two ways: primary and secondary. 

Primary growth involves increases in height and length via nodes, buds, and branches. A node is any place on a branch where leaves are produced. After one or more leaves emerge at a node, the stem extends to form a series of additional nodes followed by a terminal bud at the end of the stem. 

In younger trees, one terminal bud typically grows straight up to form what is known as a leader. Other terminal buds grow more horizontally to form additional branches. This repeated pattern of growth over time results in the unique canopy of each tree species. 

Secondary growth is the process by which tree stems, branches, and roots grow larger or thicker in diameter. If you’ve ever peeled back the bark on a live tree branch, you’ve probably observed the soft and typically moist inner layer just underneath. This is called the vascular cambium. Every year it produces new wood on the inside known as xylem, and new inner bark on the outside known as phloem. 

Nowhere is the repeated series of secondary growth more recognizable than in the annual rings found within each trunk.

Every Tree Features Annual Rings

Annual rings of a tree

Trees are the only plants that methodically record their lifespan. This living record is found in the annual rings within the trunk. 

In temperate climates, the vascular cambium begins growing when temperatures warm in the spring and stops growing when temperatures drop in fall or winter. When cambial growth stops, it leaves behind a dark line until new growth begins again.

As trees perpetually grow outward due to indeterminate growth, each dark line becomes an annual ring, just like the concentric circles that appear when a rock is thrown into still water.

Trees growing in tropical climates don’t typically have clearly visible annual rings. However, dendrologists, tree scientists, can still use chemical analysis to determine their age and the width of their rings. In years with above-average precipitation, the annual ring will be wider. In years with lower precipitation or even drought, the annual ring will be narrower. 

Who knew trees also provide historical weather data?!

All Trees Have Bark

As with the wide variations found in trunks, similar diversity can be found in the bark that surrounds them. The bark is generally defined as the two outermost layers of the trunk. Inner bark consists of both living and dead phloem just outside of the vascular cambium described earlier. Outer bark consists of dead phloem and cork. 

The external bark of a tree is its primary protection. Similar to human skin, bark provides a barrier to keep moisture in and disease and infection out. Trees have a highly developed injury defense system!

Through both chemical and physical processes, damage or wounds to the bark that threaten living tissues can be sealed off or callused. New bark eventually covers this callus growth to fully restore the tree to its pre-injury health. 

Beyond the function of bark, humans have long been intrigued by its texture and appearance. How many thousands of couples have carved their initials in the smooth thin bark of an American beech?

Many aspens and birches feature similarly soft, smooth bark. Most oaks, pines, and hickory trees, however, sport bark thick and rough enough to splinter or even cut the unwary hand.  

Great diversity can also be found in bark color. Consider the almost pure white bark of aspens or birches in contrast to the deep red of coral bark maples or Tibetan cherries. In one of nature’s many fascinating oddities, the beautiful multicolored bark of the rainbow eucalyptus tree reveals distinct shades of green, blue, orange, red, and purple! 

To learn more about why bark is so important, check out our article on why you shouldn’t peel off tree bark here.

All Trees Are Characterized By Their Height

Trees growing tall

Along with the trunk, height is the other primary visual characteristic that distinguishes trees from all other plants. Plant species such as grasses, mosses, and shrubs, grow closer to the ground, often covering large amounts of area. Tree canopies, however, often tower above to obtain the sunlight needed to sustain their energy needs.

As with trunks, there is great variety in height among the many species of trees. Shorter trees, often reaching mature heights of only around 10 feet, include crabapples, magnolias, and hawthorns. Earth’s largest trees include redwoods, giant sequoias, and coast Douglas firs.

The tallest tree in the world is named Hyperion. A redwood located in California, it rises to a staggering 397.9 feet! To put this into context, a 400-foot building would include somewhere between 37 and 45 stories. Hyperion is taller than the Statue of Liberty and the Big Ben tower in London. 

While there is no realistic way to identify the smallest tree in the world, two species stand out. The crape myrtle, native to China and Korea, can be as short as 3 feet when fully grown. The ‘Viridis’ Japanese maple rarely grows beyond 6 feet, spreading out from its trunk into a more bush-like shape. 

Another way to measure a tree is by the breadth of its canopy. Thimmamma Marrimanu, a banyan tree in one of the driest regions of India, features the largest single tree canopy on earth. Its circumference spreads a nearly incomprehensible 2,775 feet covering over 5 entire acres of land! 

All Trees Are Known For Their Longevity

Among all plants, trees have the unique ability to live for truly mind-boggling periods. 

Consider Methuselah, an ancient bristlecone pine in the White Mountains of California, largely regarded as the oldest single specimen on earth. As of 2022, Methuselah checks in at the ripe old age of 4,854! Not only does this transcend generations after generations of mankind, but entire civilizations have also come and gone while it continues to stand marking time.

The Sarv-e Abarqu, also known as the “Zoroastrian Sarv,” is a cypress tree in Iran. Dendrologists believe it is at least 4,000 years old and likely the oldest living organism in Asia.

In a true testament to trees’ incredible ability to survive in the harshest of conditions, consider the Chestnut Tree of One Hundred Horses. Located on the Italian island of Sicily, the oldest chestnut tree in the world lives just 5 miles from the crater of Mt. Etna, one of the most active volcanoes on the planet. 

The tree’s name originated from a legend about a company of 100 knights who were caught in a torrential thunderstorm. According to the legend, all of them were able to remain safe under the tree’s massive canopy.

While individual specimens come and go, tree colonies are often many times older. A tree colony is defined as a group of genetically identical trees (clones) connected by a single root system. Pando, or “trembling giant,” is a clonal colony in south-central Utah estimated to be 80,000 years old! 

Along with indeterminate growth, these extraordinary ages are achieved as a result of different tree species’ ability to adapt and thrive in many different conditions and environments. 

All Trees Have A Complex Root System

Roots of an old tree protruding from the ground growing next to a stone wall

Most plants have roots, specialized tissues primarily located beneath the soil that absorb and transport water and nutrients to sustain the life and growth of the plant.  Even those that don’t, such as mosses and liverworts, have structures called rhizomes that serve a similar general function. Nowhere in the plant kingdom are root systems as intricate and advanced as those of trees.

The size and scale of a tree’s root system are remarkable. The largest, tallest trees often boast individual roots that surpass 15 feet in diameter. These largely underground roots alone far exceed the visible portions of even the largest species of shrubs and bushes. 

Tree roots extend out radially and horizontally from the base in all directions. Because their primary function is to transport water and nutrients, roots rarely extend below the top several feet of soil. This is true whether the tree is 20 years old or 2,000. Roots sustain the tree not because of their depth so much as their length.

Each time it rains, more water reaches the ground outside the area covered by a tree’s canopy than that directly underneath. This line of demarcation is known as the drip line. This “line” is a circle or oval as it marks the distinction between these two areas as if you were looking straight down from a bird’s-eye view and tracing the canopy’s outline.  

Tree roots can extend 4-7 times beyond the drip line. For example, consider a tree with a drip line of ten feet from the base of the trunk in all directions. This would be equivalent to stretching a ten-foot length of rope from the trunk and walking around the circumference of the tree while keeping it taut. To accurately capture the true expanse of the entire root network, you would need to do the same thing with a 40-70 foot length of rope!

Even using a conservative multiple of 5, a tree with a modest 30-foot canopy planted right in the middle of a football field would have a root system extending to both endzones!

Some trees, like birch trees, have far spreading roots that need to be taken cautiously when planted near homes. But many trees generally fit into the characteristics above.

All Trees Live In Communities

Not only do trees often grow in colonies, but they also have a highly sophisticated means of communicating with each other and with other tree species. 

In The Hidden Life of Trees: What They Feel, How They Communicate, German forester Peter Wohlleben outlines the science behind a growing belief that trees behave as a sort of superorganism. 

Through their collective root networks, trees can send chemical, hormonal, and even electrical messages to each other to enhance growth and survival. As one specific example, when one or more members are cut or otherwise injured, the healthy members of the colony will divert additional resources and healing compounds to the wounded.

Trees can also warn others of danger by emitting pheromones and other scent signals through the air!

In one stunning example, consider the wide-crowned umbrella thorn acacia, a favorite food of giraffes. When acacia leaves begin to be chewed by a giraffe, they release ethylene gas as a distress signal. Neighboring acacias detect the gas and begin pumping more tannins into their leaves. It just so happens that when consumed in large quantities, these tannins can sicken or even kill giraffes.

Trees can even communicate with and form mutually beneficial alliances with other species. For example, Douglas firs and birches are known to often share resources and communicate with each other regarding dangers that could affect them both. 

In forest settings, larger more mature specimens of a given tree species will pump sugar, water, carbon, and other vital resources into the individual roots of young saplings that emerge in fully shaded areas. These so-called “Mother Trees” increase seedling survival rates by as much as 400%. If too many are cut down, entire tree networks can collapse.  

While all plants interact with each other to some degree, trees exhibit an unparalleled ability to communicate with each other in highly advanced ways that scientists are just now scraping the surface of.

Where Do Trees Come From?

Depending on who you ask, you’re likely to get several different answers. Some might quickly identify water. Others might just as quickly point to nutrients in the soil. Seeds are another frequently cited response. 

So…who’s right?

As is so often the case with scientific questions, the answer isn’t as simple as you might think. Let’s dig deeper to understand where the matter that forms the actual substance of trees really comes from. The true answer will likely surprise you.

All living things, plants or otherwise, need water to survive. The same goes for food (minerals and nutrients). Ditto again for reproduction. Curiously though, none of these factors account for the actual existence of what we see, touch, and use as the wood that makes a tree unique from other living things.  

Believe it or not, the true secret is air! Unconvinced? The late great Richard Feynman, theoretical physicist, Nobel Prize winner, educator, and arguably one of the smartest human beings who ever lived, told the BBC in 1983 that trees are made from thin air. Not theoretically, not hypothetically, but literally.

As he and other scientists describe, trees, along with all other living things, are made of carbon. The carbon that comprises trees comes directly from the sun’s ability to separate carbon dioxide in the air into its atoms of carbon and oxygen. Each molecule of carbon dioxide consists of one atom of carbon and two atoms of oxygen. 

When sunlight splits carbon dioxide, the two atoms of oxygen are cast off into the air as by-products. The carbon atom, however, joins with water and several other base resources to form the substance that permeates each cell of the tree. As water also originates from the air, regardless of where it is currently located at any given moment on earth, one can begin to appreciate the concept that trees are made from air.

Grasping and understanding this stunning revelation, however, is another matter altogether. Mr. Feynman offers an example we can all at least relate to, to assist us in that effort. Consider a burning log of wood in a fire. The wood contains physical matter, predominantly carbon that was formed when the sun separated carbon dioxide into carbon and oxygen. 

When heated to a sufficient degree, the log begins to burn, emitting heat and light in the process. The more wood, the more heat, and light. Feynman explains that the heat and light we feel and see is the sun’s energy that was stored in the wood when it was formed. 

As the log burns down, carbon is released back into the air where it immediately joins with oxygen to reform carbon dioxide. When the entire amount of energy held in the log is exhausted, it ceases to exist in material form, having released all of its chemical energy back into the air. Talk about enlightening!

That’s A Wrap!

Whatever your relationship with trees happens to be, understanding the eight traits outlined above can help deepen your appreciation of these truly incredible specimens.

To recap, most trees all share the same features of:

  • Trunk
  • Indeterminate growth
  • Annual rings
  • Bark
  • Height
  • Longevity
  • Root system
  • Community life

The next time you escape to the woods, whether via book, movie, magazine, or in the flesh, may you enjoy a rediscovered or newfound sense of joy in sharing our earth with such wonderful companions!

References

Franklin, Jennifer, and Mercker, David. (2009). “Tree Growth Characteristics.” University of Tennessee Institute of Agriculture.

Coder, Kim D. (2018). What Is A Tree? Warnell School of Forestry & Natural Resources, University of Georgia, Thompson Mills Forest & State Arboretum Outreach Product. ARBORETUM-18-06. Pp.9.

Piovesan, G. and Biondi, F. (2021), On tree longevity. New Phytol, 231: 1318-1337.

When planting trees, different species have different requirements. You may expect to plant one tree in April but another, like an ash tree, may do best when planted in the autumn months, before the first frost of the winter. So, when is the best time to plant ash trees?

You should plant your ash tree, starting from the seed, in the early fall. Late August, September or October will be best because your seed will have time to grow before the cold of winter comes along. Your tree will be well established once Spring hits the following year to continue growing.

A properly planted and nurtured ash tree will continue to see success throughout its lifetime, while a tree planted too late in the year may struggle. Read on to learn about ash trees- how and when to plant them, and even maintenance later down the road!

What Is An Ash Tree?

Ash trees are a genus of flowering plants in the same family as lilacs and… olives? That’s right, you’d be surprised to know how many types of trees are closely related! While you’re learning new things, we should talk about when and how to plant an ash tree for the best success of you and your new tree.

You can use ash trees for a wide range of things, despite any sort of bad rap they may have thanks to their susceptibility to various problems. 

According to the University of Kentucky, if cultivated varieties of ash trees are used, the problems of germinated, weedy seeds and unreliable fall color can be overcome.

So, while there is some susceptibility to hardship or afflictions, as with many other species, the ash tree is quite resilient and can adapt to many environments other species may not thrive in.

Enough of that, though, let’s talk about when you should plant your ash tree to start with as much success as you can!

How To Know When To Plant an Ash Tree

When planting trees, there are many factors to keep in mind. Most people think of the location or planting method but may completely overlook the time of year in which they plant their tree.

This can lead to issues with the tree becoming established, because it may not be getting what it needs at the very beginning stages of its life. 

That being said, let’s talk about planting your ash tree!

Plant Ash Trees During The Fall For Best Results

Ash tree seeds autumn view

The best time of year to plant ash trees is autumn.

This is because the cold of winter and any harsh freezes will slow the growth of the seed, cuttings, or seedling you may be planting. In fact, any extreme dips in temperature might kill your young ash, even when a more mature, stable tree might continue thriving throughout a cold period. 

So, September and October are the best months to plant your ash tree. We’ll dive deeper into how you should plant your tree depending on the stage it begins at, but essentially it’s important to know that early fall is the way to go!

How To Plant Ash Trees

When you look at planting an ash tree, there are more considerations than just the time of year. 

Knowing to plant your ash tree during the fall months is a great starting place, but you’ll also want to be conscious of how you plant your tree, based on your starting point.

You may start from the very beginning and use a seed to grow your very own ash tree. 

That option is not ideal for everyone, which is alright. So, some may opt to propagate, or use cuttings from an established tree to grow a new ash tree.

This is also not for everyone, and if you prefer to grow your tree from a seedling, a tiny little tree that has already begun developing, that is just fine!

Depending on your starting point, you’ll have a few things to keep in mind. So, let’s get to gettin’ on with it!

Planting From A Seed Or Cuttings 

If you start from either a seed or decide to propagate and use cuttings from an already-established ash tree, you can expect some similar aspects of your process.

For these planting methods, you’ll want to start your ash out in a pot for easier maintenance regarding the type of soil, amount of water, and overall monitoring of growth.

The soil around your ash seed or cuttings should be constantly moist, though the amount of water may vary depending on your location, dryness in the air, temperature, and other environmental factors.

You should plan to check your soil about once a day to ensure it remains moist and can continue to be a healthy growing environment for your young ash.

Though the requirements after planting remain quite similar, you should note planting from a seed and propagating requires some different techniques.

While you can plant a seed relatively simply into your pot, propagation requires you to remove an 8-inch area of the green wood that is part of a mature ash tree before removing all the leaves and placing it in a pot with sand.

The portion that had the leaves before removal should be buried underneath your soil about 3 nodes and the rest of the process becomes the same as if you’d planted from seed.

You can mist or traditionally water your soil daily, and you may opt to utilize an option like the T4U Glass Plant Mister because this spray bottle is both decorative and functional, can be used indoors or outdoors, and helps you keep your soil moist!

Planting From A Seedling

If you opt to begin your ash tree from a seedling, you can skip the pot and go straight to the soil, since your tree will already be established. Though it is young, the ash tree can be placed directly in the ground as opposed to a seed or cutting from another tree that will need to grow more before being planted outdoors.

One thing to think about when planting a seedling is that you should try to leave roots straight down while placing the seedling into the soil. This way, you’ll be able to better avoid small roots sticking to the sides of the soil and being separated. 

Any roots that are on their own or do not get ample water may dry out, especially in drier conditions or without proper watering.

On top of how you plant your ash tree, we should touch on where your tree is going to be living and growing.

Where To Plant Ash Trees

Leafage of red ash against blue sky in autumn

A big factor in being successful when planting your ash tree during the fall is making sure that you are planting your tree not only at the right time but in the proper place.

The native range of ash trees spans the Eastern part of the continent, from Canada to Northern Florida.

Ash trees can grow in USDA hardiness zones 3-9 and are one of the most adaptable species of tree native to North America. 

On top of the adaptability, these trees are drought tolerant so they can do well in areas that don’t get as much water as they should, as long as they are in the right growing zones.

Along with the larger scope of geographical location, planting ash trees where you want shade is a fantastic idea!

What Is A Growing Zone, Exactly?

We mentioned that ash trees can grow in hardiness, or growing zones 3-9, but what exactly does this mean?

The United States Department of Agriculture, USDA, has defined different growing zones across the United States to make it easier for plant owners just like you to determine which plants can thrive in certain regions.

These zones can also determine whether someone looking to grow crops or build a nursery should go to a certain part of the country.

Growing zones are based on the annual minimum winter temperature of a reason. To make it easier, we will call this the ‘minimum temperature.’

So, the minimum temperatures of a region are broken up into segments of 10 degrees Fahrenheit by numbers 1-13 to distinguish different temperature groups.

For example, the minimum temperature ash trees can thrive in, based on zone 3, would be a range of -40 to -30 degrees Fahrenheit. In zone 9, this range goes from a minimum temperature of 20 degrees Fahrenheit to 30 degrees Fahrenheit.

You could expect your ash tree to thrive in minimum temperatures that range from -40 to 30 degrees, based on zones 3-9 being the optimal growing zones for these trees.

Growing zones are not only broken up by 10-degree intervals but there are also subcategories of 5 degrees, marked by ‘a’ or ‘b’. So, 3a would be -40 to -35 degrees Fahrenheit while 3b is -35 to-30 degrees Fahrenheit.

Since the growing zone for ash trees is simply 3-9, we know that this means 3a-9b.

If any of this is overwhelming, you can always stop at your local nursery to ask about the growing zone in your area or search ‘plant hardiness zone in __’ on the internet.

Don’t forget about this USDA Plant Hardiness Zone Map, either!

How Can I Best Maintain My Ash Tree Long-Term?

So, now that you know all about when to plant your ash tree, how to go about planting, and even where you should plant, let’s talk about maintaining your ash tree so that it can live a long and successful life.

There are a few crucial steps when maintaining any tree. Watering, fertilizing, and pruning as needed are the primary considerations you’ll want to take with you on your ash tree journey.

So, keep on reading to learn about caring for your ash tree!

Water, Especially When it’s Hotter

For maintaining and sustaining trees young or old (or anywhere in between), watering for ash trees is a huge factor to be considered.

As you begin maintaining and watering your tree, you’ll want to opt for a product that can help you ensure even irrigation around the base of your ash tree.

A product like this Irrigation/Hydroponics Dripline offers a very simple to use method of creating drip irrigation. This option is not only simple but cost effective.

It’s essentially a dripline you can place in a circular shape around the base of the ash tree to make sure you don’t have to worry constantly about checking the moisture around your soil. 

Even with a product like this, you’ll want to check your soil moisture every once in a while so you have the best idea you can of how the moisture is looking.

Although ash trees are drought-tolerant, you want to do what you can to make sure they don’t have to tolerate a lack of water unless wholly necessary.

Ash trees need to be watered quite frequently, when possible, at the beginning of their life to help them get beyond the initial stage of life.

A young tree that is working to get itself rooted in a location long-term may struggle significantly without the right amount of water. Therefore, we suggest using a mister throughout the day, along with your standard watering to help keep your young ash comfortable. 

During the sapling phase of an ash tree’s life, it needs a little less water than in its early years. This is because the tree is now established in its long-term environment, but does not yet have a root system that is as extensive as it will be later on in the tree’s lifetime. 

As the tree matures further, from its mid-life to maturity (around 60 years after the tree is planted), the tree will need more watering. 

Of course, watering depends on the season, the environmental factors surrounding the tree, and other needs your tree may have.

Make Sure To Fertilize Your Ash Tree

This is true, especially in harsher conditions. Though ash trees are drought-tolerant, if you can provide some water and top it off with fertilizer, your tree is going to thrive more than it would have with just some water.

Similarly, even when the conditions are ideal, your tree will do better with extra nutrients than it will without them.

Ash trees will do best with an all-purpose fertilizer such as a 10-10-10.

What are those 3 numbers, you ask? 

Fertilizers come with an NPK number, standing for nitrogen, phosphorus, and potassium, to indicate the ratio of these commonly used fertilizer components. 

A balanced fertilizer is often recommended unless a tree or plant species particularly needs a certain element, like extra nitrogen, to do well.

Covington Naturals Liquid Fertilizer is a great product that lasts a long time and can help sustain your ash tree throughout its growth.

Don’t Worry, It’s OK To Prune!

Lumberjack cutting branch with a chain saw

You can use hand shears or hand pruners, lopping shears, pole pruners, or a saw to prune your tree, depending on the size of the branch, how high up it is, and how much you intend to prune away.

With an ash tree, and even most trees in North America, the best time to prune is going to be later in the winter because the tree is going into its dormant season. Also, later in the winter, it won’t be subject to damage from heavy freezes, as most will have already passed (if this is even a consideration in your area.)

It’s good to keep in mind pruning is still causing an open wound on your tree, and in late winter, your tree is phasing out of its dormant season. This means it will take the impending growing season to recover from the cuts caused by the pruning, and all will be well!

The Gonicc 8” Professional Sharp Bypass Pruning Shears are quite a popular option for equipment and are a great starting place if you are unsure of where to go next.

You’ll be able to cut tree branches that are just about an inch in diameter, so if you’re looking to trim away some smaller branches around your tree, these might be just what you need.

If you’ve got some larger branches, but not huge, (think about 1-2.5 inches in diameter) invest in some lopping shears to help you get the job done.

Say you’ve got some high-up branches that aren’t huge, but just too tall to reach with some hand pruners. Pole pruners are going to come in handy because they can reach up high and allow you to avoid pulling out the big ladder that you might otherwise have to drag out from your garage or shed.

Finally, if you have larger branches and need to remove them for any reason (this might go beyond your ‘regular’ pruning), use a saw or call a professional to check things out .

You can read more about when to prune large trees here.

That’s It For Now!

Ash trees are a versatile, adaptable genus of trees that truly act as a wonderful outdoor highlight in your space. 

Keep these tips in mind when you are trying to plant, grow, or simply maintain your own ash tree.

For now, friends, that is all we have for you. As always, thank you so much for trusting us to help you along your ash tree journey. I’ve been there, and I’m glad I get to help you, too!

Until next time!

References

Peper, P. J., Alzate, C. P., McNeil, J. W., & Hashemi, J. (2014). Allometric equations for urban ash trees (Fraxinus spp.) in Oakville, Southern Ontario, Canada. Urban forestry & urban greening, 13(1), 175-183.

Pugh, S. A., Liebhold, A. M., & Morin, R. S. (2011). Changes in ash tree demography associated with emerald ash borer invasion, indicated by regional forest inventory data from the Great Lakes States. Canadian journal of forest research, 41(11), 2165-2175.

Lemon trees are an amazing addition to any yard where there’s plenty of sunshine and warm weather. Those fortunate enough to live where lemon trees grow may be surprised to learn that lemon trees need more than just sunshine and water. Lemon trees benefit from fertilizer, too!

The best lemon tree fertilizers include citrus tree fertilizers, ammonium sulfate, and monoammonium phosphate. Lemon trees should be fertilized three times per year to produce the best fruit and keep the tree healthy and growing.

Below, we’ll go over the BEST lemon tree fertilizers, how to use them, and when to apply them to make sure your lemon tree thrives.

What Is Fertilizer For Lemon Trees?

Some trees and plants do just fine with the nutrients from the soil. Others, like lemon trees, are considered heavy feeders and need a boost of fertilizer to grow properly.

Fertilizers are commonly called ‘food’ for plants, but this isn’t really the case. Plants produce food for themselves through photosynthesis. 

According to the University of Minnesota, fertilizers aid the plant in promoting new leaves, buds, roots, flowers, and fruit.

But not just any fertilizer will work for every plant. Some benefit from higher nitrogen content while others need more phosphorous or potassium. It all depends on what kind of plant is growing and the soil it is growing in.

Lemon trees have a fairly common timeline of growth, however fertilizer can easily speak up this timeline!

The Best Types Of Fertilizer For Lemon Trees

Organic lemons on tree in the pot for sale

There are TONS of fertilizers out there. How do you know which is the best for your lemon tree? There are 3 main types of fertilizers for lemon trees:

  • Ammonium Sulfate Fertilizer
  • Ammonium Phosphate Fertilizer
  • Citrus Tree Fertilizer

Each fertilizer has advantages and disadvantages when it comes to providing your lemon tree with nutrients.

Ammonium Sulfate Fertilizer

Ammonium sulfate fertilizers aren’t the most popular fertilizer. According to Oklahoma State University, it represents only 2% of the fertilizers used in the United States, though it was one of the most widely used back in the day. 

The nitrogen content of ammonium sulfate fertilizers is higher than phosphorous and potassium. It contains an NPK ratio of 21-0-0. 

(NPK = the percentage of nitrogen, phosphorous, and potassium, respectively). 

Ammonium sulfate fertilizers also have a significant source of sulfur, which is one of the 17 elements necessary for lemon tree survival.

So, when should you use ammonium sulfate compared with other fertilizers? The best time to use ammonium sulfate is if your soil lacks nitrogen and sulfur, or if you need to bring down the PH of the soil.

Lemon trees prefer slightly acidic soils, so if you perform a soil test and find that the PH is too high (basic), then you can use ammonium sulfate to lower the PH.

Ammonium Phosphate Fertilizer

Ammonium phosphate fertilizers come in the form of monoammonium phosphate. They contain a good source of both nitrogen and phosphorous.

The percentages may vary depending on how the product is produced, but most of the time the NPK ratio will be around 11-52-0.

Ammonium phosphate and ammonium sulfate fertilizers are both water-soluble, meaning they are released rapidly in the soil and are available right away for lemon trees. 

Fast-release means ammonium phosphate is a great choice for fertilizer if you are seeing signs of nutrient stress in your lemon tree. However, with fast-release fertilizers, there is always the chance for root burn if there are already enough nutrients in the soil.

Signs of root burn include:

  • Brown leaf tips
  • Reduced growth
  • Discolored roots (where visible)

If you have not performed a soil test and aren’t sure of the conditions of your soil, it may be better to go with a citrus food fertilizer that is slow-release.

Citrus Tree Fertilizer

Citrus tree fertilizers come in a variety of NPK ratios and may be water-soluble or slow-release, depending on if the fertilizer is coated or not.

If your lemon tree is exhibiting signs of nutrient stress, you’ll want to look for a water-soluble citrus tree fertilizer. These will give your lemon tree the nutrients it needs right away.

Slow-release fertilizers are better if your tree isn’t stressed and you simply want to provide nutrients for better growth and fruit production. As we said before, lemon trees are heavy feeders and should be fertilized three times per year.

The best citrus tree fertilizers will have an NPK ratio of 6-6-6, 8-8-8, or 10-10-10. They may have 6-3-3 or something similar. Lower percentages are better than high percentages since the fertilizer will be applied multiple times per year.

Citrus tree fertilizers are a little less targeted toward lemon trees specifically. Instead, they target all citrus trees. Even so, they are an effective fertilizer for lemon trees.

How Does Fertilizer Work For Lemon Trees?

Fertilizers will come with instructions on the back that will help guide you in how much to apply and how often.

But how exactly do fertilizers work once applied?

Most of the time, fertilizers will need to be spread over the soil and then worked into it by watering the soil. There are also fertilizer spikes that are driven into the ground and liquid fertilizers.

Once the fertilizers are worked into the soil, the nutrients will be released into the soil and water that is absorbed by the tree’s roots. 

As the roots of the tree absorb the nutrients, they are then processed by the tree through metabolic processes and used wherever they’re needed most.

Lemons are evergreen trees, so they need enough nutrients and energy to support leaf growth and maintenance all year long!

Should You Fertilize Your Lemon Tree?

We’re talking about all these different kinds and types of fertilizers, but do you really need to fertilize your lemon tree?

According to the University of Arizona, lemon trees should be fertilized three times per year. Once in January, once in March, and again in August.

You don’t always have to fertilize your lemon tree. Lemon trees that are recently transplanted or just starting to grow should not be fertilized. Wait until you start to see growth before fertilizing. This can take up to 2 years.

How To Tell If Your Lemon Tree Needs Fertilizer

Your plants have a great way of telling you when they are stressed. Whether that stress is from nutrients, pests, or water is a whole other question.

Using fertilizer on drought-stressed lemon trees can do a lot more harm than good. Fertilizers promote growth, but without water, that growth can put too much stress on the tree.

Signs of drought-stress include furling leaves and a droopy appearance of both the leaves and branches.

There are some instances where fertilizers are necessary. Lemon trees should be fertilized three times per year no matter if there is a deficiency or not. 

In addition to the normal application of fertilizer three times per year, be on the lookout for some of the obvious nutrient deficiency symptoms listed below:

NutrientDeficiency SymptomsNotes
Nitrogen (N)Yellow leaves, limited growth, limited fruit production.Yellow leaves may also occur in fall when temperatures cool or if the soil is too wet.
Phosphorus (P)Thicker rinds on fruit. Fruit juice is highly acidic.Unusual to have a phosphorous deficiency.
Potassium (K)Extremely thin rinds. Small fruit.Lemon trees may exhibit bronze leaves as well.
Magnesium (Mg)Yellowing of the middle of the leaves. Tips and base will remain green.
Manganese (Mn)Leaves are banded with dark green.This issue may resolve itself throughout the season.
ZincYellow leaves but veins will remain green.
IronDark green or yellow veins on leaves.Iron deficiency can also indicate that the roots are too wet.
Lemon Tree Fertilizer Identification Guide

Even if you’re not seeing any of these symptoms, you should still fertilize your lemon tree at least three times per year. This will promote new growth, new fruits, and root growth.

According to Purdue University, healthy lemon trees will have dark green leaves with light green undersides. The fruit will be light yellow with a medium to thin rind. 

Your lemon tree should have an annual growth of 6-12 inches. If you’re seeing stunted growth, it is a sign that your lemon tree is unwell.

You can read more about the growth timeline of a lemon tree here.

How Often And How Much Should You Fertilize A Lemon Tree?

Ripe lemon fruits hanging on tree in orchand

We touched on this a bit earlier, but it warrants going over. Over- or under-fertilizing your lemon tree can have negative consequences that will affect your tree’s health and growth.

Once you choose a fertilizer, you should divide a whole year’s worth of fertilizer into thirds. This way, you can apply the equivalent of a full dose of fertilizer spread evenly over three applications.

It’s best to fertilize your lemon tree once in January/February, once in March/April, and again in August/September. 

Once September hits, you’ll want to cease all fertilizing until January. This is when temperatures are coolest, and lemon trees need to conserve their energy to stay alive rather than producing a lot of fruit.

According to Texas A&M University, apply one cup of fertilizer for every year the tree is old. So, a 5-year-old lemon tree needs 5 cups of fertilizer, split into thirds, for the entire year.

3 Best Fertilizers For Lemon Trees

When it comes to lemon trees, you don’t want to skimp out on fertilizing. Lemon trees are heavy feeders that need a nutrient boost to produce plentiful fruit and continue to grow.

An article in the International Journal for Research in Applied Sciences and Biotechnology found that when lemon trees are given fertilizer, they have a larger stem diameter and a higher number of branches and leaves.

Without fertilizer, lemon trees will most likely still survive but they will not grow as quickly and they will not produce as much fruit. 

Below is a table summarizing the 3 best lemon tree fertilizer types, with a few options under each. We’ll go over each one in detail after.

FertilizerTypeNPK RatioWhen To Use
Hi-Yield’s Ammonium SulfateAmmonium Sulfate21-0-0, 22% sulfurGood source of nitrogen. Best used when soil PH needs to be reduced due to sulfur content.
Greenway Biotech Ammonium SulfateAmmonium Sulfate21-0-0, 24% sulfurSlightly higher sulfur concentration and larger bag.
Greenway Biotech Monoammonium PhosphateAmmonium Phosphate12-61-0Great for foliar application. Fixes nutrient deficiencies quickly.
Miracle-Gro Shake ‘N Feed CitrusCitrus Tree Fertilizer8-2-10Great for an all-around lemon tree fertilizer. Good for when you don’t know the nutrient content of your soil.
Miracle-Gro Fruit and Citrus SpikesCitrus Tree Fertilizer15-5-10Good all-around fertilizer. Only needs to be applied two times per year. Slightly more difficult than granule fertilizers – must be hammered into soil.
Lemon Tree Fertilizer Choice Guide

The Best Ammonium Sulfate Fertilizers For Your Lemon Tree

As we mentioned before, ammonium sulfate may not be used as often today as it was back then, but it’s an excellent source of nitrogen and sulfur for lemon trees.

Hi-Yield’s Ammonium Sulfate comes in a 4-pound bag and has an NPK ratio of 21-0-0. It contains 22% sulfur as well. This product comes in the form of course crystals of varying sizes.

The instructions on the bag indicate to use ½ pound per inch of trunk diameter, which is good to go by if you’re not sure of your lemon tree’s age. If you do know its age, you can use the 1 cup per year rule we mentioned above.

For this product and all ammonium sulfate fertilizers, you’ll want to water the soil immediately after spreading it around your lemon tree. If not, the ammonium may react with the air and instead of your nutrients going into the ground, they float away with the wind.

This type of fertilizer is a good choice if the PH in your soil is on the high end. The sulfur in the fertilizer will lower the soil’s PH. This is also an excellent source of nitrogen to help your lemon tree produce fruit.

Four pounds should be plenty for a single lemon tree. However, if you have more than 2 or 3, you may want to consider grabbing a bigger bag.

Greenway Biotech’s Ammonium Sulfate comes in a 25-pound bag and has the same NPK ratio as Hi-Yield’s, 21-0-0. However, Greenway contains 24% sulfur, a little higher than Hi-Yield.

The instructions to apply to your lemon tree are the same as Hi-Yield’s – ½ pound per inch of trunk diameter.

The Best Ammonium Phosphate Fertilizers For Your Lemon Tree

Ammonium phosphate fertilizers are straightforward. They contain some nitrogen, a high amount of phosphorous, and little to no potassium.

This type of fertilizer works great on vegetable and fruit plants as it helps promote vegetable and fruit development.

Nitrogen is an essential nutrient for fruit trees, so any fertilizer you use for a lemon tree should contain at least some nitrogen.

Greenway Biotech’s Monoammonium Phosphate 12-61-0 100% Water Soluble fertilizer is a great option. It comes in a 5-pound bag but is available in both smaller and larger batches if needed.

The great thing about Greenway’s fertilizer is that it can be mixed with water to create a foliar fertilizer spray. What this means is you would create a mixture that gets sprayed directly on your lemon tree’s leaves, as opposed to spreading the fertilizer around the soil.

There are TONS of benefits to using a foliar application as opposed to soil fertilizers:

  • Corrects nutrient deficiencies quickly: According to the University of Hawaii, fertilizers that are applied directly to the leaves will correct nutrient deficiencies faster than if applied to the roots (soil).
  • Less chance of leaching: Applying fertilizer to leaves means the chances of the nutrients leaching into the soil and eventually the water table is far less.
  • Requires less fertilizer: When you use a foliar application you do not need as much fertilizer as you would when applying to the soil. 

For example, Greenway Biotech’s fertilizer suggests 2-10 pounds per 1000 square feet for soil application, but just 2-4 tablespoons per gallon of water for foliar application.

There are a few downsides to foliar applications. If it rains immediately after spraying, the plant will not have time to absorb the nutrients. 

On the plus side, this just means the nutrients make their way into the soil and are absorbed more slowly.

Always read the label and directions carefully before use.

The Best Citrus Tree Fertilizers For Your Lemon Tree

Granules fertilizer in hands of woman gardener. Spring work in garden, fertilizing plants, decorative, berry bushes, fruit tree

Unlike our last two types of fertilizer, citrus tree fertilizers are designed specifically for citrus trees like lemons.

Citrus tree fertilizers are the best choice if you’re not sure what type of soil you have. The nutrient content is typically a small percentage, which means even if those nutrients are present in the soil, the fertilizer is unlikely to burn the roots.

Miracle-Gro tends to be the standard when it comes to citrus tree fertilizer. Miracle Gro’s Shake ‘N Feed Citrus, Avocado, Mango Plant Food is a popular choice, and for good reason.

In addition to an NPK ratio of 8-2-10, it also contains magnesium, sulfur, and iron. These micronutrients are important for lemon tree health and will help in combination with nitrogen, phosphorous, and potassium to produce plentiful fruits and lush green leaves.

It is simple to use and comes with a feeding guide on the back of the container so you can be sure you’re using the right amount for your lemon trees. Simply shake the amount over the soil and water it into the soil after application.

Miracle-Gro suggests applying the fertilizer every 3 months, which is on par with how often you should be fertilizing your lemon tree.

If you still want to stick with Miracle-Gro but would rather not use granules, you can try Miracle-Gro’s Fruit & Citrus Plant Food Spikes.

These are placed into the ground early in the season – for lemon trees, this would be January or February. It is then suggested to apply them again later in the season such as at the beginning of fall.

If you decide to go with fertilizer spikes, here are a few suggestions to make it easier to get them into the ground:

  • Apply after a rainfall – the soil will be easier to work if it’s soft and moist.
  • Dig with a spade first – this way, you’re not driving your spikes into rocks or roots, which can shatter the spikes.

If your spikes shatter, it’s not the end of the world. Crumble the spike up and spread it around the soil as if it were a granule fertilizer. Be sure to water the spikes after applying.

Always follow the directions on the label before use.

That’s A Wrap!

There’s nothing quite like a fresh glass of lemonade made from your very own lemons. Or maybe a lemon cheesecake, pudding, or meringue pie. Yum!

To stay healthy and continue producing lemons, lemon trees need a little nutrient boost during the growing season. That’s where lemon tree fertilizers come into play.

To recap, the 3 best lemon tree fertilizers include:

  • Ammonium Sulfate Fertilizer
  • Monoammonium Phosphate Fertilizer
  • Citrus Tree Fertilizer

Granule fertilizers should be applied around the dripline of your lemon tree and then watered into the soil. Fertilizer spikes should be driven into soft soil and then watered.

You should fertilize your lemon tree three times per year, or if you use fertilizer spikes, two times per year. Do this, and you’ll have a happy and healthy lemon tree for life!

References

Alila, P., & Srivastava, A. K. (2008). Slow Release Fertilizers and Citrus: Emerging Facts. Agricultural Review, 29(2), 99-107.

Majeed, A. W., & Altaai, A. F. (2022). Response of Lemon Transplants to the Addition of Organic Fertilizer to Withstand Water Stress. International Journal for Research in Applied Sciences and Biotechnology, 9(3). https://www.ijrasb.com/index.php/ijrasb/article/view/375

Morgan, K. T., & Kadyampakeni, D. M. (2020, May 03). Nutrition of Florida Citrus Trees Chapter 6. Fertilizer Sources and Formulations (3rd ed.) [Bulletin SP169 and SL253]. University of Florida.

Zekri, M., & Obreza, T. (2013, July). Calcium (Ca) and Sulfur (S) for Citrus Trees [Bulletin SL382]. University of Florida.

A tree is a remarkable thing— what kind of person would ever want to cut one down? Sadly, real life is a bit more complicated than The Lorax makes it seem. Eventually, trees must come down, especially if it’s looking like it will do so on it’s own. Your willow tree is no exception.

If your willow tree is damaged or at risk of falling, it needs to be cut down. Trees that have fungus, are leaning, have lopsided branches, are hollow, have damaged roots, interfere with traffic, or are too close to houses, other trees and power lines need to be removed for safety purposes.

It can be difficult to know when to make the call to cut down your tree. Here are 15 signs that your willow’s time with you has come to an end.

Cut Down Willows You’re Tired Of Cleaning Up After

This is a valid reason to cut down your willow tree.

If tree maintenance has become more of a burden than a joy, it’s time to remove your willow.

This is not a lazy choice, either! According to the University of Marylandwillows are sometimes listed as an “undesirable species” of tree due to the high maintenance they require.

Weeping willows, for instance, have stems that grow towards the ground rather than towards the sky. These branches must be pruned every year or else they become a dense, tangled curtain.

Tiny, pointy, willow leaves look beautiful while on the tree, but they can be a nightmare to rake in the fall.

Keep in mind that you might be able to prevent some of the biggest maintenance problems by investing in quality tools. 

This Corona DualLink Tree Saw and Pruner has a built-in 10-foot extension pole. It allows you to cut higher branches (without climbing on a ladder!)

The right tool can make an agonizing task not only tolerable but even somewhat enjoyable.

But perhaps you do not have the time, ability, resources, or desire to care for your trees. If this describes your situation, consider this your permission to take a major chore off of your plate.

The Roots Are Poking Out Of The Ground

Willow tree with exposed roots in a park

Willow trees have a relatively shallow root system. It’s supposed to be that way so that they can better absorb water. 

The roots are intended to be completely underground, fanning away from the tree at a depth of about 4-6 inches. 

But that doesn’t always happen.

Sometimes soil erodes, leaving a bare space around previously buried roots.

As the willow aged, perhaps roots that were previously under the soil grew too large and are now exposed.

Maybe the willow had an inconsistent water source and developed peculiar root patterns as a way to try to accommodate and survive.

Whatever the reason, roots that are above the ground are at risk of experiencing significant damage. 

Many landscapers have shuddered at the tell-tale chopping noise that comes from the lawnmower when you hit a root that was hidden in the grass.

Once the damage is done, there’s not very much you can do about it. 

You also must consider the risk that exposed roots can be to people and animals. If a root is hidden by long grass, it can become a tripping hazard. This is especially true if long grass or other plants are growing around the base of the tree.

Can’t you just cut away the problematic roots? Not exactly. 

According to Purdue University, pruning roots causes serious damage to the tree. Your tree will not be able to replace established roots, causing it to absorb fewer nutrients than the tree demands.

Your choice is to either live with the exposed roots, or to remove the tree.

If the roots are exposed and causing problems, it’s time to cut down your willow.

There’s Damage To The Willow‘s Tree Trunk

Sometimes we forget about the trunk of a tree. But it’s more than just a “branch holder”.

The trunk is a tree’s stem. It takes nutrients from the roots and transports them to the leaves. 

We’re used to seeing wood after a tree has been cut down: it’s dry, hard, and unchanging. But when a tree is alive, the trunk is wet inside. 

The trunk is firm enough to support the weight of the tree, but also flexible enough to transport water through a complex daily cycle.

If there is damage to the trunk, the tree has a reduced ability to transport nutrients.

The size of your willow will determine how much stress the trunk can take. 

An older, mature willow tree trunk might only react to extreme damage, such as getting hit by a car. A younger, fragile willow sapling might sustain serious trunk damage from a bad windstorm or a misplaced step from a human caretaker.

Sometimes a tree can adapt to damage. Just like your body might heal from a wound, the trunk will form a similar scar.

But if the trunk is too damaged to support the tree, you will need to cut it down. Otherwise, you run the risk of the tree falling on its own!

The Majority Of The Willow’s Branches Are Damaged

Detail of a willow trunk with the bark eaten by deers in the cold long winter.

One damaged branch is not a death sentence for a tree. But if there are more damaged branches than there are healthy ones, this is a sign that your tree is in significant distress.

Ideally, dead branches are removed through an annual pruning process. 

Perhaps a particularly strong windstorm or two will knock down a few more sticks throughout the year. 

But aside from this, dead branches should be a rare sight. When you look at your willow, you should see healthy, living branches.

How can you tell if a branch is healthy? In spring or summer, it will be full of green, healthy leaves. 

If it is not autumn or winter and your tree has dead (or absent) leaves, the branches are dead.

If pruning away the dead branches would leave you with little more than an empty trunk, this is a sign that your willow is dying and needs intervention.

The Willow Tree Has A Hollow Trunk

Wild animals may love to live in hollow trunks in the forest, but this is a massively dangerous situation in your yard.

Hollow willow tree trunks are already dead. The stem of the tree has stopped functioning correctly and is not bringing nutrients to the upper parts of the tree.

Decomposition has set in. The tree is empty on the inside because part of the trunk is missing, and the remaining parts are severely weakened. This is a recipe for a collapse.

A hollow tree is not as strong as one with a solid, living trunk. If your willow is hollow, call an arborist as soon as you can!

Hollow trunks can also make great hiding places for pests such as snakes. Read up on the 4 ways you can keep them away from your willow trees!

Large Limbs Aren’t Producing Leaves

Limbs are the main branches of a tree. In large trees, they are very heavy and support many other smaller branches.

If large limbs are losing leaves and drying up this could mean they’re ready to fall.

The limb falling could happen in a major storm, but it could also happen whenever the force of gravity is stronger than the decomposing wood keeping the limb attached to the tree.

At this point, you really don’t want anyone under the tree in these circumstances.

You can choose to prune that bad limb, but this means that a high percentage of the tree will be removed in the process.

When large limbs are reaching their end, it’s better to cut down the tree.

Your Willow Tree Is Lopsided

Broken Tree Branch. Storm damaged willow tree branch. High quality photo

Maybe you or somebody else have already pruned major limbs on the tree. This may leave it looking lopsided and generally uneven.

While no law says a tree must be “pretty” to earn a spot in your yard, a lopsided tree is undesirable because it indicates that the tree may be structurally unsound.

If a tree is lopsided, it’s always wise to consult with a professional to know why exactly it is growing that way. If something is wrong, you should remove the tree.

There’s Fungus Or Other Issues With The Tree

Unfortunately, fungus can be deadly to willow trees. They can even be more harmful than other sources such as pollution or lack of water.

Watch for signs of fungus or affliction in your willow tree. Mushrooms and mold are very bad signs. Changes in the color, structure, or strength of the bark is another warning sign.

You can purchase Monterey Copper Fungicide for relatively inexpensive prices online and in gardening stores. To protect your tree, spray this at the first sign of fungus and consult a local arborist.

But maybe you didn’t spray it early enough in the fungus’ development. At some point, you just have to accept that your willow tree is too damaged and that it needs to go.

According to researchers at Harvard, the best thing to do with non-healthy trees is to remove them. This also prevents whatever ailment is causing their issues from spreading to other trees.

Your Willow Tree Is Leaning

The Leaning Tower of Pisa draws endless tourists, all visiting to see this wonder of the ancient world with their own eyes. 

If your tree is leaning badly enough that it’s drawing similar attention, that’s a major red flag.

A leaning tree is a sign that there is something wrong with the roots or the soil.

Perhaps, like the famous Leaning Tower, the soil in your yard is too spongy to support the weight of a large willow tree. 

More likely, the roots died and are unable to support the weight of the tree as they decompose.

Whatever the underlying cause might be, consult an arborist as soon as possible to address this issue.

One important thing to note is that sometimes people believe that their willow is leaning when it fact it is a weeping willow. Luckily, there are a few ways that you can distinguish between willows and weeping willows!

The Willow Tree Is Near Some Powerlines

Trees and power lines are not friends! When choosing where to plant a tree, find a spot as far away from overhead electrical lines as you can.

Sometimes, though, it wasn’t your choice. Maybe someone else planted the willow tree twenty years ago and did not think about the power lines. Or perhaps new developments in your area brought power lines in after the tree was already there.

The power company might prune it down for you if it is touching or hanging over the wires, but ultimately it is your responsibility to take care of the tree.

Trees cause issues with power lines in two ways. First, they can touch the wires and cause a fire or electrocution. Second, they can fall into the wires and cause a power outage.

Some people prune their trees by cutting off the top branches, giving it the appearance that a lawn mower came over the top and removed the extra upward growth. This is known as “topping”.

But besides looking ugly, topping a tree can be harmful to its overall lifespan and shorten it significantly.

If your willow tree is too close to a power line, the merciful thing to do might be to cut it down.

The Willow Is Too Close To The House And Other Buildings

Once again, sometimes lack of foresight can cause major issues down the road. 

If your willow is too close to a building, it can cause problems with the roof, plumbing, and foundation.

Willows grow faster than you might expect. They have a 30-year lifespan and can grow up to 10 feet taller every year (before eventually tapering off at a towering 50 feet).

The tree that gently shaded your front door when you planted it might eventually become a monstrosity that will drop roof-breaking limbs in a thunderstorm.

Like many other large trees, willow roots can also wreak havoc with your plumbing in their ever-present search for water.

Willow roots can grow into your underground pipes, causing blockages, plugs, or slow draining.

A plumber can clear this out with a special tool, but they will likely have to do it every year as your willow continues to grow. Not to mention that an annual drain snaking won’t prevent irreparable damage to your pipes.

On a side note, have you ever seen a piece of the sidewalk that has been pushed upward into an uneven edge due to a neighboring tree root? 

Imagine what similar roots can do to the foundation of your home. 

If you are interested, read up on some of the most common trees that damage foundations, and how they do so.

There’s no generally recommended “safe” minimum distance that you should plant a tree from your home – however you should aim for a minimum of 15ft away from where the nearest branch should be. I prefer farther away!

If your willow is causing (or even possibly causing) problems with your home, you need to heavily consider removing it.

Your Willow Interferes With Vehicle Traffic

To fully understand the effect your willow tree has on the surrounding neighborhood, you will need to drive or walk around your property as if you were an outsider.

If someone is in an intersection near your house, are they able to see oncoming traffic at any time of the day or night? Or is your willow blocking the view of everyone trying to safely make a left turn?

Does your willow cast a shadow on the ground near a stop sign, creating hidden black ice patches every winter? 

If a vehicle needed to pull onto the shoulder of the road, is there enough clearance that they could safely do so without hitting your tree?

If fire, police, or medical services had to respond to an emergency at your home, would they be able to see your house number? Or is your willow in the way?

In some areas, the Department of Transportation might decide for you and remove problem trees after informing you. But ultimately you are responsible for your property and the trees that grow on it. 

Don’t defer important decisions such as this to a government bureaucracy. 

The Willow Tree Is Interfering With The Growth Of Other Trees

Sometimes when we plant trees, we don’t consider future growth. Two small saplings might look cute right next to each other when you first plant them, but they will grow much larger even in just five years! 

If two trees are so close to one another that one interferes with the growth of the other, you need to make a choice. 

Which tree is healthier? Which is more aesthetically pleasing? Which one fits in better with the lifestyle of your family? 

These are some of the things you must consider when choosing which tree will stay.

An overcrowded plant will not grow well. Willow trees are no exception.

Why Do I Have To Cut Down My Willow Tree?

Man cutting branch tree using chainsaw. Gardener working in the garden during springtime. Petrol chainsaw in male hands

Unless your willow is interfering with public property, there aren’t any laws saying that your tree must come down. You might be wondering, “So why can’t I just let nature do its thing? Why can’t I just let my willow go in peace?”

Safety is the biggest motivator for taking down a tree.

Alone in a forest, your willow wouldn’t hurt anyone if it were to topple over or drop massive limbs. A tree in that setting is free to decompose and give back to the ecosystem in peace

On your property, a sick or damaged willow could badly injure someone. 

The Massachusetts Division of Fishery and Wildlife notes that human lives (and, by extension, the safety of our homes) will always be far more important than allowing nature to proceed without intervention.

You are responsible for keeping your property safe. Removing your willow tree when the time has come, thus preventing such accidents, is the right thing to do.

When To Cut Down Your Willow Tree (The Best Time)

If you choose to keep your tree, you will want to annually prune it. This ensures that your willow will remain healthy for years to come. 

The USDA Forest Service recommends pruning while the tree is dormant. But if you are cutting down the tree, dormancy, and growth patterns are irrelevant.

Unless you are a trained and certified arborist, leave tree removal to the professionals.

If you can wait, you should get the tree cut in the fall or early winter before bad weather sets in as this is the lesser busy time for arborists and it could lead to a reduced rate for you. If the tree presents an immediate issue, call someone ASAP!

Cutting down trees is tough work. Fully grown willow trees can easily weigh several tons. So again, leave it to the pros.

What To Do If You’re Feeling Sentimental About Your Willow

It might feel uncomfortable to cut down (or have someone else cut down) a tree. After all, didn’t we learn in school that trees help the environment and that we should grow as many of them as possible?

Rest easy knowing that it is far more ethical to protect yourself than your tree.

It can still be emotional to make the decision to hire an arborist, though, especially if your willow tree brings back sentimental memories.

Here are several ways you can make it easier to let your willow tree go.

Often, tree removal companies will give you the option to keep some of the wood from your tree. Willow wood is great for carving. You can carve a sculpture or create furniture out of your old tree!

Wicker is a material made from the thin, flexible branches of a weeping willow tree. If you’re feeling particularly crafty, you can dry the branches and create baskets and other crafts out of the wicker.

At a minimum, remember that it’s okay to grieve a loss, even if it’s a tree. 

Willow trees in particular have an almost magic component to them. The discovery of aspirin (medically known as acetylsalicylic acid) is said to have been inspired by the pain relieving properties of salicin, a chemical found in willow tree bark. What’s not to like about that?

If you find yourself missing your willow tree, you can always plant a new one! Willows are super easy to propagate with cuttings. 

References

Chalker-Scott, L. (2003). The Myth of Tree Topping. Washington State Nursery & Landscape Association B&B Newsletter. 

Mahdi, J. G. (2010). Medicinal potential of willow: A chemical perspective of aspirin discovery. Journal of Saudi Chemical Society, 14(3), 317–322.

Schizophyllum commune – the main cause of dying trees of the Banja Luka.

Cedar is a versatile wood that can be used in many different applications. It is often used in closets and chests to repel insects and protect clothing. Additionally, it is often used in all-purpose furniture. The problem for some is the color that cedar will age to—a dull, worn grey.

As cedar wood ages it begins to turn grey and matures to a silvery-grey sheen. Sun, rain, and age work to dry up the natural oils and degrade the cells of the cedar wood, which in turn is what eventually turns it grey. Pressure washing cedar can help restore its natural color.

If you like the color grey, or you enjoy the look of aged, weathered wood, then there’s nothing you need to do except let weather and time age your wood. If this is your preference, there are some steps to keep your cedar looking fresh, new, and warm.

Why Cedar Wood Is Used Outside

Cedar lumber has natural oils that produce a pleasing scent to us, but insects hate it, making the wood a natural, and very effective insect repellent. Because of this, you don’t have to worry about termites, wood beetles, or other insects eating your deck, siding, or fencing.

In fact, when the oils are extracted from cedar wood, they make great insecticides and insect repellants. According to the USDA, scientists who tested cedar oil against insects such as mosquitoes, flies, fire ants, and ticks. In their experiments, the cedar oil either repelled them all, exterminated the pests, or both.

These same smell-good oils are what make cedar wood naturally resistant to rot, fungal infections, and decay. While a fence made from spruce or pine may last you up to seven to ten years, a cedar fence, even without staining and protection, can last twice as long. 

When outdoor cedar applications are maintained and well cared for, they can last up to 40 years. This is why cedar is a popular choice for fencing, decks, siding, and even roofing material.

The National Institute of Standards and Technology backs up this finding. They say cedar products have an assumed lifespan of 40 years. In order to maintain the appearance and increase the life of cedar products, two coats of stain should be applied every 10 years.

Even cedar outdoor furniture tends to stay cooler than other wood furniture, even in the blazing summer sun.

This is because cedar has tiny pockets of air scattered throughout the woodgrain. These minuscule air pockets help to insulate the wood and keep it from getting as hot as other wood species.

Many people wonder if cedar is a good wood for campfires. Usually people don’t recommend cedar, but if you are interested in what makes a good firewood, check out our article on the 10 slowest burning firewoods!

Why Does Cedar Turn Grey?

Cedar wood logs with chalk markings

When choosing the lumber you want for your outdoor project, whether it’s a new fence, a deck, shingles, or something else, you might choose cedar because of the appealing color of the wood.

Cedar can be red, orange, brown, or a mixture. Either way, these warm colors are beautiful. When the wood eventually fades to a dull grey, it can be heartbreaking.

When wood is fresh cut, and stored indoors it tends to retain its natural color. But over time the oils that give cedar wood their warm colors and pleasing scent dry out, and the cells reach their end. As this happens, the wood morphs into that weathered-looking grey.

The sun’s rays not only dry out the oils and damage the living cells in wood, but they also have a bleaching property to them.

As the oils dry out and the cells shrivel up, water can get inside where it opens up tiny cracks that let more sun and weather in. This is how wood ends up rotting over time.

While cedar resists this greying more than other types of wood, without protection, it will still happen. Given time, most wood types do fade to grey when exposed to the outside elements.

How Fast Will Cedar Wood Begin To Grey?

While some parents with teens seem to grey overnight, cedar wood takes a little time to grey, but still, time is of the essence if you are looking to keep that youthful glow to your fence or deck.

Luckily, some cedars are regarded as the slowest growing trees, so once they reach maturity, they should have a long time before they turn grey due to old age.

Depending on the freshness of the wood, exposure to the elements, and the thickness of the wood, cedar may start to turn grey in as little as two weeks, or it could take up to a year before it begins to lose color. The sooner you can protect the natural wood color, the better.

After you get your outdoor cedar project finished there are a few steps to take to keep the color from fading away. The first step is to let the wood dry completely. This may take a few days or up to five weeks, depending on the weather.

Your cedar lumber might still have a little moisture trapped inside even after it has been installed, so it’s best to let the wood dry completely before applying any stain or protectant.

Skipping this step could severely shorten the life of the wood, or at the very least, result in an unsatisfactory finish.

If the cedar wood starts to grey slightly before it gets completely dry, it’s okay, we can fix that. You can scrub the wood with a plastic or other stiff bristle brush (not wire) and a mixture of oxi-cleaner and water to remove that tiny film of grey.

Ways To Prevent Premature Greying In Cedar

Fresh cedar wood planks and logs

The best way to keep the warm oranges and reds of your cedar is to stain it, add a protective finish, or both. There are many stains out there that can change the color of your wood, keep it looking natural, or even speed up the weathering process if that’s what you like.

For simplicity, we will assume you want to keep the cedar lumber looking natural, after all, that’s one of the main draws to outdoor cedar wood applications. Staining your cedar is the best way to keep the naturally warm colors.

You can use transparent stains, or stains that have pigments added in. For stains with colors added in, there are semi-transparent and opaque stains.

In this application, we recommend using a transparent stain so the natural cedar color comes through, or a semi-transparent stain that is most similar to cedar.

Choose an oil-based outdoor stain like this Cabot Wood Toned Deck & Siding Stain, CedarGood quality oil-based stains penetrate deep into the wood to offer better fade resistance, and UV protection, while also offering water resistance.

Even when staining your cedar, sun-fade still happens, only at a reduced pace.

Because of this, you will have to reapply stain to your fence, decking, or what have you, every two to five years, depending on the level of fading. This helps to ensure the wood lasts longer and keeps that warm, loving glow for many years to come.

Do You Need A Wood Sealant For Your Cedar? 

When you use a good, oil-based stain, it also seals the wood, so you don’t need to add the extra step of sealing it. While the stain is often more expensive, it has better UV protection, especially when it has higher pigment content such as solid color options.

Wood sealants are typically clear and have to be reapplied every year. Most don’t offer the UV protection of stains, so adding a yearly sealer is often seen as an unnecessary step.

Another potential problem with some sealants is they can cause a build-up, which will end up cracking or peeling.

Polyurethane and wax-based sealers are often the culprits here. They form a film over the wood to protect it from sun and water, but eventually, the elements break that film down.

Keeping the natural cedar look can be a time-consuming task, but it may be better than looking out and feeling like you’re staring at a black and white photo from the past, because of the tired-looking, grey cedar.

How To Restore Cedar Wood To It’s Natural Color Once It’s Grey

It’s okay if the cedar is already grey, new life can be breathed into it, even if the wood has been left unprotected for a few years.

Cedar will start to fade out quickly, but after the initial onset of grey, it slows down. With a few steps and a copious amount of elbow grease, your deck can look as young as a Hollywood starlet getting a botox treatment.

The first step is to pressure wash the cedar. This will wash away the old, tired, silver fox look to expose the warm, vibrant color underneath. Pressure washing also gets rid of any mildew, algae, and dirt that you don’t want to be sealed back into the wood.

If you are pressure washing it yourself, you want to use pressure between 1500 and 2000 psi. Be sure to keep the spray eight to twelve inches away from the wood. If you get too close you can “cut” or scar the wood.

You want to remove the top layer of cells to reveal the golden sheen underneath. After the pressure washing is finished, go ahead and apply a wood brightener before it dries.

Wood brighteners help to lower the pH of the wood—especially if strippers have been applied—and open up the wood grain to be more accepting of a stain.

Wood brighteners also do just that, they enliven the color of the wood. Restore-A-Deck Wood Brightener is a powdered concentrate that makes up to ten gallons. This eco-friendly concentrate comes in a small package and does a beautiful job of restoring your cedar’s natural essence.

Once those steps are completed, let the wood dry out for about 48 hours. If the wood is wet when you apply your stain, it won’t penetrate well and could cause the wood to deteriorate prematurely.

To finish this project, apply your stain. This Wagner Spraytech Stain Sprayer is an excellent time saver. It will evenly apply the stain on every surface in a fraction of the time compared to rolling or brushing.

Two coats of stain are recommended, especially for outdoor projects that get hit with sun, rain, heat, and cold. You often don’t even have to wait until the first coat has dried before adding the second coat because the first application of stain penetrates deep.

Are There Other Options To Keep Cedar wood From Turning Grey?

Master apply wood preservative with brush at workplace. Construction tool and equipment are on desktop. Furniture manufacturing and apartment renovation concept.

If all this sounds like too much work, or it’s simply too time-consuming then you can opt for the opaque stain alternative to keep your cedar from turning grey.

Let’s face it, the sun and outdoor elements do a number on wood.

No outdoor wood project is going to look new forever, and they all need routine maintenance to prevent rot and deterioration. But if you are looking for the least amount of work for your cedar project, opaque stains might be the best alternative.

Opaque stains offer the best UV protection, but they also cover all wood grain, leaving the most unnatural look of all. They come in all manner of colors, but they last the longest compared to clear and semi-transparent stains.

When you go with an opaque stain you typically won’t have to reapply it for three to five years. Depending on how much sun it gets, how hot the summer months are, and other factors, clear and semi-transparent stains may have to be applied either every year or every other year.

That’s All!

Cedar is a great outdoor wood for decks, fencing, siding, and other projects. It lasts a long time and offers beautiful colors. While some may enjoy the natural weathered look of grey cedar, others would rather keep the gorgeous glow of new cedar, but those colors have to be maintained.

There are a few options available to keep the youthful appearance of new cedar, but an oil-based stain is the best option. It may take some time to keep it looking good and will have to be applied every so often, but beauty must be nurtured and tended. 

References

Hoper, S. T., et al. “Evaluation of wood pretreatments on oak and cedar.” Radiocarbon 40.1 (1997): 45-50. 

De Groot, Rodney C., Bessie Woodward, and Paul E. Hennon. “Natural decay resistance of heartwood from dead, standing yellow-cedar trees: laboratory evaluations.” Forest products journal. Vol. 50, no. 1 (Jan. 2000).: p. 53-59: ill. (2000).

Lim, Young Woon, et al. “Fungal diversity from western redcedar fences and their resistance to β-thujaplicin.” Antonie Van Leeuwenhoek 87.2 (2005): 109-117.

Fidah, Abdelwahed, et al. “Comparative natural durability of four Mediterranean softwoods against wood decay fungi.” Journal of the Indian Academy of Wood Science 13.2 (2016): 132-137.

Poplar trees are some of the fastest-growing, most popular shade trees in America. They encompass some 35 species, not including a massive number of hybrids, and can be found in zones 3 through 9. One question many homeowners want to know is, are poplar roots invasive?

Poplar trees are invasive because they have an extensive, fast growing, and shallow root system (up to three times wider than the tree is tall) which can lift sidewalks, retaining walls, and clog pipes. Poplar roots send up suckers 100ft away from the base of the tree while spreading seeds rapidly.

Unfortunately, removing them isn’t quite straightforward. Before you plant any poplar trees in your landscape, read on to find out if you truly want them in your yard and what to do if you have one!

What Are Poplar Trees?

Poplars are part of the Populus genus and represent around 35 different trees including aspens and cottonwoods. They are fast-growing, good-looking trees that can get quite large. You may see them in parks and lining city streets because they grow so quickly and fill out to create a vast amount of shade.

They have triangular to rounded leaves that are often white on the undersides. Their bark can range from white to grey, to black making them very attractive trees.

Some of the most popular types of polar trees include:

  • Japanese poplar
  • Quaking aspen
  • Big-tooth aspen
  • Lombardy poplar
  • White poplar
  • Black poplar
  • Willow-leafed poplar
  • Eastern cottonwood
  • Grey poplar
  • Freemont cottonwood
  • Canadian poplar

Though often called a tulip poplar or yellow poplar, this tree is not part of the Populus genus. The tulip tree is part of the Magnolia family. 

Poplar sizes can range from 20 feet at maturation to over 160 feet tall. Their canopies can get as wide as 70 feet in diameter. These fast-growing trees have short lives for trees though, even with immaculate care, they only live for about 50 years. 

Because these trees grow so fast they are often utilized in commercial applications. According to the University of Tennessee Agriculture Extensionbecause of their rapid growth, hybrid poplar trees are used in fiber farms and used for pulp and paper production.

Did you know poplar trees are commonly used to make paper products. If you are interested, read more in our article on 9 different trees that are used to make paper!

Why And How Poplar Trees Can Cause Issues

Imagine a poplar tree that’s over 100 feet tall with a 50 feet wide canopy. Now picture the root system growing underneath it. Did you picture something nearly the length of a football field?

That’s how large some poplar roots can grow. The roots can extend up to three times as long as the tree is tall and they stay in the shallows of the soil. Poplar roots seldom grow deeper than two feet deep.

These shallow roots will lift up sidewalks in their search for water. They can crack and lift driveways, mess up retaining walls, and if your foundation has any cracks or minute fissures, these roots can make their way in.

Once they get into these little cracks, the roots start to grow wider, causing bigger splits and problems. While these roots can’t typically get into modern plumbing pipes, if there are any leaks or weak spots that ooze water, know that poplar roots will seek them out.

Why Are Poplars Still Popular Trees?

Poplar trees growing along a roadside

Despite being so invasive and having massive roots that can cause a ton of problems, poplars are still planted all over the place. These trees have gained popularity because they grow so fast.

In the right conditions, some species of poplars can grow between five and eight feet a year. At around 12 years old, some of these trees are already full-grown and begin flowering and spreading their seeds.

These trees have attractive white, black, or grey bark that still looks good even in winter, so many people choose them for the eye-pleasing aesthetic. When you add in the exceptionally fast growth rate, you have a popular tree that many people want, until they start having problems with them.

The fast-growing habit of these trees makes them perfect for windbreaks and effective at controlling soil erosion. Often they are planted along large flat areas of cropland or grazing areas for cattle, to protect them from heavy wind damage.

Despite this popularity, poplar trees don’t make great landscape trees because of the problems the roots can cause and other problems that can come with them.

Poplar trees on the whole are susceptible to fungus that can cause the entire tree to lose its leaves in late summer. This causes the tree to become even more stressed and then it can invite a host of insect invaders that can help to finish it off.

The worst problem poplar trees can get is canker. This issue can’t be cured and it can spread to other trees. Poplar trees are very susceptible to canker; once contracted, they will perish in a matter of a few years.

Even though they are popular, many people consider poplars to be one of the ugliest trees.

Here’s Why Poplars Are So Invasive

Beautiful poplar branch with dew close-up. Vivid green leaves of poplar tree with droplets on bokeh background. Scenic natural backdrop of rich greenery with copy space. Colorful plant in sunlight.

Invasive plants are considered non-native species that tend to spread at an alarming rate. This label is typically attached to plants that get introduced from other areas. Invasive, non-native plants often don’t have many natural predators to keep them in check either.

The Maine Department of Agriculture, Conservation, and Forestry recounts how white poplars can be incredibly invasive. The roots can create suckers over 100 feet away, where dense colonies can be formed. Even fragments from stems and roots can regenerate the tree.

Male white poplars are rare, but female trees can be wind pollinated by other poplar species resulting in male, female, or hermaphrodite trees that can produce copious amounts of viable seeds.

Poplar trees have more than one way to procreate. They send out a lot of seeds that can travel distances and establish themselves, they can send out suckers from their roots, and they can regrow even if they are cut down. All these reasons make poplar trees and their roots invasive.

Poplar Trees Undergo A Constant Growth Spurt

Poplar trees are some of the fastest-growing trees out there. This can make them very invasive because they will outgrow other species of trees and shade them out.

Many young trees need a lot of sunlight to become established, but when a poplar is nearby it will quickly outpace most other trees.

Their massive, shallow root system can make it hard for other trees to grow around them. Other tree roots that reach deeper than poplars won’t get much water because poplar trees will absorb it all before it can reach the lower trees. 

Poplar Roots Send Out Suckers

Suckers are appendages that grow on trees—typically near the base—in an attempt to grow more branches.

These usually start after the tree has suffered some kind of damage. In poplar trees, they can send out suckers from their roots and start new trees, as well as from the base of the tree. 

It’s easy for poplar trees to grow a cluster of trees from a few suckers. Given how fast they can grow, and how far the roots can spread, these trees and roots can become invasive.   

Poplar Seeds Can Spread Over 20 Miles

Poplar tree seed tufts

These trees can send out millions of seeds every year. You’ve probably seen them floating by before but just haven’t realized it. They look like thin, ethereal balls of fluff floating on the slightest breeze.

A single cottonwood tree—which gets its name because of the clusters of fluffy seeds—can release 25 million seeds in a single season. Luckily the vast majority of these seeds never grow into new trees, but each one that does will mature in about 10 to 12 years and start adding to the fluff floating in the wind.

Poplar seeds are only viable for a week to two weeks before they are no good. They need to land in a damp, sunny, soft-soiled area to get started. Once they find that perfect patch of dirt they can grow very fast, up to a quarter of an inch in a single 24-hour period.

The fluffy tendrils that stick out from the tiny poplar seeds can cause them to float on the lightest breeze. In a good wind, they can travel 20 miles away.

If they happen to land on the water they can also float until they reach some wet ground in which to germinate.

This seed dispersal, though most don’t make it, is one reason poplar trees can be so invasive.

Poplar Stumps Can Regrow New Trees

Another habit that makes this family of trees invasive is how the stumps can regrow new trees. When poplar trees are cut down, the tree immediately starts growing suckers that can quickly grow into a whole new tree or a clump of trees.

If these suckers are left alone, you could have a new set of poplar trees in a few short years. So, whenever you cut down a poplar tree, you’ll have to do something with the stump if you don’t want it to grow back.

Poplars Are Masters Of Cross-Pollination

Another reason these trees are considered invasive is because of the ease with which they cross-pollinate.

Poplar trees are either male or female versions, but they are concerned with little else when it comes to creating viable seeds.

With this ease of cross-pollination, poplar trees can make countless varieties and easily produce more seeds to spread across the lands. If that doesn’t spell invasive, I don’t know what does.

Poplar Trees Can Grow Almost Anywhere

Most invasive trees don’t particularly care what kind of soil they grow in. Poplar trees fall into that category. While they do prefer moist, well-drained soil, they can adapt to most soil conditions.

The main thing poplar trees need when looking for a place to “set down roots” is water. They do need adequate watering, especially when they are getting established, once they reach maturity, that matters less and less.

When they have such a shallow, expansive root network these trees can drink up massive quantities of water even after light showers.

Ideal conditions for poplar trees are found among riverbeds and low-lying areas that trap water. Southern regions of the United States are prime areas for poplar trees to grow.

If you’d like, here are our top shade trees for small yards for some poplar alternatives.

What Can You Do With The Poplar Tree In Your Yard?

Small old abandoned farm cottage in the shade of grove tall poplar trees.

After reading all this, you may be thinking about getting rid of any poplar trees on your property. Since they are so invasive and able to grow back even when you have them cut down, what can you do?

That single poplar way in the back of the field could be left alone if you choose. It’s an option, but if it’s near any structures or anything they can damage, you might want to get it removed post haste.

And of course, if it’s sending out suckers or spreading via seed production, you’ll probably want to get rid of it. 

Poplar trees that are fixtures in your yard or set up as landscape features might need to be taken down.

There may not be any issues with the tree at the moment, but it doesn’t take long for them to show. The decision on whether to keep it or remove it rests in your hands.

If you decide to get rid of the poplar trees in your yard, the sooner you get started the better.

Deal With The Poplar Stump

If you decide to get rid of your poplar tree, reach out to a professional tree company to cut it down for you. While you are talking to them and scheduling a time to have it removed, schedule them to add in stump grinding. 

When the poplar stump is ground down it prevents the tree from creating root and stump suckers that can quickly come back. When the trunk is taken care of, the remaining roots will begin to decay and won’t be able to grow back. Stump grinding is one way to make sure poplar trees don’t reincarnate and grow back. 

Another way to make sure poplar trees don’t grow more suckers is to cover the stump in Epsoak Epsom Salt. Epsom or rock salt is a cost-effective, albeit very slow way to prevent any growing back.

When you’re not concerned about how long it will take for the stump to decay, you can use this method to finish off the tree after it is cut down. Depending on conditions, the stump could take 3 to 5 years for it to decompose. 

Once the tree is cut down and removed you can pour a layer of Epsom salt over the flat surface of the stump then cover it with Frost King Polyethylene Sheeting to keep the rain from washing it away. 

To accelerate the process, drill holes into the stump, and around the perimeter with a ½” drill bit or auger bit, then fill the holes with salt.

Next, add water to the salt-filled holes to help spread it throughout the stump. Cover it with plastic and check on it every few weeks. Add more salt and water if the tree looks like it’s still trying to hang on. 

The Epsom salt dries out the wood and prevents water intake from the roots. When it’s no longer living, it will start to decay. Now you no longer have to worry about new poplar trees coming from that stump.

If you’d like another option, take a look at our guide on using vinegar to get rid of tree roots as well!

Stop Poplar Seedlings Once You Spot Them

Green leaves of a young poplar. Summer landscape in sunny weather. Close-up photo. macro photography.

As we have seen, even poplar seedlings can quickly grow to maturity and start growing more clusters of trees, so any seedlings have to be eradicated or you’ll be right back where you started in a few years.

Seedlings and saplings need to be removed at the root or they will end up growing back too. For smaller seedlings, it might be easier to remove them after a good, soaking rain. This way the soil is soft and loose and you should be able to remove all the roots along with the trunk.

For small saplings that are too big to pull out by hand, you’ll have to dig them out. Digging the roots out as wide as the canopy is, should be enough to keep the tree from coming back.

After you have removed the poplar trees you might be feeling like you need to replace them with another tree.

Of course, if you’re feeling hesitant after dealing with that invasive headache, we understand, and we got you covered. Check out our article on what shade trees don’t cause root problems to find the proper alternative!

Wrapping Up!

Poplar trees, despite being a very invasive species, definitely have some great uses. They are great for lumber, especially plywoods and OSB boards because they grow so quickly and are easily regrown.

They can be effective windbreakers as well, but they are not suited for home landscaping projects.

Unfortunately, because poplar trees grow so fast and are incredibly plentiful they are planted in American landscapes all the time.

If you have poplar trees on your property, you might need to have them removed to keep them from spreading everywhere and taking over.

Best of luck on your poplar tree journey!

References

Hamelin, Caroline, Benoit Truax, and Daniel Gagnon. “Invasive glossy buckthorn impedes growth of red oak and sugar maple under-planted in a mature hybrid poplar plantation.” New Forests 47.6 (2016): 897-911.

Thomas, Lisa K., and Ilona Leyer. “Age structure, growth performance and composition of native and invasive Salicaceae in Patagonia.” Plant Ecology 215.9 (2014): 1047-1056.

Riemenschneider, Don E. “Breeding and nursery propagation of cottonwood and hybrid poplars for use in intensively cultured plantations.” 

Landis TD, Thompson JR, technical coordinators. National proceedings, forest and conservation nursery associations. Portland (OR): USDA Forest Service, Pacific Northwest Research Station. General Technical Report PNWGTR-419. p (1997): 38-42.

Stanton, Brian, et al. “Hybrid poplar in the Pacific Northwest: the effects of market-driven management.” Journal of Forestry 100.4 (2002)

As you care for your plants and trees year-round, maintenance is an important practice that should not be overlooked. Pruning is a part of plant maintenance that goes along with watering and fertilizing. You may, however, find yourself wondering what the best time of year to prune may be.

Due to the risks that this can cause your trees and plants, you should never prune in the fall. Pruning right before a dormant period can exacerbate the possibility of decay. The wounds from pruning will not be able to heal as the tree or plant goes into a period of dormancy.

We will dive into the different reasons that you should prune your tree, what the best time of year is, and why that is not the fall. Keep reading to learn more!

Is It OK To Prune Trees And Plants In The Fall?

This talk of pruning may have you asking yourself whether it is okay to prune trees during the fall.

The time of year that you choose to prune your plants matters, and can have consequences.

In the same way that pruning can save your tree, or significantly help it, pruning can also damage your tree when done improperly and at the wrong time of year.

It is not recommended to prune trees, or other plants, during the fall months. Plants are at their weakest during this stage, between active and dormant periods.

A plant will not have the faculties to properly heal after pruning or to reap the benefits that pruning offers.

While you could try your luck and prune in the very early fall, as an emergency response to some sort of decay or disease, you will first want to consult with a local professional. 

Realistically, the potential damage from pruning in the fall will almost always outweigh the benefits of pruning quickly in response to a situation.

These hypothetical situations may require more insight about the nature of your need to prune, and can be best handled when someone with experience can help you evaluate the solution.

Generally, you should never plan to prune in the fall. Don’t be confused though, pruning can be a difficult thing. For more information on what you should do, check out our article on the best time to prune large trees!

4 Reasons NOT To Prune In The Fall

Tree pruning against a blue sky

Okay, onto the good stuff!

These reasons relate directly to the longevity of your tree and are not just suggestions based on looks or convenience.

As I mentioned before, the timing of pruning matters, and could be the difference between a plant that is healthy and one that begins to struggle under the weight of healing from this process.

You’ll find that the following reasons relate to one another, in the same way that individual processes of a plant work together to create a healthy plant as a whole

Fall Pruning Promotes New Growth Right Before a Dormant Period

Pruning your plants will promote new growth, which is a good thing.

However, if you promote new growth at an inopportune time, it may be all for nothing or even perhaps cause extra strain on the plant.

If pruning is done in the fall, or even very late in the summer, the new growths may not have time to develop enough before the cold weather comes.

Cold weather can cause strain on any tree, especially if a winter is particularly harsh.

A dormant period means that growth will stop or slow, and shoots that are still too small, thin, or weak in general may not make it. Their durability may just not be up to par, and any progress made by pruning and allowing for new growth will be made invalid.

For the same reason that you should never plant a new sapling close to winter, you should not be stimulating new, young, growths to be developing. This sets your plant up for failure and hardship, as opposed to the successful flourishing that you want to see.

The reality of this reason to avoid pruning in the fall is that it nullifies any positive results you could have seen had you pruned later in the year.

We want new growths to have the time to develop, become established, and become more resilient before the cold weather and dormant period come back around.

A full year for this progress will have exponentially better results than if you give new growths a couple of months at most.

This brings me to the next reason that you should not prune during the fall, which also has to do with the resilience of your plant.

Fall Pruning Creates Wounds That Won’t Heal Quickly

Another downside of pruning a plant right before a dormant period has to do with the rate of healing.

When a tree or other plant is dormant, many of its internal processes are halted. This includes the ability to close up open wounds and heal themselves.

While pruning a plant is beneficial, it also creates open wounds on a plant. This should be taken into consideration as you plan for your pruning process.

You want to not only think about how long new growths will have to establish but also about how long you are giving those areas of removal to bounce back.

When you take down branches or other limbs from a plant, the area where the cut was made is subject to being harmed. There is the possibility that, as an open wound on the face of a plant, the area could get infected or draw in insects that could harm the plant.

It is for this reason that we want to avoid having a prolonged period where the wound is open.

So, pruning and creating an open wound right before a plant is going to slow down its processes of healing is not the best idea.

This is exactly what happens when we prune in the fall.

You may cut down a limb that is not doing quite so well, but, in turn, you open up an area on your plant that will not readily heal for the coming several months.

That timing would create an issue because the tree is not able to put its energy toward healing the area that was cut until spring.

The open wound will now be subject to affliction or decay but also freezing and negative impacts of the cold weather. Whereas areas that are healthy and established (and protected by bark) may do just fine in the cold, any new cuts may handle cold weather less gracefully.

When pruning takes place in the spring and early summer months instead, a plant has plenty of time during its active period to work on healing the wound and creating new bark (or whatever outer layer the plant may have.)

So, in terms of tree or plant healing after pruning, a fall pruning date is not the way to go. Wait for spring!

It’s Difficult To Tell What Branches Should Be Pruned

Microtip pruners on small barren tree branches

Another reason to avoid pruning in the fall has to do with your ability to properly prune.

Not only is it safer and healthier to prune in the spring, but it will make your job a whole lot easier if you can delay that pruning until after the dormant period.

If you wait until spring, after leaves have all fallen and were gone throughout the winter, you’ll have better visibility of the canopy, limbs, or other parts of your plant that may have been previously hidden.

Pruning in the late summer and early fall will keep you from clearly seeing the branches that you are working to prune. While this can be done, it won’t be as simple as pruning in the spring season will be.

Ever heard of the phrase, ‘work smarter, not harder?’ That applies to this situation well.

Fall Pruning Increases The Risk Of Tree Fungal Issues

To go back to one of our reasons above, the fact that wounds will heal more slowly, pruning in the fall could result in more damage to the tree – such as fungal afflictions.

Whereas most people will prune their tree to help avoid the spread of problems, pruning right before a dormant period often has the opposite effect.

Leaving an open wound from the pruning will make your tree unnecessarily susceptible to the elements, affliction, and infestation. 

Oak trees are commonly affected by fungus. Read up on 6 simple tips to prevent and remove oak tree fungus!

What Is The Best Time Of Year To Prune Your Plants?

The best time of year to prune a tree, and plants in general, is spring. 

Depending on the type of plant you are working with, late winter and early spring may be best. For example, many deciduous trees do best when pruned during this time range. 

Other plants may be better off when pruned in the middle of spring, to make sure that the temperatures will not drop again while still providing enough time for healing and new growth. 

As a general practice, early-mid spring is the best time to prune plants.

This is another great question to ask when you are purchasing a plant, though research can always be done after the fact, of course.

Why Prune Your Trees And Plants At All?

Pruning is a great way to maintain your trees and other plants. I recommend this practice as often as I recommend sufficient watering and fertilization, which says a lot. 

Don’t just take my word for it, though, instead take some time to read about the following reasons that pruning your tree is beneficial. 

Here are a couple of the reasons that pruning your plants is so beneficial and, often, necessary:

Pruning Promotes New Growth

New life of a common fig plant from budding technique ,plant propagation method.

Pruning your plants promotes new growth. Say that one three times fast. 

Seriously, though, pruning is a great way to help your tree sprout new branches after a period of stagnant growth.

On an indirect level, pruning allows more light to get through the canopy of a plant. This helps the plant to grow new branches and lateral shoots due to this extra access to light.

Directly, pruning is something that stimulates the growth of new shoots.

According to the University of Georgia, pruning a young plant specifically can catalyze vigorous shoot growth. This process may also delay the growth and development of flowers and fruits.

This may sound like a bad thing, but delaying that development will give a plant more time to put energy toward growing its extremities and getting larger.

So, pruning certainly helps to promote new overall growth, especially when done healthily.

Pruning Can Help to Avoid Decay From Spreading

Pruning plants can also be a reactionary solution to issues like decay or the beginnings of disease on your plant.

By pruning an impacted section of said plant, you can avoid the future spread of decay. This is a quick and relatively easy way to nip that problem in the bud.

You’ll want to make sure that your pruning tools, like the gonicc 8” Professional Premium Titanium Bypass Pruning Shears, are clean and ready to use.

Pruning is a solution to decaying sections of a plant, but can also be a way for afflictions to be spread if your tools are not properly prepared.

Say, for example, that you cut off a tree limb that has been affected by some sort of problem. You don’t clean your pruning shears and then later go to prune for general maintenance and shaping. This could spread the bacteria to an area of the plant that would not have otherwise been affected.

So, make sure to prune with clean tools to keep your tree as lively as can be.

Best General Pruning Practices

It is one thing to know when to prune, but what about knowing how to do so in a safe, successful way?

According to the University of Tennessee, it is important to first remove any dead branches that may no longer be attached. Next, you want to cut just outside the branch collar of the tree to be sure that proper healing can take place.

Essentially, this means that you leave enough of a nub of the branch to stay away from damaging the trunk while cutting away enough of the branch that it can heal and will not continue growing.

On that note, it is crucial to keep from causing too much damage to the bark around your cuts. You should be able to tell if your shears are the right size or if they are too small and cutting into areas around the branch.

Proper pruning shears will allow you to avoid damage and more easily go about the pruning process.

Oh and by the way, you should never prune your trees at night.

Tree Maintenance Best Practices After Pruning

So, you know all about pruning now- the why, the when, and the when not to. What other general maintenance practices should you be implementing to best care for your plants?

There are a few basic steps that you can take to set your tree up for success in an easy, manageable way

Properly Water Your Tree

Beautiful woman watering tree at garden with watering pot

Watering your tree, or other plants may seem like an obvious and simple practice. However, you would be surprised by how often people forget to water, over water, or underwater their plants.

If you are nervous about forgetting to water or want to ensure that your plants get the same amount of water each time around, an irrigation system may be the best solution for you.

The Flantor Garden Irrigation System gives you flexibility in the placement of spouts, while also allowing for individual nozzles to be adjusted for different plant needs. 

This way, you can water your plants, trees, gardens, and flower beds in a simple, streamlined way. You won’t have to rely on neighbors if you are away and can also ensure that you avoid some of your potential human errors like forgetting to water or watering the wrong amount.

You can ask your local nursery or the vendor that you purchase your plants from about the amount of water that a given plant should need. You can also inquire about the frequency of watering.

For example, many plants do not need nearly as much water over the winter dormant period and too much water could cause issues like freezing of the soil around a plant.

To be sure of the water that a plant needs, do your research so that you can confidently water any tree, flowers, or plants in general.

Give Your Tree Sufficient Fertilizer

Fertilizing your plants is another important way to easily support them and their growth.

Fertilizer is not ‘plant food’ as it is commonly referred to. Rather, it is a product that helps your tree utilize and absorb the nutrients that it is receiving. This plays an important role in the nourishment of a plant, especially when it is properly hydrated and maintained via pruning.

You can use the NPK number on fertilizers to see how balanced the elements of fertilizer are and to compare that balance with the needs of your plant.

NPK stands for nitrogen, phosphorus, and potassium- the main three elements found in fertilizers.

You can look up which NPK value is best for a given plant, or ask the staff wherever you purchase your fertilizer. If you prefer to purchase online, you can always opt for a balanced fertilizer like this Miracle-Gro Water Soluble All Purpose Plant Food that will cover the bases for most plants.

If you are having an issue with your plant and need to target a specific problem, ask a professional to help you determine the type of fertilizer that could best help your plants.

If you are working with evergreen trees, you should read our article on the 7 most effective evergreen fertilizers!

Wrapping Up!

Okay, that’s all I’ve got for you today! 

The key thing to remember is that you should avoid pruning in the fall at all costs.

Why shouldn’t you prune during the fall, again?

  • New growth may quickly die, negating any progress made by pruning
  • Tree wounds from pruning will not heal quickly
  • You won’t be able to see branches as well, and pruning will be more difficult
  • Heightened risk of tree and plant fungal issues thanks to the slowed healing process

Instead of pruning during the fall, you should plan to prune during the early to mid-spring season. This will give you the best results.

Good luck as you continue along your tree (and plant) journey. We hope this helps!

References

Bedker, P. J. (1995). How to prune trees (Vol. 1). US Department of Agriculture, Forest Service, Northeastern Area, State & Private Forestry.

Mika, A. (2011). Physiological responses of fruit trees to pruning. Horticultural reviews8, 337-378.

Stern, R. A., Goren, M., & Gazit, S. (2003, August). The effect of shoot pruning during the fall and winter on lychee flowering and yield. In II International Symposium on Lychee, Longan, Rambutan and other Sapindaceae Plants 665 (pp. 331-336).

Marini, R. P., Sherif, S. M., & Smith, A. H. (2020). Physiology of pruning fruit trees.

While looking out your window you admire the beautiful maple trees out there and feel life is good. But then you take a closer look and realize you can’t trust those trees…they’re looking mighty shady. Jokes aside, sometimes you have to cut down maple trees, for one reason or another!

You should cut down your maple tree if it is too close to your house, attracting significant pests and insects, has received major storm damage, or it’s roots have become invasive. Maple tree roots can span up to 25ft wide, which can cause issues with underground wires and drainage systems.

Though it may be hard to think about because many trees have sentimental value, there are valid reasons to cut down your maple trees. Read on to find out why you should have your maple tree cut down, and when would be the best time.

Your Maple Tree Is Too Close To Your House

Large trees like maples need a minimum of 20 feet away from your house or structures. That doesn’t mean everyone follows this recommendation. Many people plant a tree based on how tall it is at that moment, failing to realize many trees will soon tower over the house, and be too close.

They could have been thinking more about how the shade is going to help with cooling bills in the summer, or how they will be having picnics underneath their tree in a few years instead of wondering if it’s too close to the house. 

Chances are you bought your house with that maple tree already fully established, but sitting a little too close for comfort. If you have a maple tree that’s sitting closer than 20 feet away from your house it could be sitting in the “danger zone.” 

According to the University of Missouri Extension, smaller trees can be placed about 15 feet away, but large trees need to be planted 20 feet or more away from the house. 

Trees sometimes fall on their own for several reasons. They also can drop large branches without the courtesy of giving a decent notice. To prevent major tree damage to your house or other structure, you might want to have that maple tree cut down. 

You Have A Maple Tree With Invasive Roots

Beautiful mighty maple tree trunk with great fleeced with moss roots on a cloudy day. Beautiful nature scene at fall season

Not all maple trees are considered to have invasive roots, but the silver maple and Norway maple do fall into that category. Maple trees in general tend to have shallow roots, so depending on what kind of landscaping you have, any tree can present root problems.

Shallow roots can lift sidewalks, driveways, and paving stones in your garden path, or make it a nightmare to mow. Anyone who has accidentally run over a tall, thick, tree root with a lawnmower knows what I’m talking about. It’s a jarring experience, to say the least.

Norway and silver maples are fast-growing trees that can have extensive root systems. They will get everywhere in their insatiable quest for water. These roots can dig into fine cracks in foundations, basements, and water lines.

Once they find a water source, more roots quickly crowd into that area causing more damage. Whether they increase foundation damage or get inside pipes causing them to clog and back up, there’s not much that can be done to mitigate this damage aside from removing the tree.

When a maple tree starts to ruin your hardscapes, driveway, or even your brick retaining wall, you’ll probably have to get it cut down. You can try cutting the roots back, but often the maple will just grow those damaged roots back.

Maples are known to have invasive and damaging roots. Our article on 9 trees that can damage your foundation can help you choose a tree that is good to plant near your home!

Your Maple Tree Is Ruining Your Grass

Grass can be difficult to grow underneath trees. You could have patches of weeds, weak grass, or a big brown patch that looks like a scar on your lawn.

Most grass varieties require full sun and plenty of water to keep them healthy. The broad expanse of a large maple tree’s canopy can deter both of those requirements. This leaves large patches that can be an eyesore.

In the spring and summer, a maple’s canopy can restrict rainwater from falling through. A large quantity of rainwater will run off the leaves and fall around the edge, leaving the soil directly underneath too dry for grass.

Along with providing shade for most of the day, typical grass can’t cope.

You can cover the ground with mulch, but if the dead grass patch is 20 feet or more in diameter, a huge mulch bed will simply look awkward.

Along with the grass problems, you could be dealing with raised roots that cause trip hazards. Or maybe you’ve had to replace a lawnmower blade for the X-teenth time because of shallow, protruding roots. When enough is enough, it’s time to cut your maple tree down.

Oh, and maple trees often leave helicopter seeds on your lawn, which can be quite annoying and another reason to get rid of them since they drop them in large amounts.

A Big Storm Broke Your Maple Tree

Trees grow and develop ways to withstand fierce storms, but occasionally Mother Nature brews up a special kind of storm. When this happens even the strongest trees can succumb.

Whether the ground has been soaking in a constant barrage of torrential rain and the tree topples, roots and all, or there was a lightning strike, you might have to get rid of the tree.

It doesn’t have to be summer storms that ruin trees to the point where they have to be removed for safety. Heavy snowstorms or especially freezing rain can cause tree limbs to break off, or topple trees.

Most ice storms that result in a quarter or half an inch of ice will break off smaller limbs. Hardwood trees like maples can often withstand this much ice, but if the storm continues to dump freezing rain, large limbs or even the tree itself can fall.

Ice storms start getting problematic when accumulation surpasses ½” of ice. When severe storms damage your trees you’ll need to get an arborist to check on them. Sometimes the damage is so bad, that the entire tree will have to be cut down.

Most trees can survive moderate storm damage. If the tree sustained damage but is still standing, you might want to have it checked out before cutting it down completely. It might be able to heal itself. 

Your Maple Tree Has Extreme Fungi Or Insect Damage

Rhytisma acerinum fungus on Acer platanoides leaf.

Healthy trees are often able to fight off mild insect or fungal damage. But if a tree is getting very old—some maples can live for hundreds of years—or it is going through the wringer it can be more difficult to fight off invaders. 

Maple trees can be infected with fungal afflictions like anthracnose, cottony scale, tar spot, verticillium wilt, and various types of insects. They can become beset with leaf-eating caterpillars, beetles, or boring insects that weaken them.

While some of these problems can be overcome by the tree itself, or be treated with fungicides or pesticides, there are times when you should go ahead and have the tree cut down. Some fungal infections can’t be treated and will lead to the tree’s end.

You’ll need to contact a professional arborist who can let you know if the tree can be treated effectively. The problem with fungal afflictions and insect invasion in trees is they can often be spread to others. If it’s not cost-effective to treat it, or it seems to be sick all the time, then you’ll need to get rid of it.

Your Maple Tree Is Leaning, Lopsided, And Needs To Go

A leaning tree can be similar to a ticking time bomb. It’s not going to blow up everywhere, but it could fall over without warning. Often we don’t notice leaning trees until it’s too late, or it has an odd pronounced lean that catches our eyes.

Many things can cause a tree to grow lopsided, and when the canopy gets heavy and uneven, it can make the tree slowly lean until it falls completely over.

Too much shade on one side can cause this problem. Maple trees are sun-loving trees. If other trees are growing around them, casting shade on one side, they can end up growing more on the sunny side to compensate.

Branches can fall off making them lopsided, or possibly the roots are starting to give way. Whatever the reason, a tree that has developed a prominent lean will need pruning to correct it.

When that doesn’t work, the only other option is to “defuse” the situation by having the maple tree cut down

Go ahead and get the tree before it gets you.

The Maple Tree Is Simply Too Expensive To Keep

There may come a time when the tree has reached the end and will need to be put out of its (and your) misery. Do you have to treat it yearly or more often to keep it healthy? Are you maxing out credit cards to keep it from coming down? 

We hope this isn’t the case, but when you have to constantly pay to keep a tree going, it’s probably best to go ahead and get it out of there.

Maybe the tree is finally reaching its end. Some maple trees have been known to live for 300 or even 400 years; then some varieties will never see ages such as those. The silver maple for example is a variety that grows fast and may only live a few decades in suburban settings.

When a tree is constantly dipping its branches into your wallet, it’s time to turn it into firewood. If you have a firepit you can at least enjoy the tree one last time with a bonfire.

in-fact, maple is one of the hottest burning firewoods!

Your Maple Tree Is Close To Power, Phone, Or Internet Lines

Trees and power lines have never been a good mix, and it stands to reason they never will be. Whether the tree was there first or not, power lines end up getting the right of way.

Maybe the tree grew too close to the lines and now it needs to be removed. New utility lines could have been put in and now the tree is the one that needs to move.

Trees can damage power lines by rubbing against them all the time. The branches can fall and break the lines, or even grow into them if given enough time. Unfortunately for the tree, when they get tangled up around these lines, it’s the tree that loses.

Your Maple Tree Was Topped

Topping a tree is, unfortunately, a common practice, but also an almost always a game ender for large trees. When a tree gets “topped,” all the upper branches get cut back drastically, and most lateral, or side branches, get chopped off. What’s left is a tree without any leaves or small branches.

Trees get topped because they are too close to the house, and they think drastically cutting them back will keep them from causing problems. They want to prevent storm damage so they cut large limbs off, or the tree is too close to utility lines.

These reasons have their merit, but topping a tree stresses the tree out and leaves too many large wounds that can allow an insect invasion or infection that it will no longer be able to fight off. Topping a tree also prevents it from creating food for itself because all the leaves are cut away.

The tree will respond by quickly growing a cluster of new limbs and leaves to heal itself, but these limbs are often weaker than the branches that were cut off. Besides, the tree will often end up growing as tall as it was before, only with weaker limbs.

The Illinois Forestry Conservation gives three reasons not to top a tree:

  • The fast-growing new limbs are weaker, making them more susceptible to storm damage.
  • A topped tree is exposed to decay, insects, and afflictions, and weakens the entire tree. Meaning the tree will probably require more upkeep and it will end up significantly reducing the lifespan of the tree.
  • A topped tree is often a liability, can cause property damage, and possibly reduce property values.

Topping trees may have seemed like a good idea some time ago, but the practice is quite detrimental to tree health and should be avoided if possible.

Contact a tree professional to come up with good alternatives to topping your tree. If you have a tree that was topped, then you may have to get it removed and replace it with a new, healthier tree.

After dealing with the troubles of such a large tree, you may want to consider smaller trees like these Japanese maples. They won’t get nearly as big as red or sugar maples, and they provide beautiful colors all season long.

Maybe you would rather go even smaller. If that’s the case, why not get into a bonsai hobby starting with a Live Juniper Bonsai Tree. With these, you won’t have to worry about property damage from falling limbs, power lines, or having large patches of grassless yard.

What You Need Before Cutting Down A Maple Tree

Big maple trees with orange and yellow leaves

While the tree may be on your property, there may still be ordinances or other obstacles to overcome before having the tree removed. An HOA may have restrictions on tree removal, the tree may be located on an easement or other hindrances.

Don’t be nervous if this is your first time cutting down a tree; many people cut down trees for a bunch of reasons. If you are interested to learn more about this, check out our article on 6 reasons why people cut down trees!  

Are You Part Of An HOA?

When you have a Homeowner’s Association, there may be rules in the community guidelines that prevent you from cutting trees down.

Before having your tree removed, go over the rules to make sure you won’t be getting a nasty letter or any fines. If you’re unsure, reach out to an HOA official to make certain you’re in the clear. 

Is The Maple Tree On An Easement?

An easement is a part of the property that you can use but don’t own. It can be a driveway that goes through a neighbor’s property that allows you access to your property, an alleyway, or another section of land. 

Since you don’t own that section of land, you can’t cut trees off it without permission, even if they are posing a hazard to the property. 

The Maple Tree Straddles A Property Line

Sometimes it happens, that a tree ends up sitting on a property line between you and your neighbor and it needs to be cut down. How do you handle that?

In this case, you’ll have to reach an agreement with your neighbor. You both will have to agree upon if the tree can be safely removed, and how that will happen, and you may have to figure out how to split the cost.

We just hope you have reasonable neighbors and at least have a friendly repertoire with them.

Is The Tree On Or Near A Culvert?

Maple trees during autumn in a public park

The drainage area near the road is technically an easement but it may be owned by the city or county where you live. You are responsible for the upkeep but you’re not supposed to build, landscape, or fill this area in.

Trees usually aren’t allowed to grow here, but there’s always that exception. If you happen to have a maple tree, or any tree for that matter, growing along this area and it needs to be removed, you should reach out to your officials to find out the proper procedure.

You may be able to find information on your town, city or county website about this subject.

If you can’t find the proper information you may have to call or email someone to find out for sure. Since the tree is on town or city property, you may be able to get it removed by them.

The Best Time To Cut Down A Maple Tree

When it comes to cutting trees down, leave it to the professionals. Unless of course, it’s a little sapling. The minor cost savings compared to the potential damage that can occur aren’t worth the risk.

That being said, when is the actual BEST time to cut down your maple tree?

Simply put, if your maple tree is presenting an immediate issue such as insect damage, extreme rot, storm damage, branches hanging etc., then you should call a professional ASAP to remove the tree.

If it’s something where the maple tree is just messy, then you may be able to wait and put it off until the Fall when prices from local arborists may be a bit cheaper as it’s usually not as busy for them. You could also wait to save up for the expense as well!

So go ahead and call the professional arborist, they have the equipment, the trucks, and the manpower to handle any job with the utmost safety. Peace of mind can be priceless.

Wrapping Up!

While it might hurt your heart to have your favorite maple tree cut down, sometimes it simply can’t be avoided. When the tree starts to lean, it’s just too close to the house, or the roots are causing you endless headaches, it’s time to get it “outta there!”

If you want to start new with a small maple sapling, you should read out article on the 9 best maple trees to plant!

Once that tree is gone, maybe it’s time to replace it with something a little smaller. A nice dogwood possibly, a Japanese maple, or if you prefer evergreens, you can’t go wrong with a dwarf cypress or small blue spruce. 

References

Lusk, Anne C., Demóstenes Ferreira da Silva Filho, and Lea Dobbert. “Pedestrian and cyclist preferences for tree locations by sidewalks and cycle tracks and associated benefits: Worldwide implications from a study in Boston, MA.” Cities 106 (2020): 102111.

Morgenroth, Justin, Jarlath O’Neil-Dunne, and Luis A. Apiolaza. “Redevelopment and the urban forest: A study of tree removal and retention during demolition activities.” Applied Geography 82 (2017): 1-10.

Campanella, Bruno, André Toussaint, and Roger Paul. “Mid-term economical consequences of roadside tree topping.” Urban Forestry & Urban Greening 8.1 (2009): 49-53. https://www.sciencedirect.com/science/article/abs/pii/S1618866708000587 

McKenzie, Rita, and Urban Forester. What’s Wrong with Topping Trees?. Purdue University, Forestry and Natural Resources, 2000.

Your Competitors Are Already Running Ads. Are You?

This is for service business owners who are ready to SCALE.