Grow Your Business with Tree Journey

Our TradeWorks Revenue System™ builds a detailed advertising funnel that attracts, nurtures, and converts the right clients – so you can finally stop chasing leads and start scaling your business.

When looking to accent your landscape with trees, maples are often one of the top choices for homeowners. They come in many sizes, and their foliage can be stunning. Maple trees can create beautiful focal points, provide shade, and even increase property value, but what are the best maple trees to plant?

Maple trees thrive in yards that get a steady amount of sun and have little to no obstructions underground. Some of the best maple trees to plant in your yard include sugar, Japanese, red, black, paperbark, crimson king, or silver maple trees.

Whether you have a small yard or an expansive sea of grass, you can find the right maple tree for your area. We’ll include trees hardy to many growth zones, small trees, and large trees, and we’ll include any pros and cons that go along with these trees. Let’s get to it!

About The Mighty Maple Tree

There are over 125 different species of maple trees across the world, but only 12 varieties are native to North America. Most maple trees can be recognized by their distinctive five or seven lobed leaves—think of the Canadian flag—but there are others that have completely different leaf shapes.

Some maple varieties can grow to well over 100 feet tall, while others won’t surpass five feet in height. Maple trees are deciduous, meaning they lose their leaves in cold weather, though in some places along the Mediterranean region, they never lose their leaves.

Some maple trees have shallow roots that will seek water sources, such as drain pipes, irrigation lines, or septic tanks. These roots can squeeze themselves into the tiniest of spaces and bust open or clog these lines, so caution needs to be exercised with certain species.

Most maple trees can be tapped in order to collect sap for syrup production, the sugar maple—which is native to Eastern Canada and the Eastern United States—is the most commercially tapped variety.

What Maple Trees Are Best For Your Yard?

This can be a tough question to answer without getting a good bit of information first. Consider the size of your yard, how many buildings you have on your property, and what you are looking to accomplish with the maple tree to start with.

Do you want some shade? Are you looking for a striking focal point for your flower garden? Do you want beautiful colors for a particular season? Or maybe a combination of all these reasons?

Your particular grow zone and soil type will also need to be considered because, while some maples are very tolerant, others require specific conditions for optimal growth.

Japanese Maple Tree

Red foliage of the weeping laceleaf japanese maple tree, acer palmatum in garden

The Japanese maple is popular among many gardeners and homeowners alike. They typically have bold colors that last throughout most of the growing season or show up in early fall.

They can grow upright or droop down in showy cascading patterns and have distinctive leaf shapes.

While there are many subspecies of Japanese maples, we will focus on the two most popular varieties; the Bloodgood maple, and the dwarf Japanese maple—of which there are many cultivars.

You can get your own Japanese Red Maple Tree right here. These will grow well in zones 5 to 8!

Bloodgood Japanese Maple Tree

NameAcer palmatum Bloodgood 
Average size15’ to 20’
Hardiness zones5 – 8
ConditionsFull sun. Slightly acidic, well-draining soil.

Bloodgood Japanese maple trees are the most common Japanese maple tree that comes to mind when you think of the species. They’re truly a beautiful addition to any yard and they’re an accent tree to boot!

Dwarf Japanese Maples Tree

NameAcer palmatum (various)
Average size6’to 8’
Hardiness zone5 – 9
ConditionsFull to partial sun. Soft, well-drained soils. 

Most dwarf Japanese maple trees are very slow-growing, and often mounding shrub-like trees. They often have layers of thin, wispy branches with bright showy, or lacy leaves which make them perfect focal specimens.

They are perfect for small yards that won’t allow full-sized, towering trees.

Pros:

Overall, Japanese maples work great in smaller yards because they don’t get exceptionally tall or wide. They are easy to trim because of their smaller stature and they show off deep, crimson leaves throughout the growing season.

Since these trees don’t grow very tall or get thick and hefty, you won’t have to worry about them falling down onto your house or garage.

Their roots are not terribly invasive like other varieties of maple trees, meaning these roots won’t be lifting your sidewalk or digging into water pipes.

They can be a great focal point around a flower garden, or help to break up a bare yard with some striking color.

Cons:

Overall, problems for Japanese maples include relatively weak branches and trunks and the price tag. Heavy snow, extreme winds, or thick ice will break branches.

Japanese maples can be quite expensive depending on the species and how old they are. Often even smaller trees only a few years old will be upwards of $100-$200.

While Japanese maples rarely suffer from serious insect infestation or other maladies, they can get cankers, root rot, and pests like aphids and mites.

Sugar Maple Tree

NameAcer saccharum 
Average size50’ to 75’ tall
Hardiness zone4 – 8 
ConditionsFull sun to partial shade. Well-drained, moist soil. 

Pros:

These giants are the trees that produce the sap which can be boiled down into scrumptious maple syrup (sugar maple trees are actually one of the best maple syrup trees!)

They also create show-stopping colors in the fall. Their deep emerald leaves will glow yellow as the temps drop, then they transform to orange, and finally deep red.

If you are looking for a tree that will wow friends, family, and neighbors with rich autumn colors, the sugar maple is a superb choice.

Just make sure you have plenty of yard for this big tree or it could cause some major headaches. They need to be planted at least 30 feet away from your house or other structures.

Sugar maple roots are not considered to be invasive, but you should still map out plenty of space for them when you plant the small sapling. Just because these roots aren’t considered invasive doesn’t mean they won’t dig into your underground pool if the tree is planted close by.

This maple tree is probably one of the most cold-tolerant of the species found in North America. If you are worried about harsh winters and planting trees, this variety will probably be able to handle it.

The wood of sugar maple trees also has commercial uses and makes great smelling, hot burning firewood, but you’re probably not planting it hoping to make furniture or heat your house.

Cons:

When planting saplings, especially in hotter climates, you’ll have to watch out for sun scald. What happens is the bark can create small cracks during the winter when the sap freezes. During the summer months, the heat damages the soft growing tissue underneath the bark, causing severe damage to the trunk.

Severe sun scald can be a game ender to trees, especially newer sugar maple tree saplings.

Once sugar maple trees are established, they can create a dense upper canopy that makes it hard for other vegetation to grow beneath these trees. The leaves create a near-constant blanket of shade, and rainwater drops around the drip edge. Think of a sugar maple as nature’s umbrella.

Some plants can tolerate shade well enough (maple trees generally need more sun than shade), but few can survive long periods of drought.

You’ll have to water underneath large maple trees constantly or have a big bed of mulch to keep from having a barren wasteland underneath them.

You’ll also need a lot of space to plant sugar maples. Small or medium-sized yards will have a hard time accommodating all the space these trees take up. They also don’t do well in busy urban areas, as pollution and emissions can shorten their lives.

Some maple varieties can be susceptible to fungal afflictions and insect pests. Sugar maples could get anthracnose fungus or leaf spots as well as defoliating insects such as tent caterpillars and gypsy moths.

For zones 4 through 8, especially on the eastern side of North America, you can have your own Sugar Maple Shade Tree shipped to your door. They are 2’ to 3’ saplings.

Paperbark Maple Tree

NameAcer griseum
Average size20’ to 30’
Hardiness zone5 – 7
ConditionsFull sun to partial sun. Needs watering in times of drought, will tolerate acidic soil.

Pros:

The paperbark maple is another smaller specimen of maple that can work well in small or medium-sized yards. This tree resembles birch trees with the peeling habit of the bark, but it still grows the iconic “winged” seed pods that some affectionately call “helicopter seeds.”

Most of these seeds end up being sterile, so you won’t have to cut down, or pull up a ton of paperbark seedlings every year.

The paperbark maple’s tolerance of shade means you can plant them underneath larger trees or areas the sun barely touches.

They also work great as focal points in any garden. Their birch-like bark peels away to reveal cinnamon-colored bark underneath that is stunning in the bleak, colorless winter.

The paperbark maple is a slow-growing tree that will eventually reach heights of 25 to 30 feet tall. The green leaves will darken to a beautiful scarlet red in the fall, making it an excellent showpiece.

Cons:

This variety of maple has very few cons. One is that it can be a messy tree. Smaller branches fall off during storms, and the peeling bark can be a minor nuisance.

Leafminers can inhabit the paperbark causing extra leaf drop, but other than that, these trees are about as easy to grow as they come.

Silver Maple Tree

NameAcer saccharinum
Average size60’ to 80’
Hardiness zone3 – 9
ConditionsFull sun. Moist, acidic soil.

Pros:

This maple tree is aptly named because of the silvery undersides of the leaves and the similarly colored bark. In some communities, people believe they can tell a storm is coming when the leaves all turn silver. Strong winds flip the leaves over and around, revealing the silver color.

Silver maples have recently become more popular in home landscapes because they grow so rapidly, and produce a lot of shade in a relatively short time.

These trees can grow large, up to 80’ tall, and have massive trunks. This is also one of the most striking features of the silver maple. In the winter, the trunk and limbs are a sight to behold.

Silver maples were prized in the pioneering days, according to The Arbor Day Foundation. They say settlers of the Ohio Valley loved silver maples for their willingness to grow in a variety of soils and their fast growth. These settlers also preferred to make syrup from silver maple sap, though they didn’t produce as quickly as sugar maples.

Cons:

With the exceptionally fast growth, comes weaker wood. This maple variety has a problem with dropping limbs easily, so be careful where you plant them. You’ll want to make sure they are a suitable distance away from any buildings.

The roots of silver maples are notoriously invasive. They will stretch out and clog up septic drain lines, or dig their way into any small, leaking supply line. They will also push up sidewalks and paving stones.

These fast-growing trees need a lot of space, so you’ll have to have a good-sized yard to let these trees free.

Red Maple Tree

NameAcer rubrum
Average size40’ to 60’
Hardiness zone3 – 9
ConditionsFull sun to partial shade. Tolerates most soil types.

Pros:

The red maple is aptly named because it likes to show off something red during every season.

In spring, there are small red flowers. During summer, the leaf stalks turn red, while in autumn the leaves themselves glow a deep crimson red, and in winter, the tree has pops of red buds all over.

The red maple is very similar to the sugar maple. The fundamental difference—which isn’t that big—are the leaves. Red maple leaves have a V-shaped groove between the lobes, while the sugar maple has a more U-shaped groove.

This tree grows faster than sugar maple trees, but not as fast as silver maples. These trees are also very cold hardy, but they can withstand hot temperatures as well, so they do well in most U.S. grow zones.

Cons:

Red maples easily get fungal infections that cause leaves to drop and weaken them. Limbs and trunks can sustain damage fairly easily, which can allow rot to set in. To combat these issues, keep the trees as healthy as possible.

Their roots, though not as invasive as silver maple, are still shallow. This makes mowing difficult. Sidewalks and driveways near red maples will inevitably get cracked and raised by the shallow root structure.

Check out these to start your own Red Maple Shade Tree!. They are live trees and shipped when they are between 2’ and 3’ tall.

Korean Maple Tree

Acer pseudoplatanus atropurpureum branch with fruit
NameAcer pseudosieboldiana
Average size15’ to 25’
Hardiness zone4 – 8
ConditionsFull sun to partial shade. Moist well-drained soil. Doesn’t tolerate drought. 

Pros:

These trees are similar to Japanese maples as they are similarly sized, but they can withstand cooler temperatures. If you have tried Japanese maples but the winter devastated them, a Korean maple might be what you’re looking for.

They can grow in shady areas, don’t get very tall, and take well to containers. In the spring these maple trees sprout little purple flowers, then continue the color show in autumn when the leaves turn rich, deep red.

Korean maple trees don’t get very large, so you can plant them in smaller yards, or group several of them together in larger plots.

Cons:

These trees are quite cold hardy, and they don’t have many major problems. They are susceptible to leaf fungus, and some insects, but a healthy Korean maple will easily survive most afflictions.

Tatarian Maple Tree

NameAcer tataricum
Average size15’ to 20’
Hardiness zone3 – 8
ConditionsFull sun to partial shade. Any well-draining soil

Pros:

The best thing about these maple trees is they will grow in nearly any soil type as long as they don’t sit in water. They will even grow in loam and clay soil if it drains well.

Tatarian maple trees are also fast-growing, shorter trees that will reach their max height soon. Once they are finished with the adolescent growth spurt, they take on the “dad-bod” and start growing as wide as they are tall.

While these maples will grow in shady areas, they do best in full sun conditions. Like most other maple trees on our list, they put on a beautiful colored leaf show in the fall.

Since they stay relatively small and wide, they work well in smaller landscapes where massive trees just can’t grow.

Cons:

Tatarian maple trees originated in Korea and China, so they are an introduced species to other countries like North America.

Since they can tolerate several temperature extremes and most soil conditions, they are considered invasive in many areas.

Black Maple Tree

NameAcer saccharum nigrum
Average size50’ to 75’
Hardiness zone4 – 8
ConditionsFull sun. 

Pros:

Black maples are very similar to sugar maples. In fact, they are considered a close cousin. They can still be tapped to make maple syrup and grow to a similar height.

Mature black maples fill out into a pleasing, rounded shape and will glow with yellows, oranges, and reds in fall like sugar maples. Since they get quite large and can live for well over 100 years, plant these trees where they have plenty of space to grow.

If you are looking for a great shade tree, then a black maple might fit the bill. Their canopies stretch out up to 50 in diameter, giving you plenty of cooling area in a wide open yard.

Cons:

These trees don’t have major issues to worry about. Minor problems include leaf scorch, fungus, and boring insects. They also don’t do well around coastal areas, the salt will hamper growth.

They are also not very tolerant of air pollution. These trees prefer clean, country air.

The Best Time To Plant Maple Trees

Maple tree during planting sequence in house garden

Technically, trees can be planted nearly any time the ground isn’t frozen, but to give them the best chance, fall is the optimal time.

When a tree’s roots are disturbed, they need time to establish themselves before the trees should start spending nutrients and energy on leaf growth. The best time for undisturbed root stimulation is the fall.

The tree goes through its dormant phase and can get the roots settled before winter sets in.

Summer isn’t a good time to plant trees because the heat and typically dry conditions can stress the plant. Trees pl›anted in summer don’t get the water, or the time needed to establish themselves. Weakened and stressed trees have a hard time fighting off insects and other afflictions.

If you’ve decided that you need to move your maple tree, you can take a look at our piece on transporting your maple tree here!

Why Not Plant Maple Trees In The Spring?

Spring tree planting may seem like the best time for them because that’s when they wake up from their dormancy. Leaves grow, April showers and all that, so it would theoretically seem like the perfect planting time.

While this may be true for flowers and some other species of trees, for maples, spring planting isn’t the perfect season for them. Maple trees produce a lot of sap that they have to push through the trunk and up to the leaf buds to make them expand and grow.

If the trees are trying to establish a strong root system—the roots are like the heart of the plant—then they can’t afford to expend more energy on growing leaves and new branches. Trees will work on roots first and foremost, while everything else comes in second.

Planting in fall will give the tree time to get a strong, healthy root system developed, then it will be ready for spring and the seasons beyond.

Don’t Prune Maple Trees In Spring Either

Again, pruning is often a spring or early winter activity. However, for maple trees, spring pruning can be harmful to them. This again has to do with sap production.

While trees can afford to lose some sap—thank goodness or maple syrup might not be a thing—it’s required to prepare them for leaf production. Maple trees produce a lot of sap, and the bigger they are, the more sap is needed for bushing out the wide leaf canopy.

Cutting the limbs around this heavy sap production and movement time will cause the trees to “bleed” more profusely and could result in a weakened tree. Just like humans, when trees aren’t feeling their best, infections have an easier time setting in.

When you prune or have your maple trees pruned, try to schedule it for fall. The tree won’t lose so much sap, the wounds will heal better, and it will be healthier overall.

How Long Do Maple Trees Live?

A properly cared for maple tree, depending on the species, can live between 80 to 300 years. Sugar maples tend to be the longest-lived of them, as some have been reported to live for 400 years.

Red maples often can grow for over 300 years, while the fast-growing silver maples live hard and fast. They typically last about a century before giving up the ghost.

The slow-growing Japanese maple will often live to the ripe old age of 100. Depending on the variety, you could have a tree that will last for several generations.

If you want to expand the longevity of your maple tree, take a look at our piece on the best maple tree fertilizers!

That’s All We’ve Got!

Maples, like all trees, have plenty of pros and cons, and quite a variety to choose from for all your landscaping needs. If you want a long-lived, giant shade tree, silver, red, or sugar maple might be your pick.

If instead, you want something a bit easier to manage that won’t engulf your smaller yard, then Japanese, Korean, or a paper bark maple might be just what you need.

All the maple varieties in this list will give you plenty of beautiful fall color, while some will even continue providing a colorful show throughout the winter. Whatever you are looking for, maple trees can probably check off the boxes!

References:

Wada, Naoya, and Eric Ribbens. “Japanese maple (Acer palmatum var. matsumurae, Aceraceae) recruitment patterns: seeds, seedlings, and saplings in relation to conspecific adult neighbors.” American Journal of Botany 84.9 (1997): 1294-1300.

Godman, Richard M., Harry W. Yawney, and Carl H. Tubbs. “Acer saccharum Marsh. sugar maple.” Silvics of North America 2.654 (1990): 78.

Saeki, Ikuyo, et al. “Comparative phylogeography of red maple (Acer rubrum L.) and silver maple (Acer saccharinum L.): impacts of habitat specialization, hybridization and glacial history.” Journal of Biogeography 38.5 (2011): 992-1005.
Evergreens keep our lawns interesting in the winter when their deciduous neighbors have dropped their leaves for the season. For this reason, you probably want to keep your evergreens happy and healthy, and fertilizers are one way to do that!

The most effective evergreen fertilizers are high in nitrogen. This is the mineral most readily absorbed by evergreens as opposed to phosphorous, potassium, or micronutrients. Fertilizers that are high in nitrogen work by providing evergreens with the nutrients they need to complete photosynthesis.

Below, we’ll go over the most effective evergreen fertilizers and give you a little more detail on how they work and when to use them.

Why You Should Fertilize Your Evergreen Tree

Before we get into the best, most effective evergreen fertilizers, let’s answer an obvious question: Does your evergreen need fertilizer?

According to the University Of Minnesota, evergreens need less fertilizer than deciduous trees but still benefit from the occasional nutrient bump.

If your evergreen is showing signs of nutrient distress such as slow growth or abnormally-colored foliage, it may need fertilization to provide missing nutrients.

Applying fertilizer to young trees and shrubs is beneficial to help promote fast growth and development. It’s also beneficial to fertilize evergreens affected by pests or those planted in poor soil conditions. Fertilizers can help the trees bounce back from these stresses more easily.

Newly planted evergreens that aren’t growing very fast do not necessarily need fertilizers. Most of the growth may be happening beneath the soil where the plant is establishing a root system. Nitrogen-high fertilizers are likely to stimulate growth above the soil, not below.

For this reason, it’s not recommended to fertilize evergreens that have just been transplanted. Give them a season or two to establish a good root system before fertilizing.

Another way you can tell if you need to fertilize your evergreen or not is to perform a soil test. This is a little more time-consuming, but it will give you all the details you need about your soil including:

  • Nutrient content
  • Soil PH – evergreens like their soil to be slightly acidic
  • Type of soil – clay, sand, loam, etc.

Knowing this information will put you miles ahead on knowing exactly what your evergreen requires. Knowing the type of soil will also help identify what kind of fertilizer you need.

For example, clay soils tend to promote runoff because it holds water. Using a slow-release fertilizer on clay soils will be more beneficial for your evergreen than using a fast-release, water-soluble fertilizer.

What Time Of The Year Should You Fertilize Your Evergreen Trees?

green lush evergreen hedge closeup

If you’ve determined that your evergreen needs fertilizer, you want to be careful about when you fertilize it.

Fertilizing your evergreen too late in the season may promote new growth at a time when the tree should be slowing down and hardening off for winter.

Fertilizing your evergreen too early can promote growth before the threat of frost has passed, causing brittle twigs and possible dieback.

So, when is the golden timeframe to fertilize your evergreens? 

According to Clemson University, you should apply fertilizer once in early spring and again in early summer. This is when active growth is occurring and nutrients are most likely to be absorbed by your evergreen.

One thing to note is that you should never fertilize your evergreens during a drought

Evergreens will be stressed from drought and the nutrients will force them to grow when they don’t have the necessary energy or water. This can cause root burn, which can severely stunt your evergreen’s future growth and health.

How Fertilizers Work In The First Place

A lot of people think that fertilizers are ‘plant food.’ This is a common misconception and understandable. After all, fertilizers are nutrients. Isn’t that kind of like food?

In reality, fertilizers simply provide nutrients to your evergreens so that they can make food. evergreens get food from photosynthesis, but for photosynthesis to work, a lot of things have to go right. 

Your evergreen has to have green leaves or needles and grow enough to reach the sunlight. It also has to have enough water and carbon.

For all of that to happen, the evergreen needs nutrients. 

The most important nutrients for evergreens are nitrogen, potassium, and phosphorous, also known as NPK. But besides that, they also need carbon, hydrogen, oxygen, sulfur, calcium, magnesium, boron, copper, iron, manganese, molybdenum, nickel, zinc, and chlorine!

Fertilizers help to give evergreens all of those nutrients so that they can focus on growing new shoots, new leaves, and flowering, instead of worrying about just surviving with minimal nutrients.

Fertilizers are especially effective for evergreens because these trees continue to photosynthesize all year instead of going dormant in the winter.

You can read more about how evergreens keep growing in the winter here to learn more about that!

Most Effective Fertilizers For Your Evergreens

Various evergreen pine and fur trees on display for sale in Christmas tree lot during December Holiday season

As we mentioned before, the best fertilizer for evergreens will typically contain high amounts of nitrogen. Phosphorous is rarely needed in evergreen fertilizers, while potassium may or may not be needed depending on the specific area where you live and the soil content.

Other micronutrients like magnesium, calcium, and sulfur are included in some fertilizers but typically are not as important as nitrogen.

Let’s take a look at the most effective fertilizers for your evergreens so you can keep them healthy and green for years to come.

Complete Fertilizer

Complete fertilizers are those that have a ratio of the three major nutrients: 

  • Nitrogen
  • Phosphorous
  • Potassium

These are typically listed in an NPK ratio on the fertilizer container that refers to the ratio of nitrogen, phosphorous, and potassium, respectively. For example, a 16-4-8 complete fertilizer has 16% nitrogen, 4% phosphorous, and 8% potassium.

For evergreens, it’s recommended to use a fertilizer higher in nitrogen such as 16-4-8 or 12-6-6. The reason nitrogen is so important is that it leaches through the soil more quickly than potassium or phosphorus, so it needs to be replenished more often than other nutrients.

The Andersons Store Professional PGF Complete 16-4-8 Fertilizer is a good choice for your evergreen. This is an 18-pound bag and for your evergreen, you want about 3 pounds of nitrogen per 1,000 square feet.

If you can’t stand math, the product we suggested has a table on the back of the bag for easy measurement! That way you’ll know exactly how much to use for your evergreen.

When To Use A Complete Fertilizer

The type of fertilizer you use on your evergreen will depend on a few different things such as what the soil conditions are, what problems your tree/shrub is having, and any results from a soil test.

Complete fertilizers are good to use as a basic fertilizer when you have no real knowledge of what nutrients are in your soil. Complete fertilizers cover all the basics and will be helpful to your evergreen no matter the situation. 

Studies like this one reported in PLOS ONE Journal have shown that fertilizers containing the essential NPK nutrients increase the growth and diameter of evergreen trees (fertilizer applied to different forests containing species of Nothofagus betuloides and Nothofagus pumilio in Patagonia.)

The downside to complete fertilizers is they are not geared toward specific situations. If your evergreen is already planted in potassium-rich soil, using a complete fertilizer may overcharge the available potassium nutrients.

While this won’t kill your evergreen, it won’t give it the optimal nutrients it needs and growth may not be as dramatic as you’d like.

Nitrogen-Only Fertilizer (Urea & Ammonium Sulfate)

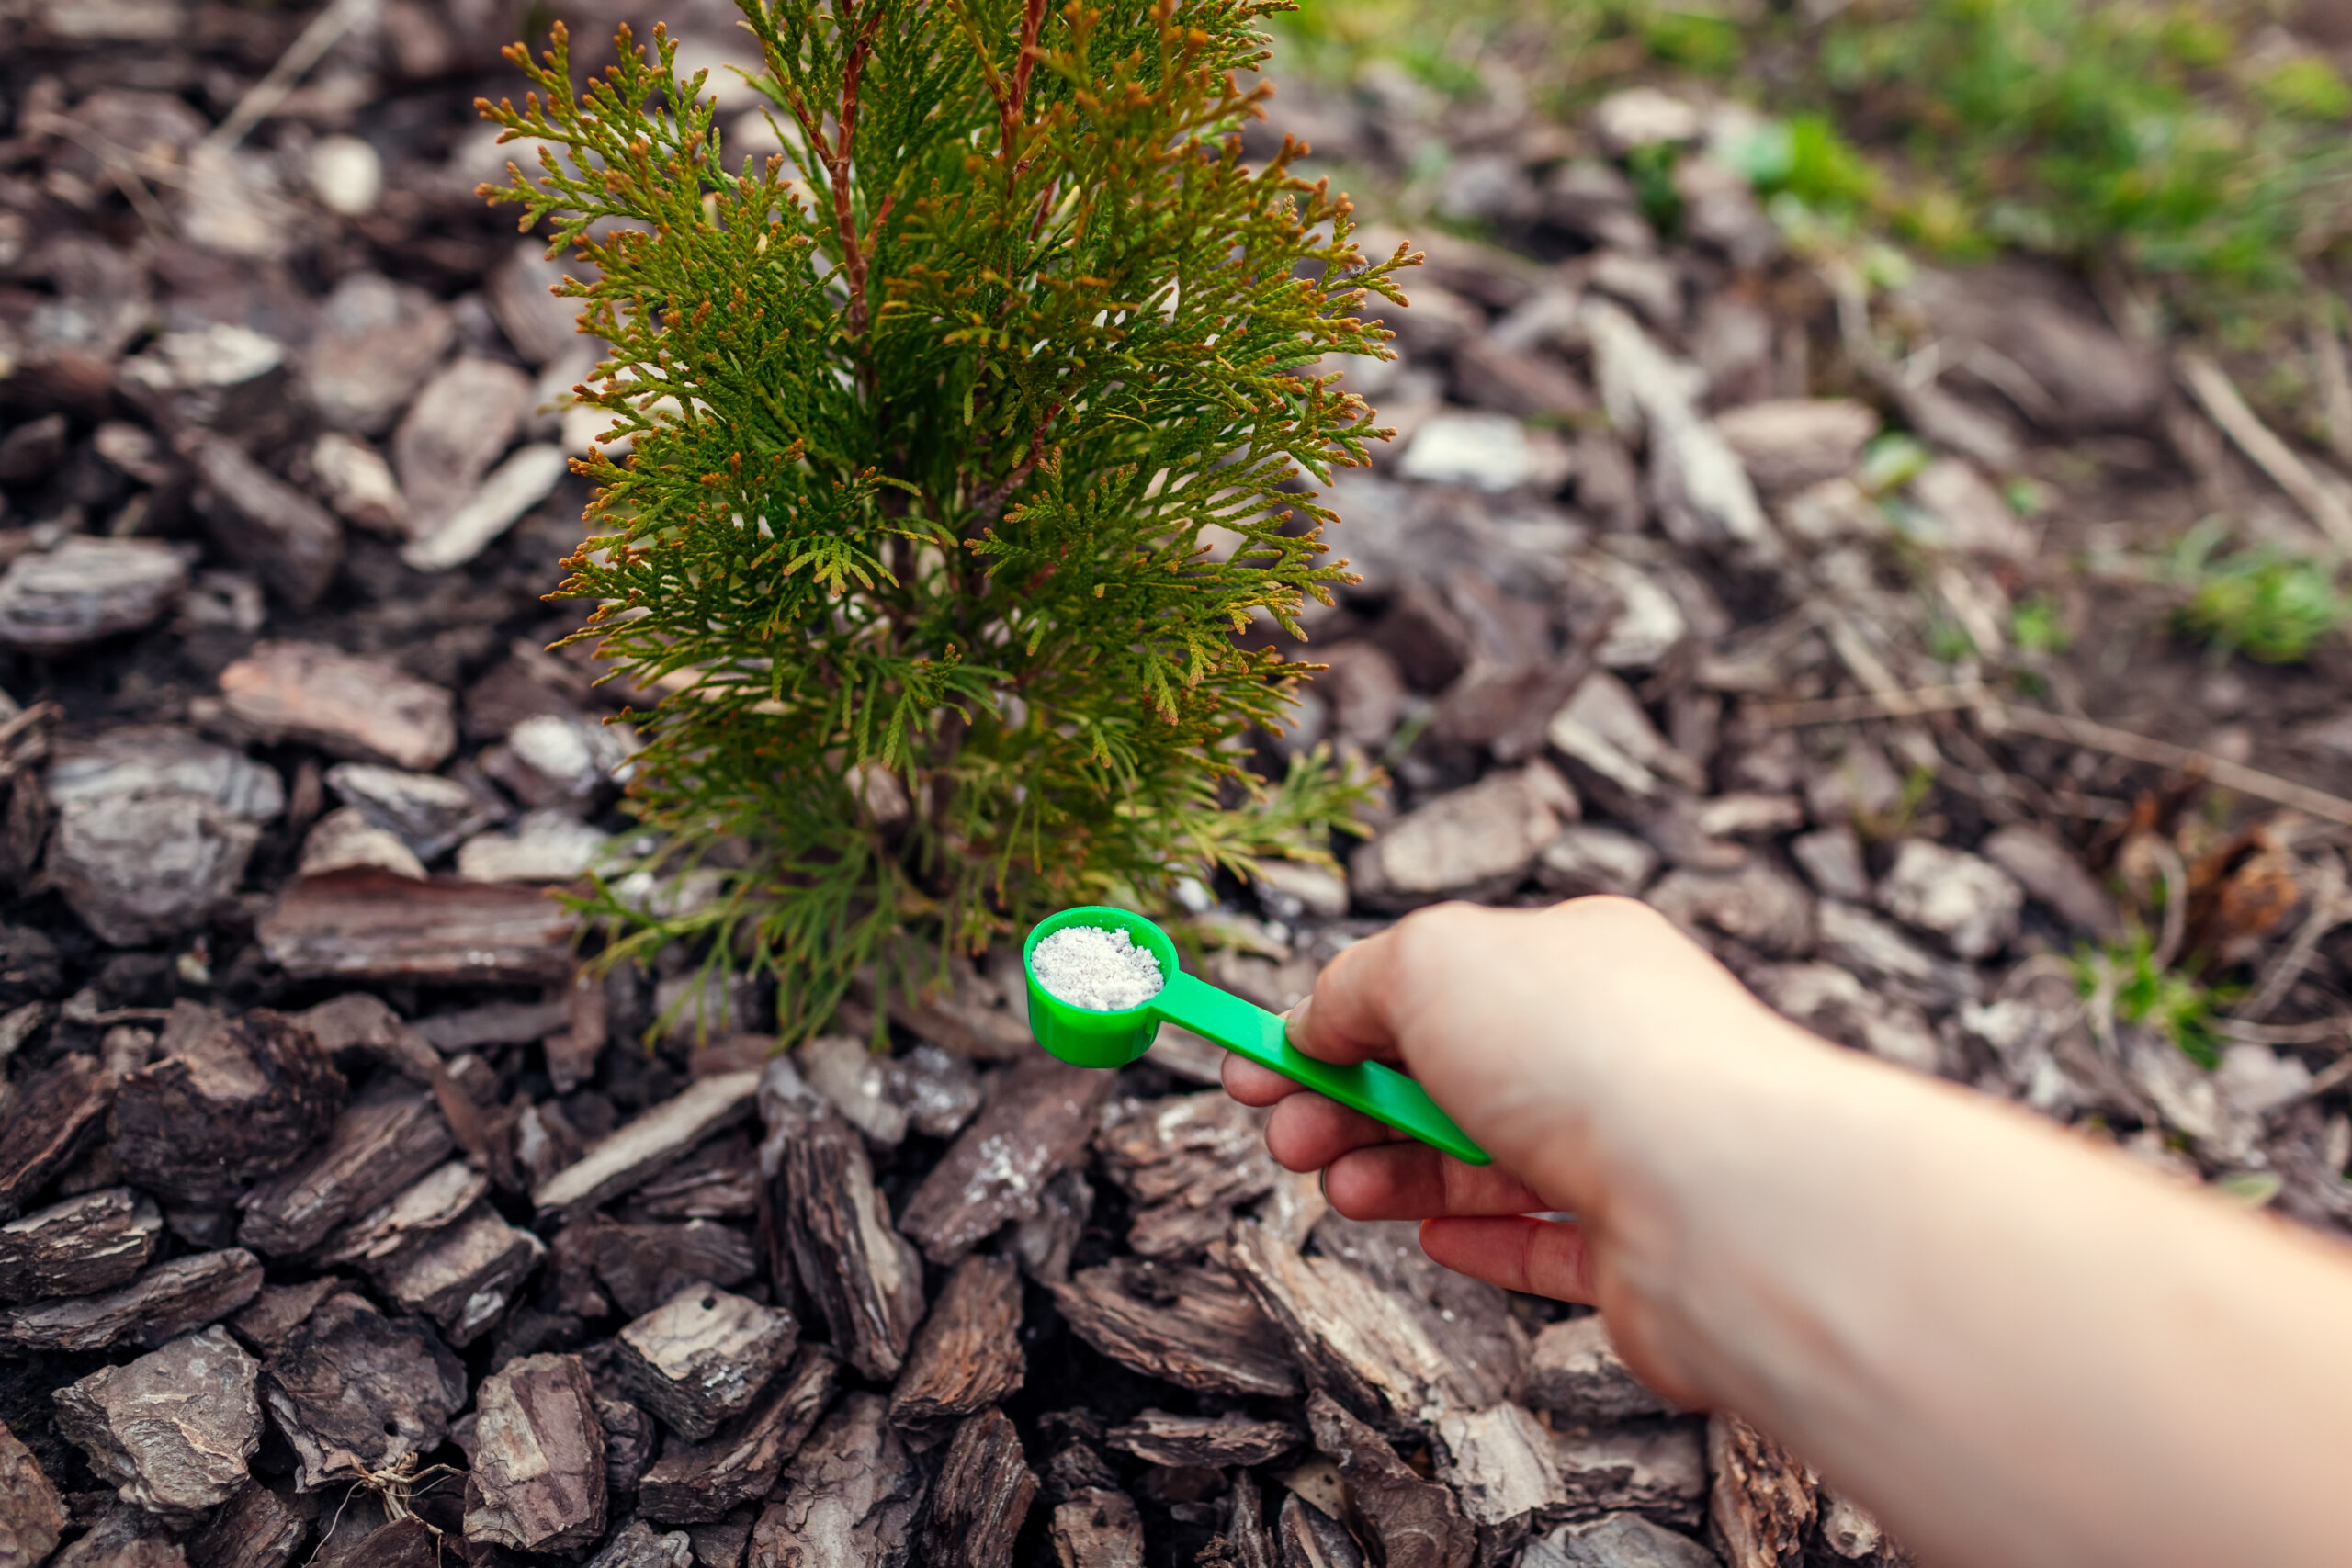
Gardener fertilizing arborvitae in spring garden. Close up of spoon with fertilizer. Taking care of evergreen thuja plants. Healthy trees

Urea is used as a fertilizer and has a very high nitrogen content. Urea fertilizers are 46-0-0, meaning it has no potassium or phosphorous in the product. Ammonium fertilizers are usually 21-0-0.

Urea and ammonium fertilizers typically come as granules that can be spread into the soil to give your evergreens a nice nutrient boost.

Nitrogen will promote growth above the soil such as new leaves, needles, and stem growth. Similar to complete fertilizers, you don’t want to apply these to brand-new transplants as you’ll want to give them time to establish roots.

According to the University of Minnesota, urea can quickly be lost to the atmosphere if allowed to sit on the soil surface in warm weather. If you decide to go with a urea fertilizer, be sure to work it into the soil when applying as opposed to simply spreading it on the surface of the soil.

Cesco Solutions, Inc. Store’s Urea Fertilizer 5lb bag contains a ratio of 46-0-0. It comes in the form of granules, which makes for easy spreading. Just remember to work the urea into the soil as it can be absorbed readily into the atmosphere.

For ammonium sulfate, Cesco also makes an Ammonium Sulfate Fertilizer 5lb Bag that’s a ratio of 21-0-0. Ammonium sulfate does not leach into the atmosphere as quickly or degrade as quickly as urea. However, it has a lower nitrogen content.

When To Use A High-Nitrogen Fertilizer

There are pros and cons to using a nitrogen-only fertilizer like urea or ammonium sulfate. Nitrogen is certainly the most important nutrient for evergreens, but it’s not the only nutrient your evergreen needs.

Using a urea or ammonium sulfate fertilizer is a good choice if you know the nutrient contents of your soil.

If you know your soil contains enough potassium and phosphorous, then using a nitrogen-only fertilizer will be the most beneficial to your evergreen.

Adding in extra potassium or phosphorous when your soil already has an abundance can slow growth. So, using a high-nitrogen fertilizer is great if you know your soil is flush with those nutrients.

Slow-Release Fertilizer

Slow-release fertilizers are complete fertilizers that are coated with sulfur or some other component to slowly trickle the nutrients into the soil as opposed to releasing them all at once.

Look for a slow-release fertilizer that has similar NPK ratios as complete fertilizers (16-4-8 or 12-6-6). This is the best ratio for evergreen trees, giving them enough nitrogen to promote new above-ground growth.

When using a slow-release fertilizer, you can apply it one time for the entire year, preferably in late spring. These can be supplemented with a fast-release fertilizer if your tree is established but young. For mature evergreens, you don’t need both.

A good slow-release fertilizer would be Schultz Nursery Plus Slow-Release Plant Food. It has an NPK ratio of 12-6-6, which is ideal for evergreens. It also contains other micronutrients that are released slowly into the soil to prevent any type of root burn.

When To Use Slow-Release Fertilizers

So, when should you use slow-release fertilizers as opposed to fast-release or nitrogen-only fertilizers?

Similar to complete fertilizers, slow-release fertilizers are good when you’re not sure what the nutrient content of your soil is. Having all three macronutrients (nitrogen, phosphorous, and potassium) will cover all the bases and give your evergreen enough nutrients to promote new growth.

Specifically, you’ll want to use slow-release fertilizers if your soil is prone to runoff such as in clay soils or on slopes.

According to Clemson University, slow-release fertilizers are also great for young shrubs and trees, giving them a constant supply of nutrients when they need it the most.

Runoff is an important factor when deciding on a fertilizer. According to an article in the Journal of HortTechnology, slow-release fertilizers are less damaging to the environment in terms of entering the water table.

Slow-release fertilizers aren’t a great solution for when your trees are nutrient stressed and need a nutrient boost right away. For those situations, you’ll want a water-soluble fertilizer.

Overall, I really like slow release fertilizers a lot as they’re less likely to overload the tree!

Fast-Release Fertilizers (Water-Soluble)

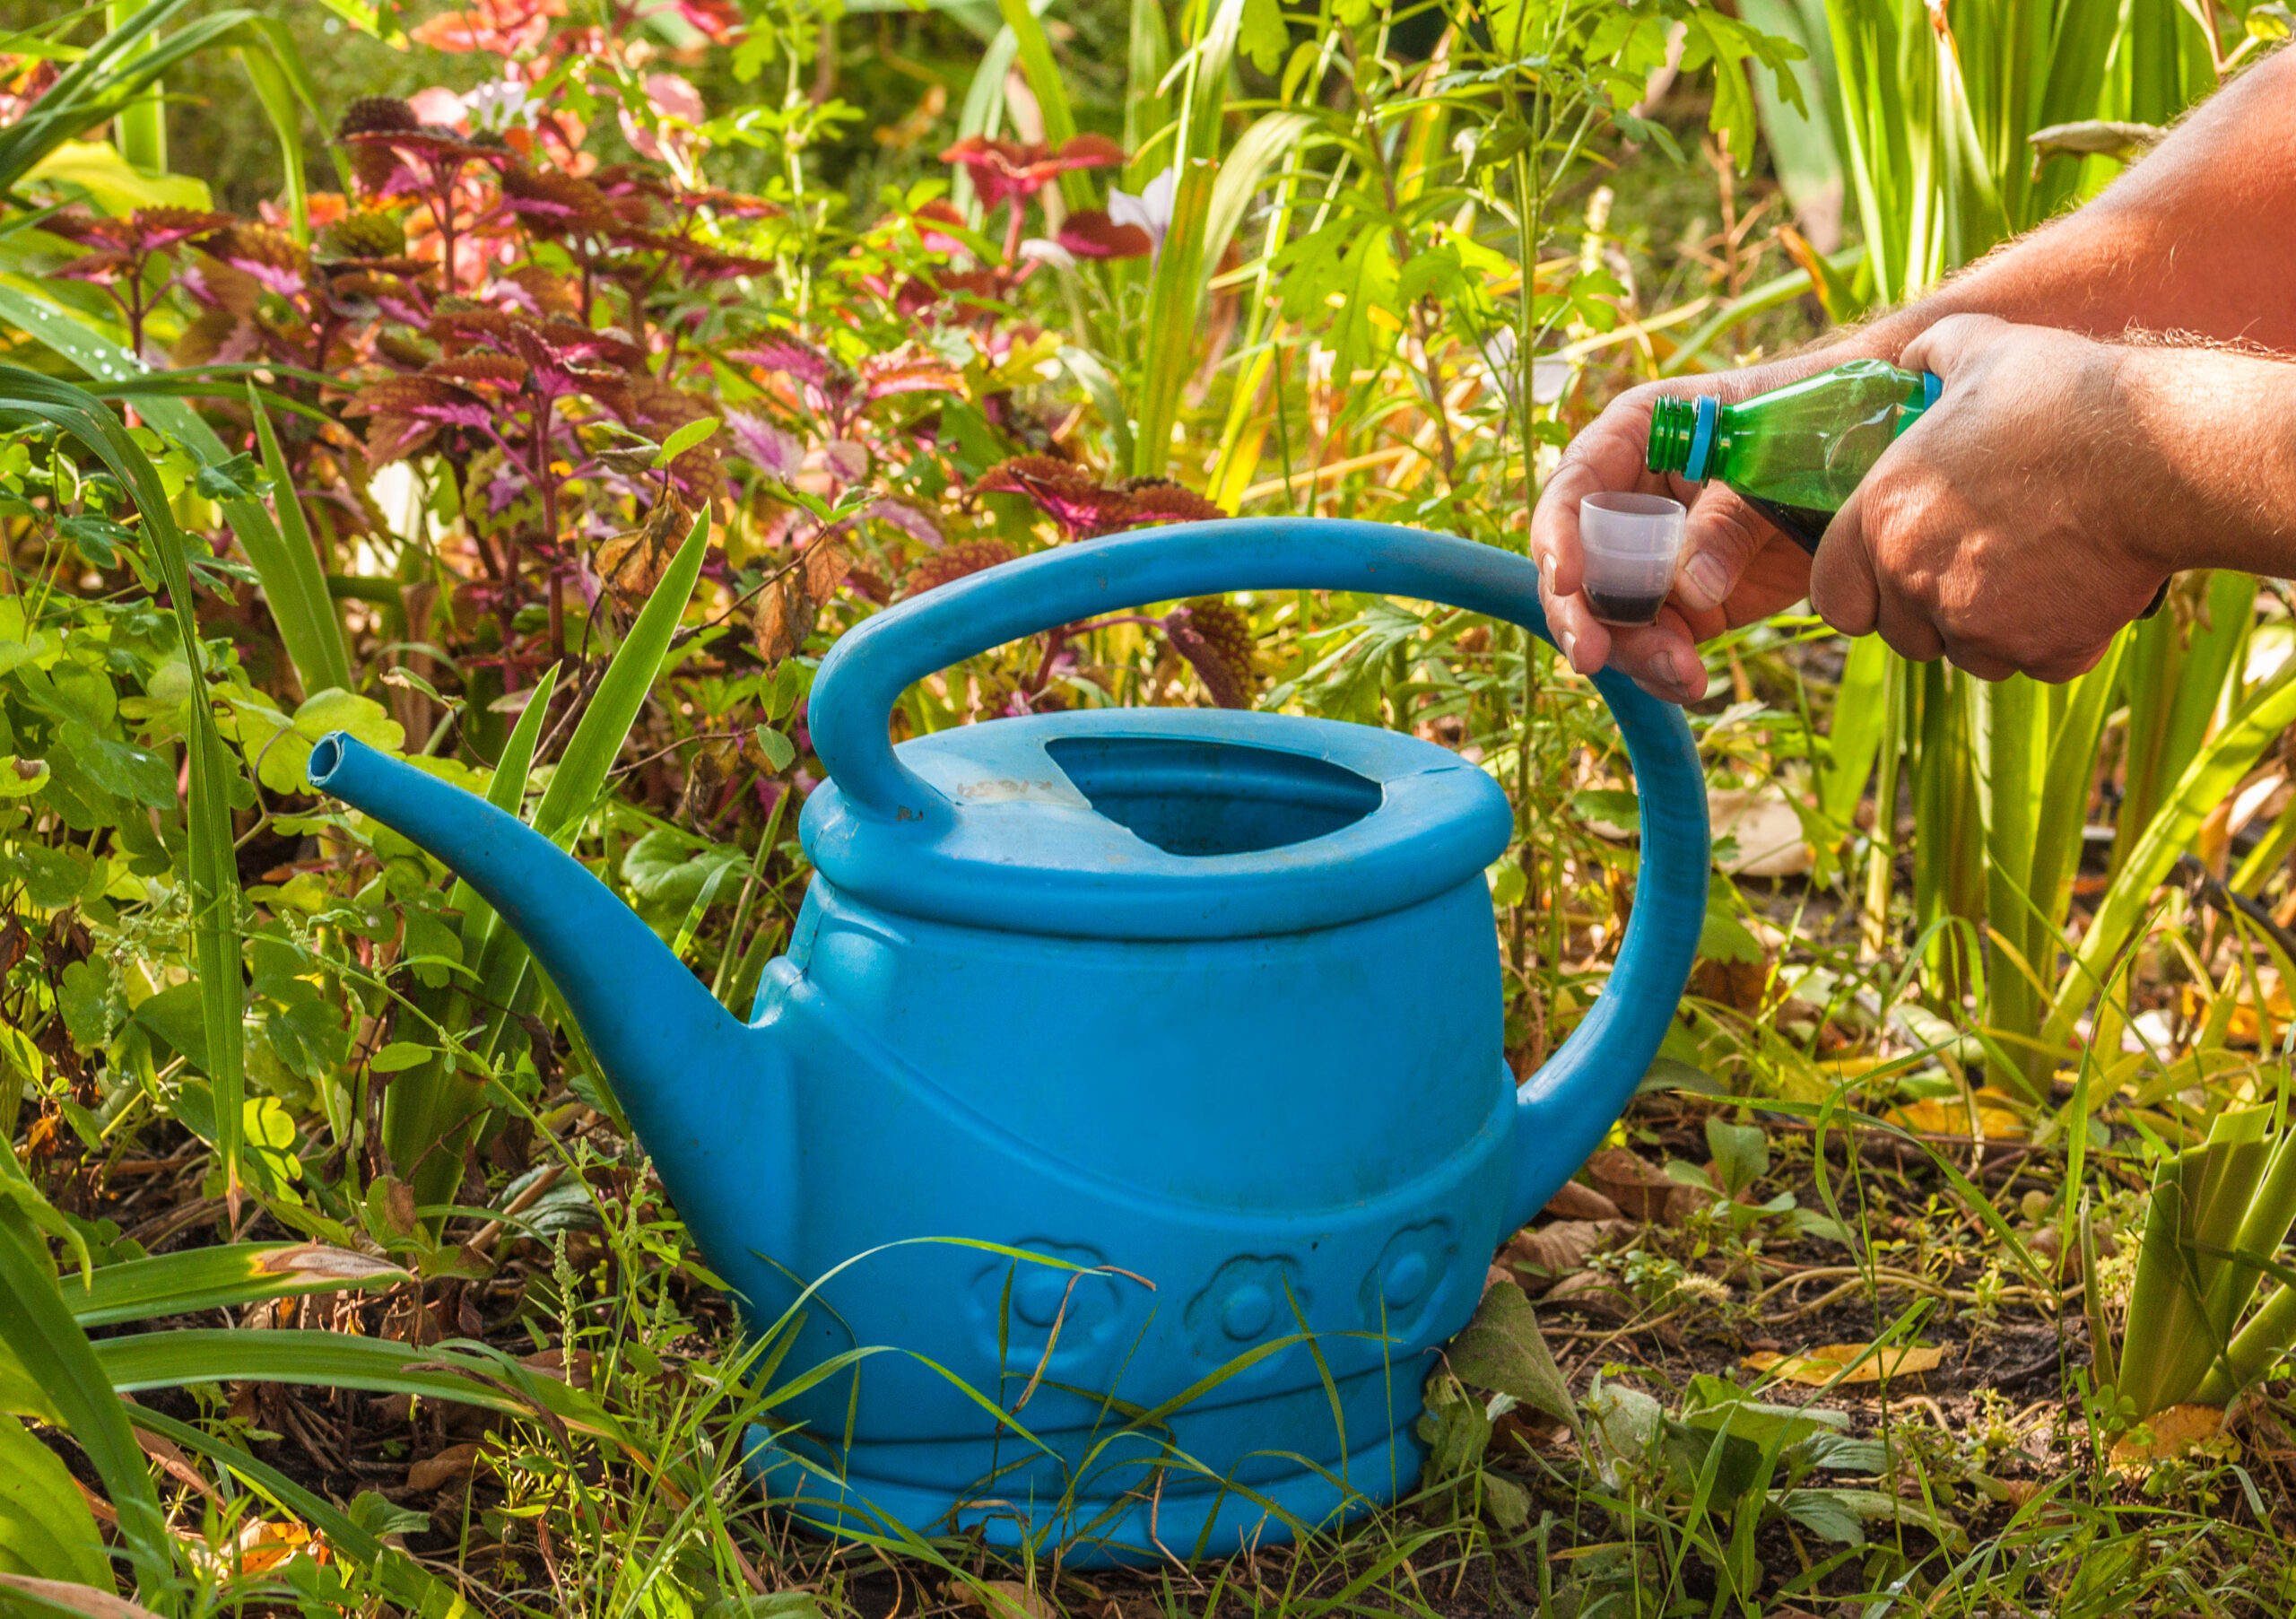
Gardener's male hands pour liquid fertilizer concentrate a watering can.

On the opposite spectrum of slow-release fertilizers are water-soluble fertilizers. These get leached into the soil and are available to your evergreens right away.

Some complete fertilizers are water-soluble, but not all. It will usually say right on the packaging if it’s water-soluble or not.

Miracle-Gro Water Soluble All Purpose Plant Food is a fast-acting fertilizer with an NPK ratio of 24-8-16. This isn’t our perfect evergreen ratio, but it still has high nitrogen, low phosphorous, and mid-range potassium, which is a really good overall combination.

When To Use Fast-Release Fertilizers

As the name suggests, fast-release fertilizers are meant to provide evergreens with nutrients right away. Once the fertilizer enters the soil, your evergreen can immediately absorb them and put them to use.

Fast-release fertilizers are best used on evergreens that are nutrient-stressed. Some of the signs of nutrient stress include:

  • Brown or yellow foliage
  • Lack of flowers or cones
  • Stunted growth
  • Lack of any new growth in the spring

In these situations, it’s best to apply a fast-release fertilizer so that your evergreens can quickly fix their nutrient imbalance and continue to grow.

Organic Fertilizer

Nothing works quite as good as mother nature to give your evergreen exactly what it needs. Organic fertilizers do just that!

Organic fertilizers for evergreen trees can mean a few different materials:

  • Fallen leaves
  • Manure
  • Compost
  • Worm castings
  • Guano

The advantage of using an organic fertilizer on your evergreen is that it includes all the macro and micro-nutrients your evergreen will need.

Plus, it avoids the additives and chemicals that come with synthetic fertilizers.

You can use fallen leaves as a replacement for mulch around your evergreens. According to the University of Maryland, this will provide your evergreens with a slow release of nutrients while the leaves break down.

Make sure to chop the leaves up relatively fine so that they break down faster than if the leaves were whole.

Compost is another option, but it’s recommended only to use about a 1-inch layer of compost to fertilize your evergreens.

Worm castings are, well, there’s no good way to put it…it’s worm poo. Worm castings are the result of worms eating through compost, vegetables, leaves, and whatever else they find palatable and passing it through their system.

The result is an extremely rich organic fertilizer that has all kinds of goodies your evergreen will love including the standard NPK, but also magnesium, calcium, phosphates, iron, and a host of other micronutrients.

Unless you are very patient with your worm farm, you’ll want to grab worm casting fertilizers online such as Arcadia Garden Products Worm Nerd Worm Castings. This is a 4-pound bag and is a great organic fertilizer for your evergreen(s).

Guano is another one of those organic fertilizers that aren’t a dinner-table-appropriate conversation. It’s the droppings of seabirds and bats. According to an article in the International Journal of Ecology, ‘guano’ is a Quechua word that translates to ‘fertilizer.’

This organic fertilizer is high in nitrogen and contains many other macro and micro-nutrients that will help your evergreen grow to its full potential each season.

Don’t worry, you don’t have to go cave exploring to find guano fertilizer. Down to Earth’s Organic Bat Guano Fertilizer is a 2-pound bag with an NPK ratio of 7-3-1.

When To Use Organic Fertilizers

Using organic fertilizers is a great choice if you’d rather not deal with chemically-calculated synthetic fertilizers. It’s a more natural solution that’s less likely to harm waterways and the environment.

Because organic fertilizers are considered ‘slow-release,’ they’ll be especially effective for evergreens growing on slopes or in poor soil conditions.

Organic fertilizers have the added benefit of being natural. You don’t have to worry about runoff or any chemicals getting into the water table. You can simply spread the fertilizer and reap the benefits!

The one downside to organic fertilizers is that they don’t contain a concentrated amount of nutrients like synthetic fertilizers.

Fertilizer Spikes And Liquid Fertilizer

Other types of fertilizers available for your evergreens are fertilizer spikes and liquid fertilizer. These aren’t any different than our other fertilizers besides the delivery method.

So far, most of the fertilizers on our list were granules that can be spread around or worked into the soil.

Spikes and liquid forms come in many varieties such as water-soluble or slow-release but have a different delivery methods.

Fertilizer spikes like Miracle-Gro’s Tree & Shrub Plant Food Spikes come in a 15-5-10 NPK ratio. This package comes with 12 spikes and has a guide on the back to let you know how many spikes you should use based on your evergreen’s drip line.

Spikes are more akin to slow-release fertilizers rather than water-soluble fertilizers. They dissolve slowly over time, providing your evergreen with constant nutrients.

Liquid fertilizers are more akin to fast-release fertilizers. They are absorbed into the soil quickly and are available to your evergreens sooner rather than later. 

The nice thing about liquid fertilizers is that they come in high nitrogen contents such as 28-0-0, which is great for evergreens.

When To Use Fertilizer Spikes And Liquid Fertilizer

Using spikes or liquid fertilizer is more of a preference than having anything to do with your evergreen’s nutrient or soil situation.

They both come in a variety of different kinds of fertilizers that we discussed above. The only difference is the delivery method.

That’s A Wrap!

Evergreen tree against the sky

Evergreens work overtime in the winter. Unlike most plants that go dormant, evergreens still photosynthesize, keeping their leaves and needles green.

But just because evergreens are hard workers doesn’t mean they won’t benefit from being fertilized here and there.

The best fertilizer for evergreens will be high in nitrogen. This is the most important nutrient for evergreens and can be readily absorbed.

Now, for a quick recap:

The most effective fertilizers for evergreens include:

  • Complete fertilizer
  • Nitrogen-only fertilizer (Urea & Ammonium Sulfate)
  • Slow-release fertilizer
  • Water-soluble fertilizers (fast release)
  • Organic fertilizers (compost, worm casting, leaves, guano)
  • Fertilizer spikes
  • Liquid fertilizer

These fertilizers should be used depending on your evergreen’s specific situation. Knowing the nutrient content and type of soil where your evergreen is growing is a huge advantage.

Best of luck on your tree journey!

References

Chastain, R. A., Currie, W. S., & Townsend, P. A. (2006, August). Carbon sequestration and nutrient cycling implications of the evergreen understory layer in Appalachian forests. Forest Ecology and Management231(1-3), 63-77.

Promis, A., & Allen, R. B. (2017, November 30). Tree seedlings respond to both light and soil nutrients in a Patagonian evergreen-deciduous forest. Plus One12(11).

Scagel, C. F., Bi, G., Fuchigami, L. H., & Regan, R. P. (2007, October). Seasonal Variation in Growth, Nitrogen Uptake and Allocation by Container-grown Evergreen and Deciduous Rhododendron Cultivars. HortScience42(6), 10.

Souraya Sakoui, Reda Derdak, Boutaina Addoum, Aurelio Serrano-Delgado, Abdelaziz Soukri, Bouchra El Khalfi, “The Life Hidden Inside Caves: Ecological and Economic Importance of Bat Guano”, International Journal of Ecology, vol. 2020, Article ID 9872532, 7 pages, 2020.

If you’ve ever heard basswood tree and linden tree being used interchangeably, you’re not alone. These trees are commonly misunderstood as being the same tree, but this just isn’t true. But what exactly is the difference between basswood and linden trees?

The fundamental difference between basswood trees and linden trees is that basswood trees are a type of linden tree. When compared to other linden trees, basswood trees are different in several ways, including their growing zones, height at maturity, pests, uses, and growth rates.

Read on to discover all the differences between basswood and linden trees. We’ll clear up some of the confusion between these trees and talk about why their names are used interchangeably!

Basswood And Linden Trees – What’s The Difference?

There are many differences between the American Basswood tree and your typical linden tree. But, it can get a bit confusing when we say ‘linden’ tree because ‘linden’ is a group of several species, basswood being one of them.

So, when we refer to linden trees in this article, we’re talking about the most common linden trees such as the little-leaf linden or Silver linden.

To add to the confusion, some linden trees are called lime trees, though they have no relation to the citrus lime tree!

Confused yet? Let’s clear up some of the confusion by discussing the key differences between basswood trees and linden trees.

Basswood Trees Are A Species Of Tree

We divide every living thing on planet earth into its own category based on what it is. This system of classification helps scientists identify the similarities between two organisms, as well as the differences.

For basswood trees and linden trees, this classification system helps us understand the fundamental difference between the two: basswood is a species of tree, while ‘linden’ refers to a genus.

A genus is a group of species. For example, both coyotes and wolves belong to the genus Canis. However, they separate into two different species after that: C. latrans and C. lupus, respectively.

In our basswood-linden debate, basswood trees are considered a species, while linden is considered a genus.

To summarize, all basswood trees are linden trees, but not all linden trees are basswood trees. To call a basswood tree a linden tree is technically correct, but you cannot call all linden trees basswood trees, as there are a lot of different linden tree species.

USDA Hardiness Zone

The hardiness zone refers to the absolute coldest temperature the tree will survive. Trees will typically be categorized in a range of zones, which indicate the optimal temperatures for that tree.

According to North Carolina State University, Basswood trees can survive in zones 2a through 9a. That is a very cold-hardy tree!

Zone 2a refers to trees able to survive down to -50℉. Your Basswood tree may not be thrilled with those temperatures, but it can survive through it and still bloom the following spring.

Other linden trees like the little-leaf linden and big-leaf linden can survive in hardiness zones 3a to 7a. Their range is a little less than the basswood, but they can still withstand some pretty chilly temperatures.

Hardiness zones are a valuable tool for those who wish to plant basswood trees (or any tree, for that matter!) in their yard. The USDA Plant Hardiness Zone Map lets you know if the tree or plant you want will thrive in your region or not.

Height Of Linden Trees And Basswood Trees

Most linden trees grow pyramidal when they are younger. As they grow older, their shape becomes more rounded.

Linden trees are considered tall trees, often reaching heights of well over 80 feet. They are stately trees and provide yards with plenty of shade.

According to Iowa State University, basswood trees reach a maximum height of around 80 feet. By contrast, little-leaf lindens typically grow to 70 feet and European lindens reach around 60 feet. The silver linden is one of the smallest linden trees, reaching only 40 feet at full height.

Height at maturity is affected by growing conditions. There are, of course, exceptions where linden trees reach over 100 feet, but more often than not, they will not reach triple digits in height.

What Are Basswood And Linden Trees Used For?

A close-up of a carpenter cutting a block of basswood with a band saw

Trees provide us with a ton of raw materials. They can be used in lumber, cabinets, veneer, trim, and furniture. Trees also provide us with medicine, oxygen, windbreaks, and erosion prevention.

However, not all trees provide the same materials. Some are not suitable for lumber because the trunks are knotty or bent. Others may not be sturdy enough for furniture or make for a poor veneer.

Basswood trees are used for:

  • Lumber
  • Veneer
  • Wood carving
  • Pulpwood
  • Rope
  • Cord
  • Mats
  • Tea
  • Nectar
  • Honey
  • Olive oil substitute (seed oil)
  • Shade 
  • Windbreak
  • Wildlife attractant
  • Medicinal

The usefulness of the inner bark of a basswood tree is actually where it got its name. Basswood was derived from ‘bast’ wood, which referred to the bast fibers found in the inner bark. 

These fibers were used historically by Native Americans for rope and cord. According to the University of Kentucky, some tribes used to carve ceremonial masks out of the trees as well.

Besides its usefulness in wood products, basswood trees also provide food and shelter for wildlife. 

Their flowers provide nectar for bees and nectar-feeding birds. Older trees tend to be hollow, providing shelter for various little critters. Animals like squirrels and deer eat basswood seeds.

The honey obtained from the basswood flowers is used in teas and by itself. Basswood trees are also useful in parks and along streets to provide shade and windbreaks.

Many trees from the linden genus have the same uses such as providing nectar for bees. However, there are some differences between basswood tree uses and other linden tree uses.

For example, big-leaf linden trees are used in more delicate wood-making, such as musical instruments and cuckoo clocks. Silver leaf lindens do not have seeds that attract wildlife, but they attract butterflies with their flowers.

Linden trees, in general, are also useful to people metaphysically and supernaturally. According to an article in the Journal of Horticulture, Forestry and Biotechnology, some consider linden trees the ‘sacred’ tree.

These sacred trees are a symbol of prosperity, friendship, peace, love, altruism, and good luck, among others.

Leaf Identification

linden tree and linden flowers with green leaves

Leaves can be a useful tool to help identify what kind of tree you are looking at. It’s best to identify a tree by its leaves in the spring or summer, as deciduous trees will lose their leaves in the fall and winter (you can learn more about how trees survive the winter here.)

All linden trees are deciduous and most of them have showy, golden-yellow leaves in the fall. Most linden tree leaves are described as heart-shaped, including basswood trees.

The big difference comes in the size of the leaves and the presence of hairs on the leaves. Most linden tree leaves are green, but some species can be differentiated by their color.

Let’s look at three of the most common linden trees and see how their leaves differ from a basswood tree.

Tree Species:Leaf Color:Leaf Size (Length):Hair on Leaf?:
Basswood TreeGreenGreater than 6 inchesYes
Big-leaf LindenGreen, Gray, White, Silver3-6 inchesYes
Littel-leaf LindenGreen3-6 inchesYes
Silver LindenGlossy Green1-3 inchesNo

As you can see, there are a lot of similarities between basswood trees and other linden trees when it comes to leaves. However, there are a few subtle differences.

The silver linden tree has the most differentiated leaves in terms of color. The silverish color of their leaves give the tree its name.

Basswood trees have some of the biggest leaves, even when compared to the ‘big-leaf’ linden. Linden trees are easy to identify by their heart-shaped leaves but can be differentiated using their size, color, and the presence or absence of hair.

Basswood And Linden Tree Common Pests

Tree pests will vary from tree to tree. Pests are typically insects that either target the leaves or bore into the trunk to cause internal damage. Some pests, like aphids, can spread tree diseases from one tree to another.

According to North Carolina State University, there aren’t any major pests or diseases associated with the basswood tree. They are occasionally plagued with spider mites during dry, hot weather. They may also host boring insects and caterpillars.

Compared to other linden trees, basswoods are less susceptible than most when it comes to pests and tree afflictions like verticillium or powdery mildew.

Silver linden trees and bigleaf linden trees are also pretty resistant to pests. Silver lindens may have aphids, while bigleaf lindens are somewhat susceptible to Japanese beetles.

Little-leaf lindens are the most susceptible to pests, particularly Japanese beetles. These beetles will chow down on leaves, leaving them as nothing more than skeletons. When infestations are heavy, they can even affect mature trees.

Growth Rate Differences Between Basswoods and Lindens

Most trees grow faster when they are young and slow down as they age. However, some trees have a slow growth rate even when they are young saplings getting established.

Linden trees fall somewhere between medium and fast in terms of growth rate. They are not slow-growing trees!

Basswood trees have a medium growth rate. According to the USDA National Agroforestry Center, a medium growth rate means averaging 1 to 2 feet per year.

Comparatively, silver linden trees have the fastest growth rate, described as ‘rapid.’ Rapid growth rate means this tree grows over 2 feet per year! Big-leaf and little-leaf linens both have growth rates similar to the basswood tree, around 1 to 2 feet per year. 

These classifications are under ideal conditions. If a basswood tree is grown under adverse conditions, such as drought, the growth rate may be slowed down to 12 inches or less per year.

What Can Basswood And Linden Trees Tolerate?

What conditions trees can tolerate will shape the regions where they can grow. Trees that are tolerant of salt will thrive in places close to the ocean or brackish waters. Trees that are drought tolerant will thrive in deserts when others would wilt.

Tolerances can give certain trees advantages over others and can create niche environments that are incredibly important to certain animals or insects.

With lindens, these stoic trees are tolerant of a lot of things thrown at them! We talked a bit about being resistant and tolerant of pests, but now let’s take a closer look at environmental conditions and see the difference between basswood trees and other linden trees.

Tree SpeciesDrought TolerantFire TolerantPollution TolerantWind TolerantHeat TolerantSalt Tolerant
Basswood 
Silver Linden
Bigleaf Linden
Little-leaf Linden

As you can see, each linden tree has its advantages for tolerating certain environmental conditions. Some of these conditions overlap. For example, all four linden tree species are tolerant of urban pollution and all but the little-leaf linden can tolerate drought to some extent.

The silver linden appears to be the most tolerant of challenging environmental conditions. It can withstand almost everything except fire.

Even though basswood trees are considered fire-tolerant, it has thin bark that is easily damaged by fire. However, the tree itself is resistant to fire and will not go up in flames as easily as some other tree species, like cypress and eucalyptus.

Basswood And Linden Tree Soil Preference

Many attributes, such as texture, soil particle size, and ability to hold water, help categorize soil.

In terms of size, soil is broken down into three major categories:

  • Sand
  • Silt
  • Clay

Sand has the biggest particles, allowing for good drainage, and sometimes too good of drainage, leaving the soil dry. Clay has the smallest particles and retains water. Silt falls somewhere in the middle.

Soils can also be loamy, which is a mixture of two or more soil types. There are some blurred lines between soil profiles. For example, you can have ‘silty loam’ or ‘clay loam’ or ‘sandy silt.’

Most linden trees prefer good drainage and can even tolerate drought and hot, dry soil conditions for a short time.

Basswood trees will thrive in almost any soil type, ranging from sand to clay. They prefer well-drained soils but can survive in moist conditions as well. 

Compared to other linden trees, basswoods have the widest range of acceptable soil types. Silver lindens, bigleaf lindens, and little-leaf lindens all prefer loamy soils with good drainage and do not do well with heavy clay or sandy soils.

Where Basswood Trees Grow (Most Common Places)

Autumnal golden american basswood leaves close-up view with selective focus on foreground

Basswood trees have a wide range of temperatures that they can withstand, making them a popular tree for yards and meadows. However, just because the temperature is right doesn’t mean the soil or environmental conditions are right.

Basswood trees grow throughout the entire midwest and northeast regions. They can grow beyond Maine and into southeast Canada. Along the east coast, they will grow as far south as South Carolina.

Basswood trees also grow in Tennessee and the northern regions of Oklahoma!

Unlike other linden trees, the American basswood tree is native to the United States. The bigleaf, little-leaf, and silver lindens all originated in Europe. However, most linden trees now grow in the United States and Canada after being brought over from Europe.

How To Take Care Of A Basswood Tree

Whether you already have a basswood tree in your yard or you’re thinking of planting one, this stately tree is a brilliant choice for shade and wildlife viewing.

Some species of linden tree must be grown from a grafted rootstock, but basswood trees can be planted and grown from seed.

It is best to get a seed from a local basswood tree fruit. These seeds have the best chance of surviving as the parent tree is already acclimated to the soil and environmental conditions. It’s not recommended to get basswood seeds online.

Here are some steps you can take to ensure your basswood tree seed sprouts into a beautiful linden tree that will provide shade for years to come.

  • Step 1 find viable seed (s): Once you have found a local basswood tree and collected the fallen fruit, you’ll want to make sure the seed is viable. Discard the outer coating and toss the seeds in a bucket of water for about a day. Discard any seeds that float – these will not grow.
  • Step 2 wait for spring: Store your seeds in a sealed container in your fridge. Make sure the temperature remains above freezing. It’s recommended to add perlite to the container to keep the seed moist and encourage germination. The Valley Garden’s Organic Perlite for All Plants is a superb choice.
  • Step 3 plant your seeds: Plant your seeds once the threat of frost has passed. Create a ½-inch deep hole, place ¼ inch of potting soil down, and then place the seed on the potting soil. Fill the remaining ¼-inch of the hole with the rest of your potting soil.
  • Step 4 care for your seeds: Water the soil so that it is moist to the touch but allow the soil to dry between waterings. Keep a lookout for squirrels and other digging animals that will dig up your seeds.
  • Step 5 care for your sprout and sapling: Once the seed sprouts, you’ll want to take extra care to keep animals and insects from destroying the sprout before it establishes into a sapling. 

Use coverings like Voglund Nursery Mesh Tree Bark Protector to keep squirrels, deer, and other troublesome critters from stripping the bark off of young saplings. 

Note: Basswood tree seeds can take up to 3 years to germinate. If you don’t see any signs of life after the first year, don’t be too concerned. If after 2-3 years there is still no growth, your seed will most likely not germinate and should be discarded.

Final Thoughts

It can be confusing when you search the internet for basswood tree and the first thing that pops up are the words ‘linden tree.’ 

I hope this article has helped shed some light on the difference between a basswood tree and a linden tree. But, just for a quick recap –

Here are the major differences between basswood and linden trees:

  • Name – basswood is a species of linden tree
  • Growing regions – USDA hardiness zones
  • Height at maturity
  • Uses
  • Leaves – color, length, presence of hairs
  • Pests
  • Growth rate
  • Tolerances
  • Soil Preferences

Best of luck on your tree journey!

References

Edmunds, B., Fick, B., & Lupcho, P. R. (2015). Fire-resistant Landscape Plants for the Willamette Valley. Oregon State University Extension Service.

Hanberry, B. B., Palik, B. J., & He, H. S. (2013). Winning and Losing Tree Species of Reassembly in Minnesota’s Mixed and Broadleaf Forests. PLOS One, 8(4).Tenche-Constantinescu, A. M., Varan, C., Borlea, F., Madosa, E., & Szekely, G. (2015). The symbolism of the linden tree. Journal of Horticulture, Forestry and Biotechnology, 19(2), 237-242.

Zasada, J. (2003). Basswood, linden, lime-tree. Minnesota Better Forests, 8(1), 12-13

Pine trees can be great. They offer shade during hot days, look majestic as they tower overhead, and can provide privacy and protection from strong winds. Sometimes, though, they can be a pain and you may need to cut your pine tree down!

You may need to cut down your pine tree if it’s leaning too far in one direction, the tree is no longer healthy, it’s creating a big mess, or it took some damage from a storm and will end up coming down on its own. If you can wait to cut it down, you should get a better price in the Fall or Winter.

Though trees often hold sentimental value to homeowners, there are good reasons for removing them. Possibly because they have become a problem to property or people, but there could be other reasons as well. Keep reading as we go over all the reasons to cut down your pine tree!

Maybe Your Pine Tree Just Needs A Trim

Often, trees need to be pruned to stay healthy. Pruning can open up the tree to allow plenty of airflow through all the branches and reduce fungal afflictions. It can also allow sunlight to penetrate lower branches so the tree doesn’t grow too top-heavy. 

Proper pruning can also keep your trees living longer. For trees that aren’t too tall, and only need a bit of pruning, try out this Sun Joe 10-inch 8.0 Amp Electric Multi-Angle Pole Chain Saw. It is completely electric, so you won’t have to mix gas and oil, and the telescoping pole will help you reach higher branches.

For trees that require large limbs to be cut, if they are very tall, or if you don’t have much experience trimming trees yourself, consider calling a professional to tackle the big jobs.

Now, with that out of the way so you DON’T just go lop down that beautiful tree, let’s get to the good stuff.

If you do decide you need to go the pruning route, you should contact an arborist as well for large trees. Take a look at our guide on the best time to prune large trees if you fancy!

9 Reasons You Should Cut Down Your Pine Tree

Big pine on a glade on the background of mountains and blue sky.

Pine trees are fast-growing, magnificent trees, but they can become a nuisance or even a larger problem.

When these trees pose too much of a risk or become too expensive to maintain, you’ll need to have them removed by a professional tree service. Let’s get to it!

Your Pine Tree Is Too Close To Your House

Whether you planted the tree yourself when it was only a sapling, or you bought your house with a nearby pine tree, if it is too close, you should have the tree removed. You should plant trees no closer than 15 to 20 feet to a structure. Trees that can get very tall will need more distance from the house. 

The roots from pine trees aren’t considered invasive, so they shouldn’t cause foundation damage under normal circumstances. The problems that arise from pine trees that are too close to structures are limbs falling, pine needles getting everywhere, and trees falling onto the house.

If you have a sapling, then you might be able to transplant the tree, but once established, moving it becomes less feasible.

If you’re still thinking of cutting down your pine tree, you can take a look at our guide on what to do with pine wood here!

Remove A Pine Tree After Irreversible Storm Damage

Storms can severely damage a pine tree. Hail, ice, snow, lightning, and wind damage can cripple even the strongest of pine trees.

For instance, did you know that pine trees are one of the most likely trees to get struck by lightning?

They are a softer wood compared to most deciduous trees such as oaks, maples, and birches, so storms can damage pine trees fairly easily.

Ice and snow can become too much for the limbs to bear, causing them to break off, while powerful gusts of wind can snap trunks, or leave them structurally unsound. Whatever has caused the damage, after a heavy storm, inspect your pine trees to see if they need to be removed.

Trees that have damaged trunks or lost large limbs might have to be cut down because they lost the original structural integrity. After losing limbs, pine trees can become lopsided and end up falling.

Sometimes storm damage can leave a tree susceptible to insect damage and disease. When a tree cannot heal itself properly, it becomes a target for pests and fungus, which can weaken it further.

After your pine trees take storm damage, you might need to get an arborist out to inspect it thoroughly to see if it is healthy enough to survive or let you know the tree needs to come down. 

You May Have To Remove Your Pine Tree After Insects Or Fungus Have Settled In

Healthy pines can usually fight off most insect invaders with sap or other defense mechanisms. However, when a tree is stressed or unhealthy, it has trouble fighting afflictions and bugs. 

Stress on a tree can happen during times of drought, if the soil is severely lacking nutrients, or the tree isn’t getting enough sunlight.

Damage to the tree or improper trimming techniques can also cause an otherwise healthy tree to become weak and susceptible to illness and insect invasion. 

According to Purdue University, insects such as borers that attack vigorous, healthy pine trees can be repelled through a strong sap flow. Healthy trees have the energy to fight off afflictions these boring insects can bring as well.

Basically, pine trees that get ample sun, water, and nutrients can defend themselves very well, but if your tree already has issues it may be too late.

Bark beetles and borers can be identified by the small holes you might find around the main trunk and sometimes in larger branches. You might also see small piles of sawdust underneath the holes.

These insects dig into the tree, underneath the bark where the living tree tissue grows and there they tunnel through the tree and lay eggs.

The larvae then travel through the living tree tissue, eating it and disrupting the nutrient and water flow of the tree. When the damage is extensive enough, trees have trouble providing nourishment to the top of the tree.

Another indication of an insect invasion is woodpeckers. These birds eat insects such as bark beetles and borers, so if you find your pine trees are suddenly attracting a lot of these birds, you might have a bug problem.

A quick side bar, we just cut down 3 rotted pine trees in our backyard that were FILLED with woodpecker holes. The trees were already rotted, but the woodpeckers definitely had their way with it.

If you notice strange coloration in the pine needles or premature browning followed by more than normal needle drop, your tree may have fungus! Wilting needles even though the trees are getting plenty of water can be a sign of a larger issue.

Fungal issues in trees can generally be treated with fungicides, while others reside in the soil and can be extremely difficult to eradicate. Some fungicides are available through retail outlets that can treat some of these maladies, but you’ll have to know exactly what fungi are on your trees. To know for sure, you should always consult an arborist who can recommend the proper treatments.

When insect damage or fungal problems have become too expensive to treat, or you’ve fixed the problem but it’s come back, cutting the pine tree down may just be the best option at this point!

Your Pine Looks More Like The Leaning Tower Of “Tree-za”

Leaning pine on a cliff on the beach. Landscape with clear Sunny weather.

Tall, top-heavy pine trees don’t have the same sturdy strength as oaks. When too much pressure is applied to pine tree trunks, they can snap and fall.

Most pine trees have long taproots that reach deep into the soil to anchor it and get nutrients. When something topples a pine tree, most times, the trunk breaks, leaving the roots still attached to the ground.

Trees that have a pronounced lean to them can be a threat to property and anything around them. Accumulating snow or ice can send them falling, or high gusts of wind can finish them off.

When a tree has become lopsided for some reason, or it is simply leaning too far, there’s not much that can be done to correct the problem. Sometimes corrective trimming can fix the lopsided tree, but a “leaner” will only continue to get worse until it ultimately falls.

Another problem some pine trees face is they get very top-heavy. As pine trees grow taller, their lower branches can weaken and fall off. This happens mainly because they stop getting enough sunlight to sustain them.

The top canopy of the tree continues to grow taller, leaving a long trunk that is susceptible to breaking. When your pine trees get very tall, or they take on a lean, you might need to have them taken down to prevent any unwanted falling trees.

Maybe You’re Tired Of Cleaning Up The Pine’s Mess

Pine trees can be messy. They drop needles year-round, especially during the fall, but there are also issues with pollen coating everything, pinecones you have to remove every time before you mow, and the constant barrage of small limbs and twigs.

If you have a pine tree anywhere near your house, you have probably had to either clean the gutters yourself or have hired someone to clean them out. Pine needles will clog gutters quickly, and they drop all year long, unlike most deciduous trees that drop their leaves during the fall.

Even if you have a type of leaf guard on your gutters, pine needles seem to find their way in. Obviously not as much as without them, but they are notorious for getting everywhere. Pine tree pollen can also accumulate around the leaf guards and will need to be wiped periodically for them to work most efficiently.

Aside from having to pick up pine cones and small branches before mowing, to keep any type of grass growing underneath a pine tree, you’ll have to manage all the needles that fall. Too many needles on the ground can choke off the grass and leave the area underneath the pine tree a barren wasteland.

If you’re completely exhausted because of the constant cleaning battle between you and the pine tree, it’s probably time to consider having those pine trees evicted from the property.

You Can’t Get Any Grass To Grow Under Your Pines

It can be difficult to grow grass under any type of tree, but there’s just something about a pine tree that increases that challenge to near impossible. The patch of brown needles and dirt that always accompanies the perimeter of your pine trees can mar a beautiful lawn.

Many people think grass can’t grow under pine trees because the needles raise the acidity of the soil, but that is a myth.

The University of New Hampshire busted the myth that pine trees make the soil acidic, they say; though it’s true soil near pine trees is often acidic, that’s because pine trees will grow better in acidic soil, but they do not create acidic soil themselves. Sometimes nothing will grow underneath a pine tree because of shallow roots, too much shade, and pine needles can quickly smother other plants.

Pine needles are slightly acidic, but when they break down, microorganisms neutralize the acid. That’s one reason pine mulch won’t lower the pH of the soil and is a good mulch option for trees and flowerbeds.

You can learn more about why trees sometimes prefer acidic soil here.

The main reason grass won’t grow under pine trees is because it doesn’t get enough sun and rain. Most grasses require plenty of sunlight and a lot of water to stay healthy. Pine tree canopies are often compact, very shady, and let very little water seep through when it rains.

The needles that drop also act as a natural mulch barrier to block out still more sunlight and choke off any chance for grass or weed seeds to take root.

Some pine trees also have shallow roots that can limit how much soil is available for plants to grow underneath them. Combine all these reasons, and you often get a miniature dust bowl underneath your pine trees.

Since pine trees love acidic soil, your soil might have a low pH, which limits nutrients for grasses and other plants. To give your grass a fighting chance, try a lime soil additive such as Jobe’s Additive De-Acidifier. This pelletized lime will help to neutralize the soil to give grass a fighting chance. 

If you’ve already tried over and over to plant grass or flowers underneath your pine tree but nothing takes, maybe it’s time to get it out of there. 

The Pine Tree Is Already On Its Way Out

Trees can live for hundreds of years, but like everything else, they only have so long before they kick the bucket. A tree that has ended its cycle can be a problematic thing. It dries out and becomes brittle, which can cause large chunks to fall, or send the entire tree falling. 

When you know the tree is no longer flourishing, have it removed before it can do any damage.

Rather, if your pine tree is just not growing, then that’s another issue entirely.

Your Pine Tree Costs Too Much To Maintain

Trees can certainly hold sentimental value. If your grandparents planted it, you remember growing up, playing around it, or you had a tire swing in it, a tree can hold a lot of memories.

For these reasons and more, you may want to do everything you can to save it. Afflictions and insects can sometimes be treated. Mild storm damage can be repaired. However, if the pine tree costs too much to keep alive, maybe it’s time to say goodbye to an old friend.

It’s unfortunate, but it happens. Although, you can look at it as an opportunity to replace the old, worn-out tree with another one, and start making new memories with a brand new tree. 

Have The Pine Tree Removed If It’s Too Close To Power Lines

Trees and power lines don’t mix, but they often come in contact with each other. Tree branches can put a strain on the electrical lines, or snap them when branches fall, so they are often cut back away to prevent this.

Sometimes new lines go in, and it’s the tree that suffers. Power companies will cut away the tree to make way for the new power lines, which often leaves the tree looking like they butchered it. While some trees can recover from aggressive trimming, most times they are left in a weakened state.

Trees can also become electrified if they come in contact with exposed electrical lines. Tree branches can wear away the insulated coating around the wires, and when this happens, the tree can carry a current.

When trees and power lines combine, the best thing to do is have the tree removed. Call a professional tree service to manage this task, because they will probably have to contact the electric company to have the power turned off for safety, while they cut it.

You can also try to get the power company to pay for this venture as its been known to happen!

When Is The Best Time To Cut Down Your Pine Tree?

Felling big coniferous pine tree logs at forest landscape.

If your pine tree poses a threat to health and safety, then it should be professionally removed as soon as possible. If the tree has sustained storm damage, if it’s leaning over too far, or has lost its structural integrity, don’t wait to have it cut down.

When the tree is fairly healthy, and it doesn’t appear to be ready to topple at any given moment, then you can wait for a good deal from a professional tree company.

There’s a busy season and a slow season for the tree removal business. During the warm months, and especially after some heavy storms have rolled through, you’ll probably end up paying more for your tree removal. But if it’s safe to wait a little while, call them up during the late fall and winter months.

When business is slow, you can probably find coupons or specials that can save you money. They need the business to keep everyone working and paid so you could find some good deals if you ask!

This Is All Wrapped Up!

Pine trees are grand to have around your property. They can make your landscape look inviting and aesthetically pleasing, remove carbon dioxide from the air, and they can offer shade or a buffer to heavy winds. 

Unfortunately, sometimes it’s better to have them removed. If they are constantly battling insect invasion or fungal issues, they should be taken down. Trees that are too close to your house, other structures, or too near power lines might have to be cut down as well. 

Pine trees that are leaning, have storm damage, or are no longer living should be removed as well.

Whenever you have a tree removed from your yard, consider replacing it with another tree. You can always find smaller trees that don’t get as tall or maybe replace them with ornamental trees that have beautiful, striking features.

Best of luck with your pine!

References

Vicente, Cláudia SL, et al. “Insights into the role of fungi in pine wilt disease.” Journal of Fungi 7.9 (2021): 780.

Boyd, I. L., et al. “The consequence of tree pests and diseases for ecosystem services.” Science 342.6160 (2013): 1235773.

Cheyney, E. G. “The roots of a jack pine tree.” Journal of Forestry 30.8 (1932): 929-932.

Yang, Jae E., et al. “Soil nutrient bioavailability and nutrient content of pine trees (Pinus thunbergii) in areas impacted by acid deposition in Korea.” Environmental monitoring and Assessment 157.1 (2009): 43-50.

Citrus trees are often associated with warm, tropical climates like Florida, Hawaii, and California. In these areas, winter isn’t some cold, dark season where trees lose their leaves and go dormant. Most citrus trees are evergreens and keep producing fruits all year!

Some of the most common citrus trees that are evergreens include orange, lime, lemon, mandarin, calamondin, grapefruit, kumquat, tangerine, and pummelo. Within’ each of those broad citrus tree categories are specific types of citrus trees such as Valencia oranges or Meyer lemons.

Below we’ll go over the 9 most common citrus trees that are evergreens and where they grow. Let’s get to it!

How Can Citrus Trees Be Evergreen?

Before we get into the specific types of citrus trees that are evergreen, let’s answer the question of why they are evergreen?

Citrus trees are evergreen because they grow in warm climates. Trees that drop their leaves do so because cold conditions make keeping the tree alive more difficult. 

Dropping leaves is a way to conserve energy so they do not need to deliver nutrients to each leaf and can keep that food and energy for the main part of the tree the trunk and branches.

Because most citrus trees never see snow, they can keep their leaves throughout the year and don’t have to worry too much about conserving energy.

However, one minor adaptation that citrus trees have is that their leaves are typically smaller than those on deciduous trees. This conserves energy and is just one more reason why citrus trees are evergreen.

According to Clemson University, the satsuma mandarinkumquats, and grapefruit are some of the most cold-hardy citrus fruits.

But wait, what about the evergreen trees that grow in cold climates? Not all evergreen trees live in tropical climates. Some have special adaptations that allow them to survive cold conditions AND keep their leaves. 

Citrus trees are not so lucky and must live in warm tropical or subtropical climates to keep their leaves all year.

Evergreen Orange Trees

Like most citrus trees, oranges feel at home in sunny, warm, tropical climates. They originated from Asia but are now grown in many different countries including the United States.

In the US, oranges can grow in portions of California, Alabama, Georgia, Louisiana, Mississippi, Texas, Arizona, and Florida. Florida produces the most oranges, which comes as no surprise since Florida’s state fruit is the orange!

But when we say ‘orange’ we’re not referring to just one single fruit. There are tons of varieties of oranges. Some of the most common orange variates include:

  • Sweet orange
  • Bitter orange
  • Blood orange
  • Valencia orange
  • Navel orange

According to the University of Florida, navel oranges are the most popular orange cultivated in Florida because they can be eaten fresh or used for orange juice. Valencia oranges are used extensively for orange juice.

Orange trees can grow up to around 50 feet but typically reach around 25 feet. They prefer temperatures to be between close to 55℉ and 100℉.

These subtropical trees can survive brief cold periods but are often injured and damaged if exposed for too long. They thrive in hardiness zones 9-11.

Indoor planting is possible for orange trees, but don’t expect the fruit to develop very fast. It can take up to a year for an orange to fully develop. However, the benefit of planting indoors is that you can live in the cold north and still grow fresh oranges!

There are a few different suggestions on how often you should water oranges, but many people (including us) suggest to water them every few days!

Lime Trees Are Evergreen

lime fruits on the tree

Limes are used in a ton of different stuff. Of course, key limes are used in pies, but limes are also used in beverages, food dishes, and as a cleaning agent.

These versatile fruits are thought to have originated in southeast Asia, but their origin is not 100% known. The most common lime is the Tahitian lime (also known as Persian lime), which is what you will find in grocery stores. Kaffir and Key Lime are two more common lime varieties. 

Most lime trees thrive in hardiness zones 9-11, similar to orange trees. However, unlike oranges, limes are not commercially grown in the United States. At least, not in numbers significant enough to report.

According to the United States Department of Agriculture (USDA), Florida used to be a major commercial lime producer. An unfortunate combination of canker afflictions, tropical storms, and population increases created a trifecta that halted commercial lime production in Florida for good.

Now, lime trees grow in places like Mexico, Brazil, and Australia. Growing in such warm climates means there’s no need to drop leaves to go into a dormant period. This is the main reason why lime trees are evergreens.

That being said, homeowners can still grow lime trees in their yards if the conditions are right. Limes can also be planted indoors in pots.

Lime trees typically grow to about 20 feet. They love soaking up the sun and should be planted in well-drained soils. Lime trees can produce limes after their first year but produce more limes the older they are!

Lemon Trees Are Surprisingly Evergreen

Lemon trees like their environment the same way I do – never cold! They are one of the most cold-sensitive citrus trees and will not do well in any place that sees temperatures below freezing for more than a few hours.

A study published by ISHS looked at comparative cold tolerances between lemon trees, grapefruit trees, orange trees, and mandarin trees. When exposed to freezing temperatures for 10 hours, they found that lemon damage was the most severe of any other citrus tree.

Lemon trees originated in India and were brought to the United States around the late 1400s. According to the Wisconsin Department of Public Instruction, lemon trees were first cultivated in Florida and California in the US.

There are a few different varieties of lemon, some of the most popular including:

  • Meyer lemon
  • Ponderosa lemon
  • Eureka lemon

Meyer lemons are the most cold-hardy of the lemons as they are thought to be a cross between a true lemon and a sweet orange. No matter what kind of lemon tree you have, you’ll want to make sure it’s protected in cold weather.

You can use a shrub jacket like Gardaner Plant Covers Freeze Protection & Plant Frost Blanket to keep your lemon trees warm during cold snaps. This product is 85” X 75” (W X H), perfect for small lemon trees!

Depending on the variety of lemon, it will bear fruit at different times of the year. For example, Meyer and Ponderosa lemons bear fruit in the fall and winter, while Eureka lemons bear fruit in the spring and summer.

Along those same lines, the shape of the fruit will depend on when the tree bears fruit. Summer-bearers like Eureka lemons will have a rounder shape while Meyer and Ponderosa will be more oblong because they produce in the winter.

Lemon trees are a little more difficult than other citrus trees to grow indoors, but it can be done! They have a very dependable growth and fruit-bearing timeline. In fact, They will produce fruit after about three years, and once the trees flower, it takes between 4 and 12 months for a lemon to develop.

In the United States, lemon trees are grown commercially in California, Arizona, and to a lesser extent, Florida.

If you’d like to learn more, take a look at our piece and breakdown of the full lemon tree growth timeline!

Yes, Even Mandarin Trees Are Evergreen!

ripe mandarines growing on the tangerine tree

Mandarins are one of the four ‘core’ ancestral citrus species according to the University of Wisconsin-Madison. All other citrus fruits were derived from mandarins along with citron, pomelo, and papeda.

Mandarins originated from China and are closely related to satsumas, clementines, and tangerines, all of which appear as small oranges. They were first established in New Orleans and eventually made their way to Florida and California.

According to Purdue University, Alabama, Florida, and Mississippi are the main states that grow mandarins. They also grow in Texas, Georgia, and California.

These tiny orange trees grow in similar conditions to their bigger cousins, preferring temperatures between 55℉ and 100℉. They will go through a dormant period and sometimes bear fruit in alternating years.

As with other citrus trees, there are a variety of different mandarines including:

  • Changsha
  • Emperor
  • Willow-leaf

The Changsha mandarin is the most cold-hardy of the mandarins, surviving temperatures as low as 4℉ without perishing.

Other names for mandarin oranges include ‘cuties’ and ‘halo’ oranges, but these aren’t different varieties, just a nickname given to mandarins because of their small appearance and easy-to-peel skin.

Mandarin trees grow in hardiness zones 9 through 11 and will take about four years to bear fruit, depending on the variety. It takes a mandarin tree between six and eight months to develop a mandarin big enough to harvest.

Calamondin Trees Are Considered Evergreen

If you’ve never heard of calamondin fruit, don’t worry, you’re not the only one! Calamondin trees are grown more for their ornamental value than for any fruit they bear.

Calamondin trees grow acidic fruit that can be used similarly to lemons such as:

  • Marmalade
  • Frozen juice
  • Beverage flavoring
  • Calamondin-aide
  • Cakes & Pies
  • Squeezed over seafood

According to Texas A&M University, these trees will bloom and produce fruit all year long and go through 4 to 5 growth periods per year. In most cases, the tree will bear more fruit than you need.

Homeowners in hardiness zones 8A through 10B can enjoy these fruitful trees in their backyards. 

Calamondin trees originated in Southeast Asia and are a cross between a mandarin orange and a kumquat. Just like other citrus trees, calamondin can grow in all of the southern-most states of the United States and California.

However, because they are the most cold-tolerant of any true citrus tree, they can creep up into Arkansas, South and North Carolina, Coastal Virginia, Utah, Oregon, and Washington.

According to an article in the International Society for Horticultural Science, temperatures around 86℉ during the day and 77℉ at night promote the fastest blooming for calamondin trees.

These little trees also reach a full height of only 12 to 14 feet, making them the perfect patio plant if you keep them pruned

They prefer sunny conditions but can tolerate partial shade. Similarly, they prefer warm temperatures but will survive down to 20℉.

Like almost all citrus trees, calamondin trees will self-pollinate, meaning you only need to plant one tree to get fruit! Fruits take about a year to mature, but because the calamondin tree goes through so many different growth periods, you’ll have fruit at all different stages all year long.

When harvesting calamondins, it’s important to clip the twig the fruit is growing on as opposed to picking the fruit off. Picking can damage the calamondin, which can spoil them within a day. Use pruning shears like Fiskar’s Bypass Pruning Shears to get a clean cut and promote future growth!

Evergreen Grapefruit Trees

Ripe Grapefruits On An Evergreen Citrus Tree

The grapefruit we see today is not at all what grapefruit looked like in the beginning. This fruit evolved as a mutation from the pummelo fruit and originally had white flesh, not red, and many seeds.

Now, this delicious fruit is near seedless with an orange peel and red flesh and is enjoyed in beverages, fruit cups, fruit salads, and eaten by itself at breakfast. 

Grapefruits were first described in Barbados of the Caribbean Islands. In the United States, grapefruits made their first appearance in Florida but quickly moved onto Texas, Arizona, and California.

Just like oranges, grapefruits grow in hardiness zones 9 to 11, meaning only in the extreme southern and southwestern states of the US.

There are several different varieties of grapefruits, some of the more popular being:

  • Ruby Red
  • Henderson
  • Rio Red
  • Duncan
  • Redblush
  • Marsh

According to Texas A&M University, grapefruits grow best during hot days and warm nights as opposed to hot days and cool nights. The secret is in the sugar content, which tends to be higher when grown on hot days and warm nights.

Grapefruit trees need well-drained soil for maximum growth and prefer full sun. They are not very cold tolerant but have been known to bounce back even after below-freezing temperatures. 

An article in the Journal of Food Chemistry found that chill injury can occur at temperatures as high as 53℉ but the damage was minor. At 35℉, the chill injury was far more severe.

Temperatures play an important role in determining the characteristics of a mature grapefruit. Colder temperatures and arid climates promote a tough peel, while humid, warm temperatures promote a thin peel.

Kumquat Trees Never Lose Their Leaves

Kumquat trees are one of the smallest evergreen citrus trees and are the smallest citrus fruit.

The trees only reach a height of about 8 to 10 feet. They’re used as ornamentals in many tropical and sub-tropical yards but also produce edible fruit!

The kumquat looks like a small orange and is very aromatic. It’s used in beverages and as toppings on food!

Like many citrus trees, the kumquat originated in China. Today, it is grown in hardiness zones 9-10, with most growth being in Florida, California, Alabama, and Louisiana. 

Kumquats are a peculiar citrus tree in that they can withstand very cold temperatures, down to 10℉. 

According to the University of Arizona, during this time the kumquat tree enters a state of dormancy and will remain in this state even after warm weather resumes for several weeks. That being said, kumquat trees prefer hot temperatures between 80℉ and 100℉.

Just like our other citrus fruits, kumquats have a few varieties with different characteristics:

  • Meiwa
  • Nagami
  • Hong Kong

Kumquat trees are great to have as ornamental trees. They can sometimes produce fruit after the first year but in other instances can take 4 to 5 years before fruit can be harvested from the tree.

Tangerine Trees Keep Their Foliage Year Round

We may have misled you a little bit with this one. Tangerines are a type of mandarin, which we already talked about.

To break it down, mandarins include satsumas, tangerines, and hybrids like the tangelo. However, in some cultures, tangerines are a completely different fruit and are considered a different species.

Either way, tangerine trees prefer lots of sun and are slightly tolerant of cold temperatures. They can survive in zone 8 but do best in warmer, subtropical, and tropical climates.

Both the kumquat and the tangerine tree cannot be planted from seed. Instead, you’ll want to purchase one from a nursery that’s already been grafted onto a rootstock. From here, you can plant them in a pot if you live in colder climates or outside in warmer climates.

In the United States, most tangerine trees are located in Florida, California, Texas, Georgia, and Alabama. Because they are hardier than other citrus trees, they have a similar range to calamondins than to mandarins. Tangerines are originally from southeast Asia.

Pummelo Trees Are Evergreen

closeup of green pomelo fruits on a tree

Opposite of the kumquat, the pummelo is the largest citrus fruit. The pummelo tree itself can grow up to 50ft tall but averages around 20 to 30 feet.

The pummelo tree is originally from Malaysia and Southeast Asia. It grows in hardiness zones 9 through 11 in the United States. Unsurprisingly, it is mostly cultivated in Florida and California. However, it can still thrive in all of the southernmost states of the U.S. as well.

Pummelo trees have a ton of variations, the list being longer than that of any citrus fruit tree. Some of the most well-known variations include:

  • Chandler
  • Double
  • Hom Bai Toey
  • Red Bantam
  • Tahitian

According to Purdue University, pummelo trees prefer temperatures in the low 80s and enjoy being at low elevation, close to the sea. Pummelos can even tolerate salty, brackish water that gets pushed in by the tides.

In the United States, pummelo fruits grow ripe from November through February and can be picked in the spring. In more tropical regions, pummelos can produce up to 4 crops per year.

Pummelos can be grown from seed and grown indoors but they are one of the hardest citrus trees to grow indoors and require special lighting or a greenhouse to truly flourish.

Much like the mandarin, pummelos are one of the original citrus fruits that all others are derived from.

That’s All For Now!

There you have it. Nine citrus trees that are evergreens! Citrus trees produce sweet, sour, and sometimes bitter fruit that can be used in many dishes, beverages, and desserts.

Citrus trees are evergreen because they originated from warm, tropical climates where the threat of winter was nonexistent. Dropping leaves is a tree’s way of preserving energy in winter, but citrus trees do not have to do this because they do not experience winter.

Now for a quick recap –

The 9 most common citrus trees that are evergreens include:

  • Oranges
  • Limes
  • Lemons
  • Mandarins
  • Calamondins
  • Grapefruits
  • Kumquats
  • Tangerines
  • Pummelos

Most citrus trees grow in the southern-most states of the U.S., particularly Florida, California, Texas, Alabama, and Louisiana. However, some can be grown in colder regions if grown indoors in pots.

Best of luck on your fruit tree journey!

References

Conesa, A., Nicolas, J. M., Manera, F. J., & Porras, I. (2015). Frost Damage in Lemon Orchards In The Province of Murcia. International Society for Horticultural Science1065, 1417-1422.

Lado, J., Gurrea, A., Zacarias, L., & Rodrigo, M. J. (2019, October 15). Influence of the storage temperature on volatile emission, carotenoid content, and chilling injury development in Star Ruby red grapefruit. Food Chemistry295, 72-81.

Lai, Y.-T., & Chen, L.-Z. (2008). Effect Of Temperature On Calamondin (Citrus microcarpa) Flowering And Flower Bud Formation. International Society for Horticultural Science773, 111-115.

Pollack, S. L., Lin, B.-H., & Allshouse, J. (2003, August). Characteristics of U.S. Orange Consumption. Electronic Outlook Report from the Economic Research Service305(01), 1-17.

Let’s face it, most of us have at one time or another burned pallets, leftover construction materials, or other “suspect” wood that contained nails and other sorts of fasteners. However, you really shouldn’t burn old wood with nails in it for quite a few reasons – even if its outside!

You shouldn’t burn wood with nails as it’s usually from construction material, which may have been treated with chemicals. Campfires can reach around 600°F (but may be hotter) while steel doesn’t melt until around 2600°F, leaving nails scattered around the fire pit ash afterwards.

When burning wood either in a campfire, wood-burning stove, or fireplace, you should only be using local, split, proper firewood, and not anything with nails in it. Let’s go over the 9 reasons as to why you you shouldn’t burn wood with nails in it and what to do instead!

Burning Wood With Nails Can Cause Them To Fly Out

It seems like the natural thing to do. You have some old pallets lying around behind the shed and you need to get rid of them. Maybe there is a pile of wood debris that you’re not exactly sure what to do with, so you burn it just to get it gone.

Wood that contains pockets of sap or is particularly wet can often pop when burned. Some wood varieties throw more sparks than others, and often these are softer woods like pine, which are used as building materials.

This example might sound like that one in a million kind of chance, but I’m sure we’ve all witnessed or experienced something with similar odds. The more the wood sparks, the higher of a chance this has of happening especially if smaller nails were used!

Again, this has a higher chance of happening with smaller nails, but still, don’t take the chance.

You can read our guide on the things to check before using dead trees as firewood here if you’re thinking of using old wood!

The Nails Won’t Fully Melt And Get Left Behind

Most fires are not hot enough to melt nails. According to information from the University of Illinois, campfires can reach around 600°F.

Of course, that can definitely increase depending on certain types of wood, how much oxygen is present, and other sorts of variables.

Steel, on the other hand melts at around 2600℉ – 2750℉, according to information from the University of Washington, so no matter how hot you get your fire, there will be things leftover. 

Inside a chimney or your wood-burning stove, you can simply remove these after the coals are cool enough, but how many of us stop to clean up and dispose of our campfire coals?

Burning wood with nails can leave them behind to become an issue for others that use the fire pit afterwards. In addition to nails, there could be staples, screws, or other bonding agents that could be quite sharp.

When burning wood for campfires, most parks, and outdoor recreation areas sell firewood and recommend you buy their own for many different reasons. It’s just a safer bet to burn proper firewood at your campsite.

Not to mention, the threat of transporting insects, but that’s a different reason altogether. 

You can also search for firewood around your campsite.

That way you don’t have to worry about burning the actual nails or transporting potentially invasive insects. To help the experience, use this Canvas Log Carrier Bag. It can be difficult to carry all that found firewood back to the site. This carrier bag can help to make fewer trips with more wood each time. 

The California Department of Parks and Recreation has made ground fires illegal because they have become an issue for visitors.

Their beaches have been left with soot, coals, nails, and other debris because people have burned lumber and pallets leftover from construction sites. These leftover nails, staples, and other perils get buried in the sand and can cause issues when they resurface!

So, clean up your fire!

Old Pallets Have Nails

Pallet Against White Wall With Nails In It

Pallet wood has a ton of nails. The pallet manufacturing instruction manual must have a section that states to use an entire box of nails for each pallet

Again, if you do a quick search, you’ll have plenty of people stating they have and do consistently burn pallets, but we will strongly caution against it.

Yes, a lot of pallets are heat-treated; meaning they are heated up slowly to help dry them out and eliminate any potential insects.

The “but” is that pallets are often used for storage in facilities that have many different chemicals and solvents, some have been treated with chemicals that you don’t want around.

Pallets that are used to store chemicals could easily have absorbed them in the wood. These chemicals could be spilled out when being used. When they are burned there’s no telling what could be released into the air.

Again, many people will argue its fine since its outdoors, but it’s better to just get some old proper firewood as you’ll still be near it.

Pallets can also be treated with methyl bromide.

This pesticide has been known to affect the ozone layer, and to be very harmful to humans according to the EPA.

Though this chemical isn’t used as much, you don’t know how old the pallet is, and some pallets aren’t stamped with how they were treated. 

Construction Materials Shouldn’t Be Burned

Wood with nails in it often comes from construction sites or home renovation projects. These types of woods shouldn’t be burned because most construction materials are treated with chemicals or have been stained or painted.

Treated wood is usually used for outdoor projects like decks. This wood when it’s new has a greenish tint to it. This treatment helps to prevent rot and insect infestation.

Burning treated lumber can release construction chemicals into the air. Not only that but some of these chemicals can remain in the coals, which then can leach into the soil and groundwater.

When wood is painted, depending on how old it is, it can release lead which can cause health problems from prolonged exposure. Though lead paint was banned in 1978, many houses still contain lead paint.

According to the State of Washington Department of Ecology, it’s important to dispose of treated wood properly. Do not burn it in open fires, wood-burning stoves, or fireplaces.

When burned, chemicals can get released into the air or stay behind in the ash. That contaminated ash can then leach into the environment and contaminate soil and water nearby.

Burning Galvanized And Treated Nails Releases Chemicals

As technology advances, so does the treatment of fasteners. Nails and screws can be treated with chemicals, coatings, or paints to make them longer-lasting, especially in outdoor settings.

When you burn wood with these nails in them, again you could be releasing smoke into the air, or chemicals into the ground. Some nails are treated with cadmium, which when it gets into the ground can harm plants and microorganisms that are beneficial to the soil.

Cadmium is a simple element that can’t be broken down into less troublesome substances in the environment. Once it gets into the environment, it will stay there.

If you’re planning a fire, take a look at our guide on the 9 types of firewood that produce the least amount of smoke!

Burning Wood With Nails Causes Potential Damage To Wood Burning Stoves

Wood-burning stove manufacturers state in their manuals to only burn proper wood and not wood scraps. Nails present in the wood can possibly get into the working, moving components of your stove. 

What would happen if a nail fell down into the motor that drives the fan, or it got tossed around in the fan blades? This is another worst-case scenario, but they do sometimes happen.

Again, this is a case of better to be safe than sorry; you wouldn’t want the additional cost of repairing your stove. 

When wood with nails is burned in a wood-burning stove, these nails can easily fall down or past the grates. Wood-burning stoves can get significantly hotter than campfire or chimney fires.

These increased temps could cause the nails to fuse to the metal parts of your wood burner, it’s just another thing you have to cleanout. 

Remember how we mentioned the popping wood earlier? The wood could pop while in the wood-burning stove and send a nail hurtling toward the glass door. It may not crack the glass but it could cause a small crack that gets worse as it heats and cools.

If you need a good solid firewood for your wood stove, take a look at our piece on the slowest burning firewoods here!

Wood With Nails Is Often Low-Quality Wood

Wood with nails is often lower-quality wood.

When you get solid wood like hickory, oak (white oak firewood is better than red oak, FYI), maple, or other hardwood firewood, you know that you are going to get plenty of quality heat from it. Wood with nails will probably be from pallets, construction projects, or furniture. 

This wood is of much lower quality than true hardwood firewood. Construction materials are often made from pine, which when burned doesn’t burn as hot or as long as hardwood firewood.

Pine also creates more creosote, which can build up in the chimney or vent pipes. 

Pallets contain thin boards that will burn fast, so you’ll end up having to constantly feed the fire with fresh wood to keep the fire going. Using proper hardwood will give you lasting flames and a good, clean bed of coals that can last through the night. 

I know it’s a cliche, but when it comes to firewood, you get what you pay for. Cheap wood is often low-quality, fast-burning, undesirable wood.

That being said, not all firewood is created equal, and you can burn high-quality wood that burns for a long time. You can learn more about different types of firewood and the best firewood to burn here.

If you have ever had trouble starting a fire, we all know blowing on it helps to get a small ember burning, but how many times has this taken forever even in the slightest wind?

Bypass that by using this INNO STAGE Wood Fire Air Bellows. When starting a campfire, sometimes it can be difficult to get a good flame going, but with the help of this bellows, you’ll have a good flame in no time.

You can also check out our list of the hottest burning firewoods if you want to keep your campfire temperature down a bit!

Leftover Nails Pose A Threat To Wildlife

While out camping, it’s an unwritten rule to have a campfire.

You need it for toasting marshmallows, making your coffee in the morning, and having the warming, crackling ambiance of an open flame while enjoying the great outdoors. 

Once the fire is out and you’ve packed up, the leftover ash can pose an issue to wildlife or other campers. Leftover nails can poke through paws, feet, or hands. Also, animals in the wild have been known to consume charcoal at times. 

Many animals instinctively eat charcoal left over from campfires. When wood with nails has been burned, wild animals could accidentally consume these items which, leads to a variety of issues from there.

How To Properly Dispose Of Wood With Nails

Stacked logs of firewood

Maybe you were thinking of burning the old wood with nails in it as a way to dispose of it. You no longer have a use for it, it’s taking up space or creating a cantankerous eye-sore, so you want to burn it to finally get rid of that ugly pile of scraps.

Before you do that, we have a few ways you can properly dispose of that pile of wood.

You may have to do a little research, but a lot of municipal waste departments will recycle or dispose of your construction waste. Contact your local waste department to find out. You may be able to drop it off to be recycled or even have curbside come pick it up for you.

Some waste departments will want you to cut the waste up into smaller pieces and simply throw it away in your regular curbside waste bin. Others will want you to drop it off at specialized waste areas.

It also depends on whether the waste is considered commercial or residential waste. Commercial waste is often debris that results from work done by professionals, such as carpenters and contractors.

Residential waste can often be thrown away with normal household waste, while commercial waste has to be treated differently. Again, contact your local waste management services to find out the proper disposal.

DIY’ers Love Repurposed Wood

Do you know anyone who likes to repurpose or upcycle old, seemingly useless “stuff”? I know of a few and they are always on the search for wood scraps and items most people throw away without a second thought. That pile of wood scraps might be a DIY’ers dream come true!

You could donate the old wood to someone else who can make good use of your junk, or you might even be able to sell it for a small price. These crafty people also love old pallets.

They can make everything from furniture to art, to wine racks, all repurposed from old pallets!

Offer up your scraps on a social media platform or online “yard sale” site, and you might not even have to get your hands dirty.

Have them come to you, then they’ll cart it away to make some amazing projects. Better yet, see if there’s something you can use it for and start your own repurpose trend. 

That’s A Wrap!

Fire With Sparks Coming Up

We know the chances of molten hot nails flying out from the fire in your direction can be astronomical, but it can still happen.

Still, there are many other reasons it’s simply better off not burning wood with nails. If you don’t know where your wood was sourced, then you never know what could be lurking inside, unseen. 

There are plenty of places and ways to find good, clean-burning firewood so that you don’t have to worry about chemicals, nails, or other hidden troubles In fact, we have several different articles concerning firewood you can check out.

References

Helsen, Lieve, and Eric Van den Bulck. “Review of disposal technologies for chromated copper arsenate (CCA) treated wood waste, with detailed analyses of thermochemical conversion processes.” Environmental pollution 134.2 (2005): 301-314.

Owoyemi, Jacob Mayowa, Habeeb Olawale Zakariya, and Isa Olalekan Elegbede. “Sustainable wood waste management in Nigeria.” Environmental & Socio-economic Studies 4.3 (2016): 1-9.

Struhsaker, T.T., Cooney, D.O. & Siex, K.S. Charcoal Consumption by Zanzibar Red Colobus Monkeys: Its Function and Its Ecological and Demographic Consequences. International Journal of Primatology 18, 61–72 (1997).

Have you ever noticed that in some new landscapes the base of the tree is buried? Into this weird-looking cone shape? Well, if you’ve seen it, erase it from your mind! We’re going to tell you just why you shouldn’t bury a tree base.

Burying the base of a tree stops the vascular flow of water, oxygen and nutrients from getting to the rest of the tree. This makes the more susceptible to ailments, fungus, and pests over time. To properly mulch your tree, evenly spread mulch around the tree’s base up to 4in deep.

In this article, we’ll explain why you shouldn’t bury a tree base and what to do instead. Keep reading to find out more!

So, Is It Okay To Bury The Base Of My Tree?

Child with parents hand holding young tree in soil together for prepare plant on ground,save world concept

No! You never want to pile any soil against the base of the tree! 

What do we mean and what does this look like? 

Burying the base of the tree isn’t the same as when you plant a new tree. It looks like a pile of mulch stacked around a tree trunk. This can look similar to a cone or a volcano and is often called a mulch volcano. This creates a multitude of problems for your tree and will eventually destroy it.

This can also look like mounds of mulch, or a cone shape stacked against the trunk of the tree. It’s not always done to all age trees, but if you’ve seen it, you’ve probably seen it around fairly young, and newer planted trees.

The weirdest part is that you’ll even see some landscapers doing this, which might make you think it’s okay and the thing to do, but we promise it is never okay!

Now, we aren’t saying to NOT mulch your tree but rather, we’re saying not to bury the base of the stump. Mulch is super great to have around your tree but is primarily beneficial for the roots.

Why Are Mulch Volcanoes Around Trees Bad?

This is a weird, yet popular phenomenon commonly referred to as volcano mulching. Volcano mulching is not good for your tree as it will create a number of issues down the road. 

Mulching is great for your tree, but piling it up into a massive mulch pile or volcano is not the way to go. If you create a “mulch volcano”, you are limiting the amount of oxygen that can happen between the roots and the soil.

Lack Of Nutrients Reach The Roots

Additionally, this mulch pile tells the roots to grow into the mulch volcano rather than into the soil creating a girdling effect. Roots begin to grow in a circle around the tree trunk eventually restricting the vascular flow of water and nutrients.

While you’re working outside in your yard, you’ll probably want to maintain your plants and trees. The Fiskars 394801-1003 PowerGear2 Bypass Lopper is an excellent choice.

These loppers can cut branches up to two inches thick, and cut them like butter. Because of their steel blades, they make cutting a breeze, smooth, and with the least resistance possible.

Causes Root Dehydration

Piling mulch against the tree trunk also causes root dehydration. When mulch compacts over time oxygen is unable to reach the tree’s roots.

So not only can the roots begin to girdle, but as the mulch degrades and roots are exposed, they become dehydrated from being at the surface where the mulch was.

Have you ever spread mulch on a hot day, when the mulch has been sitting in the sun? When you pile mulch against the trunk of the tree you’re trapping all of the heat and moisture against the trunk itself, creating a perfect environment for bacteria and pests to thrive. 

If you are looking to do some outdoor projects this year, the Fiskars 384490-1002 Garden Scratch Tool Set is a great choice! This toolset comes with a trowel, cultivator, and transplanter that are made of aluminum heads, which resist rust. You’ve got everything you need in just one set!

Makes The Tree Vulnerable To Pests And Insect Damage

How might this cause a perfect environment for pests even? Because of the slow but intense effects of volcano mulching, the tree becomes stressed and isn’t as strong to protect against insects who attack trees when they are weak.

The effects of burying the base of a tree with a mulch volcano are not immediate. They are long-term effects that happen over time. So even if you have done it, or seen it, and don’t see any issues with your trees, it’s because the damage is taking place slowly!

If your tree is already suffering, you can take a look at our guide on the best oak tree fertilizers, maple tree fertilizers, or spruce tree fertilizers depending on what kind of tree is in your yard

Fertilizers are essential to getting a tree back to its former glory once issues start taking place. It’s also a great idea to consult a local arborist if your tree already has pest damage!

What Can I Do Instead Of Burying a Tree Base?

Mulching around the base of the tree is a great way to keep moisture in, help regulate soil temperature, and improve the soil content. 

If you created a mulch volcano unknowingly, don’t worry, you can fix it! 

Rake Away Excess Mulch

If you’ve already put too much mulch around your tree, you should rake away the excess mulch to create a circle around the tree.

You only want the mulch to be 2-4 inches deep. Also make sure the mulch doesn’t come close to the base of the tree, roughly 4-6 inches away from the trunk. 

It’s fine to not have any mulch against the trunk. And, it’s better for the tree plus allows for the exchange of oxygen, water, and nutrients.

When raking out the mulch you’ll need a good rake, the Fiskars 397940-1001 PRO Rake is the perfect option. This rake has a grading edge on the opposite side for smoothing out your mulch or soil. In addition to that, it has a lifetime warranty!

Make sure to rake the mulch out to the drip line of the tree, which is where the canopy extends to. The shape will probably take on a circle, which is aesthetically pleasing and the general shape the drip line creates. And that’s it!

Create A “Mulch Circle” Around Your Tree

When you do create a mulch circle around your tree, you want to think of making it look like a donut shape.

This means you’ll want to keep the mulch away from the trunk (the hole in the donut) and pull it out evenly to the drip line (the main part of the donut). Creating a donut out of mulch can help you remember to keep that mulch away from the trunk! No matter how tempting!

Use this technique for all plants, trees, and shrubs alike!

If you haven’t mulched around your plants or tree yet, you can use the mulch donut shape to correctly mulch around your tree instead of burying your tree base.

But again, don’t put mulch against the base of the tree, and make sure it’s only a few inches deep, preferably, 2-4 inches, and no deeper!

Why You Should Always Mulch Your Tree

Beautiful closeup top view of round mulched birch tree with wood chips and shredded leaves at university campus, Dublin, Ireland. Soft and selective focus

Now that we’ve gone over the proper way to mulch your tree instead of burying it, we’re going to talk about the benefits of mulching your tree and plants.

Increases Soil Composition

First off, mulching around young trees is one of the best things you can do for your tree! It helps increase the tree’s growth rate, decreases competition from surrounding plants, and helps to improve the moisture content in the soil. 

But, the benefits don’t stop there!

Reduces Watering Frequency

Mulching your tree can help reduce the frequency of watering your tree, saving you time and money.

Mulching also increases the amount of organic matter and adds an extra layer to the soil, which helps to reduce erosion and protect the integrity of the soil.

Mulch Can Double The Growth Rate Of Your Tree

According to information from Kansas State University, the growth rate of your tree can double just by adding mulch. Of course, this is done by “properly” mulching your trees consistently.

If you follow our tips above, you’ll be in good shape because you’ll be putting your tree in a great spot to grow moving forward!

Prevents The Growth Of Weeds

Mulch also prevents weeds from germinating and reduces the growth of weeds.

So, no more need for going out and hand picking all those weeds under your tree! Well, you’ll probably still have to pick some out.

Did you think that the benefits of mulch stopped there? Well, think again, they just keep going!

Reduces Salts And Pesticides That Can Reach The Trees Roots

Mulching also can reduce the number of salts and pesticide contamination in water, and it is known for binding to heavy metals. 

According to the University of California Cooperative Extension, mulch helps dilute the number of salts that are deposited in the soil because it traps evaporation. Additionally, organic mulch can degrade pesticides and other types of contaminants like heavy metals.

Organic mulch is made up of things that decompose naturally and is made of plant material. This could be straw, old hay, pine needles, cover crops, wood shavings, compost, leaves, wood chips, and bark chips, to name a few.

This contrasts with inorganic mulch, which doesn’t break down naturally, like plastic, rubber chips, or anything of the sort.

Best Simple Mulch To Use For Your Tree

Before mulching, you’ll want to choose the right mulch for your yard and garden.

If you’re not sure where to start with organic mulch, pine straw mulch is a good option. The USA Pine Straw – Premium Pine Needle Mulch covers up to 160 square feet at a 2-3 inch depth. It helps suppress weeds and is lightweight.

Pine straw mulch is significantly lighter than wood mulch, which might be the right option if you’re looking for something that’s not as heavy as regular mulch.

Pine straw mulch is also less expensive than regular mulch, and it is a good insulator. Like most mulches, pine needle mulch keeps moisture within the soil and is best at preventing weeds. Additionally, pine straw doesn’t need to be replaced as often as other mulches.

That’s A Wrap

So, do you still think you want to create a mulch volcano? After reading this, hopefully, you’re cured of piling mulch up against the tree trunk! Let’s recap why you shouldn’t bury a tree base. 

  • When you bury a tree base, you are setting up the tree for lots of issues. These issues aren’t immediate, happen over time, and can surely destroy your tree to the point of no return.
  • Burying the base of a tree and creating a mulch pile or volcano against the trunk restricts vascular flow to the rest of the tree. It causes root girdling around the trunk of the tree preventing water and nutrients from getting to the rest of the tree. 
  • Burying the trees base also causes root dehydration and prevents oxygen from flowing to the roots. Not only this but when you create that mulch volcano against your tree trunk you’re creating the ideal environment for pest infestations and rot!

But in case you have trees in your yard that have mulch volcanoes, no need to worry, you can fix it! By raking the mulch away from the trunk of the tree and into a donut shape towards the outer edge of the canopy, you’ll have corrected your mulch volcano. 

Thanks for sticking around and we hope you learned why you shouldn’t bury a tree base! Happy mulching!

References

Gilman, Edward F., and Jason Grabosky. “Mulch and planting depth affect live oak (Quercus virginiana Mill.) establishment.” Journal of Arboriculture 30, no. 5 (2004): 311-317.

Kamara, A. Y., Akobundu, I. O., Sanginga, N., & Jutzi, S. C. (2000). Effect of mulch from selected multipurpose trees (MPTs) on growth, nitrogen nutrition, and yield of maize (Zea mays L.). Journal of Agronomy and Crop Science, 184(2), 73-80.

Koski, Ronda, and William R. Jacobi. “Tree pathogen survival in chipped wood mulch.” Journal of Arboriculture (2004): 165-171.

Mulumba, L. N., & Lal, R. (2008). Mulching effects on selected soil physical properties. Soil and Tillage Research, 98(1), 106-111.

Prosdocimi, Massimo, Paolo Tarolli, and Artemi Cerdà. “Mulching practices for reducing soil water erosion: A review.” Earth-Science Reviews 161 (2016): 191-203.

Van life isn’t for everyone, but for those who seek adventure, live in the moment, and don’t mind skipping shower day every once in a while, it’s the perfect lifestyle. There’s plenty of beauty to be seen in nature, but you can also bring beauty to the inside of your van by growing potted flowers. 

Some of the easiest, hassle-free flowers you can grow in your van include forget-me-nots, pansies, begonias, sweet Alyssum, marigolds, impatiens, Gerber daisies, and lobelia. These flowers are extremely durable and have minimal maintenance requirements.

Having a potted plant inside your van will breathe life into your tiny home and provide an oasis on those rainy days when you’re stuck in the van. Read on to discover the ten easiest flowers you can grow in your van.

Why Grow Flowers In Your Van?

As much as social media would like us to believe it, van life is not a luxurious lifestyle. You live in a very small space packed with only the necessities. 

While flowers may seem like a luxury, they have a lot of surprising benefits. 

According to an article in the Journal of ChemTech Research, one potted plant per 100 square feet of indoor space is sufficient to clean pollutants from the air. 

And since the average space inside a van is far less than 100 square feet, your single plant will have no problem keeping the air clean inside your van.

In addition to the biological benefits of cleaning the air, ornamental plants provide psychological benefits, too. An article in the Journal of Sustainability found that indoor plants boost mood. 

Specifically, indoor plants cause an increase in positive emotions and a reduction in negative emotions. Indoor plants can also cause a change in pain perception, making you feel less pain than you do (which is bound to help after a long hike!).

So, while potted plants may seem like a luxury you don’t need, they’re useful to have around when you live in a small space.

The best part? The plants on this list are EASY to take care of, so you can spend time adventuring instead of worrying about your plants.

How To Grow Flowers In Your Van

Homegrown and aromatic herbs in old clay pots. Set of culinary herbs. Green growing sage, oregano, thyme, basil, mint and oregano.

You can grow flowers in a stationary home, so why not a van?! While growing potted flowers is a little easier than growing edible plants in a van, it still comes with some tricky challenges.

Before you choose which potted plant to grow in your van, you’ll want to address some obvious obstacles:

  • Space
  • Type of pot
  • Sunlight
  • Temperature

Let’s address the elephant in the room first: Space!

Choose The Right Location For Your Van life Flowers

There are a lot of differences between living in a van and living in a home. You can’t have breakable things, you have to be able to secure everything down for when you are driving, and you have limited space.

With all that in mind, you’ll want to pick the right spot in your van so that your plant is secure yet movable, out of the way, gets enough sun, and won’t topple over when driving.

Here are some creative locations where you can place and store your potted flowers:

  • Hang Your Flowers From Your Storage Cabinets: Most van setups will have some type of cabinets near the headspace that offers storage. Consider hanging your flowers from the bottom of the cabinets by a hook.
  • Use Magnets To Keep Your Potted Flowers In Place: Magnets are a savior in the van. They can hold kitchen utensils, keep drawers closed while driving, and keep your potted flowers in place!

Lovimag’s Neodymium Disk Countersunk Hole Magnets can hold up to 26 pounds of weight. Affix one magnet to your potted flower and the other wherever you want to place your flower.

You can screw the magnet into your countertop and keep your flower on your countertop while driving or even affix it to a wall to save space.

  • Suction Cups Will Keep Your Flowers Close To A Window: Conbola’s Heavy-Duty Suction Cups With Hooks will hold up to 22 pounds. You can affix the suction cups to the window and hang your potted flowers there. This has the added benefit of providing your flowers with sunlight.

Wherever you decide to place your potted flowers, be sure they can be removed from that location. You’ll want to place your flowers outside when your van is stationary to provide adequate sunlight and air circulation.

You also want to be able to water your potted flowers outdoors so that you do not fill up your gray tank unnecessarily.

If you’d like to learn more, take a look at our piece on why you actually don’t need to water plants everyday!

One thing you don’t want to do is glue or nail your flower pot in a permanent location.

Choose A Non-Rigid Pot For Your Van life Flowers

Basil plant in a pot on  windowsill. Kitchen cooking herbs.

Ceramic pots are pretty, making a nice accent piece for your porch or windowsill. But the thing about ceramic is that it’s breakable.

And breakable things have to go when you live in a moving vehicle.

So, no ceramic, clay, or glass pots; what about hard plastic? Hard plastic is better than ceramic, clay, or glass, but it’s still a rigid container.

You want something that can mold too small or tight places for van life. You want a container that’s just as flexible as your lifestyle. For this reason, fabric pots are the way to go.

AC Infinity’s Heavy Duty Fabric Pots are an excellent choice. These come in various sizes, from 1-gallon to 25-gallons and are made of durable fabric that can be reused. Some of the sizes can even support fruit growth in your van!

The nice thing about fabric pots is that they can be folded down when not used, which is a plus when space is limited.

Give Your Flowers Enough Sunlight

Sunlight is something you’ll never be in shortage of when you live the van lifestyle. However, your indoor flowers may need some additional help with sunlight.

The plants on our list range from full-sun flowers to partial-shade flowers. Placing your flowers outdoors when you park your van can help give them the extra boost of sunlight they need to produce more flowers.

When you can’t put your flowers outside, consider parking your van so that the window faces either south or west so that it captures the most sunlight.

If you’re worried your plants aren’t getting enough sunlight, consider supplementing with grow lights. GHodec’s Grow Light for Indoor Plants includes blue, white, and red lighting for plants. 

These colors naturally mimic the sun’s wavelengths to give your plant’s the closest thing to natural sunlight. The lights also come with a clamp so you can connect them anywhere in your van, and you know they won’t fall over, even while in motion.

The best part about these grow lights is that they are powered via a 5-volt/2.4amp USB cord, the same amount of power you would use to charge your phone.

Keep The Temperature Regulated Inside Your Van

Weekend warriors might be able to get away without insulating their vans. After all, it’s just a couple of days of living in your van.

However, full-time van-lifers know the importance of insulation. It helps to keep hot air out and cool air so that the inside of your van feels comfortable on hot days. And during those colder nights, insulation will keep your van nice and toasty.

Keeping the temperature regulated inside your van is also important for your potted flowers. Some flowers can withstand fluctuating temperatures, but others are very sensitive, warm-weather-only plants that won’t do well in a van that drops 20 degrees at night.

You can use a light sheet or clothing to protect your plants if you know the temperature will drop significantly. But otherwise, you should only grow flowers in your van if you can somewhat regulate the temperature.

12 Easy Flowers To Grow In Your Van

Now onto the good stuff! What flowers are easy to grow and can withstand the mobile lifestyle? Surprisingly, there are a lot.

Very quick, you can view our overall list of the best plants to grow in your van if you’re looking for more non-flower types!

Grow Forget-Me-Nots In Vans

Macro shot of field forget me nots (myosotis arvensis) in bloom.

Forget-me-nots are known for being short flowers, which works to our advantage since we want flowers that fit in a van.

These flowers should be grown from seed and are considered low maintenance. According to North Carolina State University, forget-me-nots need less than 12 inches of space to grow.

There are many varieties of forget-me-nots, each with different characteristics and colors. Most forget-me-nots are blue with a white or yellow iris.

It’s recommended to plant seeds a few months before the last frost. Even if you are van-living in strictly warm temperatures, the thing that tells a plant whether to sprout or not has to do with the length of the days, not necessarily the temperature.

Light: Forget-me-nots appreciate full sun to partial shade. Around 3-6 hours of sun should be sufficient.

Soil: Use organically rich soil for forget-me-nots. Burpee’s Premium Organic Potting Natural Soil Mix is a good choice and contains organically-rich materials.

Water: Keep the soil moist without leaving puddles on the soil.

Bloom: Forget-me-nots bloom for a short period in April and May and sometimes re-blooms mid-summer.

Grow Begonias In Your Van

Most flowers on this list will have a ton of different varieties to choose from. Begonias are no different. 

Wax, rex, and rhizomatous begonias are going to be the best species of begonia for van life. They stay relatively small and are the easiest to care for. You can grow them from seed or find a nice potted begonia at a local garden center.

Some begonia species are very cold-sensitive, so make sure you keep the space inside your van at a comfortable temperature.

Light: Partial shade. Begonias need a little direct sunlight for their flowers to bloom, but too much sun will scorch the leaves.

Soil: Begonias do well with potting soil that contains peat moss. Baby Violet’s All-Purpose Indoor Houseplant Potting Soil Mix Peat Moss & Perlite is a great choice.

Water: Begonias should be watered frequently, but the plants are overwatered if the buds begin to drop.

Bloom: Most begonia species will bloom from summer until late fall.

Sweet Alyssum Can Grow Well In Vans

Sweet Alyssum produces beautiful white, pink, or purple flowers and has the added benefit of being very fragrant, providing your van with clean air AND nice smells.

According to the University of Florida, most normal varieties of Sweet Alyssum will bloom in spring and be done by summer. Still, some new varieties like Snow Princess, Frosty Knight, and Dark Knight will last from spring through fall.

You can always check with a local nursery or garden center to see which varieties will bloom the longest. Mostly, Alyssum grown from cuttings (instead of seed) will last the longest.

Light: Sweet Alyssum does well in full sun to partial shade.

Soil: Sweet Alyssum is not too picky with the soil type. A simple all-purpose potting soil will do just fine.

Water: Keep your Sweet Alyssum well-watered, but ensure the soil is not soggy.

Bloom: New varieties will bloom from Spring to Fall. Older varieties bloom in the spring and are typically done by summer due to heat.

You Can Grow Daisies In Vans

Daisies are one of the most popular flowers to purchase as cut flowers, but you can also plant them in containers.

Gerber daisies are a hybrid between two popular species of daisies and come in various colors, including orange, purple, white, and pink, among others.

You can snag a potted daisy plant from a garden center or plant Gerber daisies from seed in your fabric pots. Daisies will grow to about a foot tall and wide.

According to the University of Florida, Gerber daisies may become deficient in iron and manganese. Use a fertilizer like Espoma Organic Iron-tone 3-0-3 Organic Fertilizer about once a month according to the package label and directions.

Light: Provide morning sun and afternoon shade.

Soil: Gerber daisies prefer very well-drained soil. Look for a potting mix on the sandy side, and add some organic material or compost for best results.

Water: Allow the soil to dry completely between waterings.

Bloom: Gerber daisies will bloom Spring through Fall.

Try Growing Marigolds In Your Van

orange merygold blooming

Marigolds are low-maintenance container plants that grow quickly and bloom yellow-orange flowers that will bring color into your van.

Some marigolds can grow up to three feet tall, but smaller varieties like French and Signet Marigolds reach 6-12 inches, which is the perfect size for a van-life container plant!

Marigolds are one of the most forgiving potted flowers and can handle hot temperatures, direct sun, and almost any type of soil.

Light: Marigolds love sun. Give them at least 6 hours per day. You can read more about why marigolds need full sun here.

Soil: Use a lightweight potting mix and add a handful of perlite for best results and better drainage. According to the University of Minnesota, marigolds do not require fertilizer.

Water: Allow the soil to dry completely between waterings. When watering, try to water down to about 2 inches. Marigolds are susceptible to root rot, so do not allow the soil to remain soggy.

Bloom: Marigolds typically bloom from summer until late fall/early winter, after a few hard frosts.

Dwarf Varietie Petunias Can Grow In Vans

Petunias are colorful, tubular-flowered plants that are quite prolific when allowed to spread in a flower bed. 

The best species of petunia to grow in a van will be the dwarf varieties. These include species like Dwarf Mexican Petunias and Katie Dwarf Petunias. These grow between 6 and 12 inches in height and are resistant to pests, which is a plus in the van!

Many petunia varieties are drought tolerant, making them even easier to maintain if you accidentally forget to water them. It’s recommended to plant three petunia plants per 12 inches of pot space.

Light: Give your petunias plenty of sun, at least 6 hours per day.

Soil: Petunias grow best in well-draining soil high in organic matter. Petunias are also heavy feeders. According to Texas A&M University, a high-phosphorous fertilizer does wonders for petunia plants.

Element Nutrient’s Flower Fuel includes a mixture of 1-34-32, meaning the nitrogen, phosphorous, and potassium content, respectively. This is a good choice to feed your petunia plants.

Water: Petunias are more drought tolerant than other potted plants. You can allow the top 2 inches of the soil to dry out completely before watering again.

Bloom: Petunias will bloom from Spring to Fall if given the right conditions. 

Easy-To-Grow Impatiens For Your Van

Impatiens are commonly seen in hanging baskets, making them ideal if you plan to hang your plants beneath your cabinet space.

These colorful flowers can grow up to 18 inches tall, so they take up more space than some other flowers on our list. You can grow impatiens from seed or buy flowers already established in a pot from a local garden center. 

According to Iowa State University, the more shade you give your impatiens, the taller the plants will be. So, consider giving your impatiens more direct sun to keep them small and van-sized.

Light: Impatiens prefer partial shade, about 2 to 4 hours of filtered sun per day. The more light you give them, the smaller the plants will be, but the more flowers will bloom.

Soil: Use a run-of-the-mill potting soil that drains well. You can add perlite to improve drainage.

Water: Water your impatiens when the soil surface is dry to the touch.

Bloom: Impatiens will bloom in the spring or beginning of summer and last until the first frost.

Lobelia Can Grow Inside Your Van

Blue lobelia in hanging pots

Unlike many other flowers on our list, lobelia prefers cooler weather. They will not do well in super hot climates, so just be mindful of placing your lobelia outdoors if you stop in a hot desert for the day.

Lobelias varieties can be mounding or trailing. If you plan to hang your lobelia plant, consider getting a trailing variety. Stationary pots will do best with a mounding variety. Lobelias should be planted from seed.

Lobelias come in various colors, including blue, purple, and white. Lobelias do well partnered with other plants in the same container. Some of their preferred partners include:

  • Sweet Alyssum
  • Petunias
  • Impatiens
  • Pansies

All of which are on this list and are also low-maintenance.

Light: You can grow lobelia in full sun when temperatures are cooler. Place them in partial shade when summer temperatures are high.

Soil: Regular, well-draining potting soil works great for lobelia.

Water: Lobelias do not like drying out. Keep the soil moist at all times but do not let the soil become soggy.

Bloom: Depending on the variety, lobelias can be one of the first bloomers in the spring and will bloom again in the fall if conditions are right.

Pansies Are Easy To Grow In A Van

Pansies are another cool-weather plant well-known for having a face on its flowers. They come in a wide range of colors that can fit any color scheme in your van.

It is best to buy pansies as established plants as they can be difficult to plant from seed. These low-maintenance plants will grow to around 9 inches tall and wide.

Light: Pansies are cool-weather plants. They will only do good in the direct sun if the temperatures are cool. It is best to place them in partial shade in the afternoon to avoid overheating them.

Soil: Use a well-draining potting mix. Preferably sandy or sandy loam. Utah State University recommends a 5-10-5 fertilizer like Espoma’s Garden Food Fertilizer 5-10-5 applied to the potting soil before transplanting your pansies into your fabric pots.

Water: Give your pansies about 1 inch of water per week. 

Bloom: Pansies typically bloom in the spring because of the cooler temperatures. They may also bloom in the fall as temperatures cool down from summer. In mild climates, they will bloom in the winter as well.

Grow Low-Maintenance Geraniums In Your Van

Geraniums are easy to grow with brilliant pink, purple, white, and red flowers, depending on the variety.

There are three main types of geraniums: Ivy-leafed, Martha Washington, and Common. The best species for van life are the common geranium or the Martha Washington geranium. Ivy-leafed is a trailing geranium that can take up more space than you’d like in your van.

Geraniums don’t appreciate being left out in the cold as they are not cold-hardy like lobelia or pansies. However, they are great for container life as they prefer to be somewhat root-bound.

Light: Give your geraniums at least 6 hours of sun per day, but be aware that geraniums may stop flowering in hot weather. During the hottest time of the day, move your geraniums into some shade.

Soil: Any regular potting mix will do as long as it has good drainage. You can add perlite to the mixture for extra drainage.

Water: Allow the soil to dry between waterings. Geraniums are drought-tolerant to an extent.

Bloom: Geraniums will bloom from spring to fall. However, they may stop blooming if temperatures get too hot.

Final Thoughts On Growing Flowers In Your Van

That’s all we have for now on the ten easiest flowers you can grow in your van. Many of the flowers on this list are forgiving, but they still need a little TLC.

Just as a quick recap…

Ten easy flowers you can grow in your van include:

  • Forget-me-nots
  • Begonias
  • Sweet Alyssum
  • Gerber Daisies
  • Marigolds
  • Petunias
  • Impatiens
  • Lobelia
  • Pansies
  • Geraniums

You’ll want to ensure you pick the right location for your flowers and provide them with enough sunlight and water. Also, ensure the temperature doesn’t fluctuate too much in your van.

If you’re looking for the easiest flowers to plant, go with marigoldspetunias, or geraniums. These are more forgiving than others and are the lowest maintenance.

If you’re planning on being in cool weather for a lot of your trip, try growing impatiens, lobelia, or pansies, as these plants prefer cool weather and can even survive a few touches of frost.

Having flowers in your van will not only breathe life into your van’s interior but also provide physical and psychological benefits that are just too good to pass up!

References

Abd ElAziz, N. G., Mahgoub, M. H., Mazhar, A. M.M., Farahat, M. M., & Abouziena, H. F. (2015). Potentiality of Ornamental Plants and Woody Trees as Phytoremidators of Pollutants in the Air: A Review. International Journal of Chem Tech Research8(6), 468-482.

Kaplan, R. (2001). The Nature of the View from Home: Psychological Benefits. Environment and Behavior33(4), 507-542. https://journals.sagepub.com/doi/abs/10.1177/00139160121973115

Ke-Tsung, H., & Li-Wen, R. (2019, August 20). Effects of Indoor Plants on Self-Reported Perceptions: A Systemic Review. Sustainability11(16), 4506. https://www.mdpi.com/2071-1050/11/16/4506#cite

Lin, M.-W., Chen, L.-Y., & Chuah, Y.-K. (2017, October). Investigation of A Potted Plant (Hedera helix) with Photo-Regulation to Remove Volatile Formaldehyde for Improving Indoor Air Quality. Aerosol and Air Quality Research17(10). https://aaqr.org/articles/aaqr-17-04-oa-0145

Do you have your own vegetable garden? If so, there is a good chance you have marigolds planted somewhere. Traditionally, marigolds help draw insects and animals away from your juicy vegetables. Whether you’re a new or experienced gardener, it’s good to know how much sun these flowers need.

Marigolds need at least six hours of sunlight each day. They can grow in partial shade but in order to grow multiple flowers and bloom throughout fall, marigolds need full sun. Planting them in full sun will promote lush and dense plants while increasing their production of blooms.

We’ll get into depth about why marigolds need full sun and shade and how you can grow strong, full marigolds. Keep reading to keep your marigolds big and blooming!

Reasons Marigolds Need Full Sun

Marigolds are indigenous to Central and South America where they were discovered during the 1500s. From there, marigolds were brought to Africa and Europe resulting in species like the African and French marigolds. 

Because of their indigenous climate, they can tolerate drought and love sun-filled days. Although some species can tolerate part shade, it’s unlikely that you’ll achieve the full, dense look that you’re going for with your marigolds unless they have more access to the sun.

So before you begin planting this summer, lay out your marigold plants in areas that you know have full sun and you’ll have marigold dreams!

Marigolds Need Full Sun To Photosynthesize All Day

Marigolds are dense with foliage. Have you ever seen the leaves on marigolds? They are a work of art on their own, and they even look like some herbs! Because they have such dense, dark green foliage, they are constantly photosynthesizing throughout the day. This helps the marigolds continuously grow multiple flowers at once.

Certain types of marigolds even have double flowers. Yes, you heard that right! African marigolds, French marigolds, and pot marigolds all can bear double flowers.

So, they need full sun to put the energy into and grow these dense double flower heads. And since marigolds continue to flower throughout summer and fall, they need full sun to continue to photosynthesize throughout these seasons.

Marigolds can continue flowering into late fall. But to do this, they have to be deadheaded, which is simply removing flower heads when they’re done blooming. So, you can see why they need full sun, to keep growing those flower heads all year long!

Full sun allows marigolds to grow strong and full, without it, they probably won’t flower and become leggy!

If you’ve ever smelled marigolds, you know just how fragrant they are. Aside from growing dense foliage and flowers, the scent of marigolds is also dependent on the amount of sun they get, similar to lavender and other fragrant flowers. 

According to the United States Department of Agriculture, fragrant floral scents are a mix of VOCs (volatile organic compounds) and essential oils that are emitted into the atmosphere to attract pollinators.

These essential oils evaporate from the petals in warm weather releasing a floral scent. And what does the sun have to do with this? Evaporation! The more sun there is, the more evaporation there is!

Not all flowers that grow in the sun produce a scent, like sunflowers, dahlias, or hibiscus. Even flowers that are shade tolerant can be fragrant, but they typically are exposed to, and require a little sunlight, thus, releasing some floral scent. 

Whether you decide to plant only marigolds or want to venture into other full sunflowers, the Burpee Wildflower Mix Monarch Sanctuary 50,000 Seeds is an ideal choice! 

This seed mixture comes with over a dozen types of flowers including marigolds, butterfly weeds, zinnias, and Mexican sunflowers, to name a few. It comes with enough non-GMO seeds to cover 1,000 square feet. 

And, the most important part is that it’s a wildflower assortment to attract pollinators and help monarch butterfly populations by providing them with this incredible batch of flowers.

Marigolds Need Full Sun To Prevent Wilting And Pests

Marigolds in full sun

Common Marigold Issues

Marigolds are prone to things like leaf spots, wilt, blight, root rot, and aster yellows, without proper sun and drainage. They are also susceptible to pests like the imported long-horned weevil, the potato leafhopper, and plant bugs.

  • Leaf spots are caused by a fungal affliction and can vary depending upon the specific pathogen. This can be avoided, however, by making sure your plant is strong and healthy. You can do this by proper planting location, and fertilizing.
  • Next up, we have wilt. This is another fungal infection that can come from Verticillium or Fusarium oxysporum. Wilt causes wilting of lower leaves and leads to the death of the marigold. Sometimes plants won’t show any signs until it’s too late. This can also be avoided by making sure you have strong and healthy plants, and not damaging the roots.
  • Botrytis blight is pretty gross-looking because it looks like mold. Marigold flowers begin turning brown and are covered with fuzzy, gray blobs. This fungus occurs whenever there’s lots of humidity, moisture, wetness, and lack of sun.
  • Root rot is one that we’ve touched on before, and it usually affects indoor plants. But don’t let that fool you! Root rot can occur just as easily outside as it can inside, especially due to overwatering!
  • Lastly, we have aster yellows. This pathogen is caused by phytoplasmas, which are an intracellular parasite that affects the phloem of plants. This is transmitted through leafhoppers, a common pest of many plants. This disease results in small, oddly shaped, stunted plants.

Common Marigold Pests

The imported long-horned weevil lays its eggs in the soil and feeds on the roots of mairgold plants as larvae. When they become adults, they start feeding on the edges of leaves or flowers. 

The potato leafhopper is a sap-sucking insect that feeds on marigold foliage causing it to whiten and shrivel up. Also, as we mentioned, this pesky insect can transmit aster yellows.

Plant bugs. It sounds like a made-up name, but these bugs lead their eggs in the stems of marigold plants. When they hatch, they suck the sap from leaves eventually turning into circular holes. 

Most of these issues can be avoided by maximizing plant vigor and keeping your marigold healthy.

With that, one of the easiest ways to keep your plant healthy is to plant it in the proper location, in this case, in full sunlight, to help your marigolds grow big and strong!

Since we’re talking about pests, if you’ve ever worked outside during the summertime, you probably know just how bad the bugs can be. Gnats and mosquitoes especially! And if you don’t know, well let’s just say, this is your hint! 

With a bug repellent like Bug Soother Spray – Natural Insect, Gnat and Mosquito Repellent & Deterrent, you can be protected without all of the chemicals in other bug sprays with a nice and pleasant scent!

Marigolds Need Full Sunlight To Control Soil Moisture

Marigolds can tolerate a variety of soil types and humidity levels, especially depending on their type. However, most marigolds grow best in well-draining, acidic soil, and won’t do well if left in saturated, water-logged soil.

Standing water in the soil can be a direct result of lack of sunlight and poorly-draining soil. Marigolds can tolerate a little bit of shade, especially if they are newly transplanted. But if they’re going to stay in a partially shady location, they need well-draining soil.

As we mentioned, some of the pathogens above are a direct result of humid and overly wet conditions that don’t have a chance to dry out. If over-watered, or planted improperly, you are setting your marigolds up for failure instead of success.

Can Marigolds Grow In Shade?

Marigolds in shade

Marigolds can be grown in some partial shade, however, they will have the most success in full sun. Now, when we say partial shade, we mean anywhere from 3-6 hours of direct sun. Some partial shade can help lessen the heat in really hot and sunny places.

Even though some marigold varieties can thrive in partial shade – if you want to grow strong, vigorous plants, your best bet is to plant them in an area that will get at least three hours of direct sun, preferably six hours!

If you are looking to add more shade to your yard, you can learn more about the fastest growing shade trees for small yards.

Next, we’ll cover some common types of marigolds. 

Most Common Types Of Marigolds

French marigold bloom flowers

So, there are two main species of marigolds, the African marigold, and the French marigold. African marigolds are tall, large plants, with fairly big blooms.

French marigolds, on the other hand, are smaller, more compact, and probably the type you see most often.

There are also hybrid marigolds, which are a cross between African and French marigolds, which range in size and shape.

African Marigolds, Tagetes erecta

African marigolds are usually referred to as American marigolds. They have double flowers and grow up to three feet tall! This species of marigolds also can have five-inch blooms. 

French Marigolds, Tagetes patula

French marigolds are probably the most common. They have single flowers and are more compact.

These are the marigolds you have probably seen at hardware and garden stores that come in yellow, dark red, orange, and a combination of all these colors. 

These are small marigolds that range in sizes from six inches up to 18 inches. This type is more tolerant of moist conditions.

A few varieties of the French marigold include ‘Bonanza’, ‘Little Hero’, ‘Bounty’, ‘Hero Orange’, and ‘Queen Sophia’.

Hybrid Marigolds

Hybrid marigolds are French and African marigolds that have been crossbred. They range in a variety of sizes, colors, and shapes such as signet marigolds and Spanish tarragon!

That’s A Wrap!

Marigolds are the perfect addition to your garden, vegetable bed, or even to grow in pots. They will give off that incredible smell and add a pop of color wherever you decide to plant them. 

Marigolds come in all shapes, sizes, and colors, and so many varieties it’s hard to pick a favorite.

Remember, wherever you decide to plant them, make sure they’ve got full sun.

Let’s recap a few things we discussed!

Marigolds need at least 6 hours of sunlight each day to thrive and grow luscious, sweet-smelling blooms. 

Marigolds can grow in partial shade but to grow multiple flowers, and bloom throughout the seasons, they need full sun. Planting marigolds in full sun will promote strong, dense plants, and make them less susceptible to pathogens and pests.

You can choose from African marigolds, French marigolds, or a hybrid variety, all of which have the same light requirements: Sun!

Thanks for sticking around and learning why marigolds do not grow in the shade and why they need full sun. We hope this helped you in your marigold adventures, until next time!

References

Atiyeh, R. M., N. Q. Arancon, C. A. Edwards, and J. D. Metzger. “The influence of earthworm-processed pig manure on the growth and productivity of marigolds.” Bioresource technology 81, no. 2 (2002): 103-108.

Broschat, Timothy K., and Kimberly K. Moore. “Phytotoxicity of several iron fertilizers and their effects on Fe, Mn, Zn, Cu, and P content of African marigolds and zonal geraniums.” HortScience 39, no. 3 (2004): 595-598.

Conboy, N. J., McDaniel, T., Ormerod, A., George, D., Gatehouse, A. M., Wharton, E., … & Tosh, C. R. (2019). Companion planting with French marigolds protects tomato plants from glasshouse whiteflies through the emission of airborne limonene. PloS one, 14(3), e0213071.

Hongpakdee, P., & Ruamrungsri, S. (2015). Water use efficiency, nutrient leaching, and growth in potted marigolds affected by coconut coir dust amended in substrate media. Horticulture, Environment, and Biotechnology, 56(1), 27-35.

Sturz, A. V., and J. Kimpinski. “Endoroot bacteria derived from marigolds (Tagetes spp.) can decrease soil population densities of root-lesion nematodes in the potato root zone.” Plant and Soil 262, no. 1 (2004): 241-249.

Banana trees are quick to establish and produce heaps of fruit. If you’re thinking of planting a banana tree but don’t know what timeline to expect, we’ve got you covered!

It takes banana trees about 9 months to grow to full height, and only 12 months to bear their first fruit. On average, banana stalks last for about a year and a half to two years, but the plant that they stem from could last anywhere between 6 and 25 years.

The banana plants we grow today are genetically altered, which we’ll discuss more below. We’ll walk you through the full timeline of a banana tree’s life so you’ll know exactly how long it takes to grow, and what its lifespan looks like. Plus, we’ll cover some maintenance tips to keep your tree healthy and fruitful.

What Is A Banana Tree And Where Did They Come From?

Did you know bananas are technically berries, botanically speaking?

According to the Australia Banana Grower’s Council, bananas may have been the first fruit originating over 10,000 years ago. 

The original bananas and those we know of today are different, of course, thanks to the fact that our modern bananas are modified to have no seeds and lots of edible fruit. Originally, there would have been a large pit and not much edible pulp surrounding it. 

In fact, the modified bananas we eat today make it so that we have to either buy seeds from distributors or propagate already-existing banana plants to grow new ones. We’ll dive deeper into that soon, though.

The bananas we eat today come in a few varieties, sometimes referred to as plantains when they are not as sweet. The most common variety, however, is called the Cavendish after a 19th-century English Duke who propagated these plants and caused the eventual spread of these plants.

Bananas are a nutrient-dense fruit favored by children, athletes, and other adults alike. Its potassium, B vitamins, fiber, antioxidants, and other qualities make it a quick, cheap, and filling supplement for all diets.

So, you’re thinking of growing a banana tree of your own. Let’s talk about where to start: location.

Just How Fast Will My Banana Tree Grow?

Banana trees grow extremely fast. 

How long does it take a banana tree to bear fruit?

From planting a banana tree (sowing the bulb of the tree) to being able to harvest fruit successfully, it is only a 9-12 month process. 

This is quite contradictory to many trees. For example, an avocado tree can take up to 13 years to grow to maturity and begin producing its fruit. We have an article all about the avocado tree’s growth and lifespan, as a matter of fact!

This short, yearlong timeline of a banana tree may seem rather short. That’s because it is. 

However, when we stop to consider bananas grow from banana stalks that shoot out of the overall tree itself, it is easier to see how this works. 

Banana trees are a collective of individual stalks that produce fruit and then must be trimmed away. So, we can see how these trees might grow and begin producing bananas so quickly.

Okay, let’s look at the timeline of a banana tree itself.

Full Banana Tree Growing Timeline

Close-up of cluster of unripe banana fruit

So, you’ve decided you love bananas enough to grow them yourself. Congratulations. What should you expect, though? 

What is the process like?

You want your bananas by next year, but there’s no way that’s realistic… right?

Wrong. 

You can plant a banana tree and have the fruit within 9-12 months. Pretty cool, huh?

Not only that, but the tree can reach its full height of 20-40 feet tall within that 9-month period before fruit forms. Talk about fast-growing!

Day 1: Finding The Right Banana Seed 

The very first day of our timeline consists of finding a way to plant your banana tree. 

Modern Cavendish bananas and plantains don’t have seeds, as you’ve surely noticed.

So, how are you supposed to even plant a banana tree?

Bananas have been genetically altered so that they no longer have seeds, but they must come from somewhere. 

In the wild, bananas still have seeds. They take up so much of the fruit that the pulp of it is difficult to eat and nearly inaccessible. 

You can procure seeds from a supplier of some sort, whether that is a local provider or online. For example, you can purchase things like these Mini Bonsai Banana Tree Seeds to start your own banana tree growth.

You’ll want to follow a few steps to start growing your banana tree:

  • Soak your seeds. 
    • Seeds should soak for a day or two to prepare for planting.
  • Plant the seeds.
    • You can plant the seed in a pot for the first week or two if you need, but you should aim to plant it directly into permeable soil. The seed should be about an inch deep, in holes that are 4 inches wide for best results.
    • Space your banana plants about 2 meters from one another, to avoid overcrowding and the sun being blocked from any given plant.
  • Keep the soil well-suited for banana growth.
    • Moist soil is another key to successful growth, as bananas grow best in tropical environments with this sort of moist, well-drained soil. 
    • The soil temperature should also stay between 60-70 degrees Fahrenheit in good conditions, as is expected in a tropical environment
  • Wait for germination. 
    • This can take anywhere from a month to 6 months, depending on the type of banana tree. This is when you’ll see vegetative growth.

Remember, this will give you a unique, less common variety of banana. If that is your goal, go for it. If not, keep reading for planting option number 2.

Alternative Day 1: Propagating A Banana Sapling

Now that you know what planting from a seed, or bulb, looks like, we should talk about the propagation option.

This one is far more common and is probably easier if you have any sort of access to other banana plants. 

You can grow a Cavendish banana tree by propagating it, as seeds are not a part of this adapted variety of bananas.

An easier, more orthodox method is to take a pup, or sucker, both names work, from an already-established banana tree. This means that you are taking an offshoot, separating it from its main banana tree, and replanting it as its own tree. 

This is not as difficult as you may imagine, because banana trees themselves are made up of many stalks and sections that bear fruit and then need to be removed. So, the removal of a section a bit early allows it to establish itself as its tree, and continue the cycle.

Day 1–Month 6: Vegetative Growth Period

Though we call them banana trees, banana plants are technically quite different in their growing process than any other trees. 

They will grow pseudo stems, or leaves that build upon each other to support the main stem, in place of a trunk. 

Since they don’t have a traditional trunk, the growth of these plants can take place much more rapidly. 

The period of vegetative growth that takes place, in essence, is the majority of the tree’s maturing process. As it grows and develops these pseudo stems, you’ll want to provide your plant with a little extra water to ensure the healthy development of the plant. 

If you are concerned about forgetting or not adequately estimating your watering, you can always use an irrigation system. This Flantor Garden Irrigation System could be the right starting place to help you get your banana tree going, without the stress of remembering when and how much to water it.

Month 6-Month 9: The Flowering Period

Once the vegetative growth period has given your banana tree its own legs to stand on as a tall, established plant, the flowering will begin. 

This is realistically going to happen around month 9, but could be earlier in some conditions and later in some conditions. 

One reason to plant in an area that is opportune for your tree (read: USDA hardiness zones 9-11) is that the weather will allow your tree to hit its expected milestones. 

If you plant in an area that is too cold, it could take up to a year and a half for your tree to flower, effectively delaying your access to fruit and stunting the tree’s natural cycles.

This period is the connection between growth and fruit production, so it is an important one that leads us to our end goal: bananas.

Month 9-Month 12: Fruiting Period

Once you’ve gotten past the germinating, vegetative growth, and flowering periods, your plant will finally be ready to produce fruit!

Individual banana stalks will only produce fruit one time, so it is important to maintain your banana tree yearly to adjust for this. 

You’ll need to cut back the stalks after you harvest the fruit to make sure new stalks can form and new fruit can grow in the same place.

Bananas will grow in large bunches called hands, each of which has about 20 bananas. You’ll see 10 or more hands on healthy, stable banana trees, meaning you can expect to yield at least 200 individual fruits.

Now that is bananas! 

See what we did there? Anyway, you harvest the fruit after it develops during this 3-month period. 

From there, any green bananas will take about a week to ripen after being harvested. Any ripe bananas should be consumed, distributed, or stored for later. 

You can also help improve the aesthetic of your bananas by putting bags over the fruit. This is done in commercial farming to help regulate the look of the fruit, as well as keeping it safer from pests.

Where Banana Trees Commonly Grow Best

Hawaii, Florida, and other hot, humid climate areas in the United States are best for growing bananas.

Around the world, bananas are found growing in many tropical regions, from African regions to China, India, and many of the South and Central American countries. 

Anywhere with a tropical climate can, and probably does, grow bananas thanks to their quick growth and massive yield. 

Recently, Ecuador has been the top exporter of bananas in the world, followed up by the Philippines, Costa Rica, and other similar-climate nations.

In the United States, bananas grow best in USDA hardiness zones 9-11, though zone 10 is the ideal zone for this plant. Unsure of what this means? We’ll go further into these zones and their significance a bit further down.

Where To Plant Your Banana Tree

unripe Cavendish bananas growing in the garden

Banana trees need environments that are tropical, meaning warm, moist, and sunny. These factors will help to keep your banana tree and its fruit healthy and prosperous.

USDA hardiness zones ranging from zone 9 to zone 11 are best, though zone 10 is the prime location for banana trees to grow.

If you are looking to grow a banana tree anywhere in the United States, reference the USDA Plant Hardiness Zone map.

This map will help you determine which regions are the best suited to grow and sustain your banana tree. 

What The Heck Is A USDA Plant Hardiness (Growing) Zone?

The USDA has created the hardiness zones distinctions to help define different regions of the country where plants might be best fit to grow and not only survive but also thrive. 

These zones are based on the average, extreme, minimum temperatures of any given area. Essentially, in extremely cold winters, what would the average lowest temperature be?

While a region may look good in a normal year, it’s important to look at those extreme weather factors before planting any trees or other plants. This will help you identify the risks involved with the wintertime in the area, and how your tree might fare. 

The hardiness of a tree, by definition, is its ability to handle cold temperatures and adapt. So, trees that do well in low hardiness zones are extra hardy and can handle super low extreme temperatures. 

Those, like the banana tree, that require higher USDA hardiness zones to do well, are less hardy and will not do nearly as well as temperatures drop to their extremes. 

Hardiness zones are broken up into ten-degree sections by number and then split into 5-degree subcategories that are divided by A and B.

The fact that banana trees do best in zones 9-11 means they can handle the extremely low temperatures in zone 9a up to zone 11b. 

Zone 9a has minimum temperatures of 20-25 degrees Fahrenheit, while 11b has a minimum range of 45 to 50 degrees Fahrenheit.

These average minimum temperature ranges are in line with what you might expect for a heat-loving, tropical tree that is adaptable but not too much so.

How To Transplant Your Banana Tree Sapling

If you opted to plant your banana tree from a wild seed to get a unique type of fruit, or you thought your sucker (also known as a pup) would do best to start in a pot, you may need to know how to transplant your tree now. 

Helping your tree adjust to a transplant begins by transplanting correctly at the beginning.

Plan to follow these next few steps to make sure you go about the process in the right way:

  • Location, location, location!
  • Banana trees are meant for tropical environments. This means that they love sun and heat. So, pick a location that allows your banana tree to get lots of sun and enjoy that nice warm weather it wants. At least 6 hours of partial to full sunlight is ideal.
  • Also, try to avoid planting your tree too close to any structures or other trees. Remember, banana trees grow fast and you don’t want a foundation issue, to be overshadowed by your tree, or to block light to other plants.
  • You’ll want to ensure that you have a hole that can fit the roots of the plant, giving them space to grow and flourish as your tree gets bigger.
  • Place your banana tree into its new home and watch it grow.
  • Generously water the tree to help the roots get established so that the tree can grow well.

Keeping Your Banana Tree Healthy And Thriving

Unripe bananas on the tree

It’s always important to keep in mind that trees of any sort do best in the climate that they originate from.

Since banana trees are tropical plants, keeping them in a warm, sunny environment with moist, well-drained soil is key to their success.

It’s all well and good to know how to grow a tree, how to transplant it, and how to care for it, but if the tree is not in a location that can sustain it, your efforts may not be worth the hassle.

You want to water your banana tree regularly, making sure that it gets 1-1.5 inches and up to 6 inches of water per month.

Remember to note that soil should be able to drain well, because you don’t want your banana tree sitting in lots of water, either. This will cause stress on the tree and likely hinder its progress.

Too much of a good thing can be a bad thing.

That’s All For Now!

Okay, don’t go bananas, but we’re done for now. 

We hope this timeline helps you prepare to grow and sustain a banana tree, with fewer surprises. 

This tree is unique, from its quick growth to odd lifespan and fruit-bearing process. Growing a banana tree isn’t the easiest job out there, so props to you for giving it a go.

Starting from an established tree and going the propagation route is simply going to be your best option, and is the one that we recommend. 

The process is interesting, and it can be quite exciting and rewarding to see your banana tree spring to life. We know that you’ll enjoy the fruits of your labor quite literally, once you harvest the bananas your tree will produce. 

If you want your very own home-grown bananas by next year, what are you waiting for? Start now, your future self will thank you.

Thanks for allowing us to be a trusted part of your tree journey. Happy planting, friends!

References

Kilwinger, F. B., Marimo, P., Rietveld, A. M., Almekinders, C. J., & van Dam, Y. K. (2020). Not only the seed matters: Farmers’ perceptions of sources for banana planting materials in Uganda. Outlook on Agriculture, 49(2), 119-132.

Lecompte, F., Ozier-Lafontaine, H., & Pages, L. (2003). An analysis of growth rates and directions of growth of primary roots of field-grown banana trees in an andisol at three levels of soil compaction. Agronomie, 23(3), 209-218.

When deciding which tree to grow, you want to think about what might fit best in your environment. For example, if you live in the desert, you’ll want to think about trees that can grow in the desert. Which trees might grow best in a dry environment? Can trees grow in deserts?

Trees that grow in desserts generally adapt to have lower water requirements. You can expect cacti, willows, palm, and acacia trees to grow well in the desert, among others. These trees all do well in dry environments are very adaptable to droughts when needed.

Once you decide which desert-dwelling tree to incorporate into your space, you’ll want to know a bit more about maintaining the said tree. Keep reading for more information on what plants can grow in the desert, as well as why they can grow in the desert.

Desert Environments Have Plants That Can Last

All trees are adaptable to some end, but many more so than others.

It is important to find a tree that can survive in desert conditions that are:

  • Dry
  • They don’t have much shade
  • Don’t provide regular or dependable access to water
  • Prolonged high temperatures
  • High rates of soil evaporation (resulting in extra dry soil)
  • Temperature fluctuations that are extreme in either direction

Knowing also what growing zone desert climates tend to be can help significantly when you are deciding which trees to plant there. 

These desert regions in the United States range from Texas to California, between Nevada and New Mexico, including Arizona. The American Southwest and its neighbors are the regions we are going to be looking at as desert climates. 

Keep in mind that, on the USDA Plant Hardiness Zones Map, you may see regions with similar coloring that signify temperature, not environment.

Some U.S. regions may have similar extreme low temperatures on average, though they are not desert climates because there is more moisture available. There also tends to be less temperature fluctuation in these environments.

Trees Survive In Desert USDA Hardiness Zones (8a-11b)

While hardiness zones vary, the average zones that can be expected in the desert are zones 8a-11b. This range signifies average extreme minimum temperatures from 10 degrees Fahrenheit to 50 degrees Fahrenheit.

Let’s back up a minute… average minimum what, now?

USDA hardiness zones represent the geographic areas in which plants can grow. They use the range of average minimum temperature, which is typically only seen in extreme cases, to determine the necessary hardiness of a plant.

If a plant is hardier and more adaptable to conditions like weather and temperature, it will do better in lower hardiness zones because extreme cold is more likely.

Plants that are less hardy will do better in the mid-range locations, ranging from zones 5-9, give or take.

It takes plants of a different type to do well in weather that is not extremely cold but is instead arid with less water access. These trees tend to do well in the zones that are labeled 8 and above.

That’s great, but what do the numbers and letters mean?

Good question, dear reader.

The number of hardiness zones represents a range of 10 degrees Fahrenheit, while the letters (a and b) represent halves of those zones. The a is the lower half, shown as a 5-degree range, and the b represents the higher 5 degrees of a zone. 

So, if, for example, your date palm does best in zones 8-11, you can expect this means 8a-11b. We’ll talk in more detail about this specific example later on, of course.

If you see a zone say 9b-12a, this would mean that it can do well in two partial zones and the full zones of 10 and 11.

Essentially, these categories help you determine as accurately as within 5 degrees Fahrenheit how cold a place can get on average. Then, we can determine from there which trees and plants can survive at that low temperature.

How do you determine this on a plant-by-plant basis, though?

Determining A Hardiness Zone

palm in the  desert oasi morocco sahara africa dune

If you’re wondering how you should go about determining a hardiness zone for your plant, wonder no further!

We’ll tell you the hardiness zones of each tree listed below, but we also want you to be able to figure this information out for yourself.

The hardiness of a tree is its ability to survive low winter temperatures and still thrive afterward. 

Your tree may be able to physically survive a winter that is far below the range of its hardiness. However, it may not be able to bounce back and continue growing or producing fruit, leaves, or sap in the future.

You can search keywords like “hardiness zone of ___ tree” or “USDA hardiness zones that ___ trees thrive in.” 

If you buy your tree (at any stage) from a nursery, they should also be able to provide this information to you. Local nurseries and in-person chains may be more well-suited for conversations, but if you buy online you can still often find a hardiness zone range for your plant.

Take this Perfect Plants Windmill Palm that is sold online, the site lists lots of important information including its cold hardiness, citing that zones 8-11 are best. If you know what to look for, you’ll be surprised to find that the information is readily available.

Remember, you can always refer to this USDA Hardiness Zone Map to help you determine which hardiness zone you will be planting in. 

12 Trees That Can Grow In The Desert

If you live in a desert region of the United States, such as areas of Arizona, Colorado, Nevada, New Mexico, California, and Utah, growing trees might seem out of the question.

We are here to tell you that it’s not! There are at least 12 popular tree varieties that you can confidently grow in these areas. You can choose which types of trees you want based on the region you live in, the hardiness zone, and even the look of the plant itself.

The sky (or desert) is the limit when it comes to this list for all of you desert dwellers!

Desert Willow

Not a true willow, this genus of flowering plants does have a willow-like appearance. It is often used as a privacy screen when planted in a row of desert willows but can offer shade in the summer and help with insulation in the cold.

Hardiness Zones: 7b-11a: Adaptable to a versatile range of hardiness zones, the desert willow makes a good investment.

General Appearance: The desert willow is a small tree or shrub and often has a twisted trunk and branches. The canopy of the tree fans out beyond the trunk, but rounds into an even shape with regular, minor, pruning.

In the spring you can expect to see pink-purple flowers with yellow insides

Considerations: This tree is highly tolerant to drought and prefers full sunlight when possible, which should be easily found in the desert, making it a perfect tree for these areas.

Desert willows can be a bit messy when they drop their pods and leaves, so this is something to consider when planning your space.

Palo And Its Varieties (Verde, Blanco, Blue Palo Verde)

Palo Verde Tree Growing In Arizona

The Palo tree has many varieties. You’ve most likely heard of palo verde and palo blanco, but there are also versions like the yellow palo verde and, blue palo verde. 

The Palo verde tree comes in about 12 different species and just so happens to be the state tree of Arizona.

Beyond Arizona, the tree is often found in other deserts in the Southwest United States and in Mexico.

Hardiness Zones: 8-11: While, overall, Palo trees do well between hardiness zones 8 and 11, you’ll want to check on your specific type of Palo tree.

Palo Verdes are recommended to be placed in zones 9-11 while yellow Palo Verdes thrive in zones 9-10.

As you can see, some of these varieties are a bit more restricted than others based on where they can thrive. So don’t expect all Palo trees to grow and develop the same way in zones 8 and 11 as they would in zones 9 and 10, which are the common hardiness zones across the board.

General Appearance: Palo Verdes and other types of Palo trees most commonly appear as green trees and shrubs. Their branches are intricate and their bark smooth, often a shade of green.

They flower a bright yellow bud in the spring and drop their leaves after the rainy season.

Considerations: This tree does best when it has water to get established. Although drought-resistant, the Palo tree needs some help to start its growth process. 

As long as the soil drains well, the quality does not need to be very high.

Ocotillo Tree

Hardiness Zones: 8-11: This is an unsurprising range of hardiness zones for a desert tree, seeing as they are drawn toward warmer temperatures. As you’ve already seen, zones 8-11 are going to be common in this list.

General Appearance: This succulent is one of magnificent appearance, sporting many branches that go out to the sides from the base of the ground.

Almost bush-like in appearance, you’ll see that the ocotillo’s branches are strong, with flowers blooming at their tips. This plant will add a pop of color to your space any day!

Considerations: You’ll plant this tree in well-drained soil, keeping its roots moist during the early stages of growth. After that, feel free to water it intermittently as you would most other desert plants.

Date Palm

Hardiness Zones: 8-11: Here we are again, with zones 8-11 being the primary environment to host the date palm, this time.

General Appearance: The date palm pairs beauty with function as its fruits hang in bunches from the leaves that sit high up on the tree, above the patterned trunk that makes up the body of this palm.

Considerations: You’ll want well-drained soil (do you see another pattern?) and lots of sunlight (oh, and another!)

Essentially, this is another tolerant tree but needs to be able to get plenty of water when it flowers and produces its fruit.

Most Palm Trees

Hardiness Zones: 6b-11b: Not all palms do well in the lower hardiness zones, but some varieties may be keener than others to withstand a winter chill. You should always check first but when in doubt, remember that zones 8-11 tend to be the sweet spot for these kinds of trees.

General Appearance: Palm trees generally have leaves that stem from the very top portion of the trunk, and feather out. The leaves themselves may be shaped as fronds or in feather-like shapes, depending on the species.

Species type will determine the appearance of the trunk, as well. Some palms, like the date palm discussed above, have long and slender trunks while others are short and thick.

Considerations: Plant palm trees in soil, silt, or sand that can be easily drained but still has access to water (whether natural or human-provided.)

These trees should receive full sunlight and intermittent watering.

When buying a palm, you may have to purchase it at a juvenile stage, and transport it to where it will grow in your yard. Luckily this process is fairly common, and there are a few basic steps to help you transport palms.

Mountain Laurel

Hardiness Zones: 5-9: Here we have a range of hardiness zones that is a bit lower but makes sense as temperatures begin to drop the farther up a mountain you go. 

While these trees are still great for the desert, their mountain-dwelling tendencies allow them to deal with colder extremes while not being as well suited for the hotter temperatures.

General Appearance: This leafy green tree also blooms beautiful purple flowers and is slow-growing, which means that you’ll get to enjoy the process with this one.

Considerations: This tree does quite well with adversity and is another one that you can leave in poor soil if needed.

Do not prune this tree unless there is a disease or it is needed for any other reason.

Acacia Trees

Panoramic image of a lonely acacia tree in Savannah in Serengeti National Park, Tanzania - Safari in Africa

Hardiness Zones: 9-11 Acacia trees take us back to those higher hardiness zones, thanks to their general desert-dwelling presence.

While acacia trees have a few common places where they will grow, they are probably most prolific in the desert.

General Appearance: These trees and shrubs tend to have a slender trunk and a wide, flat canopy that stems from a few main, large branches.

Considerations: As with the others, full sunlight and well-drained soil will do the trick with an acacia tree.

Chilean Mesquite

Hardiness Zones: 8-11: Zones 8-11 are best for the Chilean Mesquite, unsurprisingly.

General Appearance: With either a single trunk or multiple thin trunks that merge, the Chilean Mesquite has a fluffy-looking canopy of spindly, thin green leaves.

Considerations: In the first year of planting, water this tree every 7-10 days. After that, you know the drill- it’s full sunlight, well-drained soil, and intermittent watering from there.

Desert Lily

Hardiness Zones: 8-11: The desert lily also does best in zones 8-11.

General Appearance: The desert lily is a flowering plant that is long and slender. It directly blooms its lilies from its stem, and appears almost cactus-like, when compared to saguaros with newly-formed little arms sticking out.

The beautiful white flowers contrast against the green base of this plant and add vibrance to the desert’s tan hues.

Considerations: Well-drained soil + full sun = a happy desert lily. Same deal as the others, but written as a fun equation for your enjoyment.

Cactus Species

Hardiness Zones: 2-11 Some cacti can do well in hardiness zones that are extremely low and, while 4 tends to be the lowest you see, hardiness zone 2 is as low as some can handle.

This is a situation where it is difficult to say which plants will do well in which zones because there are so many species of cactus.

So, when buying these plants you should always check your resources whether they be online, salespeople, or gardening mentors that can help advise you.

It’s safe to say that cacti come in quite the range.

General Appearance: Often, cacti are green plants with tough skins and needles that permeate the surface. Sometimes there will be flowers, sometimes not. These plants may be seen as low-to-the-ground spheres or tall, thin poles with arms extending from the sides.

Considerations: Make sure your cactus has enough light, these desert-dwellers need the sun to survive.

You should plan long breaks in between the watering of your cactus but when you do water, make sure it will last your plant for the duration of that next break.

Try not to touch the needles (pro-tip, we know!)

Saguaro 

Hardiness Zones: 8a-11b This, as a specific type of cactus, is a bit more easily qualified. Saguaros need to be in warmer zones, much like many of our other desert hardy plants.

General Appearance: Speaking of the tall, thin poles with arms extending from the sides, saguaros are a cactus, too, but deserve their category.

Considerations: Unlike other cacti, this one needs low levels of water on the same infrequent basis.

The soil you plant a saguaro in should be well-drained and allowed to fully dry in between watering sessions.

Fertilization is a big help in allowing this tree to grow to its potential, infamous, height, and age (read: tall and quite old!)

Desert Sage

High desert sagebrush and creosote bushes through a trail. Taken in Miners Delight Wyoming

Hardiness Zones: 5-9 Desert sage, similar to the mountain laurel, does well in the lower-midrange of hardiness zones, making this one a versatile desert plant.

General Appearance: Desert sage is a shrub with a green, sage-colored, base and light to dark purple flowers that span the plant.

Considerations: An infertile soil is a great home to desert sage, as long as it drains well and fast, as with our other plants on this list.

How Do Trees Grow In The Desert? 

The biggest thing about this question is to understand that trees must be drought resistant to survive in the desert.

All the trees listed above can survive in the desert because they are adaptable and can survive without much water.

According to Arizona State University’s Ask A Biologist feature, plants with adaptations to survive the desert dryness are called xerophytes and succulents.

These plants will adapt to need less water, to store water more long-term, or may even combine these two adaptations to get a leg up in the desert. Some plants even grow roots that can be over 100 feet deep to access water stores far beyond the surface.

We had a bit of a variety of hardiness zones listed above, but you may have gathered that zones 8-11 were a very popular range of minimum temperatures for these plants. This is because desert plants that do well in dryness often also prefer the warmer temperatures associated with this type of environment.

While these trees are all uniquely adapted in different ways, their common denominator is that they can thrive in desert climates. 

How do you help a tree that has already adapted to live in such harsh, dry conditions?

Maintaining Your Desert Trees

Joshua trees (Yucca brevifolia) along Boy Scout Trail in Joshua Tree National Park, California

Once you’ve chosen and planted your tree that grows well in the desert, the final, and most long-term, step is going to be maintenance. 

So, how do you best care for your tree over time to ensure that it lives a long and healthy life?

There are two things to consider, primarily, for desert plants:

  • Water
  • Fertilization

How To Water Desert Trees

Infrequent watering is best for desert plants, despite all of our urges based on watering practices in regions with more moisture. 

To most closely mimic the natural watering cycle in the desert, you should only water your desert trees and plants intermittently.

Often, you’ll also want to allow the soil to dry out completely in between waterings to follow that natural cycle.

Drip irrigation systems like this Flantor Garden Irrigation System are going to be your best bet because they help you time and distribute water accurately.

Desert Trees’ Fertilizer Needs

In the desert, the element most commonly needed by plants is nitrogen. So, opting for a nitrogen-heavy or all nitrogen fertilizer is the way to go.

Not only will you be sustaining your desert tree, but you can confidently know that you are giving it what it needs most to thrive in the desert landscape.

Trees use nitrogen to help produce chlorophyll, protein, structural tissues, and other enzymes necessary to the success and life force itself of a tree. So, what better addition when looking for fertilizer than nitrogen?

Especially if you are looking for a way to quickly bolster your tree growth, nitrogen will give you profound effects that other nutrients may not be able to provide for your tree. 

The PetraTools Liquid Nitrogen Fertilizer is a great product that should last you a while, saving you some money while sustaining your tree.

Wrapping Up

While we’ve talked all about the trees that can do well in the desert, it seems that we’ve used up our store of information for this article. 

Remember, when looking for a tree that can grow in the desert, there are a few factors you can’t beat:

  • Deep roots to soak up deep water reserves
  • Thick leaves or stems to retain water
  • Overall succulent 
  • Drought resistant thanks to the above characteristics

Once you’ve planted your desert-friendly tree, whatever type it may be, make sure to maintain and sustain it so that you can enjoy its presence for years to come!

Focus on intermittent watering patterns, nitrogen-based fertilization, and general maintenance practices such as monitoring the appearance of your tree.

For now, we thank you for joining us as you continue along your tree journey. It is certainly a process, and we’re glad you trust us to help you along the way.

See you next time!

References

El-Lakany, M. H. (1983). A review of breeding drought-resistant Casuarina for shelterbelt establishment in arid regions with special reference to Egypt. Forest Ecology and Management6(2), 129-137.

Hanscom III, Z., & Ting, I. P. (1978). Responses of succulents to plant water stress. Plant physiology61(3), 327-330.

Isaifan, R. J., & Baldauf, R. W. (2020). Estimating economic and environmental benefits of urban trees in desert regions. Frontiers in Ecology and Evolution8, 16.

That majestic oak tree is a beautiful sight to behold when it’s big and healthy. But that same beauty can be a nuisance it’s growing too close to your house. Though it may pain you to do so, you might have to cut down your oak tree!

You may need to cut down your oak tree if it has recently sustained too much storm damage, is leaning close to your house, or may fall on your own or other’s property. Oak trees that have expanding roots leading to foundation or sidewalk damage should be taken down.

Trees can bring on a sense of pride, add value to your property, or even hold sentimental value, but they don’t last forever. Keep reading as we discuss the reasons you should cut down your oak tree!

Cut Your Oak Tree If Its Too Close To Your Property

Oak trees need between 15 to 25 feet of distance from structures to be safe so they can grow without too much crowding. If your oak tree is getting a little close for comfort, you may have to cut it down.

A new seedling or sapling might be able to be moved to a new home, but once the tree gets established, it will be too big and too heavy to try and move. The root system will be spread much farther than the canopy, and damaging them could permanently damage the tree.

When a tree is very close to the house, branches that will inevitably fall could damage the roof, windows, or vehicles. Even healthy branches can get snapped off during rain storms, high winds, or snow and ice.

If the oak tree was to fall, it could severely damage the house and require extensive repairs. I’ve seen trees that weren’t considered big, shear off whole rooms when they have fallen.

A tree that has grown too close to the house needs to go for safety’s sake. In most cases, there are a few ways that you can get rid of oaks, but if your tree is large, the best option is most likely to cut it down.

You Should Cut Down Oaks That Stop Growing

Old-Growth Oak Tree

Maybe your oak tree has stopped growing completely. It’s been looking rather weak for several seasons, but now the bark is falling off all over, the leaves don’t grow anymore, and the bare wood is looking gray. These are signs the tree is dead or dying and needs to be removed.

Trees nearing the end of their lifecycle become more dangerous as branches get weaker and tend to fall off seemingly at random. It could be a fine, blue sky, not a cloud around, without a breeze, but a big oak tree limb still careened down from the tree. When trees are no longer living, the wood gets weaker and large chunks can fall at any time.

Weakened trees also attract insect pests like termites and carpenter ants. When these insects start drilling through the trees, they get even weaker.

When you start seeing signs like this, go ahead and get someone to remove the tree. Being proactive will prevent damage from a falling tree and help keep pests from spreading to otherwise healthy trees.

If you have a specific issue, take a look at our guide on how to stop caterpillars on your oak tree here!

Get Rid Of Dying Oak Trees

Hopefully, if you do have a dying oak tree you can treat it before it gets too bad, but if the illness has caused significant damage, the only option might be to have the tree cut down altogether. 

Signs of failing trees can include yellowing, browning leaves, or early drop before autumn. This could also be signs of drought so getting a tree expert out can let you know for sure. 

Other signs of afflicted oak trees are branch dieback, fungus, bark peeling and falling off, or powdery moldy looking growth on the tree. If you see any of these signs the tree might have some kind of issues that needs to be treated. 

Many tree afflictions can be spread to other trees on your property if they are not properly treated. These problems bring on the insect issues as well. 

They seem to sense weak trees and attack when they are feeling down. It’s nature’s way of weeding out the weak and keeping the strong. If you notice these problems early and get an expert out to treat them, you might be able to save your oak tree!

If too much time has passed and the tree is too far gone though, the best option might be to go ahead and remove the oak tree completely.

You can view our full guide on the most common dying oak tree issues here!

Chop Down Leaning Oak Trees

The fourth reason you might have to cut down your oak tree is that it has begun to take on a precarious lean. 

Your oak tree could be growing a bit lopsided for any number of reasons, but now it’s looking a little suspect. You might be able to get away with trimming it in a way it levels out, but if the lean is too severe, you might have to cut the oak down. 

Oak tree roots don’t grow very deep. They may extend dozens of feet beyond the canopy, but they only go about 18 inches (1.5ft) deep. I mention this because if the tree has too severe of a lean, the roots will simply get ripped out of the ground when the tree finally gives way. 

So, if your oak tree is leaning like a horseshoe on the peg, you’ll most likely have to have it cut so it doesn’t fall on its own.

If you’re wondering about your specific oak tree species, you can take a look at our piece on how long oak trees live!

You Can Cut Down Hollow Oak Trees

Old oak tree in sunlight

A tree with a hollow trunk may live for many years because the living part of the tree is just under the bark. All the nutrients and water flow through a couple of layers just under the surface of the tree. 

It may look relatively healthy except for that gaping hole in the trunk that travels up through it. Or maybe a branch fell off and you see a black hole of nothingness inside. Something has tipped you off that your big oak tree isn’t as solid as it appears. 

While trees in the wilderness with hollow trunks and branches in them can house a lot of wildlife, you don’t want all that in your yard. While hollow trees offer great shelter to animals such as porcupines, and several birds including hawks, owls, woodpeckers, squirrels, and martens, unfortunately, the tree is unsafe in your yard. 

Hollow trees don’t have a fraction of the strength and integrity that full, solid trees have. Branches can fall out of the canopy easier. If insects or rot are active inside the trunk of the tree, it could eventually cause the tree to topple over. 

According to The University of Maryland Extension, The xylem and phloem of a tree are the life support tissues. A tree with a hollow trunk can live for years but will have compromised strength. If one-third of the tree is hollow or rotten, it needs to be cut down. 

Bad Storm Damage May Force You To Cut Down Your Oak

Storm damage can mean wind knocking branches off or splitting the trunk of the tree or a lightning strike that has damaged the tree beyond repair. If the tree is so damaged from the elements that removing it is the only option, then it must be done.

Oak trees are also susceptible to ice damage. When you get heavy snow or especially freezing rain that coats the branches in thick layers of ice, the branches could snap. Some trees bend more than others like arborvitae, sweetgum, and black walnut which are more resistant to ice damage.

You’ll also find that storm damage is likely to strip the oak trees bark as well.

Some oak varieties tend to break with ice and snow, so if any of these storms cause too much damage to your oak tree, you’ll likely have to get it cut down. Especially if the crown or trunk is severely damaged.

If it’s been affected by a thunder storm, you can take a look at our guide on how to save your oak tree struck by lightning!

Cut Down Oaks With Prolonged Insect Infestation

Procession caterpillar nest on the treen trunk of an oak tree

It’s inevitable. If you own property with vegetation, it’s not a matter of if, it’s a matter of when you’re going to get an insect infestation of some type. Oak trees are no different. 

Though there aren’t many bugs that can cause severe damage to oak trees, a continued or persistent insect infestation could mean major problems. 

The most popular bugs that damage oak trees include the tent caterpillar, oak worm caterpillars, and bark beetles. 

You’ve most likely seen tent caterpillars in the trees at some point in your life because they make big clumps of what looks like thick spider webs in the canopy of trees. They typically reach peak numbers during the dog days of summer. 

The caterpillars themselves are fuzzy, usually have a whitish stripe down the middle of the back or on the sides, and can have spots that resemble eyes on the sides. They look rather creepy and dangerous but they are harmless to people. 

They live in these silk-covered nests eating leaves and growing bigger until they morph into moths. Then they only live for a few days, mate, and die. 

To get rid of a small infestation of tent caterpillars, you should cut down any nests you see with this DocaPole 6-24 Foot Double-Duty Telescoping Extension Pole + GoSaw. Once you have removed the nests from the tree, dunk them into a bucket of soapy water to drown the worms. 

If you have a heavy infestation, or the tree is very tall, you should call your local tree expert to help you tend to the problem. 

Oakworm caterpillars usually have two spikes near the head and may have spines running down their back, but they are considered harmless to humans as well. These critters also eat the leaves of oak trees, but without making the unsightly silken clusters like tent caterpillars. 

If your oak tree has a large enough infestation of oak worms, they can strip an entire oak tree canopy, leaving it struggling to make enough food for itself. This can systematically destroy the tree if it can’t create enough food for itself. 

Bark beetles are small, cylindrical, brown, or black beetles up to ⅙ of an inch long. The problem with these beetles is when you see them all you can do is give up on the tree. Once they have set in, it means the tree is too far gone to save it because they will not infest a healthy oak. 

According to UC Berkeleyonce bark beetles start attacking the trunk of an oak tree, insecticides won’t help it. The oak is so far gone that it is severely compromised and can’t be saved.

Depending on the severity and type of insects on your oak tree, you may have to get it removed. Consulting a professional tree company will give you more insight into whether the tree can be treated for the pests, or if it can’t be saved and needs to be removed. 

Cut Down Oaks That Cast Too Much Shade

A large healthy oak tree can create a lot of shade which can make it hard to grow grass. Most grass love full sun, and often need plenty of water and fertilizer to keep it growing green, lush, and healthy. So having a big shade tree, and lush lawn often seems impossible to attain.

You might be able to trim off the lower branches of the oak tree to let in enough sun for the grass to grow, but if the tree is a low-growing, long-spreading type, you’ll end up doing more harm to the tree.

Oak trees have a lot of leaves that create a large amount of shade. This shade can easily impede the growth of other plants within the area.

You might be able to find shade-tolerant grass for the area underneath the oak. Then you have to contend with the problem of having two different grass species that require alternating care and may look out of place.

Oak trees have shallow roots which can rise out of the ground which makes the yard look unsightly, as well as difficult to mow without messing up mower blades.

Grass also often requires extra watering and fertilizer. Depending on the oak species, this lawn care regimen can often slowly harm the tree. Ultimately leading to the removal of the tree anyway. For these reasons, you may want the oak tree removed from your yard.

Cut Down Oaks That Cause Power Line Troubles

 Trees and power lines seem to be adversaries because they never get along. Trees that grow into power lines can break them, grow around them, or even end up electrifying branches.

Often, trees that are near power lines are simply cut away from them or completely topped. This kind of aggressive cutting can permanently damage the tree or at the very least leave it looking lopsided and ugly.

When a tree is topped, it means all or most of the canopy is cut away. Sometimes this leaves the tree with few branches and no leaves. Leaving what looks like a sad, spike-less, bark-covered cactus. While some trees will still cling to life and try to grow more branches and leaves, the tree is left in a very weakened state and often dies after a few seasons.

Supposing the tree survives the heavy trimming, or only needs a quarter of the branches removed, it will only require frequent trimming to keep the branches away from the lines. Most times it’s simply best to go ahead and remove the tree to prevent any new problems, especially if it has been topped.

If you do cut down the tree down, you can save the oak tree for firewood!

You Should Cut Down Crowded Oak Trees

Old oak and hornbeams in natural late summer deciduous stand of Bialowieza Forest,Poland,Europe

When overcrowding happens between trees, you end up with a grove of weak, competing trees that can fall, or invite disease and pests. All trees require a certain amount of sunlight, and the tallest trees tend to get the most.

If you have several oak trees grouped, they will all be competing for enough sunlight to stay strong and healthy. Often they will grow tall, and only really leaf out at the top as they try to take in as much sun as possible before the other tree starts “throwing shade.”

The crowded trees then start to get top-heavy because the lower branches don’t get enough light and fall off. This can lead to trees falling over, especially in high winds or heavy storms. In the forest, this works out fine as the weaker trees are weeded out, but on your property, it can lead to costly repairs and clean-up.

When your trees become too crowded, call up a professional tree company who can help you decide which trees to thin out, and which ones to keep.

Cut Down Oak Trees With Root Issues

Oak tree roots can become a problem if you have pavers, sidewalks, driveways, or other concrete/asphalt structures in the vicinity of an oak tree. Their roots are shallow and can cause cracks in concrete and raise them creating trip hazards.

Though this typically happens closer to the tree’s trunk, an oak’s roots can grow 4 to 7 times wider than the tree’s canopy. Anything on the ground in this area is at risk of being cracked or lifted by the shallow roots. These roots can also penetrate your home’s foundation and cause very costly damage.

You can use root inhibiting chemicals to stop the flow of them or install barriers around your foundation to keep the roots from getting under the foundation and loosening the soil. You can also cut the roots back if you see they are becoming a problem, but this can cause other issues.

Aside from bringing nutrients to the tree, roots also act as an anchor to keep the tree upright. When you start reducing the roots by chemical means or cutting, it could damage the tree. If you live in a high wind or heavy rain area, trimming roots could make it easier for the oak tree to topple over.

An arborist will be able to tell you which roots can be cut, if that is an option, or whether the tree needs to be taken down completely. You don’t want cracked slabs or a sidewalk that’s as hilly as a roller coaster because of tree roots.

Considerations Before Taking Down Your Oak

Now that you know the reasons you may need to cut your oak tree, you might have to take other considerations in mind. Is your neighborhood part of an HOA, is the tree in question situated on an easement, or does the tree share property with a neighbor’s yard?

Maybe – you might just decide that you need to only trim your oak tree after the fact!

Before doing anything drastic to your tree, check on those things. If you are part of an HOA, make sure you can take the tree down by checking closely over the rules and regulations. You may need to call the committee to make sure there won’t be any issues with taking the tree down.

An easement is a part of your property that others can use for different reasons depending on the type. Some great examples include a driveway that a neighbor has to use to get to their property, or a utility easement, which, let’s say the water department can use to lay pipes on your property. 

If the tree in question is located on or near an easement, you may have to get permission to remove it. Check with your local property assessor to find out.

When the tree that needs to come down is on a shared property line, or very close to one, you might have to get the neighbor’s permission as well. To be sure, check with your county or local laws and hopefully you are on good terms with your neighbors.

If you’re going to cut down your oak tree in a non sensitive area (such as in a field with NO surrounding structures), I highly recommend taking a look at our piece on the 10 different ways to remove your oak tree – it’ll help you make the right choice!

When Is The Best Time To Cut Your Oak?

Depending on the state of the tree and how damaged it is, you might need to wait to cut the tree down. Of course, if the tree is ready to fall, is being held up by another tree, or is damaged severely in any way, you should have it removed as quickly as possible.

On the other hand, if the tree isn’t in danger of falling at any second, waiting a little while could save you some money and be safer.

Tree companies are often very busy during the summer months, and throughout the stormy season.

After a hurricane has barreled through tree companies might not have time to cut your tree down, or they will charge quite a bit more because they are so busy, they are paying their employees overtime. That cost is passed on to the consumer.

Waiting until late fall or during the winter when business slows down could get you a deal. Tree companies will often offer discounted rates or coupons during the slow months to get business.

Call around in the cooler months if the tree can wait, your wallet will thank you!

Trimming or cutting your oak tree after all the leaves are gone is also safer. It’s easier to see where all the branches are without all the leaves getting in the way. With all the leaves gone, it’s also easier for the tree-cutting personnel to guide the branches down after they are cut without secondary damage.

Replacing Your Old Oak Trees

Small Oak Seedling

After you have your oak tree removed for whichever reason, why not plant another in its place…or two, three…

They don’t have to be oak trees to replace the one you just removed. You may be hesitant to go through such a big undertaking again, that’s understandable, so you could plant a tree that doesn’t get nearly as big as oak trees.

Go with something ornamental like a flowering, weeping cherry, a couple of Bradford pear trees, or maybe even a Japanese maple or two.

You can get this beautiful Two Pack of Japanese Red Maple Trees for a great price. They are small enough (1 to 2 feet tall) to plant nearly anywhere and only grow to 10 to 15 feet tall. Hardy in zones 5 to 8. They don’t require a ton of maintenance and can be beautiful focal points for your landscaping.

You can also view our article on picking out a new oak tree sapling for more info!

That’s A Wrap!

It may be painful to cut down that oak tree in your yard, but there are times when there is no other alternative. Whether it’s been damaged from a storm, is infested with bugs, or has finally reached the end of its life there are several reasons you’ll have to cut down your oak tree.

We hope this guide has helped you make a decision on what to do next!

References

Garbelotto, Matteo, Pavel Svihra, and David Rizzo. “New pests and diseases: Sudden oak death syndrome fells 3 oak species.” California agriculture 55.1 (2001): 9-19.

Boyd, I. L., et al. “The consequence of tree pests and diseases for ecosystem services.” Science 342.6160 (2013): 1235773

Panzavolta, Tiziana, et al. “Tree pathogens and their insect-mediated transport: Implications for oak tree die-off in a natural park area.” Global Ecology and Conservation 15 (2018): e00437.

Martin, Tina, and Thomas Günther. “Complex resistivity tomography (CRT) for fungus detection on standing oak trees.” European Journal of Forest Research 132.5 (2013): 765-776.

Your Competitors Are Already Running Ads. Are You?

This is for service business owners who are ready to SCALE.