Grow Your Business with Tree Journey

Our TradeWorks Revenue System™ builds a detailed advertising funnel that attracts, nurtures, and converts the right clients – so you can finally stop chasing leads and start scaling your business.

Apple butter, applesauce, and apple pie are all fantastic reasons to have an apple tree in your yard. But what happens when your apple tree isn’t doing as well as expected? When is it time to cut it down and start over again?

It’s time to cut down your apple tree if it’s damaged, attracting pests, or the tree is dying. Homegrown mature apple trees can produce around 600 apples per year under proper conditions. These apples can attract a variety of wildlife including deer, birds, squirrels, chipmunks, and raccoons.

Interested in learning more about when it’s time to say goodbye to your apple trees? Read on below for our suggestions on the best way to cut down your apple tree and our recommendations to help you get the job done quickly.

Here’s Why You Should Cut Down Your Apple Tree

Contrary to popular belief, trimming or cutting down your apple tree may be the best thing for it! Regular trimming of branches can help encourage healthy growth, ensuring your tree has a long and happy life ahead of it.

As you’ll read in the next section, even cutting the tree down entirely doesn’t mean your apple-picking days are done forever.

Trimming or cutting your tree may be a good option if your tree is damaged, dying, or if it’s grown too tall to harvest from easily. You also may want to consider cutting down the tree if it’s past the point of rescue, if it’s dangerous, or if it is causing other damage to your property.

Here are the reasons you specifically should consider cutting down your apple tree:

1. To Remove Dying Branches

In their article “Rejuvenating Old Apple Trees,” The Connecticut Department of Energy and Environmental Protection states that if a trunk is split into two or it lacks more than a few branches that look healthy and growing, it may be time to cut down the tree entirely.

However, if most of the tree is still healthy, it’s likely the afflicted parts simply need to be removed, so it has a chance to truly thrive. Therefore, it’s essential to inspect your tree regularly, so you can catch any signs of browning branches or affected fruit early and treat them appropriately before they spread.

Once you cut down any affected branches, you’ll want to discard any trimmed limbs by burning or transporting them elsewhere.

2. To Remove Tree Damage

If something has physically damaged your tree, it’s better to remove any damaged portions early before issues or pests cause issues.

If there is significant damage, at best, damaged limbs won’t produce fruit. At worst, they may fall off without warning, acting as a future danger to anyone who may pass beneath them.

Trees may become damaged from storms, long-term problems, or even from animals. Deer, in particular, love to make a snack of the fruit and bark or to chew on tender young saplings.

If you find deer are making quick work of your orchard, you might want to use a product like the Voglund Nursery Mesh Tree Bark Protector to prevent any damage from occurring to the trunk, especially when the tree is young.

If your tree is damaged, it’s worth your time and energy to remove any limbs (or the whole tree, if necessary), to prevent any future dangers and to help encourage healthy growth.

An apple tree that doesn’t need to waste its resources on damaged sections can better concentrate on growing strong new branches.

3. To Reduce Excessive Growth

An apple tree canopy that grows unchecked makes life harder for both the tree and you. For example, a tree with limbs too close together can be hard to prune.

It also may be difficult to reach areas to spray for pesticides, and you might have a tough time picking and harvesting fruit.

Consider using the Tabor Tools Bypass Lopper for your pruning needs. Meant for heavier branches, this tool will make quick work of overcrowded areas, allowing you to safely and easily remove excessive growth without a fuss.

4. To Encourage More Apples To Grow

A tree packed full of branches and apples may be a beautiful sight, but it’s not always in the tree’s best interest to allow new growth to go wild.

Interior areas of the trees that see little light see higher rates of problems, more pests, and fewer happy, healthy apples overall. That’s why it’s best to trim any tall vertical branches, drooping limbs, or new growth causing significant amounts of shade.

One study by the Institute of Horticulture even showed that reducing the amount of fruit in an area can lead to larger apples being grown, meaning that by cutting back your apple tree, you’ll soon be on your way to swimming in pies and cider!

In addition, older trees produce less plentiful and lower quality fruit, so cutting down a portion of your older trees can help extend its growing years by allowing the tree to concentrate its energy and resources.

Usually, these older trees are used for pie fruit / filler anyways rather than snacking apples.

5. To Create New And Strong Limbs

While removing limbs from your apple tree may seem counter-productive, you’re doing your leafed friend a favor!

Thinning out a tree allows additional sunlight to reach the interior of the plant, and removing smaller limbs can help your tree devote resources toward growing and producing additional fruit.

If you’re worried about your tree looking too bare, don’t be too concerned. Oregon State University reports that cutting down a portion of an apple tree can help encourage entirely new limbs to grow.

Just a tip: After trimming and pruning away excess limbs, expect any new branches that appear to take two years to produce fruit.

6. Your Apple Tree Is Too Tall

Apple trees will happily grow upwards as long as they have the food and the sunlight to do so. And while a tall apple tree may look great, it can be a real pain for someone who wants to harvest apples on the upper branches.

If an apple tree grows too tall, the fruit may quickly get out of reach of even the tallest ladder. That’s why it’s crucial to cut down part of the vertical growth of your apple tree so that you can fully harvest it each year.

Although one study by the Missouri Agricultural Experiment Station suggests trimming a tree may initially affect how many apples are produced during the sapling’s early years, by 10-12 years old, the tree will not show any effects of the pruning, and it will be much more accessible to whoever is doing the picking.

In general, 12 feet of height is a good amount to aim for. If you need to trim up high, consider using a product like the Fiskars Extendable Tree Pruning Stick to reach those out-of-the-way branches easily.

7. The Apple Tree Is Too Old

North Dakota State University states that although an apple tree’s greatest fruit production peaks around 25 years, a tree can continue to produce and live up to 100 years!

Don’t expect buckets full of apples as the tree reaches the end of its life, however. Instead, as the tree grows older and the apple productivity drops, you may be better off cutting down the tree as a whole and replacing it with a younger sapling.

8. The Tree’s Root System is Too Shallow

If an apple tree grows in a less-than-ideal area (such as in a dark, forested place), it may develop a root system that lies just below the surface. Shallow roots mean the tree will be very susceptible to strong winds, making it a potential problem in the event of a particularly heavy nor’easter or hurricane.

Trees with shallow root systems because of poor growing conditions will need to be cut down and removed. They can easily fall over onto sheds, cars, or even your house and should be cut down before they cause damage or hurt someone.

9. The Root System Is Causing Damage

Just like a tree in a dark forest can cause a root system that stays at the surface level, a thick carpet of grass growing right up to an apple tree trunk can cause a root system that is unnecessarily deep.

So, although it may look pretty in your front yard, this type of tree can cause problems in your home that may go unnoticed until it’s too late.

Tree roots that travel deep into the ground affect pipes and wiring that run underground into your home. They can puncture sewer lines, causing plumbing backups and slow draining pipes.

These can all be costly issues to fix, so if your tree is in the same areas as your water, sewage, or gas pipes, it may be time to cut it down.

10. The Tree Is No Longer Producing Fruit

If your apple tree is no longer alive, the structure of the tree itself is at risk of falling down or being knocked over in the first big storm of the season.

It also may be at risk of losing limbs, causing excessive debris in your yard and even falling.

If your apple tree isn’t producing fruit and shows no signs of new growth, it may be dead, and you should consider cutting it down.

Important Considerations For Trimming Your Apple Tree

If you decide to cut down your tree, there are a few important things to know before you start.

The way you trim the tree (and when you do it) is essential to the future health of your tree.

Whether it’s an older or it’s a new sapling, it is important. Trimming can also affect future fruit productivity, so it’s good to be aware of the following points before you begin:

Your Apple Tree May (Or May Not) Grow Back After Being Cut Down

The good news is, even if you need to cut down the apple tree to the roots, your apple tree can grow back!

If enough of the root system is left over, an apple tree can come back and produce again (although it may take a lot of time to reach its former height).

It May Take Some Time To Produce Apple Again

Be aware that if an apple tree is cut down to the main stump, it must first grow its limbs back. Therefore, it may be five or more years until you see the first harvest, depending on how much was cut down.

Even if you’ve only trimmed and pruned, don’t expect apples to appear like magic overnight on recently grown limbs. New branches must grow for about two years before they produce any fruit.

That’s why it’s best to keep the tree regularly pruned, so you consistently have a mix of old and new growth in your tree and your fruit production isn’t severely affected.

The Tree’s Shape Is Up To You!

Although most apple trees naturally adopt an umbrella-like appearance, the ultimate shape is entirely in your hands!

For example, you may choose to thin the top of the tree as it grows, encouraging the tree to grow horizontally and spread out. This can make it easier to pick fruit, prune limbs, and spray the apples if you choose to do so.

Just make sure to properly prune and thin apples if you do go this route!

When (And How) Should I Take Down My Apple Tree?

Scab On Apple Tree Leaves

So what’s the key to helping your apple tree thrive in the future? Trimming at the right time and cutting down the right amount!

Read on below for our recommendations on how to keep your apple tree producing long into the future:

Trim When The Tree Isn’t Growing

If you’re going to trim or cut back your apple tree, it’s best to target the dormant period during the late winter or early spring. This will help reduce the stress on the tree during the growing season and also help you stress the tree when insects and apple tree long-term issues are less of a risk.

The exception to this? If you’re looking to cut back limbs that aren’t producing well, do so in the summer, when you can see how much fruit is on each branch.

Only Take Down One-Third (Or Less) Of The Tree

You can safely cut down one-third of your apple tree each year, and the tree will continue to grow and produce each spring with no issues.

That’s one-third of the healthy tree and doesn’t take into consideration any dying or damage branches. These should all be trimmed and pruned as well.

If you’re looking for tips on general pruning for the health of the tree, you’ll want to encourage as much sunlight to reach each tree branch as possible. To do this, trim upper branches and branches near the center, and make sure limbs aren’t blocking one another from getting a healthy dose of sunlight!

That’s A Wrap!

There are plenty of reasons to cut down your apple trees. You may choose to remove or heavily prune them because they are on their way out, browning, or damage or because your tree has simply gotten too big to handle. You also may be interested in pruning your tree to encourage better fruit production or a healthier tree overall.

Whatever your reason, by trimming and cutting it down at the appropriate times of the year and having a good pruning plan, you can ensure years of healthy growth and large harvests are ahead of you!

If you’re interested in keeping your apple tree, take a look at our guide on what plants you can plant under your apple tree to help its asthetic- it’s a doozy!

Resources:

Robinson, Terence L., Alan N. Lakso, and Zhongbo Ren. “Modifying apple tree canopies for improved production efficiency.” HortScience 26.8 (1991): 1005-1012.

Talbert, Thomas Jesse. “Results of some young apple tree pruning experiments.” Research Bulletin. Missouri Agricultural Experiment Station 313 (1940).

Valiuškaitė, Alma, et al. “The effect of sustainable plant protection and apple tree management on fruit quality and yield.” Zemdirbyste-agriculture 104.4 (2017).
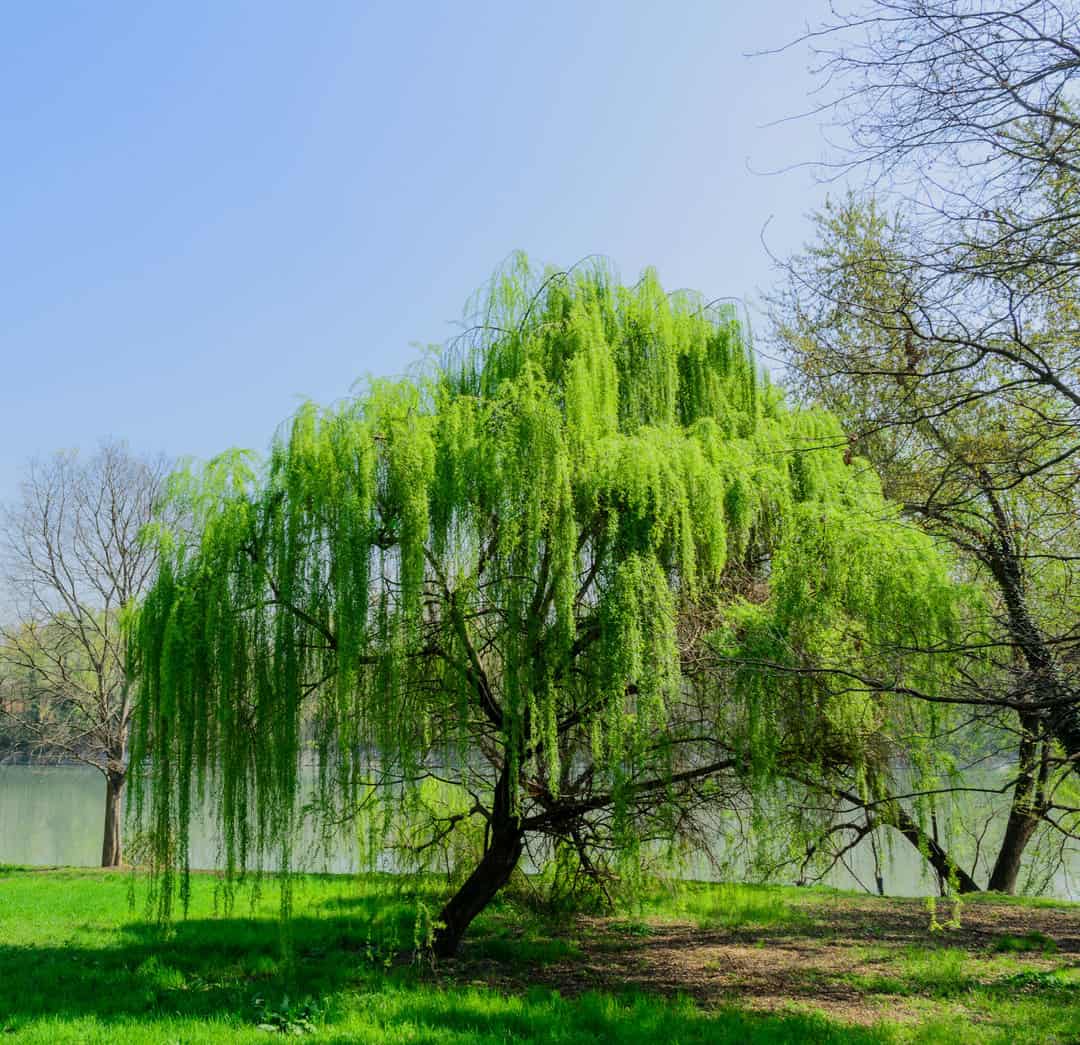
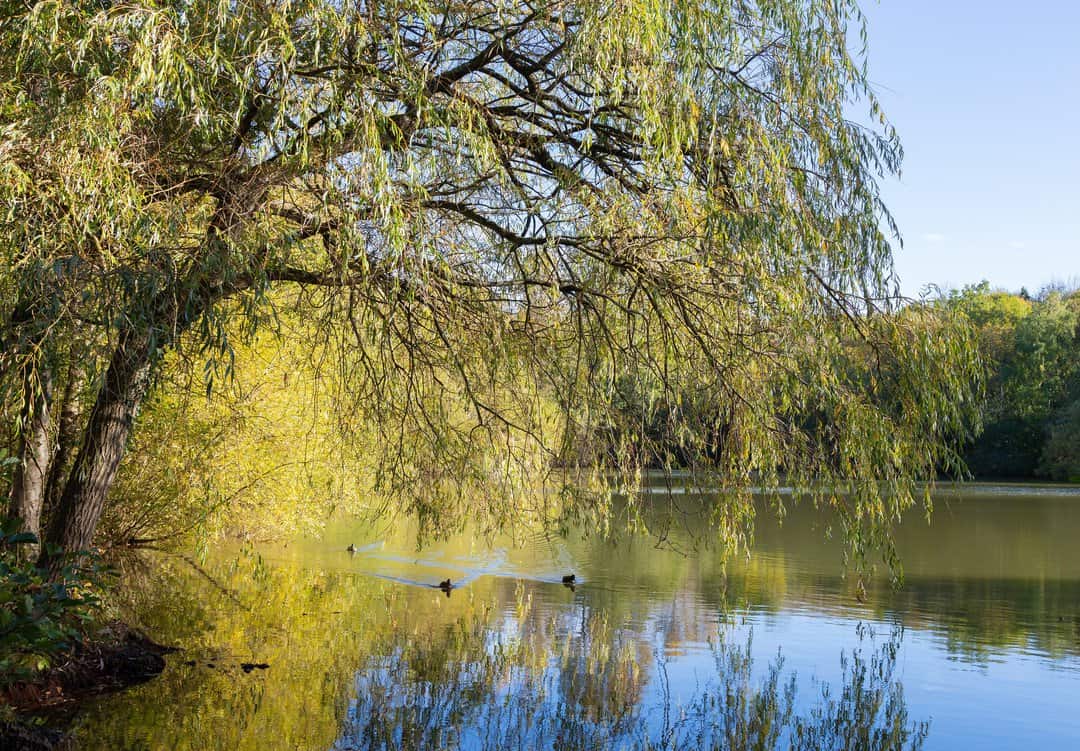
Willow trees, particularly weeping willows, are iconic trees for anyone who lives near water. These large trees have unique leaves and drooping branches, making them a popular choice for anyone looking to make their yard stand out. But where do willow trees grow?

Willow trees were originally native to parts of Central Asia and later to North America. In the United States, willow trees commonly grow in Kentucky, Arkansas, Tennessee, North Carolina, South Carolina, Georgia, Alabama, and Louisiana in hot and humid climates near rivers, swamps and ponds.

However, there’s a lot more that goes into the location than just rattling off the names of a few states! In this article, we’ll dive into what makes an ideal habitat for willows, the types of willow trees, and the most common spots where you can find them.

How To Identify Willow Trees

Some species of trees are difficult to identify at a glance. Similar leaf shape and bark texture can leave two different trees nearly indistinguishable in the eyes of an amateur. Luckily, the willow is perhaps one of the easiest trees to identify.

Brandeis University explains that weeping willow trees (scientific name: salix babylonica) can grow up to 90 ft tall and have drooping branches. From afar, a willow tree might look like a large mushroom with an exceptionally large cap.

As you get closer to the tree, you’ll see that the leaves are thin and pointed, almost like a spearhead. The outer side of the leaves is usually a light green color, while the underside has a pale complexion. Willow bark is gray in color and very rough.

You’ll often find willows growing near water, whether that’s a stream, pond, or swamp. Because of the flexible nature of their branches, some willow trees might look like massive bushes, since their foliage reaches all the way to the ground. 

Willow Trees Grow Super Quick

According to the Arbor Day Foundation, willow trees can top more than 2 feet each year! In their early years, they can easily grow more than that amount in the right conditions. However, willows tend to have a short lifespan, living no more than 30 years in most scenarios.

If you’re interested in learning more about how to identify willows and other kinds of trees, it can be beneficial to get in a field guide for when you’re out hiking!

There’s nothing wrong with searching for photos on online, but it’s always nice to have a paper copy in the outdoors with you. The National Geographic Pocket Guide to Shrubs and Trees of North America is an essential reference guide that will make plant identification and your tree journey so much smoother!

Most Common Types Of Willow Trees

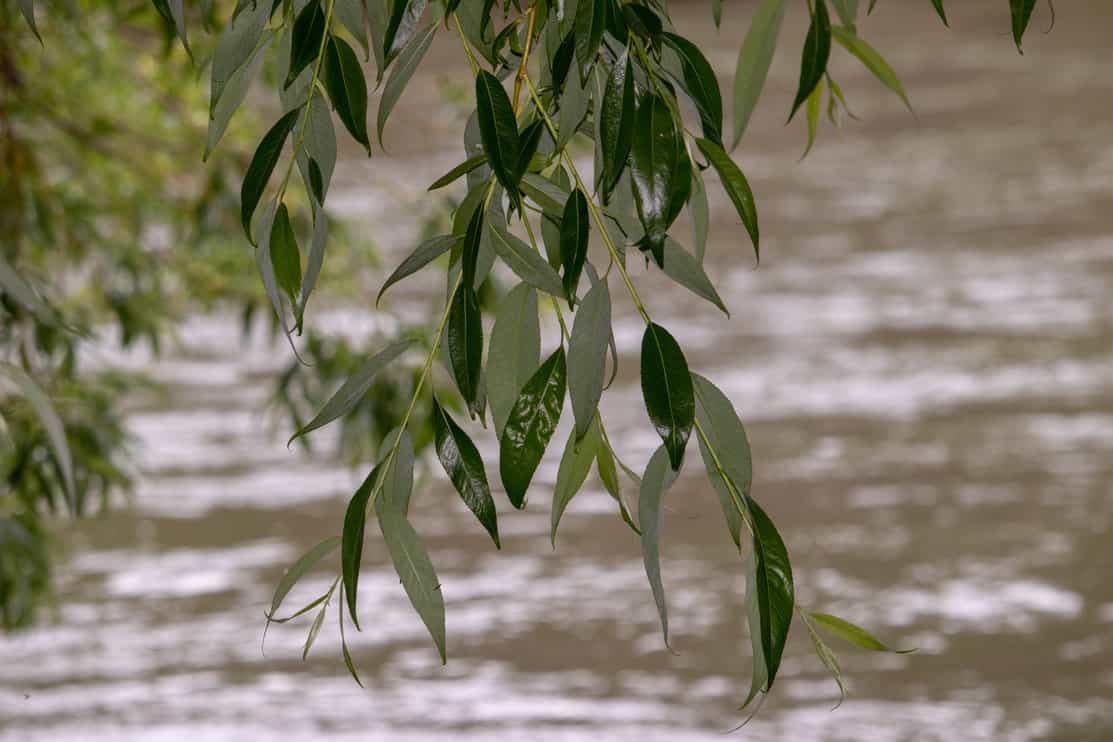
Willow Tree Overhanging Lake

The Weeping Willow (Salix babylonica) is the kind of willow that most people are familiar with. Despite being originally from Asia, the weeping willow is widespread across the United States. 

But there are a few other kinds of willow trees out there, too!

Scouler’s Willow (Salix scouleriana) – Scouler’s willow is one of the smallest kinds of willow trees, usually only reaching to be about 36 feet tall. It is named after the Scottish botanist John Scouler. This willow is common in the lower parts of Canada, throughout the Rockies, and parts of the Pacific Northwest.

White Willow (Salix alba) – The white willow can grow to be anywhere from 30 to 90 feet tall, and is largely located in the Great Lakes regions of the United States. Additionally, it’s fairly common in Europe and Central Asia. The white willow has lighter leaves than its brethren, hence the name.

Peach-Leaf Willow (Salix amygdaloides) – According to the United States Forest Service, the peach-leaf willow is one of the most widespread willow trees in North America, appearing in 27 states and 6 territories in Canada. It only grows to be about 40 feet tall, but still manages to be one of the tallest trees in the Great Plains region. Like its relatives, it thrives in wet conditions, but can also be found in dry, silt-like soil.

Types Of Willow Shrubs

Not all willows are trees, however, most are shrubs!

The Hakuro Nishiki (Salix integra) shrub is a common landscape feature, known for its colorful, variegated leaves. Other willow shrubs include the Bebb Willow (Salix bebbiana), Purple Osier Willow (Salix purpurea), and the Salix discolor

There are many variations of willows, some of which only grow in certain areas throughout the USA. These shrubs are used by conservationists to help combat erosion.

In a study conducted by the USDA and the Soil Conservation Service, willow shrubs were found to “maintain or restore endemic riparian and wetland plant communities.”

The tightly-woven root systems and rapid growth rate of willow shrubs make them the perfect vegetation for combating erosion during flood season. 

Plus, they provide foliage, vegetation, and food for native animal species! Elk, moose, small birds, and even honey bees benefit from willow shrubs.

The Most Common Places Where Willow Trees Grow

The weeping willow is a pretty hardy tree, and according to Pace University, it can even thrive in acidic soil conditions. They do, however, require a lot of water! This is why they are frequently found near or around ponds, lakes, streams, and rivers. 

As we mentioned earlier, willow trees can be found across the United States, typically growing close to the water in zones 4 through 9, although they flourish in zones 6-8.

Excluding a few areas in the northern reaches of the United States, as well as the lower parts of Texas and Florida, willow trees thrive in North America. Let’s discuss a few of these places in greater detail. The eight most common places where willow trees grow are:

  • Kentucky
  • Arkansas
  • Tennessee
  • North Carolina
  • South Carolina
  • Georgia
  • Alabama
  • Louisiana

1. Kentucky

Kentucky is a great state for growing all kinds of plants. It’s right in the middle of the United States and has a hardiness zone of 6-7, making it the perfect place for weeping willows to grow.

Kentucky has a relatively temperate climate, with a clear start and end to its seasons. According to data collected by Kentucky State University for a state climate summary, Kentucky’s summers are hot and humid while winters are mild with occasional bouts of extreme cold.

Generally, high temperatures in the summer don’t break 90 degrees Fahrenheit, while in the winter high temps might be anywhere from 38 degrees to 44 degrees Fahrenheit.

On average, northern Kentucky receives 42 inches of precipitation while Southern Kentucky receives 52 inches. Parts of southern Kentucky inch their way into hardiness zone 7.

Fun Fact: One of Kentucky’s Champion Trees is a black willow (Salix nigra) in Harlan County at the Pine Mountain Settlement School. It was nominated as a champion tree in 2020 and is 62 ft tall with a 75 ft crown.

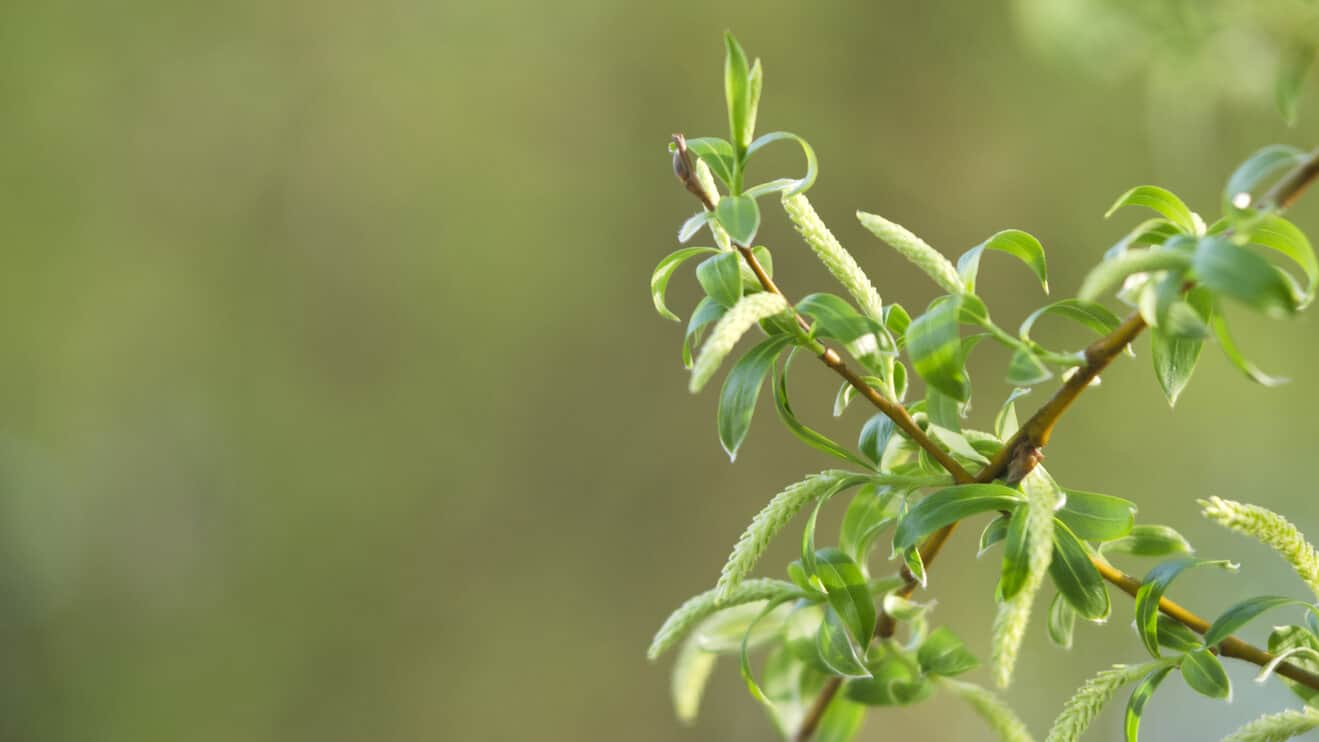
Branch of a flowering willow. Concept springtime background

2. Arkansas

Arkansas has a wide range of growing conditions, with the northwestern part of the state a zone 6-7, while the middle of the state is a zone 8. 

Arkansas has a humid subtropical climate, with temperatures ranging on both ends of the spectrum. In a climate study conducted by NOAA, it was found that this state experiences extreme temperatures. The average high temperatures in the summer can reach more than 100 degrees Fahrenheit, while winter lows sit at about 25 degrees Fahrenheit!

The state is known for having massive amounts of precipitation, be it rain or snow. The climate study showed that generally, storms in Arkansas are capable of dropping 10 inches of precipitation in short periods of time. 

Like Kentucky, a black willow made the list of Arkansas’ Champion Trees. The tree is located in Burns Park in North Little Rock. The tree is about 134 ft tall with a crown width of 36 ft. 

3. Tennessee

Tennessee is probably one of the best places to grow a willow tree. The state is pretty much exclusively a hardiness zone 7, which is right in the middle of the recommended zones for S. babylonica.

When thinking about climate, Tennessee can be divided up into four distinct sections, as outlined by the East Tennessee State University Department of Climatology.

The westernmost division of Tennessee has a median temperature between 60 and 62 degrees Fahrenheit. The easternmost division of Tennessee is the mountainous region, so in some places, median temperatures can be as low as 50 degrees Fahrenheit. Generally, Tennessee has a temperate climate.

When it comes to precipitation, most of Tennessee ranges anywhere from 60-65 inches per year. The lower flatlands experience less precipitation, and it mostly drains into the Cumberland or Tennessee rivers. These areas are where the bulk of willows grow.

Tennessee has one willow as its champion tree, again a black willow. It’s significantly smaller than the champion trees in Arkansas and Kentucky but still stands at 57 feet tall with a 50-foot crown spread. The black willow is located in Knox country.

4. North Carolina

North Carolina is split almost down the middle in terms of hardiness zone. The western portion of the state is zone 7, while the eastern part of the state is zone 8. Thankfully, weeping willows thrive in either zone, so they are widespread across the state. 

North Carolina is like Tennessee in terms of climate, with a range of temperatures throughout the year.

Generally, the temperatures can top 95 degrees Fahrenheit in the summer, and drop to 20 degrees or below in the winter in North Carolina. According to a climate study conducted by the North Carolina Institute for Climate Studies, the number of extremely hot days hasn’t increased in the past years, but nighttime temperatures have increased, sitting at around 70 or 75 degrees Fahrenheit.

In terms of precipitation, North Carolina gets about 48-50 inches each year, but the climate study suggested that heavy rain and hurricane events could increase the average precipitation rate in the coming years. The wetter the better for weeping willows!

North Carolina boasts a weeping willow as one of its champion trees, with a height of 73 ft and a total circumference of 167 inches. The weeping willow is located in the town of Cashiers in Jackson county.

5. South Carolina

South Carolina is best known for its sandy beaches and palm trees, but it’s also an ideal growing spot for willow trees. The state is almost completely a hardiness zone 8, with a small portion of the northwestern tip inching into zone 7.

Data collected for a climate study by NOAA indicates that South Carolina is primarily classified by its hot, humid summers and lackluster winters. Average temperatures range from the 50s to the 60s, with warmer temps felt closer to the coast, while cooler days are the status quo in the Appalachian Mountain range.

Summers can be brutal in the low country, but winters are quite mild, with average temperatures between 40 and 47 degrees Fahrenheit.

The Midlands is the driest part of the state, with less than 40 inches of precipitation each year. Most other areas of South Carolina receive about 40-50 inches of rain a year, with more precipitation in the mountains. 

While there isn’t a registry of champion trees in South Carolina that features a willow, there is a unique variation of the tree that appears throughout both North and South Carolina. According to North Carolina State University, the Carolina willow (Salix caroliniana), commonly known as the swamp willow, only grows to be about 20 ft tall, but is notorious for growing in the worst possible soil conditions. For that reason, it’s often found near salt water and other water run-off areas. 

6. Georgia 

Like South Carolina, Georgia is primarily located in zone 8. There are a few areas in the north that are in zone 7, and a few places in the south and southeast that are in zone 9. While willows will grow in zone 9, the bulk of them are growing in hot, humid zone 8. 

Because Georgia has a portion of coastline near the Gulf of Mexico, and mountainous regions throughout the state (Appalachian and the Blue Ridge Mountains), temperature zones vary greatly. According to a study conducted by NOAA into the climate of Georgia, the state is known for long summers and short winters with temperatures rarely dropping below freezing. 

Precipitation also ranges pretty drastically, with 70+ inches in mountainous areas, and an average of about 45-50 inches in the lowland areas. Snow is infrequent, and doesn’t usually amount to more than 5 inches.

Since the summers are so hot and humid, and rainfall is fairly consistent, Georgia is largely an agricultural state. But willows grow alongside those Georgia peaches!

In Georgia, a weeping willow made their champion willow list. It is located in Young Harris, which is in Towns Country, Georgia. The tree has both a height and crown spread of 52 feet, and was last measured in 2010.

peach-tree willow branches
Peach-tree willow branches.

7. Alabama

Alabama is largely land-locked, with the lower three-quarters of the state residing in hardiness zone 8, and the northern portion reaching into zone 7.

Alabama is at the perfect spot where air masses meet, coming up from the Gulf and down from the rest of the US, giving it a pretty mild climate.

NOAA conducted a study of the climate in 2020 and found that Alabama’s temperatures haven’t changed much since the early 2000s. Summer days are hot, with frequent days reaching above 95 degrees Fahrenheit. But, winters are mild and temperatures don’t drop much below 30 degrees in the north and 45 degrees in the south.

Alabama has pretty consistent precipitation, with only a few dry months near the end of the summer. On average, you can expect to see 55+ inches in any given year. This hot, wet weather is perfect for agriculture and even better for willow trees.

But, because Alabama sits right where air masses collide, the state has frequent tornadoes. These nasty storms wreak havoc on willows, which have characteristically weak limbs and snap easily in high winds.

Alabama has plenty of champion trees, but as of 2021, they lack a champion willow.

8. Louisiana

Louisiana is at about the southernmost point in the United States where willow trees grow. The northern portion of the state is a zone 8, while the lower half is firmly a zone 9.

The climate in Louisiana is hard to pin down because there will be wildly hot streaks and occasional brutally cold days. NOAA’s climate study indicated that historically, there are usually between 25 and 40 extremely hot days each summer, while the days with temps below freezing are next to none.

Precipitation in Louisiana is almost constant, with some places experiencing 60+ inches of rain every year.

Louisiana, being so close to the Gulf of Mexico, is subject to hurricane conditions during the summer. These storms often destroy a lot of property in southern Louisiana and can be a nasty problem for willow trees, which typically grow near floodplains.

Unfortunately, no willow trees made the list of Louisiana‘s champion trees.

Don’t Weep (Willow, That Is!)

Get it? Weeping willow? Ok, I’ll stop…

So, where do willow trees grow? Hopefully, you’ve learned that the ideal climate for willow trees is often hot and humid. Because willow trees have a relatively short lifespan (about 30 years), low temps can stunt their growth, so they love the weather in the southern US.

But just because they’re fans of the marshes, swamps, and riverbanks in the lower states, doesn’t mean they don’t pop up in other places! Most states in the US have weeping willow trees, and black willows too. The only states where you’ll be hard-pressed to find willows are in the north. Think Michigan, Wyoming, and Montana. 

Remember, willows prefer:

  • Neutral or slightly acidic soil
  • Full sun
  • Rich, moist growing conditions

Willow trees, like the weeping willow, are originally from Asia. But, because of their extensive root systems and incredibly fast growth rate, they’ve become a staple of erosion control specialists and landscapers throughout North America.

If your willow tree is causing an issue, take a peak at out guide on the reasons to cut down your willow tree for some tips!

References

Mutlu-Durak, H., & Yildiz Kutman, B. (2021). Seed Treatment with Biostimulants Extracted from Weeping Willow (Salix babylonica) Enhances Early Maize Growth. Plants, 10(7), 1449.

Szekely, G., & Dagmar, V. (2011). Willow trees in the parks of Timisoara. JOURNAL of Horticulture, Forestry and Biotechnology, 15(1), 75-77.

Roloff, A. (2020). WEEPING WILLOW AS A POTENTIAL URBAN TREE IN BHUTAN.

If you have found yourself wishing for a tree that will grow fairly quickly, provide nice shade, and also produce some beautiful foliage in the spring and fall, you might find that the ash tree is the right fit for you! Ash trees can grow from seedling to mature tree quickly in the right conditions, and they can flourish for decades and decades with the right environment and care.

The time for an ash tree to grow to maturity can vary wildly, but in general, expect it to take about 3 to 15 years. Once the tree has grown fully, it can be 120 feet tall and live for up to 200-300 years depending on the species and growing conditions.

Read on for all the info you need to plant your ash tree, help it grow, keep it healthy, and protect it from destructive pests!

How Long Does It Take To Grow An Ash Tree?

Branches of red ash against the sky in October

Ash trees grow fairly quickly, but how fast they grow depends on a few factors.

First, young ash trees grow faster when exposed to a lot of sunlight. If you want to accelerate the growth of your ash tree, keep this in mind when choosing a planting location.

Another factor in tree growth is the soil around the roots. Your ash tree will grow bigger and faster with rich, healthy soil. You can enhance the soil of your ash tree by using fertilizer, like Miracle-Gro Shake ‘n Feed, which is made specifically for flowering trees.

Typically however like we stated above, expect your ash tree to reach maturity at around 15 years (this will vary widely based on the species.) During their peak growth, ash trees can grow around 1-2ft per year until they reach their full height!

Planting Your Ash Tree For Faster Growth

Ash trees can be found around the world and prominently in North America. Billions of them grow in the United States. They are flowering trees that have a few different species.

According to the USDA, the most popular of which is likely the white ash tree, which is also sometimes called the Biltmore ash. In the United States, ash trees grow mainly in the east, but it is possible to grow them in other parts of the country, too, as long as you can take care of them with good soil and watering.

In general, the best time to plant ash trees outdoors in your yard is the spring. This will give the tree the most time possible in warm weather, allowing its roots to strengthen and its branches to grow before the cold temperatures of fall and winter arrive. This start will allow your ash tree to get the best possible head start on fast growth.

If you plant your tree in the summer, you will see its leaves change with its first fall season, no matter how few leaves there are. For ash trees, this means yellow leaves that might darken to red or even purple, then turn brown and fall off for the winter.

Trees also do well when they are planted in the fall. With this timing, according to the Conservation Seedling Program, the tree’s roots can establish themselves over the winter while the tree’s growth is dormant.

Then, in the spring, the young ash tree will grow new, green leaves. Ash trees will then soon produce white flowers that linger through most of the summer before the new fall season changes the leaves yellow once again.

If you are concerned about the health of your young ash tree over the winter for any reason, you can protect a young tree from the cold elements by wrapping it in burlap or covering it with a tree protector, like these Alpurple Plant Protection Covers.

Whether you choose to plant in the spring or the fall, ash trees are likely to do well with either planting season as long as you plant them properly and set them up for a healthy first year with plenty of sunlight, water, and protection from pests (more on that later). 

To learn more about when it is the best time to plant your ash, check out our article on the best time to plant ash trees!

Where Should You Plant An Ash Tree For Fastest Growth?

Ash trees can be planted under shade, but they do better with at least a little sunlight. If you want your ash tree to grow as fast as possible, plant it in full sun (unless you live in a harsh sunny climate, like the southwest United States; then the sun might be too much for your new ash tree). The sun will help your ash tree grow tall faster than shade. 

But if you do not have a spot without shade, don’t sweat it. Your ash tree will still grow; it will probably just be slower to get tall than an ash tree that gets lots of sunlight. 

Make sure to plant them at least 10 feet apart if you are planting more than one ash tree. 

You can plant your tree in a garden area or a grassy area. Most ash trees do well even in wild areas that are not regularly weeded, especially after the first few years. Once your tree is well established, the only regular care it will need is pest control and the occasional pruning.

Just remember – ash trees loveeeee sun!

One reason why you may want to plant an ash tree is because it can cool down your yard. Read more in our article on the 5 reasons why ash trees make great shade trees!

How Do You Plant An Ash Tree In Your Yard?

Once you have determined the optimal spot for your new ash tree, there are a few things to keep in mind during planting to set your tree up for success. If you are not able to plant your tree right away, make sure to keep the soil around the tree moist until you can plant it. 

Here are some steps to help you plant your ash tree outdoors:

  • Dig a hole that is larger than the root ball of your ash tree. It is good to err on the side of the hole being too big, as it is easy to fill the hole with loose dirt if you need to make it smaller. Ideally, the hole should be at least twice as big as the root ball. 
  • Remove any plastic, burlap, or paper from the root ball of your tree. Check to see if any tags or ties have been left behind. If you purchased your tree from a store, it may have a tag on its branches to identify it. You can leave this on if you like. Just make sure to remove anything that will end up buried underground. 
  • Loosen the soil around the edges of the hole you have dug. This will make it easier to completely cover the root ball with soil. 
  • Put the root ball in the hole you have dug and see how close the tree’s trunk flare, which is where the tree’s trunk emerges from the roots, is to the ground surface. The trunk flare should be even with the ground. Fill in the bottom of the hole, under the root ball, as needed until the base of the tree trunk sits level with the ground. 
  • As you fill in the hole, water the soil. According to New York State Conservation, this will help eliminate air bubbles and make the tree more secure in the hole. 
  • Fill in the hole with the dirt you dug, or supplement with growing soil. 
  • Once you have planted your tree, use a garden hose to thoroughly water it, giving it a good start. 
  • Check on your tree over the next few days to see if the trunk is planted securely, the tree seems to be getting enough water, and nothing unexpected has entered the tree’s environment. 
  • Enjoy your new ash tree!

What Can You Do If You Don’t Have A Good Spot To Plant Your Ash Tree? 

Did you know that you can start some trees in containers? While some trees can live their entire lives in containers, that is not the case for the ash tree, which will eventually be too big. But if you have a reason that you cannot plant it in the ground right away, a large container might be the solution to your problem.

Maybe you want to give your ash tree a head start with plenty of sunlight, then move it to a shadier area. Maybe you are planning to move in the next couple of years and want to take your ash tree with you. Or perhaps you want to plant your ash tree in the fall or winter when outdoor conditions would possibly be too cold for a young ash tree seedling. 

For any of these reasons, you might look into planting your young ash tree or seedling in a container, which is usually just a very large pot. 

Here are some steps to getting started with your container ash tree:

  • Buy a very large pot or container. It should be significantly bigger than the root ball of your ash tree seedling.
  • Choose a spot for your container. If this is indoors, make sure you can put the container in a spot that gets enough sunlight. A window with southern light exposure is best, if possible. If your container will be outdoors, watch the spot you have chosen for a day or two to see how the sunlight changes throughout the day. In general, unless it can be sunny most of the day, choose morning light over afternoon light.
  • Put a layer of rocks, pebbles, or even tree bark at the bottom of your container. This will help the water drain away from the roots of your ash tree and prevent them from rotting.
  • Plant your ash tree in a container with potting soil, like Miracle-Gro Potting Mix, which can help your tree grow faster and healthier.
  • On top of the soil, put a layer of peat moss, like Miracle-Gro Sphagnum Peat Moss. This will help keep the soil moist and prevent your tree from going without water for too long.
  • Once your container is planted, make sure to water it regularly or place it in a location where it can receive natural rainfall.
  • When the tree has grown too big for the container, move your ash tree to a spot in your yard where it can reach its full size and live the rest of its years.

What Are Some Problems To Look Out For When Growing An Ash Tree?

Ash tree with browning flowers and leaves

Ash trees are fairly hearty trees that can survive both summers and cold winters, so once your tree has established itself in the soil, it is unlikely that you need to take steps to protect it from the weather. There is, however, a major threat to ash trees that you should be prepared for from the very first day you plant your tree.

Ash trees are often plagued by the emerald ash borer, an Asian beetle that was first found near Detroit, Michigan in 2002. These destructive beetles can cause the demise of an ash tree in anywhere from one to four years, depending on the age and size of the tree.

Three major species of ash tree–including the white ash tree–are listed in the northeast United States as critically endangered because of emerald ash borer infestation.

Emerald ash borers are incredibly invasive, and they are devastating to ash tree populations. In the national parks of the National Capital Area (in the eastern United States), for example, there used to be 300,000 ash trees. In only a few years, the National Parks Service states, emerald ash borers eliminated all but less than 80,000 of them.

In states bordering the Great Lakes, the number of ash trees had been increasing in the 1980s and 1990s, but after the emerald ash borer arrived around 2004, the number of trees was drastically reduced.

In addition, you may have problem with how much water or sun you are giving to your tree. Read more about how much water ash trees actually need!

How Do You Protect An Ash Tree From Emerald Ash Borers?

While this information might seem scary, it doesn’t have to stop you from planting an ash tree, nor does it have to stop your ash tree from living a long lifespan. With the proper attention and treatment, particularly insecticides specific to emerald ash borers, your ash tree can thrive.

You should take steps early to prevent emerald ash borers from infesting your ash tree. Don’t wait until it is too late.

According to the City of Burnsville, these beetles are so prevalent now that if you have an ash tree in your yard, you should plant another species of tree in your yard, as well, so that you will not lose all of your shade if you have to remove the ash tree.

One of the easiest ways to protect your ash tree is to treat the soil around it with a fertilizer that also includes a pesticide to help keep it safe from emerald ash borers.

These beetles can eliminate your tree very quickly, so it’s best to start with this protective measure. Use something specific to emerald ash borers, like BioAdvanced Tree & Shrub Protect & Feed.

How Do You Know If Your Ash Tree Has Been Infested?

Because emerald ash borers live under the ash tree bark, you may not know they are there until it is too late–unless you know how to look for the signs of infestation.

Here are the main signs of emerald ash borer infestation, according to the State of Maryland:

  • There are lots of woodpeckers on your ash tree. They are there to eat the emerald ash borers, so if you see a lot of woodpeckers, that might be a sign that the beetles are under the bark of your ash tree.
  • Your ash tree starts to lose leaves at the top of its canopy.
  • There are holes in the bark of your ash tree in the shape of the letter “D.”
  • The bark of your tree is splitting. 

If you treat your ash tree preventively to keep emerald ash borers from infesting it in the first place, and you are vigilant to make sure there aren’t telltale signs of emerald ash borers in your ash tree, your tree can grow healthy and strong and stay that way for many years. 

Make Sure To Prune Your Ash Tree

Ash trees grow wonderfully in wild forests, so they can survive and thrive without pruning. If you are growing an ash tree in your yard, however, you might want to take some steps to prune it to remove dead branches.

This will make it less likely to fall under the weight of heavy snow, and it will just make the tree look better. Pruning also helps with the control of pest infestation, but hopefully, you are already using an insecticide to prevent that, as well.

Lower ash tree branches die frequently, which is normal and not a cause for alarm. The best time to remove them, according to officials in Minnesota, is during the fall or winter.

This is because, during the colder seasons, the emerald ash borers are dormant and less likely to be spread to other ash trees that may not have been treated for them like yours has.

What Colors You Can Expect Your Ash Tree’s Leaves To Be Once Grown!

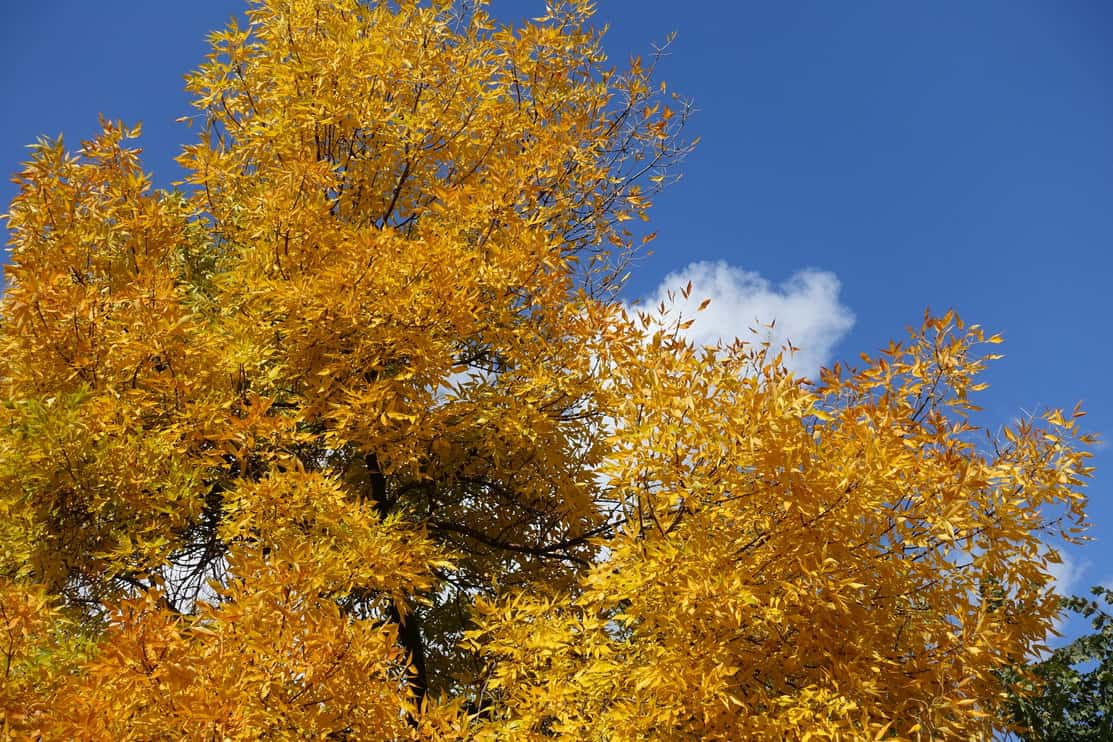
Orangey yellow autumnal foliage of Fraxinus pennsylvanica against blue sky in October

In the fall, you can expect the trees on your ash tree to change from green to yellow for most of the season, though some ash trees will also darken to a red that even looks purple as the fall comes to an end.

To make sure your ash tree’s leaves experience the full potential of their autumn foliage, be sure your tree gets plenty of water throughout the year.

If you live in a very dry climate or your area experiences periods of drought in any given year, you should water your tree. This will ensure those bright autumn colors.

In the late spring through the summer, ash trees usually produce white flowers (white ash!)

So, Why Should You Plant An Ash Tree?

Ash trees are critically endangered due to the widespread infestation of emerald ash borers, so every new ash tree that is planted helps keep these trees part of nature.

Ash trees are important in the myths and rituals of some native people across Europe and Asia. Ash tree wood is also the most popular wood used in making baseball bats.

Ash trees are home to many wildlife species, such as squirrels, bats, and even porcupines. That is not to say that a porcupine is going to take up residence in your yard!

But the more ash trees there are, the more their seeds can spread and grow in the hope that their populations will soon return to the huge numbers that used to exist in the United States!

That’s A Wrap!

Now you are ready to plant your ash tree and watch it grow. Just keep an eye out for emerald ash borers and all should be well. Enjoy your new shady addition to your yard!

If you’d like to learn more, take a look at our guide on the plants NOT to plant under your ash tree if you’re thinking about growing one!

I wish you the best of luck on your ash Tree Journey!

References

Dumont, Darl. J. (1992). “The Ash Tree in Indo-European Culture.” Mankind Quarterly, 32.4, 323.

Pugh, Scott A., Andrew M. Liebhold, and Randall S. Morin (2011). “Changes in ash tree demography associated with emerald ash borer invasion, indicated by regional forest inventory data from the Great Lakes States.” Canadian Journal of Forest Research, 2 November 2011. 

MacFarlane, D. W., & Meyer, S. P. (2005). Characteristics and distribution of potential ash tree hosts for emerald ash borer. Forest Ecology and Management213(1-3), 15-24.

Sheeren, D., Fauvel, M., Ladet, S., Jacquin, A., Bertoni, G., & Gibon, A. (2011, July). Mapping ash tree colonization in an agricultural mountain landscape: Investigating the potential of hyperspectral imagery. In 2011 IEEE International Geoscience and Remote Sensing Symposium (pp. 3672-3675). IEEE.

Ash trees can be beautiful additions to your yard, providing colorful foliage in the spring, summer, and fall. Ash trees also provide a great deal of shade. If you are looking for plants to plant under your ash tree, you might not be sure where to start. This guide is here to help!

You shouldn’t grow plants such as mums, lavender, lamb’s ear, canna lilies, lantana, milkweed, pansies and bee balm under your ash tree. These plants are either invasive or require significant amounts of sunlight, which would be difficult to get under the shade cast by the canopy of an ash tree.

As long as you pay attention to the environment under your ash tree and the needs of each plant you choose, you can have a spread of foliage at the base of your ash tree, just as beautiful as the tree’s canopy. Read on for all the info you need to make the best choices when purchasing plants for the ground underneath your ash tree!

Why Certain Plants Can’t Grow Well Under Your Ash Tree

Ultimately, some plants have more needs than others and will often lead to a competition for resources, especially when at the base of an ash tree near their roots.

Ash Trees Cast Shade Over Sun Loving Plants

The base of your ash tree is most likely a very shady place. In fact, it is probably an area of your yard that is always shady except in the winter when the leaves of your ash tree are gone.

This means this spot is the perfect place for perennial shade plants, which require little sunlight (and even die or grow poorly in lots of light) and which return year after year.

There are several plants that, while they might appear to be the type of plant that thrives in the shade, are sun-loving plants. These are poor choices for the base of your ash tree.

Another thing to consider about light is whether the plants you have chosen will go dormant in the winter or will continue to grow. If you choose annual plants, they will most likely die in the fall or winter for good, and you will have to plant entirely new plants the following spring or fall, depending on which planting season you choose.

Most plants are planted in spring, but some, like autumn mums, for example, are planted in the fall.

If you choose perennials that are still thriving in the cold months, make sure they can tolerate both the shady seasons of spring, summer, and fall, when the ash tree has leaves on its branches, as well as winter when the leaves have fallen and the branches are bare.

Ash trees make wonderful shade trees, and you can learn more about why in our other post!

Ash Tree’s Will Compete For Water With Other Plants

If you choose plants that require a lot of water, but you are not prepared to be diligent in watering them, you are probably setting your plants up for failure.

No matter what type of plant you choose, pay attention to the amount of watering that is required and consider whether you can provide that much water to the ground under your ash tree.

Use A Sprinkler System For Plants Under Your Ash Tree

If you want to supply extra water, there are several ways to do that. You can choose to install a sprinkler system.

This is the most complicated and likely the most expensive method, as it requires digging trenches in your yard and installing the tubing and parts to water your lawn.

You also have to install a control unit that you can program to operate the sprinklers. 

If you already have one of these systems, great! Now check that it adequately waters the ground under your ash tree. Many sprinkler systems will water the grass of the lawn, so that does not always mean that they reach the flower beds, roots of trees, or other areas of the yards. Make sure it’s slow moving and gets a nice deep water so it reaches the bottom of all roots.

If your system does not reach and you do not want to make modifications to it, you will need to rely on one of these other systems.

If you’d like to learn more, take a look at our guide on the specifics of how much water ash trees need!

Watering Without A Sprinkler System: How To Make It Easier

If you do not have a sprinkler system, or yours does not provide enough water to the base of your ash tree, you still have a number of options.

The most simple is perhaps to stand there every day or so spraying the ground around your ash tree with a garden hose. Many people choose this method and even find it a relaxing part of their day.

If you would rather automate the system, you can use a standard garden hose attached to a sprinkler head. You can also use a sprinkler hose, which is a two-in-one hose that acts like a sprinkler.

This Swan Element Sprinkler Hose can be turned in one direction to spray the water like a sprinkler, and you can also use it as a soaker hose that lies on the ground, providing water without spraying it into the air.

To get your watering system automated so that basically nothing is required from you at all, set the system up with an automatic timer. This Orbit Single-Outlet Hose Watering Timer can be set so that the water turns on and off whenever you want. It even has a rain delay function that can help you save water by not watering when it has recently rained.

I can’t say this enough, water DEEPLY so you reach all the roots!

8 Plants To Avoid Planting Under Your Ash Tree

Beautiful close up landscape image of Ash Fraxinus Excelsior tree in English countryside

These general guidelines can help you make some good choices about what to plant under your ash tree and take better care of your plants once you decide what to plant.

You can apply these to any plant you consider along your journey to add colorful blooms, vibrant greenery, or ground cover to the area around the base of your ash tree.

Here are a few plants you should avoid, as they are not good options for the base of your ash tree.

Mums

Mums are beautiful flowers, especially in the fall, so it might be tempting to plant some under your ash tree, hoping that their bright autumnal colors will complement the yellow fall leaves of your ash tree. There are also varieties of mums that bloom in the spring.

This versatile flower seems to have something for everyone, potentially making it a choice for some colorful blooms under your ash tree. 

However, mums are very unlikely to survive under an ash tree for longer than those first few weeks of bloom right after you have planted them if you planted them in the fall. If you planted them in the spring, they probably will not even make it to their first bloom.

Why are mums such an awful choice for under your ash tree? They will not do well for one main reason: mums thrive in lots of sunlight. Planted in the shade, like under the full canopy of an ash tree, mums will not receive enough light to flourish and will probably even parish.

If you want the color of mums, or the festivity of their fall blooms, under your ash tree, your best bet is to use annual mums that are planted in containers. These blooms will survive the season under your ash tree, but you will need to either move them or say goodbye after a few weeks. 

Lavender

Lavender is a wild-looking but lovely plant that produces a famous scent. It does not require much care, and it thrives in dry conditions. It seems like it might work well as the type of plant you could plant underneath an ash tree and enjoy with little effort. But, unfortunately, that is not the case.

Lavender is another plant to avoid under your ash tree, in part because of its sunlight requirements.

Lavender needs full sun, all day to thrive, and it will receive little to no sun under your ash tree, except maybe in winter. According to Purdue University, lavender goes dormant in the winter, so it will be too late by then to give it the sunshine it needs. 

Another reason that lavender is a poor choice for planting under your ash tree is that lavender likes very dry soil, but your ash tree probably does not. And planting a plant like lavender under your tree, that cannot tolerate a lot of watering, will prevent you from planting much of anything else there, as most plants, especially those that thrive in full shade, need a lot of water.

Lamb’s Ear

Lamb's ear macro photograph

Lamb’s ear is an interesting plant, given its common name because of the soft and fuzzy texture of its leaves, which resemble the ears of lambs. It has a soft color, too, of a pale green, and grows purple flowers. It might seem like an ideal choice for an interesting and pretty addition to the plants around your ash tree, but it is not.

The sunlight requirements of lamb’s ear make it unlikely to grow in the shade of your ash tree. So while this evergreen plant with leaves all year round is a tempting prospect for gardeners who want something that will not turn brown and die in the winter, lamb’s ear is best left to other, sunnier parts of your yard, not under your ash tree.

Also, lamb’s ear is an intensely spreading plant.

Planted in a flower bed, it can serve almost like ground cover, filling in the gaps between other plants. But under an ash tree, unless containers are built, lamb’s ear would spread enough as it would have to be regularly pruned, so it takes away from the effortless nature of some other types of plants better suited for under an ash tree.

Canna Lilies

Under a tree with bright green leaves, it might seem like a good idea to plant some brightly colored flowers with tall stalks to give color and depth to the base of your ash tree.

Canna lilies are a popular and common flower that comes in many colors, from yellow and orange to bright pinks and reds. But these flowers will not provide those vibrant blooms under your ash tree.

Canna lilies need full sun, so they will not receive enough light under your ash tree to thrive and bloom. If you want to plant them elsewhere, choose a flower bed without shade or even the side of your house that gets the most sunlight. 

Additionally, canna lilies are planted as bulbs, so it might be difficult to find a spot under your ash tree that isn’t already taken up by the roots of the tree.

According to the State of Colorado’s cooperative extension program, you can estimate the size of the root system of your tree by looking at its canopy; the root systems will be about two or three times the size of the spread of the tree’s branches.

Roots that expand that much may have created an inhospitable environment for canna lily bulbs. It’s best to avoid this flower for the area under your ash tree.

Lantana

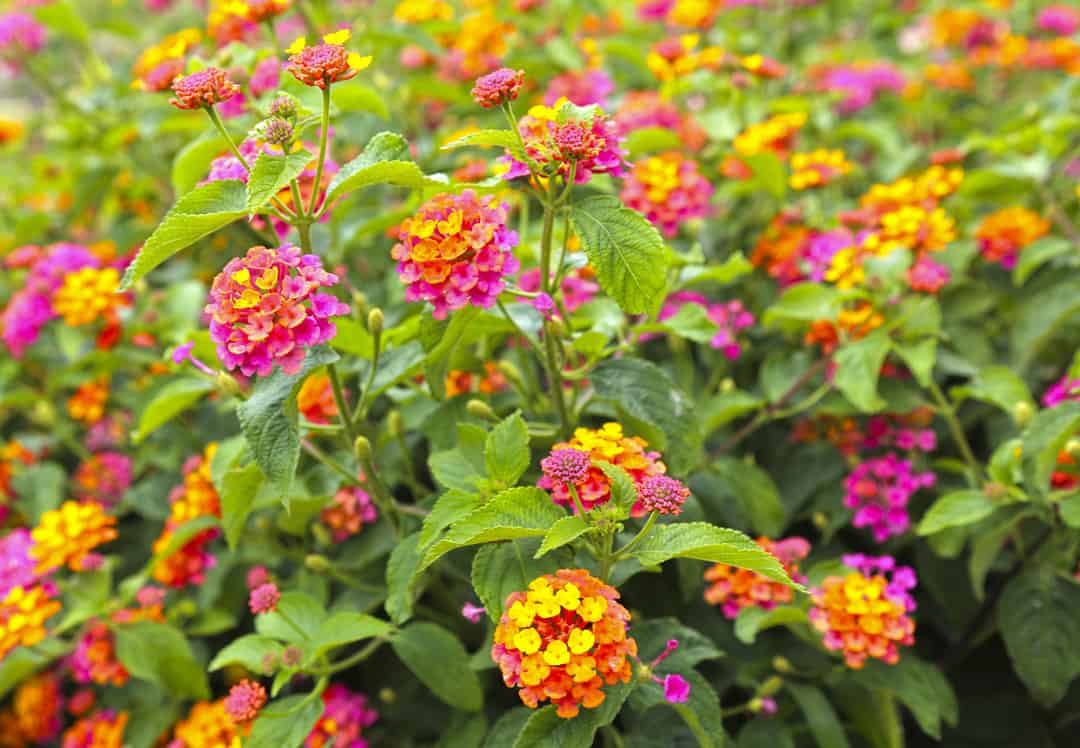
Beautiful orange and yellow lantana camara flower blooming in garden

Lantana is a flowering plant that thrives in heat and sunlight, which makes it a favorite for gardeners who live in hot, dry climates. But these favored conditions of the lantana make it a bad choice for under an ash tree with a shady canopy. 

Another feature of lantana that makes it an awful choice for under your ash tree is that lantana can be invasive, meaning that it can take over the areas where other plants are planted and end them.

Lantana is best used as a container plant or in a structured flower bed where it can’t escape to wreak havoc on other plants and other areas of your yard.

Milkweed

Do you love butterflies? If so, milkweed might be an interesting option for you, as the plant attracts butterflies. It is particularly well-known for being a favorite of the iconic orange and black monarch butterfly, which is also known as the milkweed butterfly.

According to the University of Arizona, milkweed is of integral importance to monarch butterflies because it is where they lay their eggs, and the caterpillars eat the milkweed before spinning their cocoons.

Milkweed needs full sun, so it will not grow well under your ash tree. So if you want to help all those beautiful monarch butterflies, plant the milkweed somewhere else.

Another major reason not to plant milkweed at the base of your ash tree is that the insecticides that are required to treat ash trees for emerald ash borer infestation are dangerous to the butterflies themselves.

So, even if milkweed could grow well under your ash tree, you would pose a risk to the butterflies that want to eat the milkweed, as the flowers would likely have been inadvertently treated with an insecticide dangerous to the insects.

Pansies

If you want to plant something that will bloom in the wintertime when most everything else seems dead, pansies are a great option.

But, while they can tolerate some shade, pansies do best with a lot of sunlight, meaning that, once again, the canopy of your ash tree causes some problems for growing these winter flowers.

Also, according to Utah State University, pansies are sensitive to weeds, which can keep them from growing properly because they steal their water and nutrients. If you want something low-maintenance under your ash tree, these flowers are not the best choice. 

Bee Balm

As its name suggests, bee balm is beloved by bees, as well as by other insects and wildlife, like hummingbirds. But, like the others on our list, it is not a great choice for planting under trees because it likes full sun.

Bee balm is also an invasive spreader, meaning that it will quickly take over the surrounding area, which can harm other plants. It is also susceptible to mildew, which can not only kill the bee balm but might be a problem for other plants, including the ash tree.

Red Flags When Choosing Plants For The Base Of Your Ash Tree

There are some general things you can look out for aside from just sunlight and watering requirements when thinking about what to plant under your ash tree. 

First, there are some dangers particular to ash trees to look out for, like cotton root rot, also known as Texas root rot.

This rot, caused by a fungus, can spread to ash trees from other plants, so you don’t want to plant something under your ash tree that is particularly susceptible to cotton root rot. According to the USDA, this includes different types of plants including roses, so that is one type of plant to avoid, no matter the sunlight requirement. 

You should also look out for plants that might be harmful to plants you have already placed around your ash tree. If you have planted some shade perennial plants, for example, make sure you do not plant invasive species or plants that will overpower the others.

Last, be sure to space your plants appropriately so that each one can get the required nutrients and water that it needs.

If you’re considering planting an ash tree in the future, I highly recommend taking a peak at our guide on the best time to plant ash trees – it’s a good one!

That’s A Wrap!

Now you are ready to make some great choices for plants to plant under your ash tree. While this list is a what-not-to-plant, there are a lot of great options out there to suit most gardeners who want to add some foliage or even flowers to the base of an ash tree. 

Just remember to keep an eye out for not only the sunlight requirements but also the depth at which plants must be planted, the amount of water they need, and their general compatibility with not only your ash tree but also other plants that might be planted around or near it.

Happy planting!

References

Taylor, Subhashni, and Lalit Kumar, Nick Reid, and Darren J. Kriticos (2012). “Climate Change and the Potential Distribution of an Invasive Shrub, Lantana camara L.” PLOS ONE, https://doi.org/10.1371/journal.pone.0035565

Herms, D. A., McCullough, D. G., Smitley, D. R., Sadof, C. S., Williamson, R. C., & Nixon, P. L. (2009). Insecticide options for protecting ash trees from emerald ash borer. North central IPM center bulletin, 12.

Though native to Japan and Asia, the Japanese blueberry tree is becoming a popular choice for landscapers and gardeners because of its beautiful evergreen foliage. If you’re unfamiliar with this tree and want to try growing it, you might be wondering about the growth rate of a Japanese blueberry tree.

Japanese blueberry trees have a moderate to slow growth rate. However, they follow a predictable timeline and can be germinated from a seed. They can take up to three years to get established but then require little maintenance. They will grow slowly to a fully mature height of about 40 to 60 feet!

The Japanese blueberry is often used as a privacy row because of its evergreen foliage and wide spreading canopy. They can also be used as a focal plant that attracts birds, butterflies, and pollinators. Keep reading as we go over how long it takes a Japanese blueberry to grow.

An Introduction To The Japanese Blueberry

The Japanese blueberry does produce little, oblong-shaped, purple berries, but they are inedible to humans. Birds and other wildlife like to eat the berries, but the trees themselves are more for show than anything.

These slow-growing trees have broad, leathery leaves that some gardeners have said reminds them of Rhododendron trees.

Some of the leaves will turn a coppery-red color before they fall off, but they are usually replaced after a few weeks. The tree doesn’t lose all the leaves at a time, it replaces the oldest leaves a few at a time.

In the spring, the tree produces plenty of small, white flowers that butterflies and bees will enjoy. After that, the inedible berries start to grow, providing a stark coloration between green and red leaves, and the dark blue to purple berries.

These trees are hardy to warmer climates in the United States. They do best in USDA growth zones 8 to 11. They require very little care, are drought tolerant once they are established, and take well to pruning.

One drawback to note for the Japanese blueberry is they are a messy tree that may require some cleanup. Much like pine trees that drop needles all year long, this tree drops leaves all year long as they are constantly being replaced.

The North Carolina State Extension says that Japanese blueberry trees are relatively pest-free trees that adapt to many climates. They can be used as privacy screens, a windbreak, or alone as attractive specimens. The only problem most owners mention is the fruit and leaf litter that needs to be cleaned up often.

How Long Does It Take A Japanese Blueberry Tree To Grow?

Unless you are planting trees from seeds, the most time spent on growing your Japanese blueberry tree will be getting it established. After that, the only thing you’ll have to do is the occasional clean-up or mulching of the leaves and flowers that fall.

You can start your own Japanese blueberry trees either from seeds, cuttings, or saplings. If you’re growing these trees from seeds, keep in mind that it may take up to two years before they germinate.

On the road and unable to meet the time commitment of a Japanese blueberry right now? You could also try one of these other easy fruits to grow inside your van or RV if you’re a camper!

How To Grow Japanese Blueberry Trees From Seeds (Timeline)

If you are collecting seeds from an established tree, you need to gather them from the ground. The berries straight off the tree are not mature yet. Look for older berries that are dried up or have started shriveling.

Seeds that have been collected from the ground need to be cleaned off and have all the remaining fruit removed completely. You can also purchase Japanese blueberry seeds from some online sources, or possibly from your local nursery.

The First 24 Hours

digging soil with shovel for planting

Once you have your seeds, the first thing to do is scarify them.

Scarifying seeds helps to break through the tough, protective outer covering of the seeds. Skipping this step adds months of waiting as you have to wait until the outer edge slowly breaks down.

Scarify The Seeds

There are a few different ways to break through the outer shell. Some people use chemicals such as acid to weaken the seed coat. This is often unnecessary for scarifying seeds at home.

You can use medium grit sandpaper, you can cut them with a pair of scissors, skate them across a metal file, or even use nail clippers.

To scarify seeds using sandpaper, you’ll need something around 100 to 180 grit. The smaller the number, the more coarse the sandpaper is. You don’t want something too coarse as you could break through quickly and damage the tender seed inside.

Alternatively, sandpaper that is too fine will take longer to get through the outer shell. 150 grit is ideal, but if you have something laying around that is close, go ahead and use that.

Take the seed, and scrape it across the sandpaper a few times until you have broken through the tough shell. Often you will see white, or some other light coloration when you’ve penetrated the outer coating.

The idea is to open the seed enough to let water and air inside the growing part of the seed so it will start the germination process. When the inner seed starts to grow, it will split the outer coating easily.

The process is the same with a metal file. Just examine the seed each time after you scrape it across the file. When you see the inner seed, you’ve properly scarified the seed.

If you are using scissors, or nail clippers, all you need to do is snip off a small section of the seed on either end. A sharp pair of scissors or a clean pair of nail clippers can make for easy work once you get the hang of it.

Be careful to just take a small section off. If you damage the inner seed too much, it won’t grow. All you want to do is open up the hard, outer shell.

Soak The Seeds

After scarification has taken place, you’ll want to soak the seeds for several hours. Soak them for 12 to 24 hours. Once they have soaked, drain the water and set the seeds on clean paper towels to remove excess moisture, then plant them.

While the seeds are soaking, prepare small pots for each of your seeds, or you can put two to three seeds in each pot and thin them out once they are growing. For the potting mixture, you’ll need well-draining soil. Gardening soil is too dense and will compact over time, and hold too much moisture for the seeds.

A mixture of one part quality potting soil and one part vermiculite, perlite, or sand will be ideal for Japanese blueberry seeds. Make sure your pots have drainage holes, then fill them with the potting mixture and water thoroughly in preparation for the seeds.

Make sure that the soil you’re using is acidic enough for your Japanese blueberry. Learn more about why acidic soil may be great for your tree!

Day Two: Germination

After you have soaked your seeds and have the pots ready and waiting, go ahead and place the seeds in the pots and cover them with a thin layer of soil. You only need about a half inch of soil covering them.

Next, give the seeds some water and put them in a warm area that gets plenty of sunlight. At least six hours worth. A sunroom or greenhouse is perfect, but if you don’t have either of those, a warm, sunny window will work just as well.

During the warmer days of spring and through the summer you can leave your pots outside, but you’ll have to water them more and keep squirrels and chipmunks out of them. They like to dig in the soft potting mix, and if they find the seeds, they’ll eat them.

Day Three And Beyond

Now you wait for the seeds to sprout. While waiting for them to poke their little leaves above the ground, keep the soil moist. You can do this by misting, or watering them lightly when the soil is dry to the touch.

When the pots are outside, and the days are hot and dry, potted plants can dry out very quickly. Check them every day when you have them outside. You may have to water them daily, or even twice a day while waiting for the seeds to germinate.

A little trick you can use to keep from having to water all the time, cover the pots with a clear plastic container or cut the bottom off a container such as a two-liter soda bottle or milk jug. Place it loosely over the pots to help keep the potting mix moist.

You don’t want a tight seal as there still needs to be an exchange of gasses or mold could occur. Just check the pots every few days and mist them as needed to keep the soil from completely drying out.

Remove the covering as soon as you see a sprout. Keeping the covering on while the seed is sprouting could cause the plant to get too hot, and could cook the tender sprout.

Even with scarification, seed germination could take a few months. Without scarification, you could be waiting up to two years before they finally show themselves. Be patient here and just keep the soil from getting too dry.

Growing: From Seedling To Sapling

If you have grown your Japanese blueberries from seed, you can transplant them into individual containers when they are a few inches tall. While they are still small, it’s best to keep these trees in smaller pots until you plant them outside.

Smaller pots help to reduce root problems. For saplings under a year old, a quart-sized pot may be all you need. But if you notice the tree getting root bound, go ahead and transfer it to a bigger container.

For the first year, you can keep the saplings in a pot, but you’ll need to put them outside as much as possible so they harden. Water them regularly when the first inch or two of the soil is dry.

Adding an all-purpose fertilizer will help the growth for the first year. Look for fertilizer numbers similar to 10-10-10, and add the plant food once about every six months while they are in pots. Southern Ag All Purpose Granular Fertilizer 10-10-10 is a great all-purpose fertilizer that can be used wherever you need some even, extra feeding.

Japanese blueberries grow moderately fast for the first few years, then they slow down a lot. Once your tree is a few feet tall, go ahead and plant it in the permanent spot. They should grow three to five feet for the first few years, then slow down to one to two feet of growth per year.

The best time to plant Japanese blueberry trees outside is mid to late fall. Even though the tree is evergreen, it slows down growth during the colder winter months. During this time the tree shifts focus on the roots while the rest of the tree’s growth slows down.

If you don’t want to wait for seeds to sprout, consider purchasing small cuttings of Live Japanese Blueberry Trees.

Growing Japanese Blueberry Trees From Cuttings

Japanese blueberry trees grow well from cuttings. Start in spring when you can see new growth on the tree. Use clean, sharp pruning shears or a sharp knife, but a few stems that have about 8 inches of new growth on them.

Cut the stems at a 45-degree angle, remove all but the first two to four leaves, and soak them in clean water for an hour. You can dip them in Bontone II Rooting Powder for an added advantage. This rooting hormone powder helps speed root production which will give you more plants from your cuttings.

While the stems are soaking, prepare a mix of the potting medium that we went over for planting seeds. Water the soil so that it’s damp. After the cuttings have soaked and been dipped in the rooting hormone, plant them in the damp potting mix.

Keep the cuttings inside where they can get plenty of sunlight and keep the soil moist. After a few months, the cuttings should have a good set of roots on them. You’ll want to plant them outside, in their permanent home, in the fall.

What To Expect From Japanese Blueberry Tree Saplings

You might be able to purchase saplings from your nursery and skip the time spent trying to grow Japanese blueberries from seeds or cuttings. You’ll still need to spend time with these trees as they get established. Even when planting them from saplings, Japanese blueberries may still need two to three years of regular care.

Whether you have grown them from seeds or purchased already growing saplings, you’ll want to plant them in a sunny, or partially shady spot. These trees need at least six hours of sun and well-draining soil.

First Two Years

For the first two years, you’ll have to water your Japanese blueberry trees regularly. During times of drought and high temperatures, you may have to water them once a week. Adding a layer of mulch will help retain moisture so you don’t have to water them as often.

You want to keep the soil damp but not soggy. During the winter months, you can slow down the watering, and only water when the soil isn’t frozen.

Adding a small amount of fertilizer twice a year while these trees are getting established will help them stay strong and healthy.

Once established, these trees are drought tolerant, don’t need much fertilizer, and will grow well in slightly acidic or slightly alkaline soil. They’re not too picky. Just be sure to give them plenty of space as they can grow up to 60 feet tall and nearly 40 feet wide.

Japanese blueberries take well to pruning as well. You can keep them rather small—around 20 to 30 feet tall with regular pruning. Some people like to shape them in a conical, Christmas tree shape, but you can also trim them into round or oval shapes as well.

If you plan on letting them grow naturally without any pruning, you’ll need to space them about 40 to 50 feet apart.

Years Three And Beyond

Now that your Japanese blueberry trees are nice and established you can scale back the watering and fertilizing schedule. They are quite drought tolerant and will only need to be watered now during periods of extended drought. You also can stop fertilizing them.

By keeping a good layer of mulch around your trees, the mulch breaks down over time and releases organic matter into the soil for the trees. If you also mulch the leaves or let some of them naturally break down, they add to the organic matter, so there’s no need to add fertilizer.

Cleaning up after the leaves and flowers will be the most you need to do with Japanese blueberries after they have become well established unless you are pruning them to keep a certain shape.

You’ll want to start pruning these trees early. Getting them shaped the way you want is easier when they are young. Heavy, aggressive pruning can be tough on these trees so get them shaped before they are several years old.

Pruning can help to increase flower production and hold the shape you are looking for. This should be done once a year. Aim for late February or early March to do the pruning.

Remove any suckers and/or water sprouts as well as any unsightly limbs as needed. Suckers are vertical, quick-growing offshoots that grow along the base of the tree. They can take a lot of water and nutrients from the main tree.

The same goes for water sprouts. They are suckers that grow from the branches and are noticeable because they grow straight up. These need to be removed because they grow so fast that they can break easily and then cause illness for the tree if not trimmed quickly.

While pruning, remove any sickly-looking branches, branches that have no leaves, or ones that are rubbing on each other. With proper care, your Japanese blueberry trees should grow for at least 60 years.

According to The University of Florida, the canopy of Japanese blueberry trees benefits from yearly pruning, especially while the tree is still young. Other ways to keep the tree healthy are to provide plenty of sun, well-drained soil, and good airflow between the branches.

Keeping Your Japanese Blueberry Healthy

Aside from their beauty, one of the best things about Japanese blueberries is their health. With the right care, these trees rarely fall ill and have very few pest problems. The best way to keep trees from contracting afflictions or attracting insect pests is to keep them strong and healthy.

As we mentioned earlier, once they get established, the only real care they require is pruning and watering when Mother Nature is extending a weeks-long drought. Pruning at the correct time helps the tree heal itself and prevents problems.

The most common ailments these trees can get include sooty mold, leaf rust, and sunburn, but most times you won’t have to deal with any of these. You will want to learn more about these 6 Japanese blueberry tree problems (and how to fix them).

Wrapping It Up!

Japanese blueberries are a tolerant, easy, slow-growing, evergreen tree that can be used as a focal point in your garden or to add some privacy. They require a bit of care in the beginning but once they are set up you’ll have a care-free, attractive tree for many years.

They can grow to medium-large sized trees if left on their own, or you can even trim them to certain shapes and keep them small with regular pruning. However you plant them, the Japanese blueberry is sure to be a hit in your garden.

References

McDonald, M. B., & Khan, A. A. (1983). Acid scarification and protein synthesis during seed germination 1. Agronomy Journal75(1), 111–114.

Moore, M. R., et al. “First report of infecting Japanese blue berry tree in Florida, USA.” Journal of Nematology (2020).Wang, HeChun. “Growing performance of Japanese blueberry varieties in two forms of seedling.” Southwest China Journal of Agricultural Sciences 27.6 (2014): 2543-2547.

Wang, HeChun. “Screening of Japanese blueberry varieties suitable for open field cultivation of Dandong area.” Southwest China Journal of Agricultural Sciences 28.6 (2015): 2676-2680.

You’ve probably seen a juniper tree at some point in your life. They have tiny little blue berries and peeling bark, plus they smell amazing. If you’ve seen them, you know they usually grow in areas that get little water, especially if you’ve hiked in sandy or mountainous areas. Without needing much water, though, how long do they last?

Juniper tree lifespans vary based on the variety. Some commonly used landscape junipers can live anywhere from 30 to 70 years, but most varieties can live for hundreds of years. Some Junipers have been reported to be thousands of years old.

Junipers can last quite a long time, enough for you to get full use out of them! Keep reading to learn about the juniper’s lifespan and how long these other-worldly trees last.

How Long Do Junipers Last?

Junipers are quite amazing trees. They can survive in some of the harshest environments. They are drought-tolerant and sustain high winds, extreme sunlight, heat, and cold, freezing temperatures.

Junipers are slow growers and can live for hundreds of years, even some living for thousands of years. They are self-pruning trees with an extensive root system. Junipers prefer full sun areas with well-draining soil, and will not do well in shade or wet soils.

The lifespan of the juniper will depend on its variety.

Blue Point, Sea Green, Spartan, And Trout Man Juniper Tree Lifespans

Certain landscape juniper like the blue point juniper, the sea green juniper, the spartan juniper, and the trout man juniper, which are commonly used in landscapes, are typically expected to live for 30 years.

But for this article’s purposes, we’re going to discuss the longer living juniper, such as the Rocky Mountain juniper, which has a lifespan of up to 300 years on average!

However, some junipers can live well beyond that age. And I mean, hundreds or thousands of years. According to the National Park Service, junipers can live anywhere from 350 to 700 years.

The Rocky Mountain Juniper Tree Lifespan

The Rocky Mountain juniper, Juniperus scopulorum, is one that lives for hundreds of years, and its growth doesn’t start slowing down until well over 100 years of age. The average age of a Rocky Mountain Juniper is anywhere between 250-300 years!

According to the United States Forest Service, the Rocky Mountain juniper optimum age for seed production isn’t even until 50-200 years. They even list one Rocky Mountain juniper found in Utah at an estimated 3,000 years old!

This species of juniper is mainly found in the range of pinyon-juniper woodlands from Utah, Nevada, Colorado, New Mexico, and Arizona. The Rocky Mountain juniper is found at elevations of 9,000 feet, all the way to sea level.

Eastern Red Cedar Juniper Tree Lifespan

The eastern red cedar juniper, Juniperus virginiana, has what are called false rings within the growth rings, which make it more difficult to determine the most accurate age. However, according to the USDA Forest Service, the eastern red cedar can live for over 450 years.

The eastern red cedar can also grow a whopping 2ft per year!

Utah Juniper Tree Lifespan

Another other-worldly species is the Utah juniper, Juniperus osteosperma. The Utah juniper is another one that lives for an incredible length of time. These junipers can live up to 650 years old according to Utah State Extension!

Like the Rocky Mountain juniper, they live in rocky, mountainous areas with strong winds and little to no rain.

Pinchot’s Juniper Tree Lifespan

Pinchot’s juniper, Juniperus pinchotii, is a species found in New Mexico, Oklahoma, and Texas. This species isn’t known to live as one as the Rocky Mountain juniper or the Utah juniper, mentioned above.

But, certain plants have been found to be as old as 170 years in isolated areas in Texas. The Pinchot juniper, however, is unlike the others we mentioned in that tree height was the most accurate predictor of sexual maturity of the tree rather than age. 

Alligator Juniper Tree Lifespan

Probably one of the coolest junipers we have yet to mention is the alligator juniper, Juniperus deppeana.

The bark of this juniper looks like an alligator hide! This tree has been reported to be 500 years old! You will find this juniper in New Mexico, Texas, and Arizona at elevations of up to 8,000 feet. 

Early Stages Of Junipers

Juniper bushes in the greenhouse. Thuja seedlings in pots in the garden. Nursery of various green spruces for gardening. Various seedlings: Chamaecyparis, Thuja, Taxus, etc.

We’ll cover a few species of juniper trees in these next sections, namely, the western juniper and the Rocky Mountain juniper.

How Junipers Start Off

In the early stages of life for the western juniper tree, birds and mammals disperse seeds in the fall through their feces. 

For seeds of western junipers to germinate, they need stratification, which typically happens in April. Stratification is necessary to break the dormancy period and is accomplished through cold, over-winter temperatures. 

Once stratified, seeds are sown in fall or spring. Western junipers are resistant to disease, insects, and even animals during the early stages of growth.

If you’re growing your own juniper tree, check out our guide to how much water junipers need!

How Junipers Establish Root Systems

The growth of roots and height ranges depending on the location’s conditions. As a seedling, the western junipers grow roots fairly quickly.

A juniper trees root system grows vertically, downward, before growing laterally. Once they are more established, they focus their growth on growing roots laterally to reach water and nutrients.

Birds, gravity, and water disperse the Rocky mountain juniper seeds, rather than mammals, which disperse western juniper seeds. These seeds don’t germinate until the following year’s spring, but this is sometimes delayed for over two years.

The root system of Rocky Mountain junipers is a shallow, lateral root system. Compared to the western juniper, whose roots can penetrate rocky soils easily, rocky areas limit the Rocky Mountain juniper’s root depth. 

The most commonly distributed juniper in the Eastern United States is the eastern red cedar, Juniperus virginiana. These juniper species are found in every eastern state. 

Eastern red cedar seeds are eaten and spread by digestion by birds and animals. Seeds typically germinate the following spring, after they spread the seeds. The berries or cones contain the seeds that get spread. 

The root system of eastern red cedars has a wide, very fibrous root system they develop within the first year. They will grow a taproot, but it depends on the soil conditions they like for growth

Aging & Maturation Of Junipers

Junipers are considered to be slow-growing trees, most growing around 1ft per year.

For instance, the western juniper needs full sun and does poorly in shade. This species of juniper doesn’t do well with competition. 

The western juniper is extremely tolerant to wind, however, fire tolerance depends on age. Mature junipers are more fire-resistant than younger junipers. Their bark is thick and foliage typically grows high.

The western juniper grows to up to 32 feet in height according to information published by Penn State.

Unlike the western juniper, the Rocky Mountain juniper becomes established when in partial shade and moist locations. 

As the Rocky Mountain juniper matures, it becomes less shade-tolerant than when it was a seedling or sapling. 

The Rocky Mountain juniper grows about 1ft per year and can also reach a height of around 30ft tall.

The eastern red cedar will even survive in severe competition from other plants and trees.

Uses Of Junipers

Juniper bush branch with berries.

Historically, juniper was used during pioneer times for things like firewood, pole fences, corrals, and more. The western juniper is extremely durable, which explains its variety of uses.  

Wildlife also uses the western juniper for shelter, food, and shade. 

The Rocky Mountain juniper was and is also mainly used for firewood. The heartwood, or inner wood, of the Rocky Mountain juniper is decay-resistant, so it was heavily used for fence posts. Native Americans also used juniper bark to weave cradles and used juniper berries as food. 

The eastern red cedar is mainly used among wildlife for nesting, roosting, and cover. Although its foliage is fairly low quality as food, animals eat it in an emergency. The berries, however, are eaten by many wildlife species, including birds, rabbits, foxes, opossums, and coyotes, to name a few.

Not only does the eastern red cedar have extreme drought tolerance, but it also can handle extreme temperatures. This species is also the best species to limit wind erosion on the soil. 

That’s A Wrap!

There you have it! Let’s recap some things we covered in this article!

Juniper lifespans vary based on the variety or species. Although we mentioned some commonly used landscape junipers, which can live anywhere from 30 to 70 years, most varieties can live for hundreds of years. 

Junipers are extremely drought tolerant and can withstand extremely harsh environments, including extreme temperatures and wind. 

Certain species, like the Rocky Mountain juniper, live for hundreds of years and their growth doesn’t start to slow down until they are roughly 170 years old! However, the average age of these junipers is usually between 250-300 years. But, one Rocky Mountain juniper was found to be 3,000 years old!

Another incredibly long-lived species we talked about is the Utah juniper. This one lives for an incredible length of time and lives an average age of 400-750 years.

One of the most amazing adaptations is their root system. Junipers have what’s called a tap root that goes straight down to reach water deep beneath the surface. They also have a root system that spreads out wide. This extensive root system helps them survive the extreme drought conditions!

Well, we hope you learned just how long juniper trees last and some other interesting facts about junipers. 

Thanks for sticking around and reading with us!

References

Miller, Richard F., Tony J. Svejcar, and Jeffrey A. Rose. “Impacts of western juniper on plant community composition and structure.” Rangeland Ecology & Management/Journal of Range Management Archives 53, no. 6 (2000): 574-585.

Miller, R. F., Tausch, R. J., McArthur, E. D., Johnson, D. D., & Sanderson, S. C. (2008). Age structure and expansion of piñon-juniper woodlands: a regional perspective in the Intermountain West. Res. Pap. RMRS-RP-69. Fort Collins, CO: US Department of Agriculture, Forest Service, Rocky Mountain Research Station. 15 p., 69.

Tausch, R. J., West, N. E., & Nabi, A. A. (1981). Tree age and dominance patterns in Great Basin pinyon-juniper woodlands. Rangeland Ecology & Management/Journal of Range Management Archives, 34(4), 259-264.

Ward, L. K. (1982). The conservation of juniper: longevity and old age. Journal of Applied Ecology, 917-928.

Yang, Bao, Dmitry M. Sonechkin, Nina M. Datsenko, Jingjing Liu, and Chun Qin. “Establishment of a 4650-year-long eigenvalue chronology based on tree-ring cores from Qilian junipers (Juniperus przewalskii Kom.) in Western China.” Dendrochronologia 46 (2017): 56-66.

While many trees have stripped bark, you may wonder whether this is a sign of something going very wrong. What causes the bark to be stripped in the first place and why can (or can’t) a tree survive in this scenario?

When a tree loses it’s bark, it hardly will ever grow it back. For minor bark damage, trees form callouses around the missing bark to isolate the inner part of the tree that’s exposed. When a tree has serious bark damage, too much of the actual tree can be exposed, making it less likely to survive.

Oftentimes, it depends on the nature of the stripped bark, combined with other environmental and internal factors. Stick with us to learn about the ways that a tree may or may not be able to survive once its bark has been stripped!

1. A Small Amount Of Bark Was Stripped By A Small Animal (Minor Concern)

While it is ideal for no bark to be stripped from a tree at all, this is not always very realistic. 

Say a small animal, like a squirrel, has stripped away a bit of bark to get to the phloem layer underneath. They appreciate the sweetness of this part of your tree, but the tree certainly does not appreciate having its bark stripped away. 

However, since this is such a common practice and happens quite often thanks to squirrels and other small animals, you should not be too concerned about this one. 

Because squirrels are small, they do not strip away as much bark as some other occurrences, and will therefore not have as large an effect on the tree, its health, or its ability to survive. 

On that same note, we should mention that the phloem layer is a big part of why stripping bark is so problematic to a tree. This layer helps to regulate the tree and circulate energy throughout. So, damage to the phloem layer is a cause of great concern. 

Again, though, squirrels are small enough that they won’t likely do much harm to the tree as long as it is healthy overall. 

Say a hundred squirrels strip bark from the same tree, then you’ve got a very different scenario that will likely be fatal to your tree.

Often times, when a tree loses bark it won’t regrow it back and instead, it will develop callouses over the area. You can read more in our article about why tree bark doesn’t grow back!

2. A Larger Animal Strips Away Bark (Medium Concern)

Of course, a larger animal is going to have a larger impact when it comes to your tree and its viability. If more surface area has bark stripped away, the worse off your tree will be.

Say a deer uses its antlers to rub against the trunk of your tree, stripping away a great deal more of bark than a tiny squirrel peeling back some layers here and there. 

While this might not be the absolute biggest concern when compared to some other bark-stripping scenarios, it is quite significant. You should be prepared for the possibility of larger animals stripping your bark, especially if you live in an unfenced area or on a large piece of land that is open.

If you notice larger marks and larger pieces of bark that have been removed, it may be time to start thinking about what you can do to help restore that bark. At the least, you’d want to keep those larger animals away from your tree when possible. 

We’ll dive into those preventative measures a bit later, though.

3. A Tree Is Hit By A Car (High Concern)

This one, for obvious reasons, is the highest concern we’ve seen so far on this list. 

Say somebody is driving along and an animal jumps out into the road or cars stop quickly up ahead. They try to veer but end up running into the tree in your front yard. This is MUCH more common then you’d think.

This is not ideal for the driver, of course, nor is it for your tree and potentially other parts of your yard.

If a tree is hit by a car, the bark may be stripped off, but the tree as a whole is also going to go through the trauma of such a high impact. 

Most likely there is going to be more damage Ito the tree than just that semi-surface level trauma of stripped bark.

In a situation like this, you would want to have a professional come to evaluate the comprehensive damage to the tree to get a good idea of where you stand.

4. A Storm Has Caused Bark Loss (Varying Concern Based On Situation)

This occurrence depends on the severity of the storm, how close your tree was to a lighting strike or if it was directly hit, the speed and intensity of any wind or hail, and other environmental factors.

This is another one of those situations that will need evaluation by either you or a professional to determine what action can be taken and if your tree is still viable.

5. Bark Loss Due To External Issue (Medium Concern)

When the bark is falling from your tree, likely a result of a fungus, malnourishment, or some other form of strain, the concern level may be hard to gauge. 

You’ll want to first take a look at how much bark is falling off to help you initially determine the concern you should feel in this situation.

Next, if you can evaluate the cause on your own, you can proceed from there. If not, you’ll want to reach out to a professional who can help you figure out your next step.

6. Poor Pruning Of A Tree Leading To Bark Loss (Minor Concern)

Unless you happen to cut a huge chunk of the bark off of your tree, this one is likely going to be a very low level of concern.

Realistically, there is no huge reason to get concerned when you accidentally nick your tree with some pruners or shears. As long as the missing bark area is tiny, as one would expect, your tree should be alright!

Take a look at our guide on how to properly prune large trees for some tips!

7. Bark Loss Due To Extreme Temperatures (Medium Concern)

This is another one of those things that is so much a part of the natural process a tree goes through in an area that has extreme weather, but it can still cause a great deal of stress on the tree.

You may have read about how there are many ways that trees survive the winter but what if they don’t? Or what if the temperatures get too hot in the summer?

Both of these extremes can lead to trees cracking and bark may appear to do so much as crack off the tree.

Depending on the temperature, extremity of the region, and damage to a tree, this one tends to be a medium-level concern.

What To Do If Your Tree Is Stripped Of Bark

Trunk of pine tree with peeled bark

When you realize that your tree has been stripped of its bark, in any way, shape, or form, you’ll need to decide what sort of action to take. 

How much bark is lost, and how healthy does the tree appear otherwise?

Essentially, is it worth it to put time, money, and effort into saving a tree, or is it time to go ahead and take it down altogether?

Ultimately, that decision is up to you.

How To Save A Tree With Stripped Bark

A close up of a pine trunk, eaten by bark beetles, Moscow region

Now that you are aware of seven reasons why a tree can (or can’t) survive without its bark, let’s talk about ways to save those trees to save those trees that have a better chance of pulling through. 

What are some measures you can take to sustain your tree and nurture it back to it’s glory?

By the way, if you’d like these tips more in-depth, I encourage you to take a look at our full guide on how to save a tree with stripped bark. We’ll give you the high level of that below!

Keep Animals Of All Sizes Away From Your Tree

Let’s begin with prevention, as that is ultimately going to be the best way to save a tree before the bark is stripped. One preventative measure you can take is keeping animals away from your tree. 

You can try a product like the Deer Repel Deer Repellent to keep the larger animals away from your tree. Funnily enough, it keeps other, smaller animals away even though it is branded as ‘deer repellent.’

You can count on this to keep rabbits and rodents out of your tree, as well. 

Repair Damaged Tree Bark

Now, let’s talk about repairs once your tree bark is damaged.

According to New Mexico State University, girdling, when the bark is removed from part of the circumference of a tree, has varying consequences. 

For example, they noted that the removal of bark that was one-quarter of the circumference of the tree or lower wouldn’t do as much harm, while one-half of the circumference increased damages significantly and put the tree at higher risk of death. 

Complete girdling, when the bark is removed around the entire circumference of the tree, can be quite the game ender.

This will help to create a gauge of your damages, and what you can do to save your tree. 

Now, let’s talk about the methods you can use!

Help To Create A Clean Bark Wound On The Tree

Even in a situation like the first one we mentioned, where a small rodent-sized animal causes some damage to your tree, you can still take action to minimize damage. 

Jagged tears in the bark will heal less quickly than clean cuts. So, even when there is just a small bit of bark missing that will likely not cause any significant harm to the tree, there is the chance that you could make a small difference and help your tree bounce back more quickly.

Not to get into too much detail here, but jagged wounds actually affect the way that a tree can store, receive, and transport nutrients from part to part. Clean-cutting is a recommended method not only to help your tree heal but to ensure that it can remain properly nourished during that process.

If you’ve been reading our pieces for a while, you probably already know that sealant is not as effective as one might think. When you clean-cut a wound, you’ll want it to be a shallow cut that frames the wound but avoids going too far out. 

As long as you cut away all of the areas of the damaged bark, you should be in good standing. 

Bridge-Grafting In Response To Serious Tree Bark Damage

When methods of trying to keep animals away, like clean cutting, and repairing damaged bark have failed, you may need to resort to bridge-grafting to keep your tree alive. 

When the damage is too severe, like after a large animal has scraped bark away, a car has hit your tree, or a storm has impacted the bark, you’ll have to do some extra work to ensure that your tree is able to transport the nutrients it needs to keep on going.

Essentially, when areas that have lost bark become too large, the tree is unable to transport nutrients through that area. So, human intervention is necessary.

What does that look like, though?

According to the West Virginia University Extension, bridge grafting is a process of re-establishing interrupted sap flow.

First, the injured section of wood needs to be cleaned up and cut cleanly, as we detail above.

Instead of stopping there, you’ll next use some scion wood, a fancy way to say twigs used to propagate woody plants. These are going to be placed every few inches around the base of the tree to accommodate a new system of sap flow. 

You should cut about two inches into the bark near the damaged zone to stick the scion wood pieces underneath. Then, you’ll tack the wood down using a tack nail and cover it in a form of wax to prevent excess loss of moisture.

As an aside, this is really the only time we’ll tell you to tack anything or use a form of sealant on your tree. It is necessary for the grafting process but often there are other, better methods to use if a tree is not being grafted but needs support in some way.

If you’re looking for the materials to properly create a tree graft, you can try this MESTUDIO Grafting Tool Set to ensure you have the right equipment. This easy-to-use tool kit has durable materials, and allows you to know that you are using the right stuff!

With that, we’ll leave you for now.

That’s A Wrap!

Bark on tree that is damaged

Many people may see that their tree has lost some bark and think, “Well, that can’t be a big deal, right?”

On the flip side, many others may be immediately concerned for their trees and think it is a sure sign that the tree won’t make it.

Often, the result is somewhere in the middle. Taking steps to support your tree as well as to prevent any further loss of bark is an important way to sustain a healthy, safe tree that can go on for years to come.

Remember, there are varying levels of damages possible due to any of the seven situations listed above. So, consulting with a professional is always worthwhile when it comes to things you aren’t quite sure of.

As usual, we wish you the best as you continue along your Tree Journey. Cheers, friends!

References

Purohit, A., Maikhuri, R. K., Rao, K. S., & Nautiyal, S. (2001). Impact of bark removal on survival of Taxus baccata L.(Himalayan yew) in Nanda Devi biosphere reserve, Garhwal Himalaya, India. Current Science, 586-590.

Van Bel, A. J. (2003). The phloem, a miracle of ingenuity. Plant, Cell & Environment, 26(1), 125-149.

No matter how good they look, artificial Christmas trees just don’t capture the same type of Christmas spirit as a live tree. The festive event of either chopping one down in the forest or picking one from a Christmas tree lot is often an event the whole family looks forward to all year long. But how many times have you found the perfect tree only to discover a few days or weeks into enjoying it, it loses the pep in its step?

While watering your Christmas tree at the trunk is important to keep it alive and looking fresh, many people skip out on spraying the needles and branches with water. Spraying your Christmas tree with water can keep needles from falling off and drying out, along with giving the tree added moisture.

These tips can help you choose the right tools for spraying your Christmas tree, determine when to spray it, and learn how much to spray it each time. Read on for the best reasons to spray your Christmas tree with water and the best methods for doing so!

Most Common Types Of Christmas Trees

There are many types of Christmas trees, but most fall into the category of pine trees, which are trees with needles that require moisture. According to the USDA, a few of the most common types of Christmas trees are Douglas fir, balsam fir, noble fir, blue spruce, and Scotch pine.

None of these trees is immune to the seasonal problem encountered by families all over the country (and the world!) who look to bring a live tree into their homes once a year at Christmastime. The worst problem for Christmas trees is dryness, a problem that is compounded because winter is, for most homes, the driest time of the year.

The dry outdoor air of winter combined with the dry indoor air of artificial heat makes a sad environment for a live tree. However, you can take some steps to make your home more hospitable to your Christmas tree this year.

This will help you preserve those beautiful needles, characteristic Christmas tree branches, and, perhaps most importantly, that Christmas tree smell!

Since pine trees are the most common, understanding how they grow can help you learn how to keep your Christmas tree looking fresh! Check out our full guide on the timeline of pine tree growth if you’re considering getting this type.

If you’re thinking about your next tree – get a fresh one and cut it down yourself.

Here’s me cutting down our tree last year – it always makes for a memorable experience 🙂

As a side note, we actually got a great deal on this tree due to the lack of needles on the bottom, so we just did a little more leg work and chopped those off / trimmed the tree. SO – always keep your eye out for stuff like that!

OK, now back to it.

Your Christmas Tree Probably Needs More Water Than You Think

It is standard for Christmas tree stands to include a reservoir for water, like this Cinco Express Christmas Tree Stand. According to the University of Georgia, your Christmas tree stand should be big enough to hold about a gallon of water, and you need to refill the water in the stand every day.

Christmas Trees Need A ‘Fresh Cut’ To Absorb Water

It is also common for Christmas tree lots to offer fresh cuts off the bottom of the tree trunk so that water can be more readily absorbed as soon as you get your Christmas tree home and in its stand.

According to North Carolina State University, a fresh cut is a very important part of helping your Christmas tree get enough water. The cut should be about ½ inch off the bottom of the tree’s trunk, and you can make new fresh cuts throughout the season if you find you need to up the water consumption capabilities of your Christmas tree.

Some people recommend additives to help your tree stay fresh, but Michigan State University recommends that you add nothing at all to your tree’s water; Christmas trees need fresh water and that is all.

Spraying Your Christmas Tree Branches With Water Keeps It Hydrated

Despite all the emphasis put on keeping your Christmas tree hydrated, few people have ever heard of spraying a Christmas tree’s branches with water, and most people rely on that stand reservoir to keep their tree alive. Unfortunately, that method does not always work, and many trees are standing in a thick blanket of their own needles long before the presents are opened.

So, how do you keep that from happening? You spray the needles themselves. This simply means using a spray bottle or mister to apply water directly to your Christmas tree’s needles and branches, from the star on top to the presents below (but make sure to cover the presents!)

If you have ever visited a botanical garden or greenhouse, you have probably noticed that they regularly mist the tropical plants with water, creating a very humid environment, much like that of a jungle or rainforest. These plants rely on water from all around, not just at their roots. You can think of your Christmas tree similarly.

If you do not water your tree at all, you can expect a heavy loss of needles and your tree will appear dry quickly. Therefore, watering your tree is very important, and many people go to great lengths to make sure their trees get enough water in the reservoirs of the tree stands.

Spraying the Christmas tree gives it that extra moisture in parts of the tree that are not hydrated enough from the water that is taken in through the tree’s trunk. Read on for some specific ways your Christmas tree can benefit this year from a little extra water.

Spraying Your Christmas Tree Keeps It From Losing Its Needles

One of the biggest problems with indoor Christmas trees is the loss of needles over the holiday season. It is quite common to have an enormous pile of pine needles lying on the floor of your living room when the New Year comes around and you take the tree outside.

Needles can also turn brown when they dry out, which does not look very festive!

The primary culprit in needle loss is dryness. While the water the tree drinks from its trunk can counter some of the dryness of the needles, you can give them an added boost with some added water. Spraying your Christmas tree’s needles directly with water keeps the needles from getting too dry, keeping the needles green and on the branches longer.

More moisture for the needles can also help them keep their green color. Dry, brown needles can quickly make a beautiful Christmas tree look sad. If you spray the needles regularly and water the tree from the trunk every day, you can fight this common problem and keep your Christmas tree looking full and healthy for weeks.

When pine needles begin littering the floor, just remember they have uses after they are dried out. Pine needles are harvested for pine straw, which you can learn the uses of here.

Spraying Your Christmas Tree Helps It Live Longer

variety of evergreen pine and fur trees on display at a seasonal Christmas tree lot

If you regularly mist the needles and branches of your tree, it will keep the tree alive longer. This results not only in helping the tree retain its needles but also in keeping the tree’s limbs and branches from drooping.

Nothing can ruin the appearance of a Christmas tree faster than dried, brittle limbs falling toward the ground. Sometimes this can be so bad that the branches fold in on themselves, causing ornaments to fall and break, strands of Christmas lights to fall haphazardly, and presents under the tree to become hidden by a tiny forest of dead branches.

To keep your tree from this fate, keep it watered and hydrated. While this type of branch drooping is extreme, it happens most often to very dry trees. If you have experienced this type of Christmas tree demise in the past, your home is likely very dry and you will need to take drastic measures to keep your Christmas trees alive, hydrated, and fresh.

How To Properly Water And Spray Your Christmas Tree

The only tool you need for this method is a sprayer. Luckily, misting plants is a method used by many house plant enthusiasts and gardeners, so there are several options you can pick from to spray your Christmas tree.

Misters, like Continuous Spray Mister will keep your tree’s needles moist without soaking the tree and turning it into a dripping mess. So it’s probably best to use a mister instead of a standard spray bottle.

But, in a pinch, you can just rinse out an empty spray bottle from your all-purpose kitchen spray or something similar. Just make sure that there aren’t any residual cleaning supplies in it, as those have the potential to damage your Christmas tree, undoing all the great work you were doing by spraying it.

You can also buy a new spray bottle, like the JohnBee Spray bottle, if you want to make sure you are only spraying water on your tree and nothing else, like a cleaner.

How Often To Spray Your Christmas Tree With Water

Luckily, if you keep your tree stand’s reservoir full, you may not need to spray your Christmas tree with water every day. A good place to start is to mist or spray your Christmas tree every two or three days.

Some experts recommend spraying it every day, so monitor it in the meantime. If the needles look or feel dry, you might need to spray them more often.

The humidity level of your home or the weather outside your home can also affect how often you should spray the tree. If it’s very rainy or you live in a warmer, more humid climate, you can probably spray your tree less. If you live in a very dry climate, you might need to spray it more often.

Another factor for humidity can be the temperature outside and inside your home. If it is very cold out, you are probably going to have your home’s heat turned up to compensate and make your house more comfortable.

As you probably know, this usually creates very dry air in your home, so the colder it is outside, the more likely it is that you will need to increase the frequency with which you spray your Christmas tree with water.

Fighting Extreme Christmas Tree Dry-Out

If the Christmas tree described earlier sounds familiar to you–a dried out tree, falling needles everywhere, and branches pointing horizontally to the ground–you need to take extreme measures to keep your tree from drying out.

Here are some steps you should take that might differ from those who live in more humid environments:

  • Check your Christmas tree’s water level every single day. To make sure it is getting enough water, don’t worry about the exact amount in your tree stand’s reservoir. Just fill it up every day.
  • Spray your Christmas tree with water every single day. You might also consider going from a mister to a spray bottle in this situation. Your ornaments are going to get wet, but the payoff might be worth it. Spray the tree until the needles are wet. And don’t forget to spray the branches, too! The more water you can get on the tree within reason, the better.
  • But don’t forget about the gifts under the tree! Move gifts out of the way each day before spraying so you don’t end up soaking all those Christmas presents. Keeping your tree alive might take more work in this scenario, but when the branches are healthy and the needles are green and fresh, you will probably think it was worth all the work.
  • Consider putting a humidifier near your tree for the duration of the Christmas season. This can constantly deliver a stream of cool moisture to your tree all day long to help stop it from drying out.

Eventually you will have to discard your Christmas tree. When that time comes, you can use the pine wood for many things!

Make Sure Not To Water The Decorations On Your Tree

Before you spray your Christmas tree, make sure you have unplugged all the lights on the tree. Don’t rely on an on and off switch; you will need to unplug the lights.

You should also pay attention to the types of ornaments and decorations you have put on your tree. A good start is to give your Christmas tree a thorough spraying all over before you put on any lights or ornaments. Allow the branches and needles to dry, then string the lights and decorate your tree. This will buy you a few days before you have to spray the tree again.

When you get ready to spray your tree after it has been decorated, you can use a couple of different methods to prevent any damage to your Christmas tree ornaments and decorations.

First, make a note of where the most important ornaments on your tree are, and just don’t spray those areas. The branch holding the ornament that commemorates your child’s first Christmas? Just skip that one.

The same goes for any other ornaments that are of particular significance to you.

If you find that all of your ornaments fall into this category, determine whether you think any of them are waterproof. A light misting of water will not harm many types of Christmas ornaments. Those that will be harmed can simply be skipped or even temporarily removed while you spray your tree.

Once you have finished spraying your tree, give it some time to dry before you plug the lights in again. A good time to spray your tree might be right before you go to sleep, as that is likely when you would turn off all the Christmas tree lights anyway.

This way, your tree will be dry enough for the lights to be plugged in again when you wake in the morning.

You might also want to move the Christmas gifts out from under the tree before you spray it, or you can cover them with a waterproof material until you finish misting your tree.

These steps might seem like a hassle, but when your tree is still green and fresh at the end of the season, you won’t regret it!

Some Final Tips On Choosing A Fresh Christmas Tree

Spruce nursery with young conifers that will decorate the New Year or Christmas

Now that you are in the festive spirit, it’s time to put all your new knowledge of Christmas trees to good use.

But first, a few final tips you can use before it’s even time to water your tree.

  • Choose a tree that seems fresh from the beginning. It’s much easier to keep a tree hydrated than to rehabilitate a dried-out, dying tree.
  • Test the needles on your Christmas tree before you buy it. If they seem fresh and hydrated, and most stay on a branch if you pull it, this is probably a good, fresh tree.
  • Choose a Christmas tree lot known for high-quality trees. You can even ask where the trees are from, how long ago they were cut, and whether they were kept covered during transport. These are all factors that can affect the freshness of the tree and, therefore, the tree’s life once you bring it into your home.
  • Buy your Christmas tree on the same day you plan to set it up in its stand. Don’t buy a Christmas tree and then leave it wrapped in netting outside for a few days before you put it in its stand. Those few days can cause the tree to lose a lot of valuable water, meaning that you might see more needles on the floor on day one than you expect several weeks in.
  • If you want to make sure your Christmas tree is fresh from day one, you might be able to cut one down yourself. Many Christmas tree farms across the country offer this option, which allows you to cut the tree down on the same day you bring it home.

    Other states have designated forest areas where you can obtain a permit to cut down a tree in the wild. Don’t wander off into the woods and choose just any tree, though; make sure you are not on private property or in an area that requires a permit.

    Either way, cutting down the tree yourself or having one cut down the same day you purchase it is a sure way to know how fresh your Christmas tree is from the beginning.

That’s A Wrap!

Picking out and decorating a Christmas tree is a highlight of the season for many families. Seeing that same tree dry out, droop, and lose all its needles before the stockings have been filled is a real disappointment during the Christmas season.

Try to prevent that from happening this year by spraying your tree with water and following our other tips for keeping your tree fresh from Thanksgiving to New Year’s Day.

Merry Christmas!

References

Chastagner, G. A., & Riley, K. L. (2003). Postharvest quality of noble and Nordmann fir Christmas trees. HortScience, 38(3), 419-421.

Smith, W. A., & McClung, W. A. (1967). Safe Use of Christmas Trees. Leaflet/Texas Agricultural Extension Service; no. 722.

The American Sycamore tree is one of the most popular deciduous shade trees in the Eastern United States. It’s a common choice for urban developers and new homeowners because it’s fast-growing, easy to care for, and great at rehabilitating less-than-ideal soils.

In the right growing conditions, the American Sycamore growth rate is about 2 feet per year and will reach anywhere from 75 to 100 feet tall. Sycamores will flower at about 6 years, start seeding at 10 years and will start bearing fruit close to 25 years.

That’s a pretty basic estimation of the American Sycamore’s lifespan, so we’ll provide a full Sycamore tree timeline below. Plus, read more about the desirable traits of P. occidentalis, where to plant it, and common variations. Let’s get to it!

Complete Sycamore Tree Timeline From Day 1

On the branch of the sycamore and palm trees sit two doves

American sycamore trees are coveted as shade trees throughout the Eastern US and perform well in zones 4 through 9. According to Clemson University’s Home & Garden Information Center, American sycamores can grow to be 10-14 feet in diameter.

It will take sycamore trees centuries to get that large, and if we planted one from seed today, most of us probably won’t be around to see it reach its full glory. However, sycamore trees can bear figs and seeds in as little as 10 years, which is a pretty attainable timeline. Here’s a step-by-step growth timeframe for the American sycamore:

Day 0: From Seed, Clipping, or Nursery

There are a couple of ways to get your hands on a sycamore tree. The simplest–and fastest–method is to head to your local nursery or greenhouse and buy a seedling. (Seedlings are any sycamore less than 10 years old).

Typically, you’re going to pay more for a larger tree. Very small seedlings can range anywhere from $8 to $20, but you’re usually only getting a 1-2ft seedling.

We recommend spending a bit more money to get a seedling that’s at least 6-7ft tall, which might cost anywhere from $80 to $100.

If you can’t find sycamore plants near you, or just aren’t willing to spend the money, there are a few other methods you can use to get a sycamore tree for your yard.

Propagate From a Clipping

It’s possible to propagate a sycamore tree from a softwood cutting from an adult sycamore tree, but it is more labor intensive. The first step is to gather the necessary equipment:

You want to select a softwood branch from the end of an adult sycamore tree limb. The cutting should have a few pairs of leaves on it, as well as at least one set of buds. Only harvest a cutting on a warm sunny day during the mid-summer months. Taking cuttings in the spring or fall can decrease your chances of successfully propagating the sycamore.

(You can find sycamore trees in many parks across the United States, and if not, look around your neighborhood. Make sure to always ask the property owner before taking a cutting.)

Once you have an 8-inch cutting, dip the end in your rooting concentrate and keep it in the propagation tray. Mist the cuttings daily and keep them in a place where they’ll get ample sunlight.

After a few weeks, you should start to see roots growing from the cuttings. Once the roots are about an inch long, you can move the cuttings into pots with potting soil.

You’ll have to check your clippings and ensure they’re well-watered and fertilized. After about a year, you can plant them outside.

Grow A Sycamore From Seed

Your final option for growing a sycamore tree is to start it from seed. This is the least expensive option, but also the most time-intensive.

To start, find an adult sycamore that produces seed pods. They look like little spiky balls. In the spring, the sycamore will drop these pods and all you have to do is collect them. Inside the spiky outer layer, you’ll find the sycamore seeds. Soak them in distilled water for about a full day.

While they’re soaking, prepare your soil. Normal garden soil will not do the job, so you have to be very careful. A horticulturist from Oregon State University says that a good mixture is “⅓ pasteurized soil or compost, ⅓ sand, vermiculite or perlite, and ⅓ coconut coir or peat moss.”

With this recipe, you can easily make as much starting compound as you need. Alternatively, you can purchase seed-starting mixtures from garden or hardware stores.

Once you’ve prepared the potting mixture, dampen it with a water mister and plant the sycamore seeds about a quarter of an inch deep. Water frequently. In about two weeks, you’ll see a sprout. From that point forward, care for the seedling like you would a clipping, keeping it indoors for about a year.

Year 1: Planting Day

Macro of sycamore (Acer pseudoplatanus) leaves over blur forest background

If you started your American sycamore tree from seed or a clipping, the one-year mark is when you should migrate your tree outdoors. If you purchased your seedling from a nursery, this is likely where you’ll start the sycamore tree timeline.

Pick A Spot To Plant

The first step is to pick the best spot to plant your sycamore tree. Now, American sycamores are incredibly versatile and will grow just about anywhere. However, they have preferences!

According to the Iowa State University Natural Resource Stewardship program, American sycamore trees prefer rich, deep, and moist soil. That’s why they’re commonly found near streams or rivers, or in shallow bottomlands.

That being said, they will adapt to grow in dry areas as well, but to see above-average growth rates, they need to be planted in wet, nutrient-rich soil with a neutral pH (even a bit alkaline is fine).

First, identify what area on your property is ideal for sycamores. We recommend picking a few spots in late spring or early fall and digging into the ground. Dig down about a foot and look at the soil. If it’s incredibly sandy or full of rocks, move to the next spot.

A bit of clay and stone is fine, but largely the soil should be free of anything that might impede root growth.

Remember: the spot you choose should receive full sun and have ample room for the sycamore to grow. In 100 years, it will probably grow to have a wingspan of around 75 feet, so you don’t want to plant it too close to power lines, other trees, or buildings.

Actually Planting Your Sycamore Tree

When you’ve solidified a spot to plant your sycamore seedling, you’ll need a few things:

  • Shovel (a spade shovel is pretty helpful)
  • Tree fertilizer (2-1-1 or 3-1-1 ratios are best)
  • Landscape fabric
  • Bark mulch/wood chips

Many people think you need to plant trees deep in the ground, and they end up digging too far down. Generally, the sycamore tree sends its roots out instead of down (sometimes spreading out over 6 feet!). You should only dig as deep as the pot you have the seedling planted in.

If you purchased a tree from a nursery, chances are you’ll have to dig down about a foot or more. If you grew a seedling from a seed pod or clipping, your hole will probably be a bit more shallow.

Try to break up any clumps in the dirt and remove any loose stones, root balls, or debris from the hole. Remove the seedling from the pot and knock off some of the dirt into the bottom of the hole. You want the roots to be nice and loose when you put it into its new home.

Packing Your Newly Planted Tree

Once you’ve lowered your tree into the hole, pack it in with a mix of your potting medium and the dirt you removed from the hole.

The next step is to ensure the soil retains moisture. To do that, we have to remove any vegetation around the tree. If you’re working with lawn grass, use the spade shovel to remove the top layer of sod in a circle around the tree.

You should create a circle that’s about 4 feet in diameter around the tree. (That means 2 feet on each side of the trunk).

When you’ve cleared the area down to bare soil, give it a good watering. Make sure the soil is nice and moist. Then cut your landscaping fabric to fit the circle you just made. You can cut an X in the center and fold in those corners to make a square.

Slip the fabric over the sycamore seedling and into place. Cover with your bark mulch or wood chips. This will retain moisture in the soil and look nice as a landscaping element in your yard.

As a final step, place a tree fertilizer spike in the soil around the seedling and give it some more water. You’ve successfully planted your sycamore tree! Make sure to water it consistently throughout the summer and fall.

Year 2-5: Monitor Your Sycamore Tree’s Growth

As we mentioned before, in the right conditions, the American sycamore growth rate is about 2 ft per year, and with ample watering in dry months and fertilization in its developmental stages, it can grow much faster.

After the first full year outdoors, your sycamore tree should have become acclimated to its new home. If you planted in the spring, you likely saw the tree grow multiple feet during the summer and fall, which is fairly common. If you planted in the fall, the seedling likely is a bit shorter but will have a growth spurt in the spring.

Keep track of the tree’s growth. Generally, after the initial growth spurt, you won’t have to keep watering the tree unless you’re in extremely hot and dry conditions.

The adult sycamore is popular because it’s drought-resistant, so try not to over-water it. Occasional fertilizer spikes are fine.

After the first winter, look at the mulch. If it’s gray and brittle, scoop some of it away and replace it. This is usually a yearly task and is best done in late spring or early summer.

After the first 5 years, check the landscape fabric. Depending on the variety you bought, it might need to be replaced. The sycamore root system is notorious for buckling sidewalks and creating little bumps in your lawn. So if the fabric is ripped, replace it.

This is a good opportunity to expand your circle. As the tree grows, its roots will stretch farther out, and you can help it along by keeping the soil moist. Expand the circle by a few feet and replace the fabric and mulch.

It is also good to note that if you are planning on growing plants under or around your new tree, there are plants not to grow under a sycamore tree AND plants that you can plant under a sycamore tree.

Year 6-10: All Grown Up

By this point, the sycamore tree is reaching its adult stages. It’s likely a fairly tall tree, about 20+ ft with a good-sized trunk. All you need to do is watch it grow! 

Make sure you replace the mulch in the tree ring yearly and expand it as you see fit. 

By about 10 years, your sycamore tree will produce seeds! It’s always exciting to see your tree grow up, especially if you grew it from a seed.

As your sycamore tree reaches maturity, it will produce fruit. While most trees don’t start producing fruit until about 25 years, you might see some small figs early.

How Long Do Sycamore Trees Live?

With the combination of good soil pH, ample room, and moist, nutrient-rich growing conditions, the sycamore tree can live for a very long time. Some of the oldest sycamore trees are thought to be hundreds of years old.

Simsbury, Connecticut boasts one of the largest sycamore trees in the northeast, lovingly called the Pinchot Sycamore. In 2016, the trunk was 28 ft in diameter and the tree was over 100 ft tall, with a canopy spread of 121 ft. In short, the tree is massive.

Another sycamore tree in Lancaster, Pennsylvania is estimated to be about 370 years old, with a trunk diameter of 27 inches. The tree was struck by lightning in the 1950s, so it’s partially hollow.

All this to say, sycamore trees will be around for many generations if you take care of them right!

Best Places To Plant A Sycamore Tree

The sycamore is a desirable tree because of its beautiful, flaking bark pattern and its edible fruits, the sycamore fig.

The American sycamore grows to be quite large and isn’t always the right tree to plant on your property.

According to the USDA Natural Resources Conservation Service, the American sycamore is ideal for properties that have had some kind of soil contamination. It’s commonly planted around strip mines, old agricultural land, and water disposal sites to help bring nutrients back to the soil.

Generally, the American sycamore is well-equipped to deal with wet environments and is often found in floodplains, riverbanks, or swamps. Interestingly, seedlings can survive being entirely submerged in flood waters!

If you’re looking to plant a sycamore tree on your property, you should know they grow to be enormous trees, with an average width between 75 and 100 ft. Make sure you have ample room for your sycamore to grow to its full potential. You can also plant it in a wet part of your yard, like in a shallow dip or near a stream bank.

Do Sycamore Trees Fall Easily?

It’s no secret that sycamore trees aren’t the strongest trees in North America, but that doesn’t mean you have to worry about them falling over. Usually, sycamore trees will remain tall and strong for decades without very much care at all.

However, there are a few things you can do to keep your sycamore in peak condition.

  • Trimming dead branches can help reduce unnecessary weight
  • Keep your tree fertilized and watered if you live in a dry area
  • Watch the leaves for signs of color or texture changes not related to changing seasons

While it’s pretty uncommon for your sycamore tree to just keel over one day, the branches are particularly brittle, which means you’ll likely have a lot of sticks in your yard. This is normal, however, and you can expect to see a lot of twigs and branches around your sycamore after a storm or gusts of high wind.

If you’re worried about your sycamore tree and are considering cutting it down, take a look at our guide on the reasons to cut down your sycamore tree.

Most Common Types Of Sycamore Trees

Large Western Sycamore tree (Platanus Racemosa) on a sunny winter day; blue sky background; Sycamore Grove Park, Livermore, east San Francisco bay, California

Most of this article has been focused on the American sycamore (P. occidentalis), but there are a few other variations of the tree that are just as common.

London Planetree (Platanus x acerifolia) The English sycamore, also known as the London Plane, is a hybrid of the American sycamore and the oriental plane tree. It’s hardier than the American sycamore and is also a popular choice for air purification and urban planning.

Western Sycamore (Platanus racemosa) – Also known as the California sycamore, this tree is found primarily along California rivers, streams, and floodplains. Similar to the American sycamore, the Platanus racemosa grows to over 100 ft. tall and is primarily used for landscaping, park design, and urban development.

Arizona Sycamore (Platanus wrightii) – The Arizona sycamore is smaller than its relatives, reaching only about 80 ft. tall at full maturity. It’s mainly isolated to parts of Arizona, New Mexico, and northern Mexico. But, like the Western sycamore, it appears near rivers and streams.

That’s A Wrap!

The American sycamore tree is a brilliant choice if you’re looking for a beautiful shade tree with really interesting bark patterns. It’s hardy and grows in wet areas well. It’s a low-maintenance tree and is drought-resistant.

The sycamore tree will grow 2+ ft per year in the right conditions and will reach maturity in about 10 years. After, you can expect the tree to grow up to 75 to 100 ft, with an even wider canopy spread.

References

Habibi, R., Millard, P., & Proe, M. F. (1993). Modelling the seasonal nitrogen partitioning in young sycamore (Acer pseudoplatanus) trees in relation to nitrogen supply. Annals of Botany, 71(5), 453-459.

Pulford, I. D., & Watson, C. (2003). Phytoremediation of heavy metal-contaminated land by trees—a review. Environment international, 29(4), 529-540.

Wood, E. M., & Esaian, S. (2020). The importance of street trees to urban avifauna. Ecological Applications, 30(7), e02149.

You may love your palm tree— adore it even. But there may have also been a time or two you’ve considered removing it. If you’ve found yourself wondering if you should cut down your palm tree, you aren’t alone.

You should cut down your palm tree if it has insect infestations, is too large, has rot, structural concerns, or is causing too much needed maintenance. Palm trees can cause issues during intense storms, and should be removed when they have the potential to fall.

Palm trees can be a great addition to your space, but you have to know when it’s the right time for them to go. Stick around to learn about when and why you might cut down your tree!

Your Palm Tree Is Already On It’s Way Out

Though there are a lot of reasons that you might have to cut your palm tree down, rot or another similar issue can be one of the most prevalent. If anything, it’s the first that comes to mind.

If you can catch it early enough, you may be lucky enough to save your palm tree. Affected parts of a tree can often be removed by pruning, which allows you to take away any affected branches without having to cut the entire tree down.

Palm trees have leaves known as fronds. The fronds form a circle around the top of the tree in what is known as the crown.

Crown rot is a major issue in palm trees, but removing affected fronds can stop disaster in its tracks!

Try the Fiskars Bypass Pruning Shears to help you trim away any areas that have started to get worse. This can be an easy process with the right tools, and as long as the problem is caught before it has spread to other parts of your tree. 

If it is too late to just trim a little bit away, or if the issue is already in the later stages, it might be time to remove your palm tree.

You can always call a local arborist to check for what’s affecting the tree and before pulling the metaphorical plug on your palm tree.

Your Palm Tree Is Too Messy

You may expect that your palm tree will be a pretty clean and mess-free tree.

Right? Not always.

It depends on the variety of palm tree you have, of course, but remember that certain types of palm tree will bear fruit. When that fruit drops, it can quickly cause a sticky mess. 

If your palm tree produces fruit, watch for when it gets ripe.  If you harvest the fruit before it drops, you can prevent a major mess.

However, if your goal is solely to limit fruit to prevent a mess, it may be best to think about tree removal. 

Fruit bearing trees will bring you the same dilemmas year after year and the solution is to either adapt or remove the cause of the mess.

Berries from certain varieties of palm trees, including those known as acai, can make quite a mess. 

Here are a few considerations if you are not planning to harvest the fruits of your palm tree:

  • Pets: Palm berries are not toxic but they may not agree with Fido’s stomach!
  • Your Car:  Getting berries all over your car is not ideal, especially if you’re leaving it parked for a while. 

If you are anxious about your palm tree wreaking havoc on the car during your absence, prepare yourself with a bottle of Goo Gone Automotive Cleaner. Give it a try if things are getting sticky before you vow to tear down the tree.

  • Sidewalks:  I mean, have you ever seen an acai bowl? Those berries are DARK with a capital D! That means that their stains will be, too. 

Some good news is that you can actually remove the flowers and fruits from your palm tree if you’d like. 

In fact, this will allow your tree to take the energy it was directing toward these areas and repurpose it to help the tree maintain its health and overall growth. 

If this seems like the step you want to take, try out the DocaPole 6-24 Foot Double-Duty Telescoping Extension Pole + Go Saw pruning tool.  This will help you target smaller areas of growth on the tree.  Preventing the fruit from growing is one way to keep your yard fruit-free!

Now, if this still sounds like too much maintenance overall, that may be a sign that it’s time to go ahead and take down the tree.

Say that the fruity mess is getting on your car or damaging lawn furniture. This could be an indication that the problem has passed being a little mess and has become a full-blown issue.

Your Palm Tree’s Roots Are Too Big

Roots can be annoying to mess with, but they can also cause issues that impact other parts of your space.

According to Clemson University, palm roots will usually extend 30 to 50 feet or more out from the trunk of the tree itself. Palm roots are flat and tend to be more surface level than many trees you may be used to. 

So, what are the issues with this?

Unlike other trees, the roots of a palm tree aren’t going to cause foundational or structural damage, such as breaking concrete. They won’t grow under your house and suddenly break through the floor or the siding. 

They will, however, create tripping hazards. This is not a dealbreaker by any means, but is something to consider. 

Additionally, the reach of a palm tree’s root system may not damage foundations, but it can do some damage beneath the surface. 

If you have pipes near the roots of your palm tree, the roots may wrap around the pipes. This won’t cause instant damage, but over time can lead to expensive issues.

General maintenance can usually keep palm tree roots under control.  But if you fear your tree is causing issues for your piping system, contact a professional to come to take a look. 

If there is a bigger issue, it may unfortunately be time to cut down your tree. While this is not ideal when it comes to a healthy, otherwise thriving tree, it is sometimes necessary for the good of your space.

Again, reaching out to a professional to determine the best course of action is something I strongly recommend. This will also help you know that you made the best decision you could.

Your Palm Tree Requires Too Much Upkeep

Palm tree and green grass field with blue sky

There are so many factors that could tie into this one. From root issues to messiness, rot to safety, and others that we haven’t yet discussed, maintenance may just become more than its worth.

Any of these reasons on their own are enough to make you consider your options, but if you have any combination of factors piling against you, it’s fair to say you’re probably at your wit’s end.

You may feel like the problems with the palm tree will never end, or like a solution is just out of the question. While this is sometimes true, often a quick break to assess the situation can help you make a plan of action. 

If you still feel like things are just too out of control and not worth the hassle, that is a valid reason to remove your palm tree.

We all have a point where we have to adjust our priorities, and if your palm tree falls to the bottom of the list, it may be time to say goodbye. 

Palm trees are relatively easy trees, but their height can also make maintenance tricky. If the canopy needs to be trimmed and there is no way you can get up there to do it year after year (or have someone else help) it is completely fair to say that the tree may need to go.

Maintaining a plant or other parts of your space is important, but not more so than personal safety. 

If you feel that any maintenance or solutions for your tree require more than you can give, call a professional to help you decide on your next steps.

If yard maintenance is already causing you a headache, you’ll want to avoid these 17 Plants Not to Plant Under Your Palm Tree!

There Are Insect Infestations In Your Palm Tree

Insect infestations may not be as common in your palm tree as they are in other species of tree. 

However, this can still be a concern, especially when it comes to one species of beetle in particular. If you have a tree that is already weakened in any way, the problem may only get worse.

Red Palm Weevils

So, if this little critter is so bad, well…what is it, exactly?

According to the University of California Riverside, the red palm weevil is widely considered the most damaging insect pest of palms worldwide. 

Though this species is typically attracted to unhealthy or otherwise weakened palm trees, it can target perfectly healthy palms as well. 

The larvae of these beetles will feed within the growing points of the tree. This ends up causing deeper tissue damage over time.  The extensive damage severely weakens the palm trunk over time.

What might palm damage from a red palm weevil look like? Here is what you can expect to see with a red palm weevil infestation:

  • Tunnels on the trunk or at the base of the fronds
  • Gnawing sounds’ from the larvae feeding inside, if the infestation is severe enough
  • Appearance of chewed plant material with a particular, fermented odor
  • Oozing fluids from the tunnels on the tree
  • Empty casings and dead adult beetles around the base of the tree
  • A weakened tree that may start leaning, a palm crown that topples, or a trunk that breaks

If you have a weevil infestation, it might be better for the palm tree to be removed than to keep it.

Tropical Storms Make You Nervous For Your Palm Tree

Bottom view of palm trees tropical forest at blue sky background.

If you are in an area that can host palm trees, you may also be in the path of potential tropical storms. 

While palm trees don’t pose the same sort of threats as others when it comes to weather damage, you may still have your concerns. 

A palm tree doesn’t have heavy branches like an oak tree, so you don’t have to worry about losing limbs through an upstairs window during a lightning storm.  But strong winds could still uproot this tree and send it right into your home. 

If your palm tree is too close for comfort to any buildings or structures, you may consider removing it to prepare for potential damage before it happens.

To decide whether your tree is too close or not, or if it’d be able to cause more damage than it’s worth, call an arborist or other professional that may be able to help you make that call.

If you feel don’t have a good feeling about it, don’t wait to be proven right.

Especially if your tree has been damaged or weakened by other factors like insects, rot, or any other external factors, prioritize removal.

Maybe your tree was already damaged in a storm and you’re afraid of the results if another storm occurs. 

Whatever the reason, if your tree has the potential to cause damage, get it checked out by an arborist.

The Neighbors Are Complaining About Your Palm Tree

Say that your palm tree hasn’t been storm damaged, nor has there ever been an infestation that you know of. Maybe it’s a safe distance from the house and piping, and things are okay overall.

What on earth could cause you to remove the tree?

Unfortunately, the court of public opinion can sometimes prevail.

Say that your neighbors are complaining because your tree hangs over their property line or drops berries near their car. Maybe they just don’t love the look of the tree.

This may all be annoying chatter, or it could develop into a more backed-up argument.

Some HOA (homeowner’s associations) will have rules about things like house color, mailboxes, and yes, even trees.

Depending on where you live, this may not always come to the forefront of discussion. However, if complaints are filed about a tree that technically violates rules, things may change.

If it is discovered that the tree fails to meet any regulations like location, size, spacing, or any other technicalities, you may be asked to remove your tree.

Between that and a recurring fine, tree removal may just be the way to go, sadly.

Your HOA might like your palm tree better if your landscaping has more curb appeal. Check out our guide on the 9 Beautiful Plants To Put Under Your Palm Tree.

Your Palm Tree Doesn’t Look Right

Sometimes, the cost of maintaining a tree becomes more than the tree is worth. Other times, you may notice that your tree is beginning to decline but cannot pinpoint a specific cause. 

If that sounds familiar, it may end up being a case of solving the question, “Why doesn’t my tree look right?”  This may end up costing more time and money than you have. 

It may be a bummer to throw in the towel, but if you don’t have the time or resources to put toward a tree that is on the decline for a mystery reason, that’s just that.

To take care of yourself and other responsibilities, you may determine that the palm has got to go. It’s sad, but it’s also okay.

The Best Time To Cut Down Your Palm Tree 

No matter what the reason for removing your tree may be, you should be prepared for when it’s time to say goodbye.

So, part of the timing will have to do with the reason you have to cut down your tree. If you have an infestation, rot, or are avoiding storm damage, the answer may need to be as soon as possible. 

Otherwise, the dormant season is going to be the best time to cut down your tree if the motivation is solely preferential, or in response to some nagging neighbors.

Early spring, or even late winter, are the best times to cut down your palm tree because there will be less overall bloom or growth.

If you are concerned about the timing, but think you can wait a while, you should contact an arborist to confirm that your tree does not need to be removed immediately. They’ll give you the best tips for your specific variety!

Why You SHOULDN’T Cut Down Your Palm Tree

While some things like curb appeal and frustrated neighbors made the list of reasons to cut down your palm tree, I want to mention that the choice is always up to you. 

Consider the value that your tree has— if it is otherwise healthy and stable.

Sometimes, trees have more value than we give them credit for and the work to maintain your tree may be worth it in the end.

Cutting down tour palm tree might now be the right move. You can learn more about the things palm trees are good for inside our in-depth guide!

If your tree has been around for a long time, maybe it’s in every picture of your backyard that you’ve ever sent your parents. Maybe your household loves running around it and using it as the default hide-and-seek hiding spot!

Maybe there isn’t a ton of sentimental value, but it adds character to your yard that you may be sorry to see go.

Whatever it is, take a moment to think about the technical reasons to remove your tree versus the more day-to-day benefits it might provide.

If your tree is a hazard, or struggling beyond help, that is a different story than a tree that gets messy or blocks your neighbor’s sunlight for a little while each afternoon.

Now you know when it’s time to let your palm tree go. Yes, even if you love your tree, it may be time to say goodbye.

Let’s go over some of the most common reasons that people cut their palm trees down:

  • Your palm tree is rotted
  • Your palm tree is too messy
  • Your palm tree’s roots are too big
  • Your palm tree requires too much upkeep
  • Insect infestations in your palm tree
  • Tropical storms are making you concerned
  • The neighbors are complaining
  • The palm tree just doesn’t look right

Keep in mind that it may depend on the situation, but the best time to cut your tree down is most often late winter and early spring. The dormant season will allow you to most easily, and successfully, remove your palm tree.

Call a professional arborist if you have concerns or if your tree is causing safety issues and needs to come down ASAP.

If this article resonated with you, I’m sorry to say that it might be time to cut down your palm tree. 

This isn’t the most fun step to take, but it’s another part of your palm tree journey.

References

Ghori, W., Saba, N., Jawaid, M., & Asim, M. (2018, June). A review on date palm (phoenix dactylifera) fibers and its polymer composites. In IOP conference series: materials science and engineering (Vol. 368, No. 1, p. 012009). IOP Publishing.

Smith, Kevin T. 2013. Do you believe in palm trees? Landscape Hawaii. January|February 2013: 14-16.

Birch trees are a very popular choice for landowners, especially since they make great ornamental trees. They can be quite messy, though, thanks to several natural traits that lead to some sticky situations. No worries, though, there are many solutions to keep your yard clean in the wake of a birch tree!

Birch trees produce large amounts of sap, which attract insects that produce honeydew. This honeydew attracts insects such as ants, wasps, and sugar loving insects to your yard. Birch trees also shed their bark extremely easily, leaving bark scattered on the ground near the tree.

To understand more about birch trees, we’ll first explain what type of tree it is before we dive into the ways that the tree creates a mess. Next, we’ll discuss how to provide general care to keep it healthy and how you can quickly clean your yard. So, let’s get into it!

What Exactly Is A Birch Tree?

A birch tree is a hardwood tree, and a deciduous one, which means that it loses its leaves during the months of the year that get colder. Not to worry, it blooms again in the spring before cycling back through the process again the next year!

Enough of what a birch tree is, though, let’s get into the real topic of this piece- the messiness of birch trees.

Why The Heck Are Birch Trees So Messy?

In case you weren’t yet sure, or are thinking of getting a birch tree and landed here, we can confirm that birch trees are, in fact, quite messy. 

How so, you may ask? 

Well above all else, these trees can get sticky.

Birch Trees Produce SO MUCH SAP

According to the University of Vermont, birches, river birches, in particular, are ‘bleeders’ meaning that they release large amounts of sap. 

Open wounds on the tree can lead to a heavy flow of this sap that can cause some secondary concerns such as attracting bugs and making it messy to clean up.

Birch trees’ continuous seeping of the sap creates a sticky situation that landowners may come to see as quite a pain.

The sap and its mess are not the only concerns though. The sticky substance that comes from birch trees does more than create surface-level messes for you to deal with. It also attracts bugs that cause a whole new set of worries.

Something super cool – you can actually harvest birch tree sap for syrup!

Birch Tree Sap Attracts Bugs And Insects

Speaking of bugs and sap, the cycle of attraction can become neverending rather quickly. 

Aphids are insects that like to suck on sap from trees. Well, not only does this sap attract aphids, but those aphids actually produce a secretion of their own, too. 

Known as honeydew, this secretion can cause decay and even types of mold if left to sit on a tree for too long. 

So, aside from sticky scenarios, is there anything else that causes substantial mess when it comes to birch trees?

Yes, in fact, there is!

Birch Trees Shed An Incredible Amount Of Bark

Not only are there concerns regarding stickiness and insects, but also of bark shedding in your yard. Even the trunk itself seems to shed its bark. 

Why is this?

While young branches appear to be very smooth with a thin layer of bark intact, older branches and the trunk begin to appear quite weathered. The bark will shrivel and peel until it falls off, is knocked off by animals, or is blown off by the wind. 

Are the extremities of birch trees weak, or is this just the nature of the tree?

According to the University of Wisconsin-Madison, this is not because twigs and branches are brittle, but actually, it’s just the opposite.

The branches are not prone to wind or ice damage because of their strength, so die-back occurs in the outermost parts of the tree, the bark.

These die-back areas will shrivel and peel easily, creating a mess in the space beneath. 

Now, you combine this with readily-flowing sap and some bugs that also produce a sticky secretion, and you’ve got a real mess on your hands. While the bark peels off on its own, you should never try peel it off, you can learn more about why you shouldn’t peel birch tree bark in our in-depth piece.

Before we get into how to clean up your yard and maintain a space that feels in your control, let’s briefly talk about what to know when it’s time to grow!

Things To Consider When Planting Birch Trees To Limit The Mess

Pathway in autumn fog birch forest

There are a few things to consider when growing a strong, healthy birch tree.

We won’t waste any time getting into it here, though, so follow along!

Think About Soil

Birch trees do well in damp soil, but can also thrive in soil that is drier as long as enough water gets through to it, at the end of the day.

The real factor to consider when thinking about soil is the nutrients that it may be able to provide your tree.

Where To Plant

If you are just getting started, it’s important to know that birch trees thrive when they get as much sunlight as possible on their canopy.

Shade from a building may not end the tree, but it certainly won’t be doing it any favors.

If you can help it, ensure that your birch tree gets at least 6 hours of full sunlight a day to keep growing successfully.

Check out our guide for the best places to plant a birch tree if you’d like to learn more.

Keeping Weeds Away

Now, this may seem simple, but you’d be surprised by how many people overlook this easy step. 

Weeds suck the nutrients, water, and other essentials from being given to your tree, and can quickly wreak havoc. Instead of spraying down a product, I highly recommend that you pick weeds out by hand – just make sure to get all the roots!

Keeping weeds away is a great bridge between keeping your tree healthy and your yard maintained.

On that note, though, let’s talk about how to avoid the mess now that you’re keeping your tree healthy and stable!

How To Keep Your Yard Clean With An Established Birch Tree

Countryside autumn birch forest with fields on background

There are a few things that you can do to decrease the level of mess that your birch tree creates. 

You don’t have to work super hard to avoid a catastrophic yard. In fact, we want to give you some of our simplest solutions so that you can go about your days knowing that things are taken care of.

Wash Your Tree To Limit Sap Build Up

Back up… wash a tree?

Yes, you read that right!

Birch trees, and other species, can be washed to get some of that sticky sap removed. 

This is a great preventative method when it comes to keeping insects and animals away and keeping your tree from getting so stuck in sap that it begins to decay. 

All around it’s a win-win. 

So, how should you go about this?

Great question!

According to the US Forest Service, the honeydew secreted by aphids is neither easily nor permanently removed, but there is a solution.

You can use a soft sponge, loofah, or other gentle-bristled cleaning supplies to apply a small amount of a soap-and-water mixture to the tree where there is an excessive amount of sap or secretion. 

This is not something you’ll need to do regularly, but in order to maintain appearances and give your tree some special attention, this can be quite beneficial.

Keep Bugs Away From Your Birch

If aphids, or other insects attracted to your birch’s sap, are causing you issues, another solution is to use an insecticide to minimize the issue. 

Realistically, bugs will always be drawn to the sap – so I’m using this point to reiterate to clean the sap! Just don’t scrub too hard. Cleaning the sap will help keeps bugs away from your birch tree and yard altogether.

So, what is the final step we can take to keep a clean yard?

Rake Up The Shedding Birch Tree Bark

As the bark-shedding is a natural occurrence for birch trees, you’ll likely need to either rake the fallen branch bits or leave them on the soil.

Eventually, this organic tree matter will decompose and help nourish your tree once again.

However, we know that the appearance of shriveled bark laying around is not always the most sightly yard decor. So, if you’re looking to rake the bark away, try using a 63” Garden Leaf Rake for a quick and easy clean-up that won’t damage the soil or your tree.

Thanks For Sticking Around!

White birch trees forest background, spring.

Get it? Because of the sap…and the honeydew?

Thanks for hanging out and learning about why birch trees are so messy and what you can do to keep your yard looking fresh and ready for anything!

May your birch tree produce no more than the usual amounts of sap, and may your tree journey continue developing as you learn and grow along with your trees.

See you next time, friends!

References

Cliff, E. P. (1969). Our birch resources. In Birch symposium proceedings (pp. 19-27).

REY, A., & JARVIS, P. G. (1997). Growth Response of Young Birch Trees (Betula pendulaRoth.) After Four and a Half Years of CO2Exposure. Annals of Botany, 80(6), 809-816.

Pine trees are a classic North American plant that even those unfamiliar with tree names, one can quickly identify. Pines hold a special place in our hearts due to family time spent decorating the Christmas tree and summertime campouts in the mountains. Why wouldn’t you want to grow one of your very own?

Pine trees are hardy trees that tolerate low temperatures, high altitudes, and acidic, sandy soil. Typically, pine trees reach full maturity in 25 to 30 years with some species of pine tree growing to be 150 feet tall! All pine trees begin as small seeds, growing to saplings and then mature trees.

Are you unsure of where the heck pine trees start (or finish?) Don’t worry, because we’re going to talk about every step of a pine tree’s development. Let’s follow a timeline from seed to mature tree!

Which Trees Are Considered To Be Pine Trees?

First of all, we need to make sure that we are talking about the same type of tree when we say “pine tree”. Not all evergreen trees are pine trees.

A pine tree has long, pointy needles. The needles grow in clusters of 2 or more. Pine trees are often confused with other conifers (cone-producing trees) such as firs or spruces.

Most pine trees grow in the classic “Christmas tree” shape that we all know and love, but some would more accurately be referred to as a “shrub” rather than a tree.

Pine trees are a unique tree because they produce seeds, but not flowers. 

Most seed-producing plants, including trees, grow flowers to attract pollinating insects. Once pollinated, the flowers wither away to reveal the fruit or seed pods beneath. 

Pine trees pollinate using airborne pollen, eliminating the need for bees and other insects to help.

Pine trees are also unique because of their foliage. Instead of where we would traditionally expect to see a leaf, they have needles. (To be fair, needles are a modified version of a leaf. But they’ve evolved to become very different structures.)

Pine trees are capable of year-round photosynthesis since they do not shed their needles all at once in the fall like deciduous tree leaves. (The needles are discreetly shed throughout the year, and the majority stay with the tree through the winter.)

Although some of the things mentioned in this timeline might also apply to other evergreen trees, keep in mind that this is primarily about pine trees.

Still feeling confused as to what is considered a pine tree? Cornell University has a picture guide describing how to distinguish different evergreens, including firs, spruces, pines, cedars, hemlocks, and junipers.

How Long Does A Pine Tree Take To Grow?

A pine tree is considered fully mature between 25 and 30 years of age. 

Coincidentally, that is the same age range in which the human brain finishes developing!

In pine trees, this age is considered “grown up” because this is when growth dramatically slows and its wood is harvested.

A tree can be “ready” earlier depending on the species, purpose, and care it has received.

Most Christmas trees, for example, are about seven years old (Douglas fir is not actually a pine, interestingly!) Although this is far from being fully mature, it’s the perfect size for bringing holiday cheer into your home.

A pine tree will produce pine cones, shade, and aesthetic beauty long before 25 years have passed by. By age 10, a pine tree will be sturdy and established enough that you don’t need to give in the same tender care a sapling requires. 

Without further ado, let’s start our pine tree timeline!

Day 1: Finding A Pine Tree Seed Or Sapling

Small Pine tree seedling

For you new growers, you have the choice to start your pine tree from either a seed or a sapling.

Let’s discuss how to start with seeds, then we’ll discuss saplings. If you’re just interested in how that pine tree in your yard got to where it is today – still keep on reading!

Starting A Pine Tree From Seed

Pine seeds are stored in the female pine cones that drop in the fall. 

Inside the cone, seeds are encased in papery wings (nicknamed“helicopters” by many) that help the seeds disperse far from their parent tree.

 (Not all “helicopters” have pine seeds inside. Many trees utilize this method of seed dispersal, so you will need to identify the parent tree to know what the seed will grow into.)

You can harvest the seeds yourself, or you can purchase a variety that you would like to grow, such as this pack of 50 White Pine Tree Seeds.

You can germinate the pine seed indoors, although in many pine forests the seeds germinate right in the soil!

Germinating pine seeds takes a lot of patience. It can take up to 30 days of consistent temperature, moisture, and light for a seedling to erupt. 

You don’t need anything special to germinate seeds (after all, seeds do it on their own outside all the time!) However, having some tools can help you be more successful.

This Seed Starter Kit with Grow Light includes a seed tray with 60 separate cells, a humidity dome, and a UV full spectrum bulb that replicates sunlight.

Some gardeners use the top of their refrigerator as a seedling “nursery”, as the heat that radiates off the top can provide warmth. It’s also a place where the seeds are unlikely to be disturbed!

Even with the proper tools, it’s not necessarily a simple procedure to germinate seeds, however. To make it more complicated, some of the seeds are not viable, meaning that your germination efforts may be in vain.

Many landscapers choose to start with a pine tree sapling instead because the hard work of germination has already been completed.

Starting A Pine Tree From A Sapling

You can purchase saplings in plant nurseries, both online as well as in brick-and-mortar stores, 

Saplings are a little more expensive than seeds, but this makes sense, considering all of the time invested in helping the seed germinate.

You can find deals on bulk saplings, such as this 6″ to 12″ Organic Loblolly Pine Naturally Sprouted Starter Pine Tree Seedlings. This is more than enough to quickly populate your yard with more pine trees than you know what to do with!

If cost truly is an issue, you can also find pine tree saplings growing at the bases of other pine trees.

If you choose to take a sapling from the outdoors, just be sure to ask for the landowner’s permission first!

Unless you’re in a national forest, most landowners view spontaneously growing tree saplings as weeds and would be happy for you to remove them. But you still need to ask first!

Growing your sapling indoors for a while? Make sure that you are using the best soils for pine trees in containers!

Day 1-90: Planting Your Pine Tree Sapling Outdoors

A small pine tree in the forest

The North Carolina Extension recommends transplanting bare-root pine saplings during warmer periods of their dormant season (October through March), although saplings already established in containers can be planted at any point during the year when the temperature is consistently above freezing.

If you’re transplanting a pine tree from a container to the ground, the process is fairly straightforward. Just be sure not to damage the roots!

Planting tree seedlings is different than planting other types of plants. Rather than digging a giant hole, the Virginia Department of Forestry recommends hand planting with a “dibble”, also known as a planting bar. This method is especially useful when planting large numbers of trees.

To dibble, you need a long, thin tool. For one or two trees, a shovel can be used. Instead of hollowing out a hole like we typically do when planting trees, you create a slice. (Sort of like the dirt is a birthday cake and you are cutting a piece!)

Once you have made a long, narrow cut in the ground, temporarily push the dirt to the side using your tool. (Dirt should not come out of the ground.)

You will need to make a cut deep enough in the ground that the pine tree’s roots will be able to fit and point downwards without bending.

Push the dirt just far enough aside that you can place your sapling in the ground. Remove your tool and allow the dirt to fall into place around the sapling’s roots. Presto! You just planted a pine tree.

A similar technique is used when the internet company comes and buries a cable in the yard connecting the receiver to the house.

Jim-Gem Speedy Dibble Tree Planting Bar Tool is a heavy-duty solution for planting a large number of trees at one time. If you’re going to start a Christmas tree farm or plant a major windbreak, this tool will save you from hurting your back!

Where To Plant Your Pine Tree

Primarily found in the northern hemisphere, pine trees are often found far from the tropics in temperate and polar zones. 

Pine trees are tolerant of sandy soils, high elevations, and extremely cold temperatures, so they can grow where other trees would struggle. 

But just because pine trees can grow under these conditions does not mean that they thrive. Well-drained, fertile soil with full sun and plenty of water is best.

Carefully research the species of tree that you are interested in planting. Make sure that you live in a USDA Hardiness Zone where it will thrive.

Gardeners in the Southern United States (USDA Zones 6-9) will have success with a species like the loblolly pine, a pine tree that craves humidity and mild winters.

On the other hand, gardeners in the Northeastern United States (USDA Zones 3-6) might have more success with a variety like the cold-tolerant Eastern white pine.

Whichever variety you select, it’s best to plant pine trees away from your house. Not only can they grow extremely tall, but their moisture-seeking roots can also wreak havoc on your underground plumbing.

Clemson University states that the height of a mature tree can vary greatly depending on the species. A dwarf mugo pine might only grow to be 4 feet tall. But under the right conditions, a white pine can grow to be over 150 feet tall! 

Plan carefully as you scout out a location for your pine. A spot with full sun and plenty of room is best.

Month 3-Year 1: Transplanting Your Pine Tree

Many Young Pine Trees In Field

It is best to transplant your pine tree as soon as it is warm enough for you to do so. Larger pine specimens are harder to transplant due to their long taproots, a root that plummets deep into the soil to access water.

Transplanting can be a traumatic experience for sensitive roots, and it’s best to limit it as much as possible.

Speaking of sensitive roots, pine tree roots are ESPECIALLY fragile during their first year of life. 

Use slow-release fertilizers in the first year of your pine tree’s life, as the roots are sensitive to overfertilization. After the second year, pine trees are more resilient, but will still need regular fertilizer. 

A slow-release formula with balanced nutrients such as Southern Ag All Purpose Granular Fertilizer is perfect for pine trees at all phases of development. It’s gentle enough for sensitive roots but provides the nutrients a growing tree needs.

Are you ready to landscape around your tree? Click here to learn more about the best plants to plant under your pine tree!

Year 1- Year 3: Focusing On Sustaining A Healthy Tree

You may be familiar with this old couplet:

Good timber does not grow with ease.

The stronger the wind, the stronger the trees.

It’s true that trees that have to overcome opposition from wind end up with stronger trunks.

But while this poem might inspire you to be more resilient when facing challenges in your personal life, it’s poor advice when growing young pine trees.

Forestry: An International Journal of Forest Research notes that “windthrow” of 2-3 year old pine trees is a major issue in windier parts of the world. 

Windthrow is when the wind blows so hard that a tree is no longer able to stand upright. 

Windthrown trees can even begin to grow in a way where their trunk is permanently bent to the side!

It affects older trees too, but young trees are especially vulnerable.

A tree does not have to completely fall over to be considered “toppled”. A 15° bend in a tree trunk is still enough to cause significant long-term harm, even if the roots are still in the ground.

Protect your saplings by providing them with a protected place to grow with limited wind. Install a windbreak made out of bales of straw or select a less windy location.

In addition to avoiding powerful winds, there are plants you will want to avoid planting around your pine. Learn more about them in our article about plants not to grow under your pine tree.

Year 3 – Year 7: Continued Growth Of Your Pine Tree

Pine trees need moisture to thrive. This obviously can come in the form of rainwater or irrigation, but fog can help in areas where summer drought would dry out young trees in the wild. 

Research published in Oecologia, a noteworthy ecology journal, theorizes that coastal fog is how pine forests in climates like northern California can do as well as they do.

Even if you live in a place with a drier climate, you can successfully grow a pine tree if you provide it with regular, deep watering.

Is your tree not developing the way you thought it would? All is not lost! Learn more in our guide on why your pine tree isn’t growing and how to fix it.

Year 7 – Year 200 (Maybe Even 4,000!)

Old Growth Pine Forest

No, that’s not a typing mistake. Utah State University notes that the bristlecone pine can live to be over 4,000 years old!

From about Year 7 onward, you’ll notice that your pine is sturdier than it was in the past. Most pine trees will live much much less than that. The eastern white pine, one of the most common pine trees in the United States, will typically to around 200 years but possibly even up to 450 years, according to information published on the USDA.

Although regular watering sessions will still be important, the taproot will likely be deep enough in the soil that groundwater can subsidize your watering efforts.

It’s not an exaggeration to say that your tree may live longer than you! 

Of course, just because some trees grow to be 4,000 years old doesn’t mean that all will. Has your pine tree’s life come to an end? Click here to learn about reasons to cut down your pine tree and when to do it.

At around age seven, you’ll notice that your pine tree might begin to produce pine cones. Congratulations! Your pine tree is healthy enough to produce seeds! 

The appearance of pine cones does not mean your tree is done growing, however! Your pine tree’s trunk will continue to grow taller and wider with each passing year.

Why Should I Grow A Pine Tree?

You might be wondering what benefits there are to growing a pine tree as opposed to another species of tree.

Research published in the Agricultural and Forest Meteorology Journal suggests that pine trees have a greater effect than other plants do when exchanging carbon dioxide for oxygen.

Because they are evergreen, pine trees can continue photosynthesis throughout the winter. If your carbon footprint has been worrying you, a pine tree might be just the thing to offset that!

Pine trees do not need pruning in the way that other trees do. Of course, it’s always good landscaping practice to remove dangerous nor dead limbs, but your pine tree will not require shaping.

There are also a variety of products that can be formed from pine trees from turpentine (from the sap) to wood.

Are you interested in what else you can do with pine trees aside from landscaping? Learn more in our article on what to do with pine tree (wood uses) if you’d like!

Common Mistakes When Growing A Pine Tree

Pine trees are tough, but you can’t just abandon them and expect them to successfully grow. 

Here are errors that novice gardeners sometimes make with pine trees:

  • Too much water. Pine trees need water to survive, but too much water can cause the roots to rot and invite mold.
  • Not enough water. If you do not use enough water, your pine tree will dry out. Growth will be stunted.
  • Too much sun. When a pine tree is small, too much hot sun can burn the needles! This damage can be devastating for such a small plant.
  • Not enough sun. Although it’s nice and shady underneath its boughs, a pine tree needs full sun for proper photosynthesis to occur.
  • Too much fertilizer. Especially when young, a pine tree’s roots can absorb a toxic amount of nutrients if too much fertilizer is applied.
  • Not enough fertilizer. If a pine tree does not have the nutrients it needs, it will not grow.

After reading that list, it might feel like you are trying to please Goldilocks rather than plant a pine tree sapling! 

Balance truly is essential to keep your pine tree healthy.

Growing a pine tree from a seed or sapling is an achievable, rewarding goal. If you provide enough water, sunlight, fertile soil, and room to grow, you will soon have a tall, beautiful tree in your yard that will bless your yard for generations.

References

Baguskas, S. A., Still, C. J., Fischer, D. T., D’Antonio, C. M., &; King, J. Y. (2016). Coastal fog during summer drought improves the water status of sapling trees more than adult trees in a California Pine Forest. Oecologia, 181(1), 137–148. 

Briggs, G. M. (2022). Inanimate Life. Pressbooks. 

Dolman, A. J., Moors, E. J., & Elbers, J. A. (2002). The carbon uptake of a mid-latitude pine forest growing on sandy soil. Agricultural and Forest Meteorology, 111(3), 157–170.

Moore, J. R., Tombleson, J. D., Turner, J. A., &; van der Colff, M. (2008). Wind effects on juvenile trees: A review with special reference to toppling of Radiata Pine Growing in New Zealand. Forestry, 81(3), 377–387.

Your Competitors Are Already Running Ads. Are You?

This is for service business owners who are ready to SCALE.